Running & Managing Jobs
You can learn more about managing and running jobs, and navigating the job page here.
Find the following sections below:
Continue reading to learn about managing jobs.
Managing Jobs
Jobs are the main component of Loome Integrate and they can be executed using various methods and strategies, such as creating a schedule or making a job dependent on another job.
Choose your project from the left-hand menu list of projects.
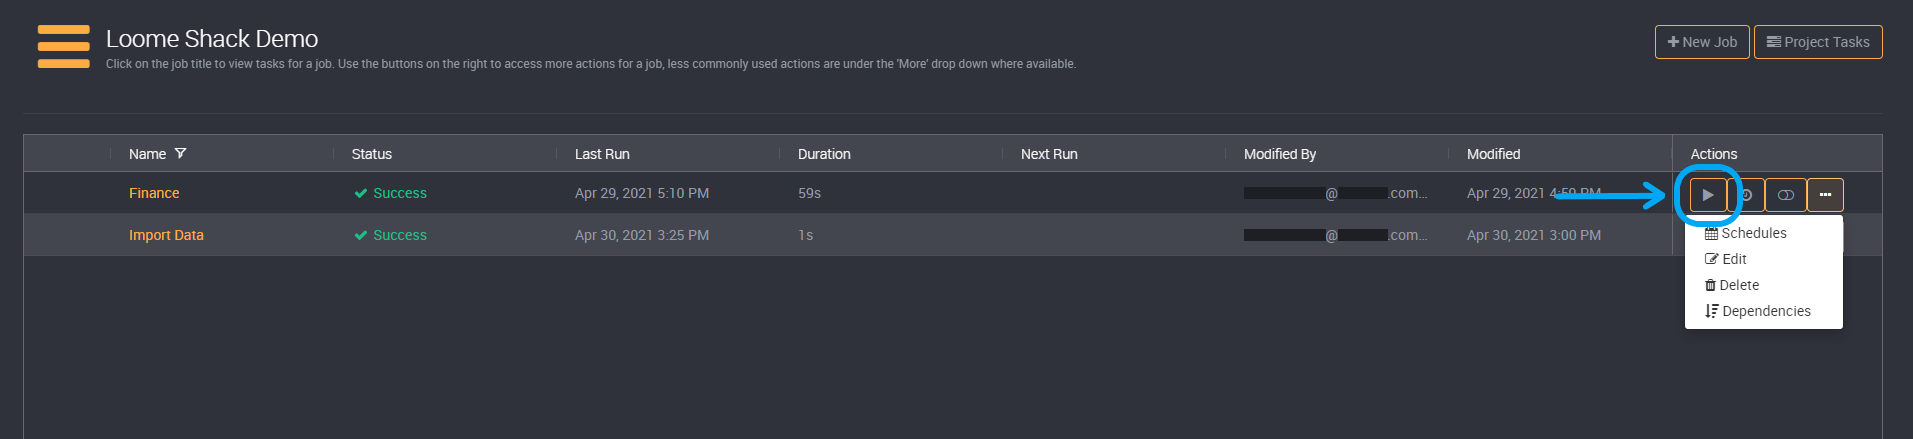
Beside each job on the project page, there are action buttons to manage each job.

These actions (from left to right) are:
- Run Now
- View Execution History
- Quickly Enable Schedules
- Manage Schedules
- Edit Job
- Delete Job
- Manage Job Dependencies
Run Now
You can use Run Job to run a job at anytime as an adhoc execution.
You can run a job on both the project page and at the top-right corner of a job’s sequenced tasks page.

Click on run on the right of a job to run the job.
You will need to confirm that you would like to run the job now, and whether you want to be redirected to the real-time execution logs page.
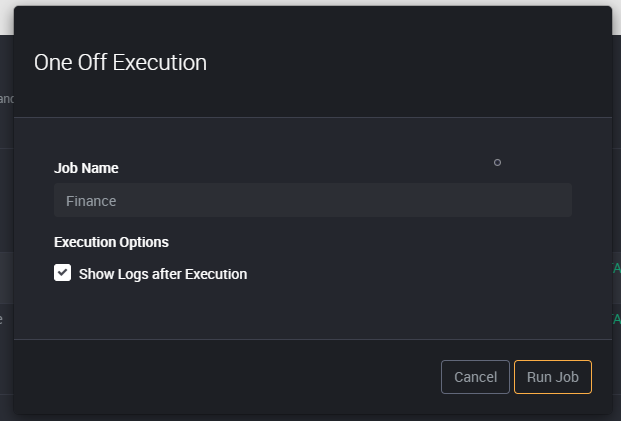
Note that unlike scheduled jobs, running a job manually will not factor in if the job is running already and will run no matter what.
View Execution History
View a history of this job’s executions and the logs of each execution.
You will be notified in the logs if your agent fails or is shut down while running the job. If logging is offline while the job is run, the logs will be prefixed with ‘[Offline Log]’ when loaded, and will resync according to its refresh period.
For each execution, you can find a log of events such as information, debug and any errors.
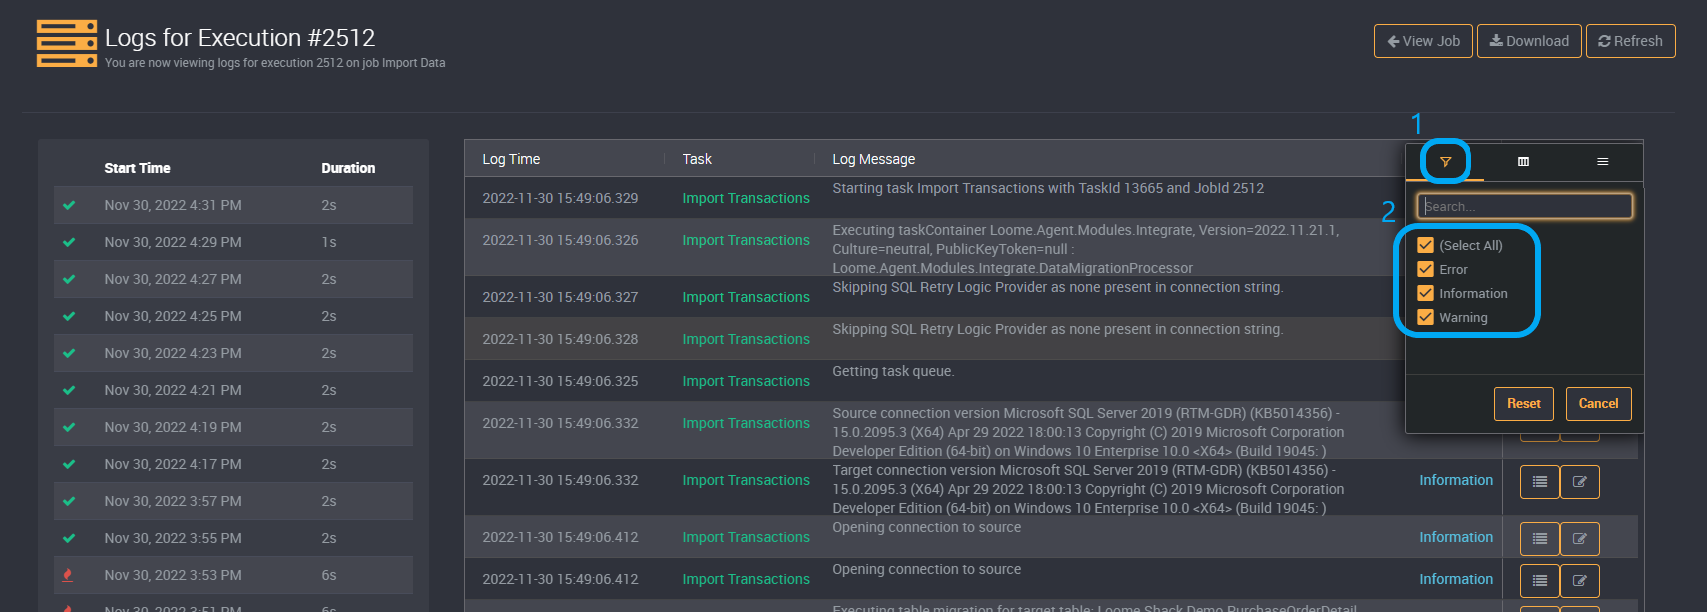
You can filter each column of log time, task, log messages, and events.

To filter each column, click on the filter button that appears when you hover over a column title.

You can then filter on your log data and choose from checkboxes, like the example in the following image for the ‘Event’ column, or choose a time or time range, text value, or task depending on the type of the column.
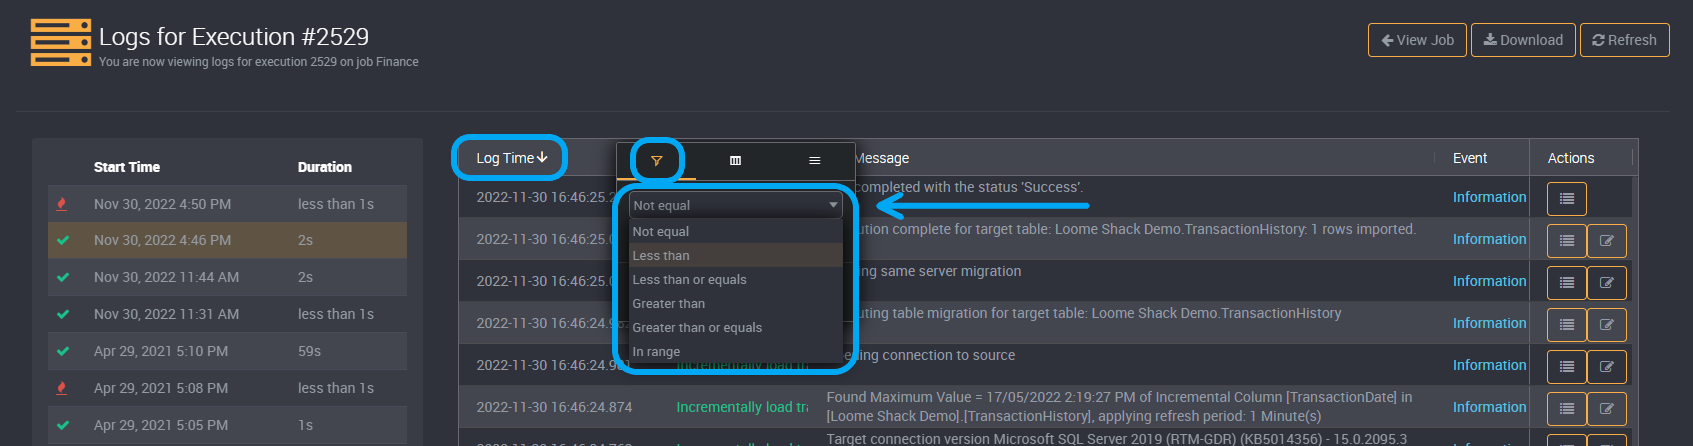
Log Time
You can filter on the logs by time.
Select a condition and then choose a time. If you choose ‘In range’ you can choose a time range.
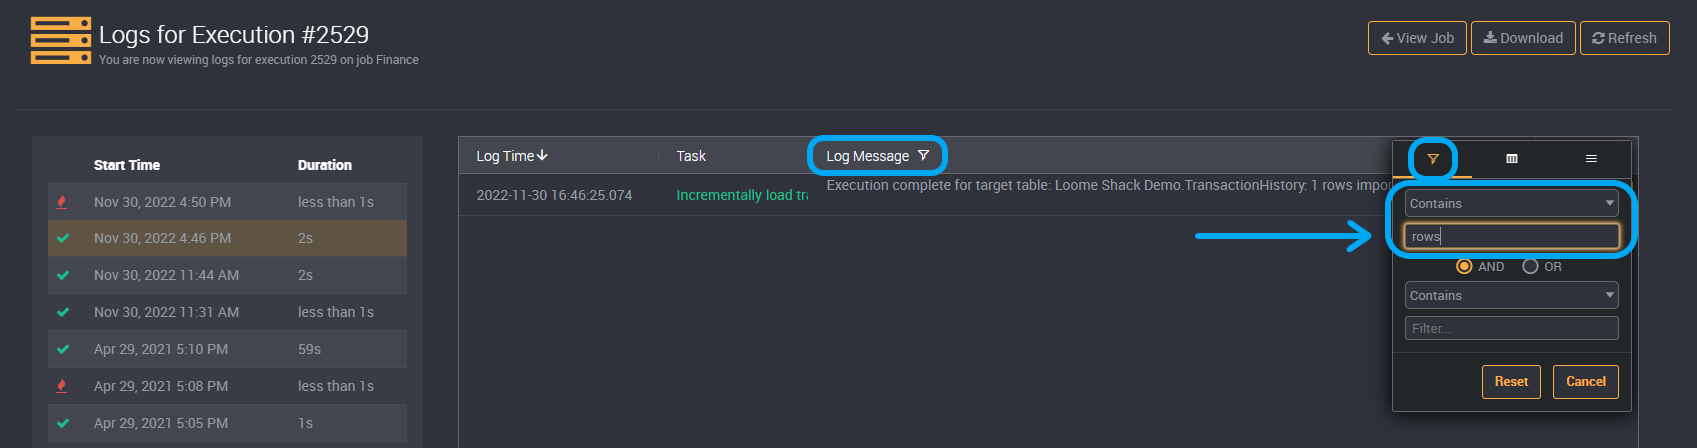
Log Messages
You can filter log messages by entering a text value.
Filter by Tasks
If you would like to view the logs for a specific task and not the complete job, you can select the checkbox of a task. It will filter the logs for your selected tasks.

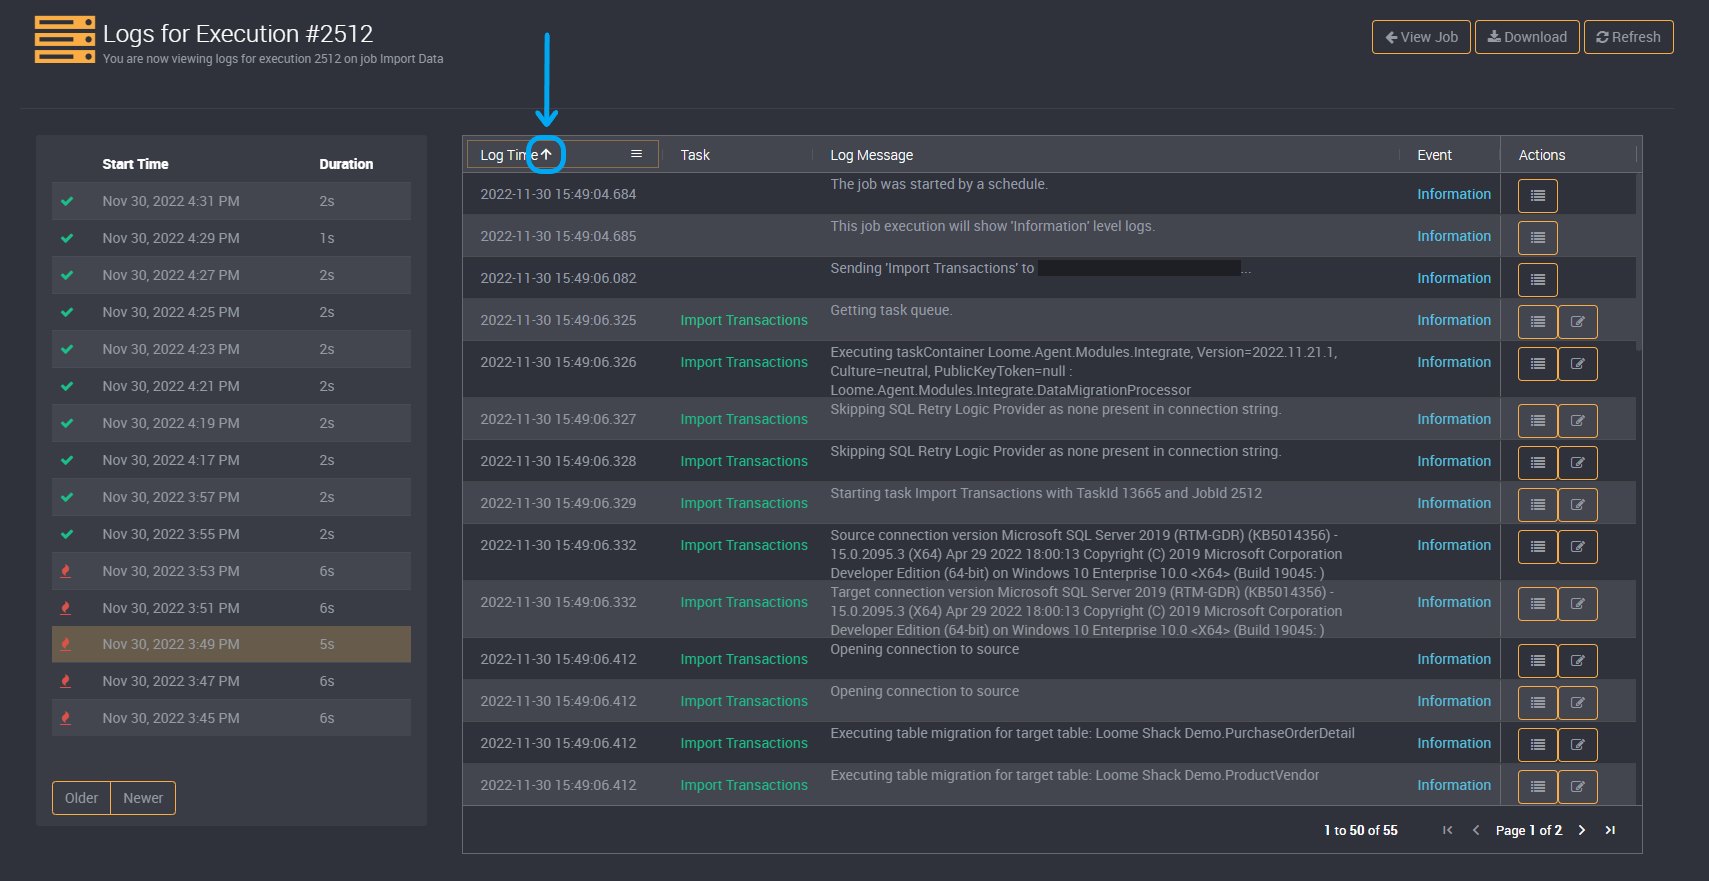
Sort
You can also sort your columns using the sort button by clicking on each column title. Click on it again to switch between ascending and descending order.
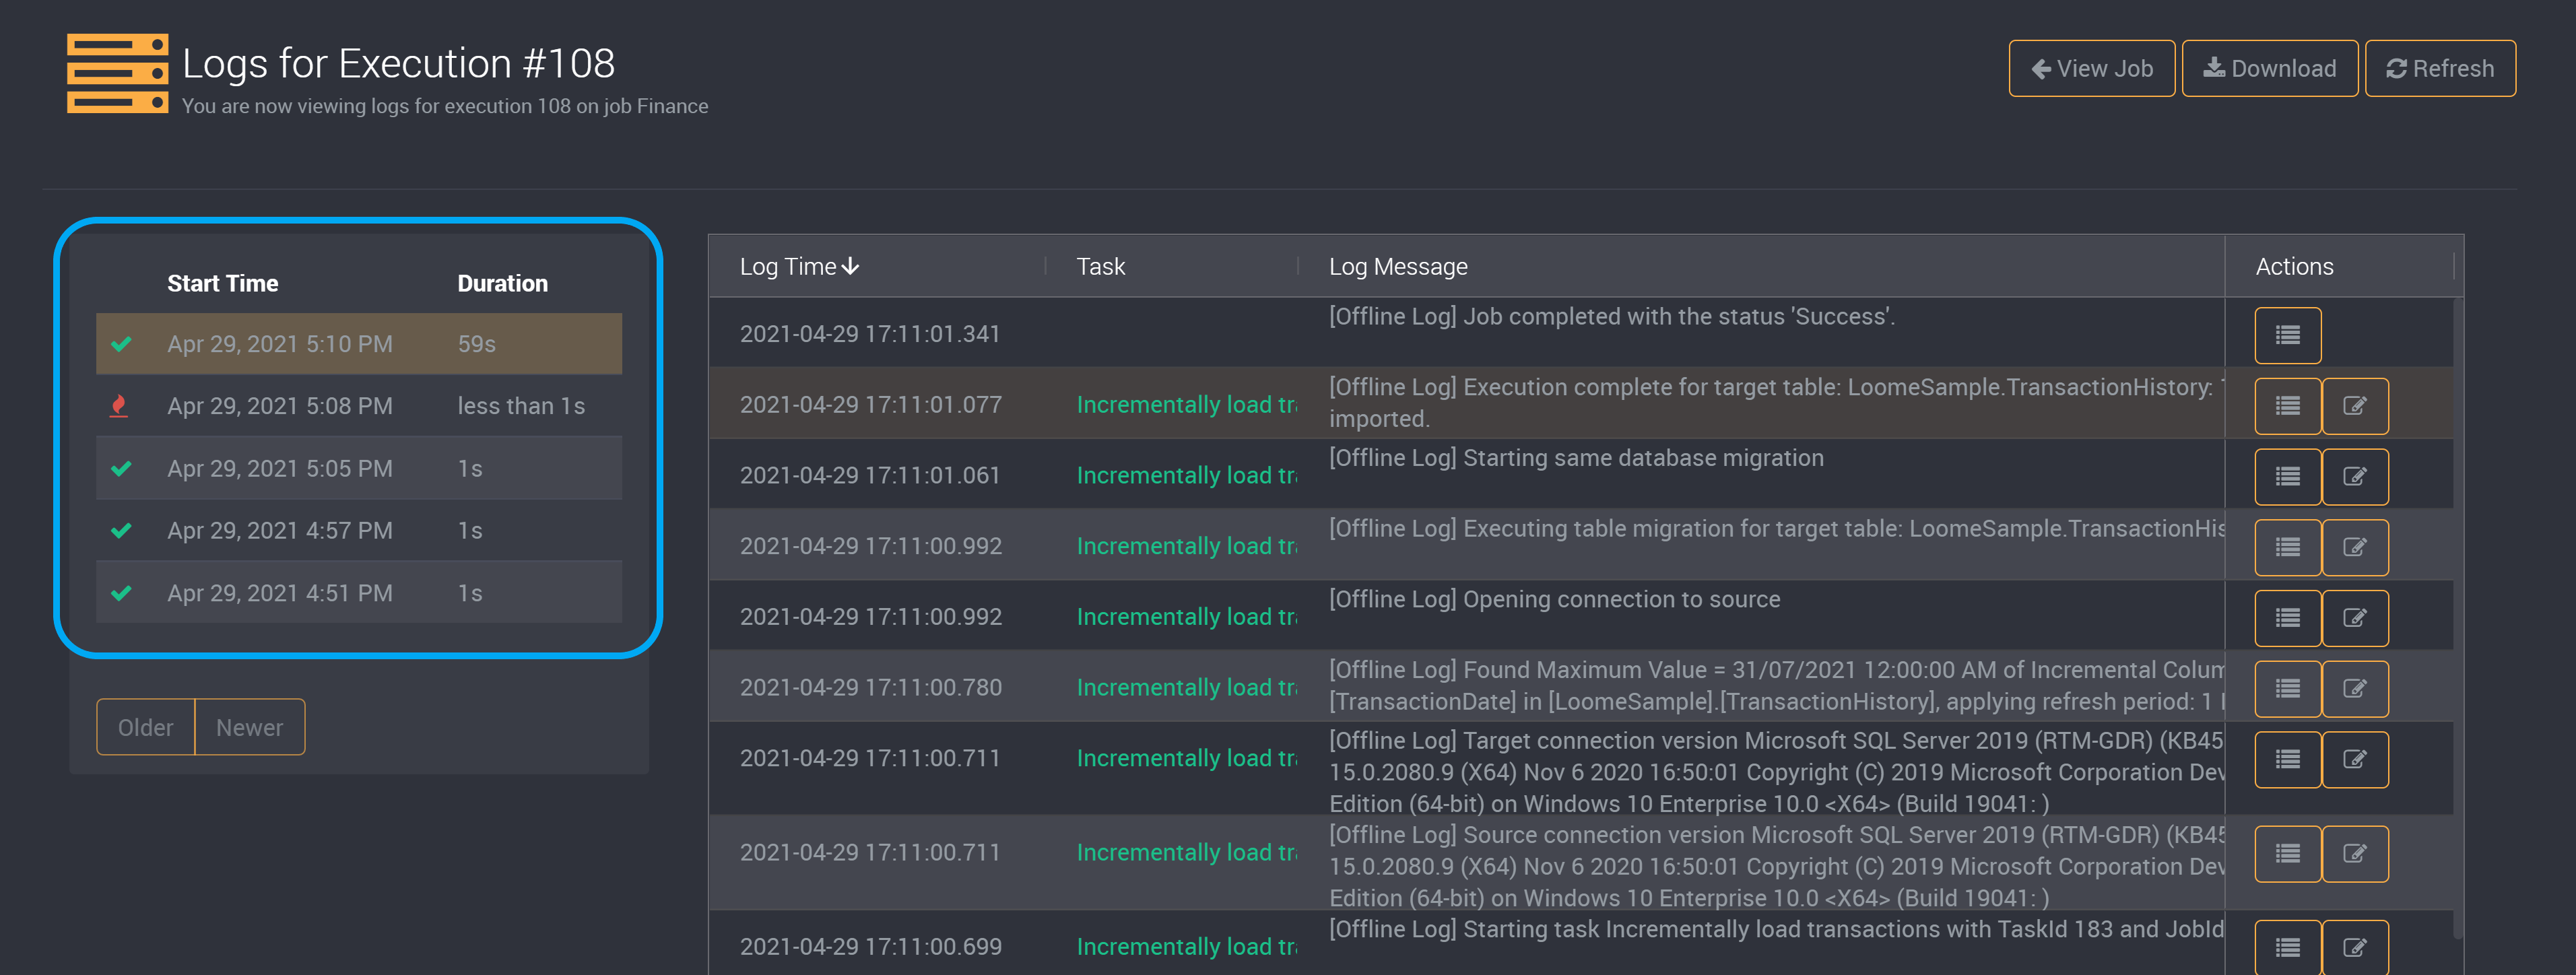
Previous Logs
The duration and the time of each execution of a job will be listed on the left-hand side of the page.
You can choose one of the past executions in this list to view the logs of that run.
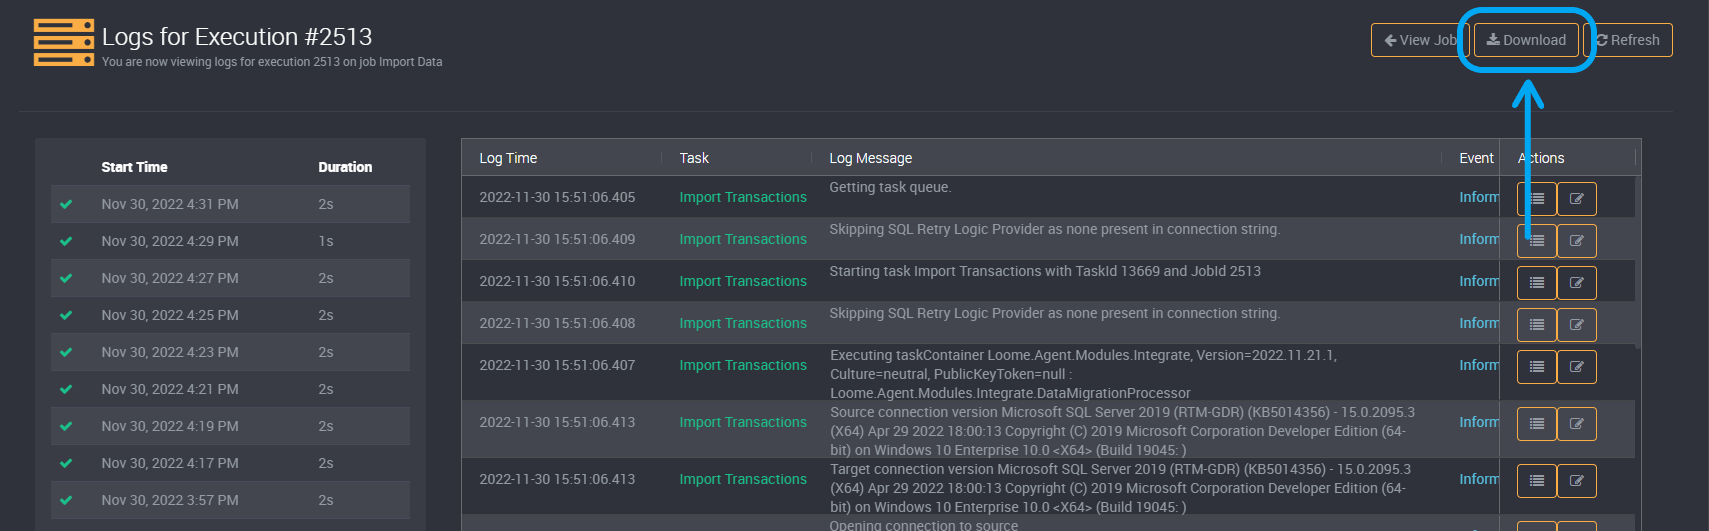
Download Execution Logs
You can download the logs of a job execution as a text file using the Download button at the top-right of the Executions page.
It will contain the logs of each task and all logs for the job. It will download the log of the execution you have selected from the left-hand execution history. It will be titled with the execution log number and date, and job name.
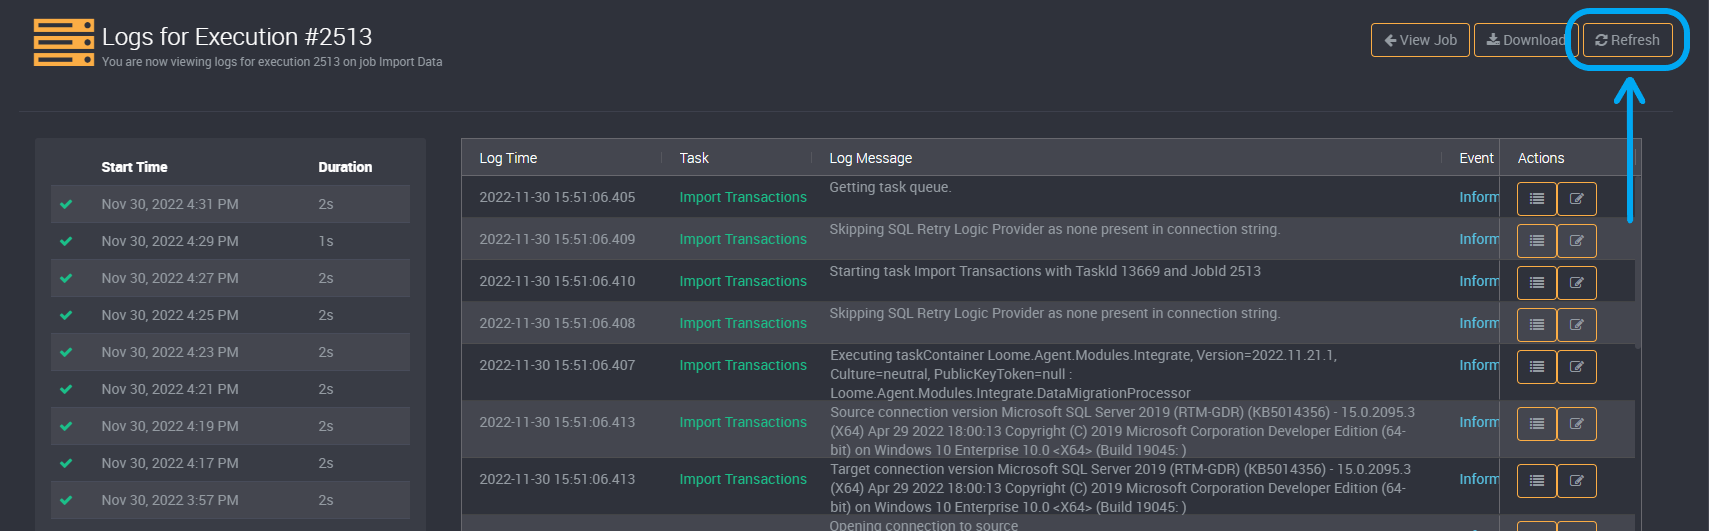
Refresh Logs
You can refresh the logs of a job execution by clicking refresh.
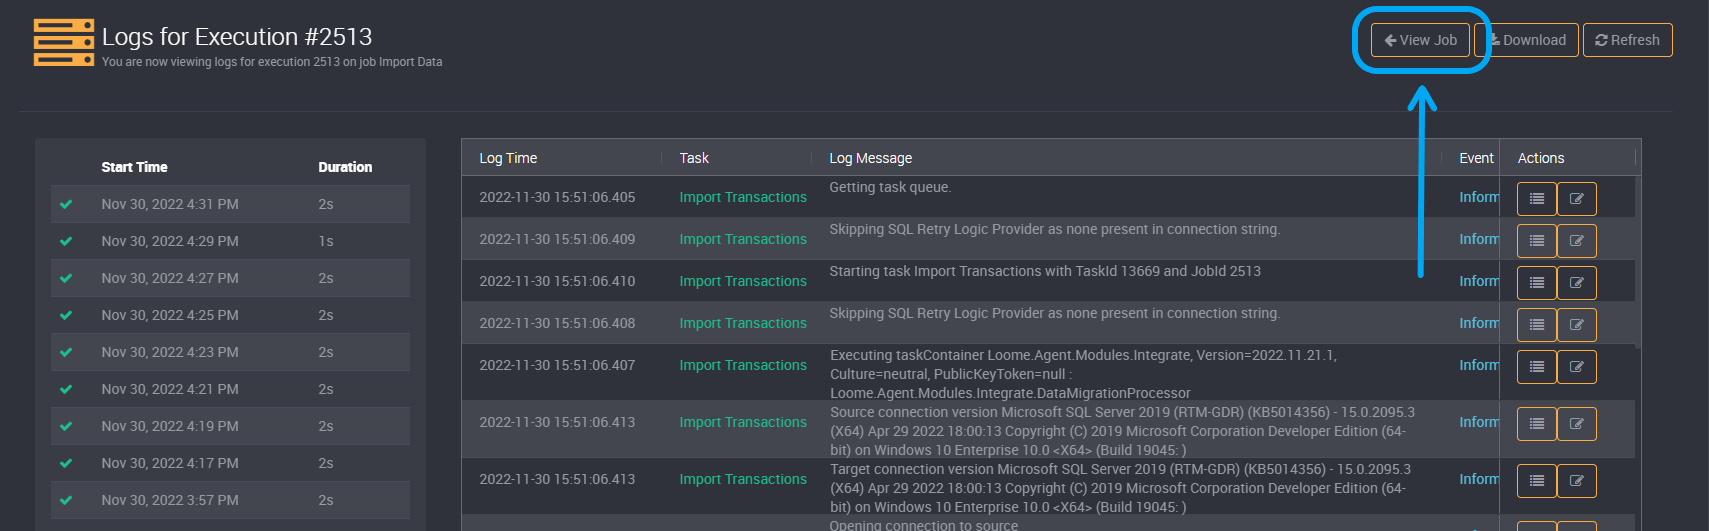
View Job
You can go back to the job page by clicking ‘View Job’.
Enable Schedules
This will display the schedules available for this job that can be enabled.
Please click on the schedules you would like to enable.

Turn Off Schedules
If you would like to turn off any enabled schedules, just click on the schedule toggle to turn off all schedules.
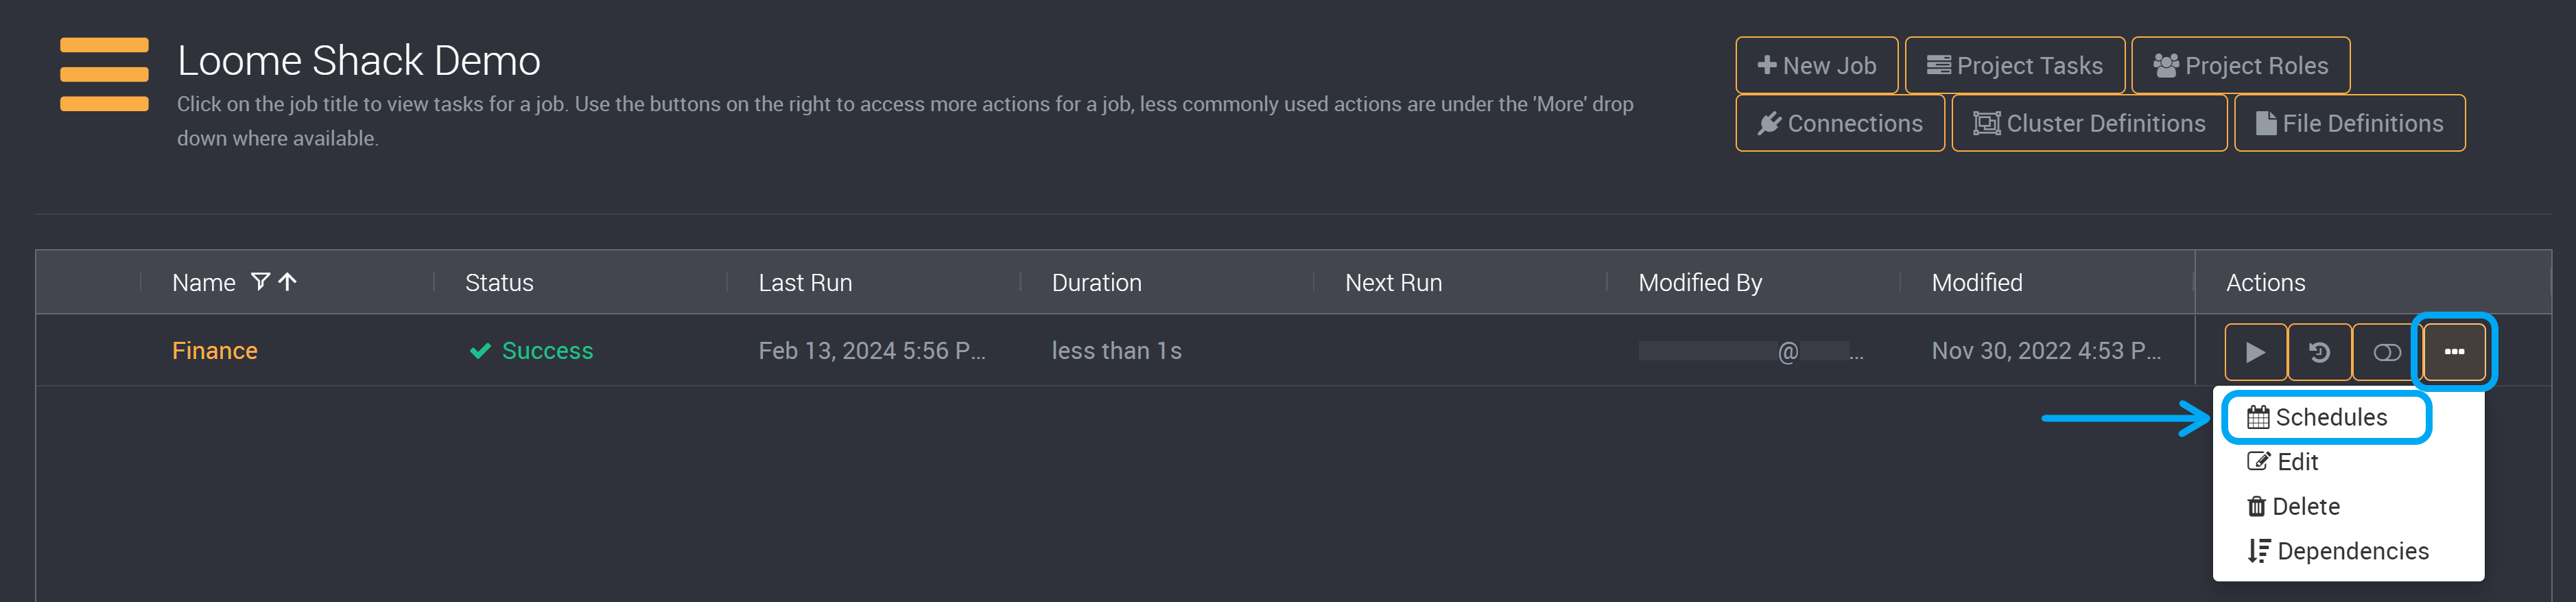
Schedules
This will direct you to the schedules page for this job. You can add and remove schedules for the job. Learn more about setting and managing Schedules here.
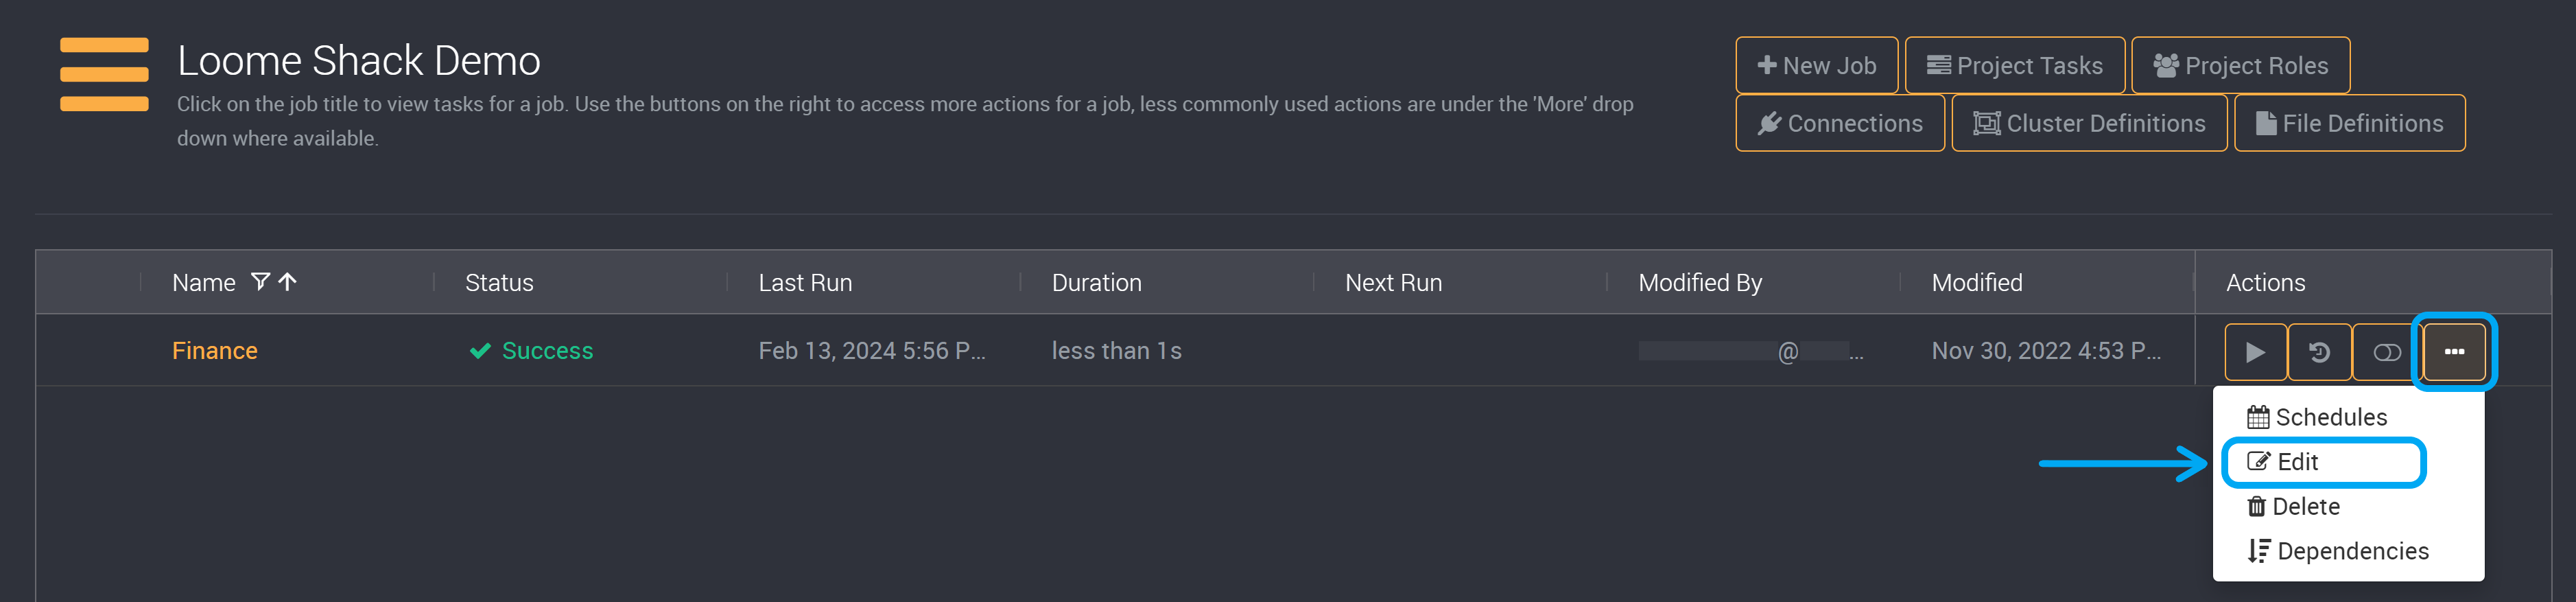
Edit Job
Click Edit to edit the details of the job such as its name, log level, email notification settings and job dependencies. Learn more about editing jobs here.
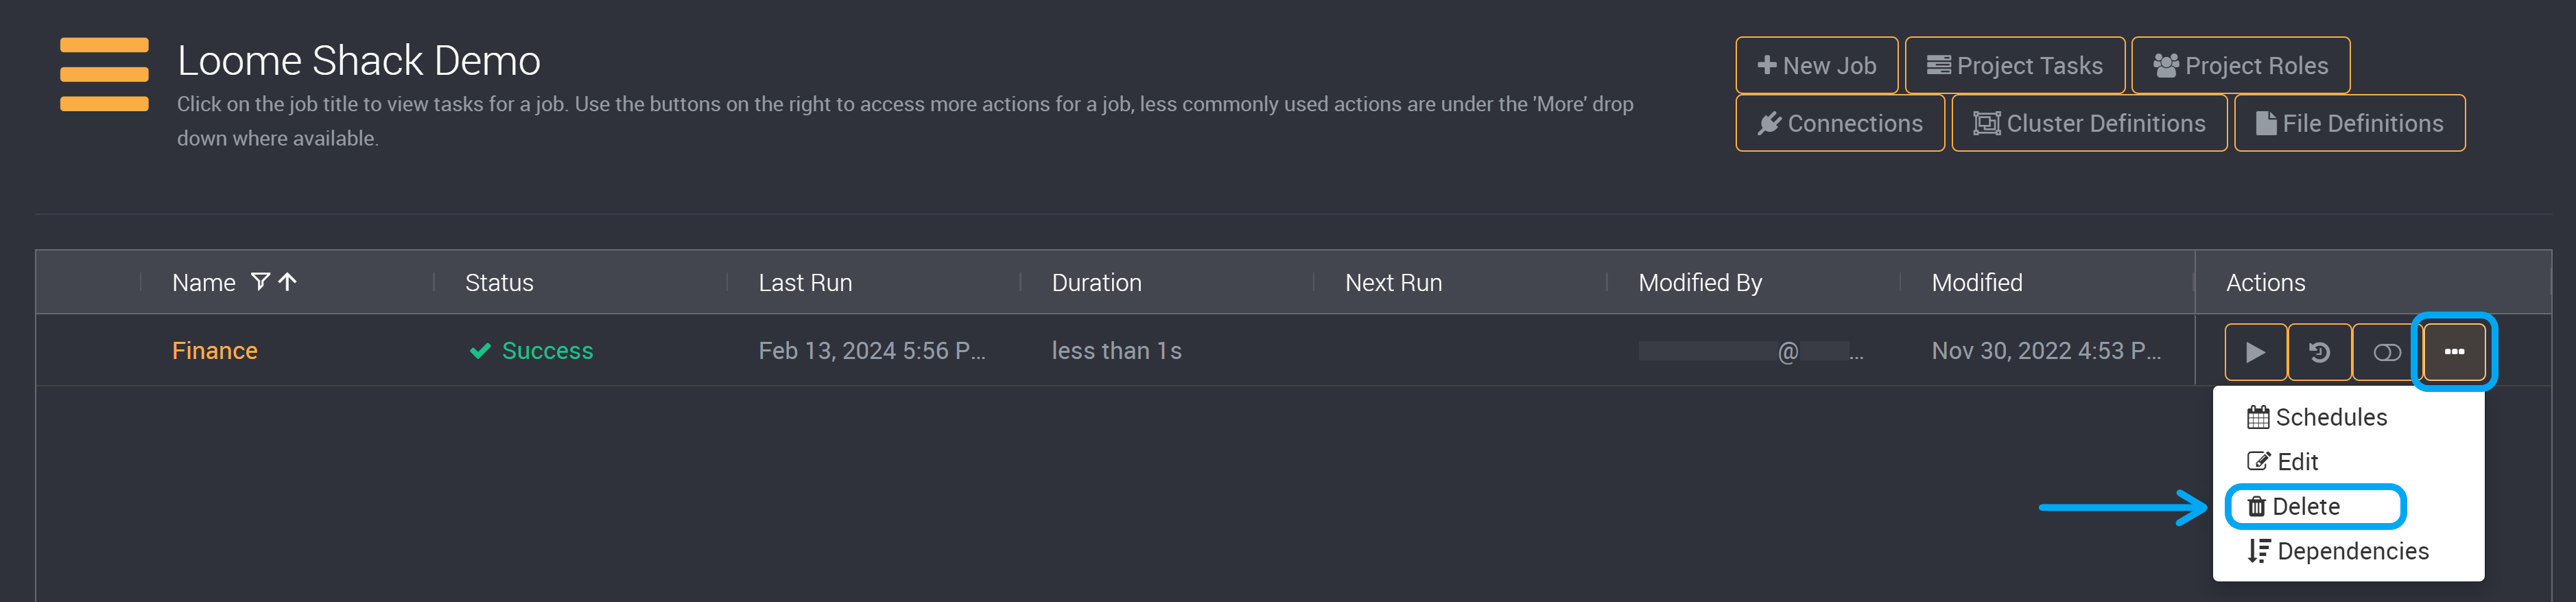
Delete Job
Click Delete to remove the job from Loome Integrate. Note that the tasks sequenced in the job will still exist in the project as an available task.
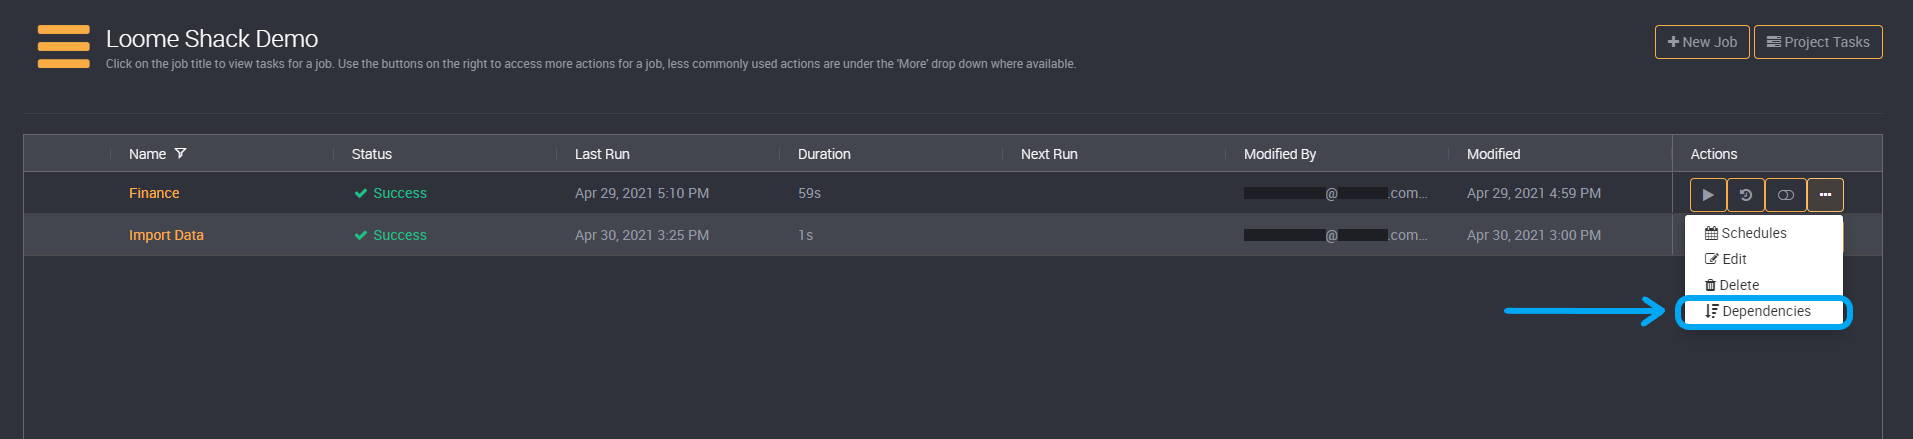
Manage Job Dependencies
What is a Job Dependency
You can manage and view the jobs that this job is dependent on. If it is dependent on another job, that job’s last execution will need to be successful so that this job can run.
Running a job that is dependent on jobs in other projects will not cause those jobs to also run. It will only run this job, and its outcome will depend on the status of the jobs it is dependent on.
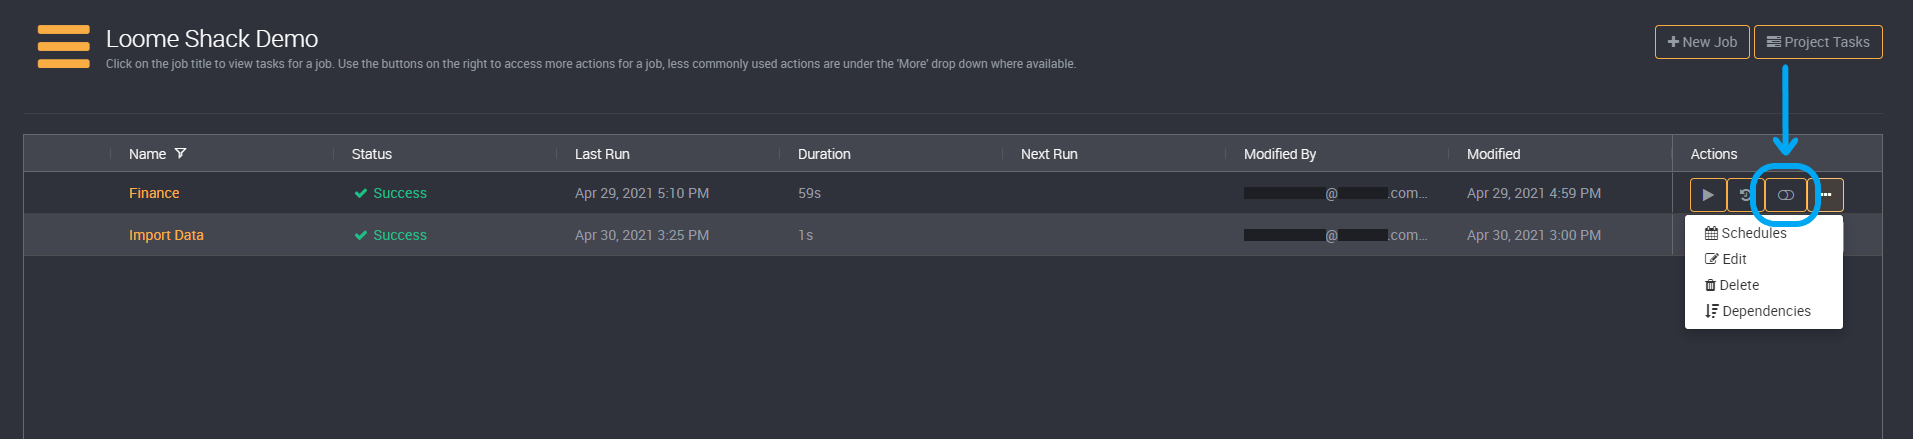
How to Make a Job Depend on another Job
On the right of your chosen job in a project, click on the Dependency action.
Browse jobs from all projects and select the jobs that this job will be dependent on. All your projects will be displayed on the left, and the jobs relevant to the project will be displayed on the right.
Check the box next to each applicable job to select the jobs that this job will be dependent on.
You can make a job from one project dependent on a job from another project by choosing the other project in the left project section.
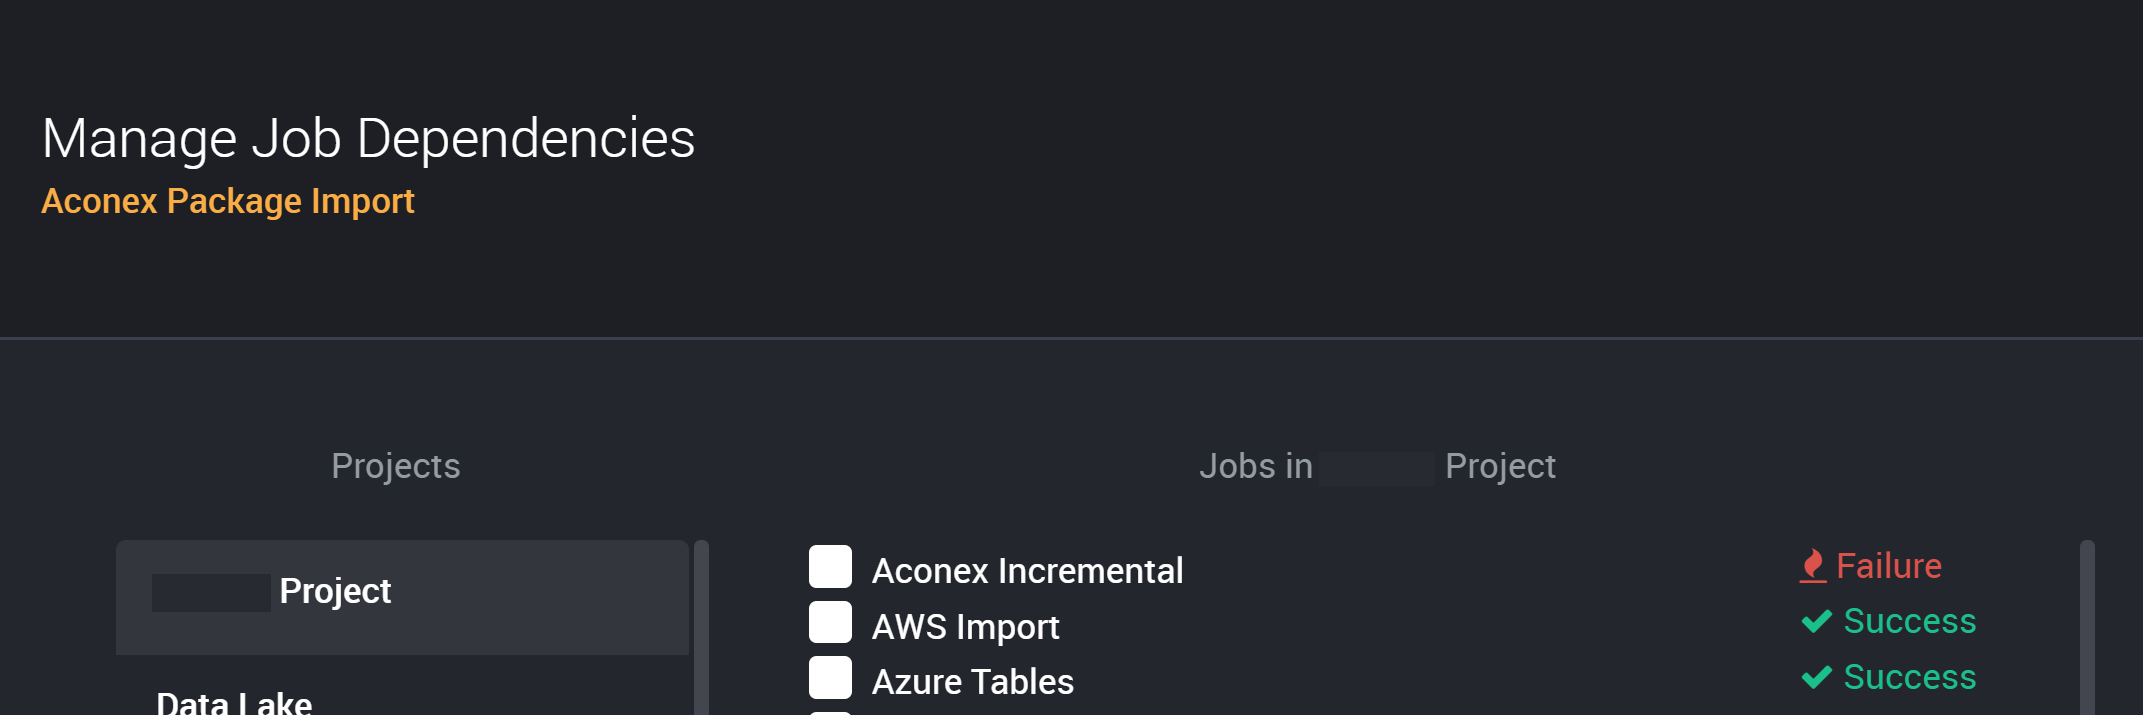
You can also view any existing dependencies. They will be indicated with a yellow icon beside the dependent job and project.

If you have chosen for a job to be dependent on a job that has the Retry Count enabled, the dependent job will wait for all necessary re-attempts to complete and will run if the first or a subsequent attempt was successful.
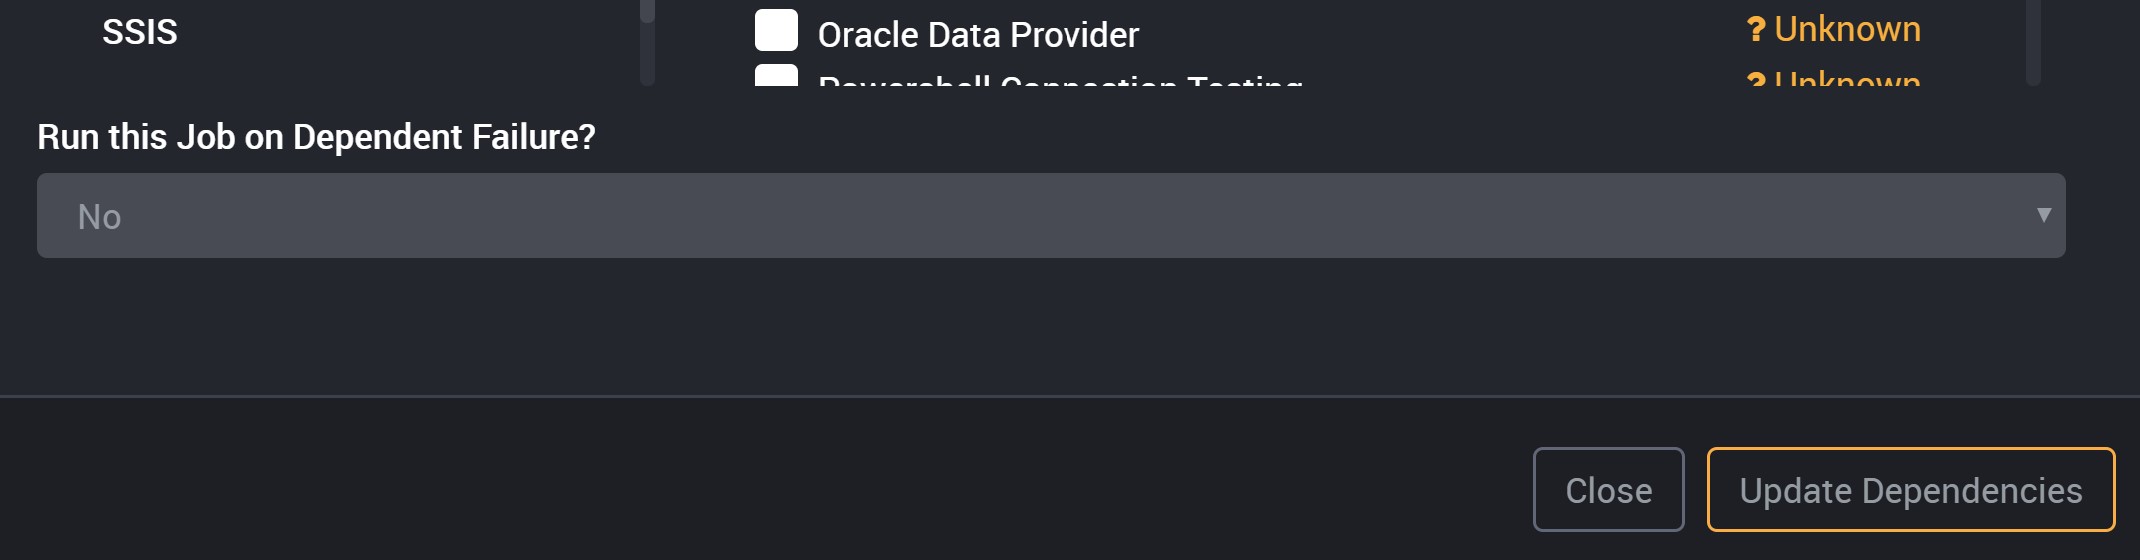
Run this Job on Dependent Failure?
Then choose whether a dependent job should still run if the job it is dependent on failed on its last execution.
This behavior is not enforced by default, you will need to set ‘Run this Job on Dependent Failure?’ to ‘Yes’ in order to utilize job dependencies.
Select whether this job will run on dependent failure:
- If this is set to ‘Yes’, this job will run regardless of the status of the job it is dependent on.
- If it is set to ‘No’, this job will fail if the job it is dependent on has a failed job status. But if the status of the job that it is dependent on is successful, then the job will run.
Sort and Filter the Job Page
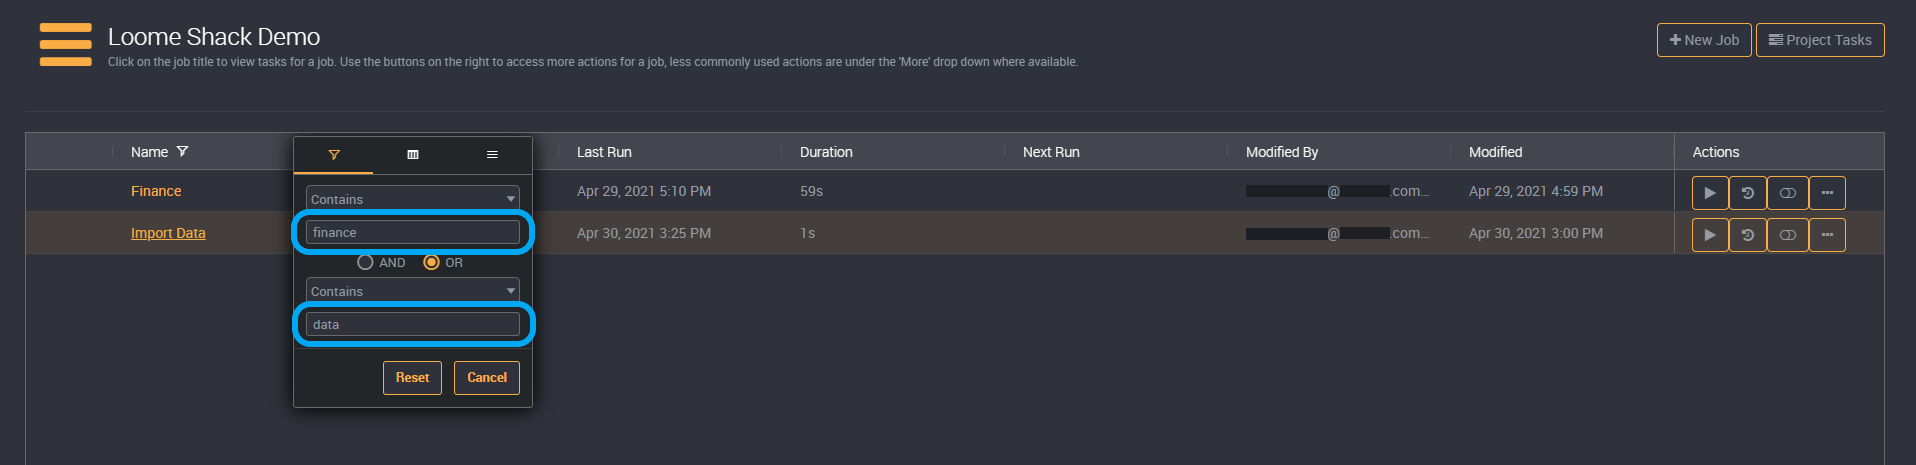
You can filter a list of jobs in a project by clicking on the Filter button that appears when you hover over a column title.

Use the text filter for the job names, highlighted in the image below, to filter and search the list of jobs in this project.
Sort Jobs
Sort the list of jobs in this project using the arrow button that appears beside each column title, highlighted in the image below.

Reset Filters
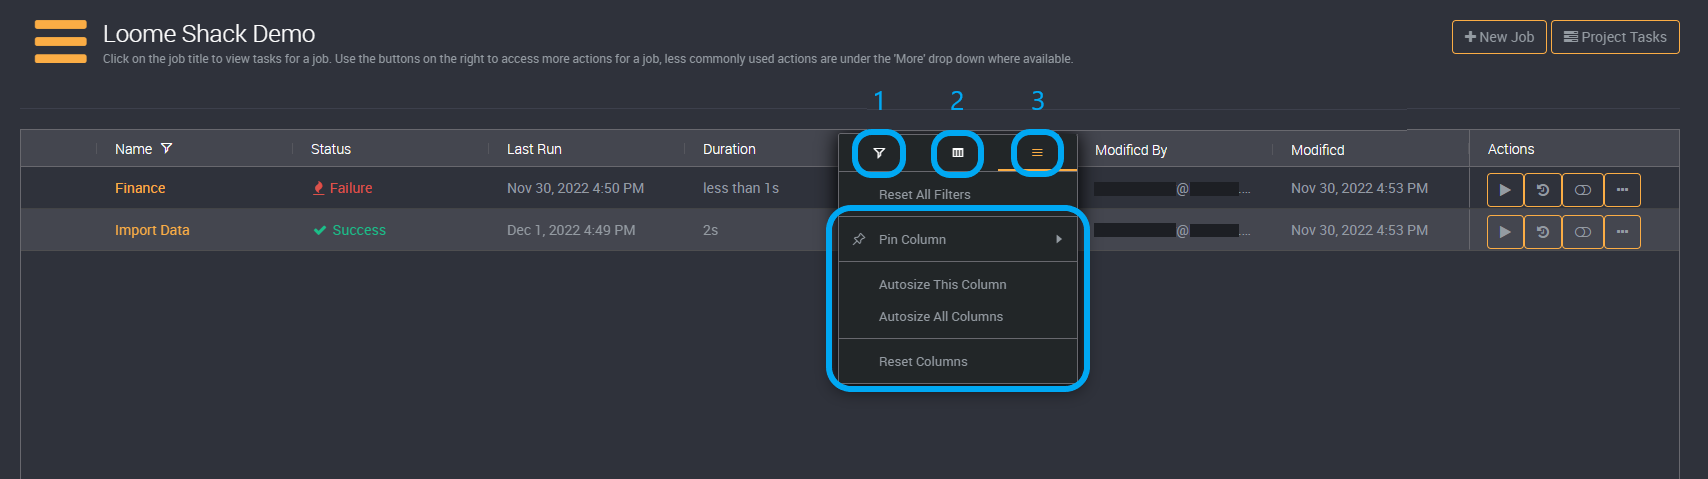
Reset your filters by clicking on the filter button beside a column, select the right-hand filter option, and then ‘Reset All Filters’.
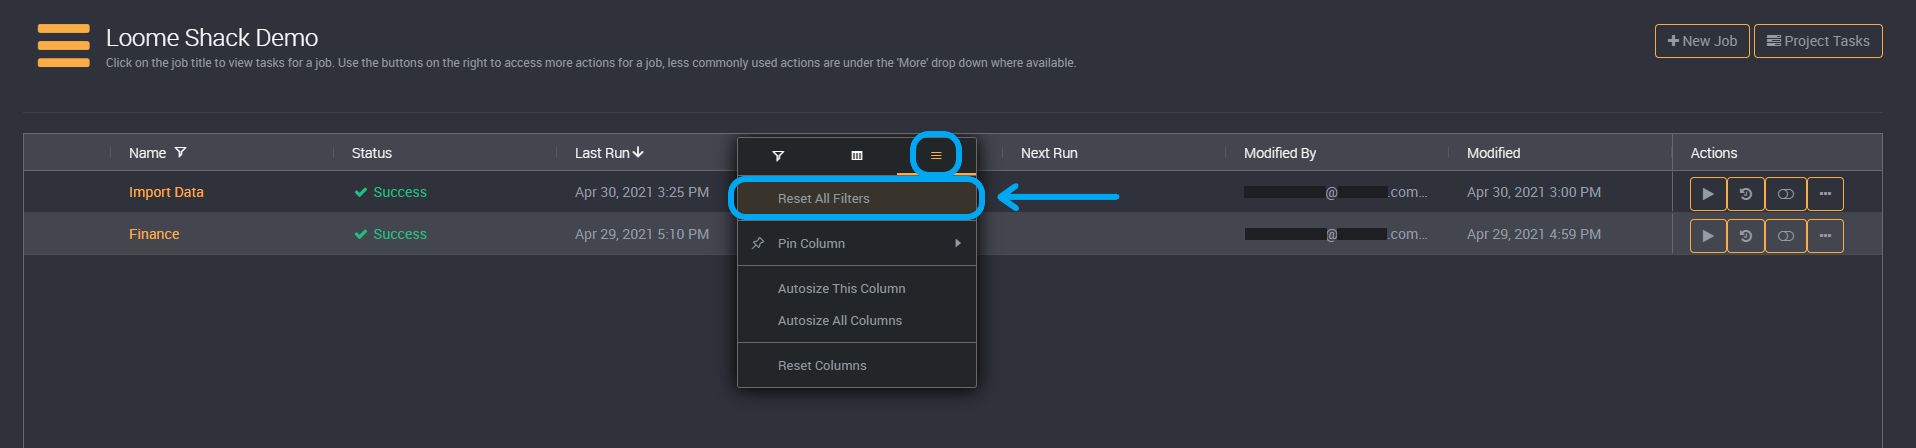
Filter on Columns
You can also filter on columns in the second filter tab, and choose to hide or show columns, pin columns to the left or right, autosize or reset your applied filters in the third filter tab.
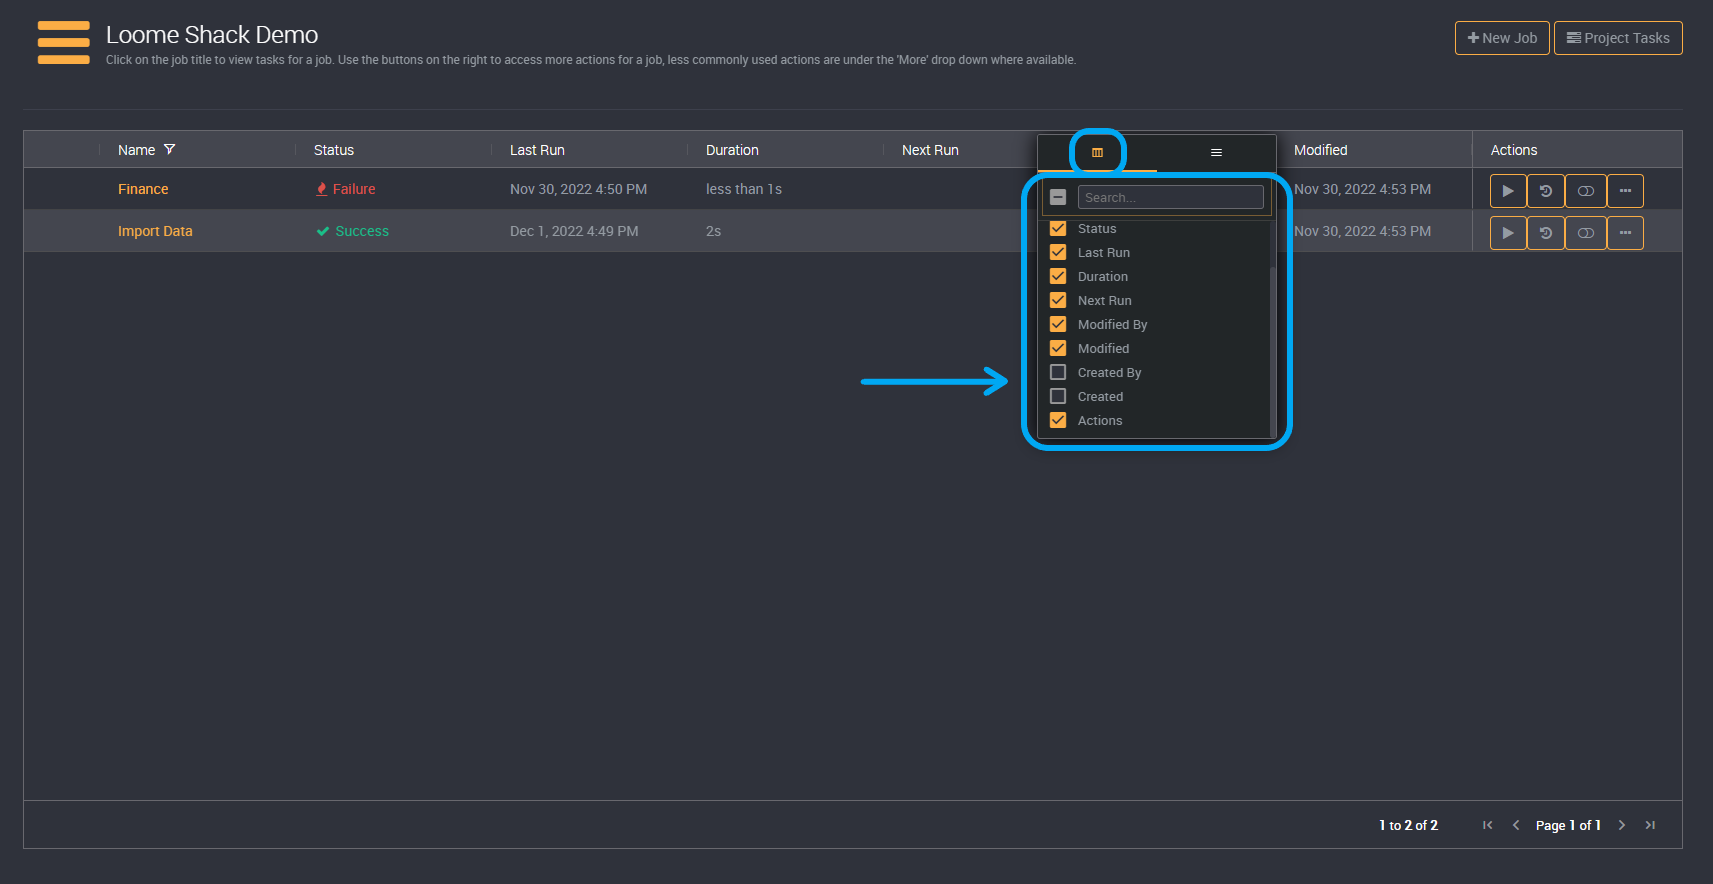
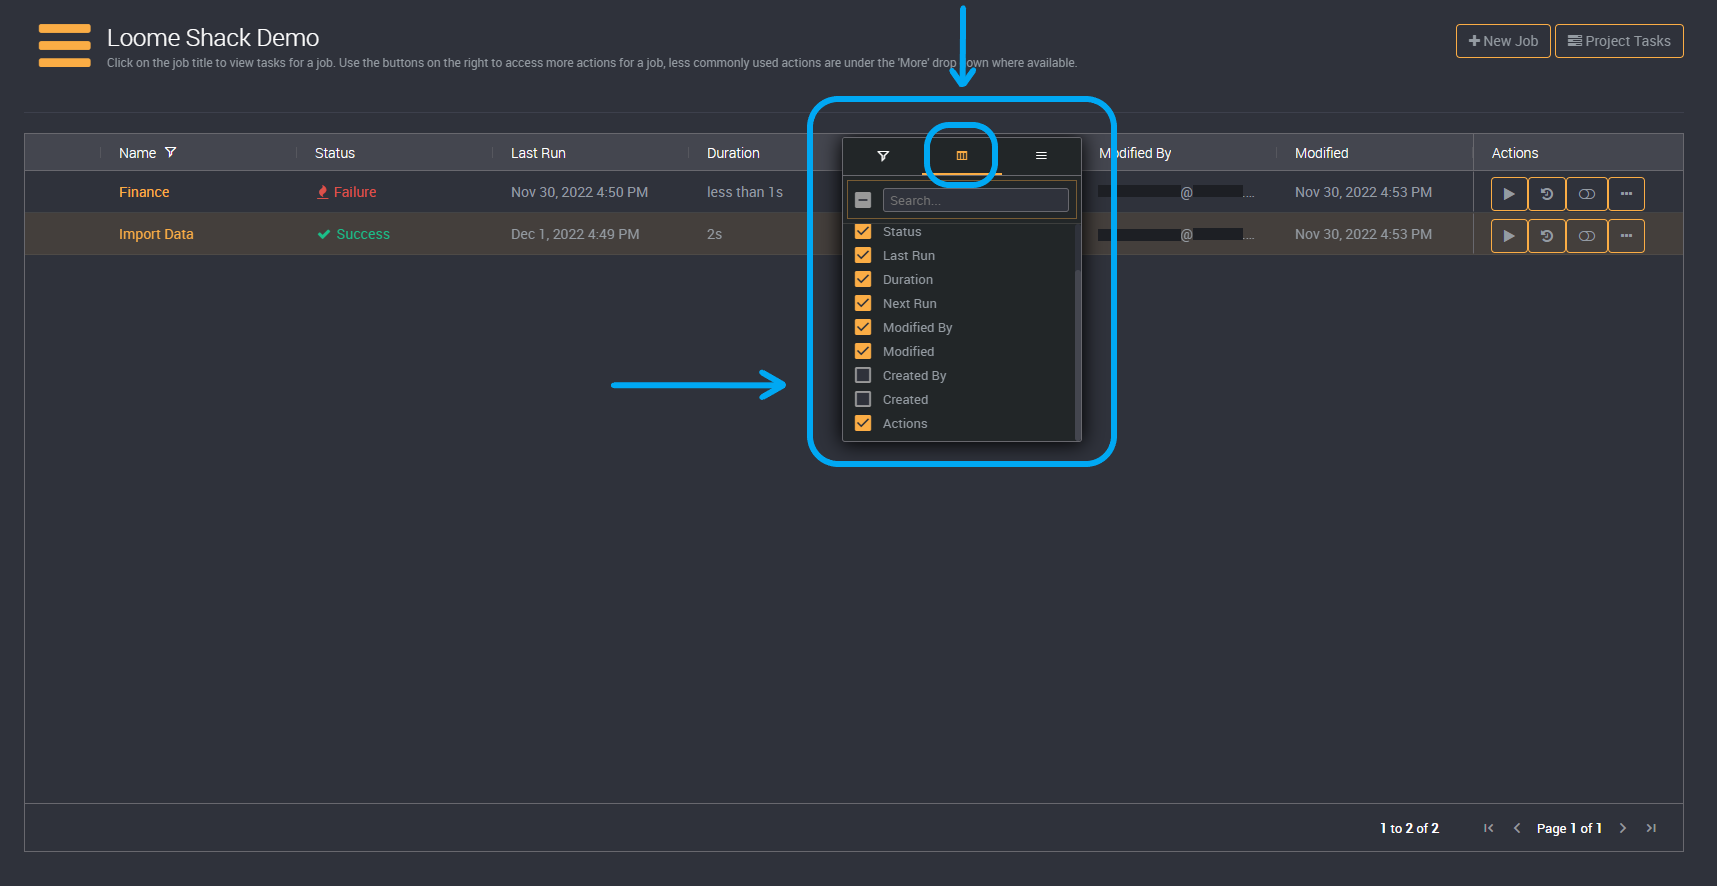
Hide or Display Columns
You can hide or display columns on the job page, for example the ‘Created by’ and ‘Created Date’ columns will be hidden by default.
You can use the filter option on any column to select which columns will be displayed or not.
Just select the checkboxes of the columns you would like to view.
Some columns may only have two filtering tabs, but you can still find them in the column selector here.