Kepion
Introduction
Kepion is a powerful Business Performance Management solution that allows you to design and develop your own enterprise applications that work just perfectly for your planning, budgeting and forecasting process. Kepion leverages the Microsoft Business Intelligence Platform which brings together the powerful BI tools from the Microsoft Business Intelligence Platform, along with the planning, forecasting and budgeting capabilities of Kepion to deliver a full Corporate Performance Management (CPM) software solution and an end-to-end BI reporting and analysis suite.
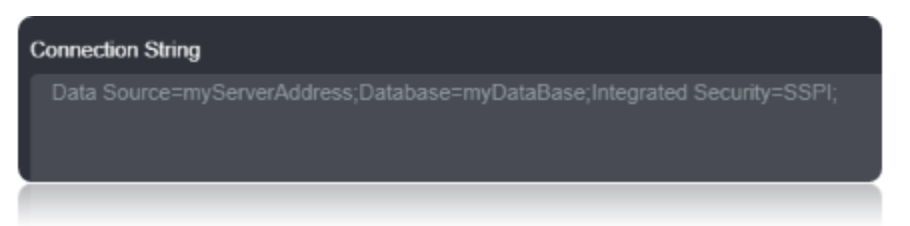
Connection String
For Kepion you need the Loome Integrate Service Account to have access to the SQL Server Instance where the Kepion Application databases exist and SSAS Server that Kepion deploys its cubes to, preferably as sys admin. These permissions should be setup during installation of the application where Loome Integrate is used for integration.
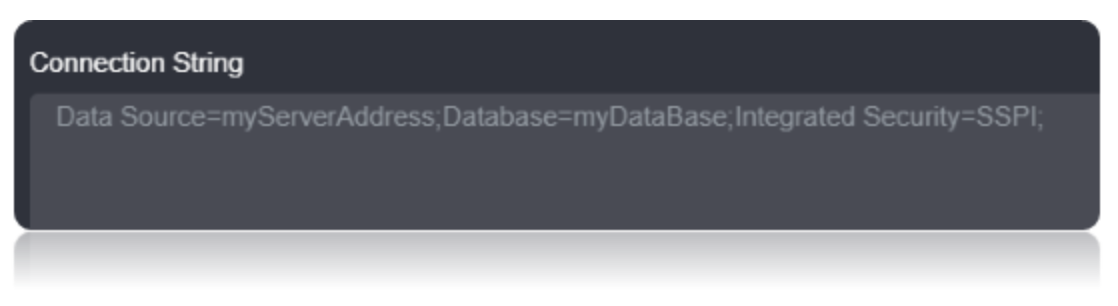
Connection String Parameters
| Parameter | Description |
|---|---|
| Data Source | Set this to the hostname of the server |
| Database | Set this to the Application database name |
| Integrated Security | Set this to SSPI |
Connecting to Keipon
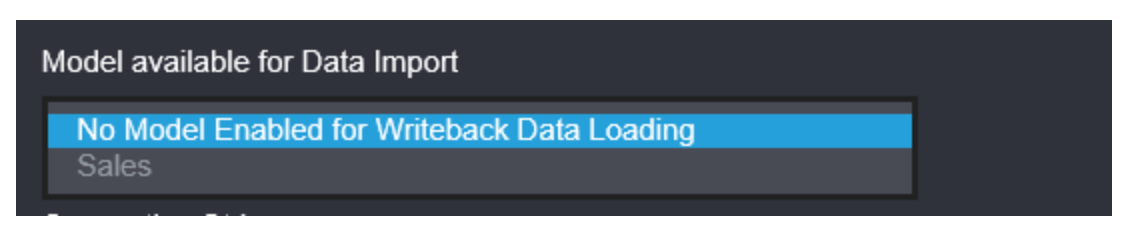
Kepion allows for data to be staged and validated prior to loading into the application tables. Loome Integrate sets the tables available for direct import. This is set by selecting the targets below. If nothing is listed in the drop down, you need to verify your connection.
Data Migrations
To Check for the data migrations:
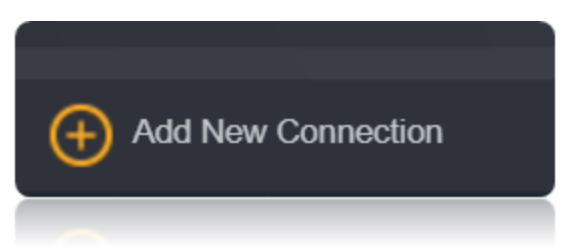
Add a new connection in Loome Integrate as shown.
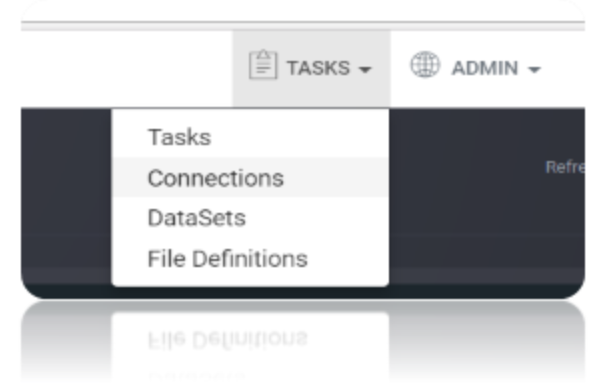
- Go to tasks and click on Connections.
- Add a new connection Using Add New Connection Option.
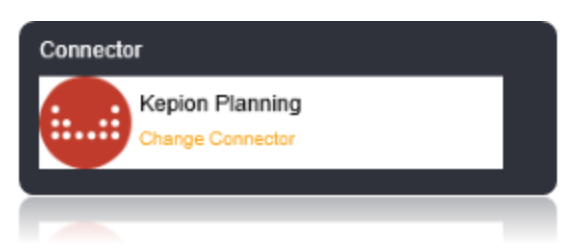
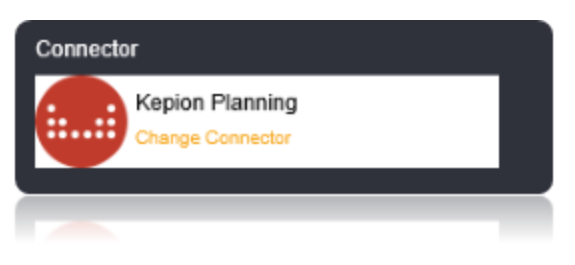
- Choose Kepion Connector from the available Connector Options.
Using the connection string parameters created, Verify the connection using the VERIFY CONNECTION Option in Loome Integrate. Once the Connection is verified, Insert the Connection Using Insert Option.

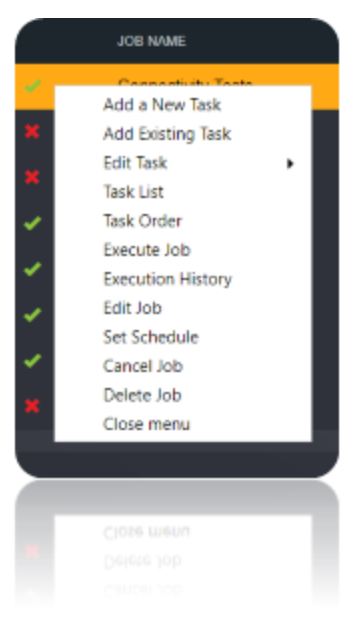
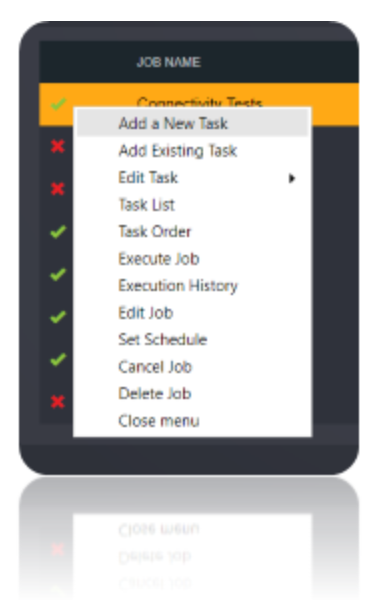
Create a Job Using ADD A JOB option in Loome Integrate name the job, Set the Logging Mode and Save the job.

Create a New Task by right clicking job list and then Add a New Task Option. If you want to edit an Existing Task Use Edit Task.
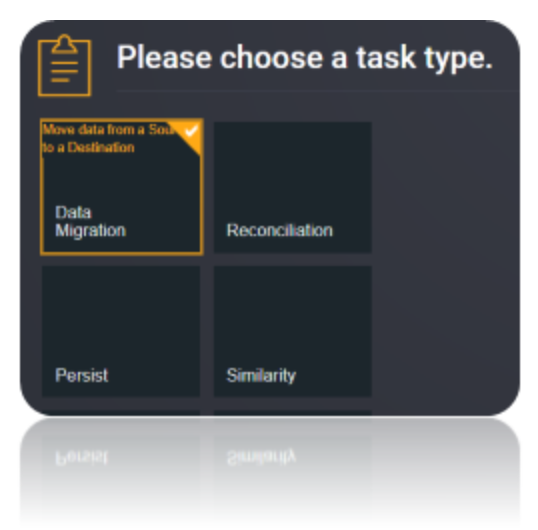
Choose a Data Migration Task.
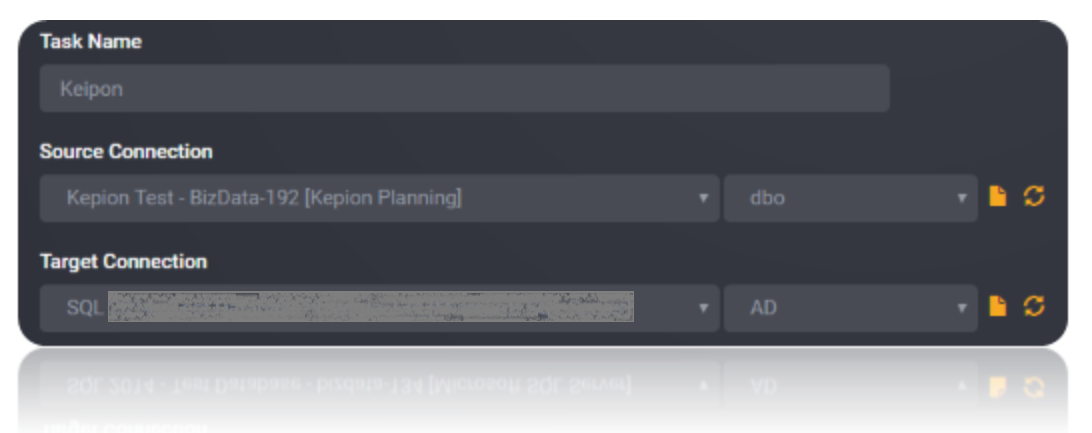
Choose the source and the destination for the migration of data. Name the Task.
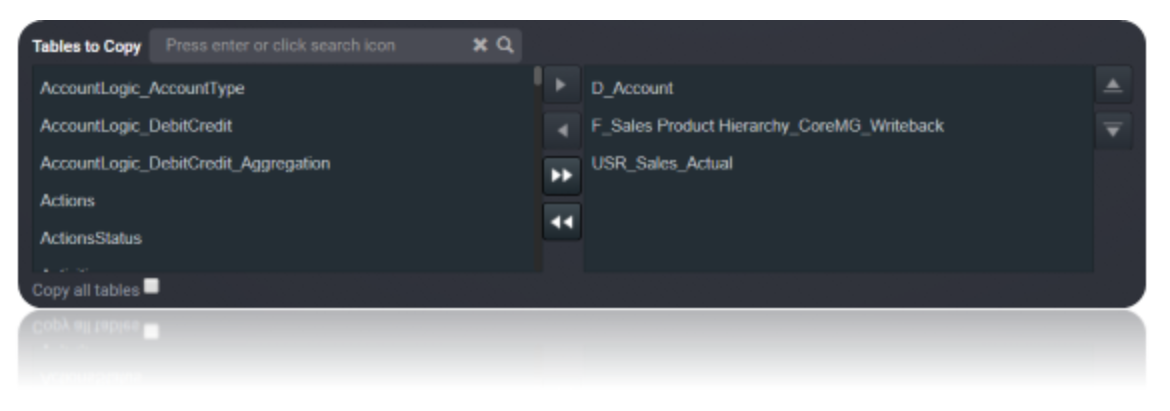
Choose the Tables or the data that need to be migrated from the source to the destination. You can Copy all Tables by checking Copy all tables box. Save The Task.
Execute the Job. Check for results and the details of the data migrated in Execution History.