Import/Export & Azure DevOps
Overview
This setup guide goes through how to configure a CI/CD for Loome Integrate in Azure Devops. By the end of this guide, you’ll be able to utilize Azure DevOps’ Repos and Pipelines to move changes from one tenant to another.
Pre-Requisites
The following are required for this setup guide:
- Two Loome Integrate tenants, both with at least one healthy agent connected.
- Group Admin privileges in both
- An Azure DevOps subscription with access to the Repos and Pipelines modules.
- An Azure Devops hosted Git Repository
Terminology
Development Tenant
The development tenant is the tenant which has the jobs we will be exporting into Azure Devops.
Production Tenant
The production tenant is the tenant which we will be importing jobs into from Azure Devops. By the end of this guide, the contents of the production tenant should match those in the development tenant.
Step 1. Setting Up Azure DevOps Access for Loome Integrate
To access Azure Devops from Loome Integrate we will be using a Personal Access Token (PAT).
This access token will act as an alias for your Microsoft/Office 365 account, Loome Integrate is able to use this token to securely access Git. PAT’s can be destroyed at any time and by default have an expiry.
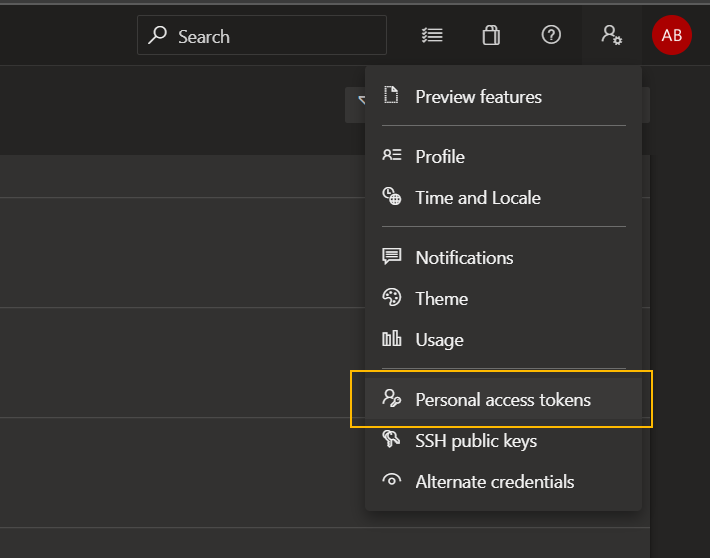
To create a PAT, open up Azure Devops and select the user settings icon in the top right hand corner. From the dropdown select “Personal Access Tokens”.
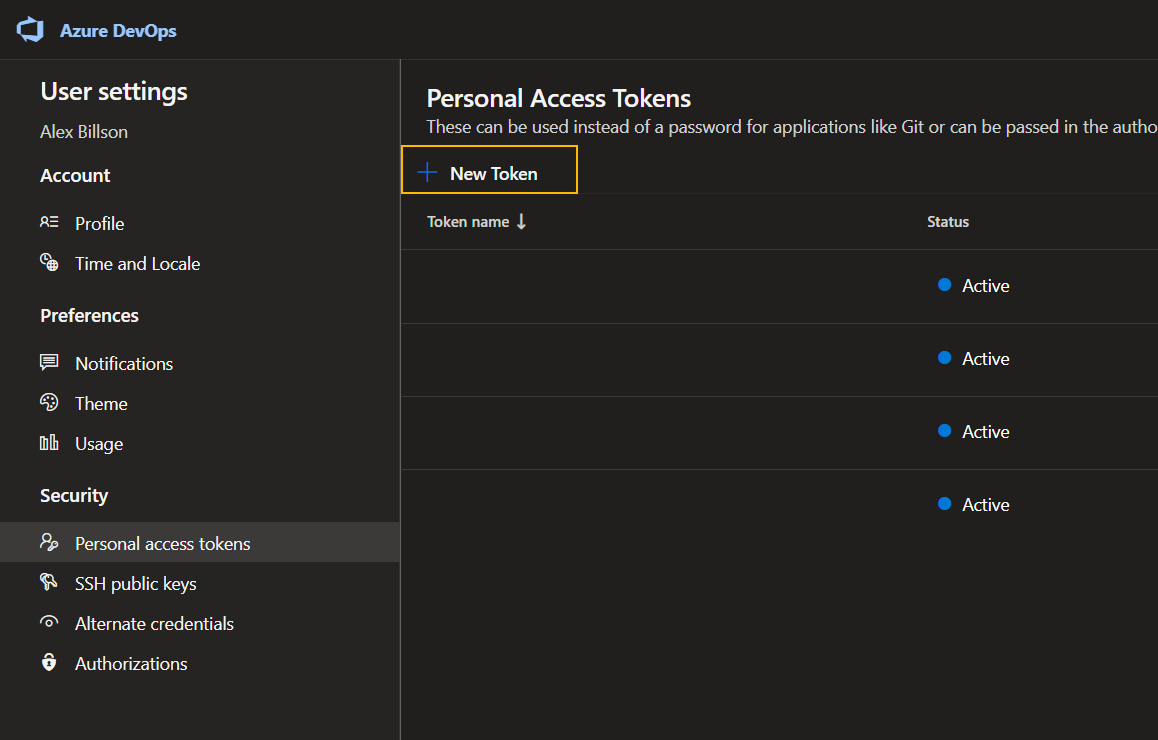
From the Personal Access Tokens screen, select “New Token”.
For new Personal Access Tokens, the only scope that is required is “Code (Read, Write & Manage)”.
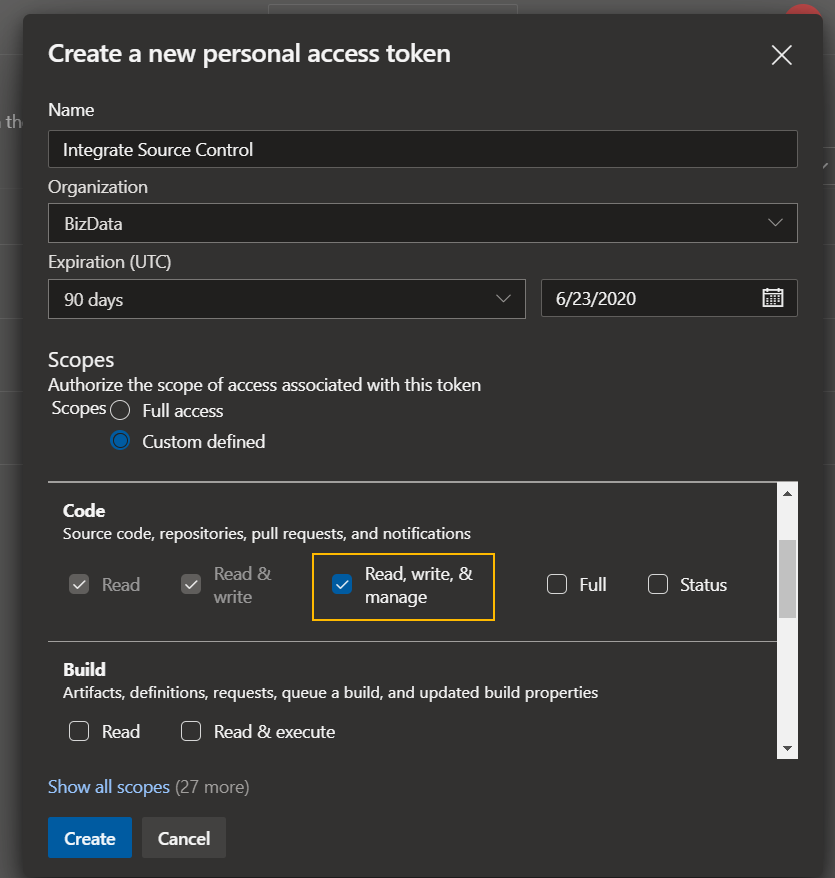
Whilst Loome Integrate does not require a specific Expiration value. If a Personal Access Token expires, Loome Integrate will require a new token for the associated Git Repository connection.
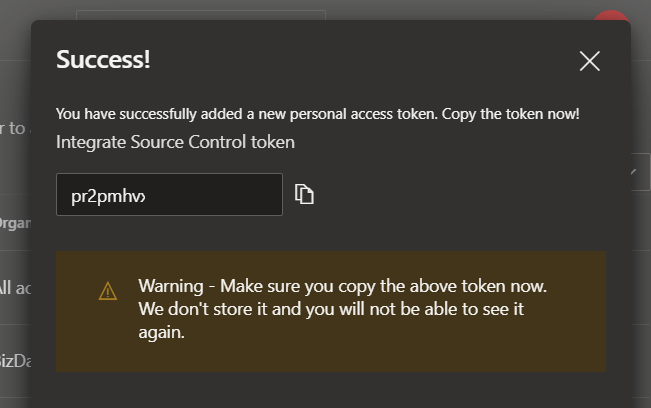
Create the new token and save the provided token value, this will be used in the password field for your Git connection in Loome Integrate.
Step 2. Setting Up Git Sync in the Development Tenant
With your newly created Personal Access Token, open up Loome Integrate and navigate to your development tenant. To setup Git Syncing you will need to create a new “Git Connection”.
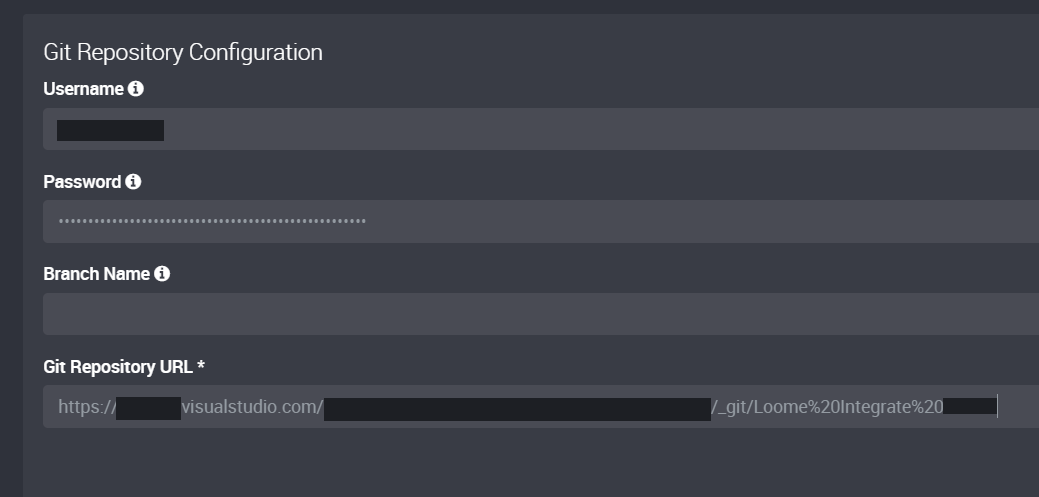
The details of the Git Connection will be the following:
| Field | Value |
|---|---|
| Username | Your Username |
| Password | Your Personal Access Token |
| Branch | Leave empty (Loome Integrate will create branches for Import/Export) |
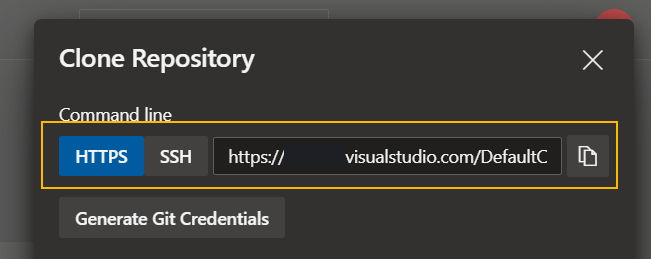
| Git Repository URL | The URL of your Git Repository (This is the URL you use to clone the repository) |
In Azure DevOps, you can retrieve the URL of your Git Repository by clicking the “Clone” button in the top right of the Repos page.
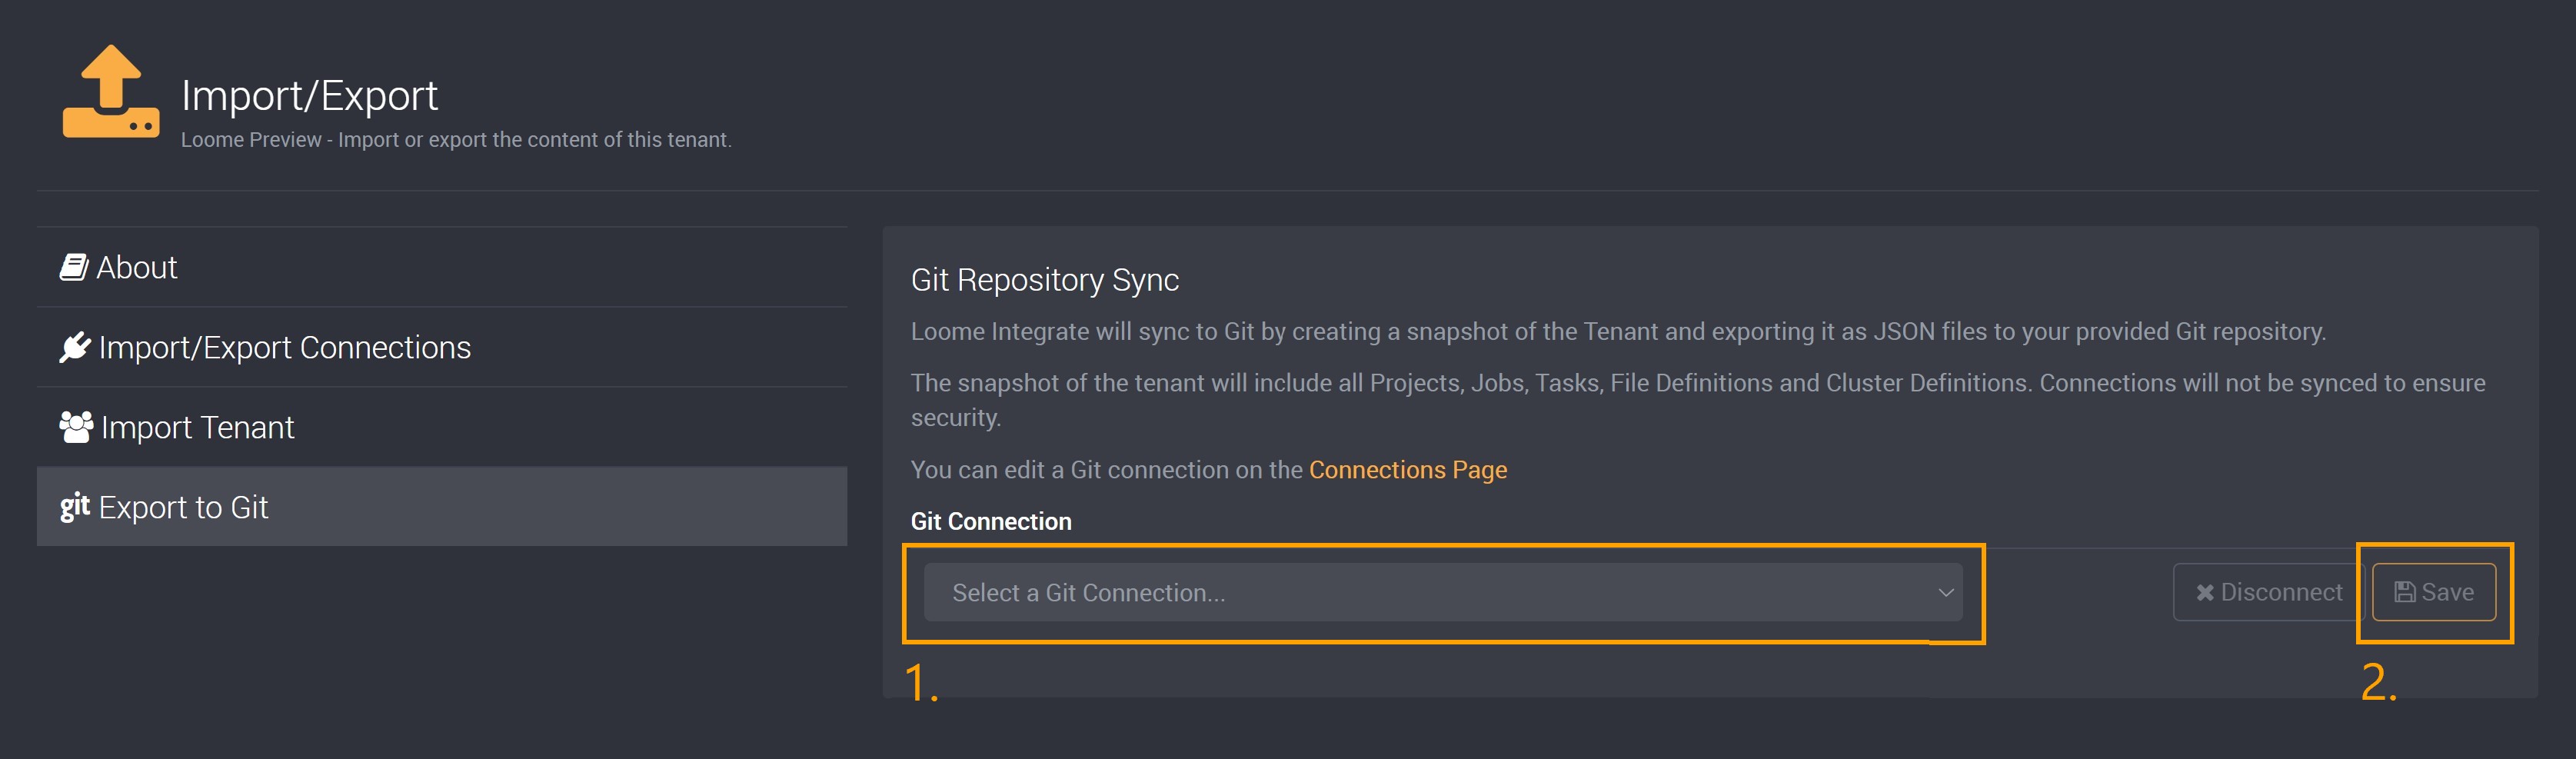
Create and validate the connection in Integrate, once the connection is validated open up the “Import/Export” settings from the top right hand dropdown.
Open up the “Export to Git” tab, you will need to provide a Git connection use for exporting here. Once you click the save button you will be able to export the contents of your Tenant to your Azure Devops repository.
Once this is enabled, you will see a button appear in the top right of the application that says “Sync Changes”. This button will appear any time there are changes available to sync to Git.

In the rare case this button doesn’t appear on the enabling of Git sync, adding an empty job to a project will enable the button as a change will be recorded.
Clicking this button and then confirming the sync from the pop up will export the contents of the tenant to Azure Repos. Once the sync is completed, you will see a notification in the bottom right hand of your screen showing the name of the created branch.
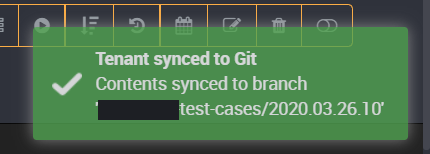
Navigating to Azure Repos will show that this branch has been created and your tenant contents have synced.
Step 3. Importing Connections into the Production Tenant
Before importing jobs into another tenant, you will need to ensure that all connections used by those jobs are also available in both tenants.
Loome Integrate does not include connections in the Import/Export process, there are a few reasons for this:
It is standard practice to not include database connection details and credentials in source control, abiding by this practice ensures that Integrate is correctly handling sensitive data.
There may be different connections used in development and production environments (eg: production loads may use a cloud data warehouse with more resources available or a different database entirely for some migrations).
Connections that are validated on one tenant with a specific agent may require minor changes to be validated on another tenant, especially if the production tenant has an agent on a different host.
On the development tenant, open up the Import/Export page and select the Import/Export Connections tab.
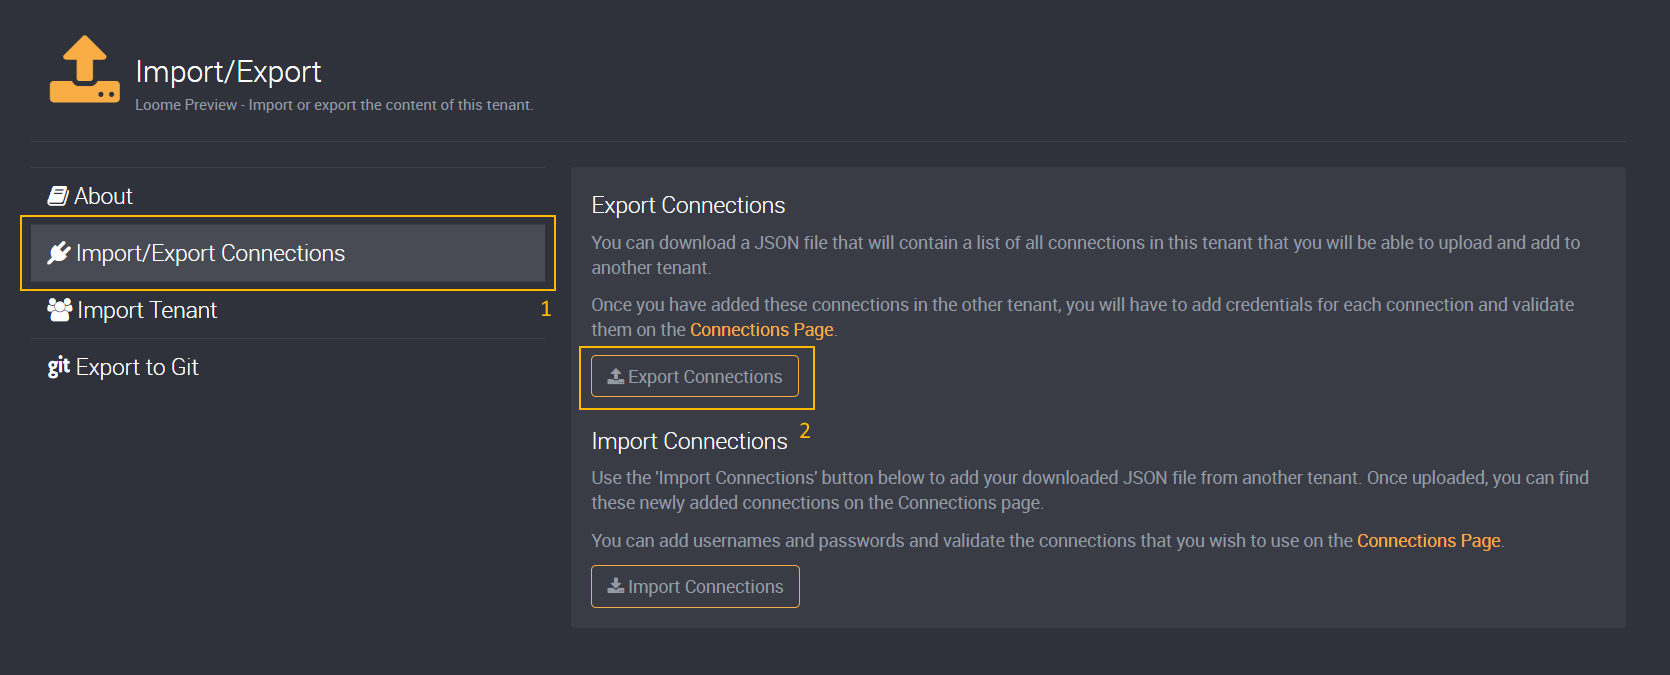
Clicking the Export Connections button will download a JSON file with all the connections from the development tenant.
On the production tenant, open up the Import/Export page and select the Import/Export Connections tab.
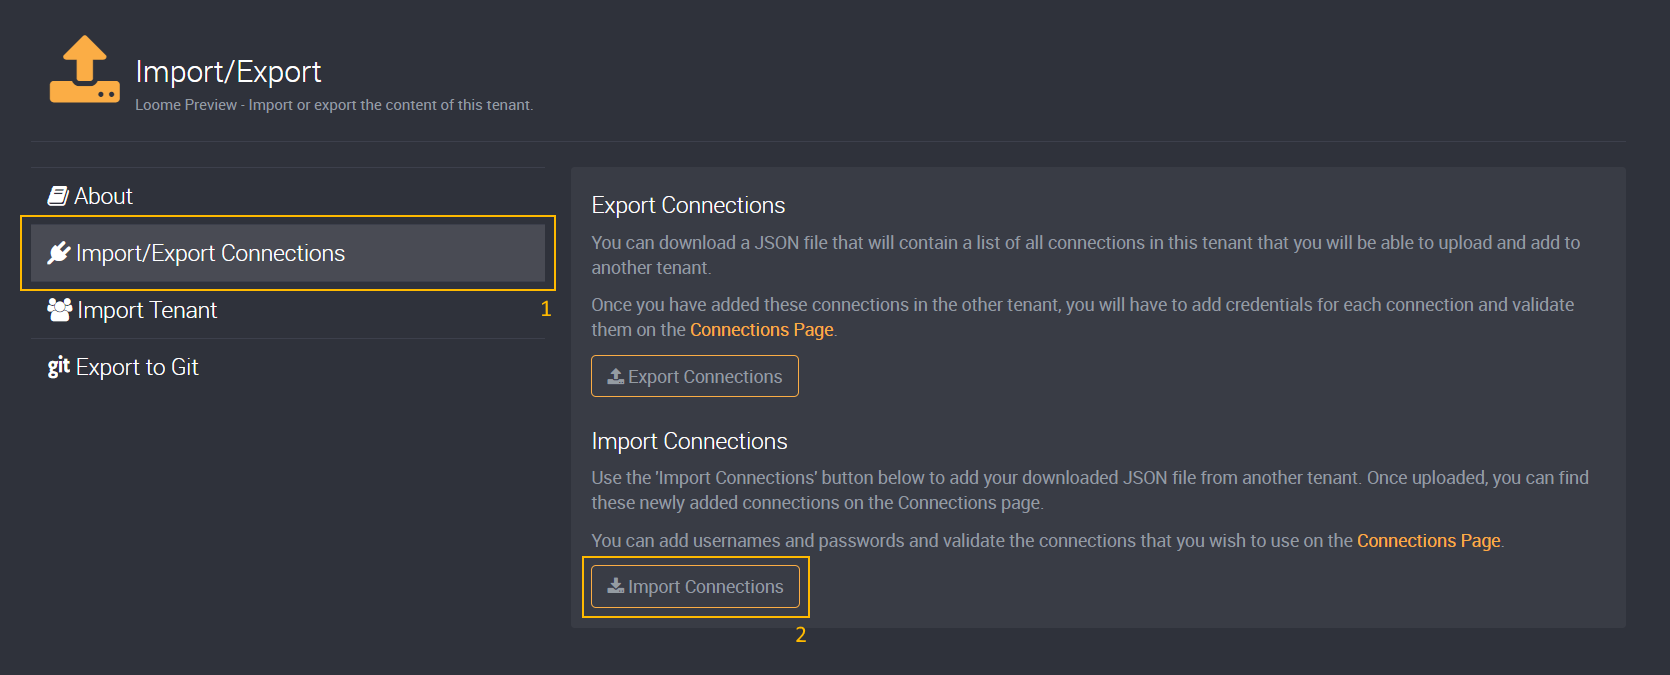
Clicking the Import Connections button will prompt you to provide the connections file downloaded previously. One you have provided the file you will be prompted with how many new connections have been imported.
Loome Integrate will only add connections that do not exist in the tenant yet, if a connection with the same name is already present it will not be imported.
Once the connections have been imported, you will need to validate them before you can run jobs that use them.
As mentioned previously, you will need to reconfigure the following as it is not brought over with the import.
- Usernames
- Passwords
- Domains
- OAuth Configurations
Once you have validated the connections, you are ready to set up the CI/CD pipeline for your jobs.
Step 4. Setting up the Build Pipeline
In Azure Devops, CI/CD is achieved through Build and Release pipelines. As there is no code to “build” for Loome Integrate tenant imports, most of the work is achieved in the release pipeline, with the build pipeline mainly existing to ensure all the contents of the tenant are provided in a standard format and container.
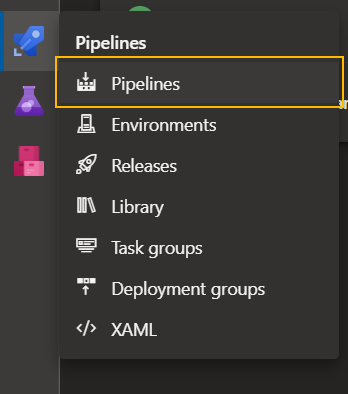
In Azure Devops, navigate to the project which contains your Loome Integrate export and select “Pipelines > Pipelines” from the side menu.
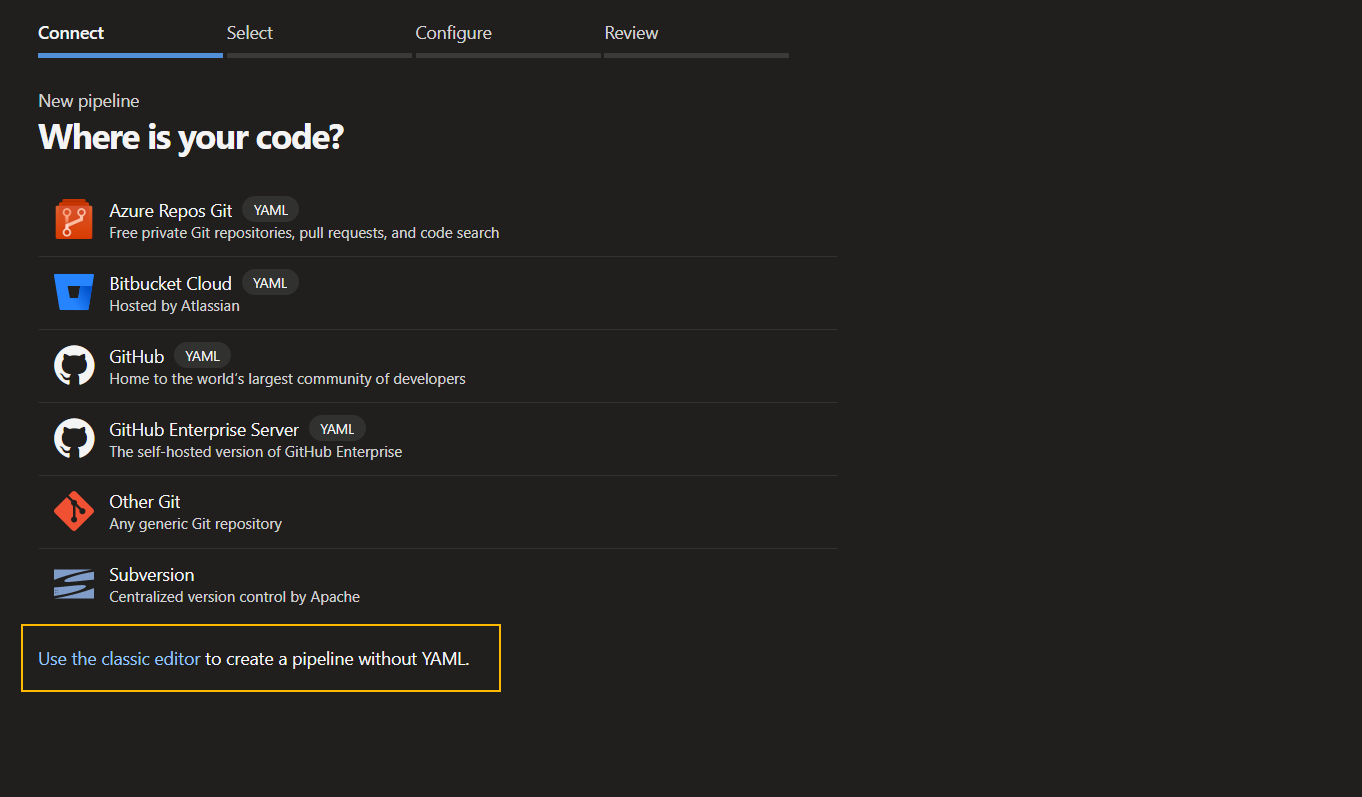
Select “New Pipeline” from the top right hand corner of the page, you will then be prompted to provide what kind of pipeline you wish to create. Opt to use the classic editor rather than the YAML editor, this is available as a link at the bottom of the screen.
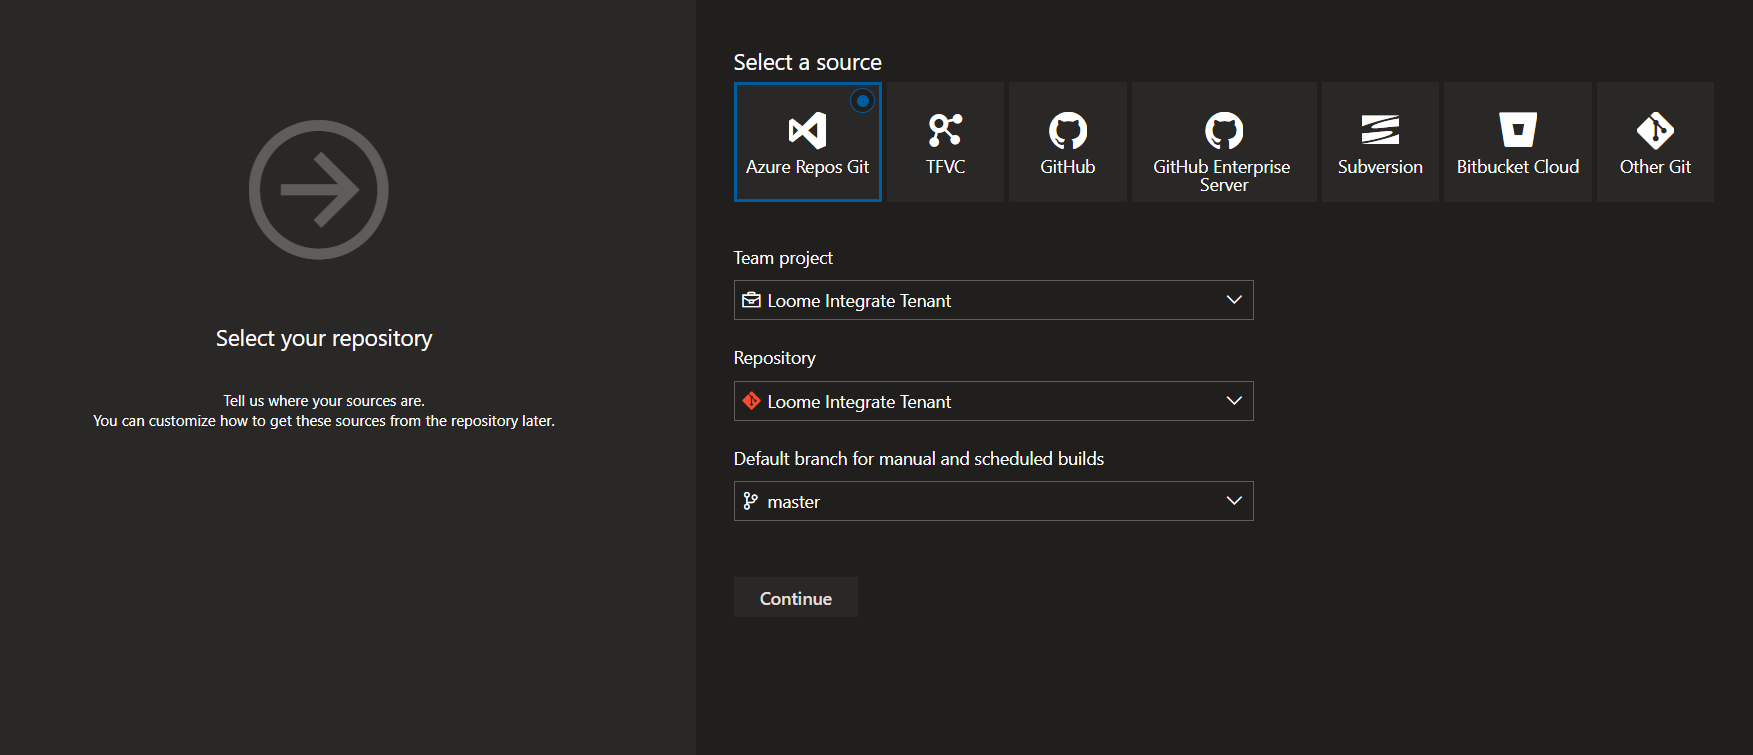
When you navigate to the editor page you will be prompted with a screen to select your source for code, by default Azure Devops will
use the master branch and for this tutorial we will do the same.
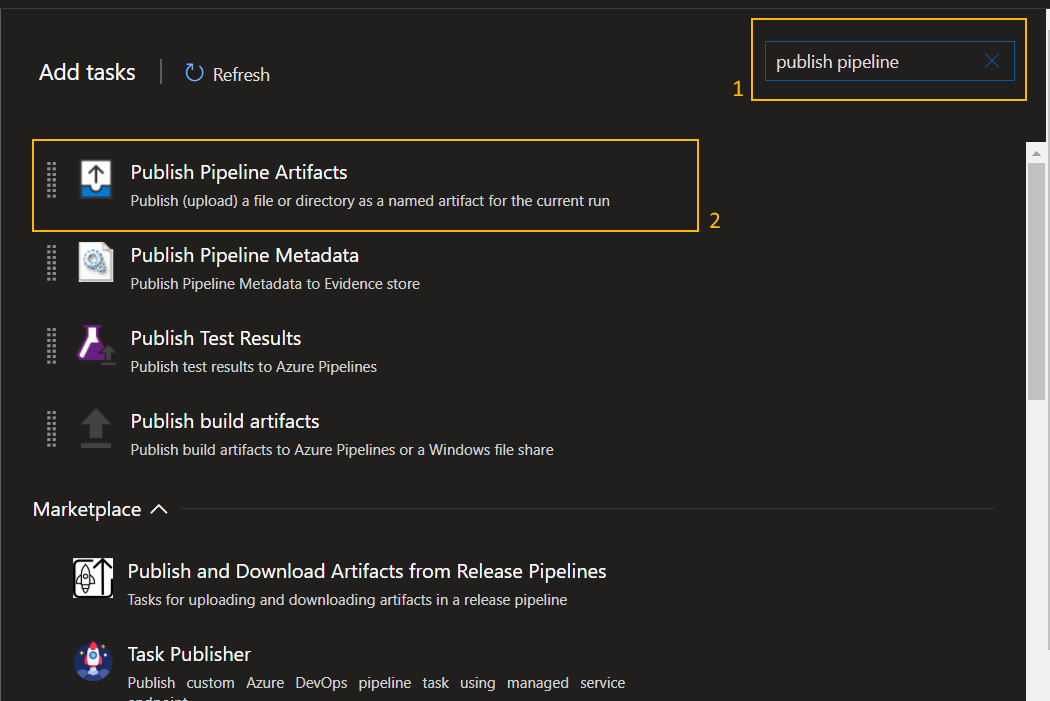
There should only be one step in our build pipeline, to add a step hover over the plus in the “Agent Job 1” panel.

Then filter the available tasks by “publish pipeline”, select “Publish Pipeline Artifact” task type.
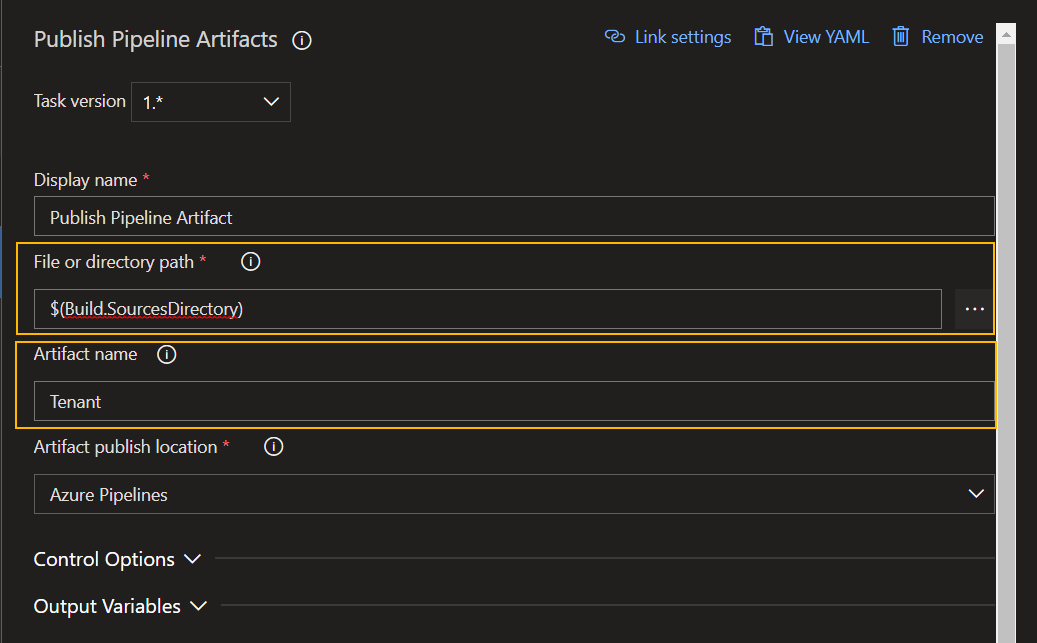
For configuring the task, you will need to set the following values:
| Field | Value |
|---|---|
| File or Directory Path | $(Build.SourcesDirectory) |
| Artifact Name | Tenant |
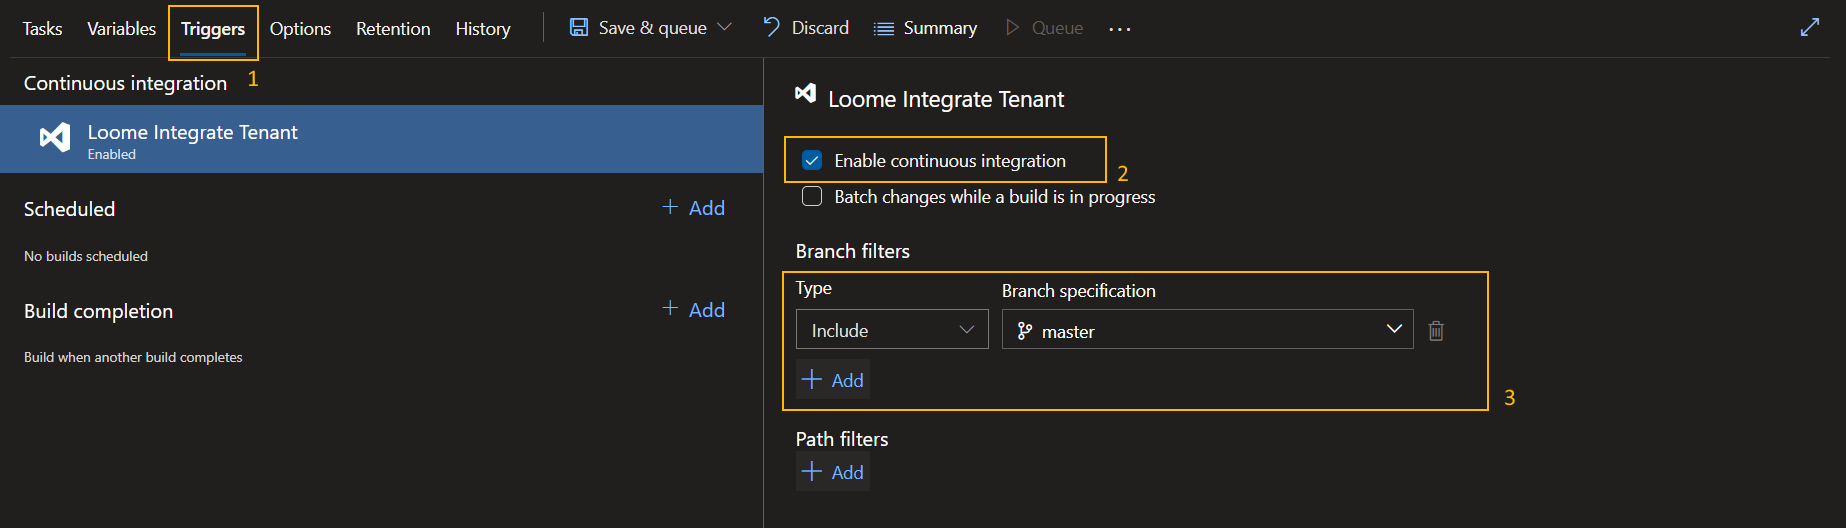
Your build is now setup, the last step is to enable the trigger to build on push to master.
Select the “Triggers” tab from the top of the page and click “Enable Continuous Integration”. Once that’s done, you should have one
branch filter for master.
Once the trigger is set up, click the “Save & Queue > Save” at the top of the page. Note that if you have not merged your tenant changes into master your build will not contain anything.
Step 5. Setting up the Release Pipeline
The next and final step in Azure DevOps is to setup the Release Pipeline. This is a little more complex than the build pipeline, but we have standardised the process so that as little configuration as possible is required to get up and running.
The provided release pipeline has been built for a standard scenario in which the production tenant has one agent for running all jobs. If you need to distribute tasks across multiple agents or have a use case that differs to what we’ve provided, contact support@loomesoftware.com and we will work with you to create a release pipeline that suits your needs.
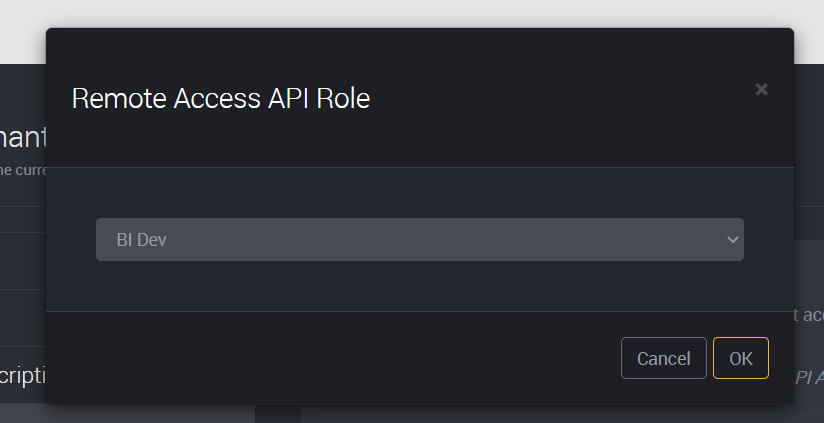
Before we setup the release pipeline, you will need to setup a Remote Access client for your Production Tenant. This process is well documented here, once you have created the client ensure you save the Client Id as that will be needed for the release pipeline.
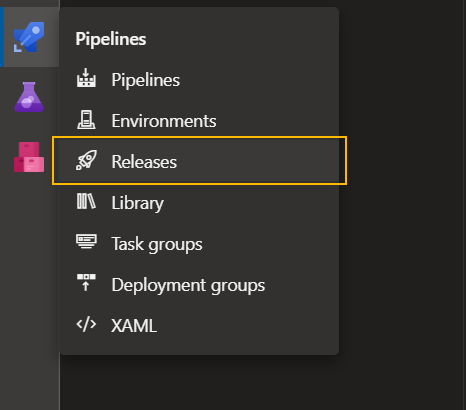
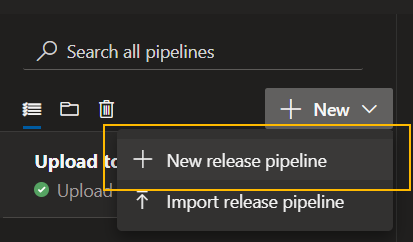
Back in Azure Devops, open “Pipelines > Releases” from the menu on the left, then click “New > New Release Pipeline” from the dropdown on the left.
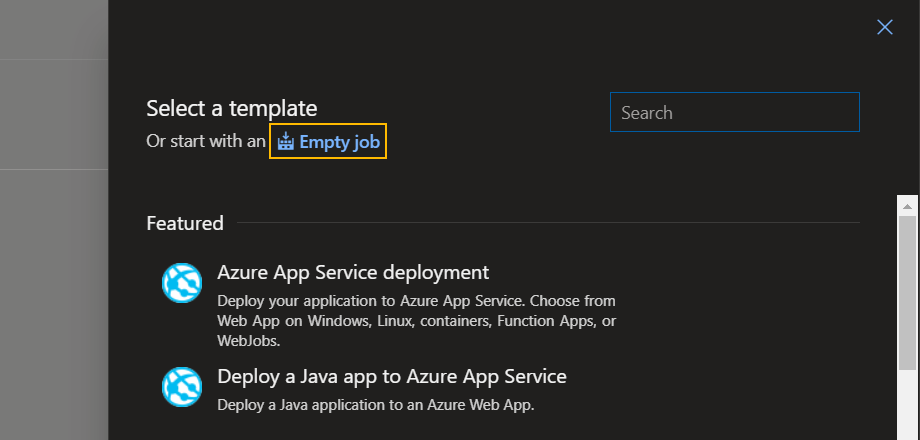
You will want to use an empty job for this release pipeline.
The first step of creating the release pipeline is to select the Loome Integrate Tenant build as a source artifact. Select “Add an Artifact” from the left and from the provided slide in make sure you select the Build Pipeline we previously created.
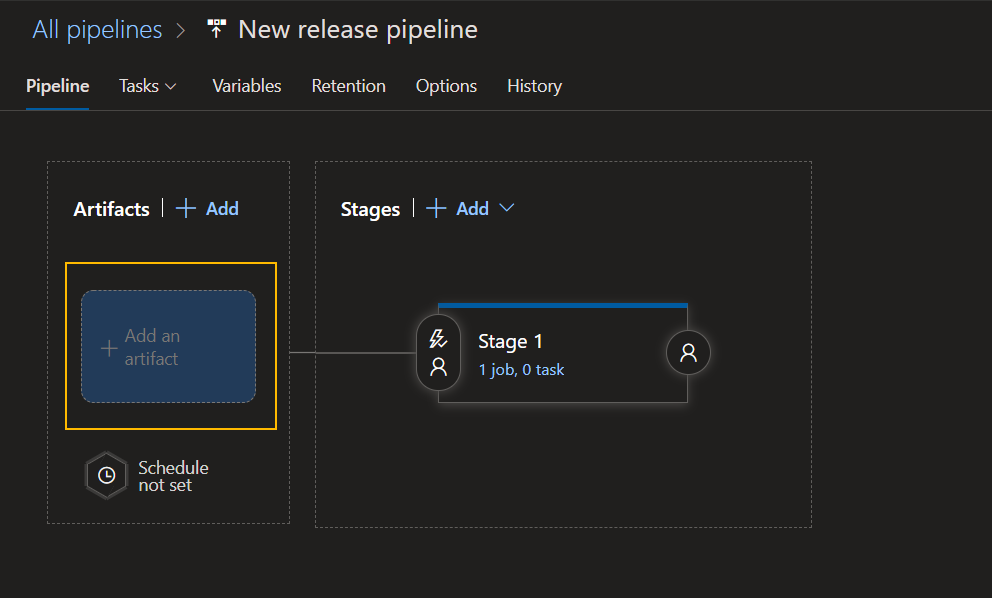

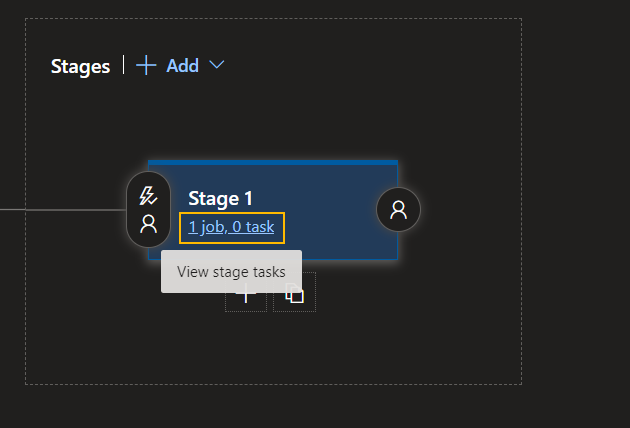
Once you have selected your artifact, hover over the first stage of the release pipeline and click the “1 job, 0 task” link.
As was the case with the build pipeline, the release pipeline has one step but this time we are going to be adding a Powershell task to the pipeline job.
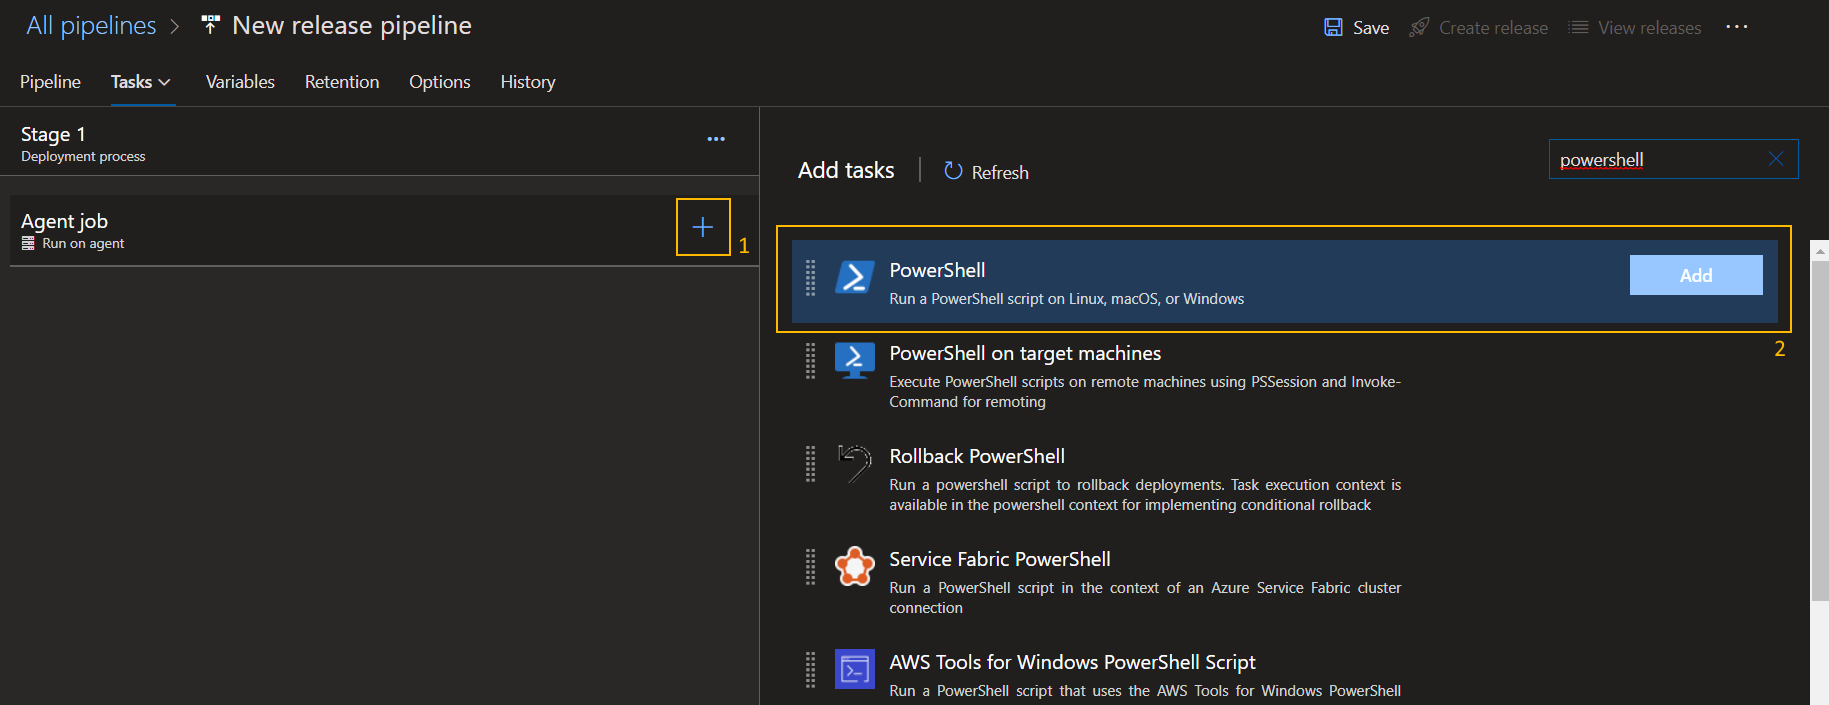
Set the “Type” of the script task to “Inline” and then paste the following into the script box:
Add-Type -AssemblyName System.IO.Compression.FileSystem;

$ClientId = $env:ClientId;
$IdHostName= $env:IdHostName;

$TokenRequestBody = @{
    "grant_type"    = "client_credentials";
    "client_id"     = $ClientId;
    "client_secret" = $ClientId;
    "scope"         = "webApi"
};
$AccessToken = ((Invoke-WebRequest -Uri "https://$IdHostName/connect/token" -Method Post -Body $TokenRequestBody).Content | ConvertFrom-Json).access_token;

$ArtifactOutputDir = (Get-ChildItem $env:SYSTEM_DEFAULTWORKINGDIRECTORY)[0].FullName
$ApiHostName = $env:ApiHost;
$BaseUrl = "https://$env:ApiHostName/api/v1/";
$AgentHostname = $env:AgentHostName;

function Upload-Zip ($ZipLocation) {
    $AccessHeaders = @{"Authorization" = "bearer $AccessToken" }

    $ZipUploadUrl = $BaseUrl + "Import/Zip?agentHostName=$AgentHostName";

    try {
        $Response = Invoke-RestMethod $ZipUploadUrl -Method 'POST' -Headers $AccessHeaders -InFile $ZipLocation -ContentType "application/zip";
        Write-Output $Response;
    }
    catch {
        $Exception = $_.Exception;
        $ErrorMessage = $Exception.Message;
        if ($null -ne $Exception.Response) {
            $Stream = $Exception.Response.GetResponseStream();
            $ContentReader = New-Object System.IO.StreamReader -ArgumentList $Stream;
            $ErrorMessage = $ContentReader.ReadToEnd()
        }
        throw $ErrorMessage;
    }
}

$ZipPath = "tenant.zip";
Remove-Item $ZipPath -ErrorAction Ignore;
[System.IO.Compression.ZipFile]::CreateFromDirectory($ArtifactOutputDir, $ZipPath, 0, $false);
Upload-Zip -ZipLocation $ZipPath;
This script will upload compress the contents of your tenant as a zip and then upload it directly to Loome Integrate. If anything goes wrong during the import (for example if new connections were not imported before the import) then the task will fail.
Expand the “Environment Variables” section of the task and add the following entries:
| Name | Value |
|---|---|
AccessToken |
$(AccessToken) |
ApiHostName |
$(ApiHostName) |
AgentHostName |
$(AgentHostName) |
ClientId |
$(ClientId) |
IdHostName |
$(IdHostName) |

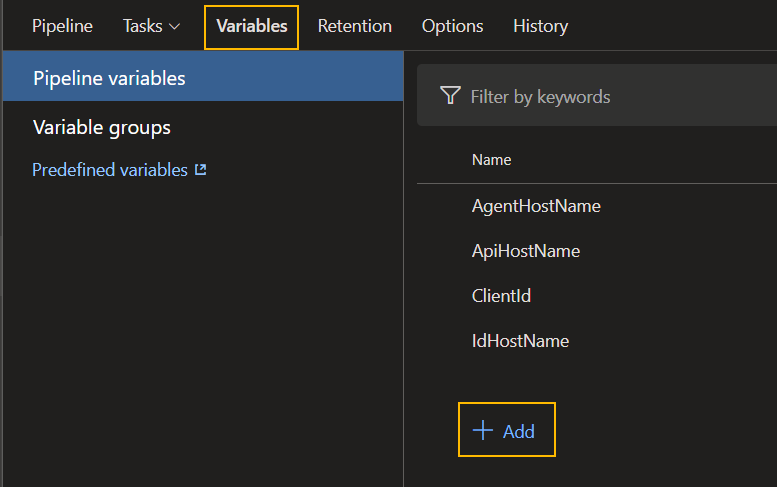
Your task is now configured, the last step will be setting up the Pipeline Variables for this Release.
Select the Variables tab from the top bar of the page. This step varies slightly depending on what region for Integrate you are using, however there will always be four variables to set:
AgentHostName
- This is the host name of the agent on your Production tenant.
- This can be grabbed from the agents screen or the bar at the bottom of the application.
- This is the agent the imported tasks will be assigned to.
ApiHostName
- For AU Clients this will be
dg-api-au.perspectiveilm.com - For US Clients this will be
dg-api-us.perspectiveilm.com
ClientId
- This is the Client ID you created at the start of this step.
IdHostName
- For AU Clients this will be
identity-au.perspectiveilm.com - For US Clients this will be
identity-us.perspectiveilm.com
Once these are set, your release job is setup. Save the job and return to the release pipeline page from before, like with the build you’ll need to set a trigger for the release.
In the release pipeline view, click the thunderbolt on the artifact panel then enable the “Continuous Deployment Trigger”.
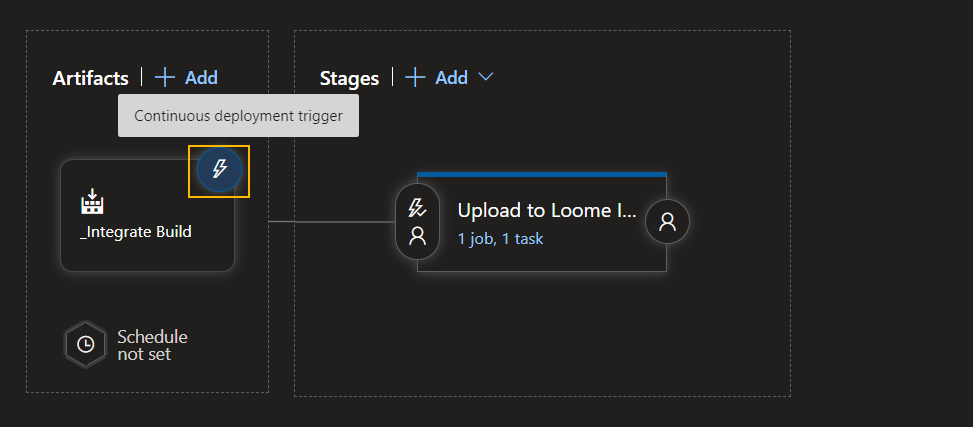
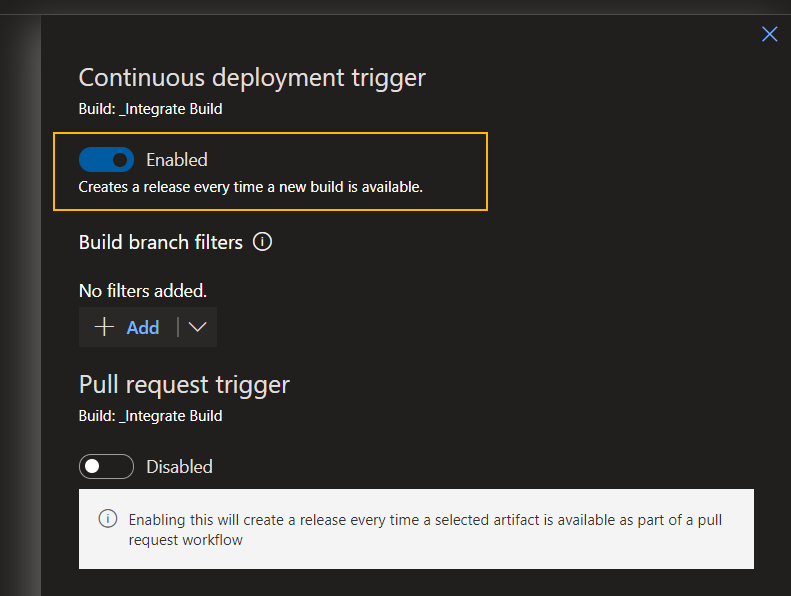
Once this is saved, your release will run every time a build runs.
You have now configured both the build and release pipelines for your Loome Integrate Import/Export.
Step 5. Wrapping it all up
In this setup guide, we have created a full Continuous Integration/Continuous Deployment pipeline for our Integrate tenants. At a high level we support the following flow:
- A user in the Development tenant makes a change in the Development tenant.
- The user syncs the changes to a new branch in Azure DevOps Git
- A project administrator in Azure DevOps merges the changes from the new branch into
master - Once the changes have been merged, Azure DevOps pipelines pushes the changes to the Production tenant.