JIRA
Introduction
The Connector for JIRA provides easy access to JIRA data, including Projects, Groups, Workflows, and more! The JIRA Data Provider makes this JIRA data look like SQL tables in your applications. With this Connector the JIRA developers can simply DataBind to data, just like using SQL Server.

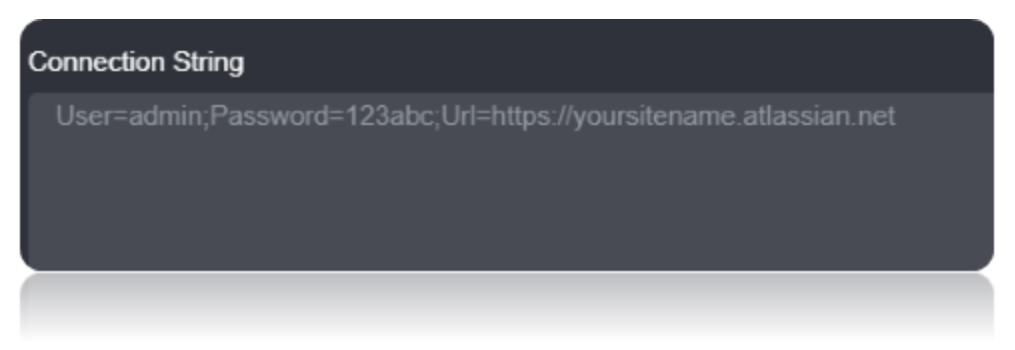
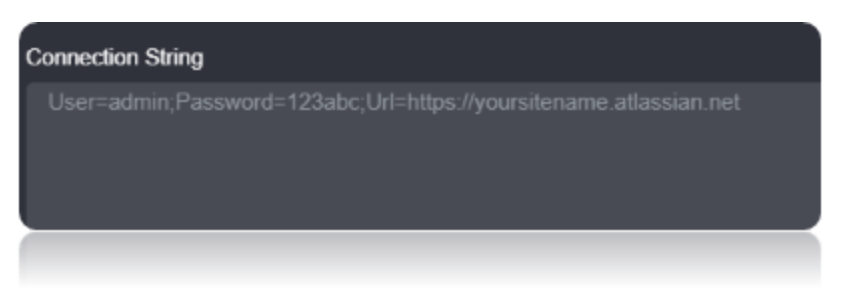
Connection String
To connect to JIRA, provide the User and Password. Additionally, provide the URL for example, https://yoursitename.atlassian.net.
Connection String Parameters
To build a connection string, use a name which is user column.
| Parameter | Description |
|---|---|
| UserName | The username of a currently authenticated User. |
| Password | Password column use the password currently authenticated by the user. |
| URL | https://yoursitename.atlassian.net. This URL is supplied from atlassian when you create an account to connect to JIRA. |
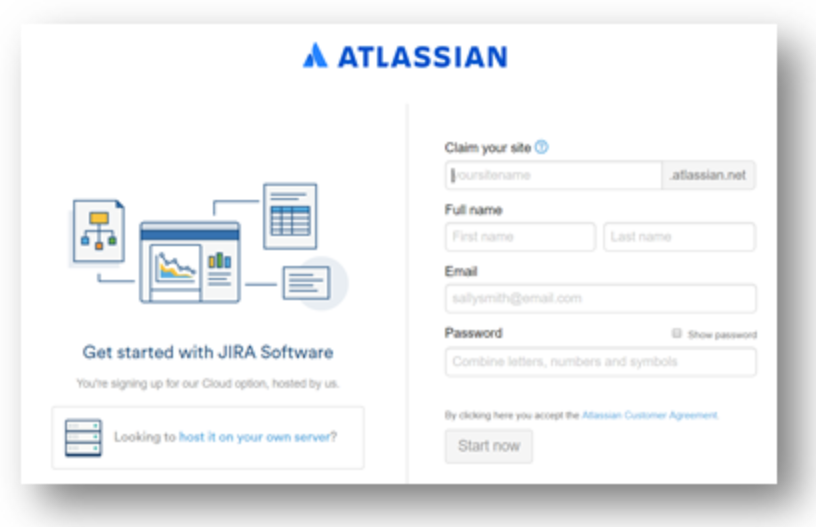
Connecting to JIRA
Go to developers portal https://developer.atlassian.com/. Create Sitename using atlassian. The Username and Password used to create the Account is Used as Username and Password in the Connection String.
Data Migrations
To Check for the data migrations:
Add a new connection in Loome Integrate as shown.
- Go to tasks and click on Connections.

- Add a new connection Using Add New Connection Option.

- Choose Jira Connector from the available Connector Options.

Using the connection string parameters created (You can Specify the Username and password either in the connection string or in the box Shown Below), Verify the connection using the VERIFY CONNECTION Option in Loome Integrate. Once the Connection is verified, Insert the Connection Using Insert Option.


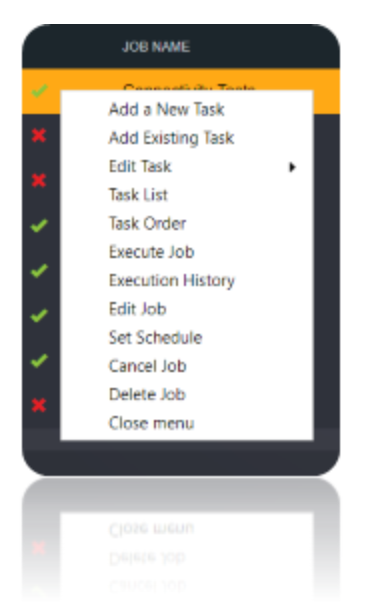
Create a Job Using ADD A JOB option in Loome Integrate, add a data migration task to the job.

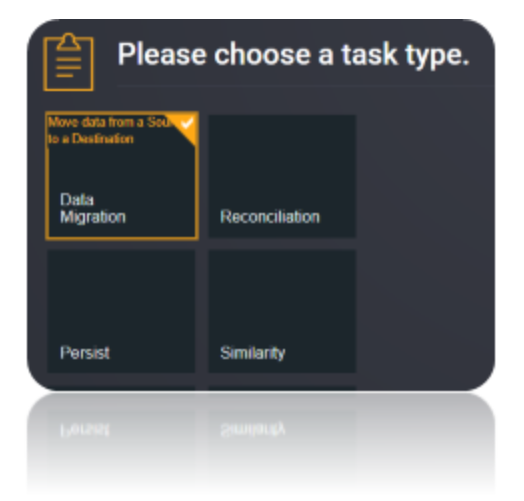
Create a New Task by right clicking job list and then Add a New Task Option. If you want to edit an Existing Task Use Edit Task.
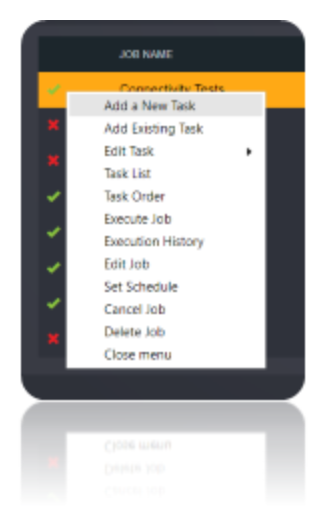
Choose a Data Migration Task.
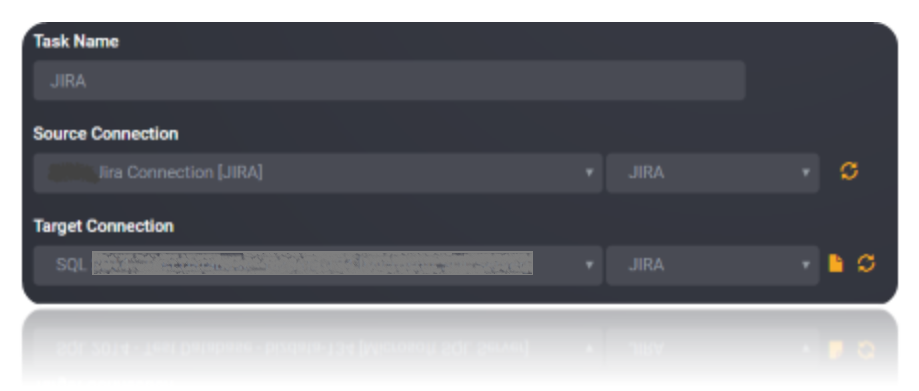
Choose the source and the destination for the migration of data. Name the Task.
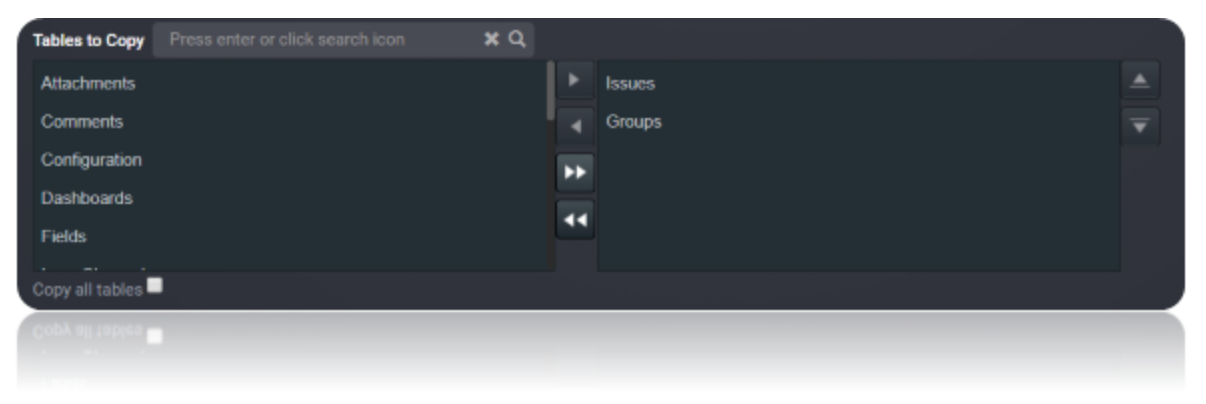
Choose the Tables or the data that need to be migrated from the source to the destination. You can Copy all Tables by checking Copy all tables box.
Execute the Job. Check for results and the details of the data migrated in Execution History.
Data Model
The provider models the JIRA API as relational views. View schemas are defined in simple, text based configuration files that describe the column behavior of system fields for JIRA entities. Additionally, the Issue tables support native JQL (JIRA Query Language) in the WHERE clause, along with the columns of the view.

Tables
The tables are normalized and contain an Id column, which is the primary key.
| Name | Description |
|---|---|
Comments |
Query Comment types in JIRA. |
Worklogs |
Query the available Worklogs in JIRA. |
Views
Views have the same structure as tables; however, views do not support updates.
| Name | Description |
|---|---|
Attachments |
Query the available Attachments in JIRA. |
Configuration |
Query the available Configurations in JIRA. |
Dashboards |
Query the available Dashboards in JIRA. |
Fields |
Query the available System and Custom Fields in JIRA. |
Groups |
Query the available Groups in JIRA. |
IssueChangelogs |
Query the available IssueChangelogs in JIRA. |
IssueFixVersions |
Query the available IssueFixVersions in JIRA. |
IssueSubtasks |
Query the available IssueSubtasks in JIRA. |
IssueTransitions |
Query the available IssueTransitions in JIRA. |
IssueTypes |
Query the available Issue Types in JIRA. |
MyPermissions |
Query the available Permissions in JIRA. |
Projects |
Query the available Projects in JIRA. |
RoleDetails |
Query Role Details in JIRA. |
Roles |
Query the available Roles in JIRA. |
Users |
Query the available Users in JIRA. |
Votes |
Query the available Votes in JIRA. |
Watchers |
Query the available Watchers in JIRA. |
Workflows |
Query the available Workflows in Jira. |
Error Notification
The Error shown can be solved using the SQL statement by issuing the necessary columns. For Ex, For Votes Table provide it with ISSUEKEY or ISSUEID
SELECT * FROM Votes WHERE IssueId=‘MKY-1’