XMLA Command task
The XMLA Command task would be used for the following scenarios:
- Process full SSAS cubes
- Process specific objects within a SSAS Cube
Tip: XMLA is not supported for SQL Server Analysis Services 2016 Tabular models, and although it is still supported for Multi-Dimensional models the Loome Integrate XMLA Task may not work with either type of SQL Server Analysis Services model in a SQL Server 2016 environment. We recommend using the SQL Server Analysis Services PowerShell cmdlets in a PowerShell Task for any SQL Server Analysis Services functions.
These cmdlets use AMO to interact with SSAS (both Tabular and Multi-Dimensional). SQL Server 2016 ref: https://msdn.microsoft.com/en-us/library/hh758425(v=sql.130).aspx Microsoft’s SQL Server 2012⁄2014 cmdlets do NOT support Tabular Model processing, however a set of PowerShell cmdlets for SS2012/2014 Tabular models is available at http://tabularcmdlets.codeplex.com/
From the task type screen, select XML Command.
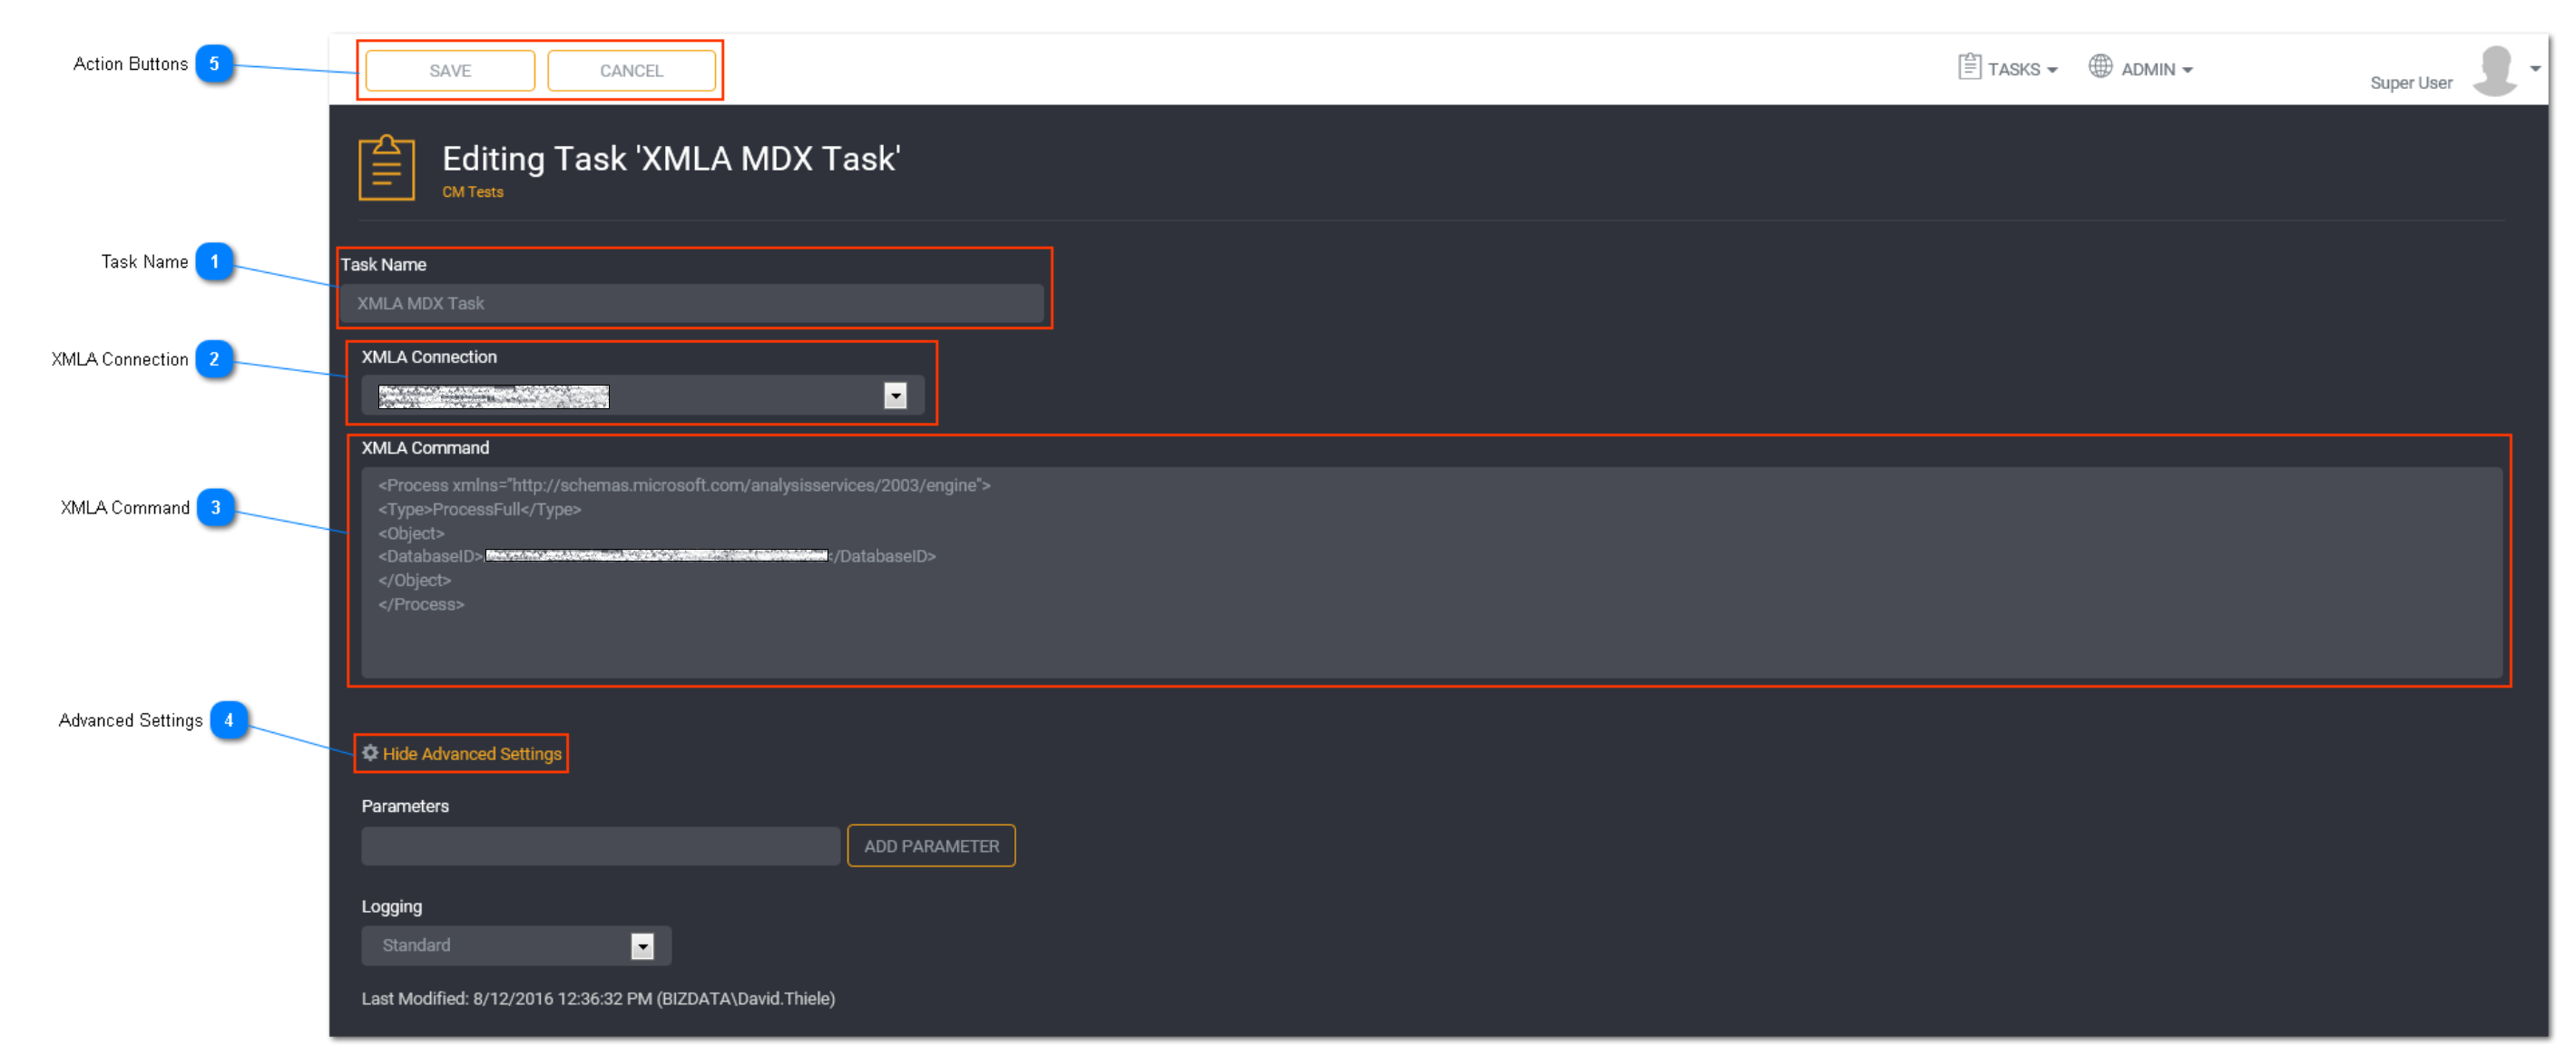
Task Name
Enter a unique task name here. Task names must be unique to a project.
XMLA Connection
Select the XMLA connection from the drop down list. Predefined XMLA connections will be listed here.
Tip: The only connections that will appear are those created with an XMLA connection type.
XMLA Command
Enter the XMLA command that will be used.
Tip: If processing a cube that exists in Analysis Services, generate the XMLA command script from SQL Server Management Studio.
Connect to the SSAS environment, right click on the database you want to process and select process database.
Click on the Script button and select Script Action to New Query Window.
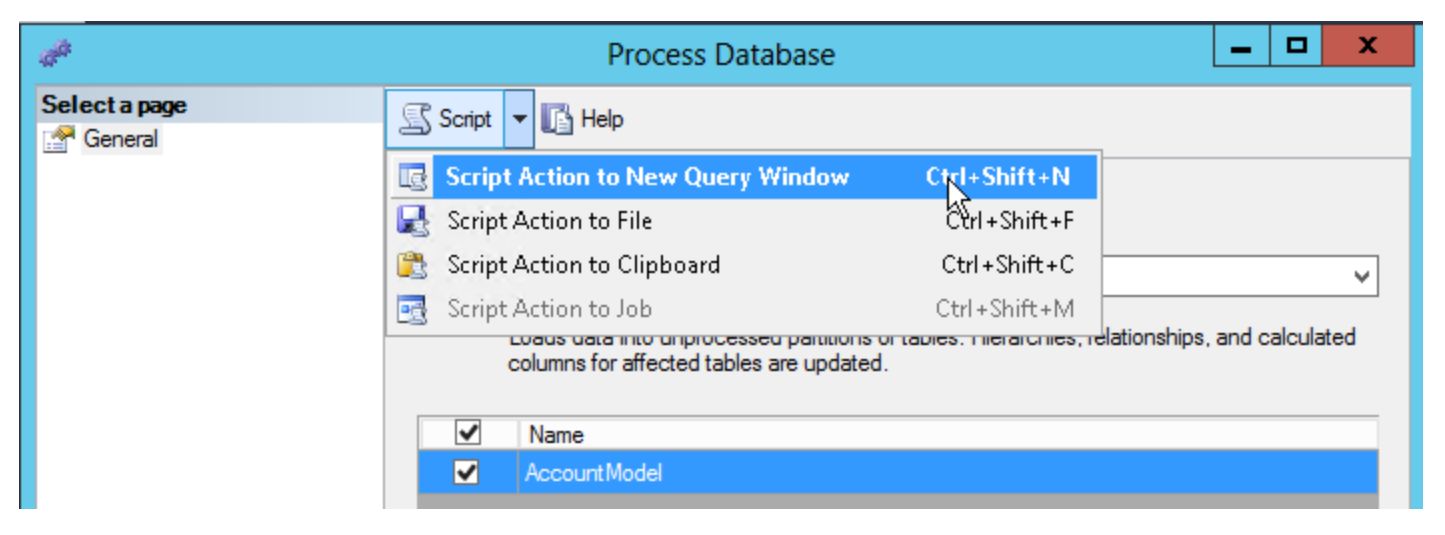
If the environment will allow, execute this command to ensure there are no errors. Copy the XMLA script from SSMS to the Loome Integrate task.
Advanced Settings
Toggle to show or hide the advance settings. Advanced settings are different for each task type.
Subject Areas:
Select Subject Area for the task if applicable. Refer to Using a Subject Area for more information.
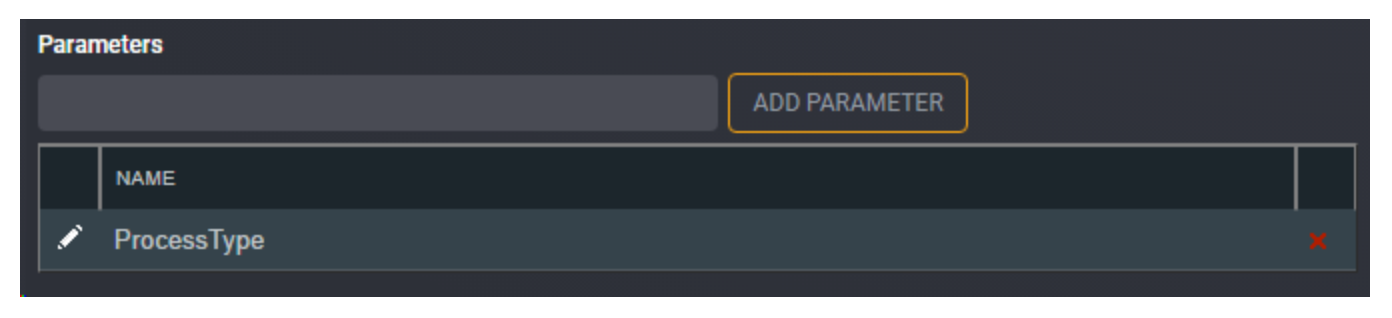
Parameters:
Adding a parameter in Loome Integrate is a 2 step process. The parameter names are created in the task details screen and subsequently the parameter values are assigned in the Parameters And Dependency screen. Here we are just adding the name of the parameter. No value has been assigned to this parameter.
For a XMLA Command task you have the option to add a parameter. This section allows variables to be set during execution of the XMLA command.
Enter the Parameter Name and click Add Parameter. This will create a list below the field. You can continue adding more parameter names if required. When you have added a parameter name, it will appear in the parameters list.
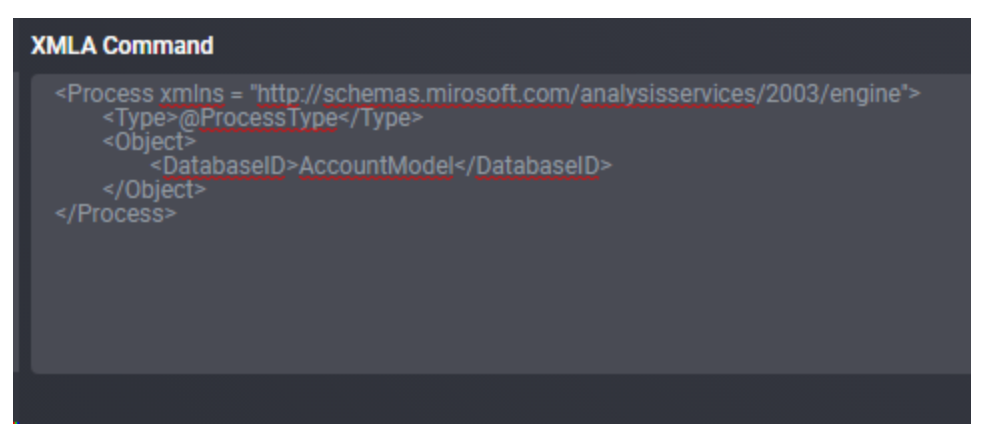
Once the parameters have been defined in Loome Integrate, the parameter must also exist in the XMLA command. Do this by prefixing the parameter name with the ‘@’ symbol in the script.
Once you have created the task, follow the instructions for Configuring Parameters and Dependency to assign a parameter value to the task.
Tip: The parameter values are set in a different place to where it is created.
This is to allow for the same task to be added to a Job (or multiple Jobs) with different parameter values passed each time it is run.
Logging:
You can choose to select task logging.
Select a logging level. Logging options vary depending on the task type selected.
The available logging options for a XMLA Command task type are:
- Standard - the default logging level as provided by Loome Integrate
- Debug - the standard logging level with additional logging to assist with investigation of issues
- Save Packages - the standard logging level with actual SSIS package to nominated disk location (primarily used for issue resolution)
- Save Packages & Debug Logging - all of the above
Tip: If you have both job logging and task logging on- when job logging is set to Standard then the task logging option will override this. Otherwise job logging will always take precedence.
Action Buttons
When you have entered all the necessary task details, click Save.
An information box will appear to confirm that the task has been successfully saved. Click Close.
Tip: New tasks are added to the bottom of the list as Enabled.