Master Data Services
Introduction
Master Data Services enables you to manage a master set of your organization’s data. You can organize the data into models, create rules for updating the data, and control who updates the data. With Excel, you can share the master data set with other people in your organization. Loome Integrate Connector allows you to integrate data from multiple sources into your master data, or provide MDS as a source of master data to subscribing systems.

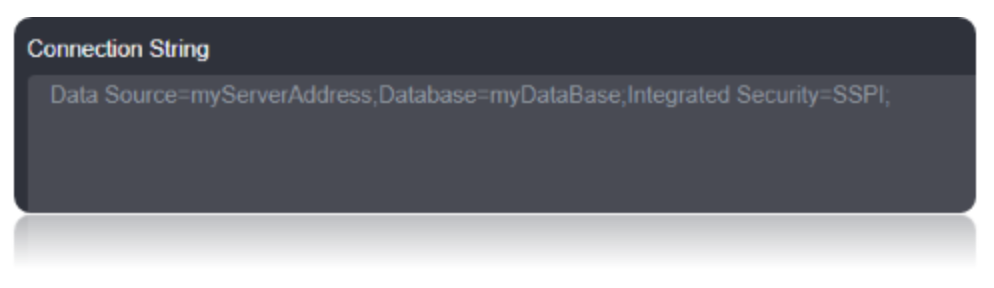
Connection String
For Master Data Services you need the Loome Integrate Service Account to have access to the SQL Server Instance where the Master Data Services database. These permissions should be setup during installation of the application where Loome Integrate is used for integration.
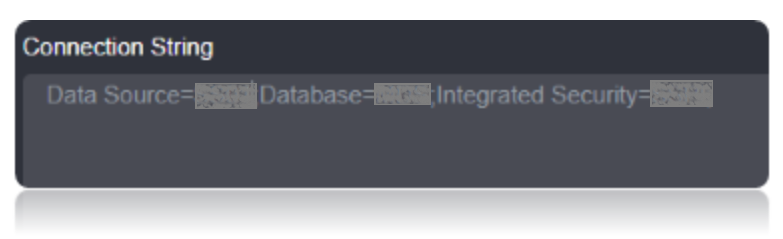
Connection string Parameters
| Parameter | Description |
|---|---|
| Data Source | Set this to the server address to Connect to MDS. |
| Database | Set this to the Database Name. |
| Integrated Security | Set this to SSPI. |
Connecting to Master Data Services Connector
- Set the Data Source Connection string property to the Hostname or the Server address to connect to Master Data Services.
- Set the Database Connection String property to the Specific database name in the Server Specified.
- Set the Integrated Security to SSPI. This setting is mainly to allow the Windows Authentication.
Data Migrations
To Check for the data migrations:
Add a new connection in Loome Integrate as shown.
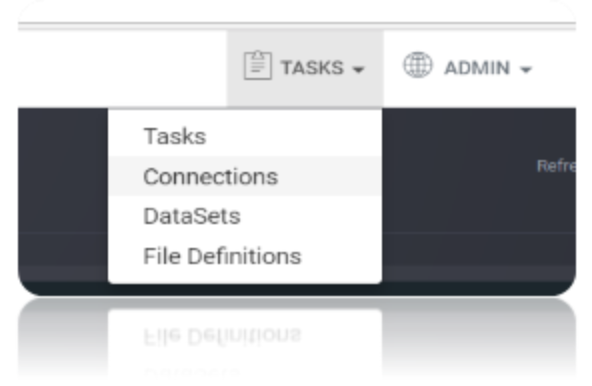
- Go to tasks and click on Connections.
- Add a new connection Using Add New Connection Option.

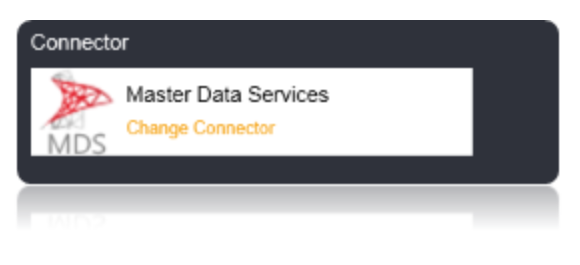
- Choose MDS Connector from the available Connector Options.
Using the connection string parameters created, Verify the connection using the VERIFY CONNECTION Option in Loome Integrate. Once the Connection is verified, Insert the Connection Using Insert Option.

Create a Job Using ADD A JOB option in Loome Integrate name the job, Set the Logging Mode and Save the job.

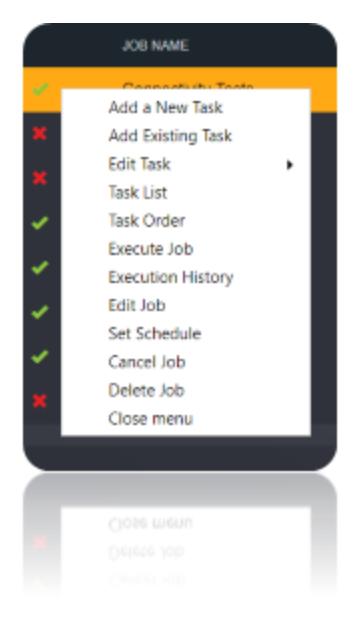
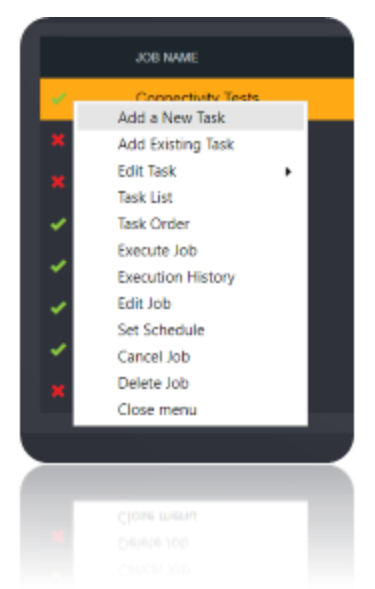
Create a New Task by right clicking job list and then Add a New Task Option. If you want to edit an Existing Task Use Edit Task.
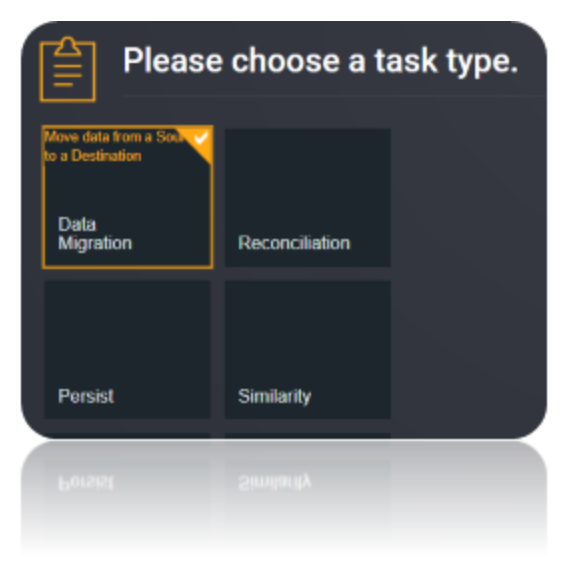
Choose a Data Migration Task.
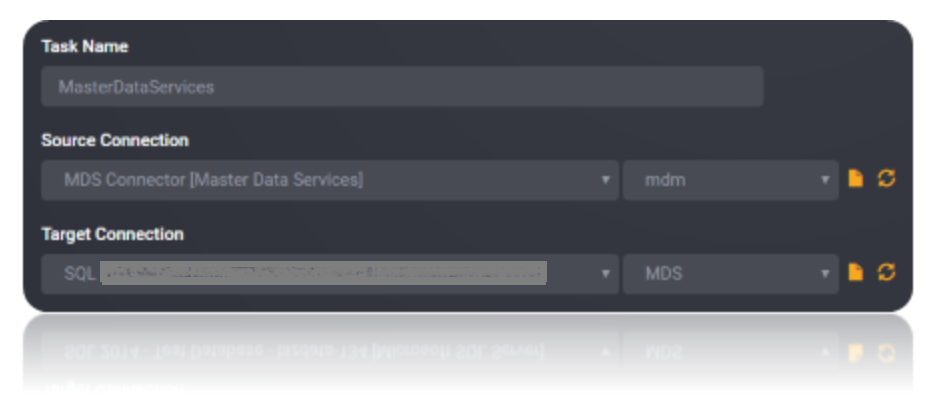
Choose the source and the destination for the migration of data. Name the Task.
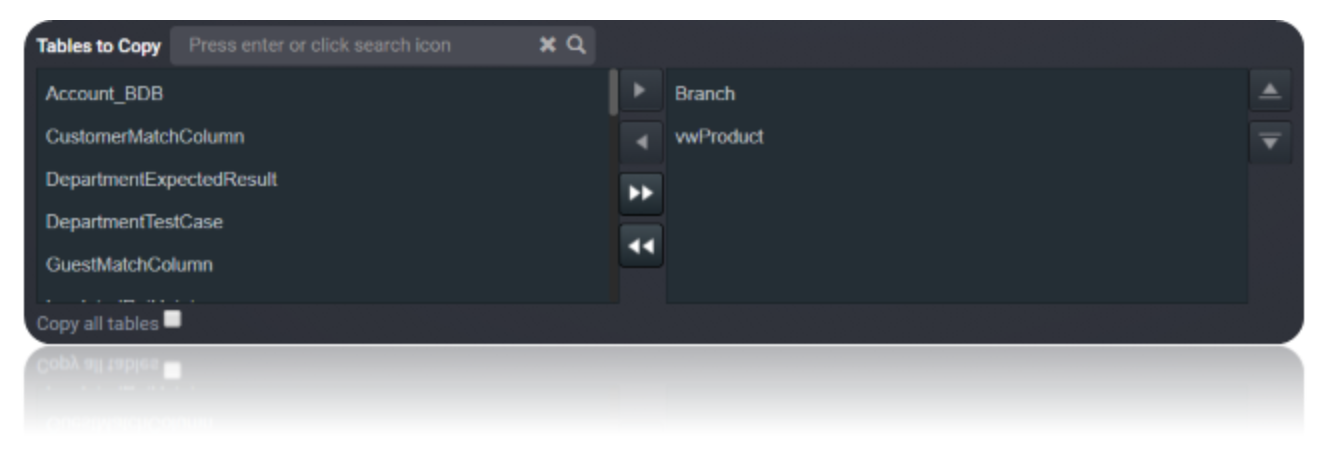
Choose the Tables or the data that need to be migrated from the source to the destination. You can Copy all Tables by checking Copy all tables box. Save The Task.
Execute the Job. Check for results and the details of the data migrated in Execution History.