Setup
Pre-Requisites
The installation process for a Control Node and a Standard Node are near-identical with the one exception of providing a Node Configuration.
The installation instructions for all deployment scenarios can be viewed in the Installation section.
Providing a Node Configuration
During the installation process, you will eventually be prompted for the portal’s NodeConfiguration value. Set the value to “Control” to install Loome Publish as a control node.
You cannot change the NodeConfiguration of an existing Loome Publish node from Standard to Control or vice versa. Doing so will result in data loss or malformed configuration. The NodeConfiguration must be set on the initial setup of the instance.
Preparing the Standard Node
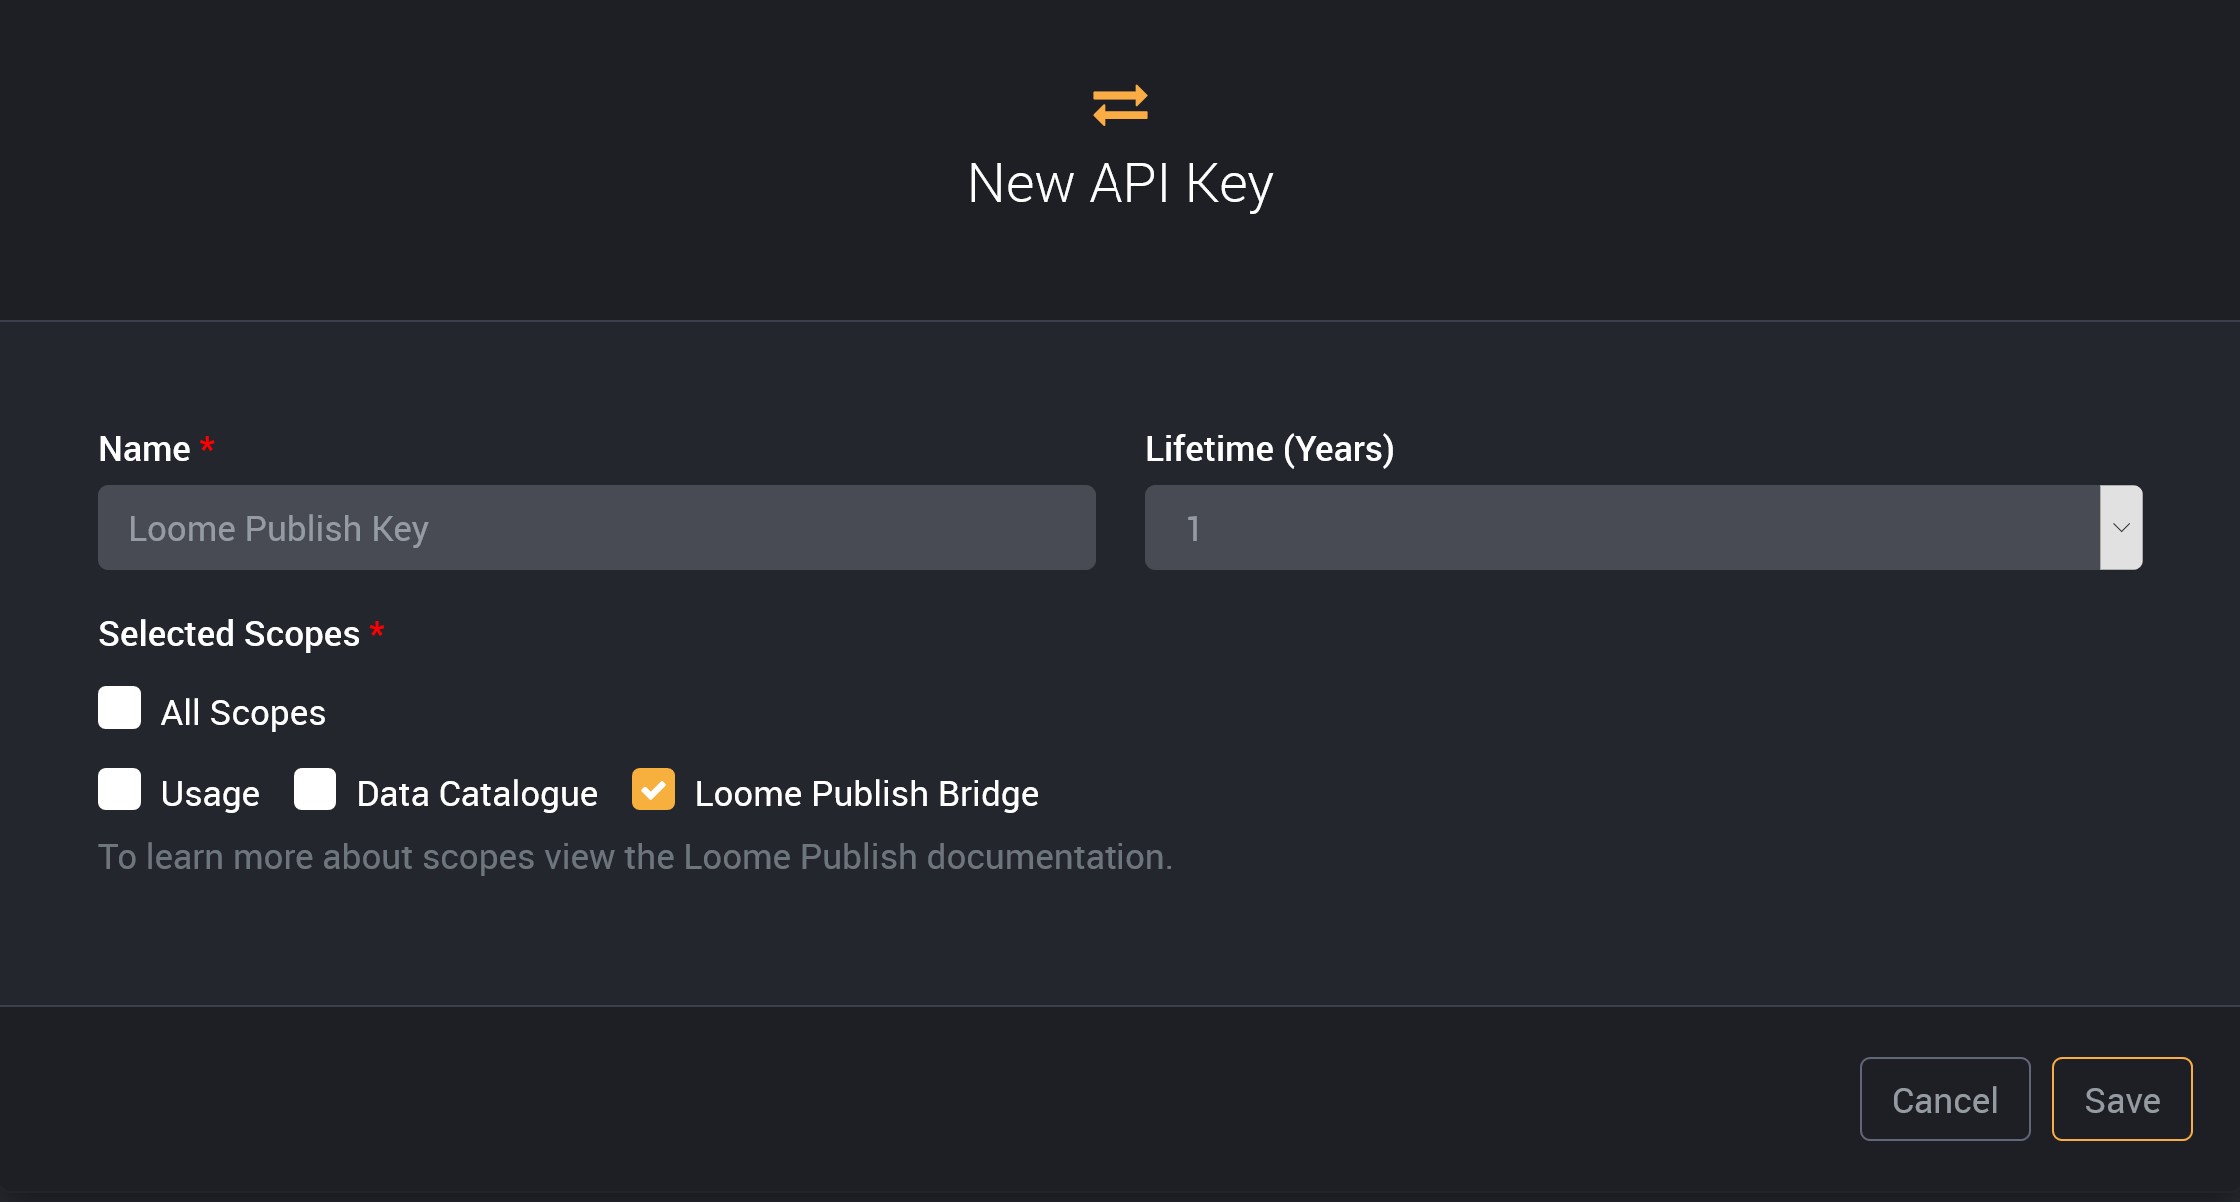
Before setting up a Control Node, you will need to create an API Key to access the Standard Node.
Open the Loome Publish node that you would like to add to the Control Loome Publish node.
Find the API Keys settings menu from the Settings Cog.
Create an API Key with a scope of Loome Publish Bridge, further detail on how to create an API Key is found here. Copy this key immediately as it will be hidden and cannot be accessed to be copied again once you click on another option or navigate from this page.
Setting up your Control Node
Once you have provided a license key for the control node, you will be prompted with the following screen on startup:
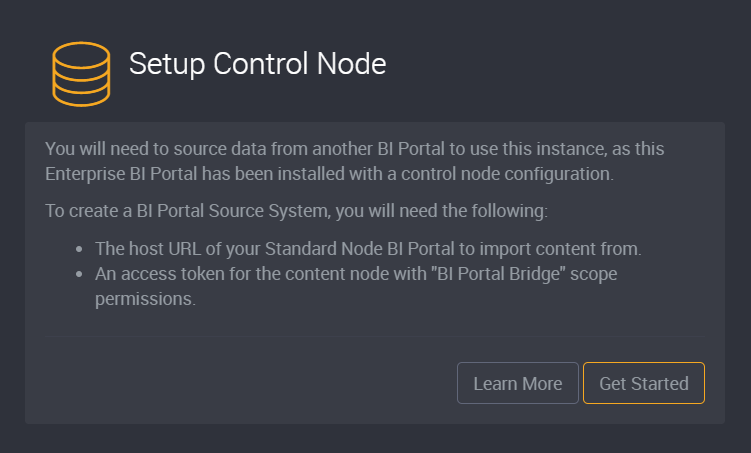
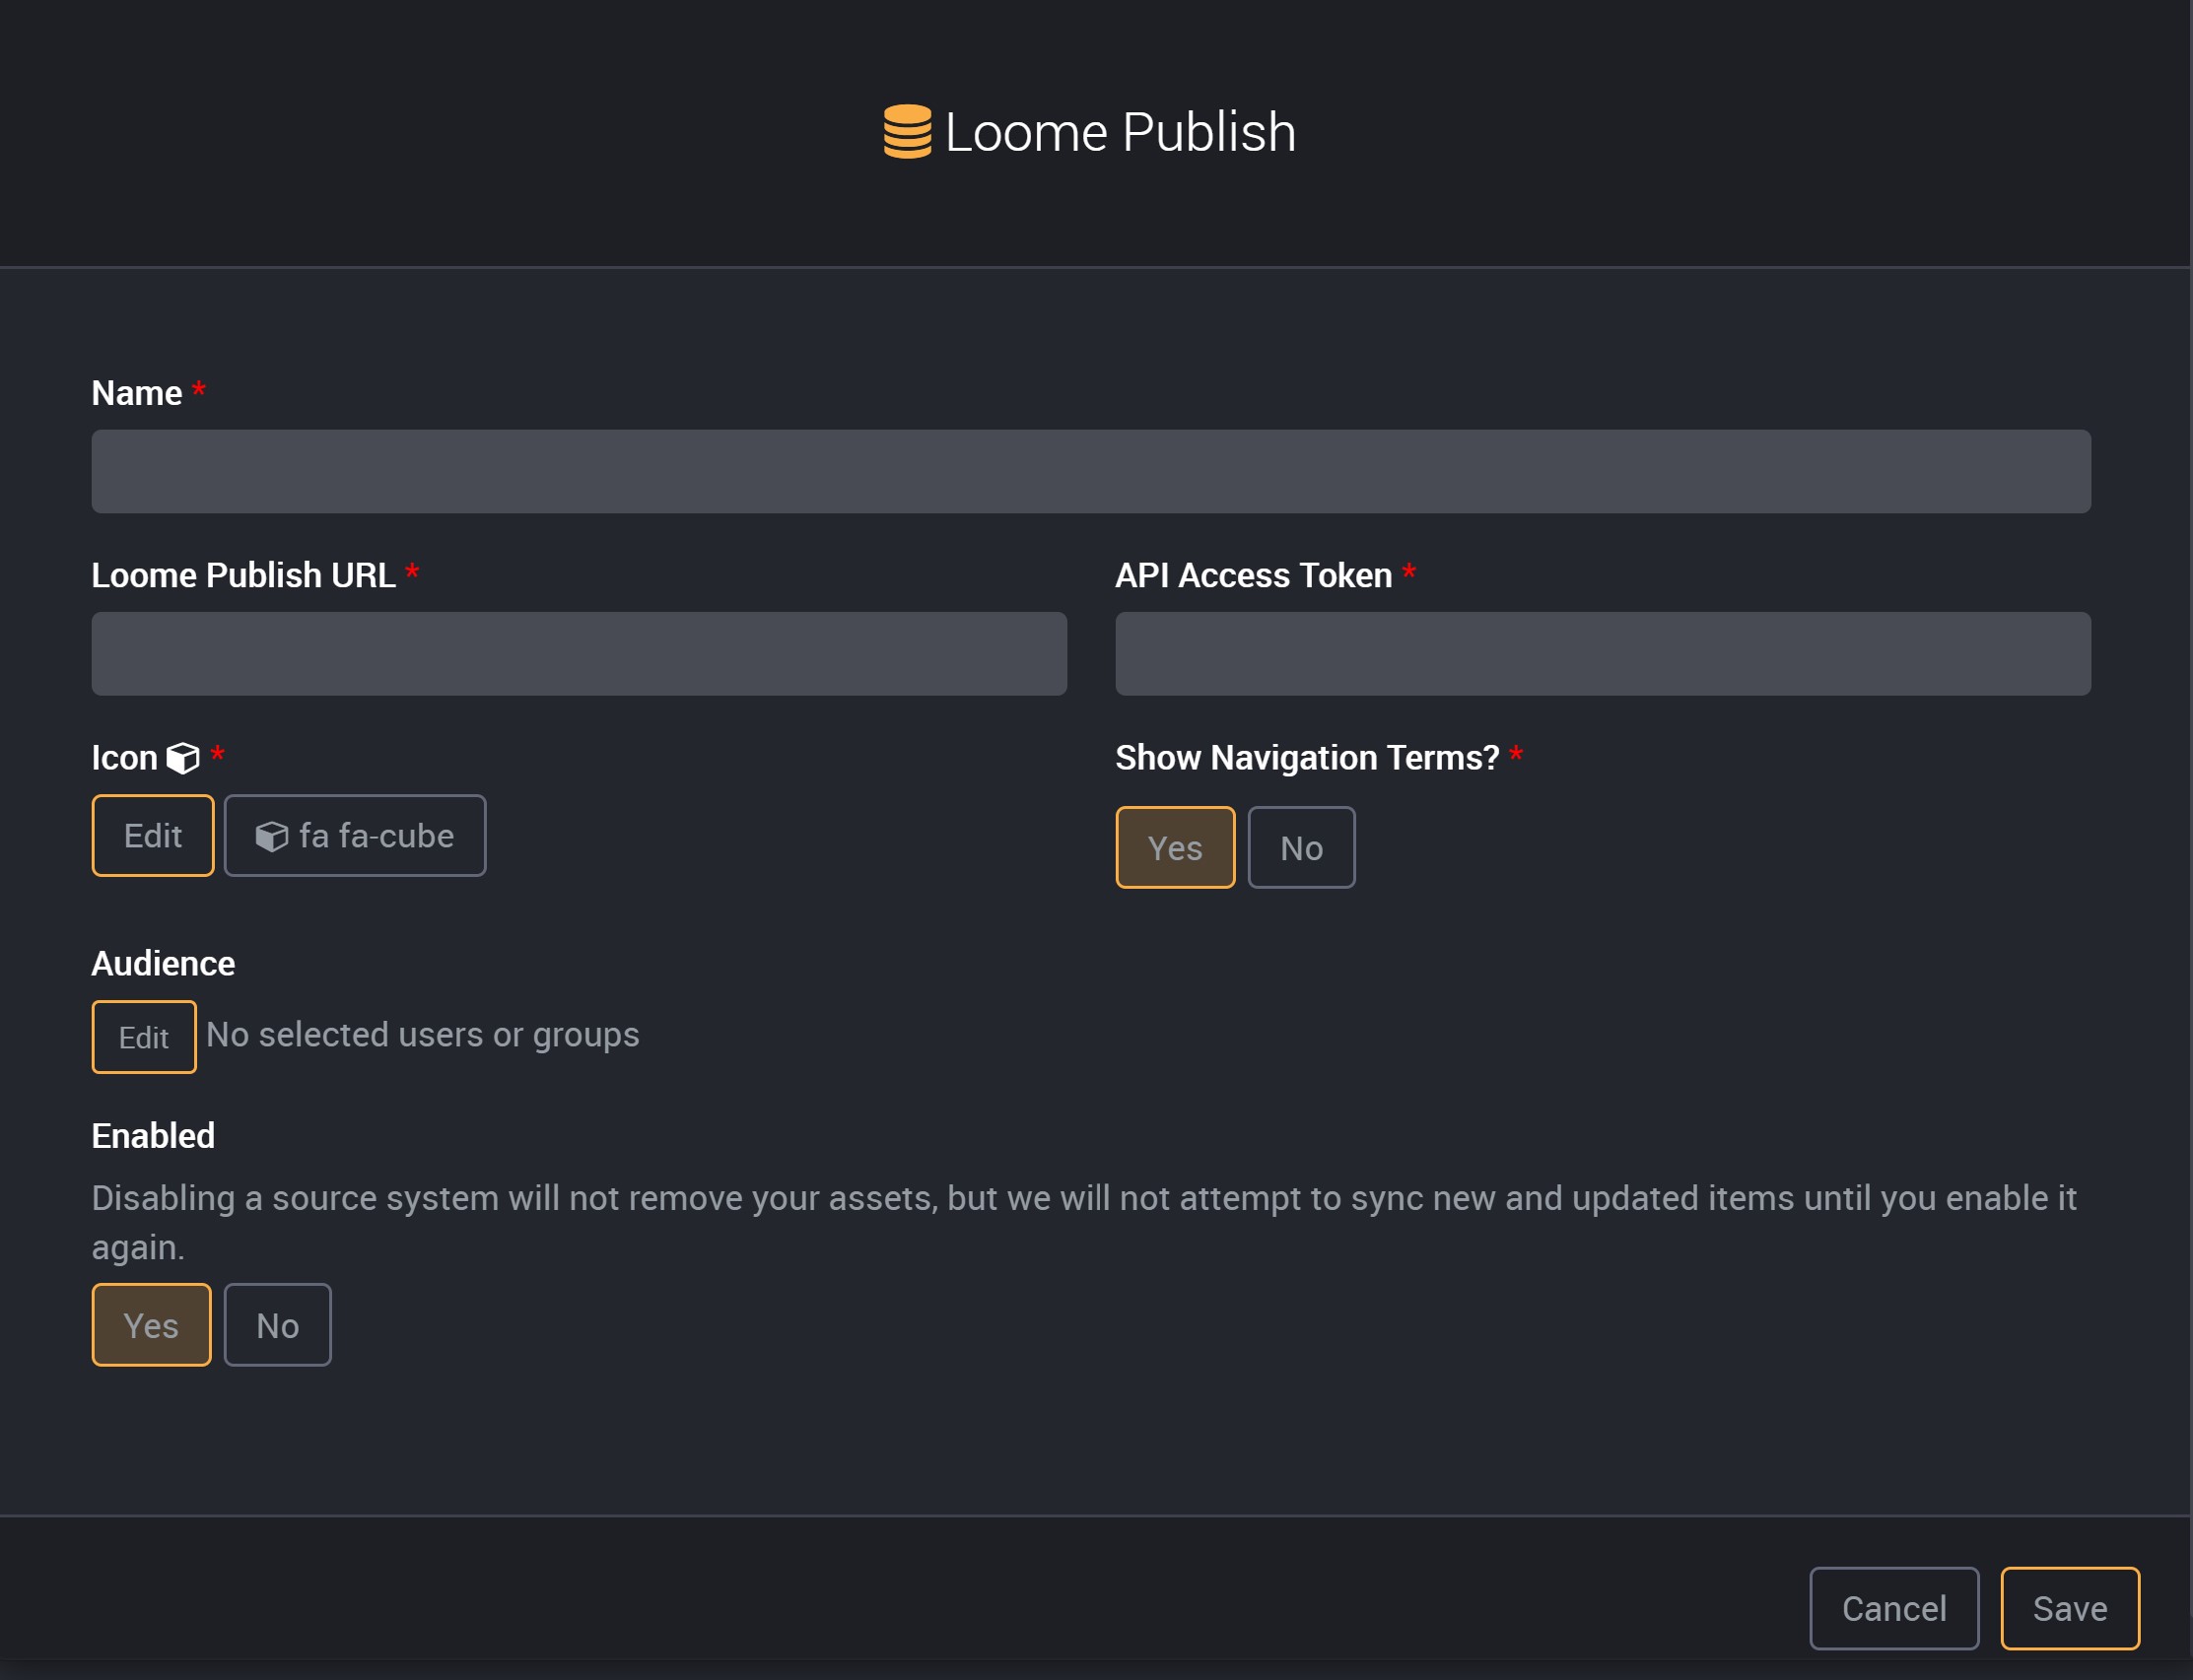
Loome Publish will guide you through linking your first standard node to the control node. This link is known as a “Source System” and requires the following details:
- Name
- A human readable name for the Source System, this will be the label of Loome Publish in the Control Node.
- Loome Publish URL
- The URL of the Loome Publish node you wish to sync with.
- This should be the same URL of the Loome Publish node you generated the access token on.
- API Access Token
- The previously generated access token.
- Icon
- Select an icon to associate with the source system.
- Audience
- Applying an audience will hide the content node from other users in the left-hand navigation. Select the users or groups that will be the only users that have access to this content node.
Once the source system has been created, Loome Publish will begin syncing the content for the first time. Once the import has finished the page will refresh and you will be greeted with a view of your imported Loome Publish nodes tile layouts.
Adding a source system will also automatically add it to the App shortcuts in your App Navigation Panel. Though, any changes made to a source system will not also be made in the App Navigation Panel, and will have to be manually changed on the Configuration page.
Adding Additional Source Systems to the Control Node.
Adding additional Source Systems requires the same information. Loome Publish nodes are the only source systems that can be added to a Control Node. View the Source System documentation to learn more.
You may need to refresh your browser after you have clicked on On Demand Sync to view any imported changes.
Can I assign application roles to users on first login to a Control Node?
Administrators can assign application roles to users on first login to a Control Node by clicking on Application Roles available in the top right Settings Cog.
Will I receive notifications when syncing Source Systems?
Administrators will receive notifications if there are new items from a sync and if there has been an error during sync.
If your source system fails to sync and results in an error or if new assets have been synced from a source system, Loome Publish will send an email to notify administrators. Administrators can edit the email templates for these email notifications in Configuration.