Syncing
Table of Contents
- Overview
- Pre-requisites
- Source System Configuration
- Sharing content with the Power BI Master Account
Overview
We currently support the syncing of the following types;
- Dashboards
- Reports
- Tiles
- Q&A
We do not support syncing of apps, as these do not exist in the Power BI API. You can however sync content from the workspace of the app.
Your content can be kept in a workspace created by any developer, however you must follow the steps under Sharing content with the Power BI Master Account for all content you wish to sync.
Pre-requisites
Power BI Master Account
Content is synced between Loome Publish and PowerBI.com via a service account called the Power BI Master Account. This account is a standard user account in your Active Directory available via Azure Active Directory that you must create.
You should create this account in your directory and retain the user principal name (account@my.domain.com) and the password for later use. You will need to assign a Power BI Pro licence to this account via the Office 365 Administration Portal.
If you are using App Owns Data embedding, you can reuse the same account.
Azure AD App Registration
To facilitate communication between Loome Publish and PowerBI.com with the Power BI Master Account, we will require an Azure App Registration. If you are running the Azure or On-Premises with Azure AD versions of Loome Publish, this will be in addition to your existing App Registration.
If you are using App Owns Data embedding, you can reuse the same app registration.
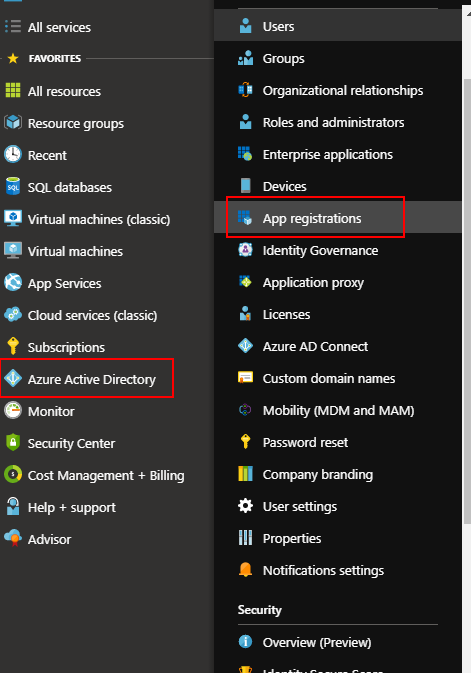
Browse to portal.azure.com, then click on ‘Azure Active Directory’ from the menu, followed by ‘App Registrations’ from the Azure AD menu.
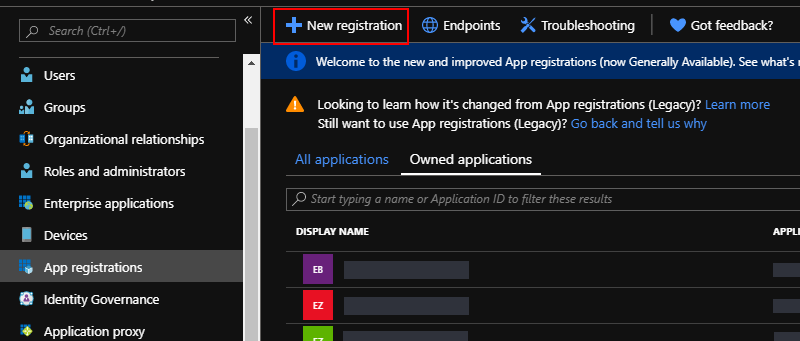
Click on the ‘New application registration’ button.
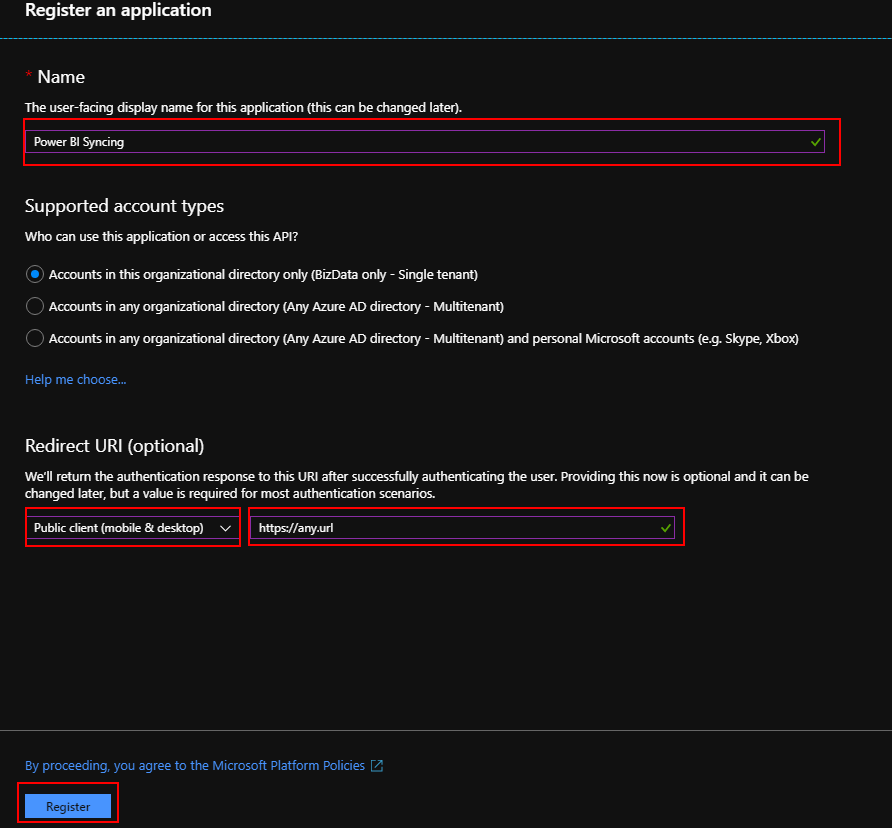
Type a name for your application registration.
Select ‘Public client (mobile & desktop)’ from the drop down.
As this is a Native application, you can enter any fictitious URL for the ‘Redirect URI’.
Select the ‘Register’ button to create the App Registration.
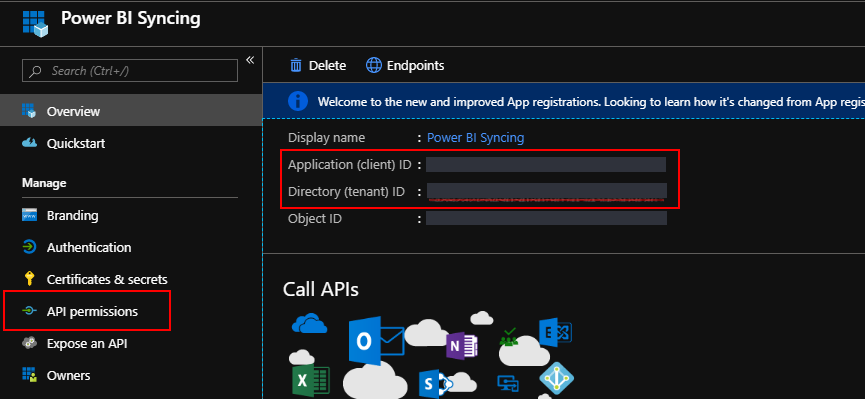
Copy the ‘Application ID’ and ‘Directory ID’ for use in the source system configuration.
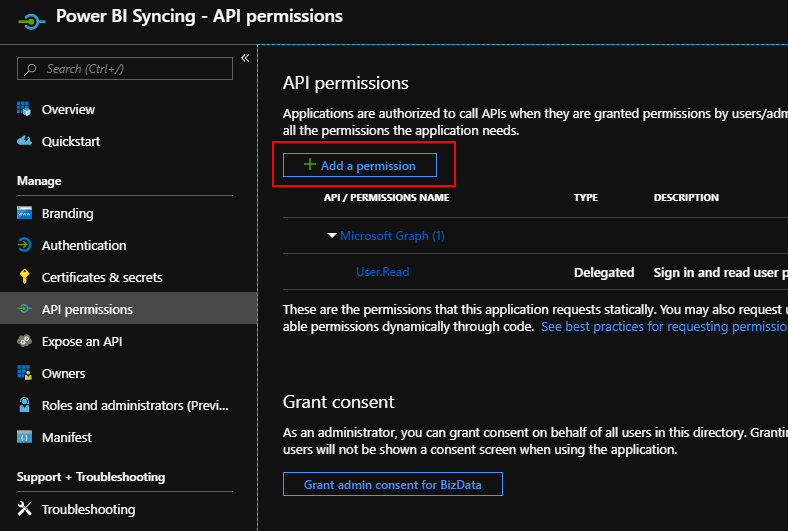
Select ‘API Permissions’ from the app registration menu.
Click the ‘Add a permission’ button from the top of the registered app.
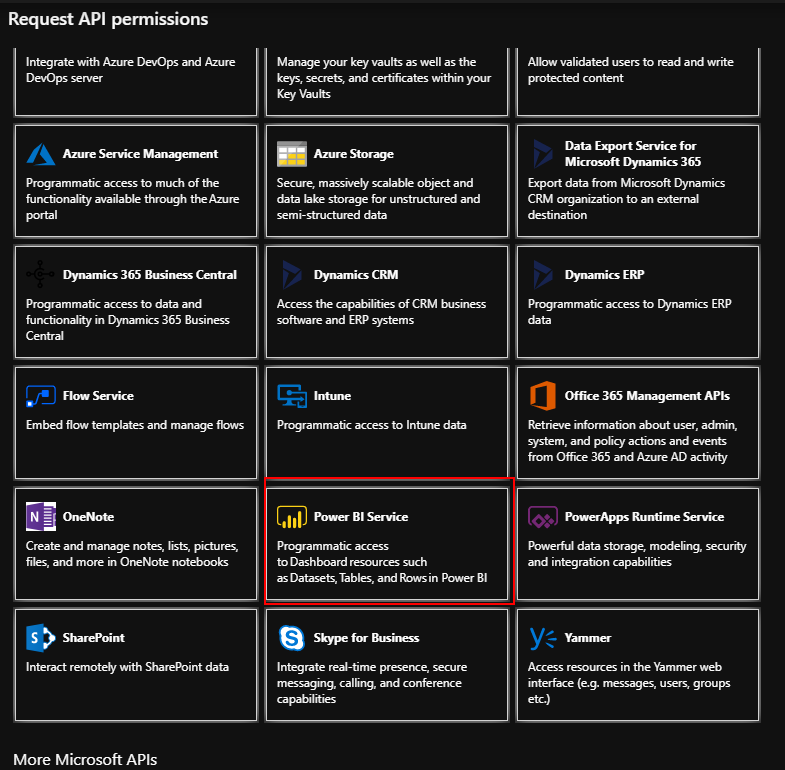
Select ‘Power BI Service’ from the list of available services.
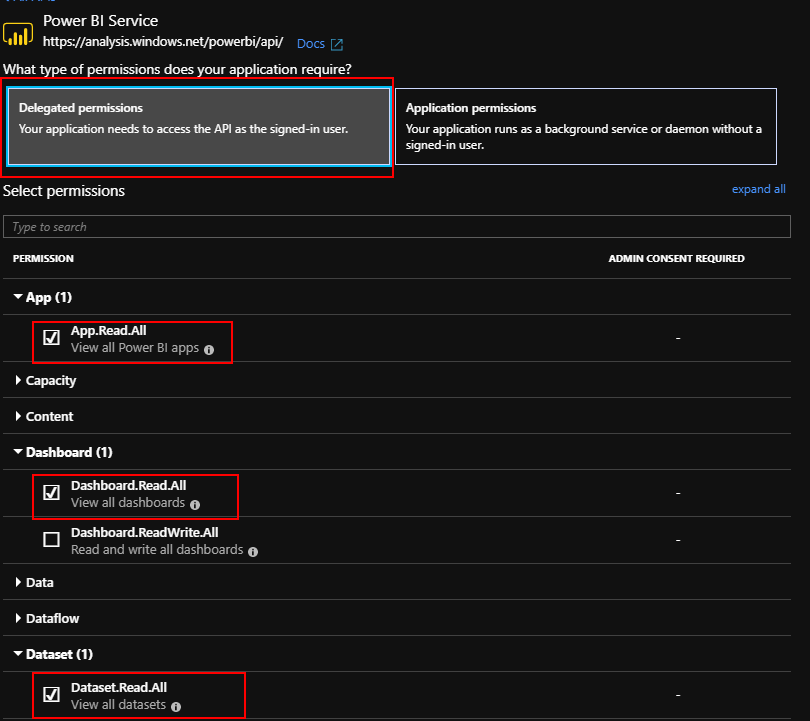
Select ‘Delegated Permissions’, permissions will now appear.
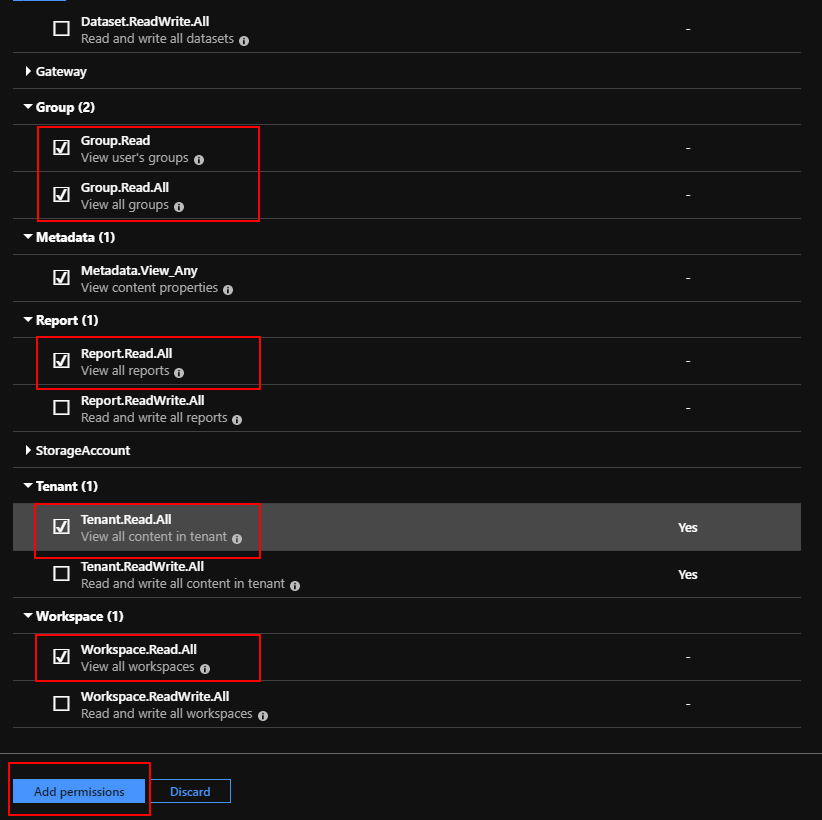
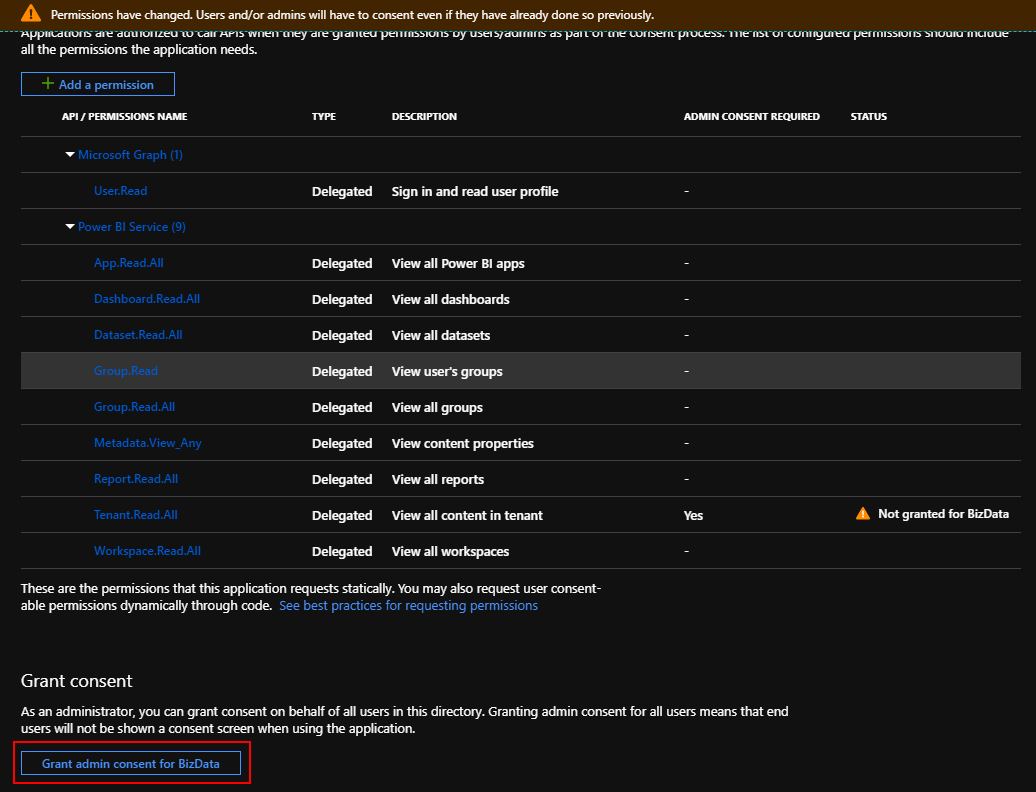
Select all permissions as shown in the following two screenshots, then click ‘Add Permissions’
This step requires a Global Administrator account to complete.
Click the ‘Grant admin consent for company’ button at the bottom.
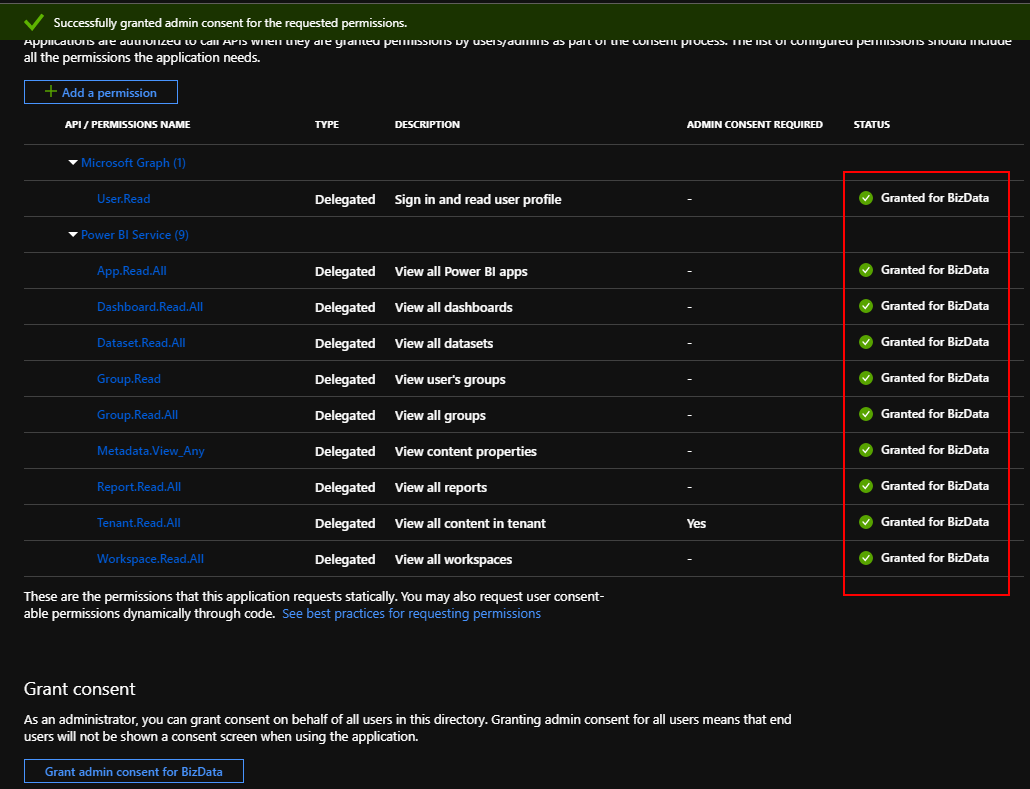
This step requires a Global Administrator account to complete.
Click the ‘Yes’ button to confirm consent.

Verify you now see the ‘Granted for company’ tick next to each permission.
Source System Configuration
The last step is to setup the source system from within Loome Publish, using the information from the above steps.
You can learn more about source system configuration here.
Browse to Loome Publish, and from the top-right cog menu, click on Source Systems.
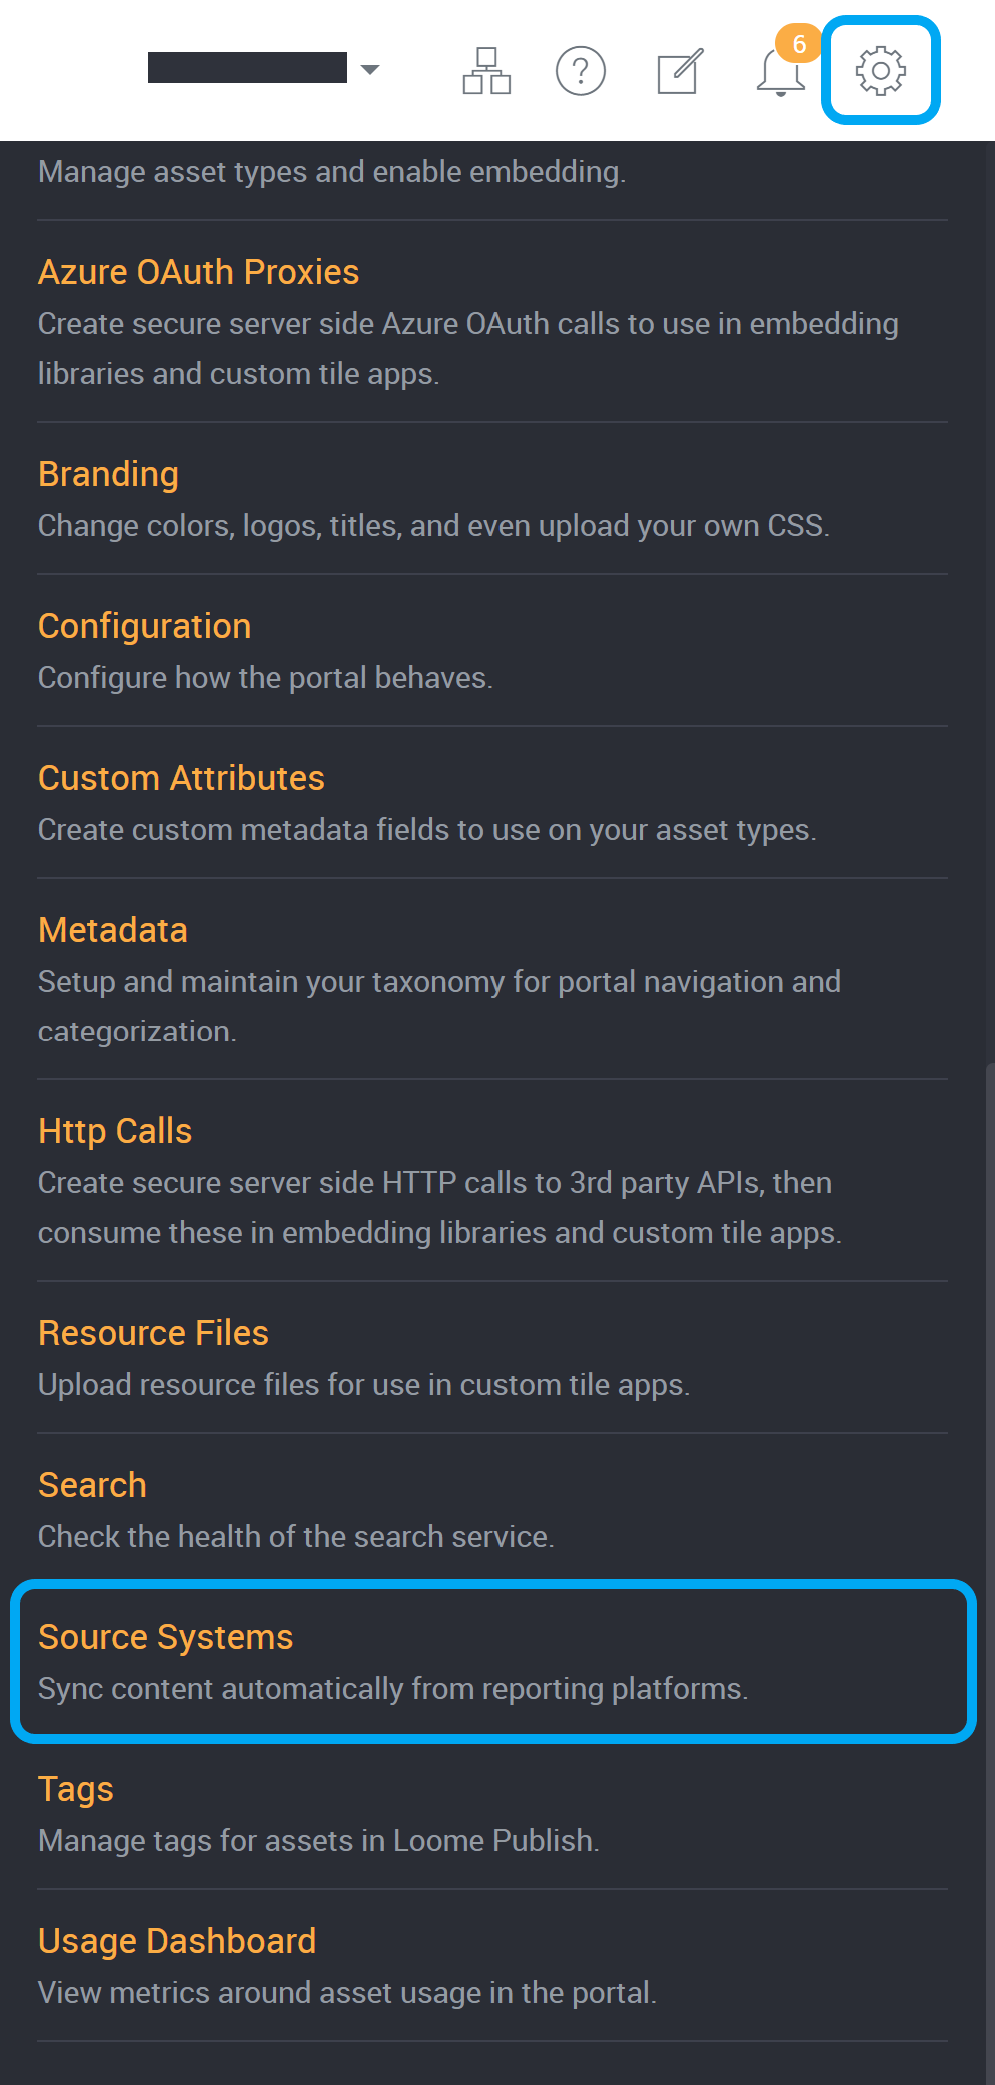
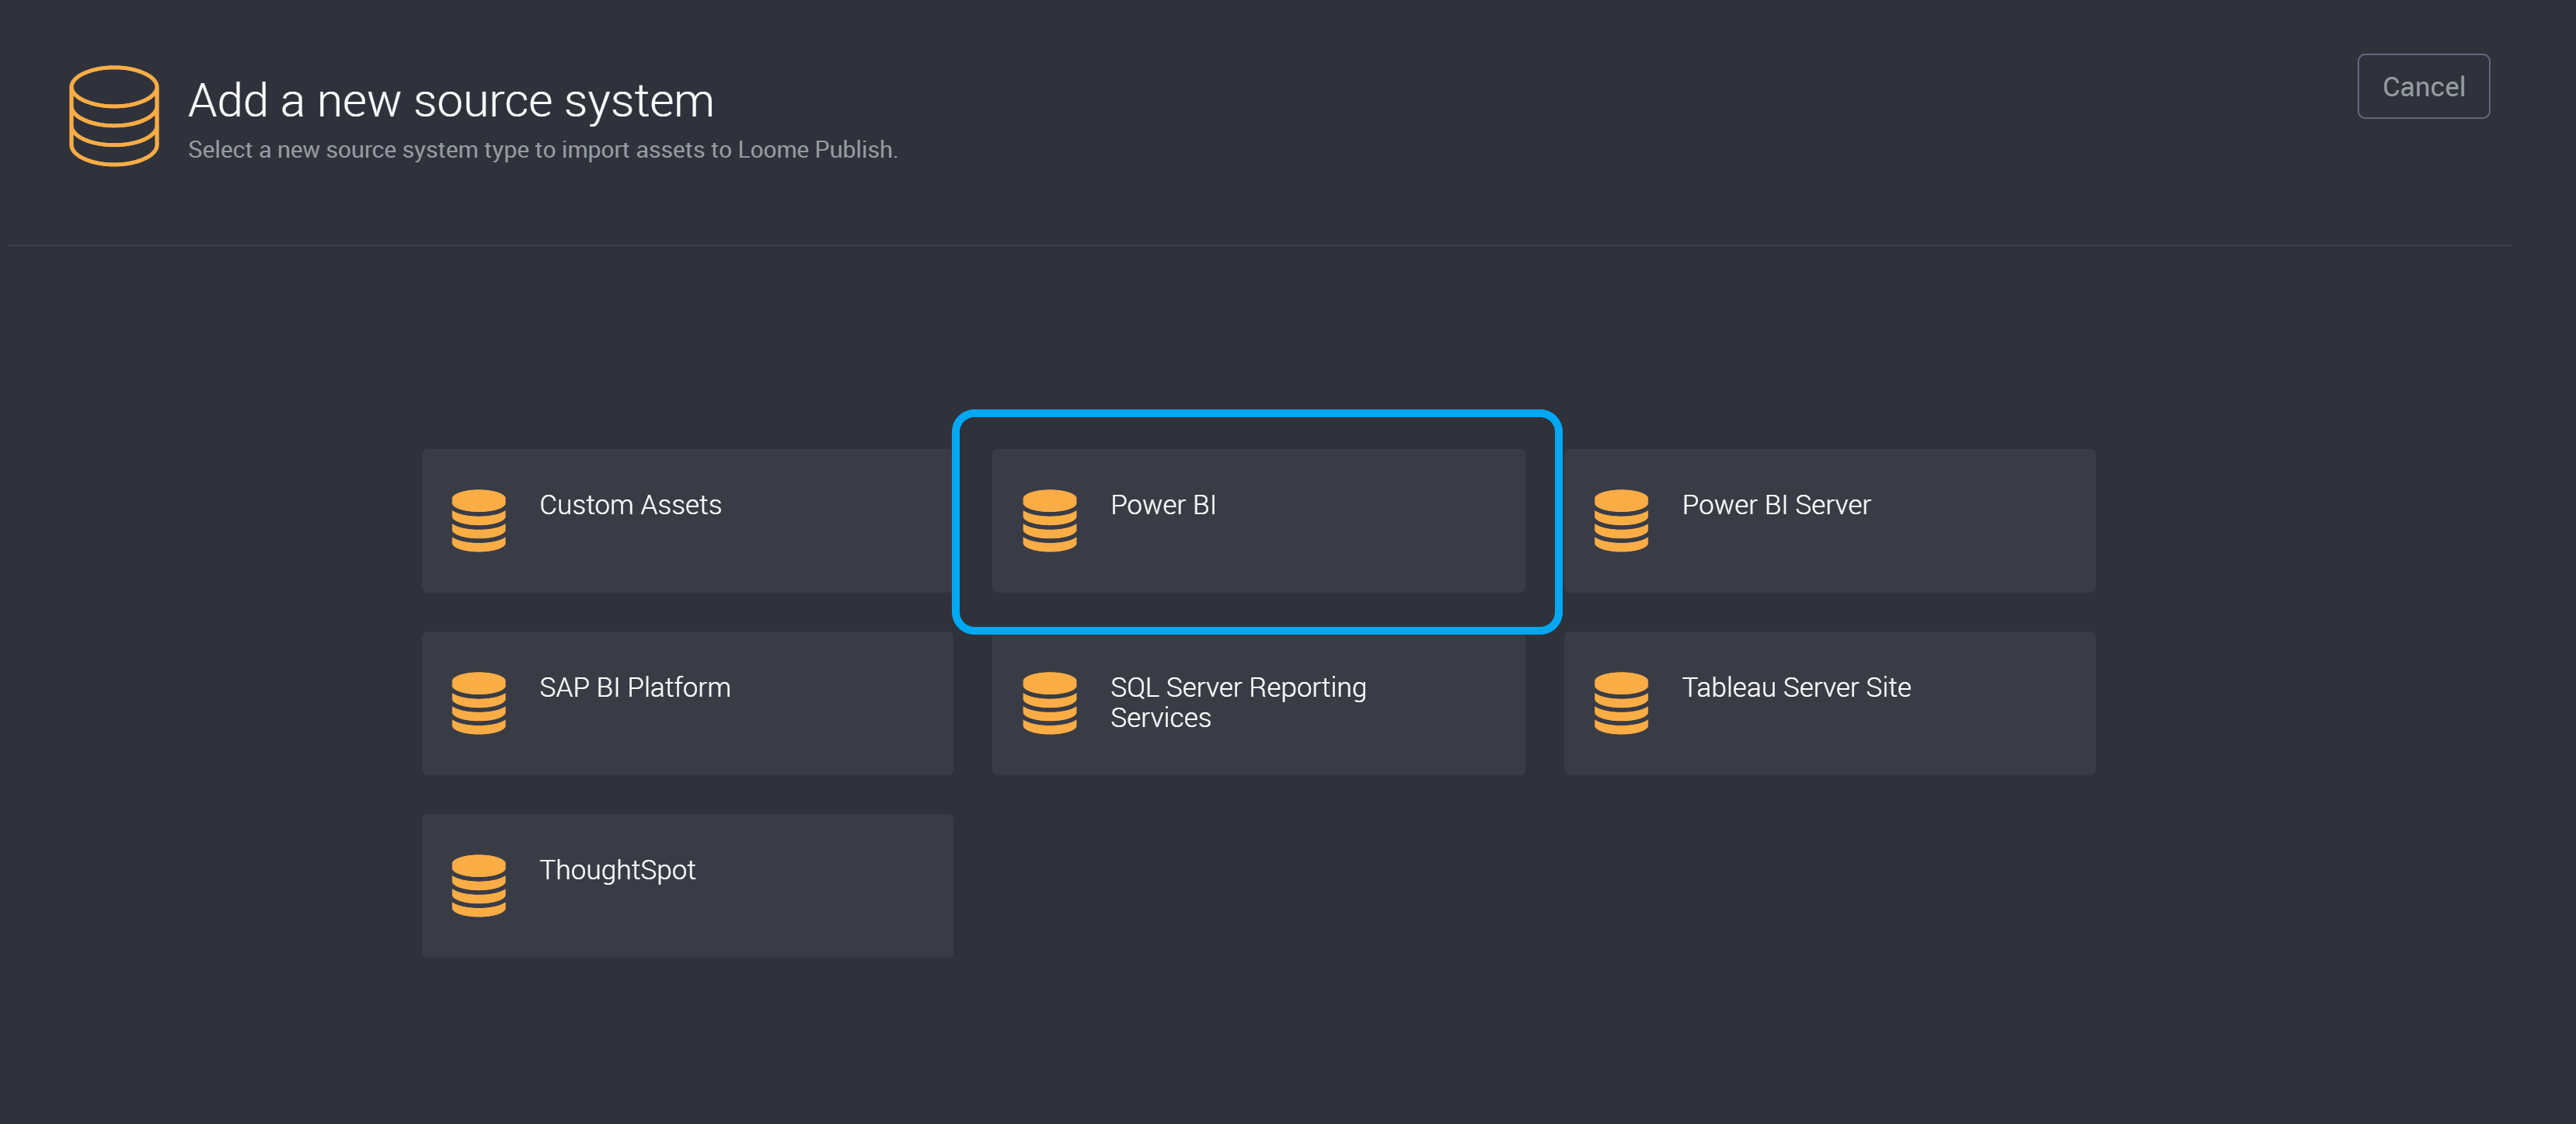
Click on New at the top-right.
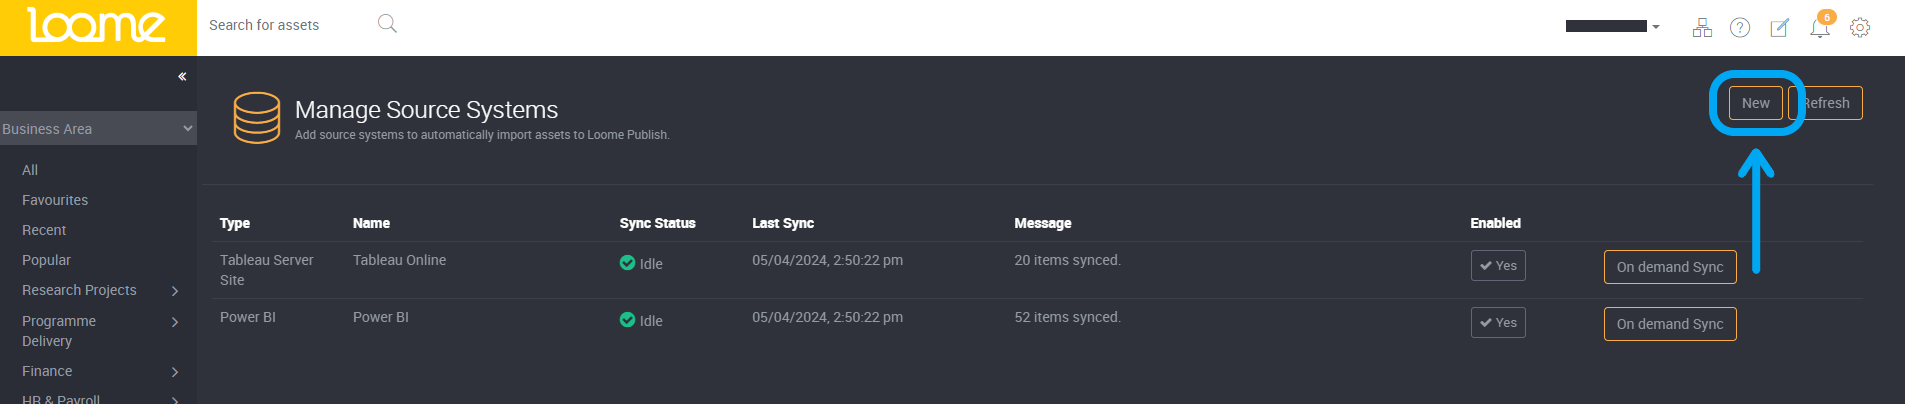
Choose Power BI.
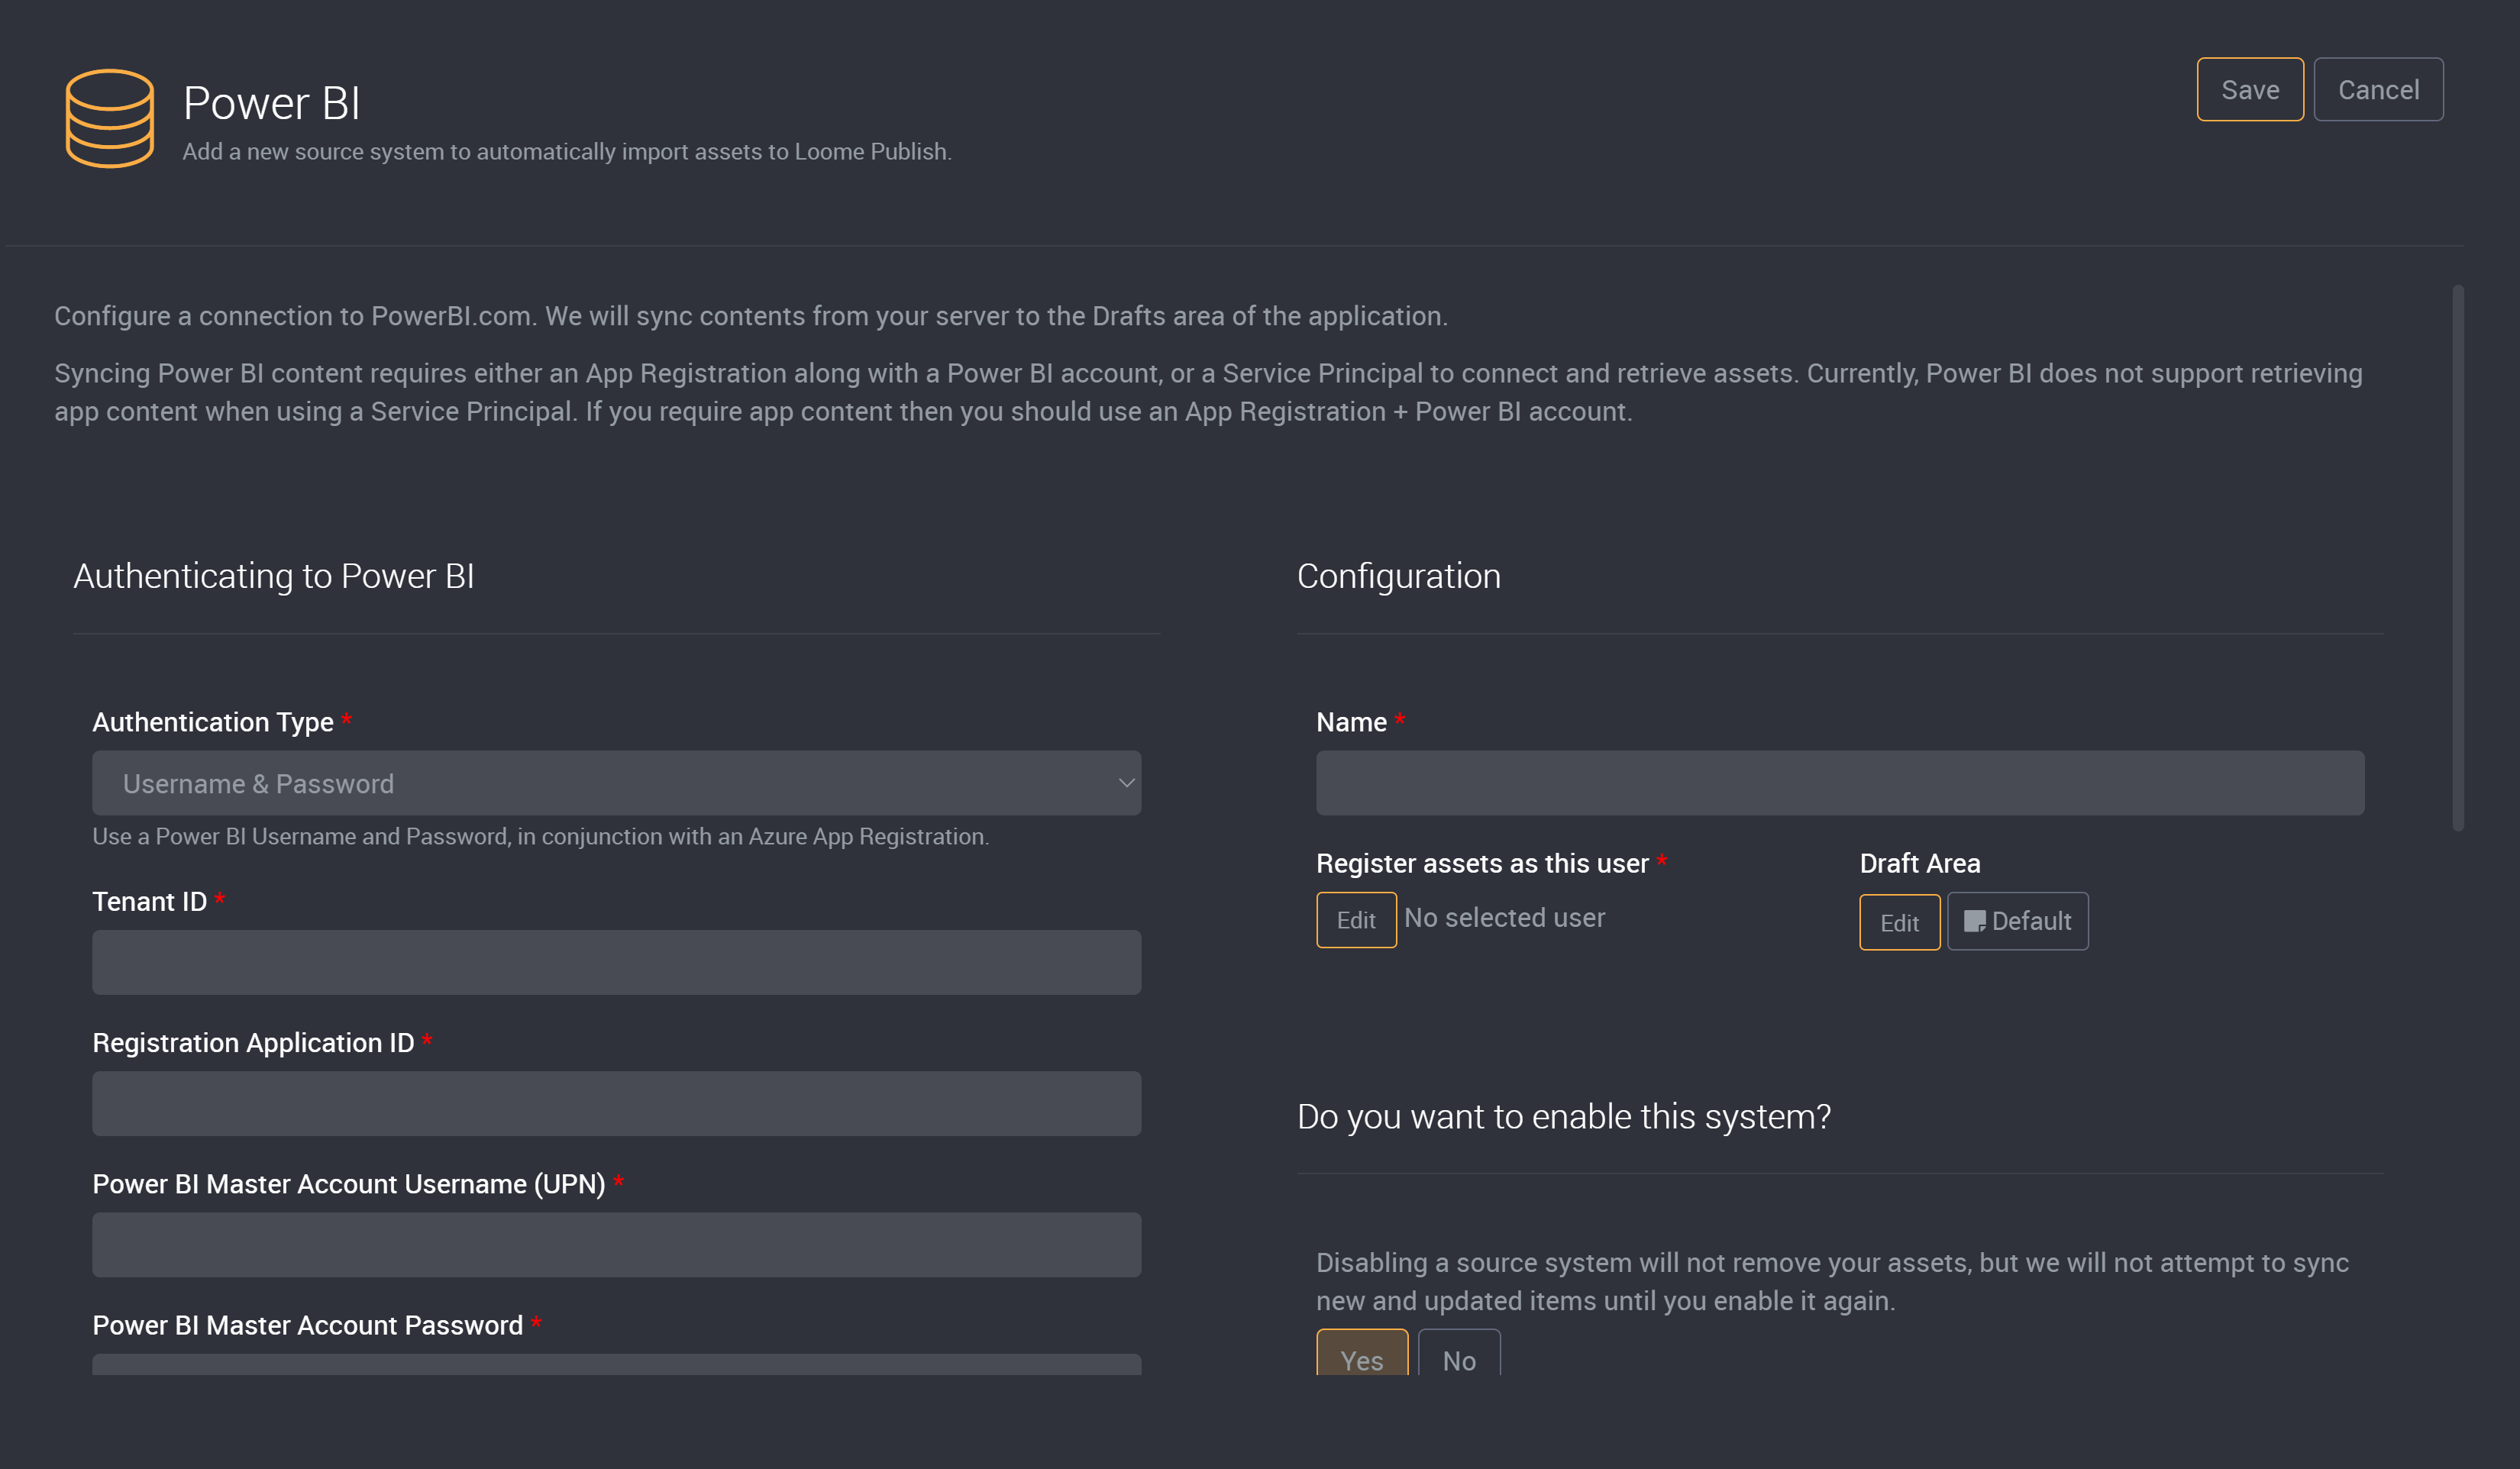
Enter the following information as shown in the screenshots below. Once complete, click the Save button at the top-right of the page.
| Field | Description |
|---|---|
| Name | This is a friendly name to identify your source system. If you plan to register multiple Power BI tenancies, you should specify a meaningful name, such as the Azure AD domain that the Power BI tenancy belongs to. |
| Register assets as this user | Because we can’t guarantee that the user who created the asset in PowerBI.com exists in Loome Publish, we require you to specify an account to appear in the registered by field of the asset. |
| Draft Area | This will be where assets are synced to. Administrators can create other draft areas in the configuration settings. |
| Authentication Type | This is the type of authentication that will be used to connect to Power BI. It will change the type of fields that are required for authentication. |
| Tenant ID | This should be the tenant ID of the Azure tenancy where the Native App Registration was created earlier. |
| Registration Application ID | The Azure App Registration Application ID of the Native App Registration created earlier. |
| Power BI Master Account Username (UPN)** | This is the UPN of the account that you will grant access to content in PowerBI.com |
| Power BI Master Account Password** | This is the password of the account that you will grant access to content in PowerBI.com |
| Azure App Registration Secret** | This is the Azure App registration Secret that will grant access to content in PowerBI.com |
| Azure Key Vault URI** | This is the Azure Key Vault URI that will grant access to content in PowerBI.com |
| Azure Key Vault Secret Name** | This is the Azure Key Vault Secret Name that will grant access to content in PowerBI.com |
| Azure Key Vault Certificate Name** | This is the Azure Key Vault Certificate Name that will grant access to content in PowerBI.com |
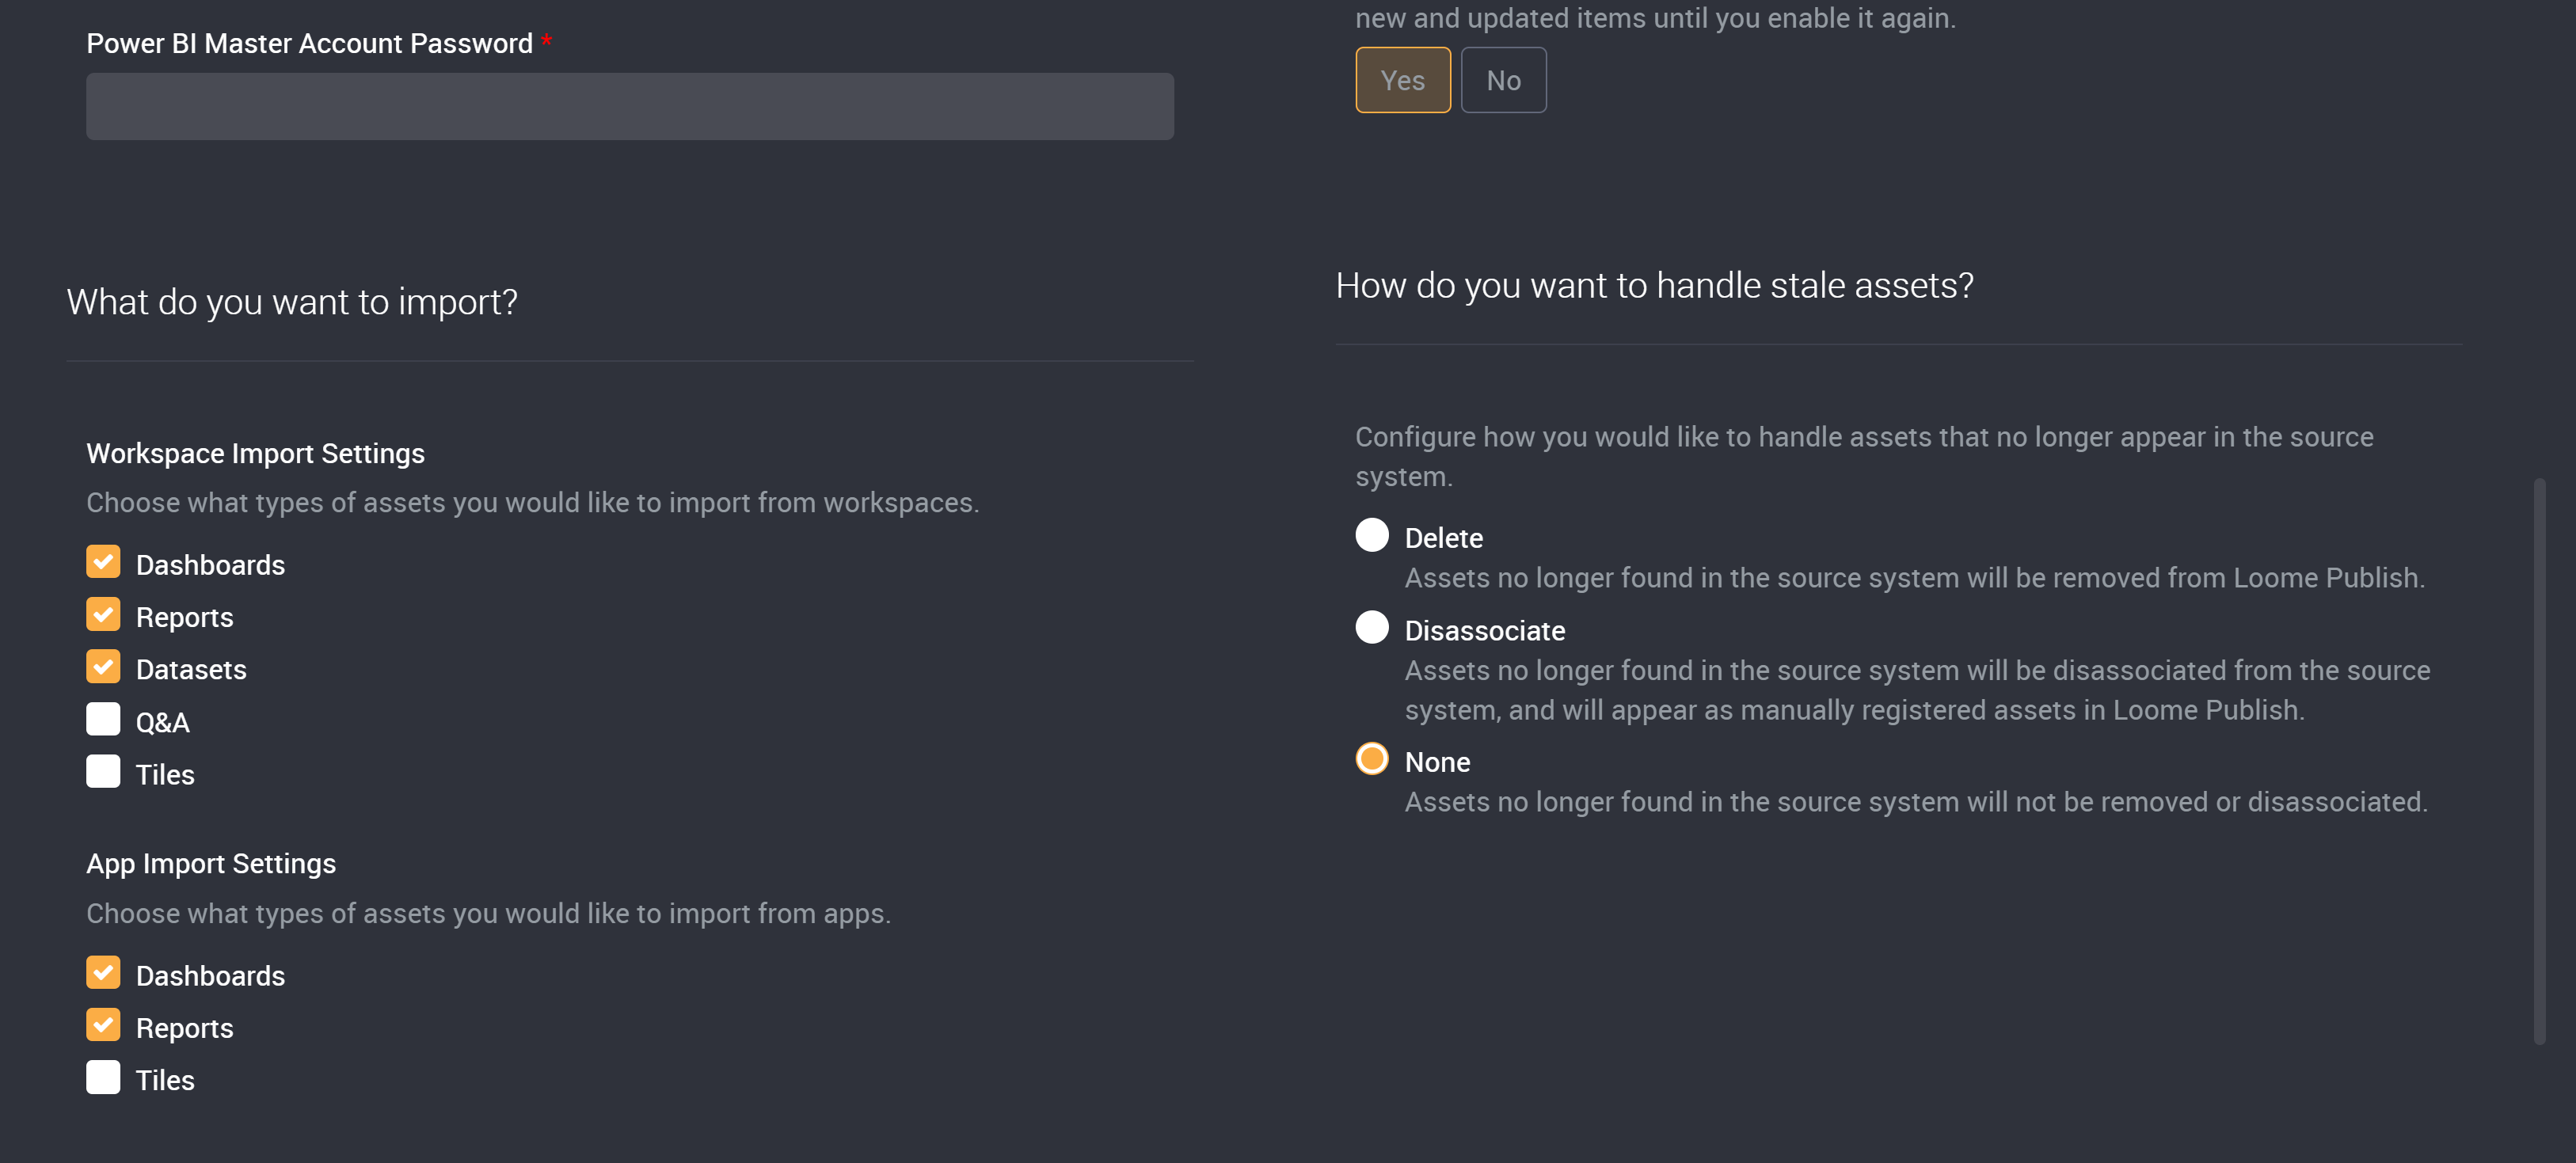
| Workspace Import Settings | Check each type of asset (individual dashboards, reports, datasets, tiles, and Q&A) you want to register as assets in the portal. |
| App Import Settings | Check each type of asset (individual dashboards, reports, and tiles) you want to register as assets in the portal. (Power BI does not currently support using Service Credentials to access App content. If you require App content, please use the Username and Password authentication type.) |
**These fields are dependent on authentication type.
The source system will begin syncing on creation. If you do not see any change, click the Refresh button. If the sync does not begin after clicking the refresh button, click the On Demand button. Once completed you will see the number of items synced.
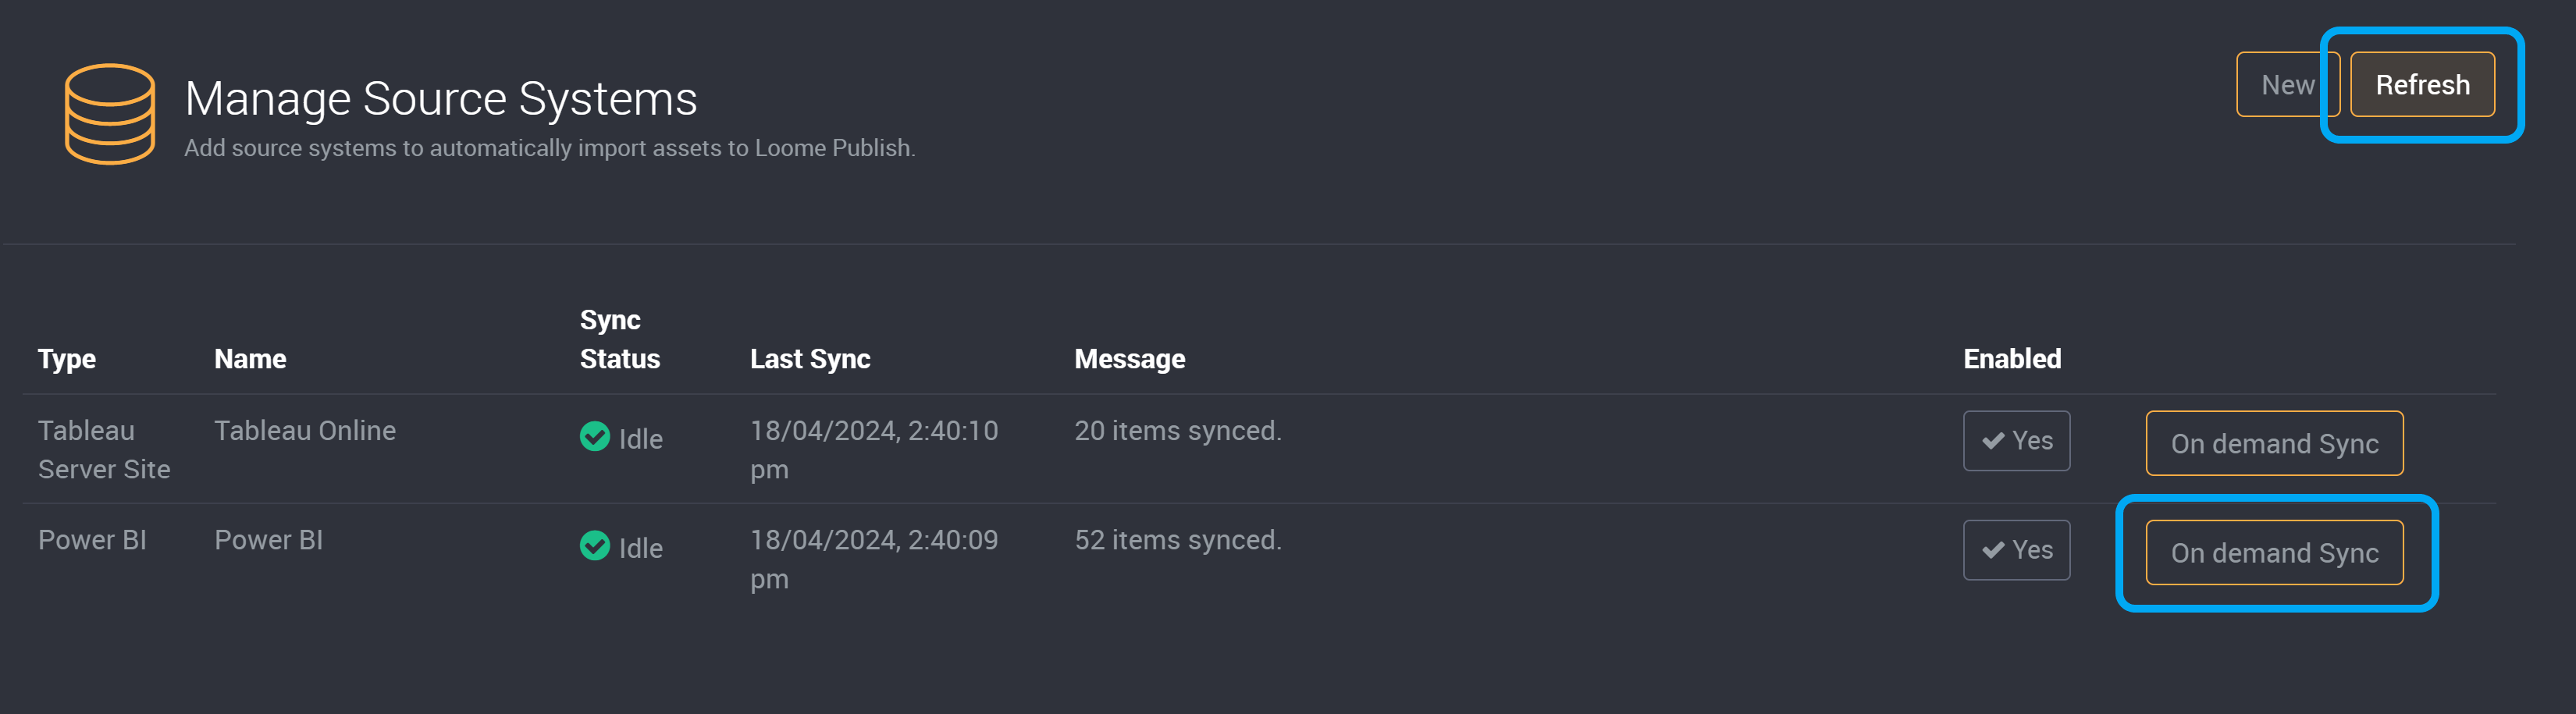
These items will be in the draft area of Loome Publish, you can now begin to publish assets.
Sharing content with the Power BI Master Account
In order for the Power BI Master Account to see your content, you must complete a two step process as shown below.
Add the account as a workspace admin
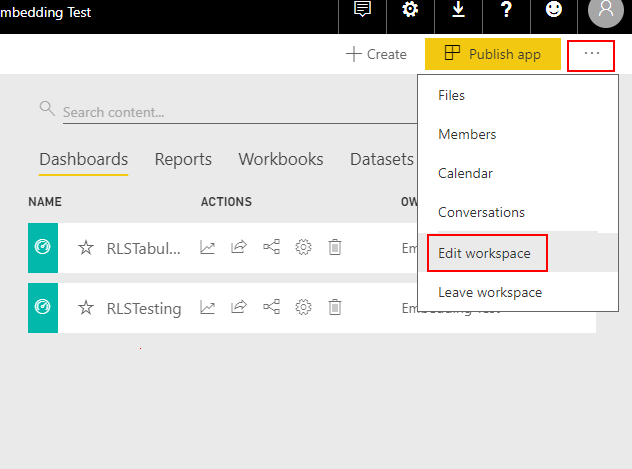
Browse to the workspace containing your content. Click the ellipse at the top right corner of the page. Click on ‘Edit Workspace’.
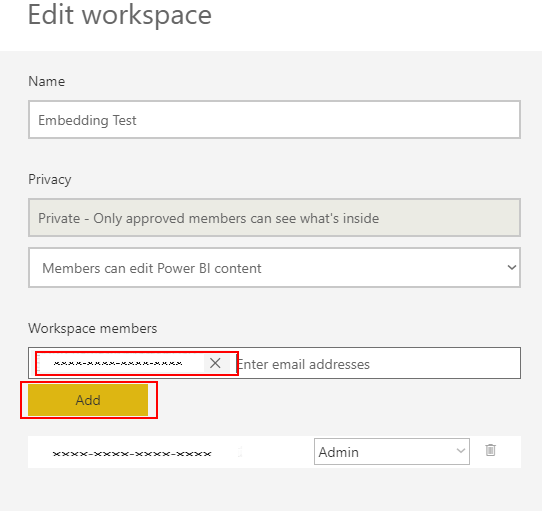
Lookup the Power BI Master Account using the ‘Workspace members’ control. Click ‘Add’
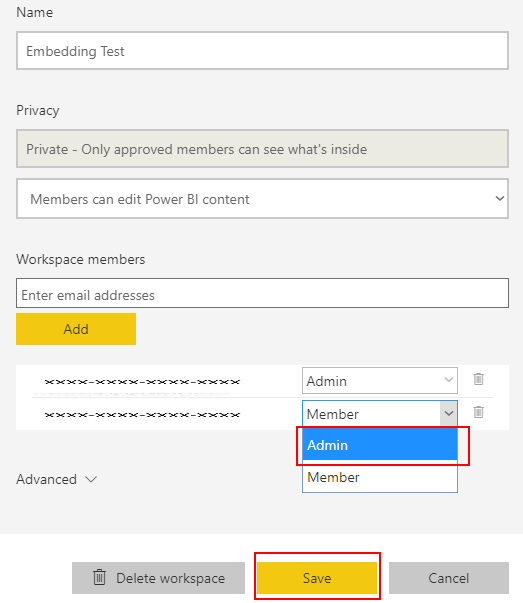
Click the drop down for the Power BI Master Account and select ‘Admin’. Click the ‘Save’ button
Share dashboards and reports with the account
Once logged into your desired workspace in PowerBI.com, open up a report or dashboard and select ‘Share’ from the top right hand corner.

This will bring up a slide out that will ask you who you wish to grant access to. This is where you enter the user principal name of the master account.
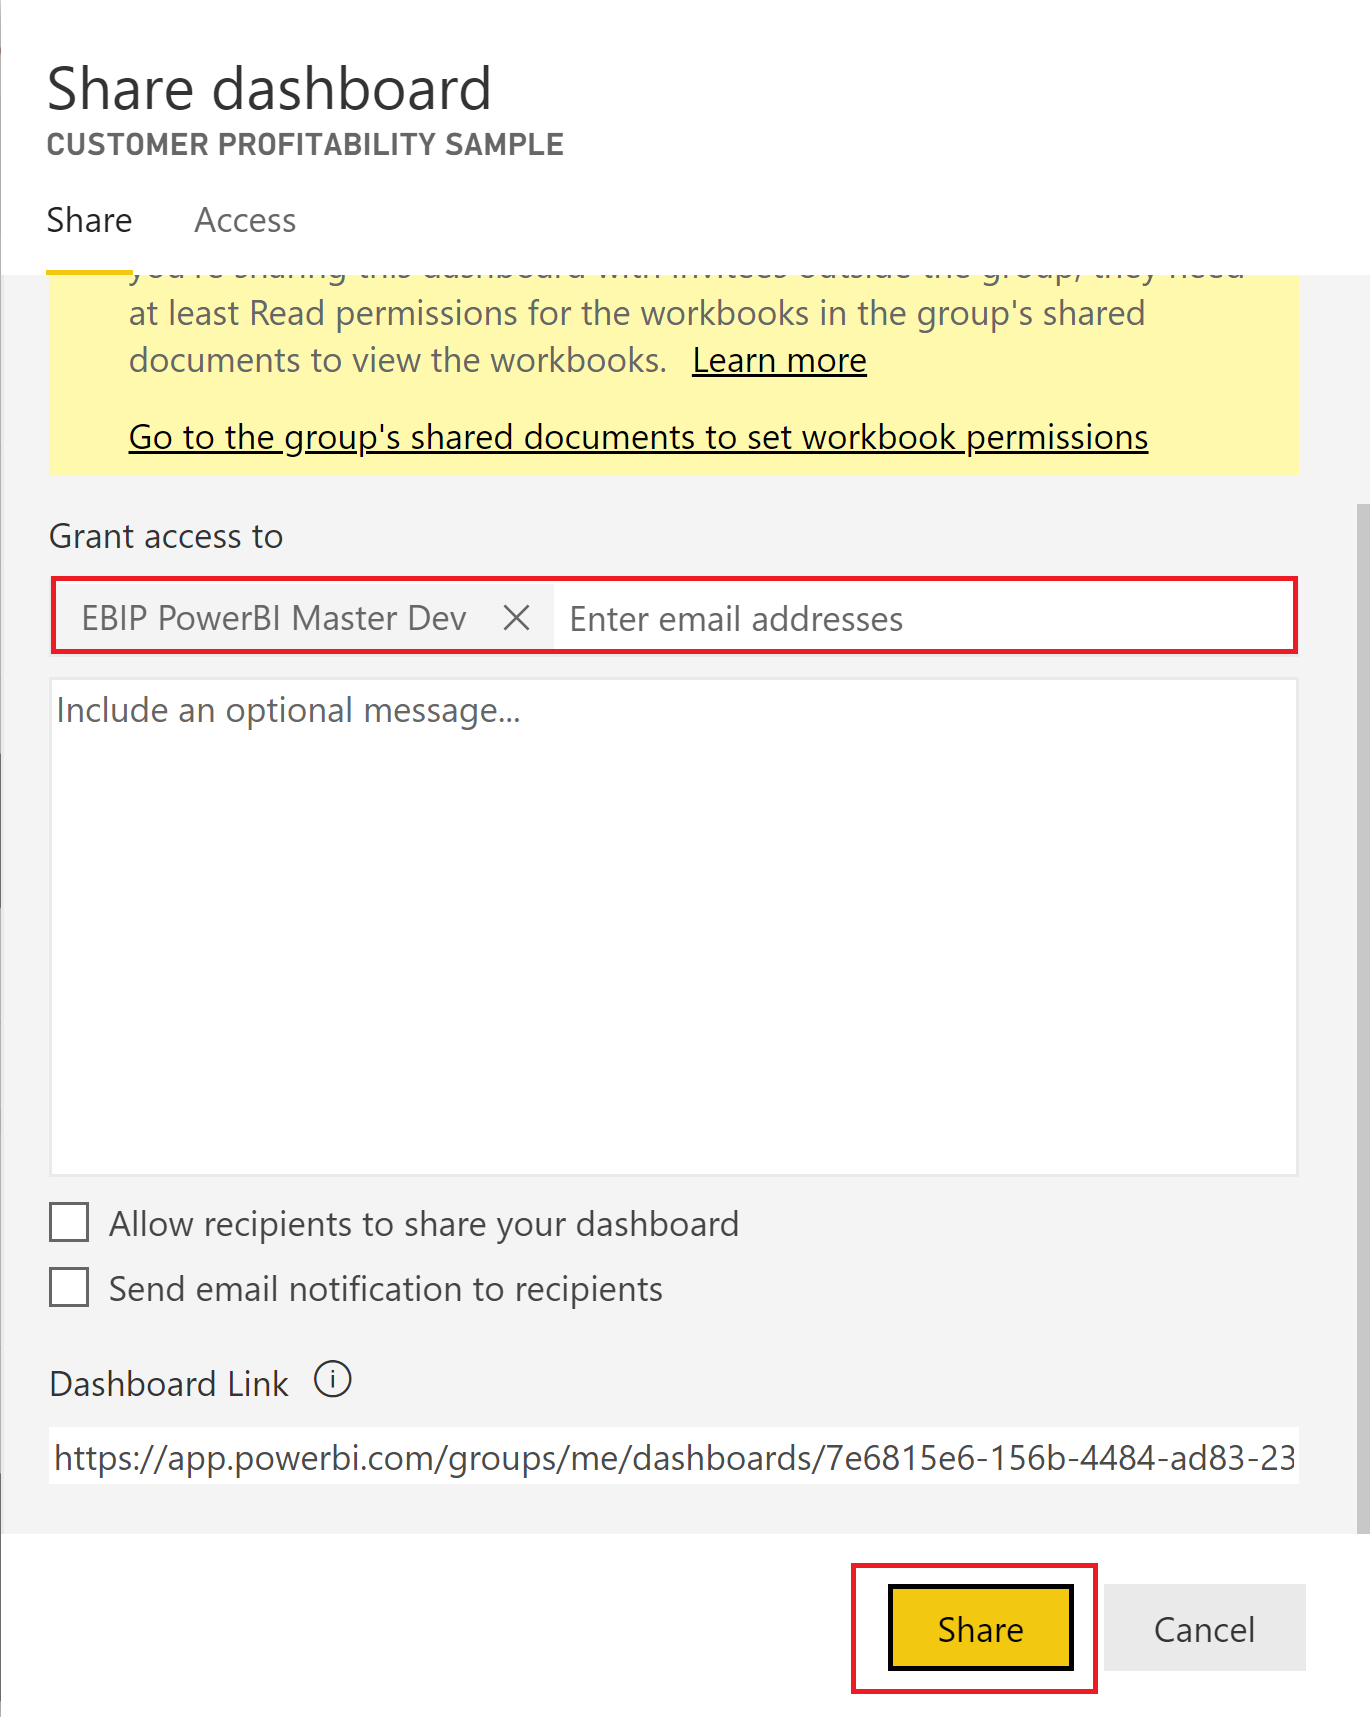
You will then receive a notification to confirm that you have successfully shared the dashboard/tile/report with the master account.
