User Owns Data
Table of Contents
- Overview
- Pre-requisites
- Embedding Wizard
- Sharing content with users
- You’re now ready to embed in Loome Publish
Overview
User Owns Data is the simplest form. In this model, you licence each user who will access Power BI via the website or via embedding in another system (Loome Publish) with a Power BI Pro licence.
You can assign permissions to view content in PowerBI.com directly to users and groups, and users can browse content in PowerBI.com if they wish. When users view an embedded Power BI asset on Loome Publish, their Azure AD token is passed to the Power BI API and they are authenticated as themselves, and it can be passed through to data sources as well.
The User Owns Data model can only be used when running Loome Publish in Azure, or on-premises with Azure AD as we require an Azure AD token to pass to PowerBI.com. If you are not running one of these versions and would like to, Loome can assist you in converting your installation.
We currently support the embedding of the following types;
- Dashboards
- Reports
- Tiles
- Q&A
We do not support embedding of apps, as these do not exist in the Power BI API. You can however embed content from the workspace of the app.
Your content can be kept in a workspace created by any developer, however you must follow the steps under Sharing content with users for all content you wish to embed.
Pre-requisites
Follow the steps below to update the app registration so that Loome Publish has permission to request Power BI access on user tokens as they login.
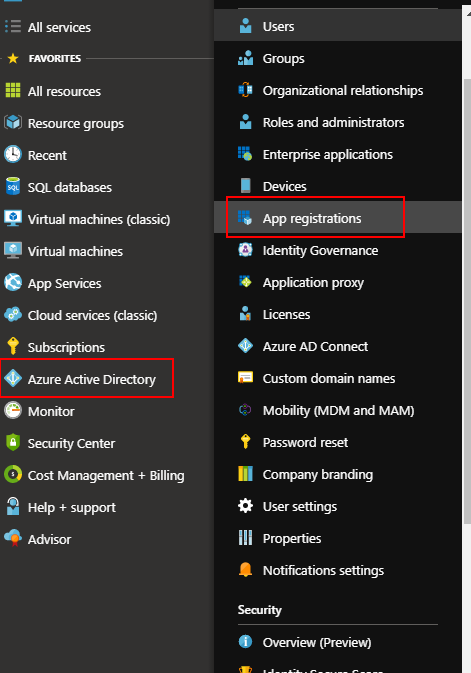
Browse to portal.azure.com, then click on ‘Azure Active Directory’ from the menu, followed by ‘App Registrations’ from the Azure AD menu.
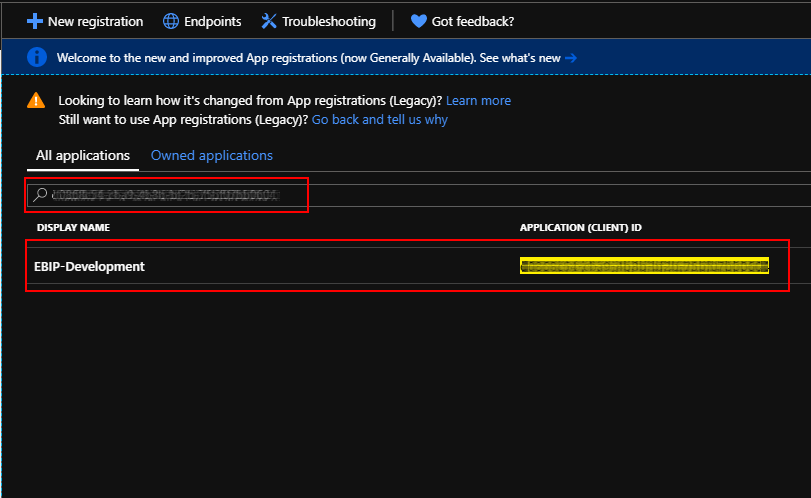
Use the search box to locate the app registration for your Loome Publish application.
Click on the app registration to open it.
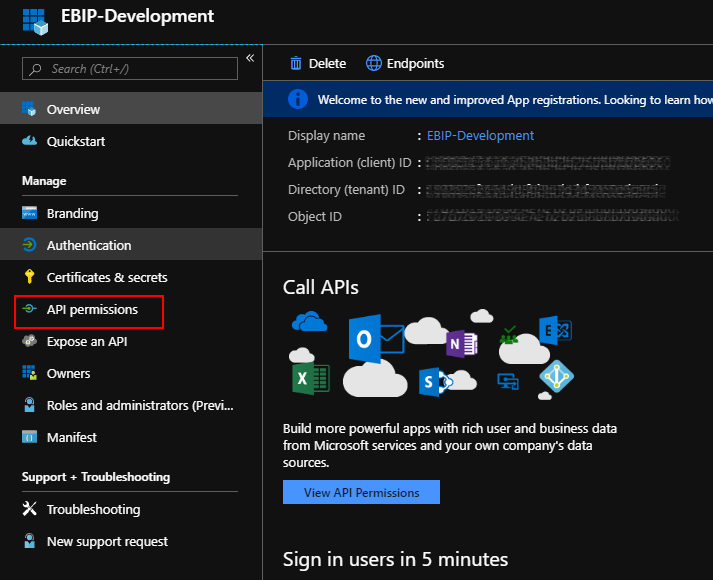
Click the ‘API Permissions’ button from the app registration menu.
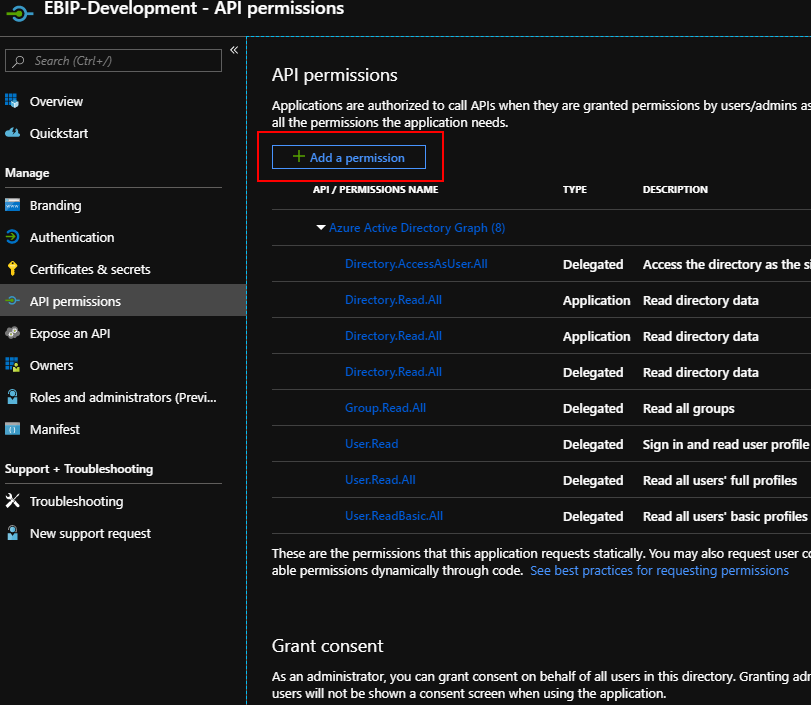
Click the ‘Add a permission’ button from the top of the registered app.
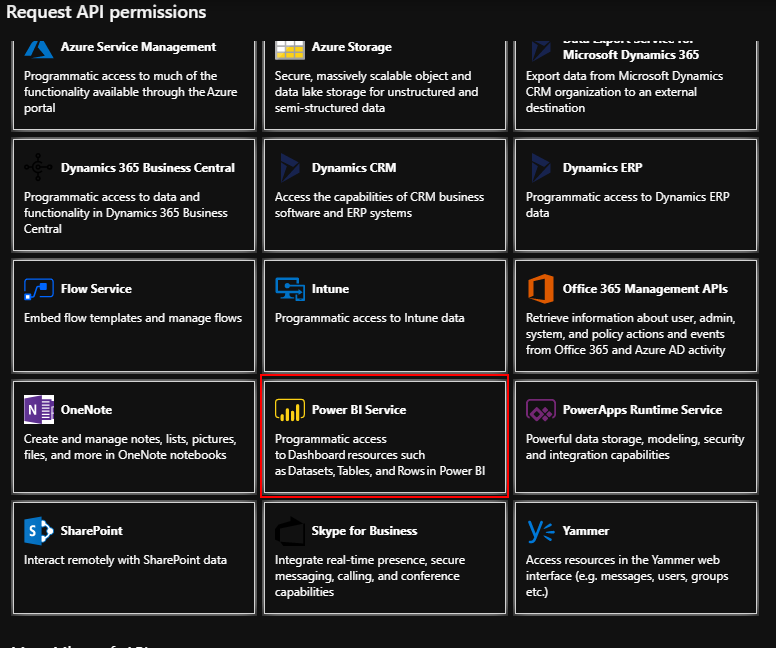
Select ‘Power BI Service’ from the list of available services.
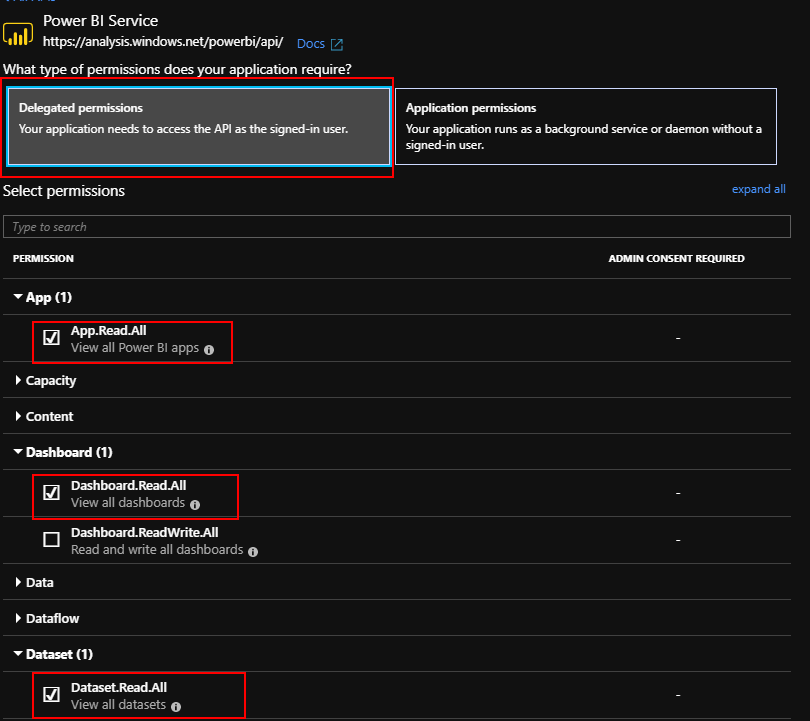
Select ‘Delegated Permissions’, permissions will now appear.
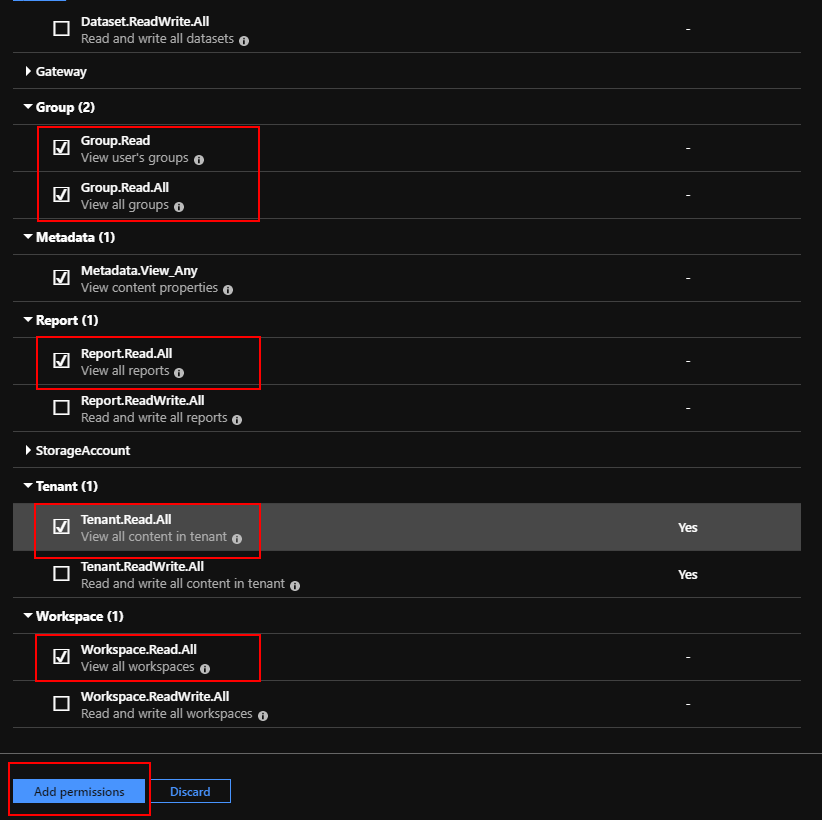
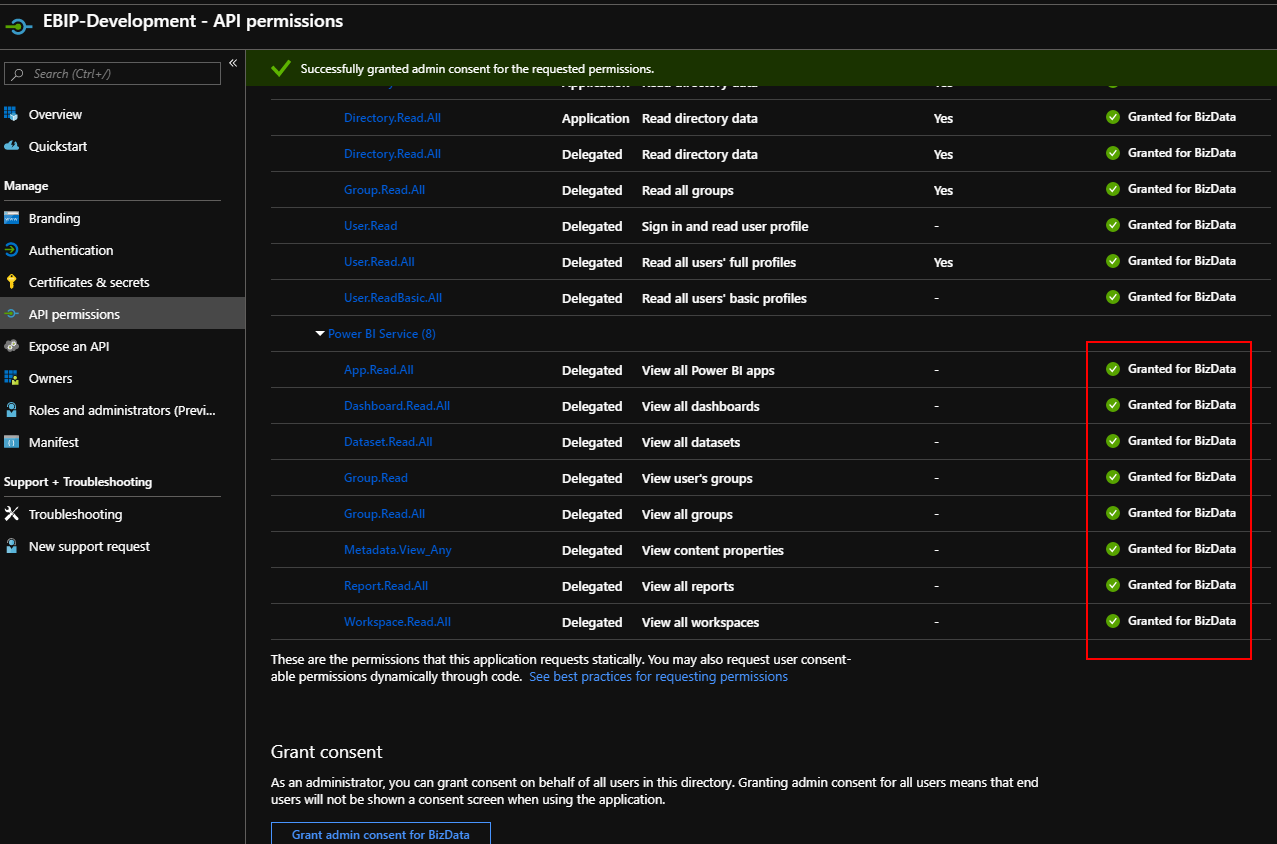
Select all permissions as shown in the following two screenshots, then click ‘Add Permissions’
This step requires a Global Administrator account to complete.
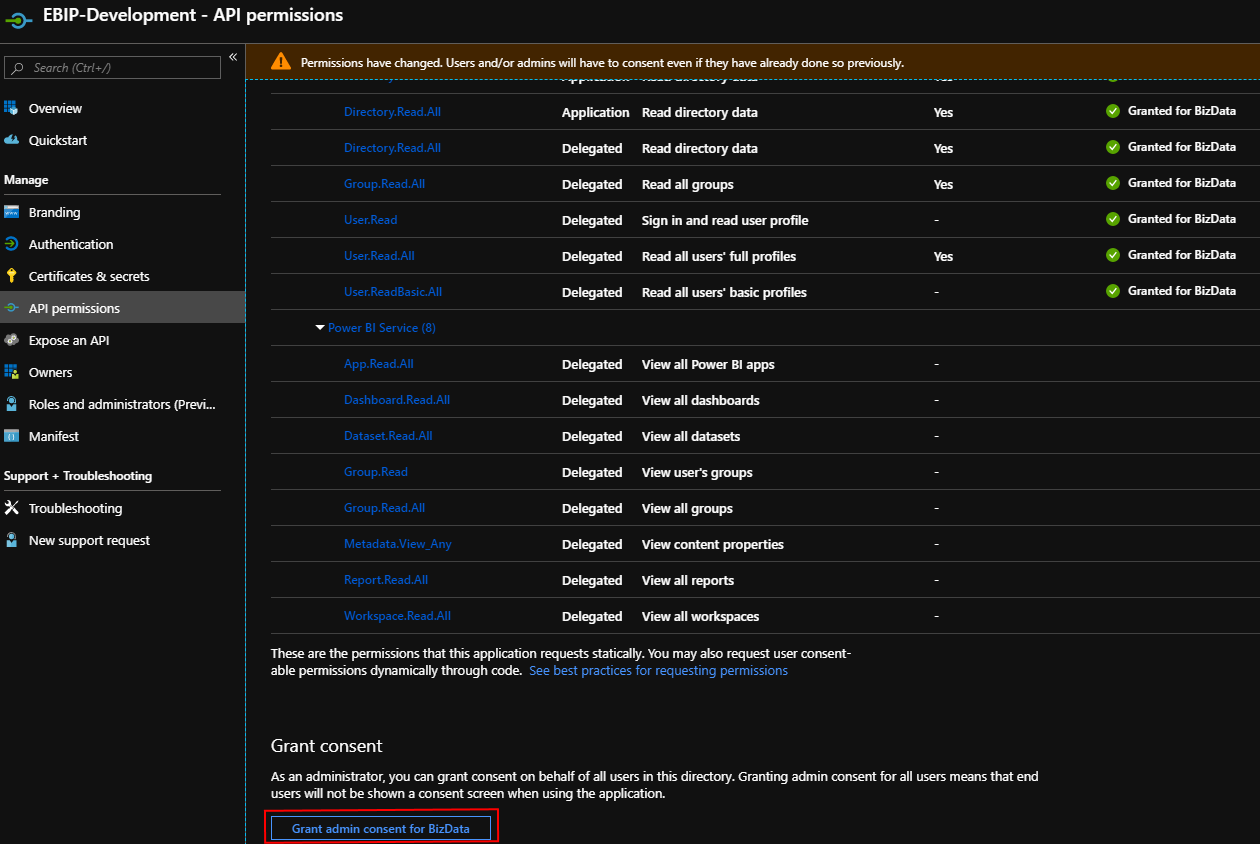
Click the ‘Grant admin consent for company’ button at the bottom.
This step requires a Global Administrator account to complete.
Click the ‘Yes’ button to confirm consent.

Verify you now see the ‘Granted for company’ tick next to each permission.
Embedding Wizard
The embedding wizard within Loome Publish needs to be run to enable embedding.
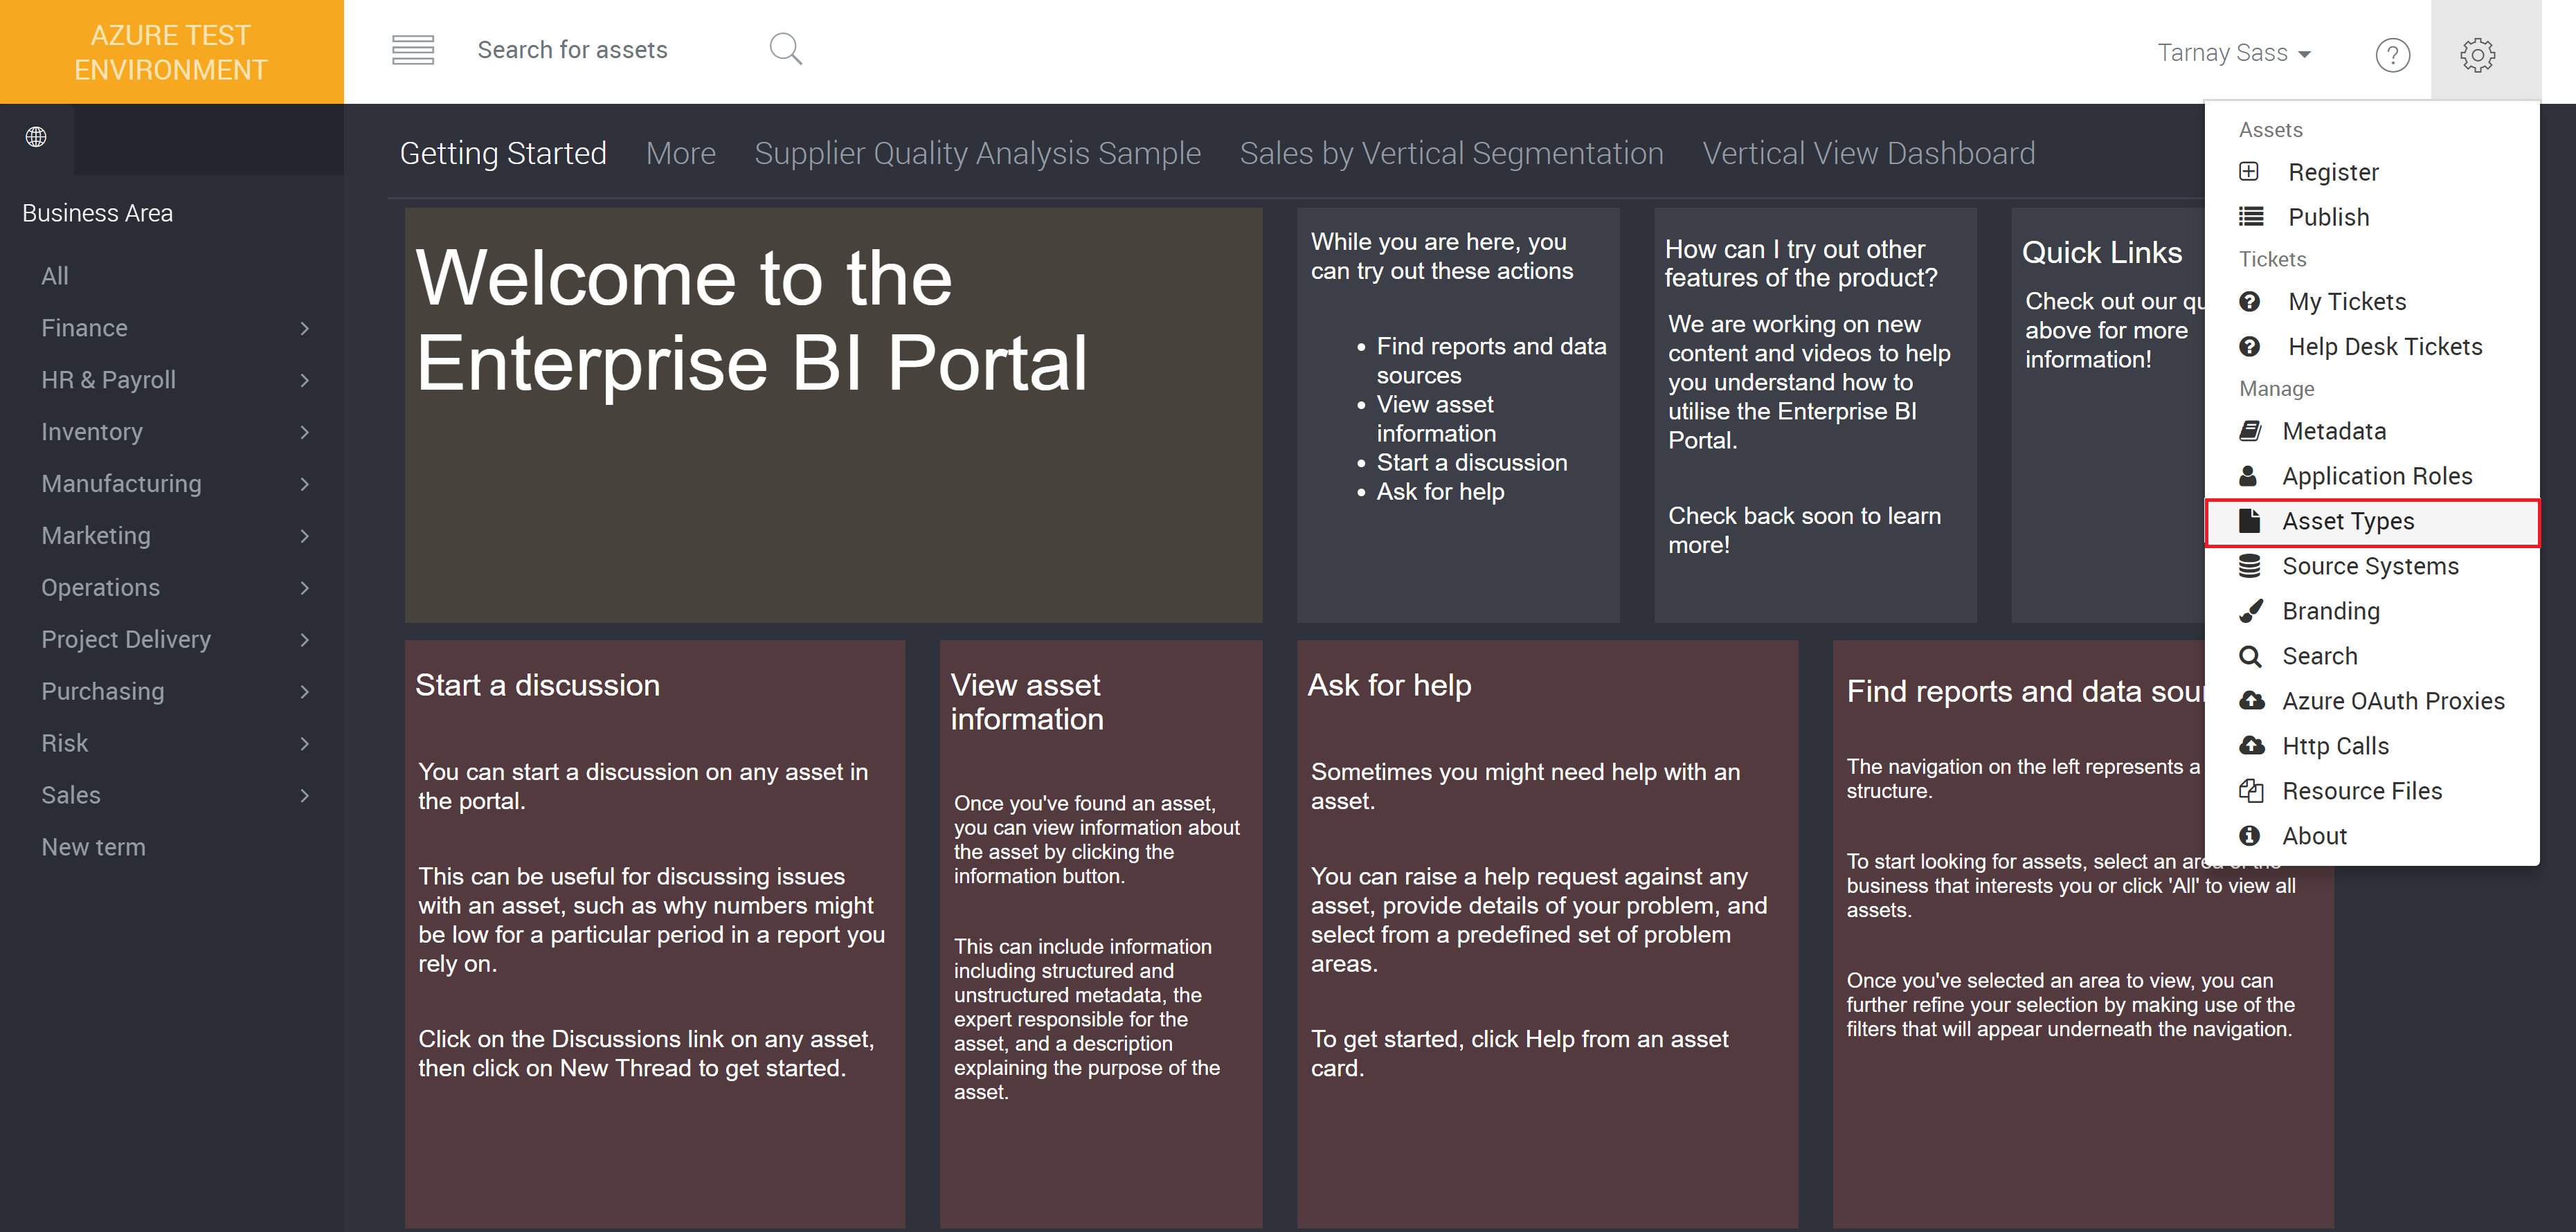
Browse to Loome Publish, click on the cog in the top right hand menu and then click on ‘Asset Types’
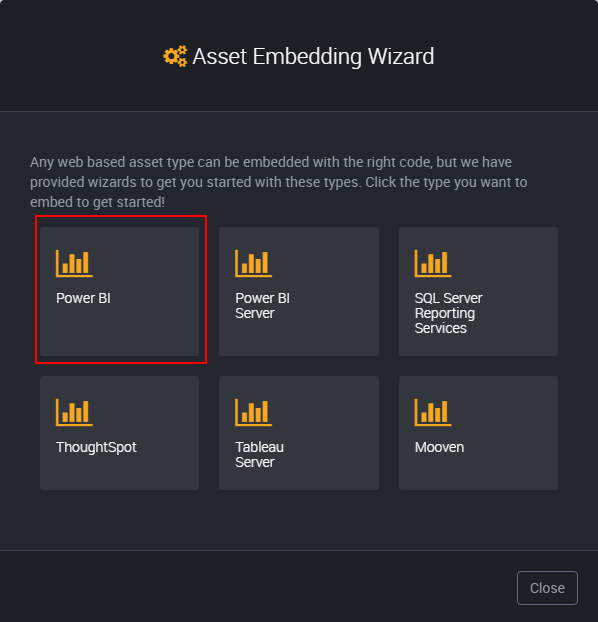
In this scenario, you want to choose “Power BI Types”.
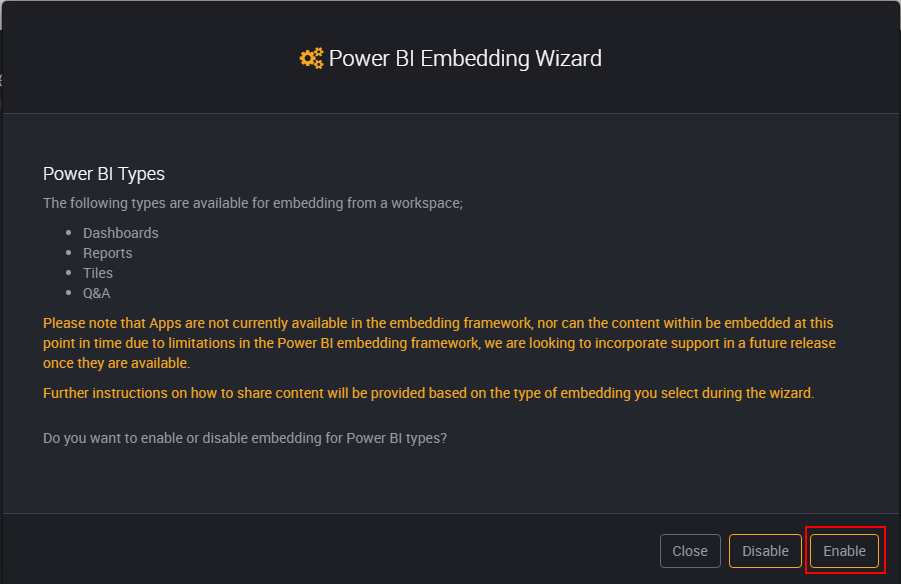
The next screen is just a brief description of what is supported through embedding, and to clarify if you want to enable or disable the embedding feature.
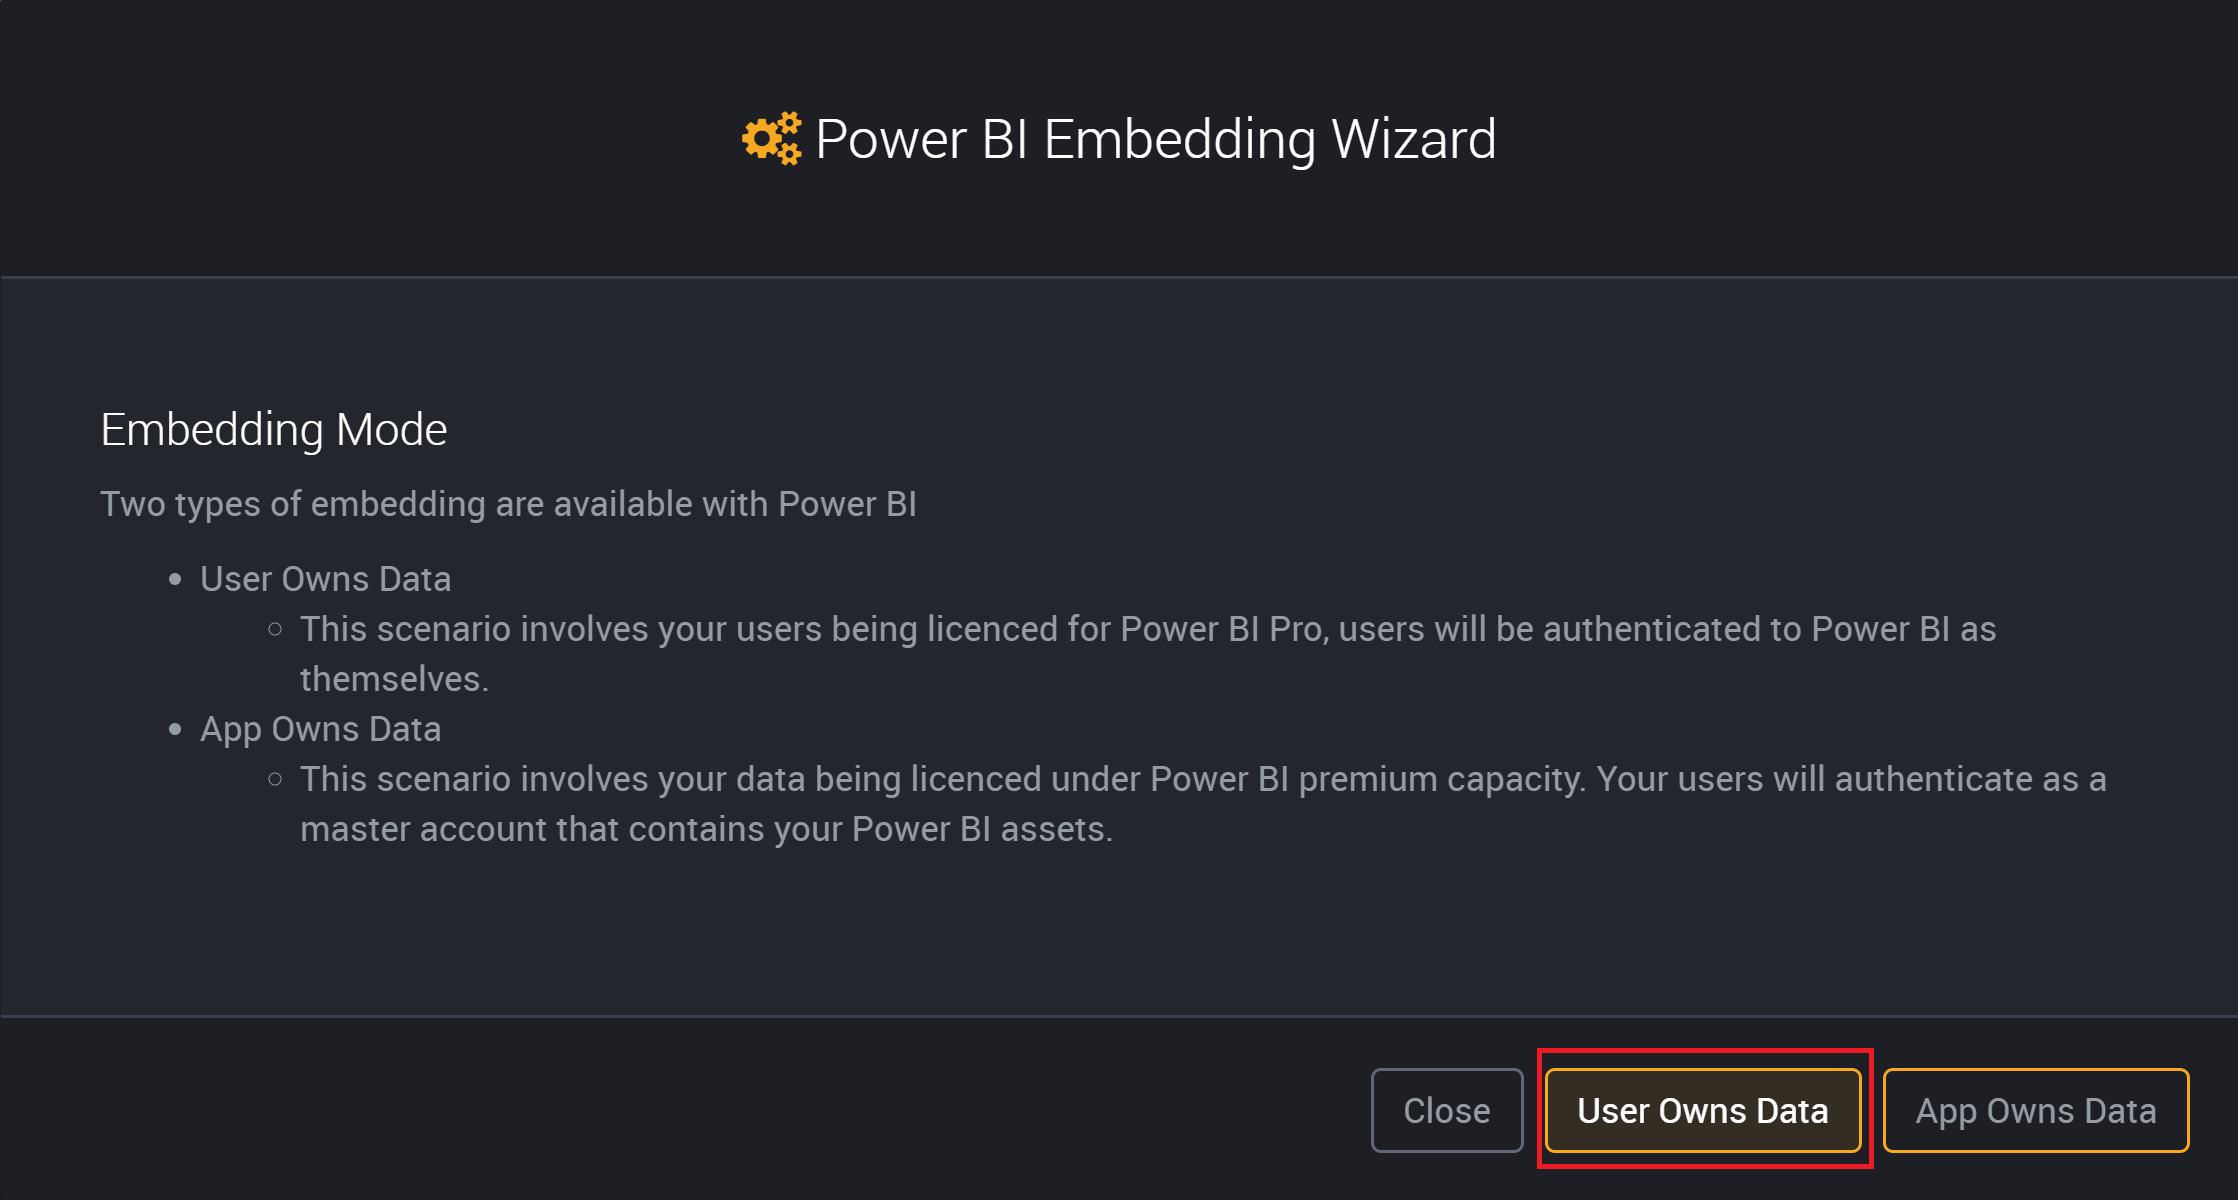
The wizard will now ask you to choose which embedding mode you wish to proceed with. In this scenario, you will click User Owns Data.
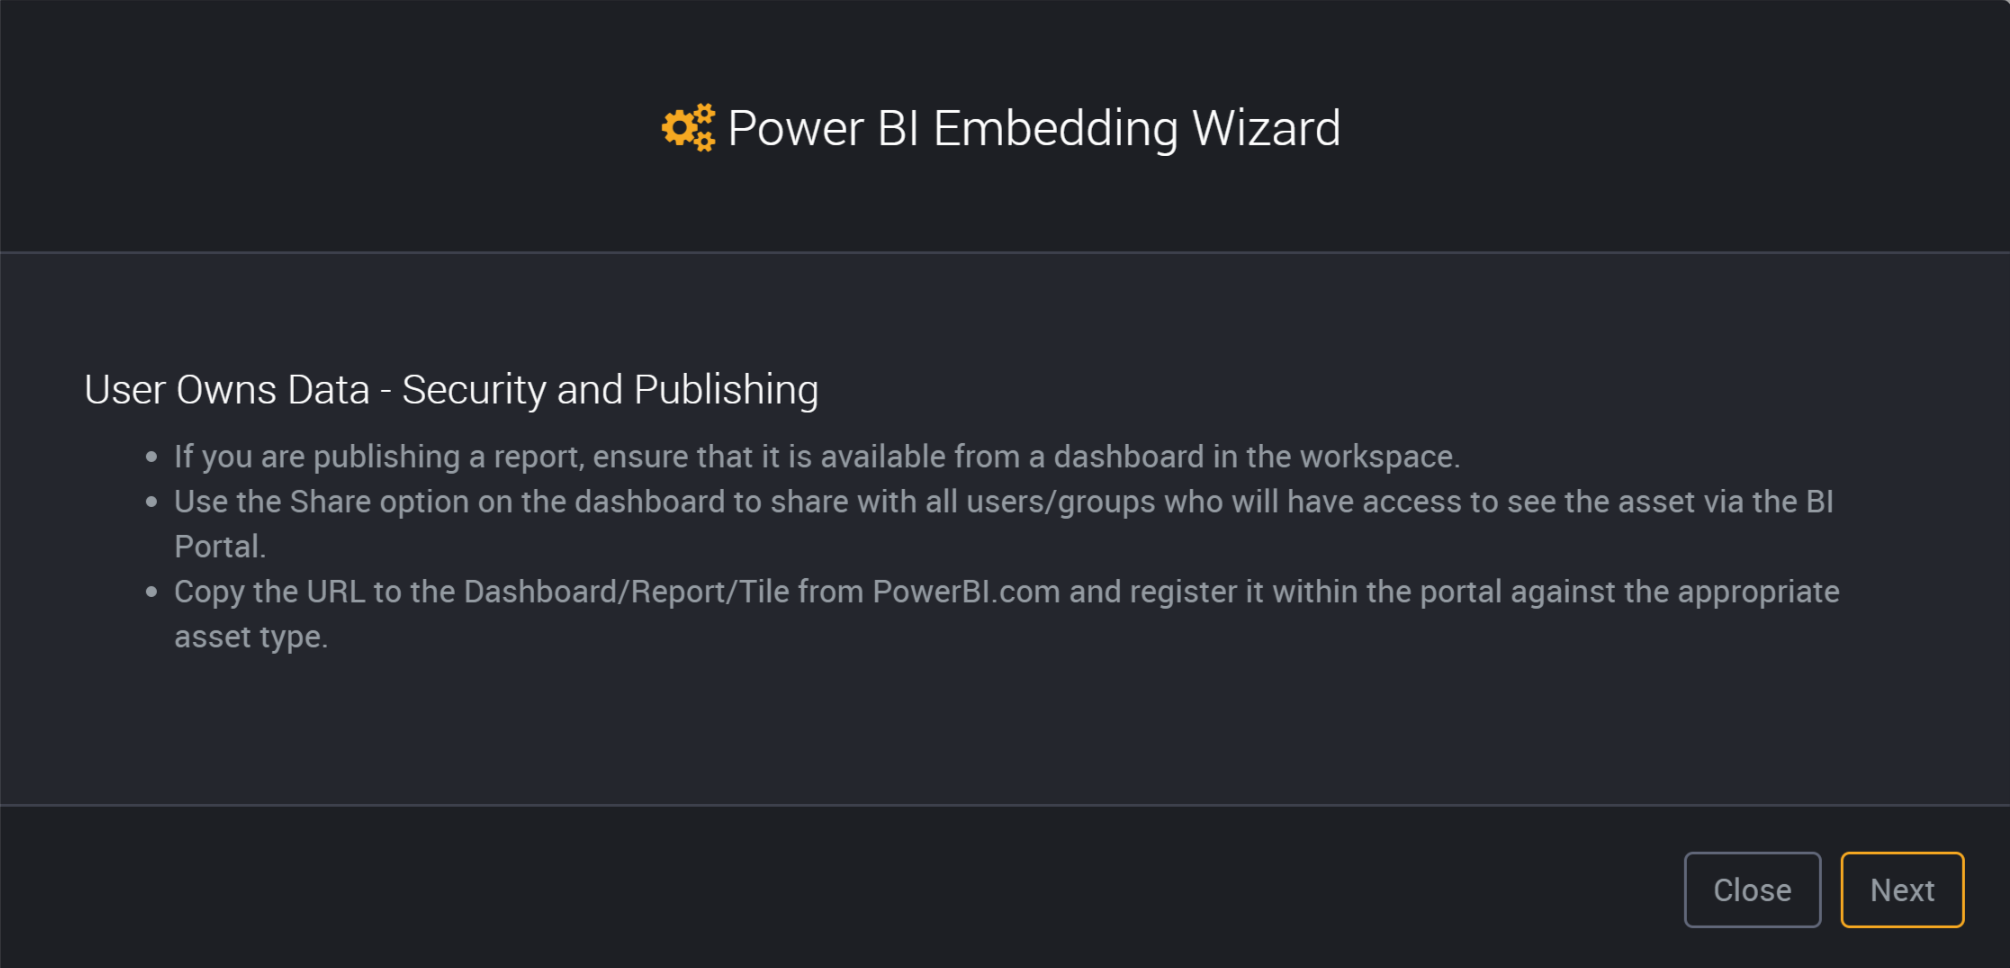
You will now be presented with some more information regarding necessary pre-requisites.

The wizard will prompt you to ensure that you have granted access to the relevant user accounts in your workspace in PowerBI.com. The steps for using this share functionality will be outlined further down.
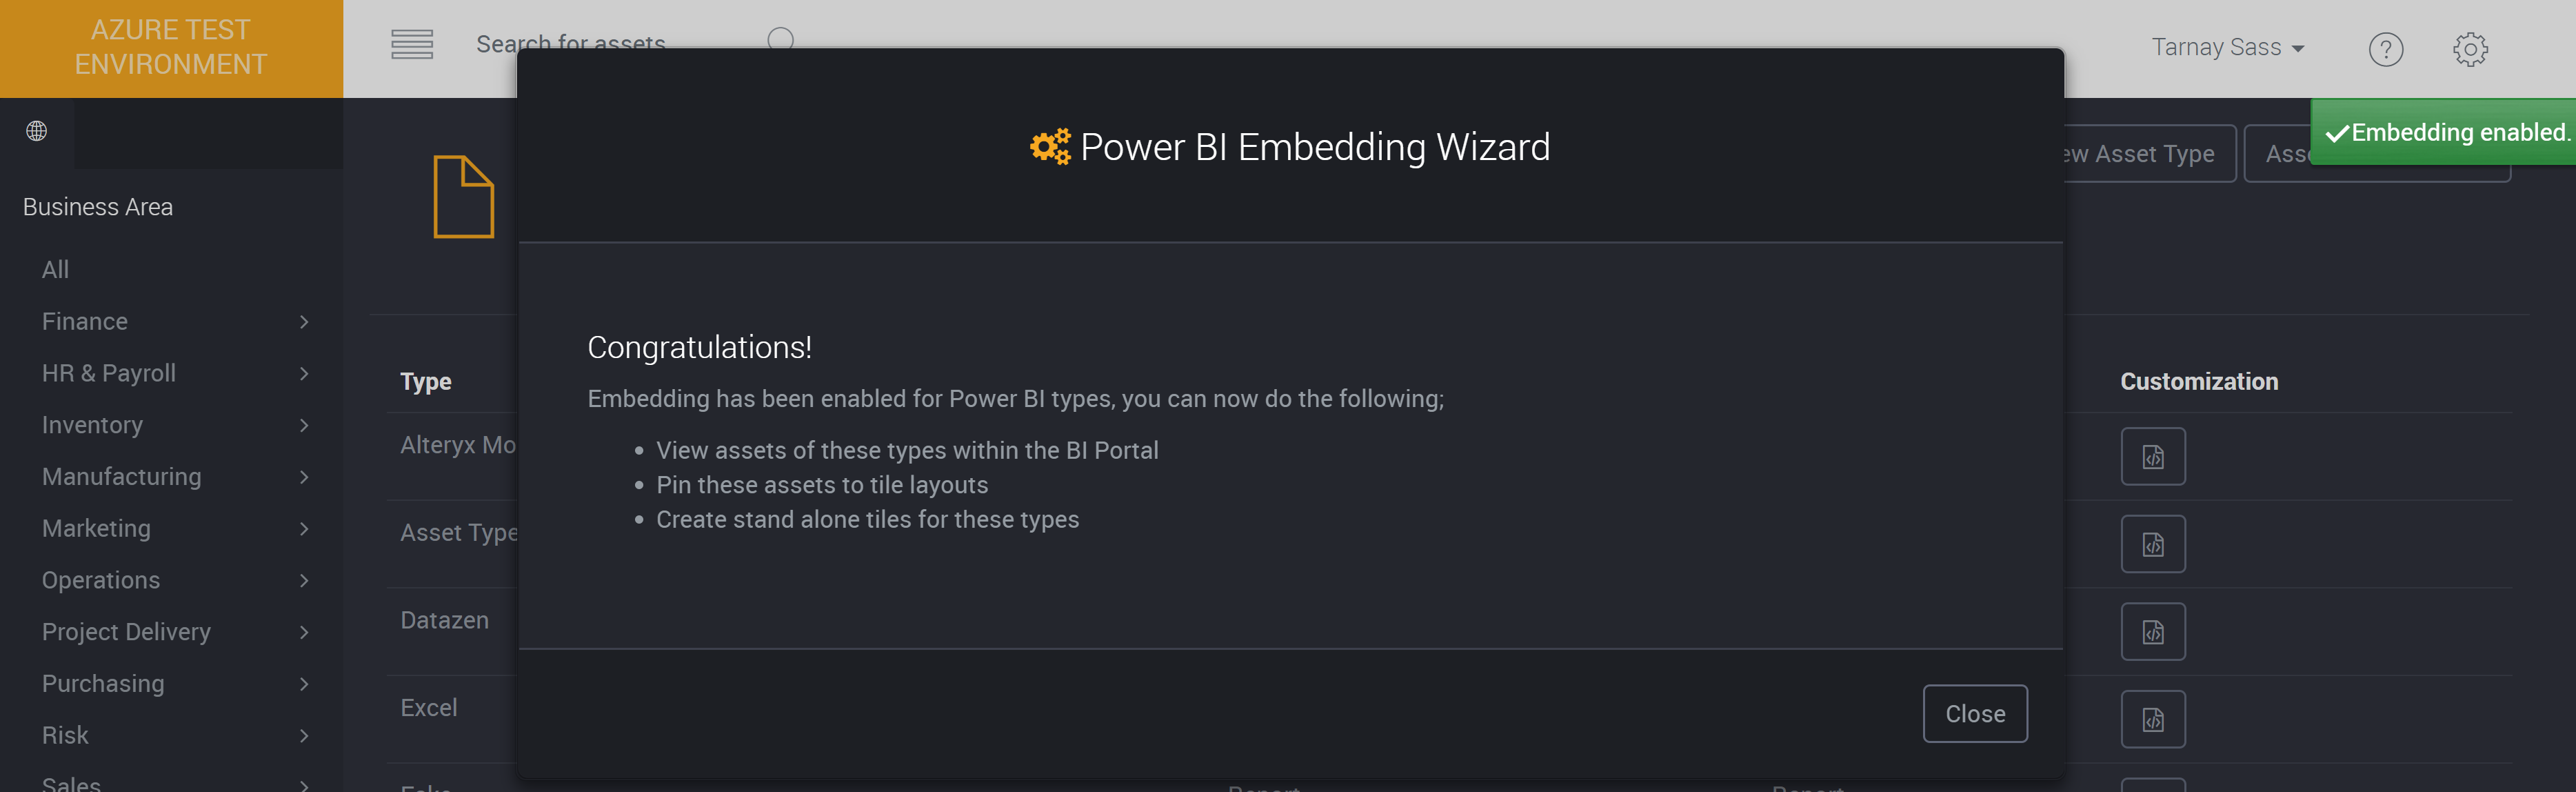
Congratulations, you can now embed your Power BI assets directly into Loome Publish.
Sharing content with users
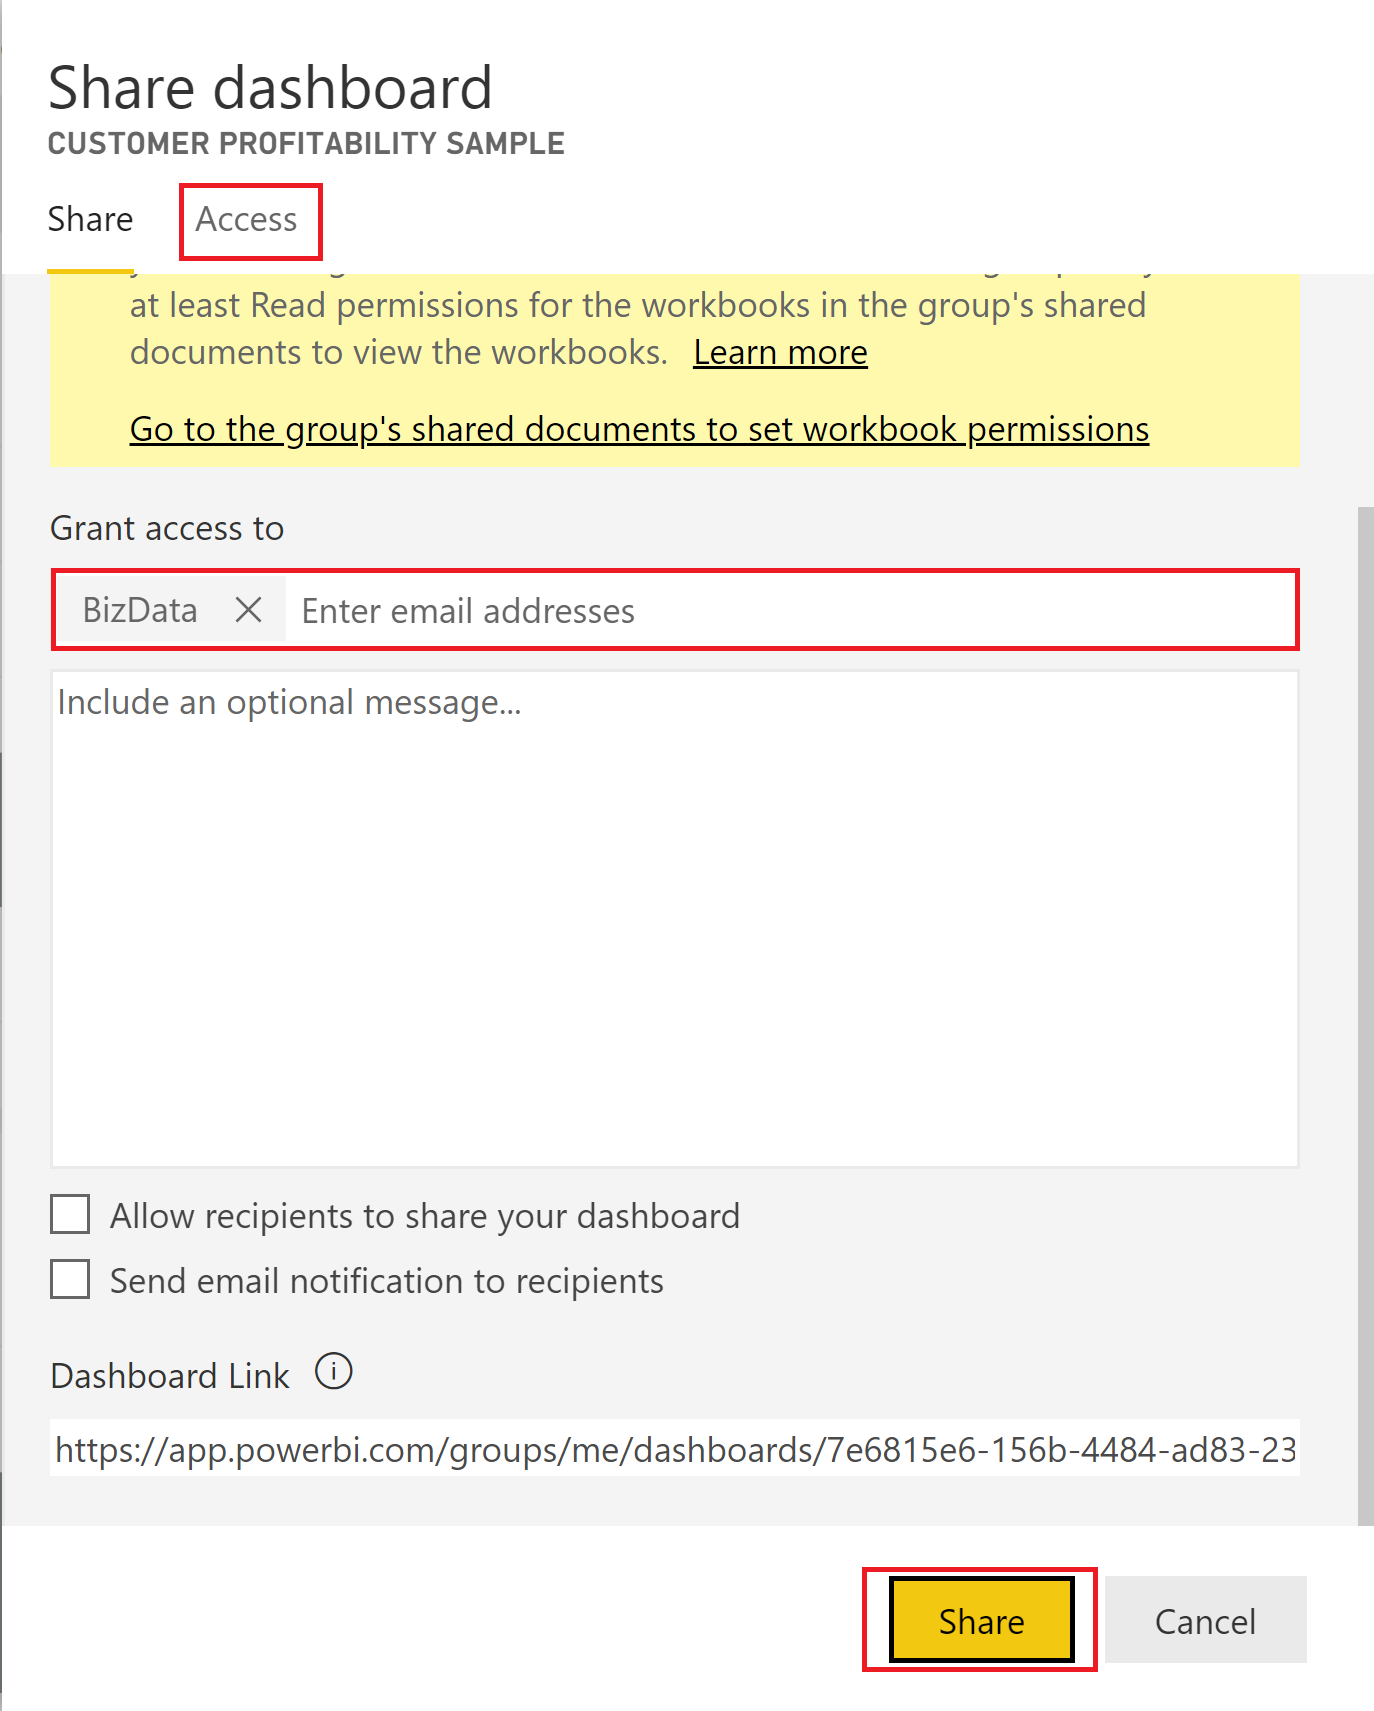
Once logged into your desired workspace in PowerBI.com, open up a report or dashboard and select ‘Share’ from the top right hand corner.
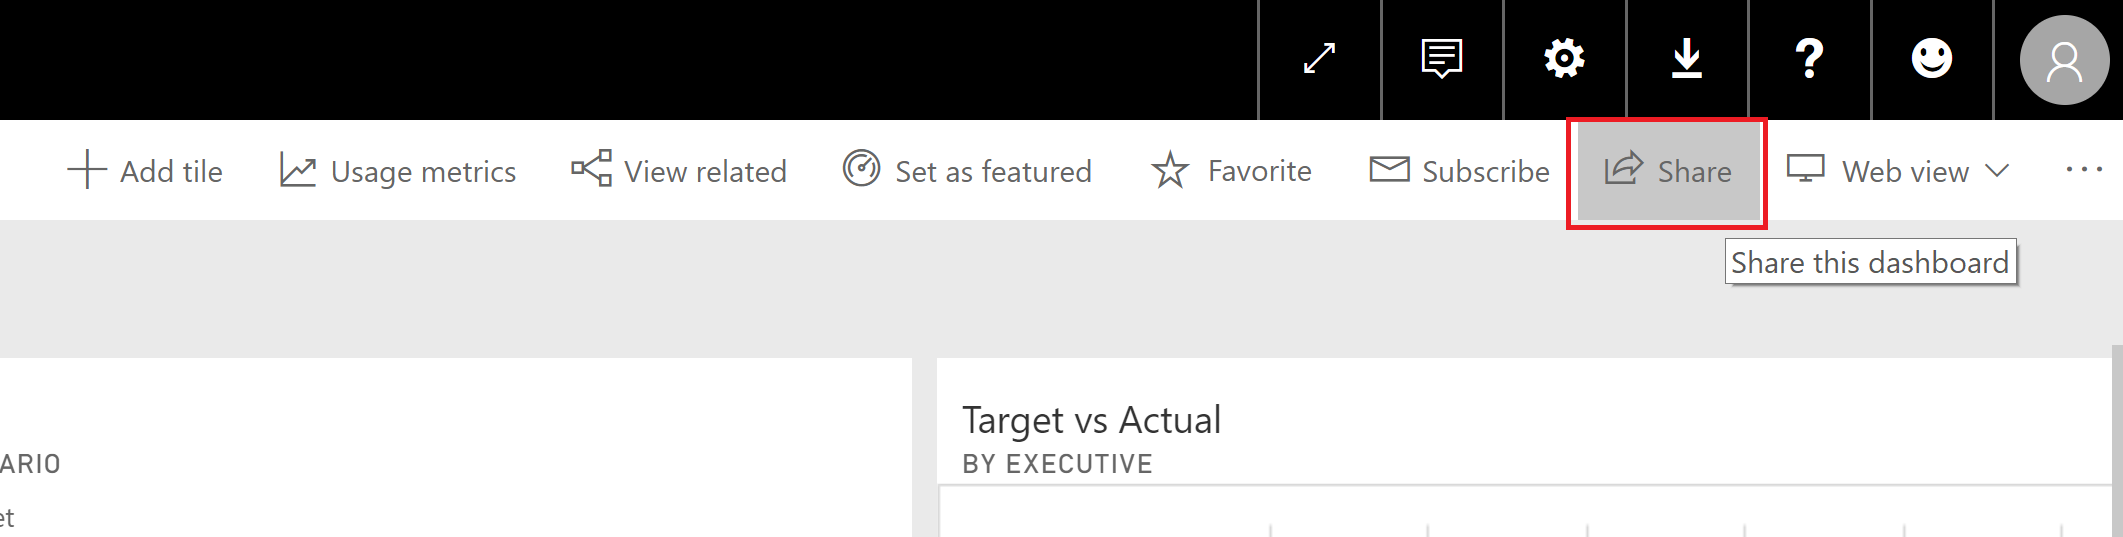
This will bring up a slide out that will ask you who you wish to grant access to. This is where you enter the user principal name of the groups or users that you wish to share the report with.
This will bring up a slide out that will ask you who you wish to grant access to. This is where you enter the user principal name of the master account.
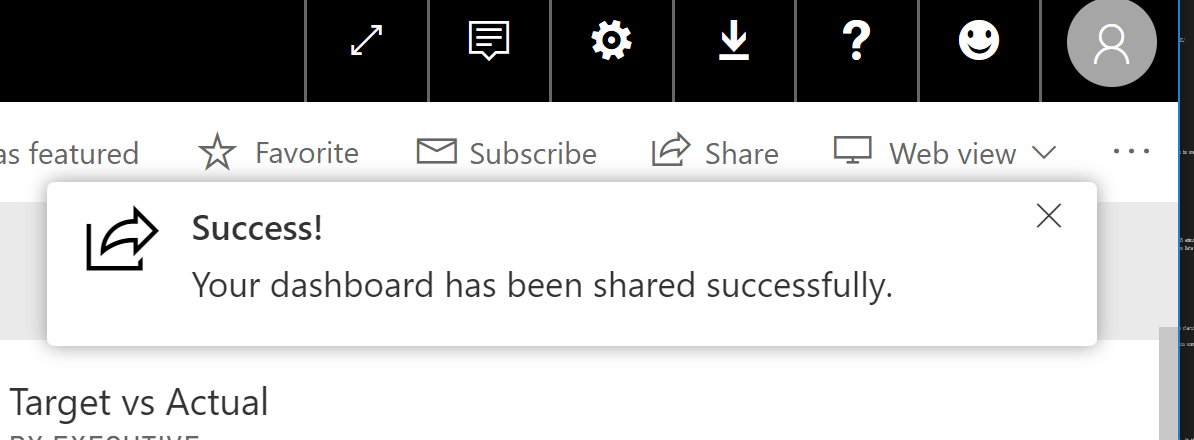
You will then receive a notification to confirm that you have successfully shared the dashboard/tile/report with the group or user.
You’re now ready to embed in Loome Publish!
Once you’ve completed the one-time setup processes above, you are ready to start embedding Power BI assets in your Loome Publish portal. This is simple to do - once the permissions are all turned on, embedding is the same process as registering an asset, however the end result will show your content within the Portal instead of in an external tab.
This is where you can read about registering assets.
To obtain dashboard and report URLs needed for the registration process, open each and copy the URL in the browser window. If you are embedding a tile, don’t forget to first hover over the desired tile and click focus mode before copying the URL in the browser window.