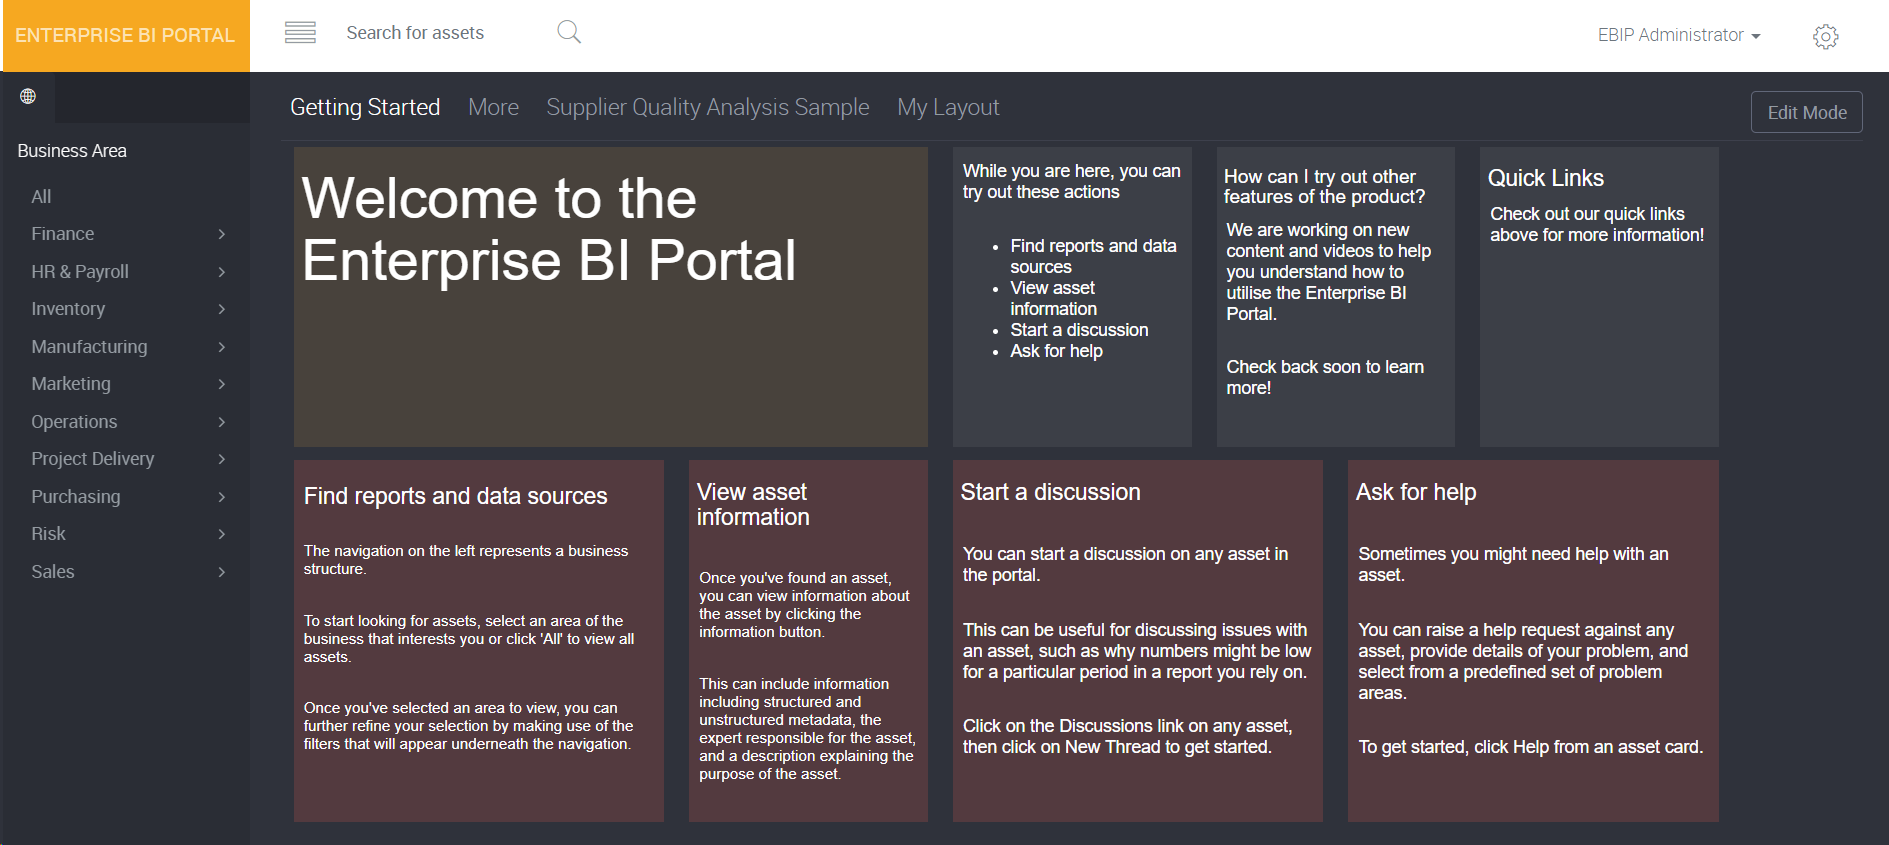
Tile Layouts
What are tile layouts?
Tile layouts allow you to provide high level information to targeted audiences within the organisation.
You can build and customise layouts for particular groups. For example, you can have a layout for Executives with those high level figures they want to see daily to make those important business decisions. Or a layout for the Finance team with financial figures for budgeting. Or even a Sales layout with crucial sales targets, revenue, and forecasting highlights. You can showcase the information however you like!
However, bear in mind that tile layouts are not actual reports. Think of it as a whiteboard or a one page newsletter used to communicate new or key messages to business users.
How do I add a tile layout?
Loome Publish comes with two sample layouts when you first sign in, Getting Started and More. You can simply edit the existing tiles on these layouts or you can create a new layout of your own.
To create a new tile layout, click the Edit Mode button at the top right hand corner of the screen.
From there, click Actions.
Select New under ‘Layouts’.
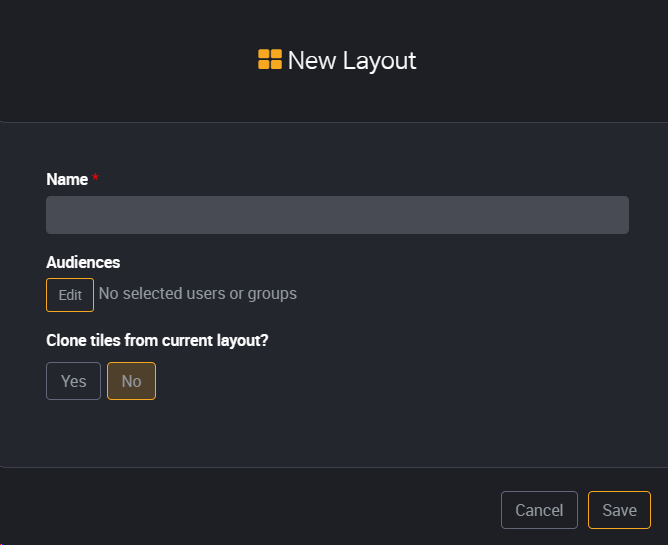
Name
- Enter a name for the layout (required). This name will be displayed across the top in the layouts bar.
Audience
- You can add audiences by clicking Edit.
- Start by typing the name into the field.
- A list of users and groups will appear as you type.
- Select the user or group to assign as an audience.
Click Close to finish.
Cloning tiles from current layout
- You can choose to clone tiles from an existing layout.
- The layout which you were on when you selected to add a new layout will be the layout from which Loome Publish will clone from.
- Choose either Yes to clone the tiles or No to create a brand new layout from scratch.
Click Save.
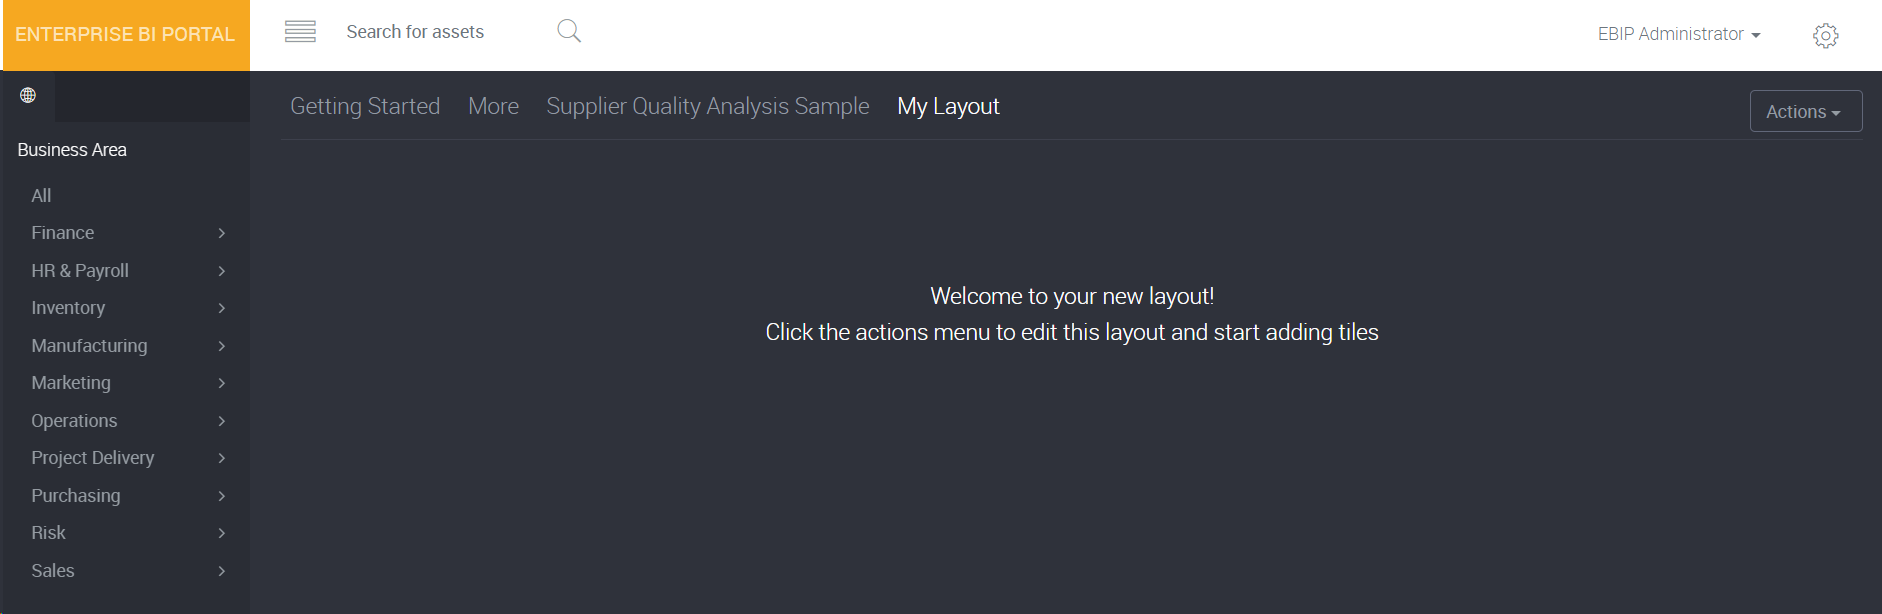
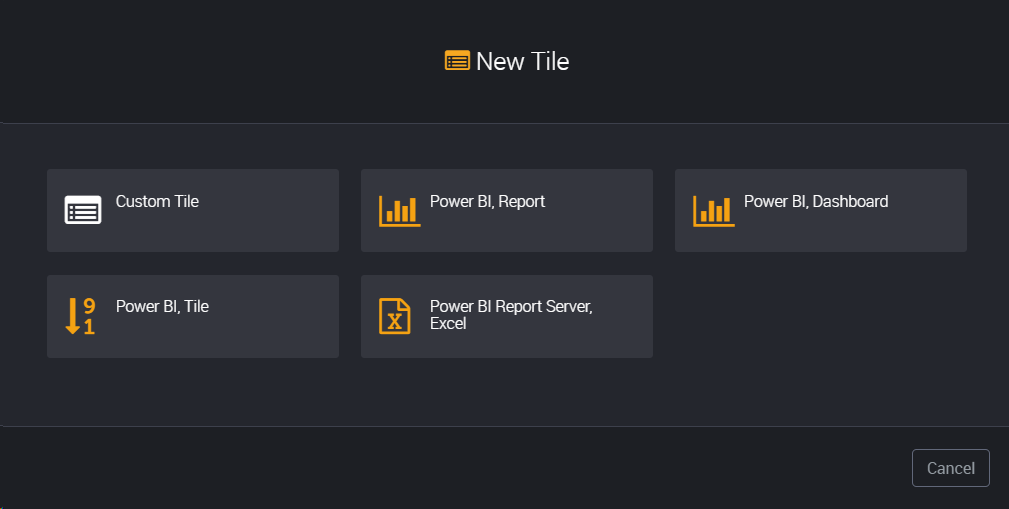
How do I add a tile?
To add a tile, click the Actions button at the top right hand corner.
Select New under ‘Tiles’.
Select Custom Tile.
Other tile types may also appear here. We will cover these in another section of the User Guide.
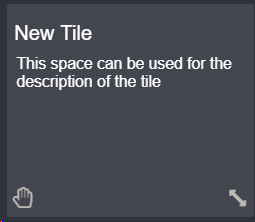
A new tile will appear on the layout.
How do I edit the tile?
From within Edit Mode, click on the tile.
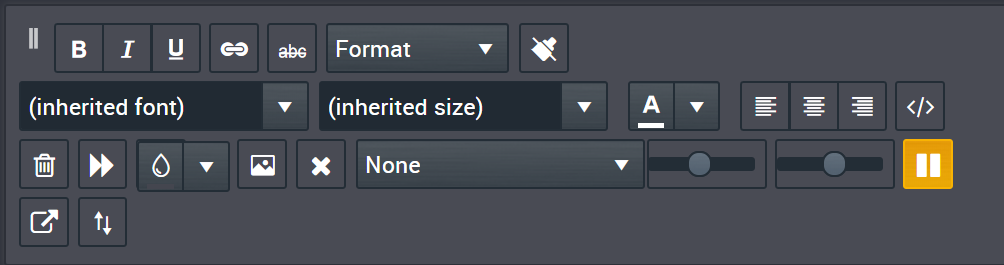
An editing toolbar will appear. Aside from the standard text formatting options there are a few additional features in the toolbar.
Move toolbar.
Click on the || icon at the top left hand corner and drag the toolbar to a different spot on the screen.
Delete tile
Click on the rubbish bin icon to delete the current tile.
There is no confirmation and the tile will be automatically deleted.
Switch slides
Each tile has two slides, a front and a back. By default only one side is displayed.
Use the Set slide transition icons to display both sides of the tile when in View Mode.
Click the >> icon to switch between the tile slides.
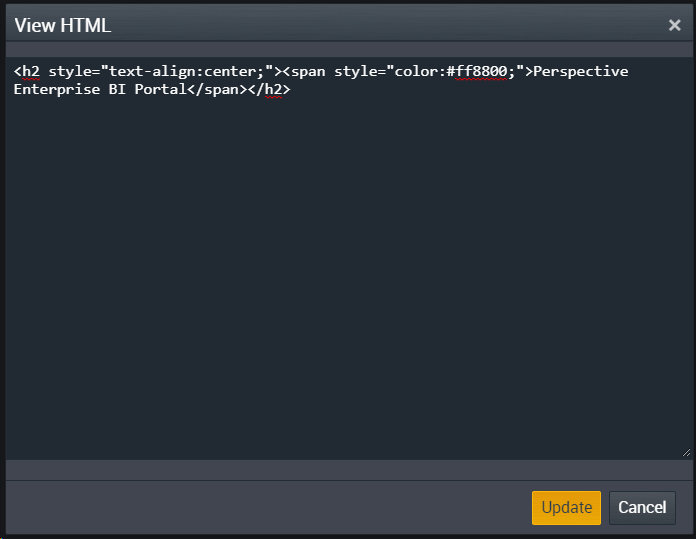
HTML formatting
Click the </> icon to use your own HTML code to format the tile.
Set Background
Select a tile background colour from the colour palette or enter in a hexadecimal code.
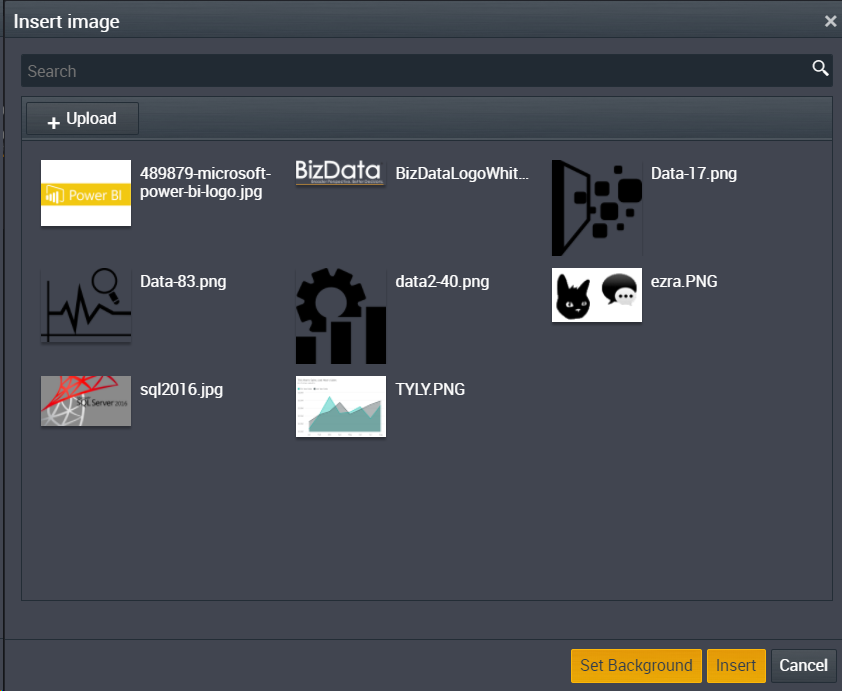
Or you can click on the image icon to add an image as a background.
Upload an image and then select it.
You can choose to insert the image or set the image as a background for the tile.
Delete image
Click the X icon to delete background image.
Add a hyperlink
Click the chains icon to add a hyperlink to the tile. You can choose to have the link open in a new tab.
Set slide transition
- None - default (only one side of the tile will display)
- Carousel
- Fade
- Flip
- Slide
Time between transition
The first slide bar sets the time in seconds of the slide display.
Therefore, how long one slide will be displayed before transitioning to the back slide.
Transition speed
The second slide bar sets the speed in seconds of the animation transition from the front slide to the back slide.
Therefore, how fast or slow the transition of the slide will be.
Pause on hover
If the pause icon is selected, the tile face will pause if the mouse is hovering over the slide.
Once the mouse is off the slide the transition of the slides will continue.
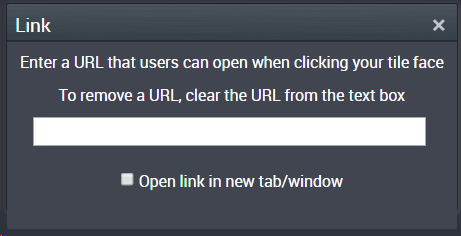
Add a link to tile face
Click the link icon to add a link to the tile face. You can choose to have the link open in a new tab.
Add scrollbars
Click on the up/down arrow icon to add scrollbars to the tile.
How do I edit a tile layout?
To edit a tile layout, click the Edit Mode button in the top right hand corner.
Click Actions.
Select Edit under ‘Layouts’.
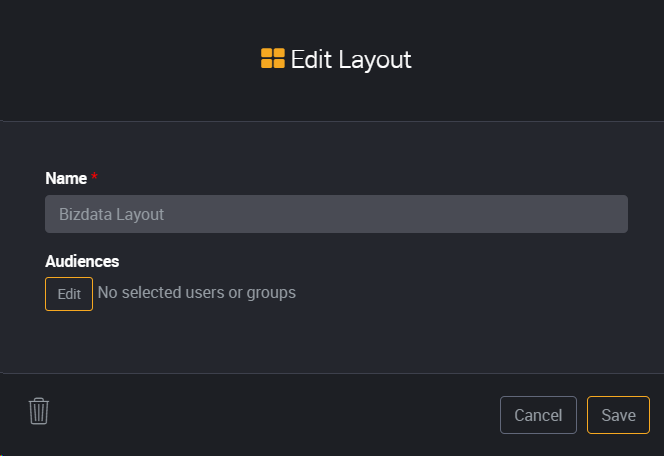
You can edit the layout name, change the target audience, or delete the layout from here.
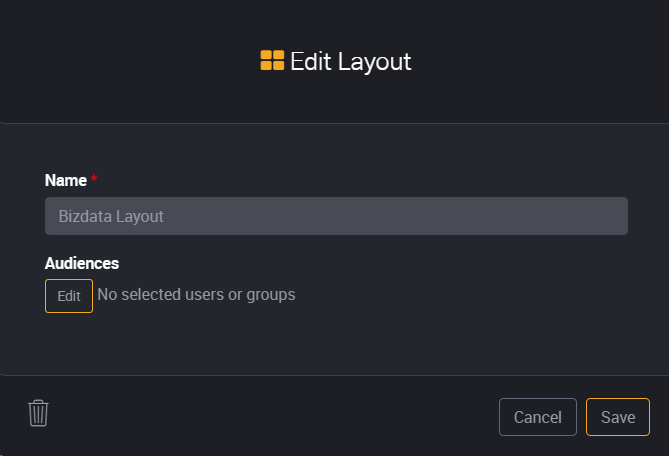
Click Save to save any changes made.
How do I rearrange or resize the tiles on my layout?
Click the Edit Mode button in the top right hand corner.
Hover over the tile you want to move or resize.
Click and hold the hand icon at the bottom left hand corner of the tile to move it.
Click on the resizing arrow icon and drag the tile in or out to resize it.
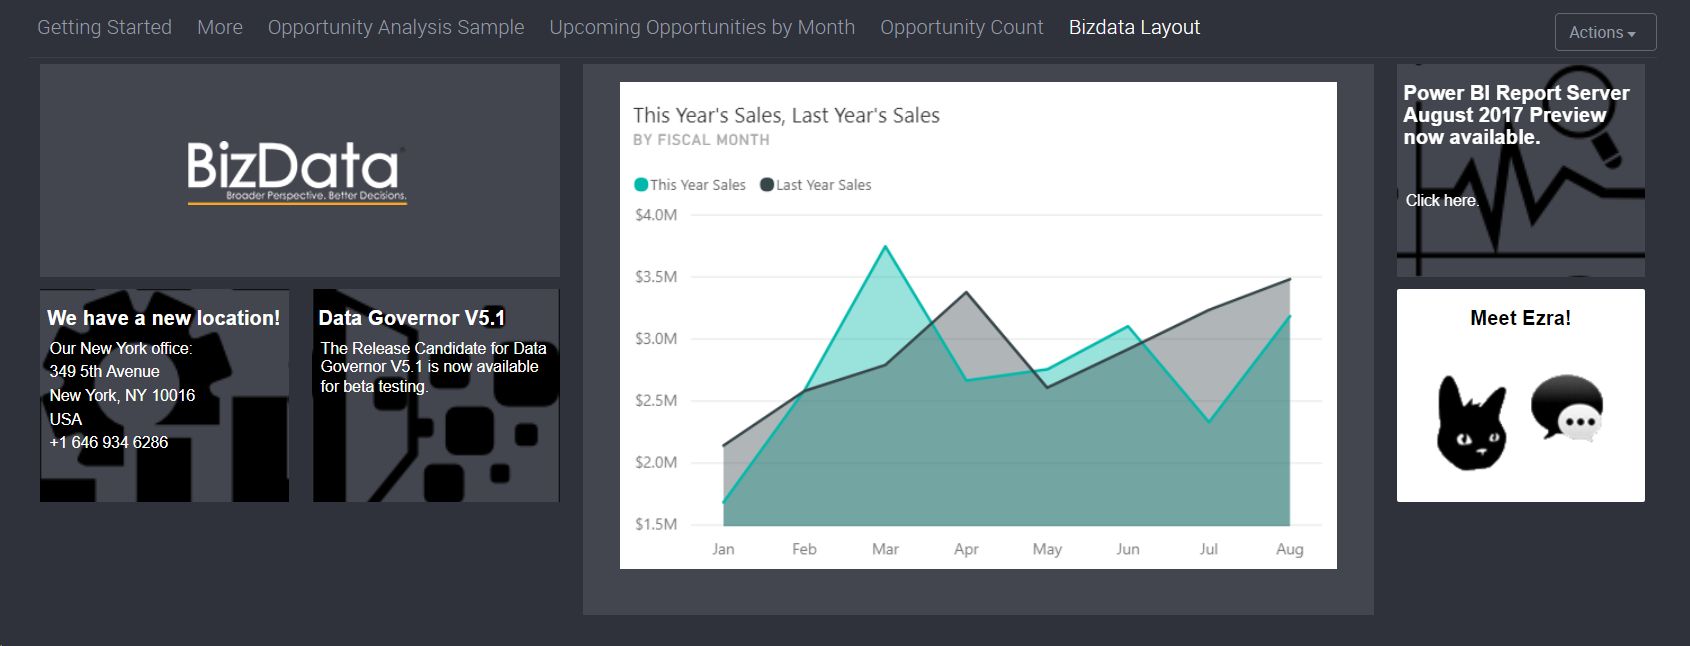
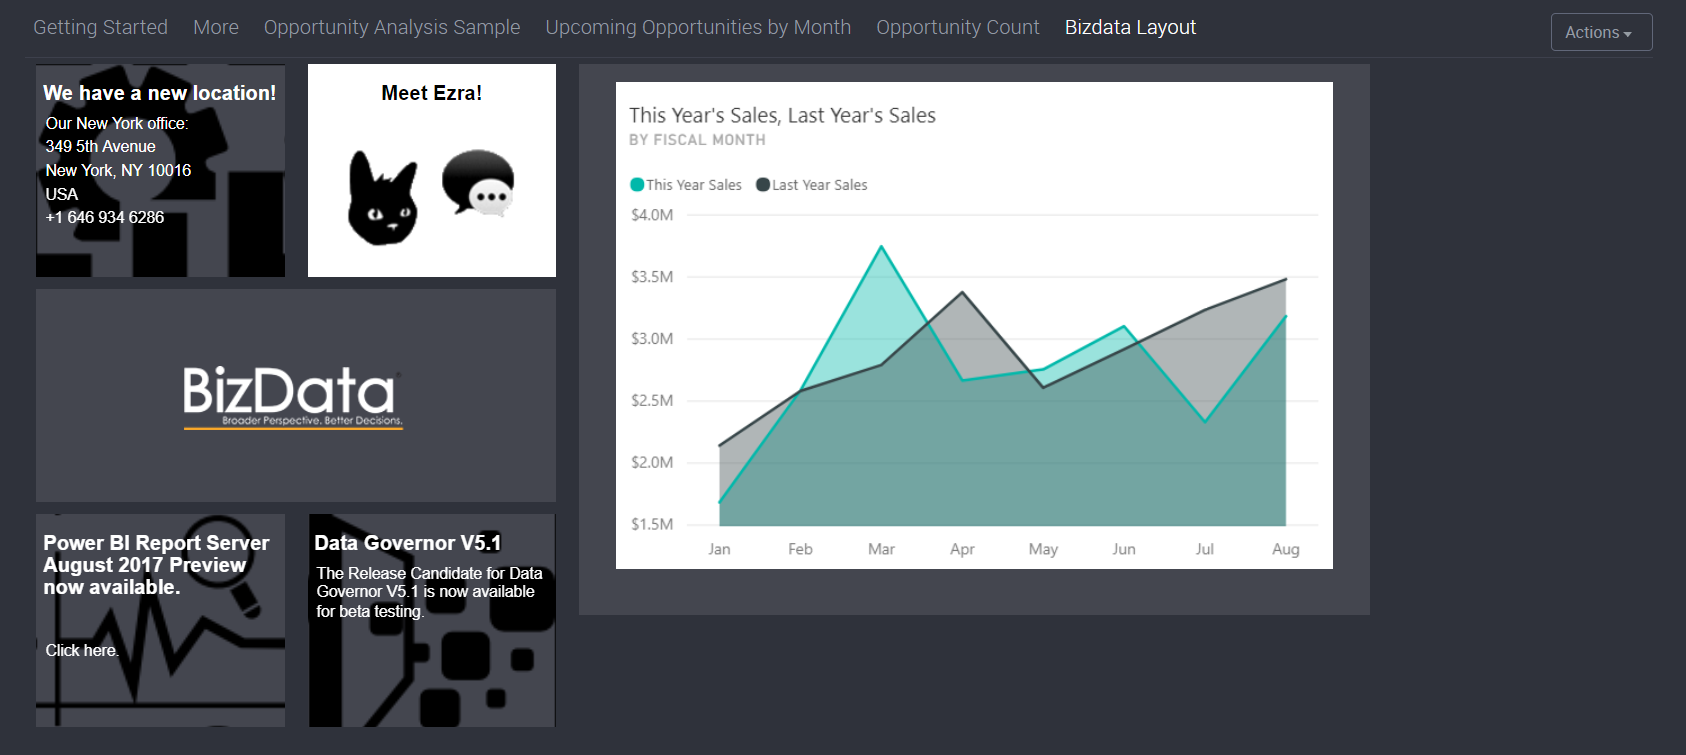
Below are two examples of the same tiles used in different layouts.
How do I pin content to the tile layout?
Loome Publish allows you to pin asset content to a tile layout.
When an asset is embedded it will open within the portal screen.
Asset options will be listed in the navigation pane.
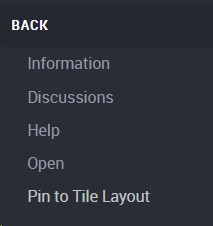
To pin an asset
Click on Pin to Tile Layout.
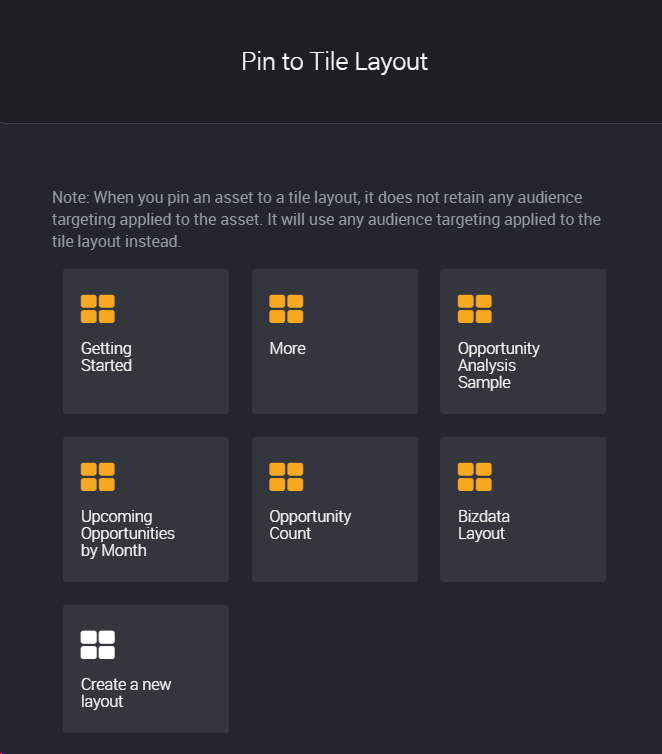
A list of existing tile layouts will display.
Select a tile layout to pin to or select Create a new layout to pin to a brand new layout.
Pinned content will inherit target audiences of the tile layout and not from the asset itself.
So, you should be cautious not to pin sensitive data to a tile layout without the correct target audience being set.
How do I assign tile layouts to specific users only?
Click on the top left icon to display the portal layouts.

Click on the layout you want to work with.
Click the Edit Mode button at the top right hand corner of the screen.
From there, click the Actions button.
Select Edit under ‘Layouts’.
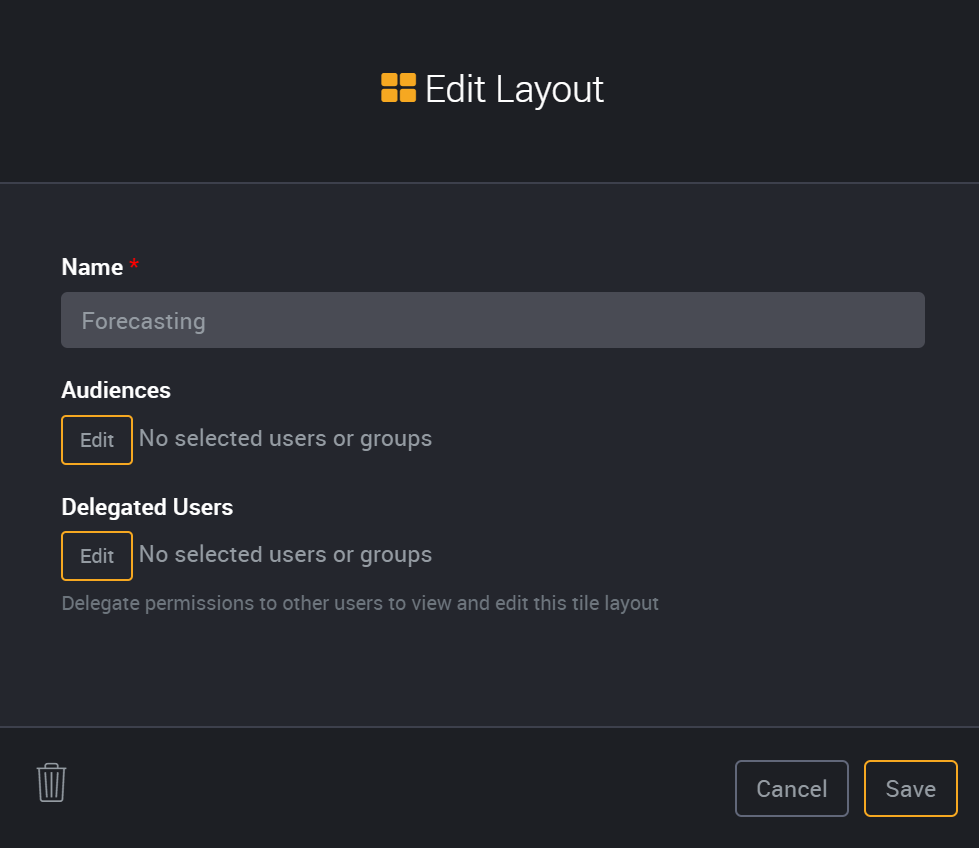
To add an audience click the Edit button under ‘Audiences’.
Start by typing the name into the the field. A list of users and groups will appear as you type. Select the user or group you want to assign as an audience.
Click Close.
Click Save.
How do I delegate tile layouts to users?
Administrators can assign users or groups to manage existing tile layouts. Once delegated the user will have editing permissions for that particular layout.
To delegate a tile layout to a user or group, click on the layout
Click the Actions button.
Under ‘Layout’ select Edit.
The ‘Edit Layout’ screen will appear.
Under ‘Delegated Users’, click the Edit button to add the user.
Start by typing the name into the the field. A list of users and groups will appear as you type. Select the user or group you want to delegate the layout to.
Click Close.
Click Save.
Delegated users can also be added when the tile layout is first created.
How do I import tile layouts to the Control Node?
Version 4.7 of Loome Publish allow tile layouts from Content nodes to be imported and synced to the Control node.
Login to the Control node.
From the Menu drop down, select Source Systems.
Find the portal you want to import the tile layouts from into the Control node.
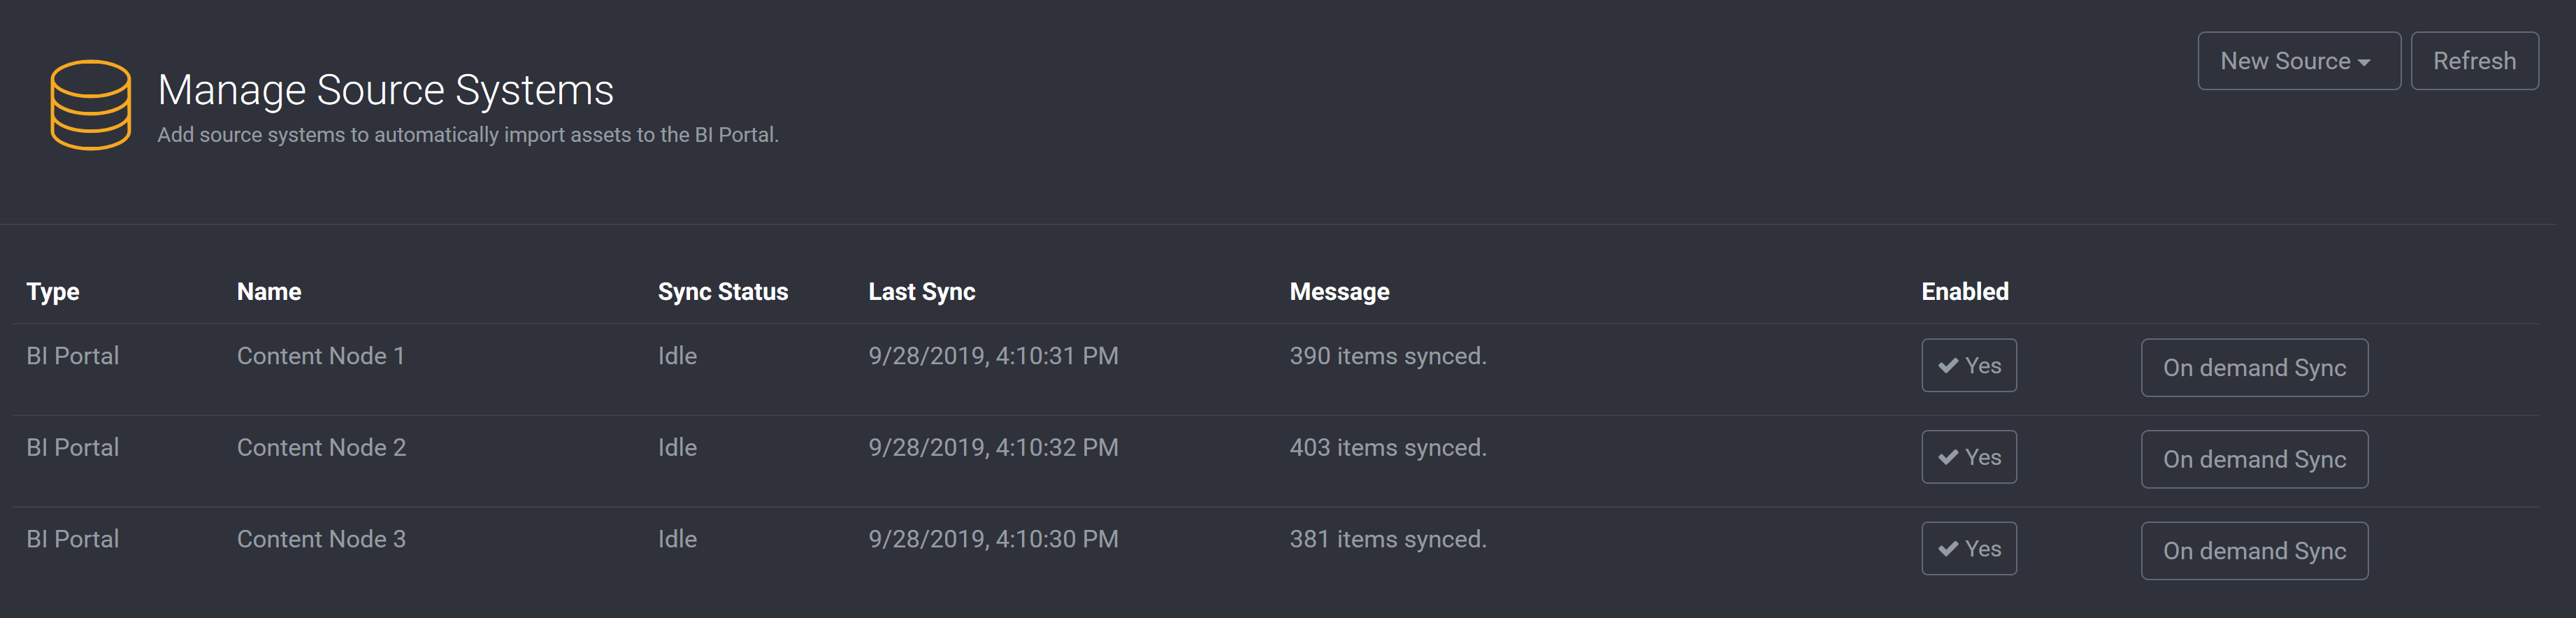
Click on the corresponding On demand Sync button.
Make sure that source system you are trying to sync is set to Enabled.
How do I pin the asset board of a term to a tile layout?
From the Source System, select the term you would like to pin to a layout.
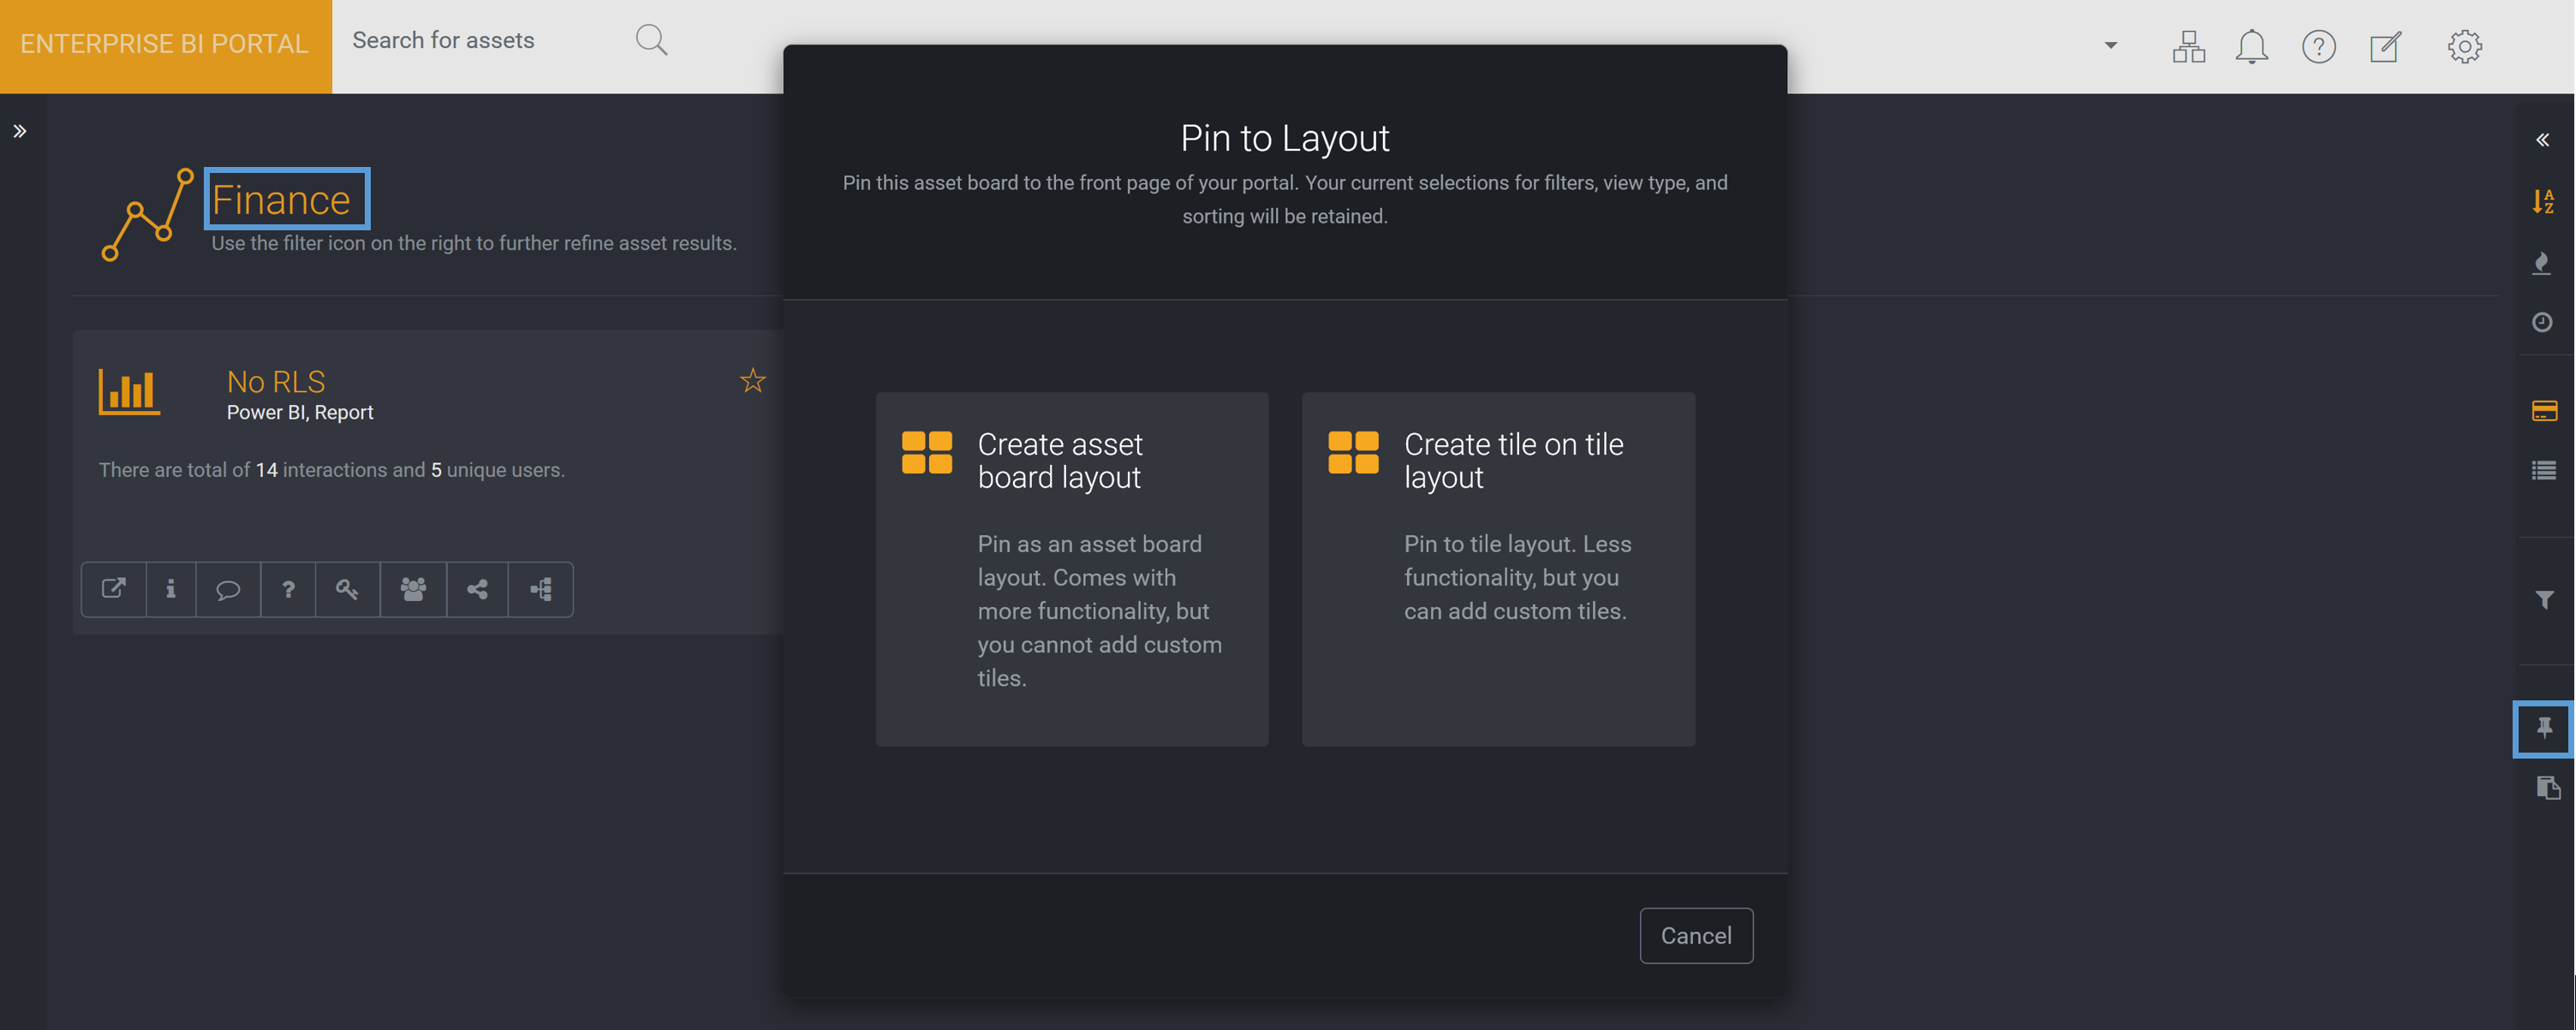
Click the pin icon on the right hand side.
You will be presented with two options:
- Create asset board layout - Pin as an asset board layout. Comes with more functionality, but you cannot add custom tiles.
If you select this option the term will be pinned as a board layout.

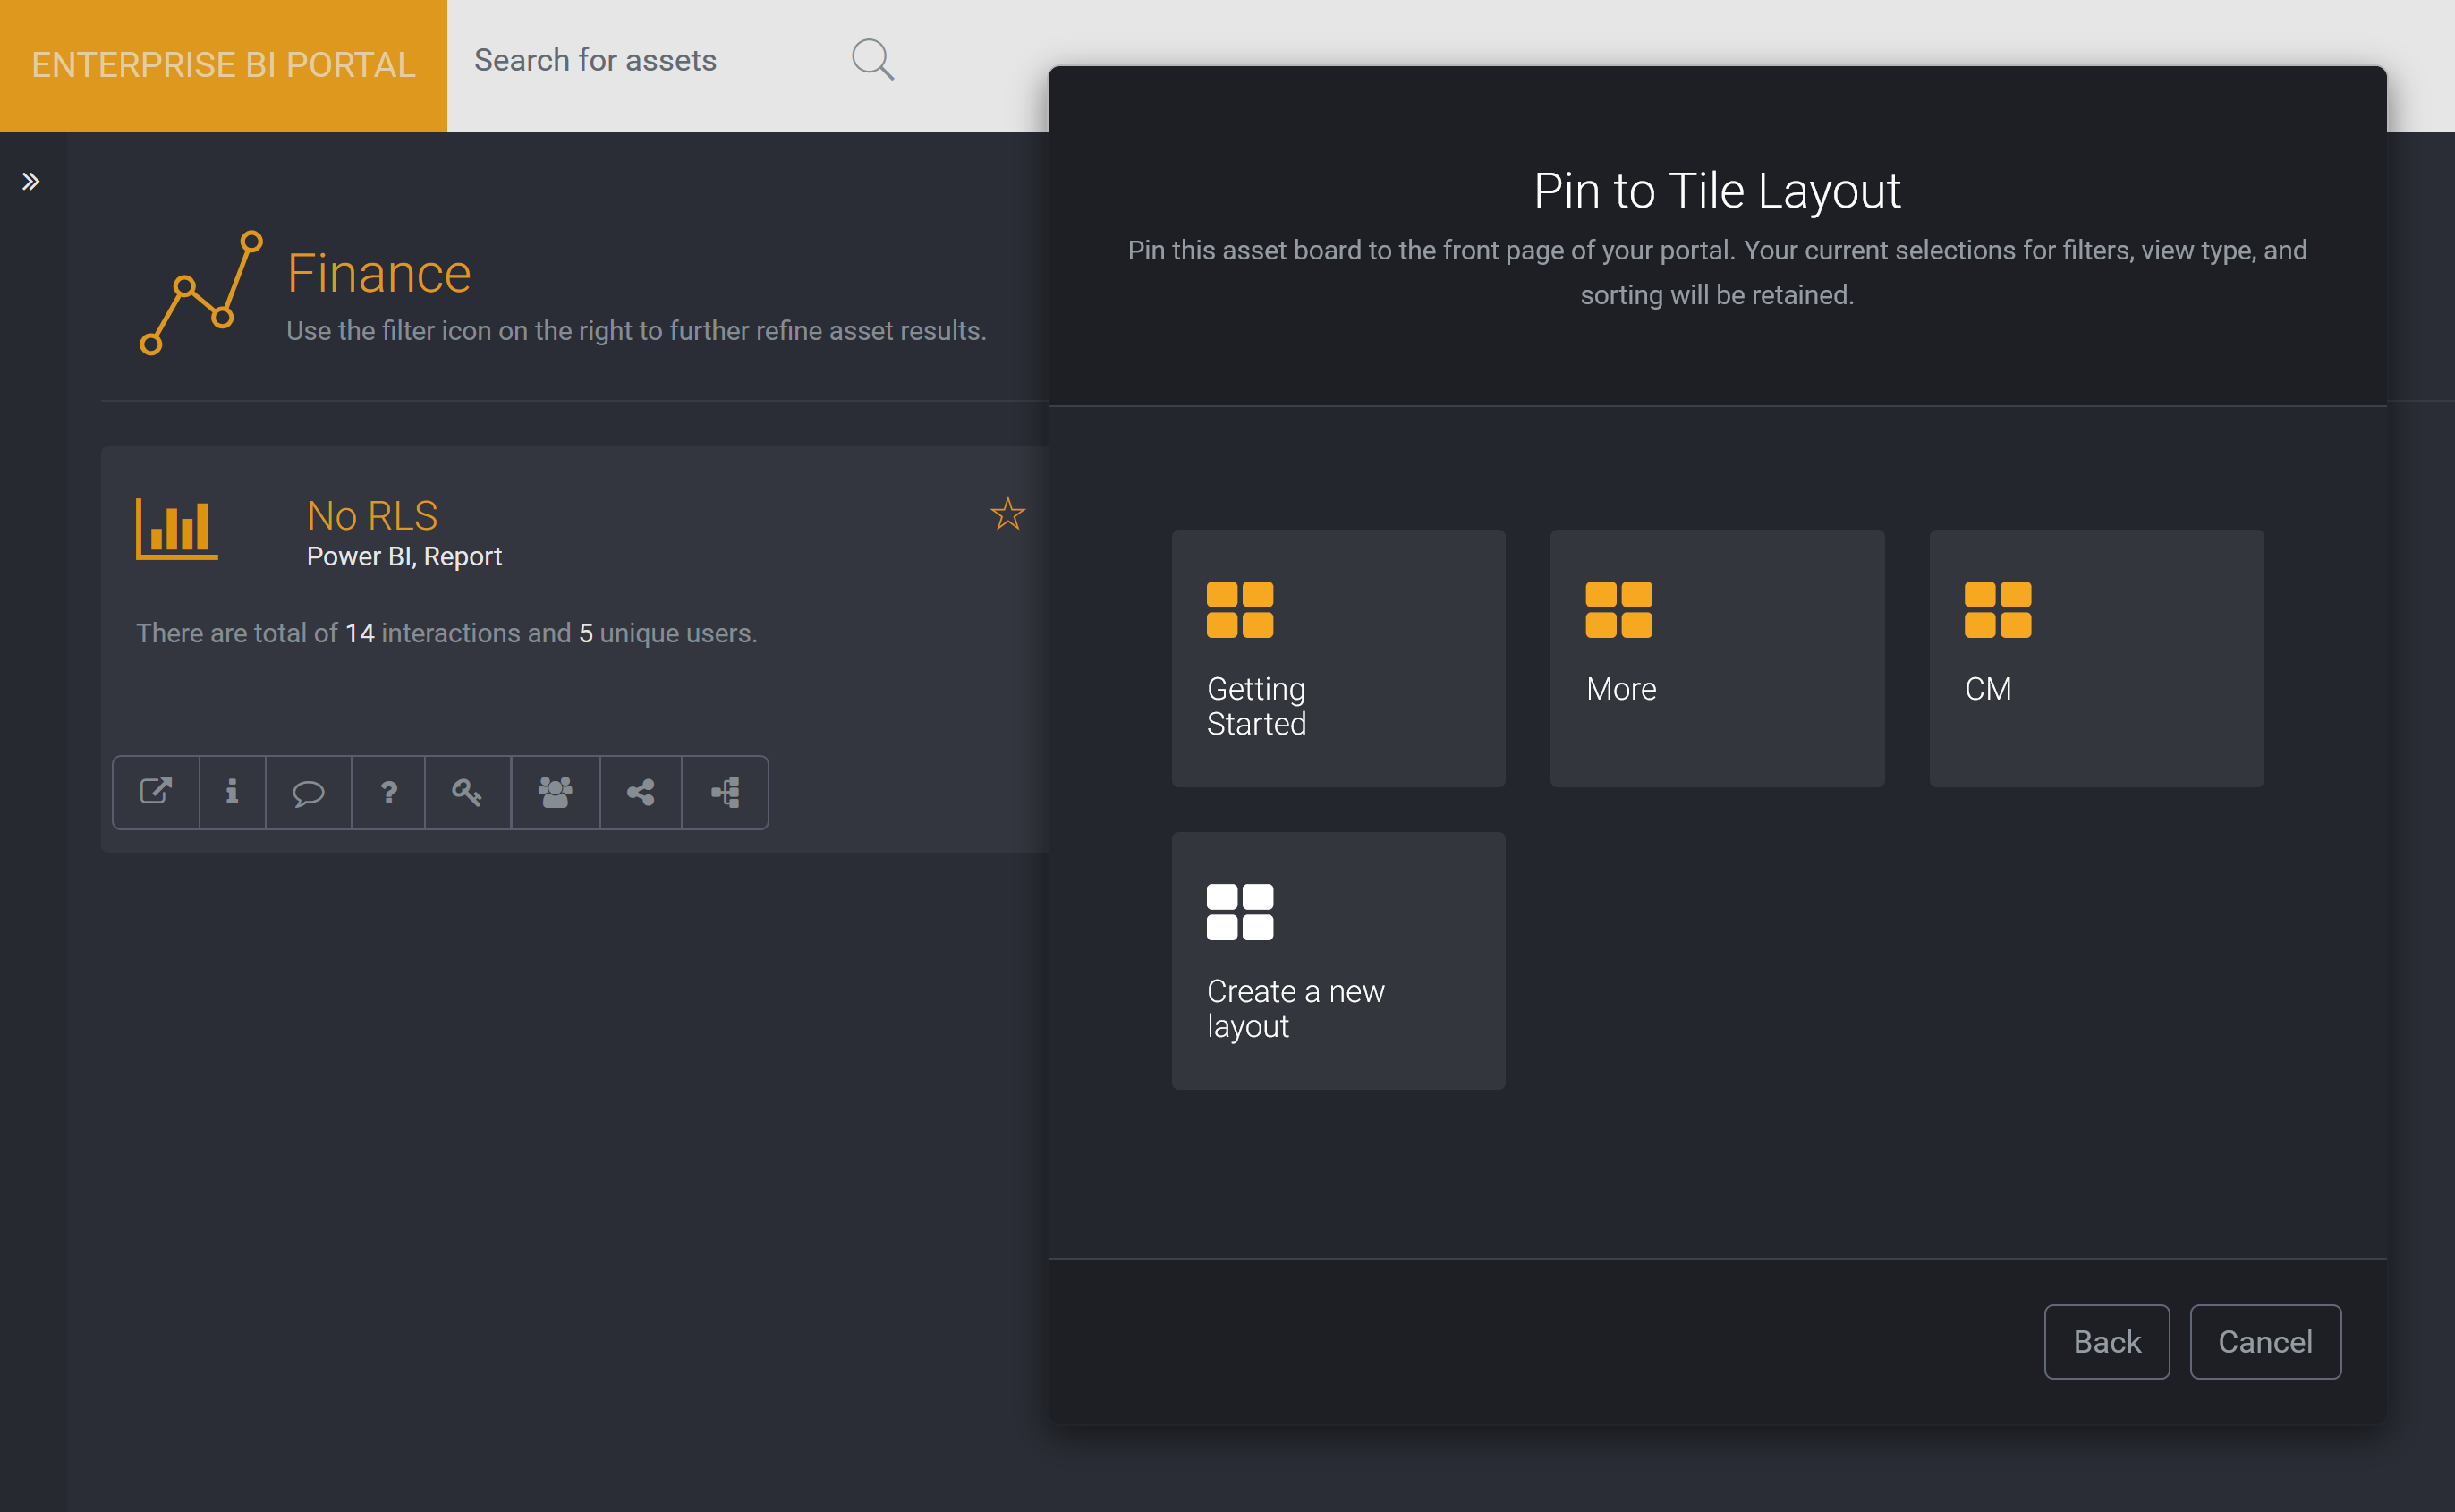
- Create tile on tile layout - Pin to tile layout. Less functionality, but you can add custom tiles.
If you select this option, the following screen will display.
Select the tile layout you would like to pin to.
How do I add a link to an embedded asset tile?
Administrators and delegated users can add a link to a new or existing embedded asset tile. Clicking on this tile will direct users to the saved URL.
Click on Edit mode on the top right of your tile layout.
Click on an existing embedded asset tile that you want to link to a URL (or create a new embedded asset tile and once created, in edit mode, click on the tile).
Provide the asset’s URL.
Provide the Embed URL.
Provide the Overlay Link. When this tile is clicked it will link to this URL. (You cannot use any interactive functions of tiles when this is applied).
Select whether this link will open in a new tab or on the same page.
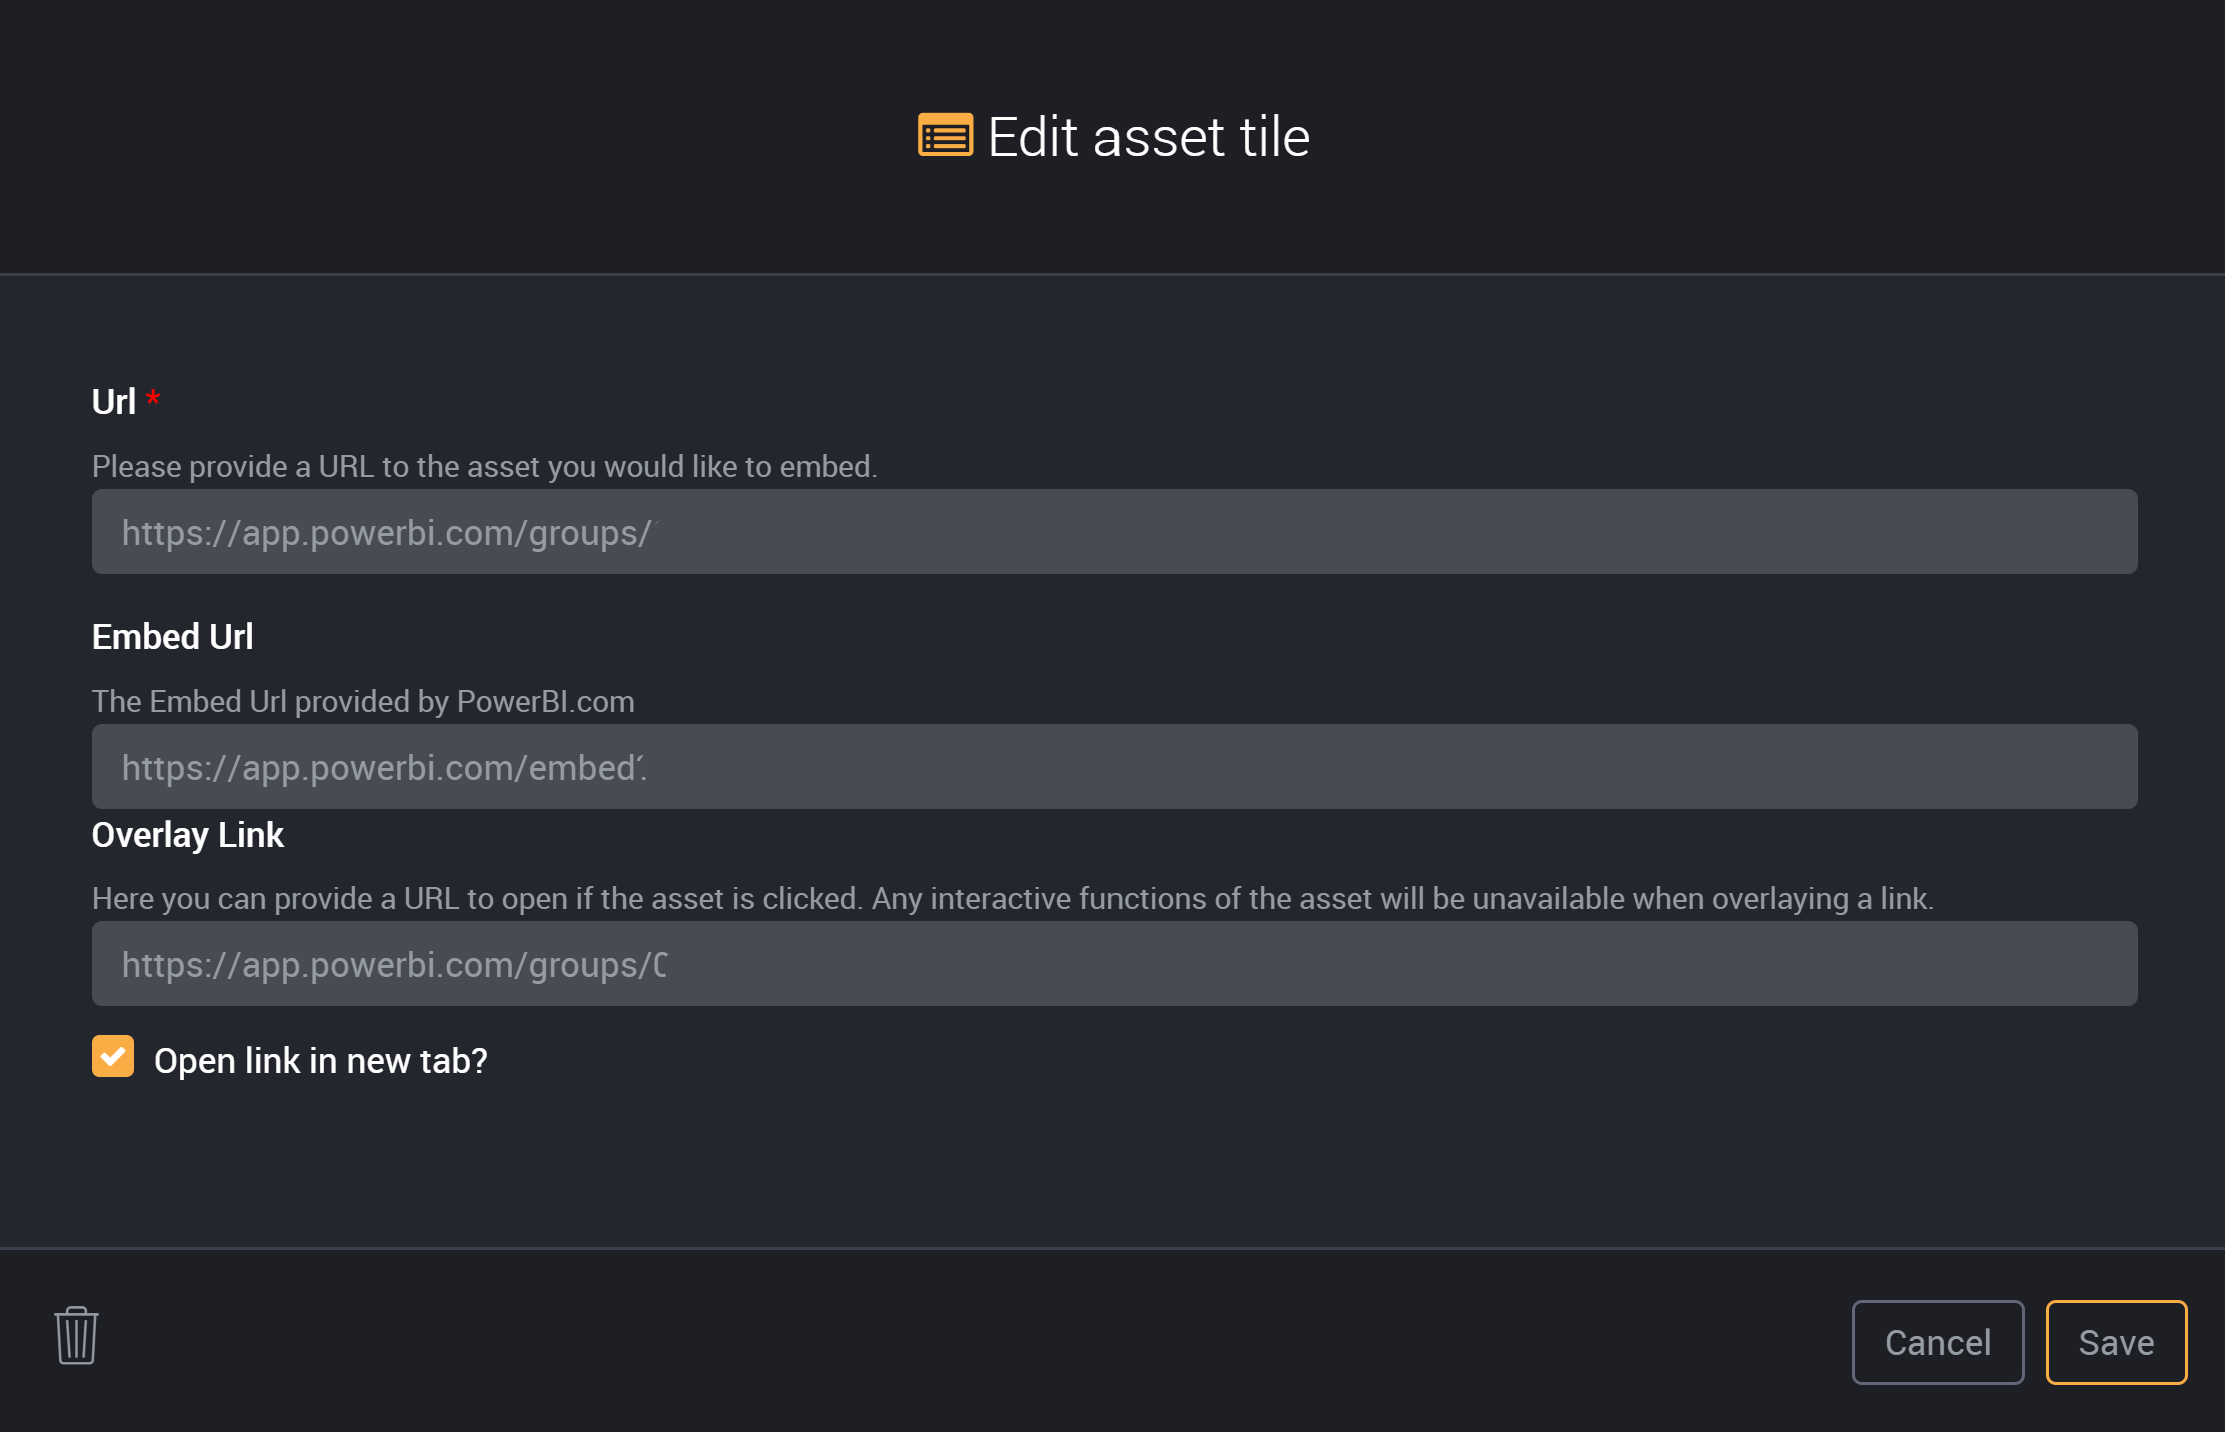
Click Save and this tile will now link to your saved URL.