Active Directory App Registration
Follow the steps below to register an application within Azure Active Directory. This provides permission for the application to talk to Active Directory.
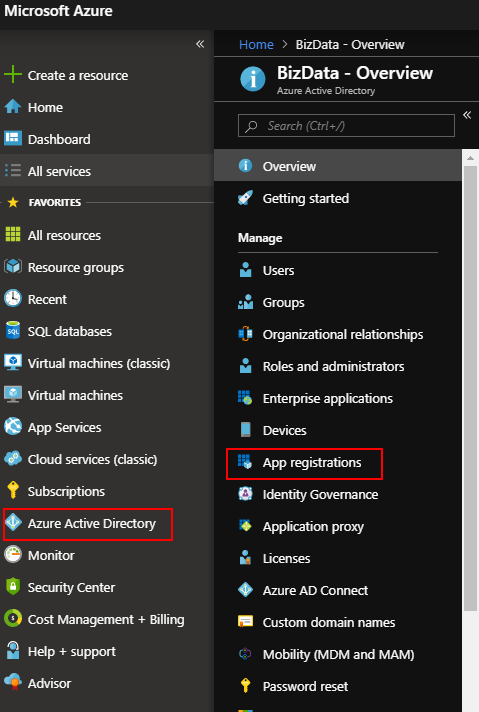
From the Azure menu, select ‘Azure Active Directory’.
Then click on ‘App Registrations’.
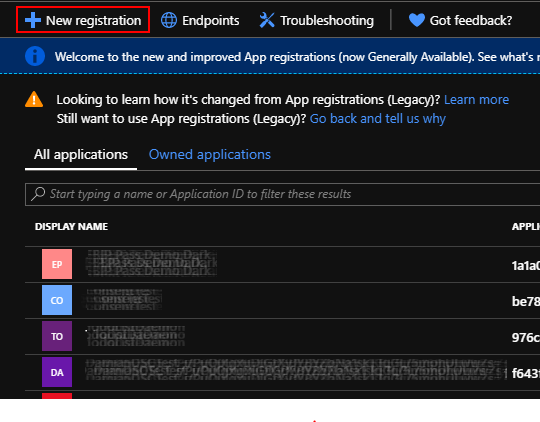
Click on the ‘New application registration’ button.
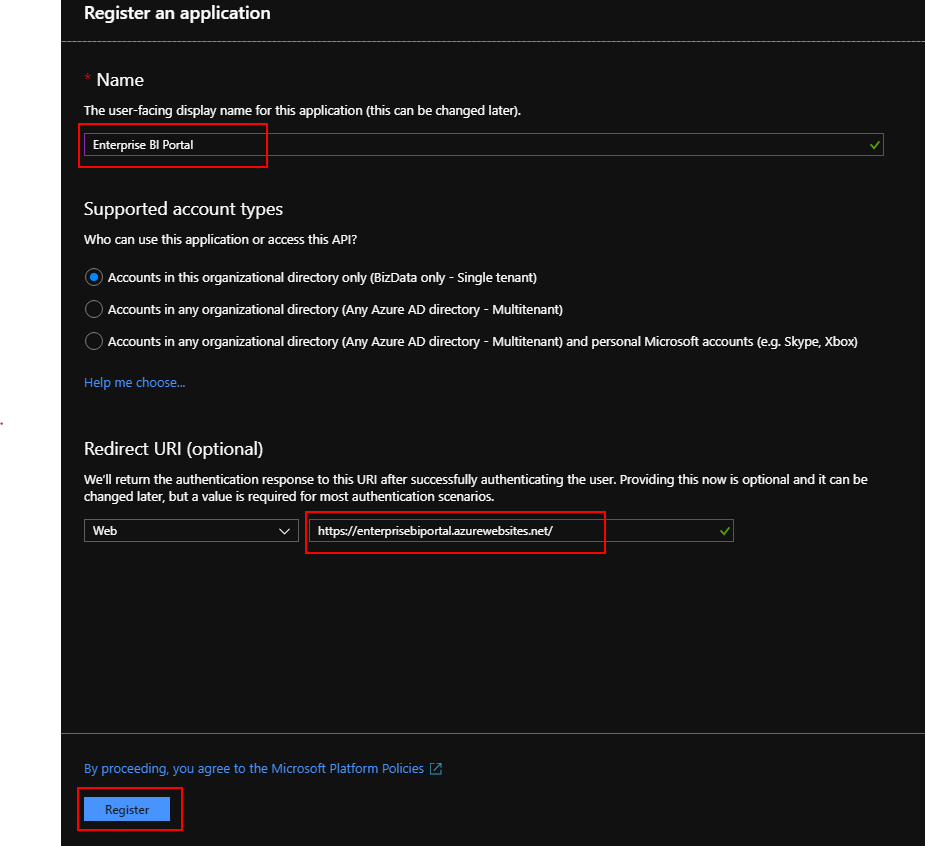
Type a name for your application registration, generally this would be the same as your Web App name.
Enter the redirect URI for your application. This is the URL you created for the Web App in the previous section.
Ensure you provide the trailing forward slash on the URL as denoted in the screenshot, failure to do so will prevent the application from working.
Click the ‘Register’ button to create the App Registration.
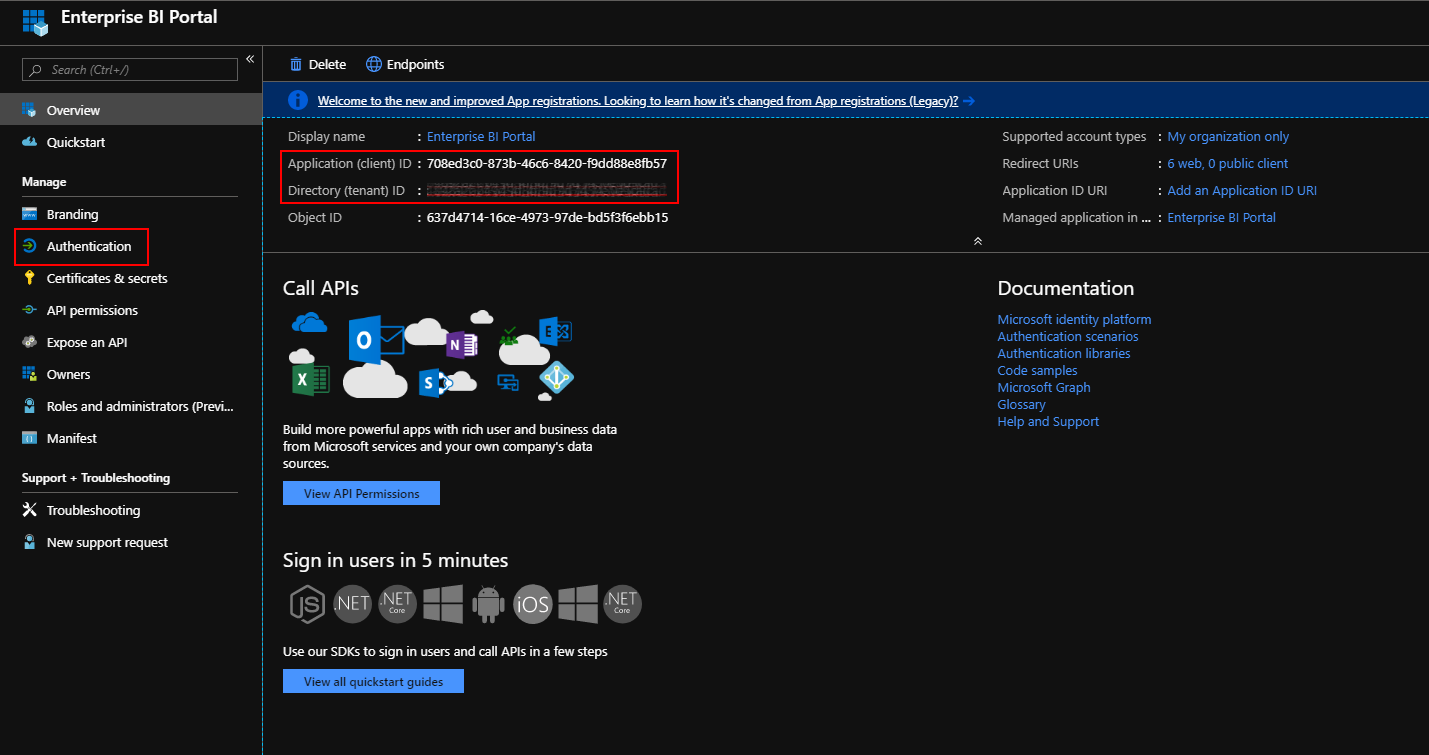
Make a note of the ‘Application ID’ and ‘Directory ID’ values, these will be used later in the installation process.
Click on ‘Authentication’ from the app registration menu.
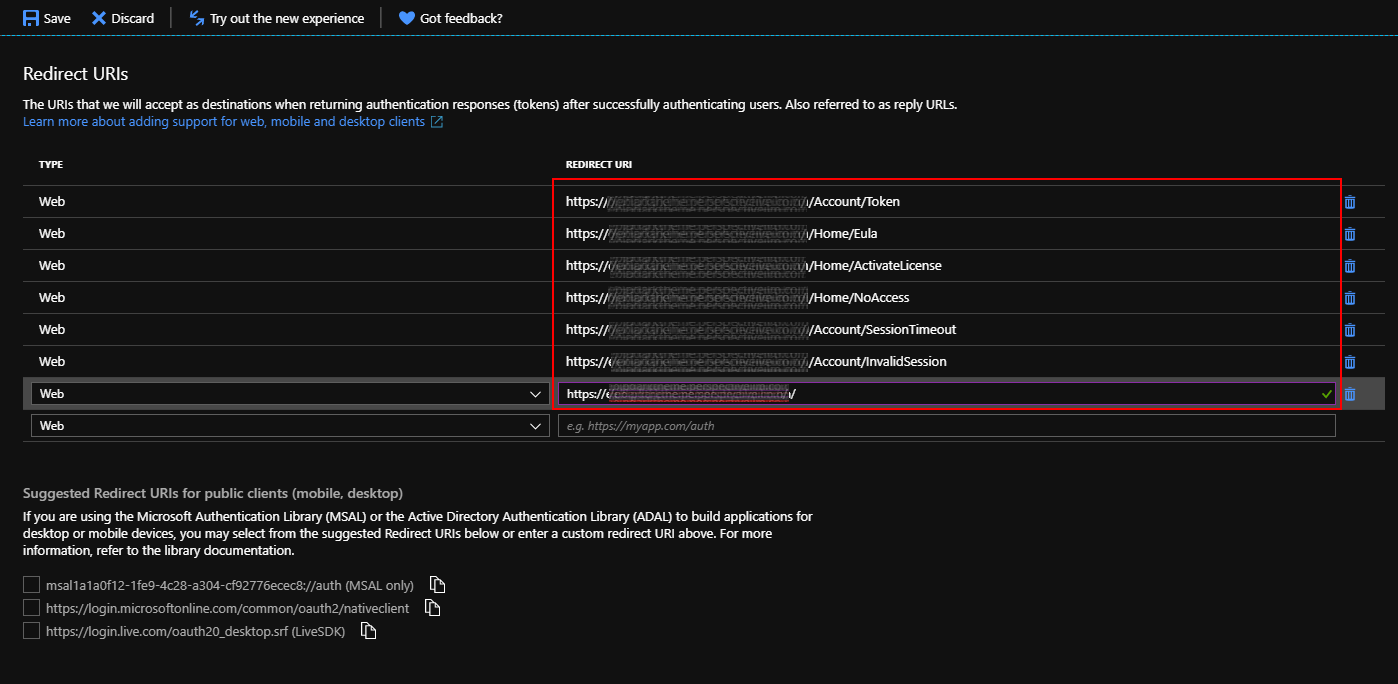
Ensure that you have the following reply URLs.
Click here to copy these values from the appendix Azure App Registration - Reply URLS.
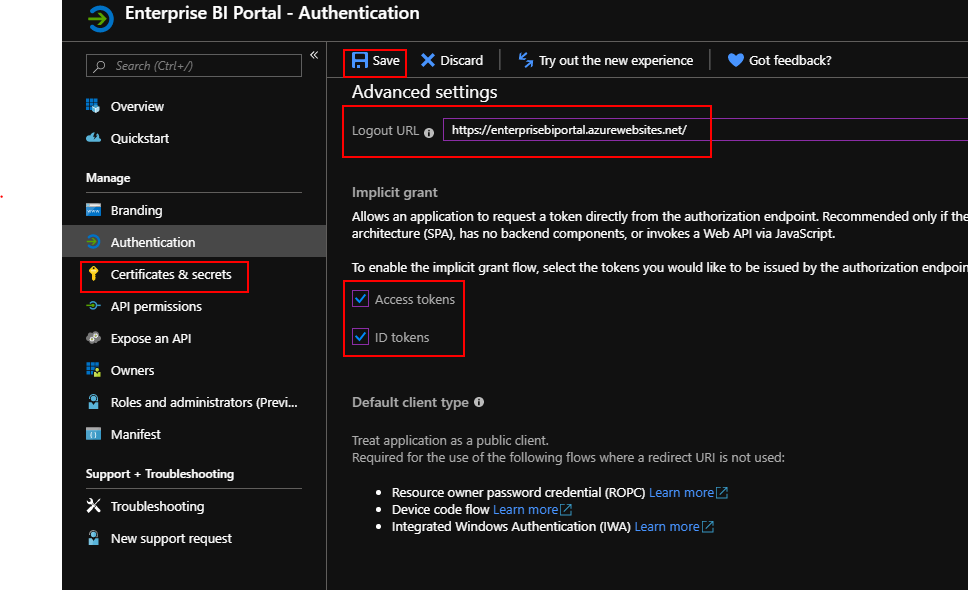
Scroll down to ‘Advanced Settings’.
Enter the ‘Logout URL’ for your application. This is the URL you created for the Web App in the previous section.
Tick the boxes for ‘Access Tokens’ and ‘ID Tokens’.
Click the ‘Save’ button above.
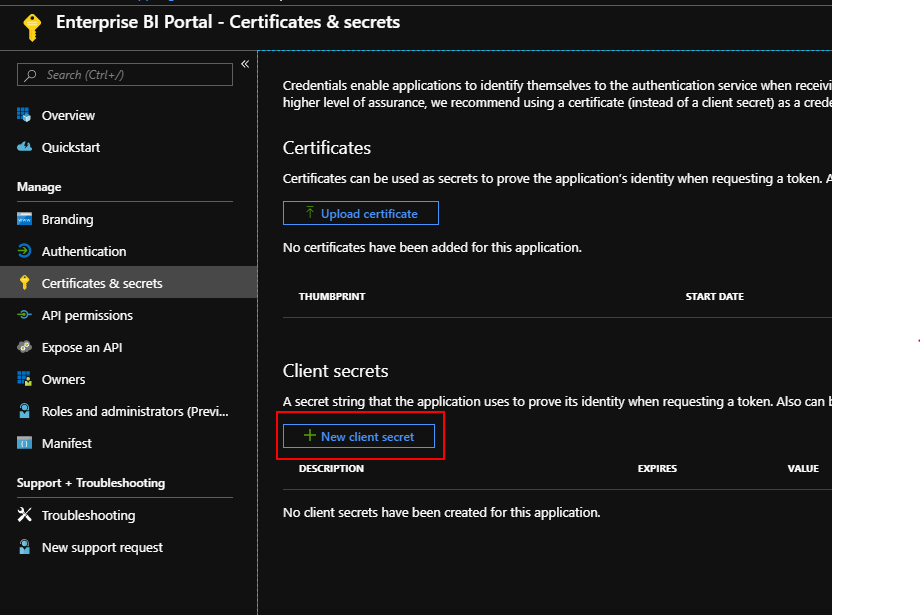
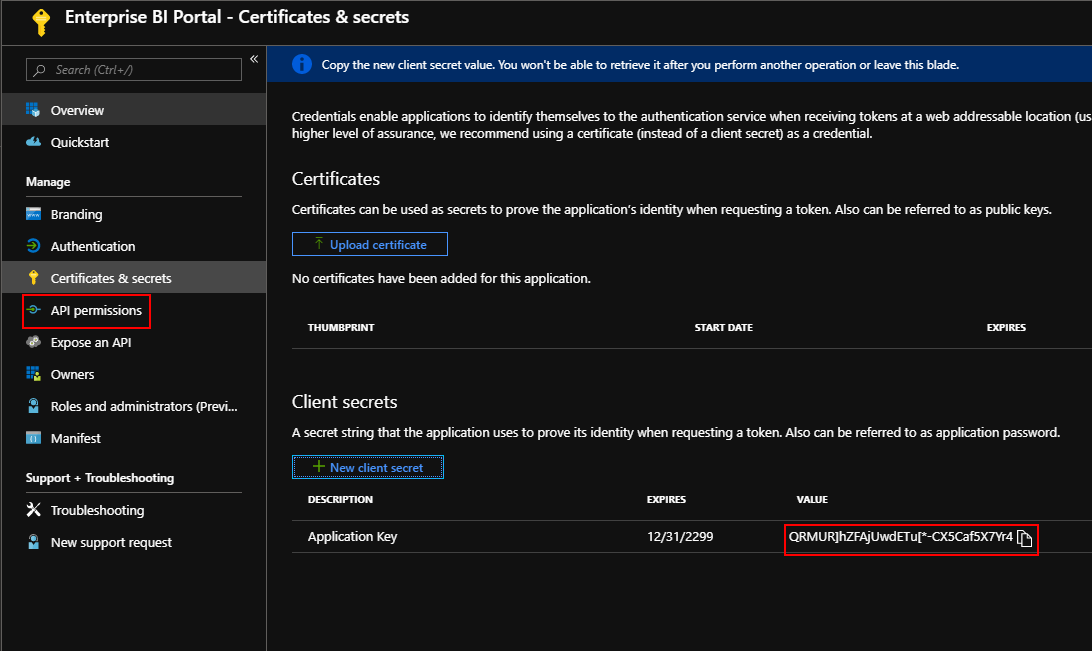
Click on ‘Certificates and Secrets’ from the app registration menu.
Click on ‘New client secret’.
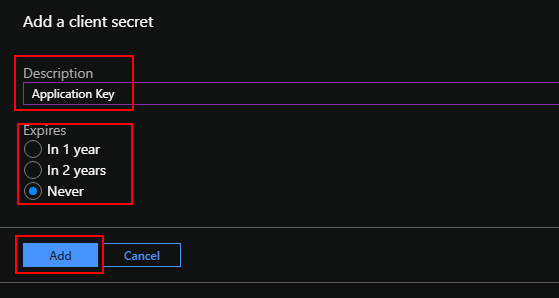
Enter a description such as ‘Application Key’ in to the ‘Description’ field.
Select an expiry date for the application key.
If you select a value other than ‘Never expires’ you will need to repeat this process once the existing key expires, and then update it within the Azure Web App settings, failure to do so will prevent Loome Publish from functioning.
Click ‘Add’.
Make note of the key that appears in the ‘Value’ field, we will use it later in the process.
You will not be able to access the key again after you leave this page, failure to make note of the key value will require you to repeat this process.
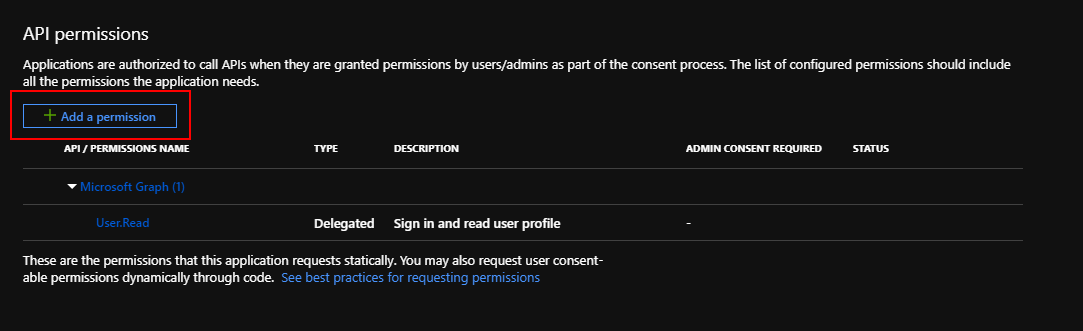
Click ‘API permissions’ from the app registration menu.
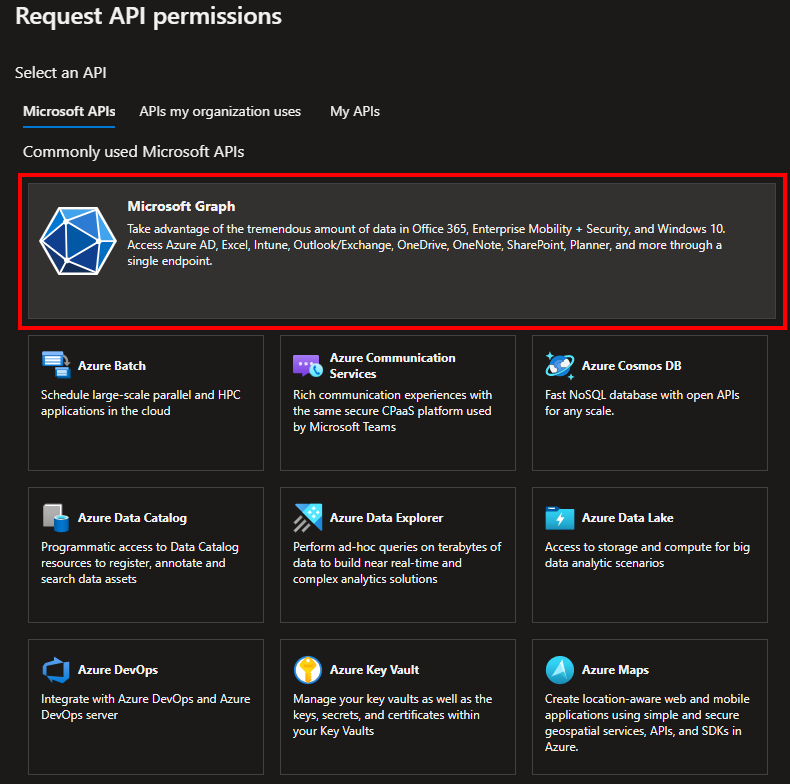
Click the ‘Add a permission’ button.
Click the ‘Microsoft Graph’ button in the flyout that appears.
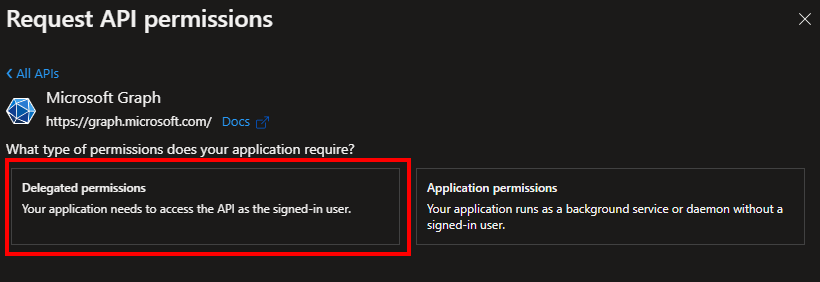
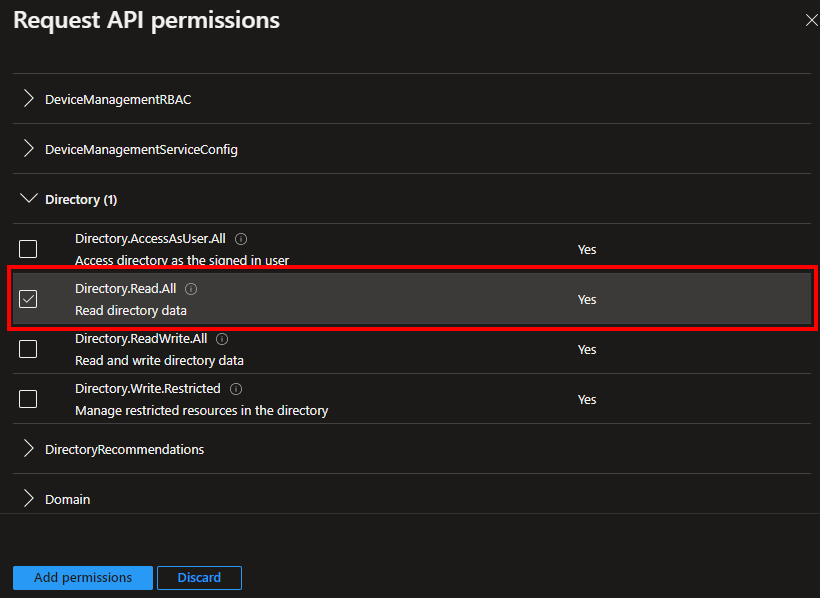
Click on ‘Delegated Permissions’.
Select the ‘Directory.Read.All’ permission.
This permission will be used to query the following endpoints on Microsoft Graph as the logged in user. - /users - /groups - /groups/{id}/members - /directoryObjects/getByIds
Scroll back up and click on ‘Application Permissions’.
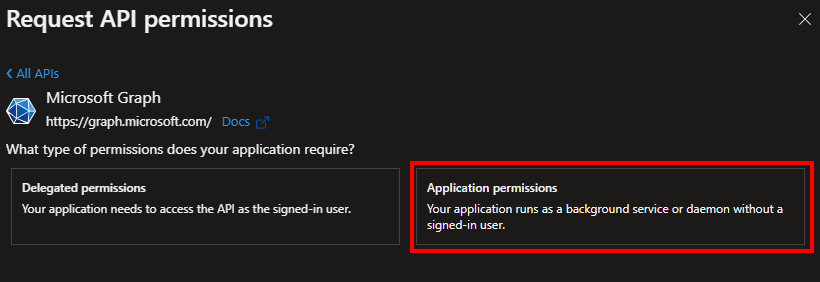
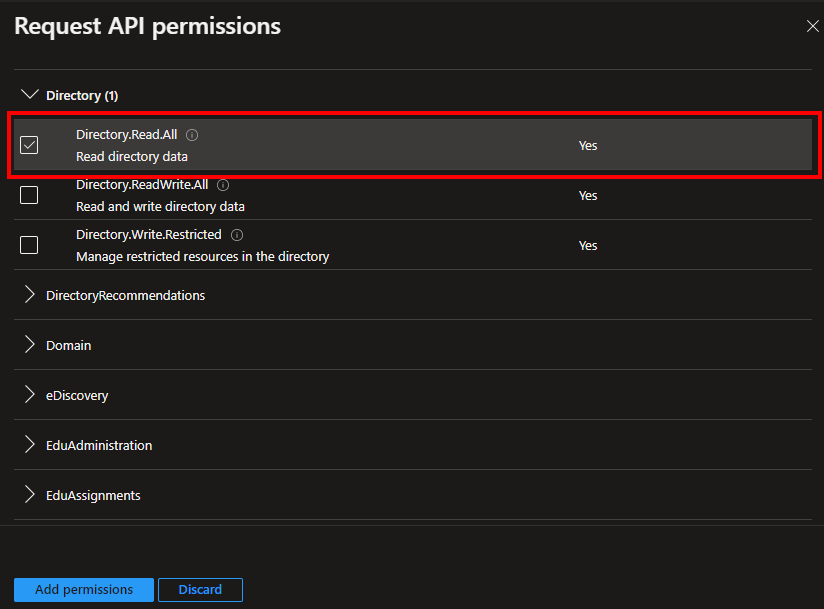
Select the ‘Directory.Read.All’ permission, then click ‘Add permissions’.
This permission will be used to query the following endpoints on Microsoft Graph as the application in order to complete search results involving users or groups. - /users - /groups - /groups/{id}/members - /directoryObjects/getByIds
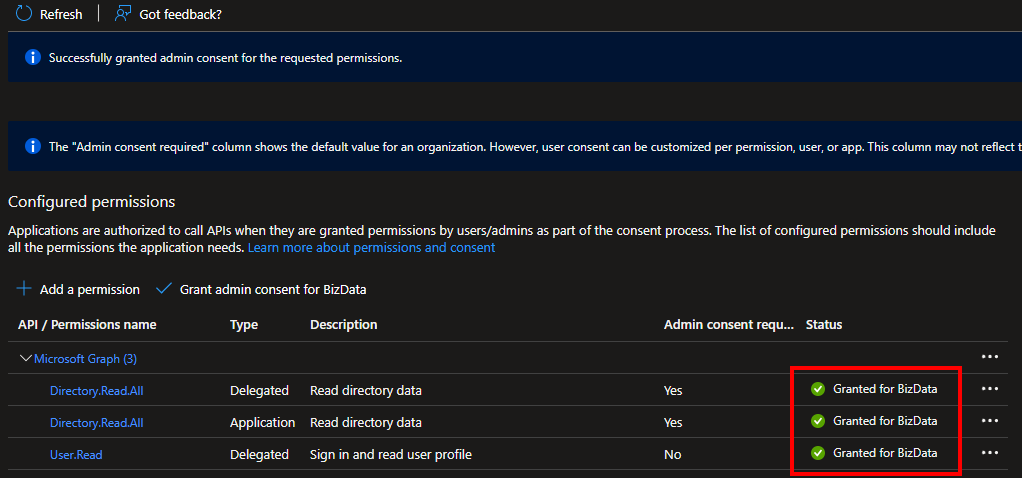
Click the ‘Grant Admin consent for Company’ button.
This step requires a Global Administrator account to complete.
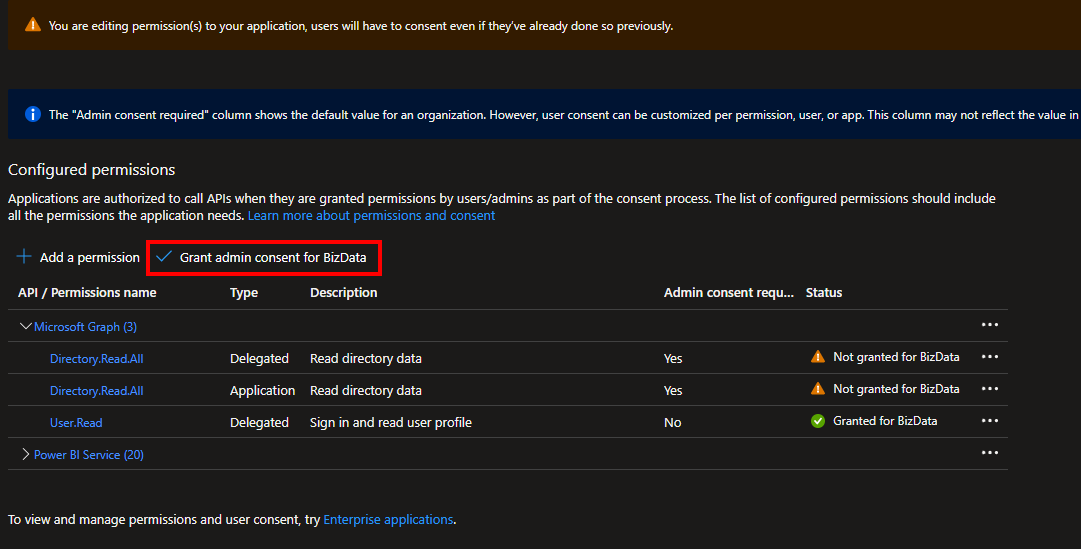
Click ‘Yes’ for the confirmation prompt.

Confirm that permissions now have the ‘Granted for Company’ tick next to each permission.
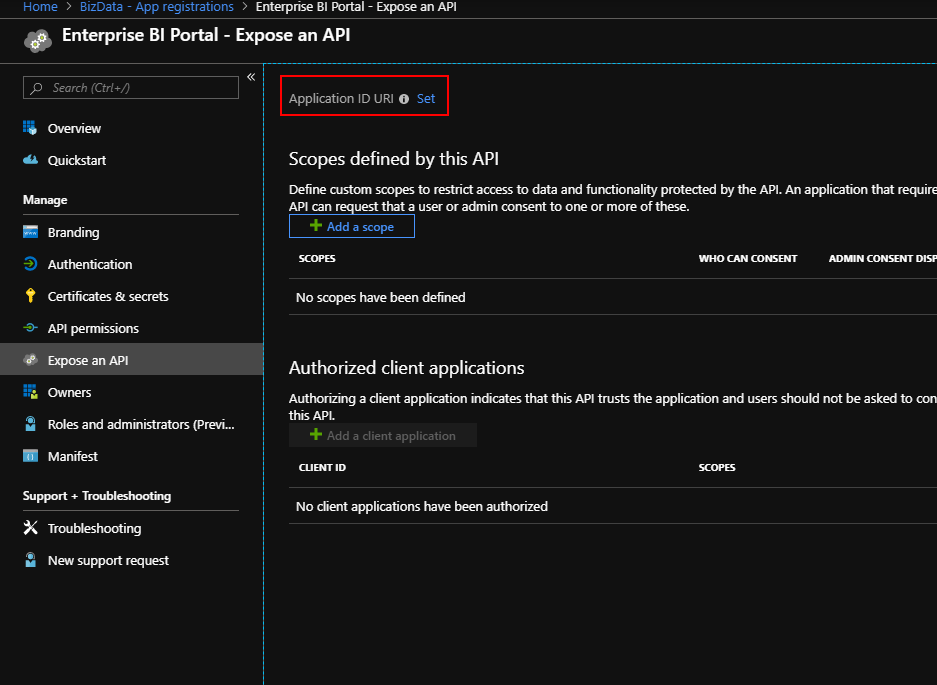
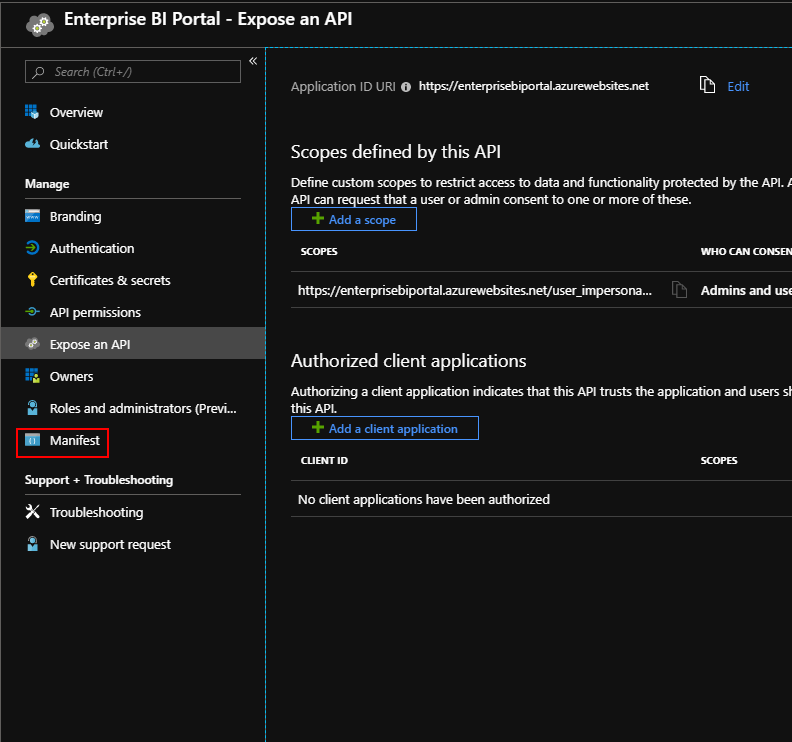
Click on ‘Expose an API’ from the app registration menu.
Click the ‘set’ link next to ‘Application ID URI’.
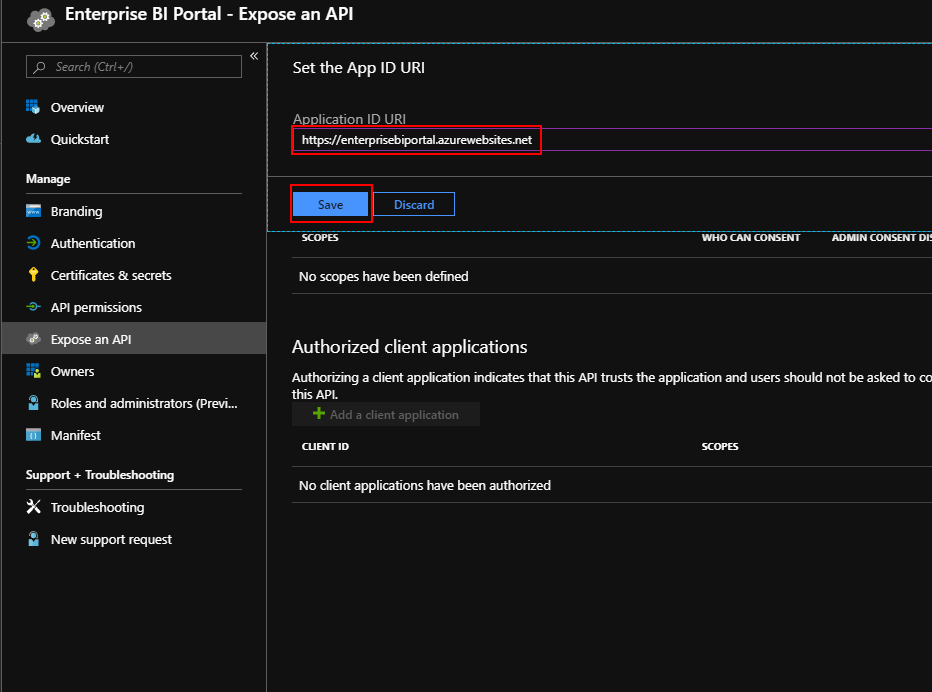
Enter the URL for the Loome Publish web application.
Click the ‘Save’ button.
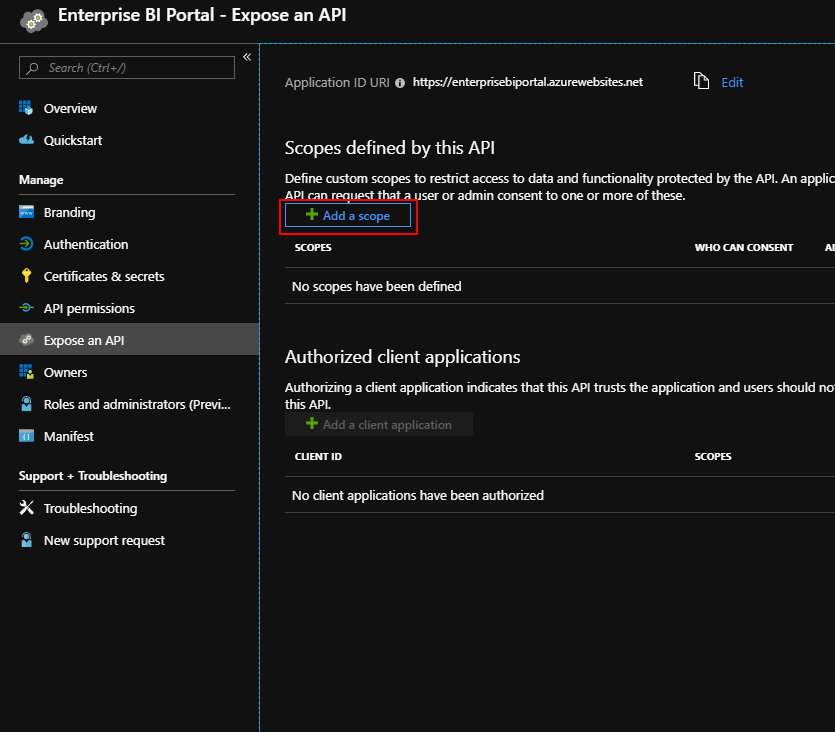
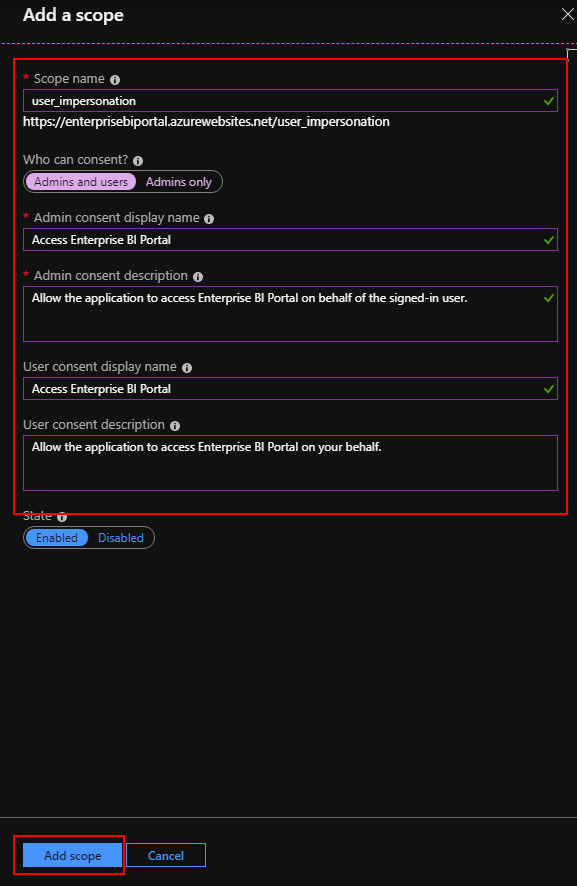
Click the ‘Add a scope’ button.
Set ‘Scope name’ to ‘user_impersonation’.
Set ‘Who can consent?’ to ‘Admins and Users’.
Set ‘Admin consent display name’ to ‘Access Loome Publish’.
Set ‘Admin consent description’ to ‘Allow the application to access Loome Publish on behalf of the signed-in user.’
Set ‘User consent display name’ to ‘Access Loome Publish’.
Set ‘User consent description’ to ‘Allow the application to access Loome Publish on your behalf.’
Click ‘Add scope’ at the bottom.
Click on ‘Manifest’ from the app registration menu.
Change groupMembershipClaims value from null to ‘All’.
Change oauth2AllowImplicitFlow value from false to true.
Change oauth2AllowIdTokenImplicitFlow value from false to true.
Click the ‘Save’ button above.