Edit your Records
Edit your Results
There are two ways to edit your records. You can edit individual records in a single editing view or you can edit all displayed records in the results table.
Individual Record Editing
You can edit your results in a few ways. You can ignore a result, assign a user to a result, and add values to your custom fields.
You can edit a result by clicking on the Edit button on the left of a row.
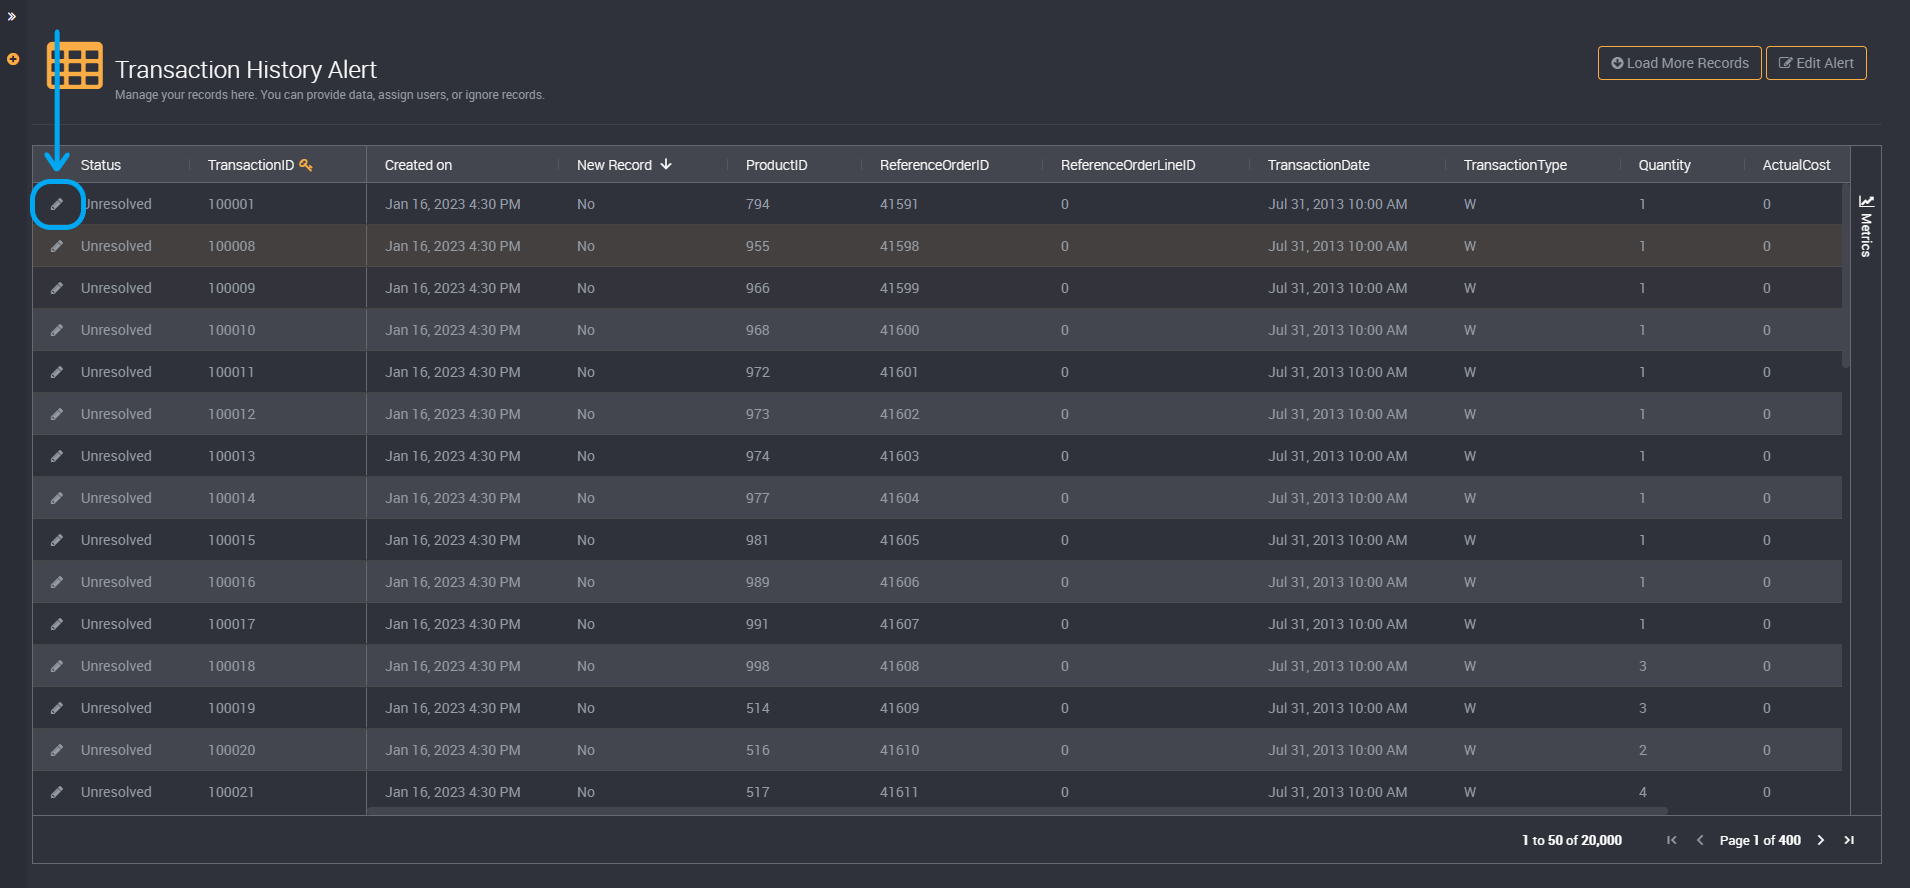
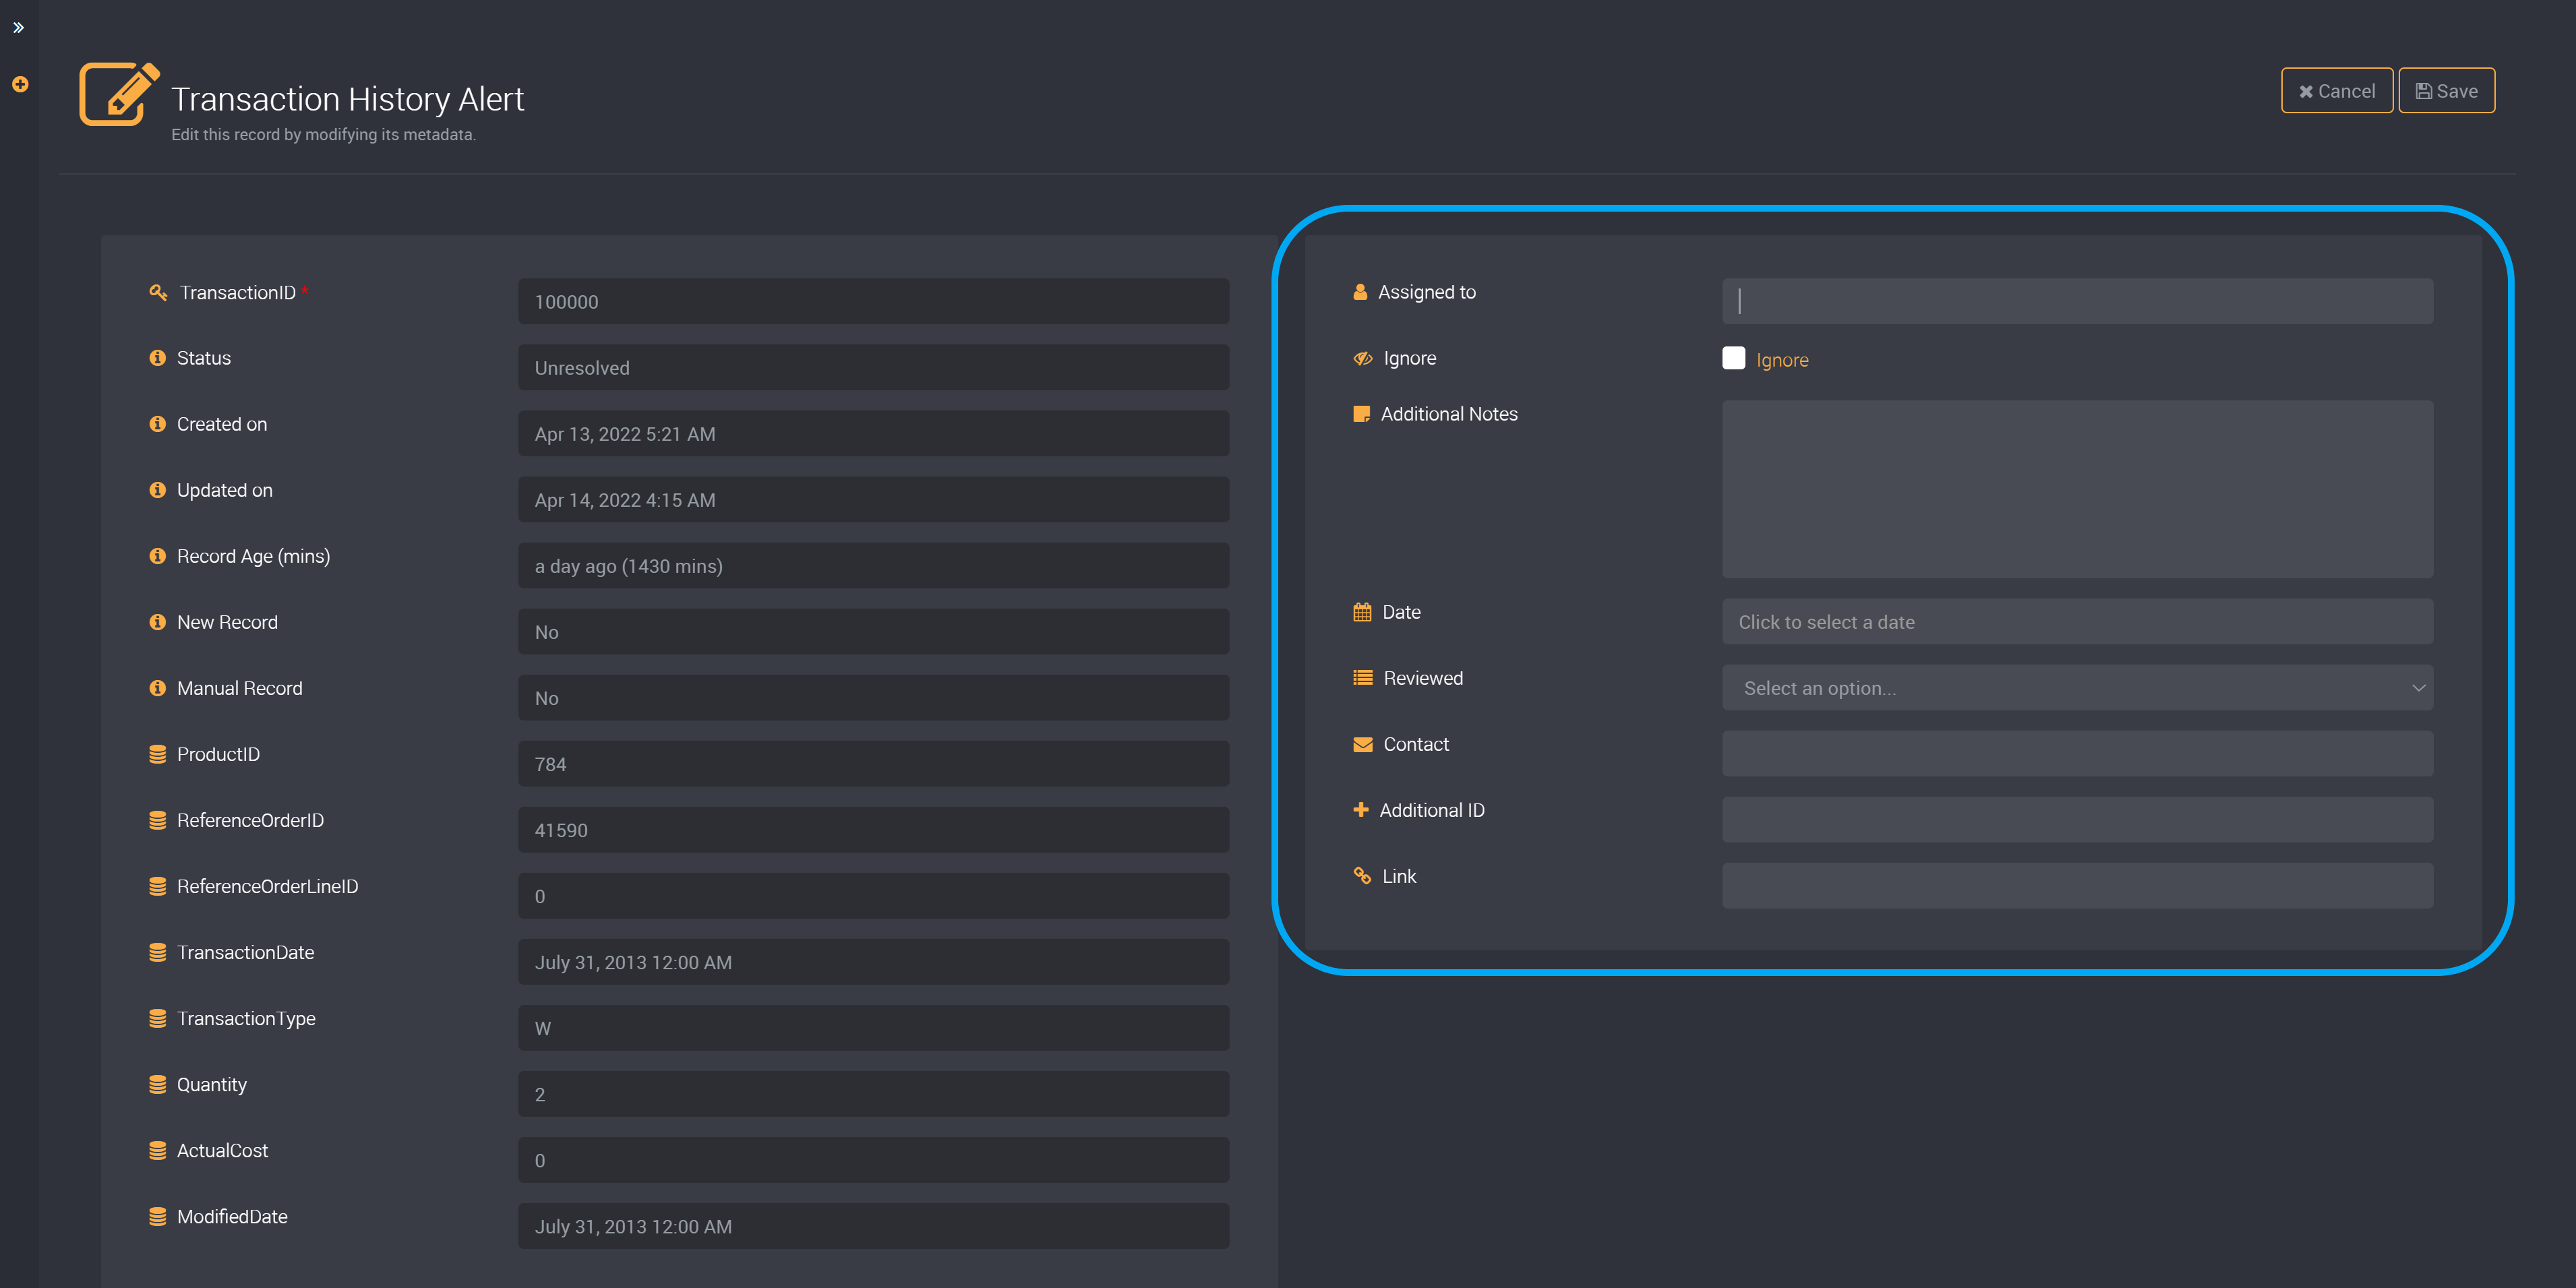
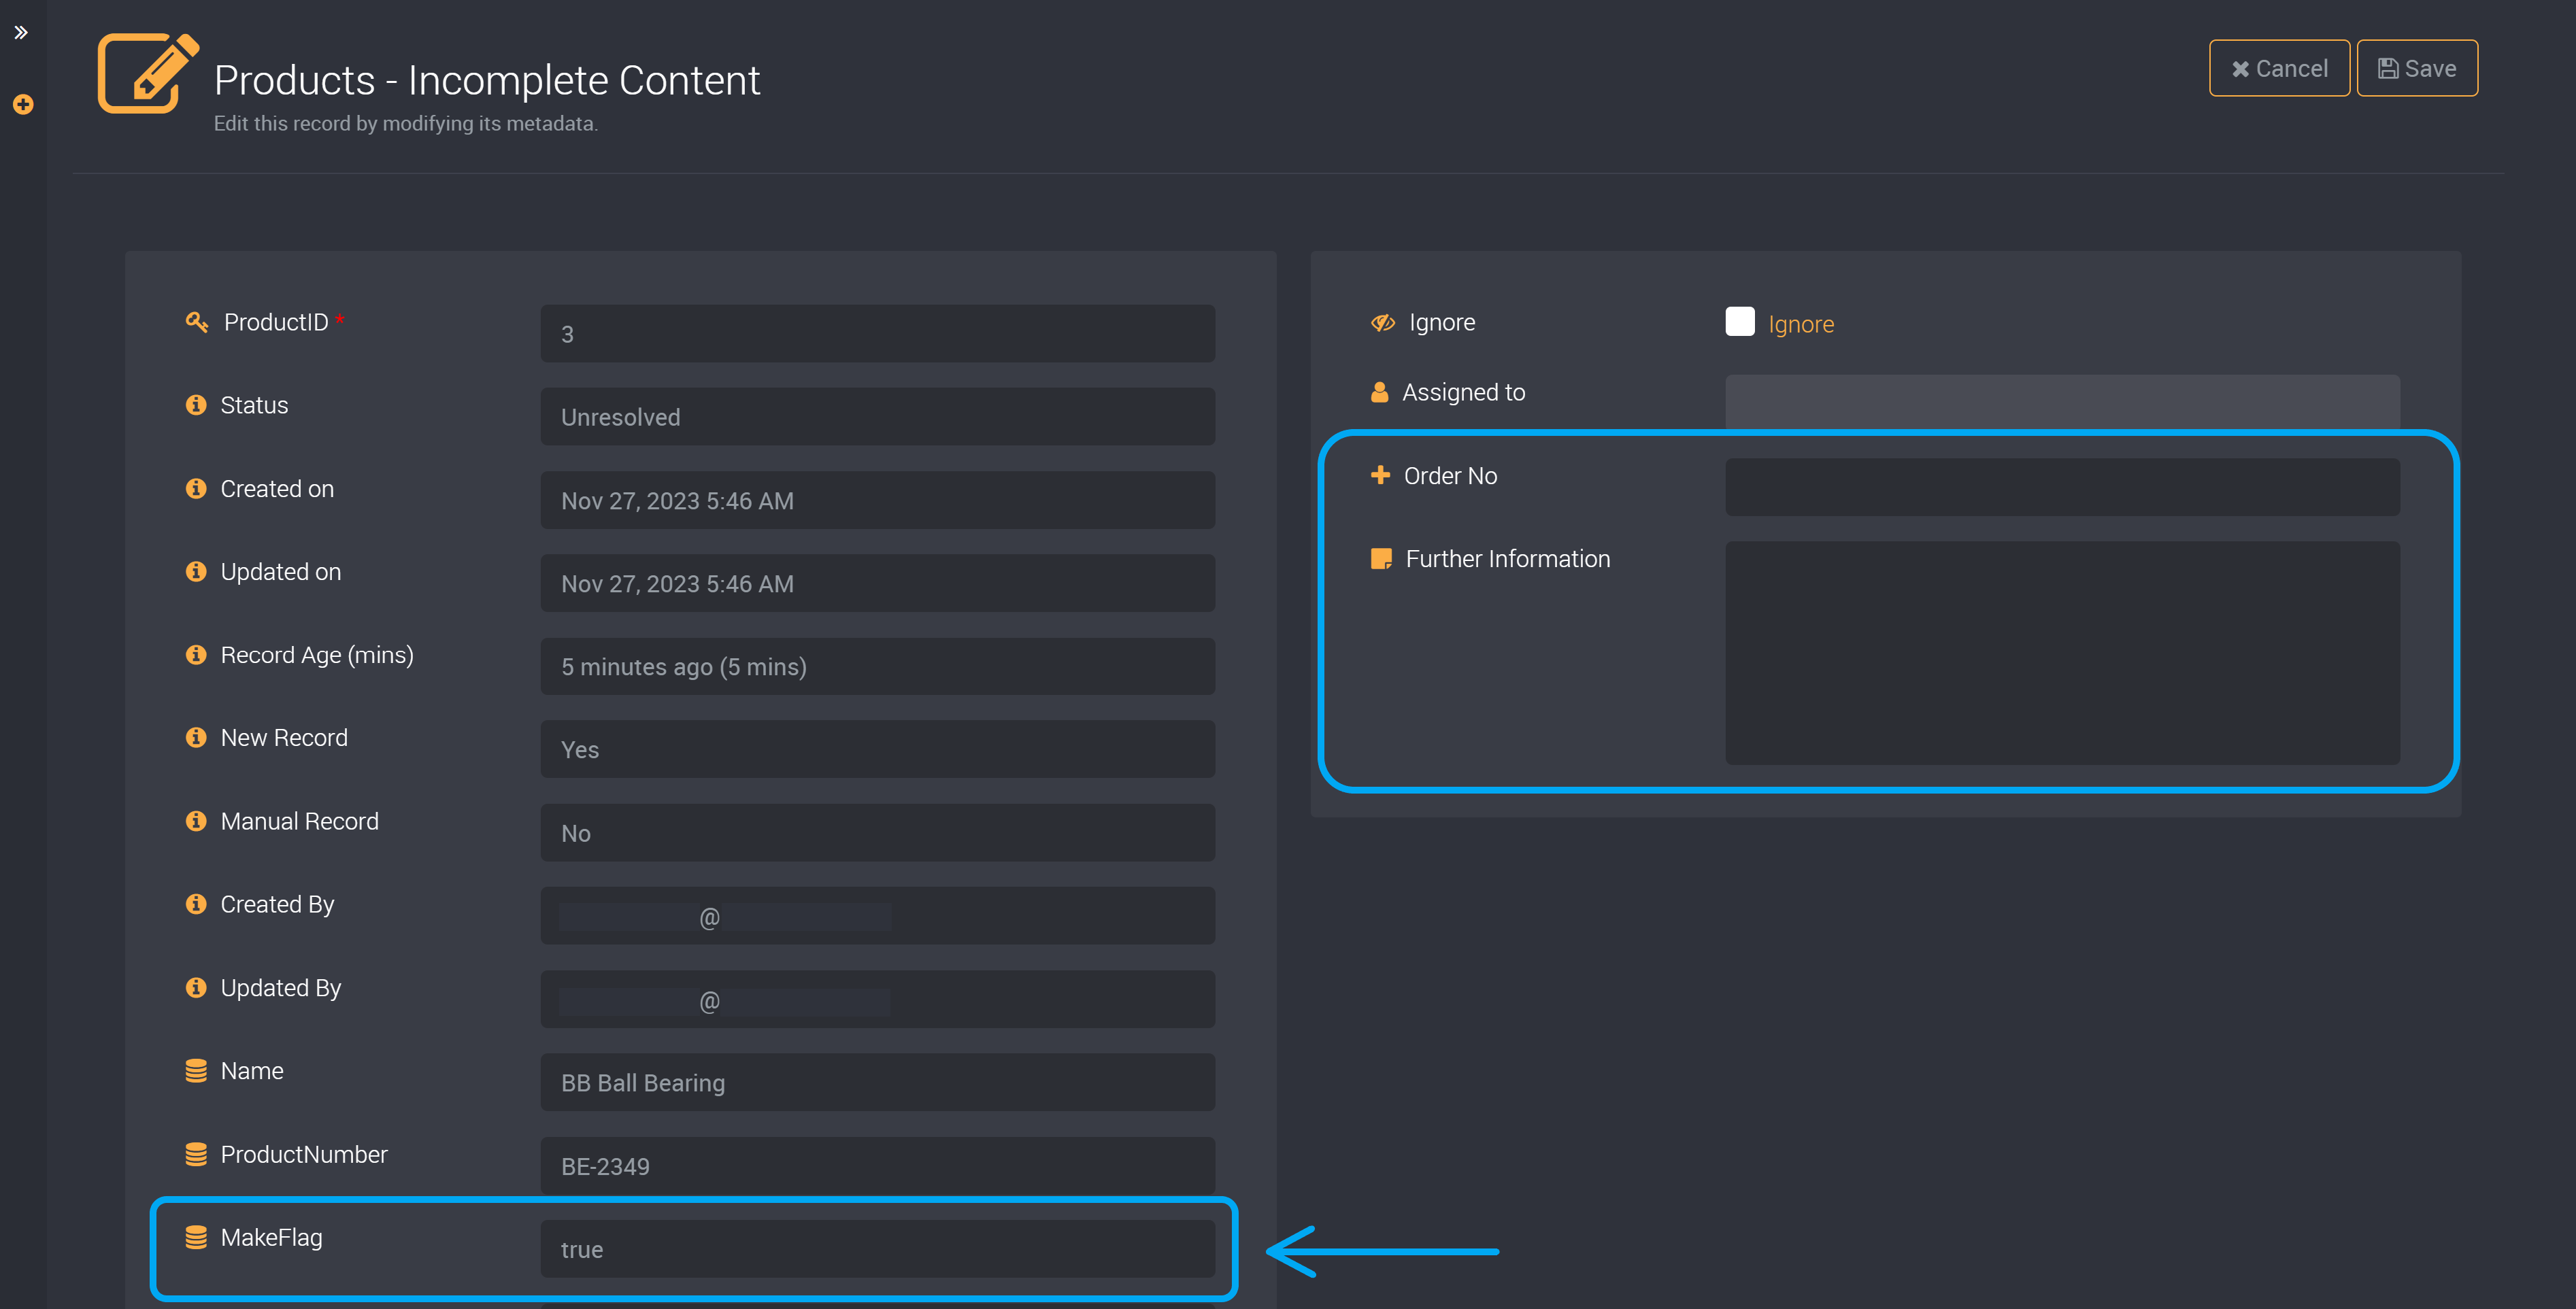
It will display a page where you can edit each custom field, assigned user and whether a result is ignored. You will find that you can only edit fields on the right, and source data that cannot be edited is displayed on the left of the page.
Assign a Result to a User
You can assign a result to a user by clicking on the Edit button on the left of the result and providing their email address in the Assigned to field.
Click on save at the top right, and this assignee will be displayed by its result.
You can assign a row to only one user. Please provide a single email address in a complete email format.
Ignore a Result
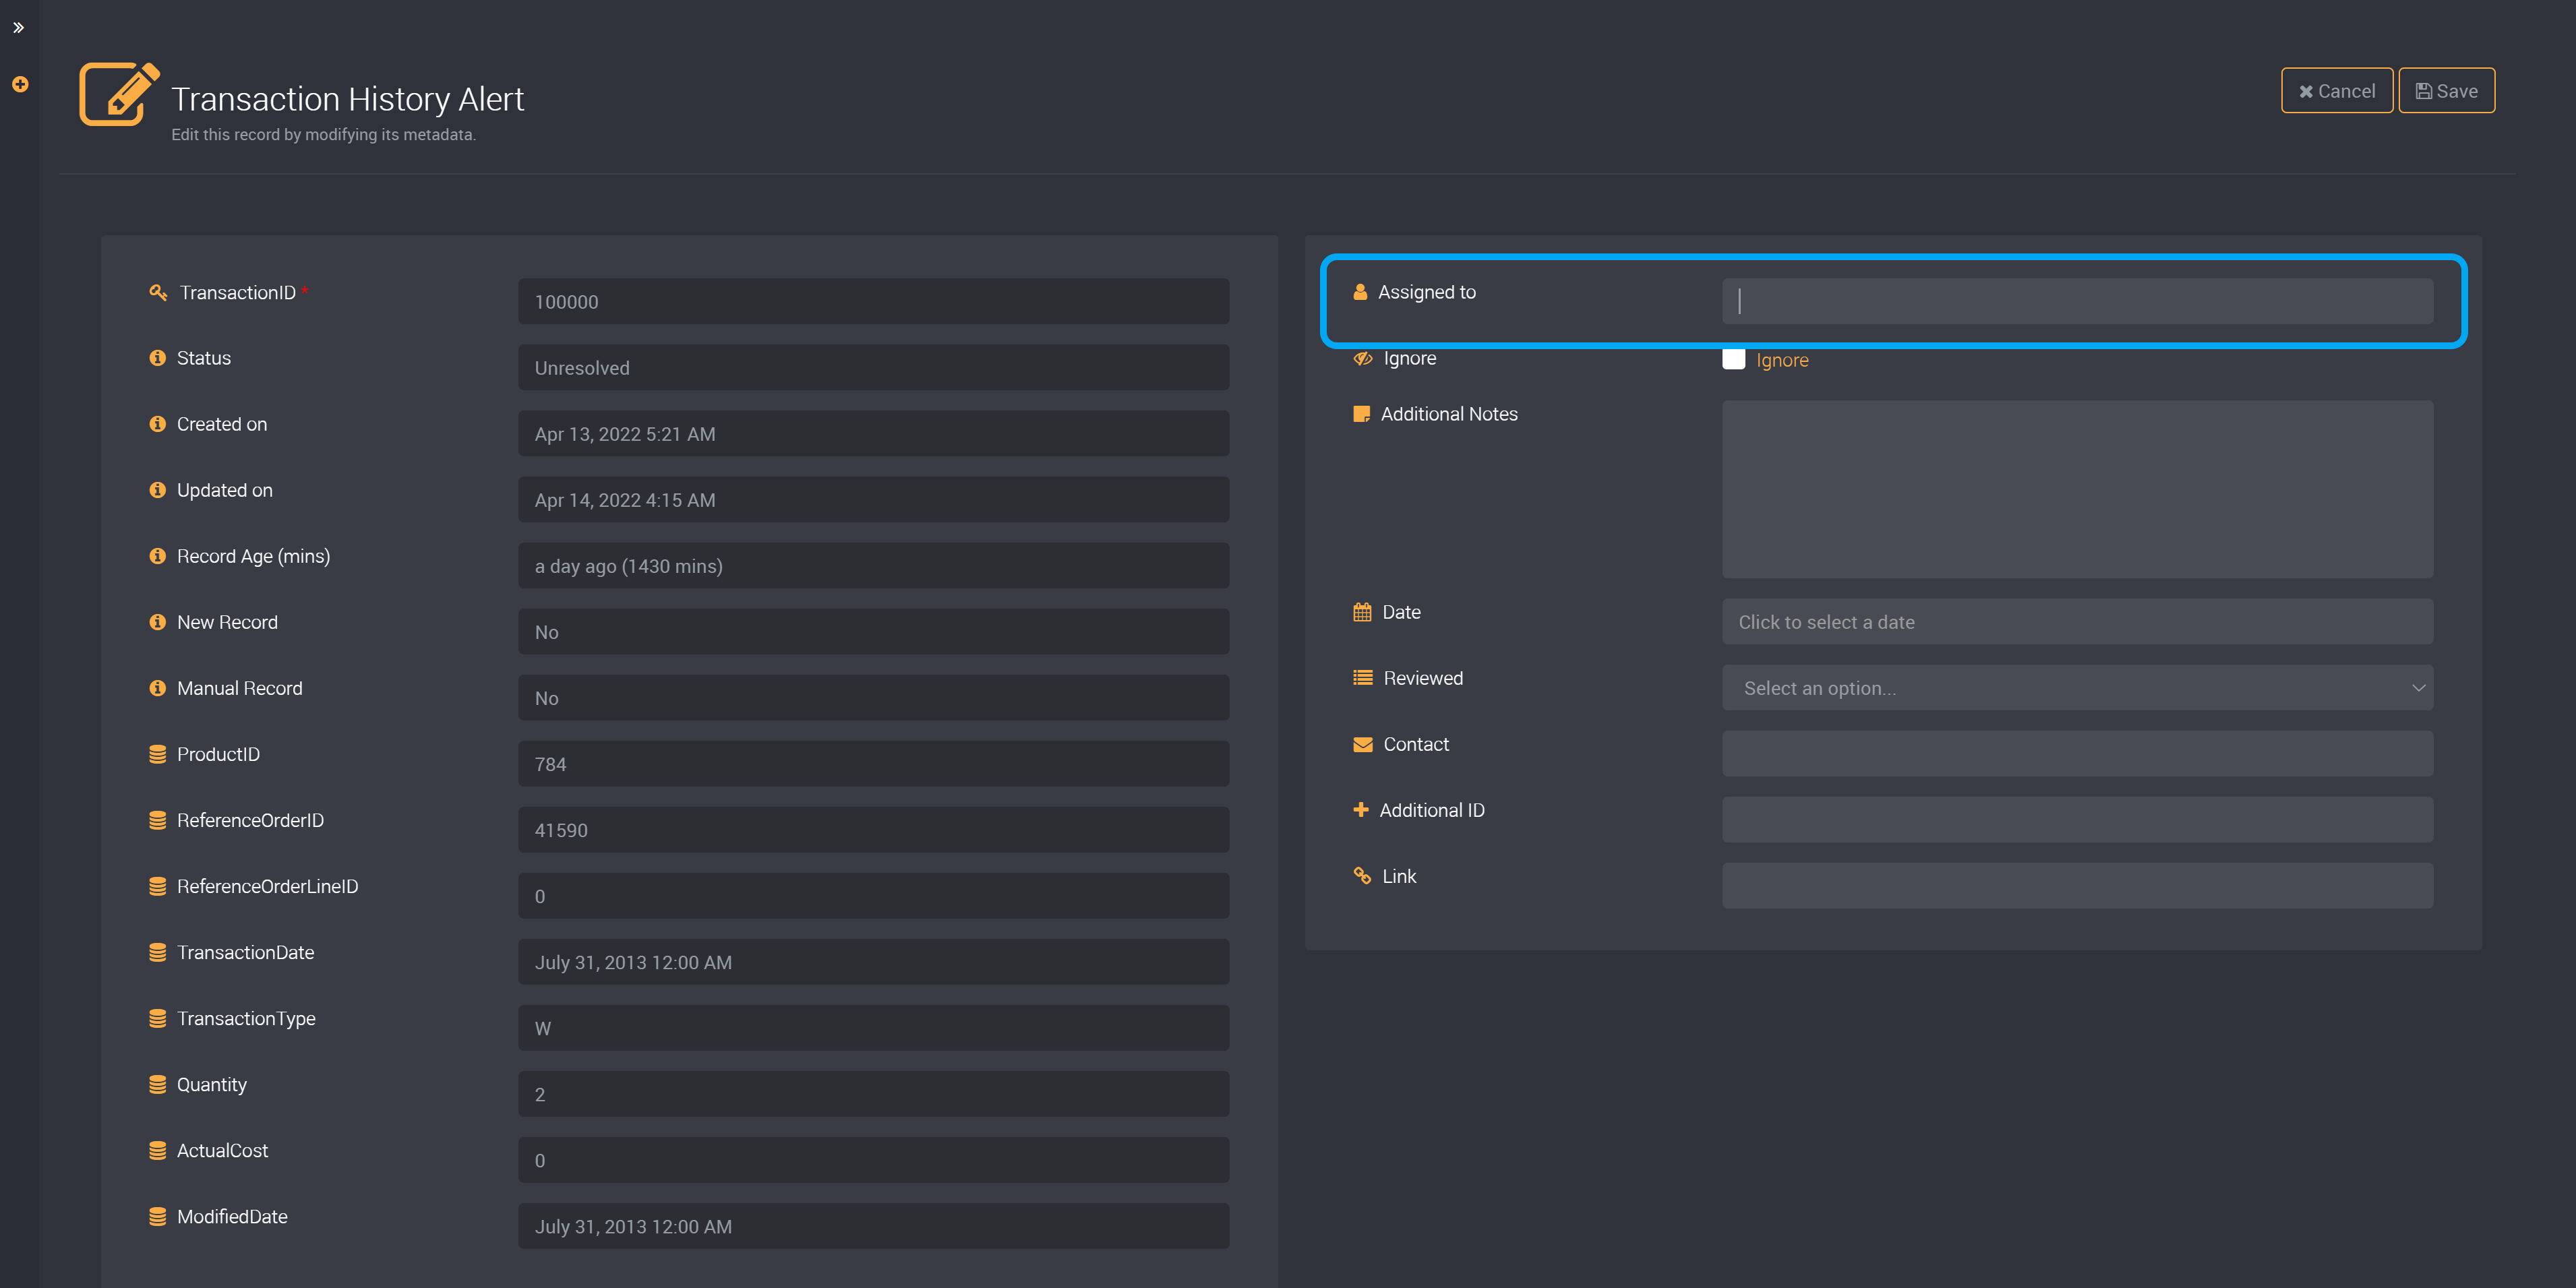
You can ignore a row of results by clicking on the Edit button of that row.
Click on the checkbox for Ignore.
Provide the reason why you want to ignore this row.
Save and this row will be ignored. It will not appear in the default view of results.
This row will be excluded for any future executions of this rule and so, will no longer be updated.
Edit your Custom Fields
Click on the Edit button of a row to edit any custom field you added when creating or editing a rule.
We have added each custom field type in the rule in the examples below.
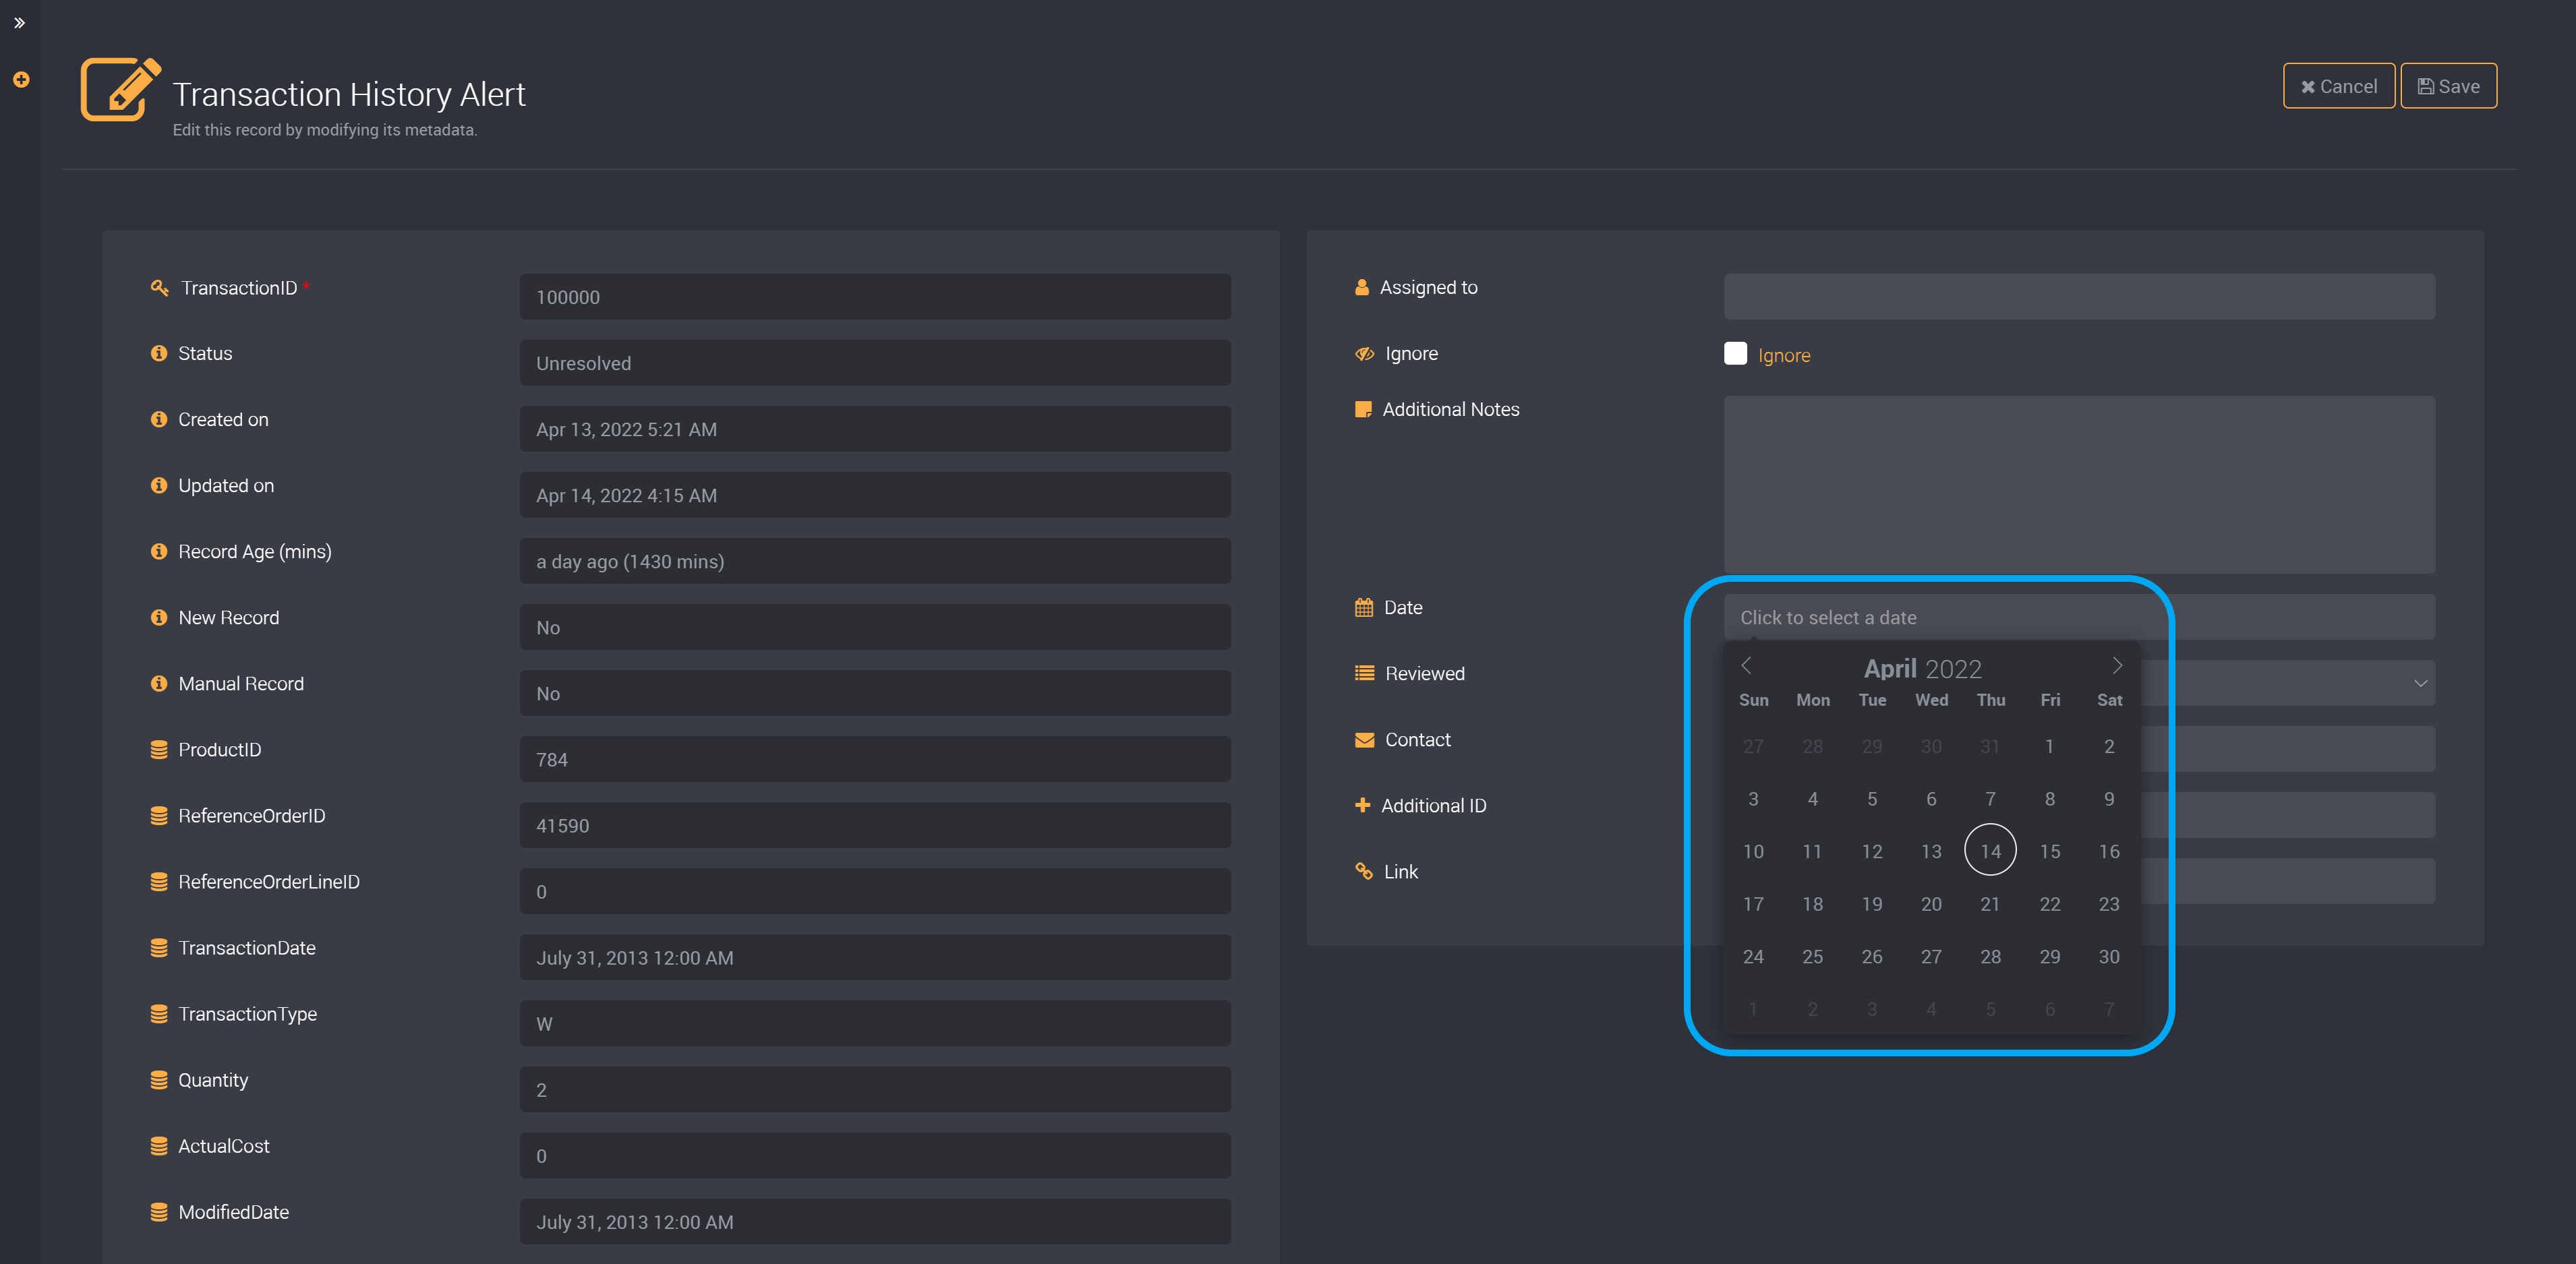
Date
Select a date from the dropdown.
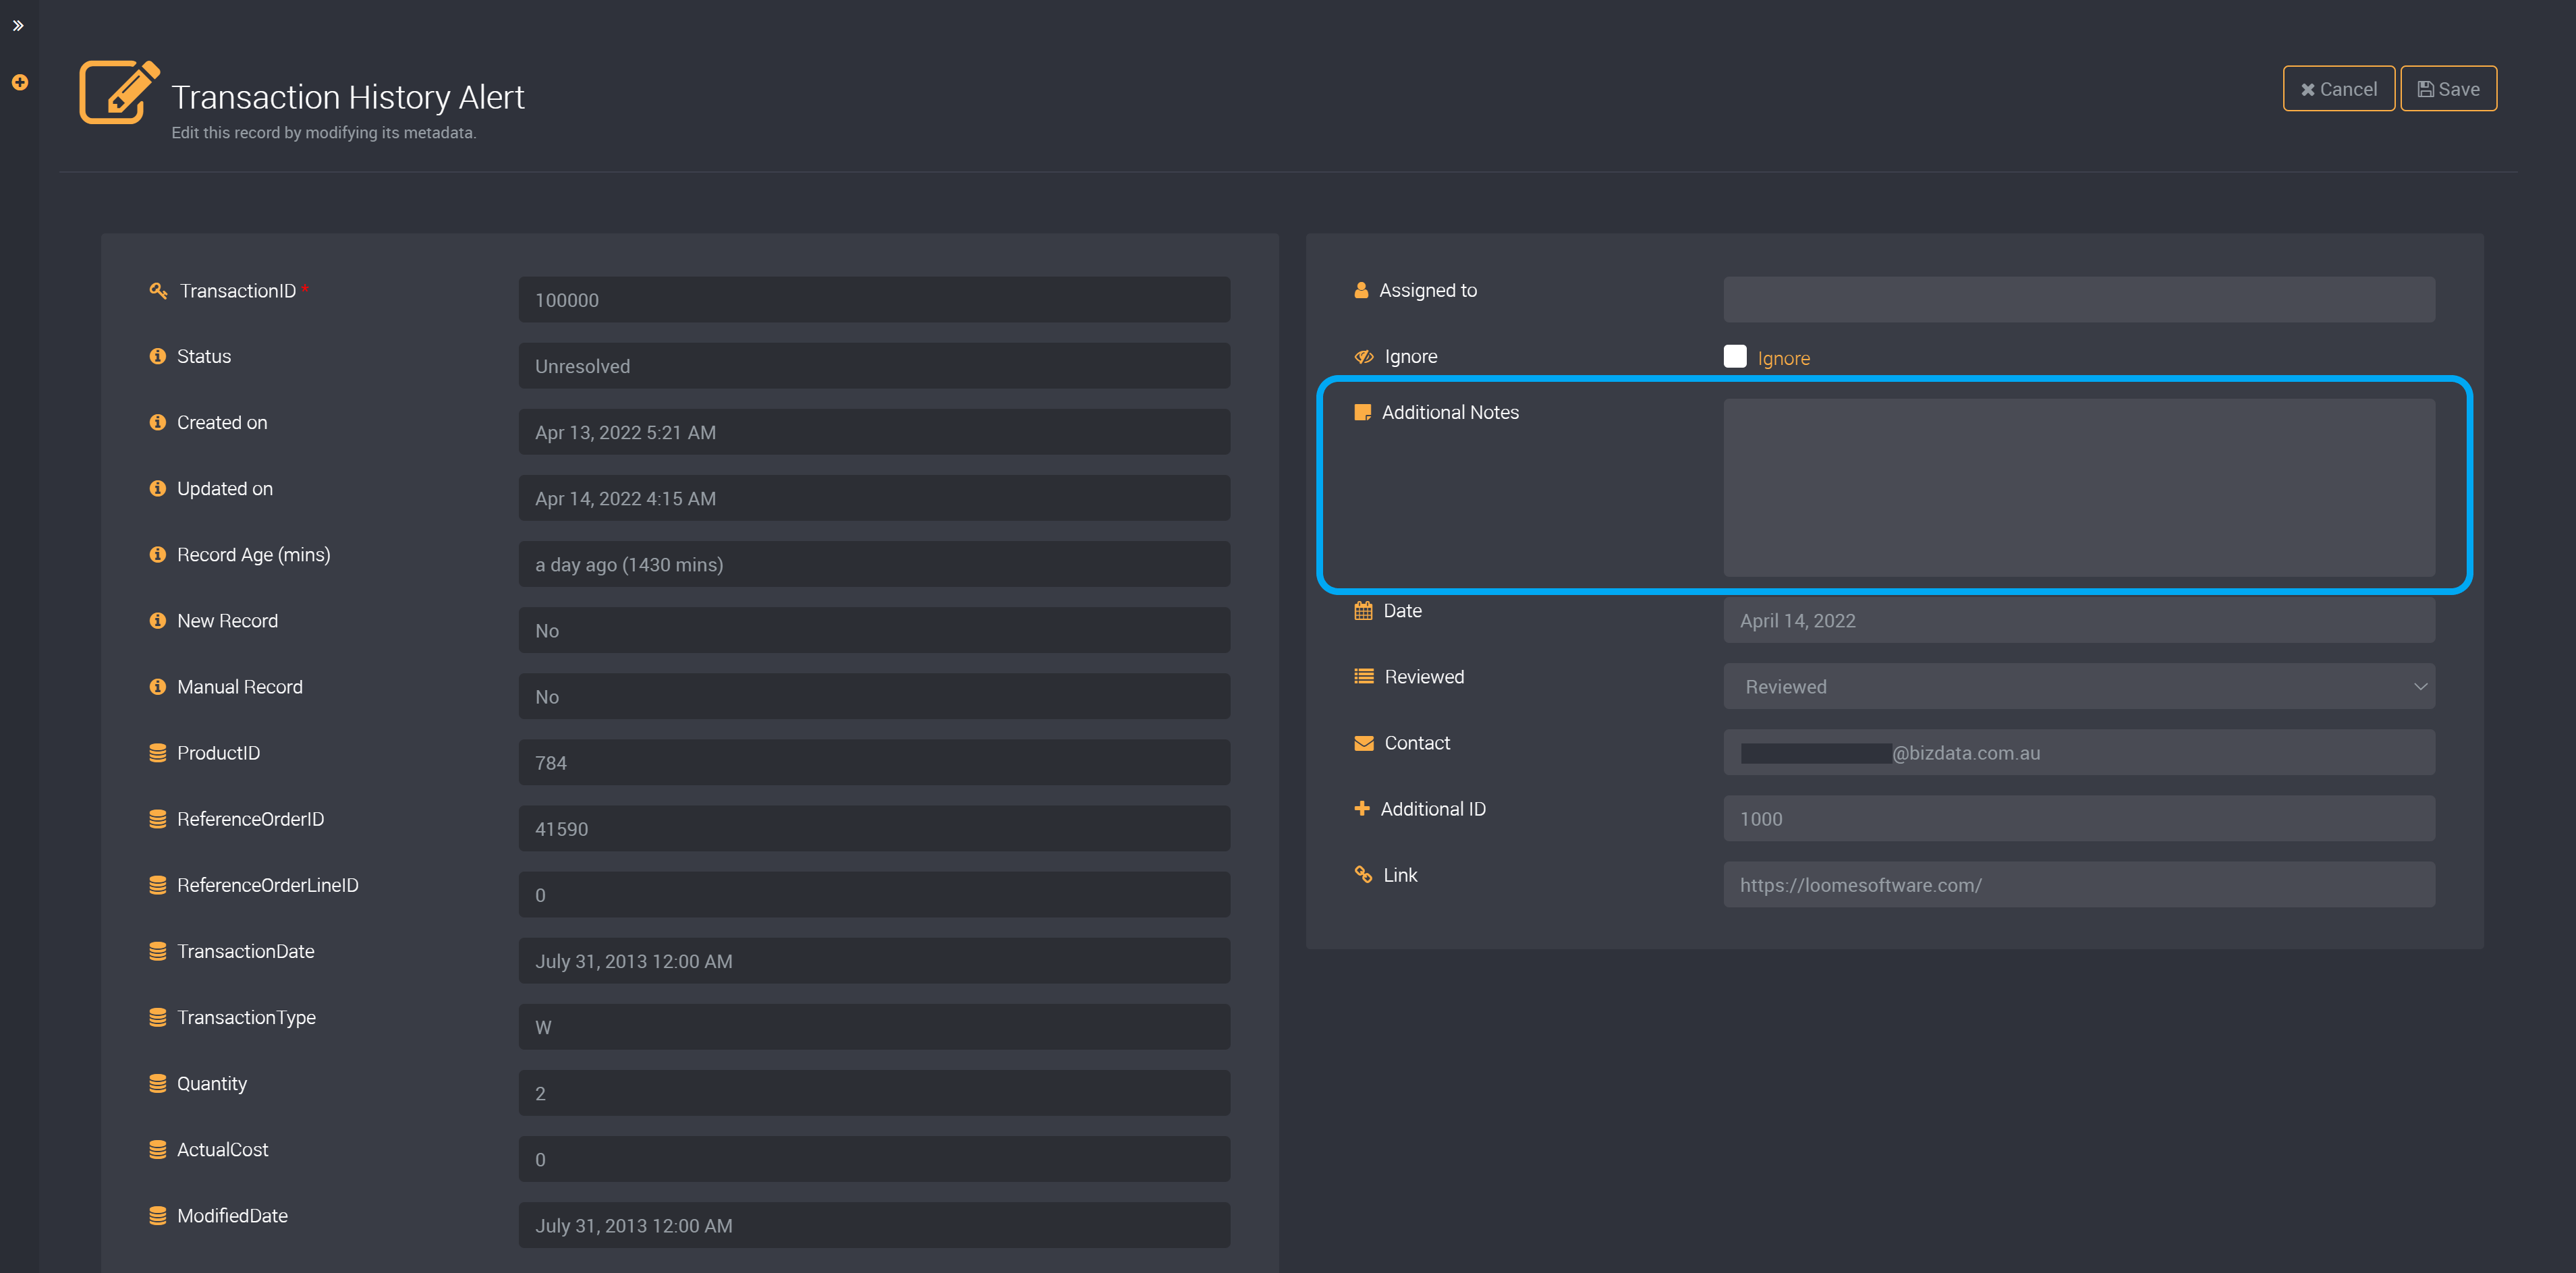
Notes/String
Provide values to your notes or string fields.
Note custom fields are for longer text values, while you can add shorter values to a string field.
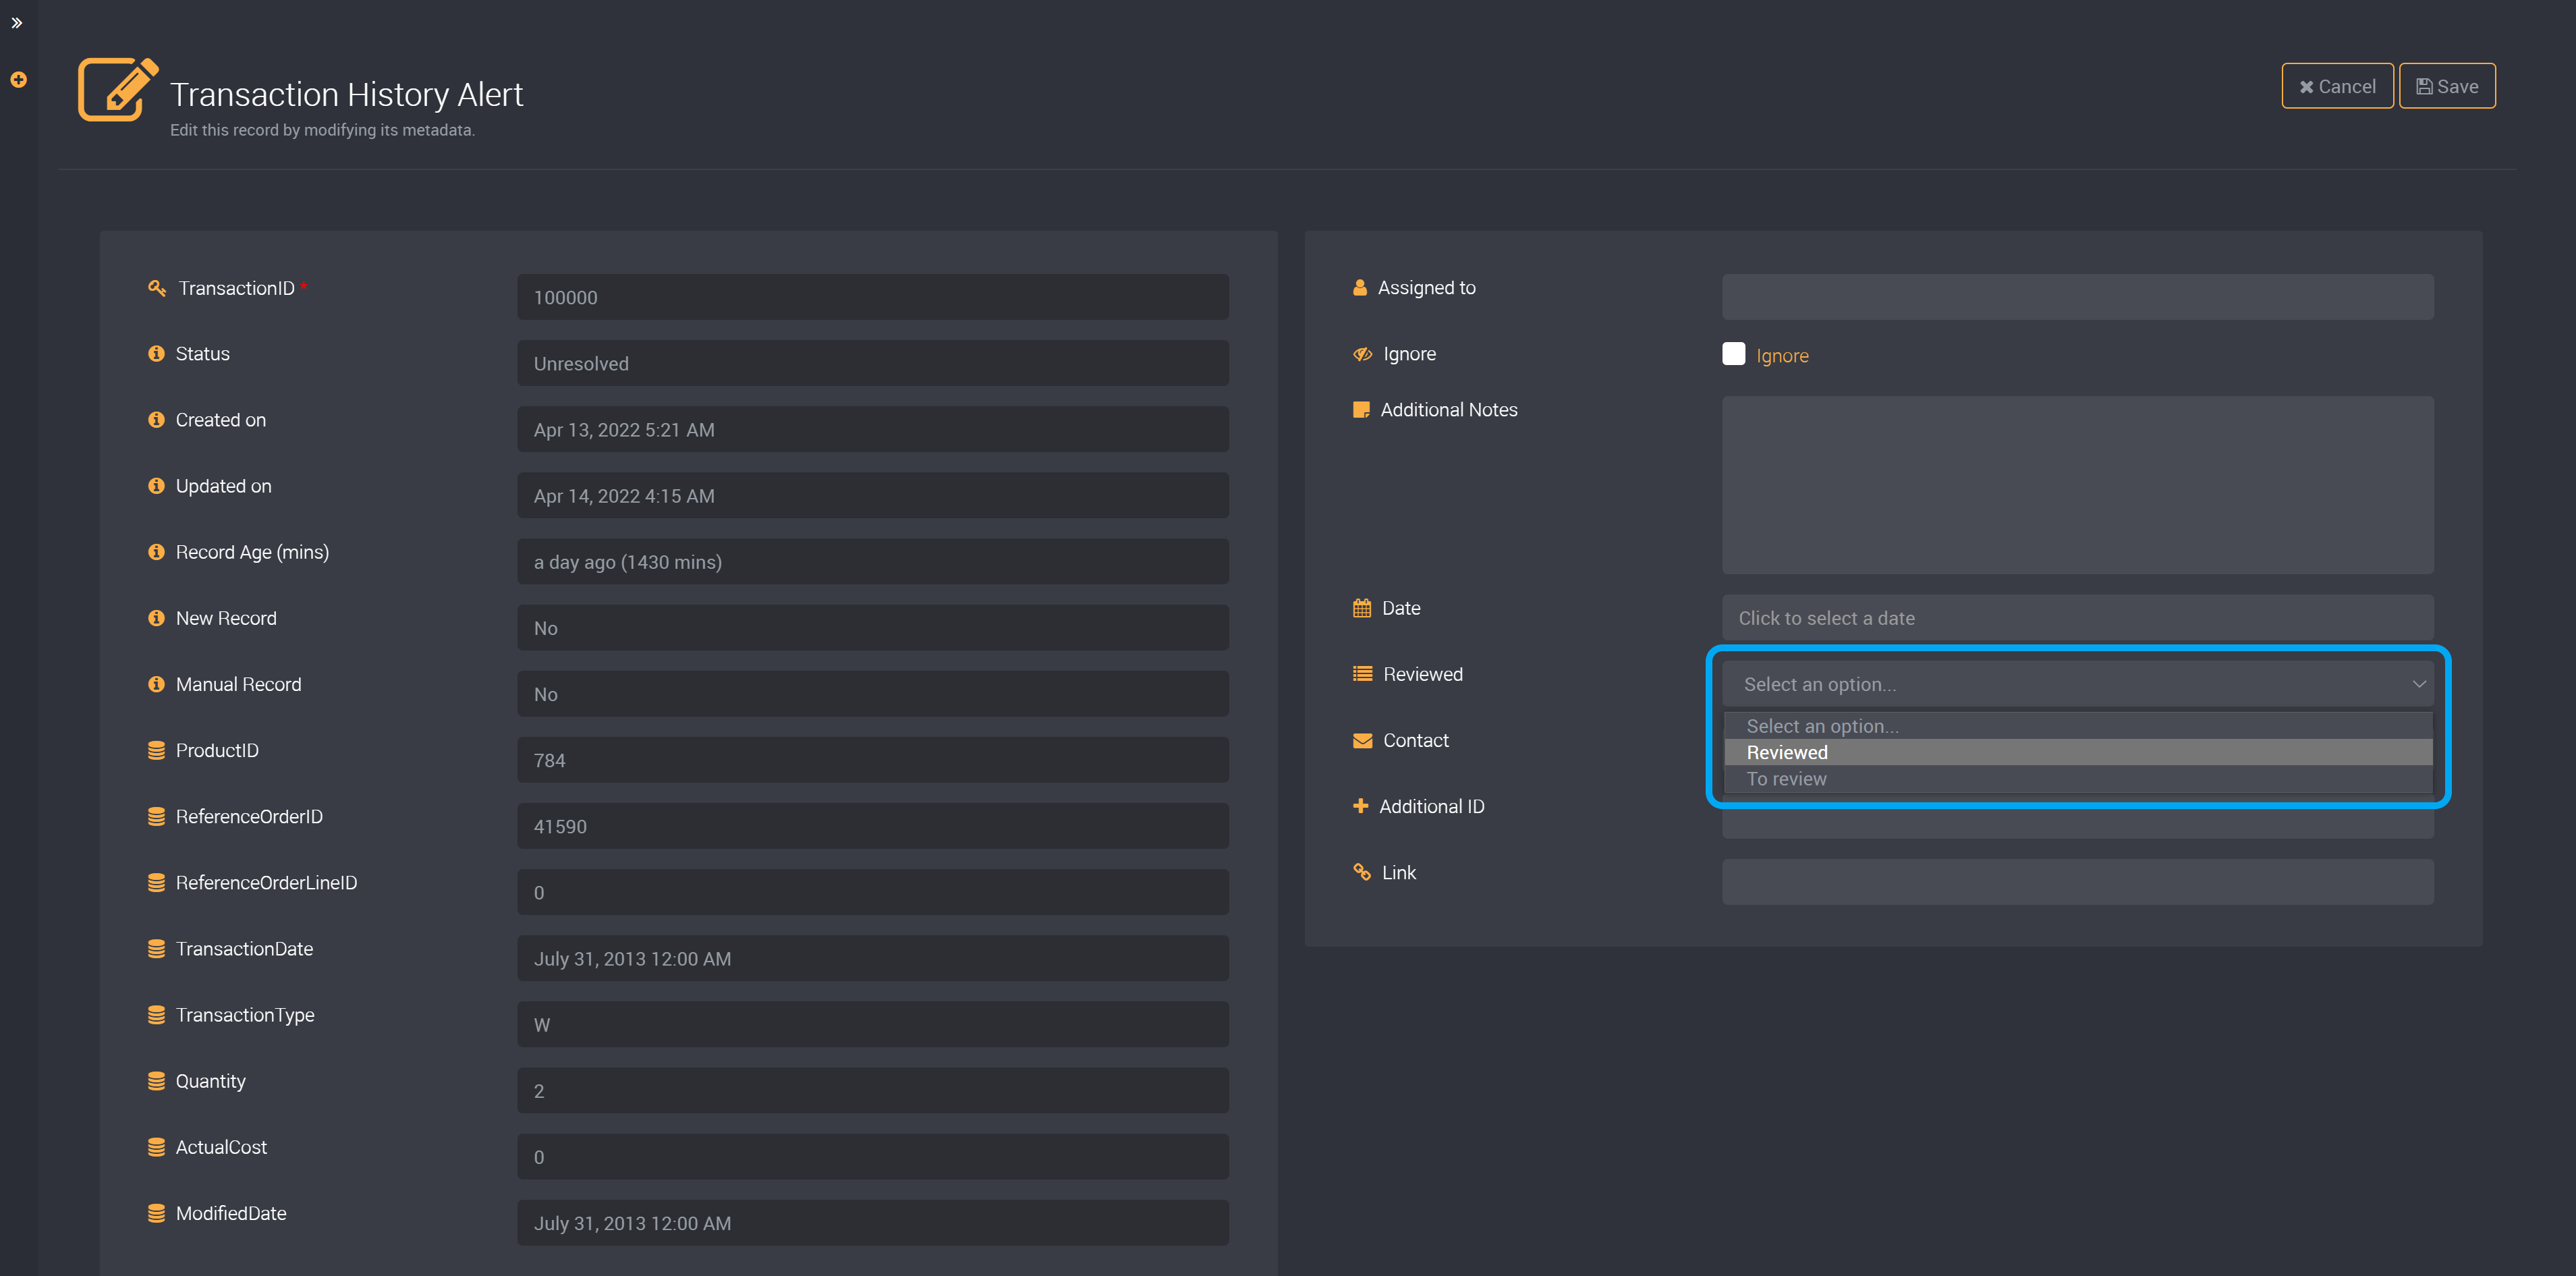
List
Select from your list options.
These are the list options that were provided when creating this custom field.
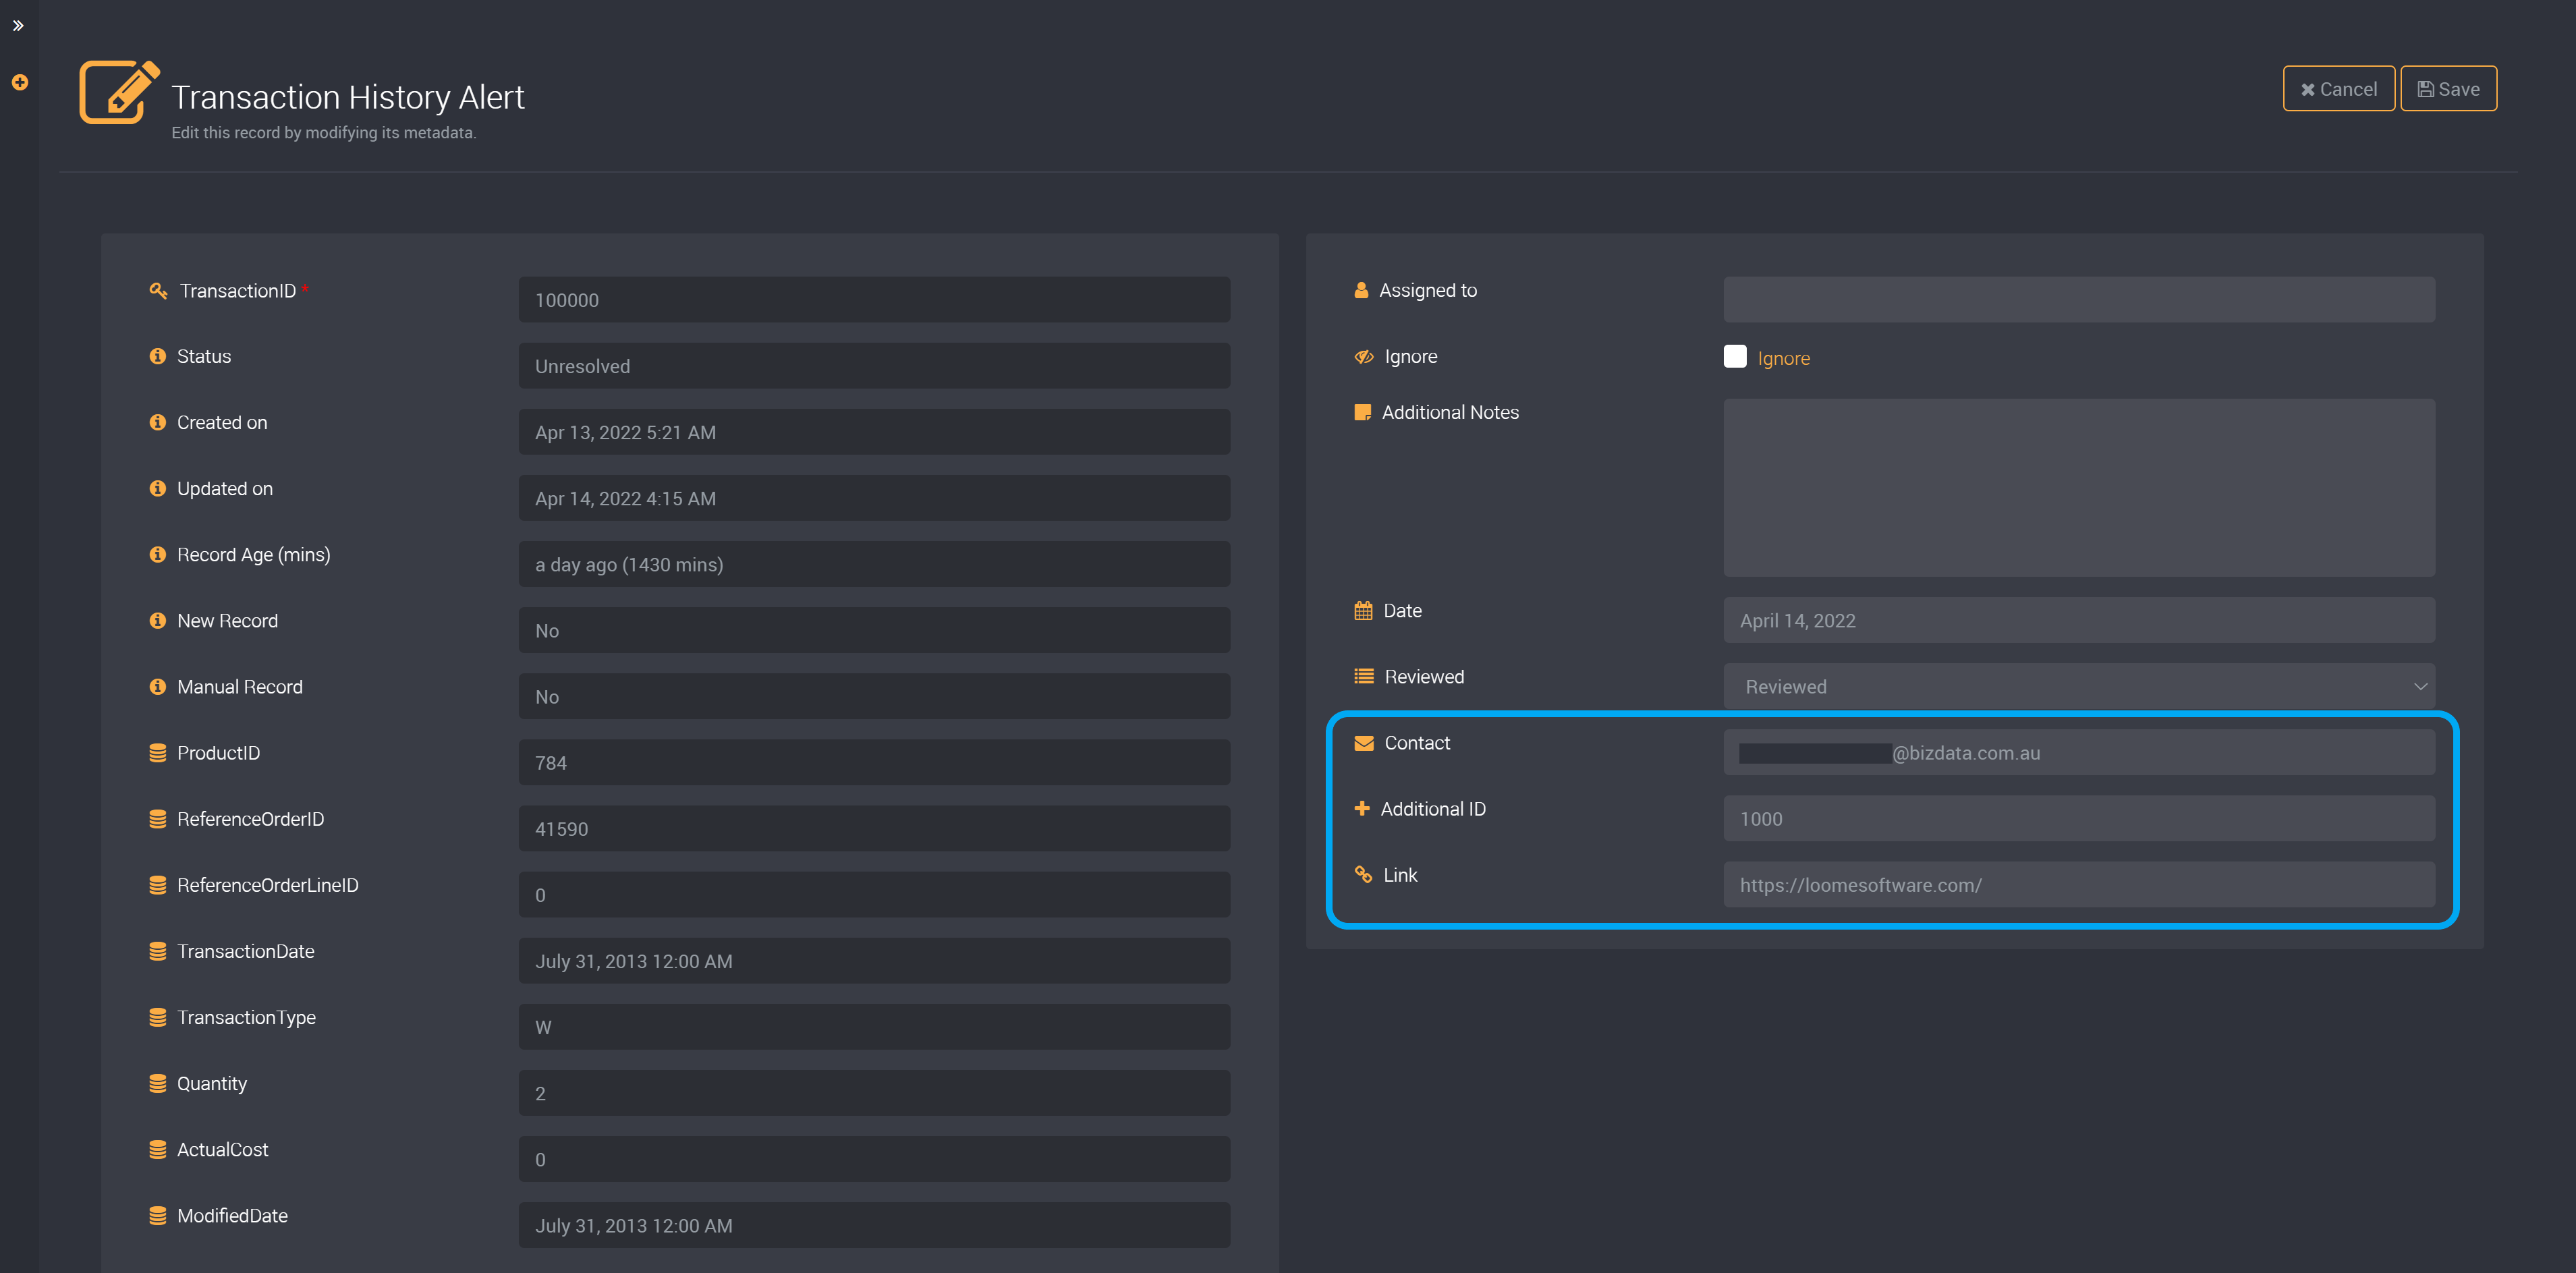
Email and URL
We have also added a URL to the ‘Link’ field, and an email to ‘Contact’.
Make sure to include ‘https://’ at the start of your URL.
Please also ensure that emails are provided in full email format.
Number and Decimal
Add a number to the number or decimal field.
For the number field, please provide a whole number, no larger than nine digits.
For the decimal field, please provide a decimal value within the precision and scale that was selected while creating the decimal custom field.

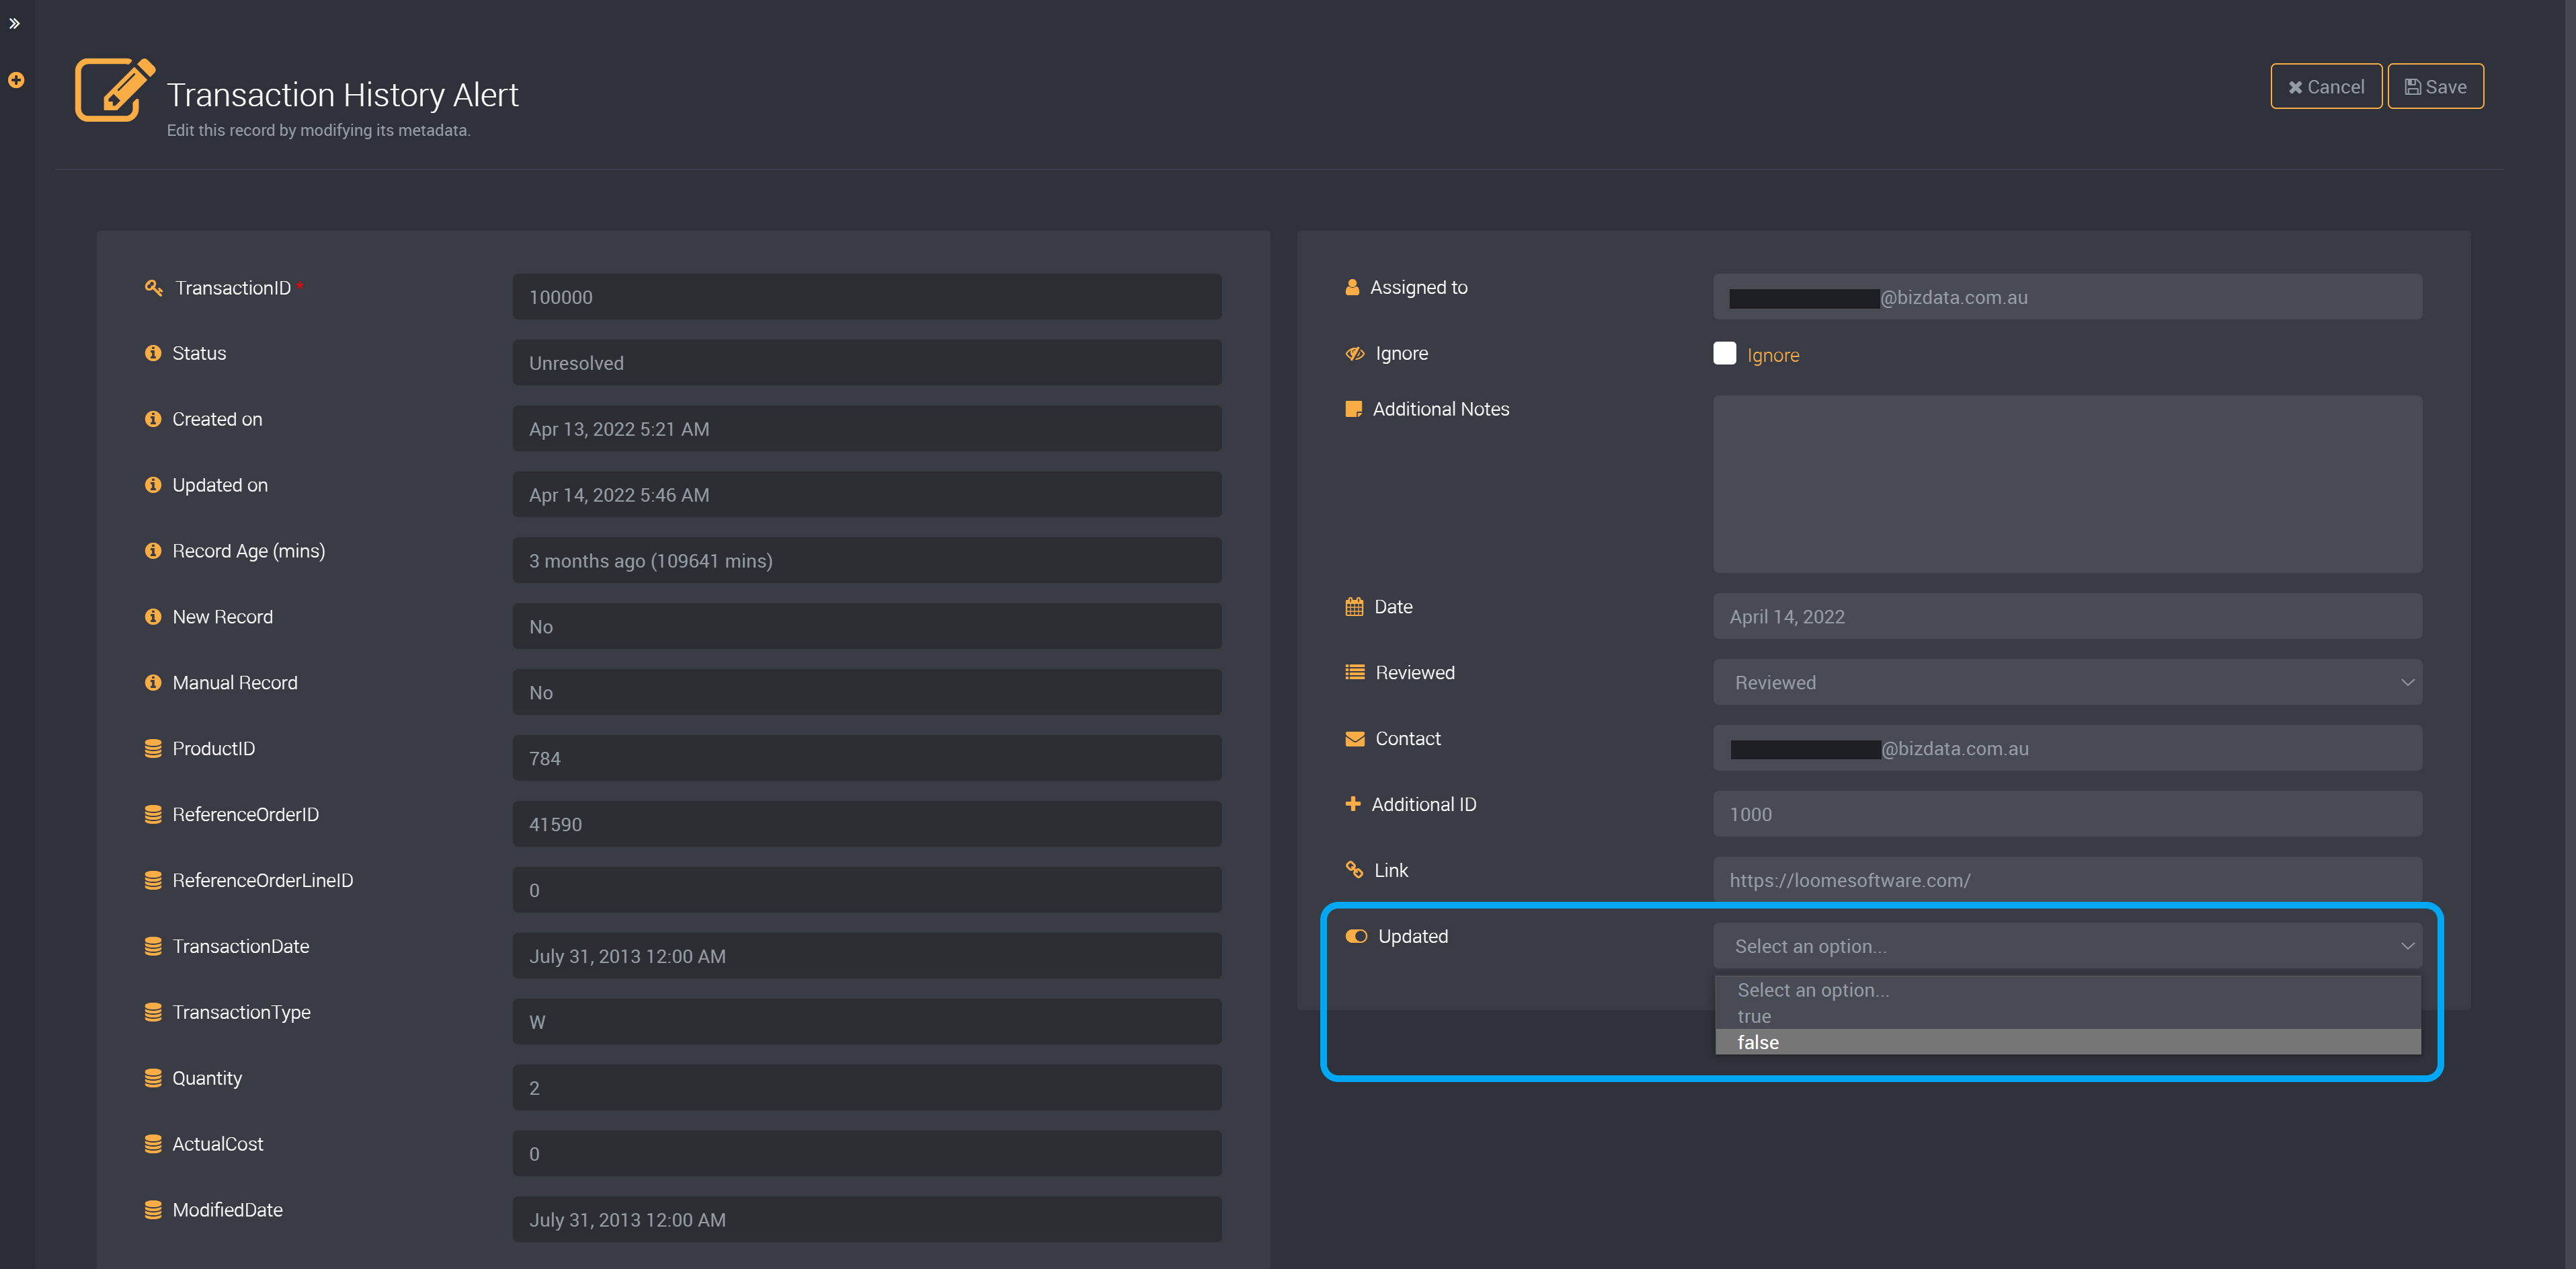
Boolean
You can choose from ‘True’ or ‘False’ from the boolean dropdown when editing a record.
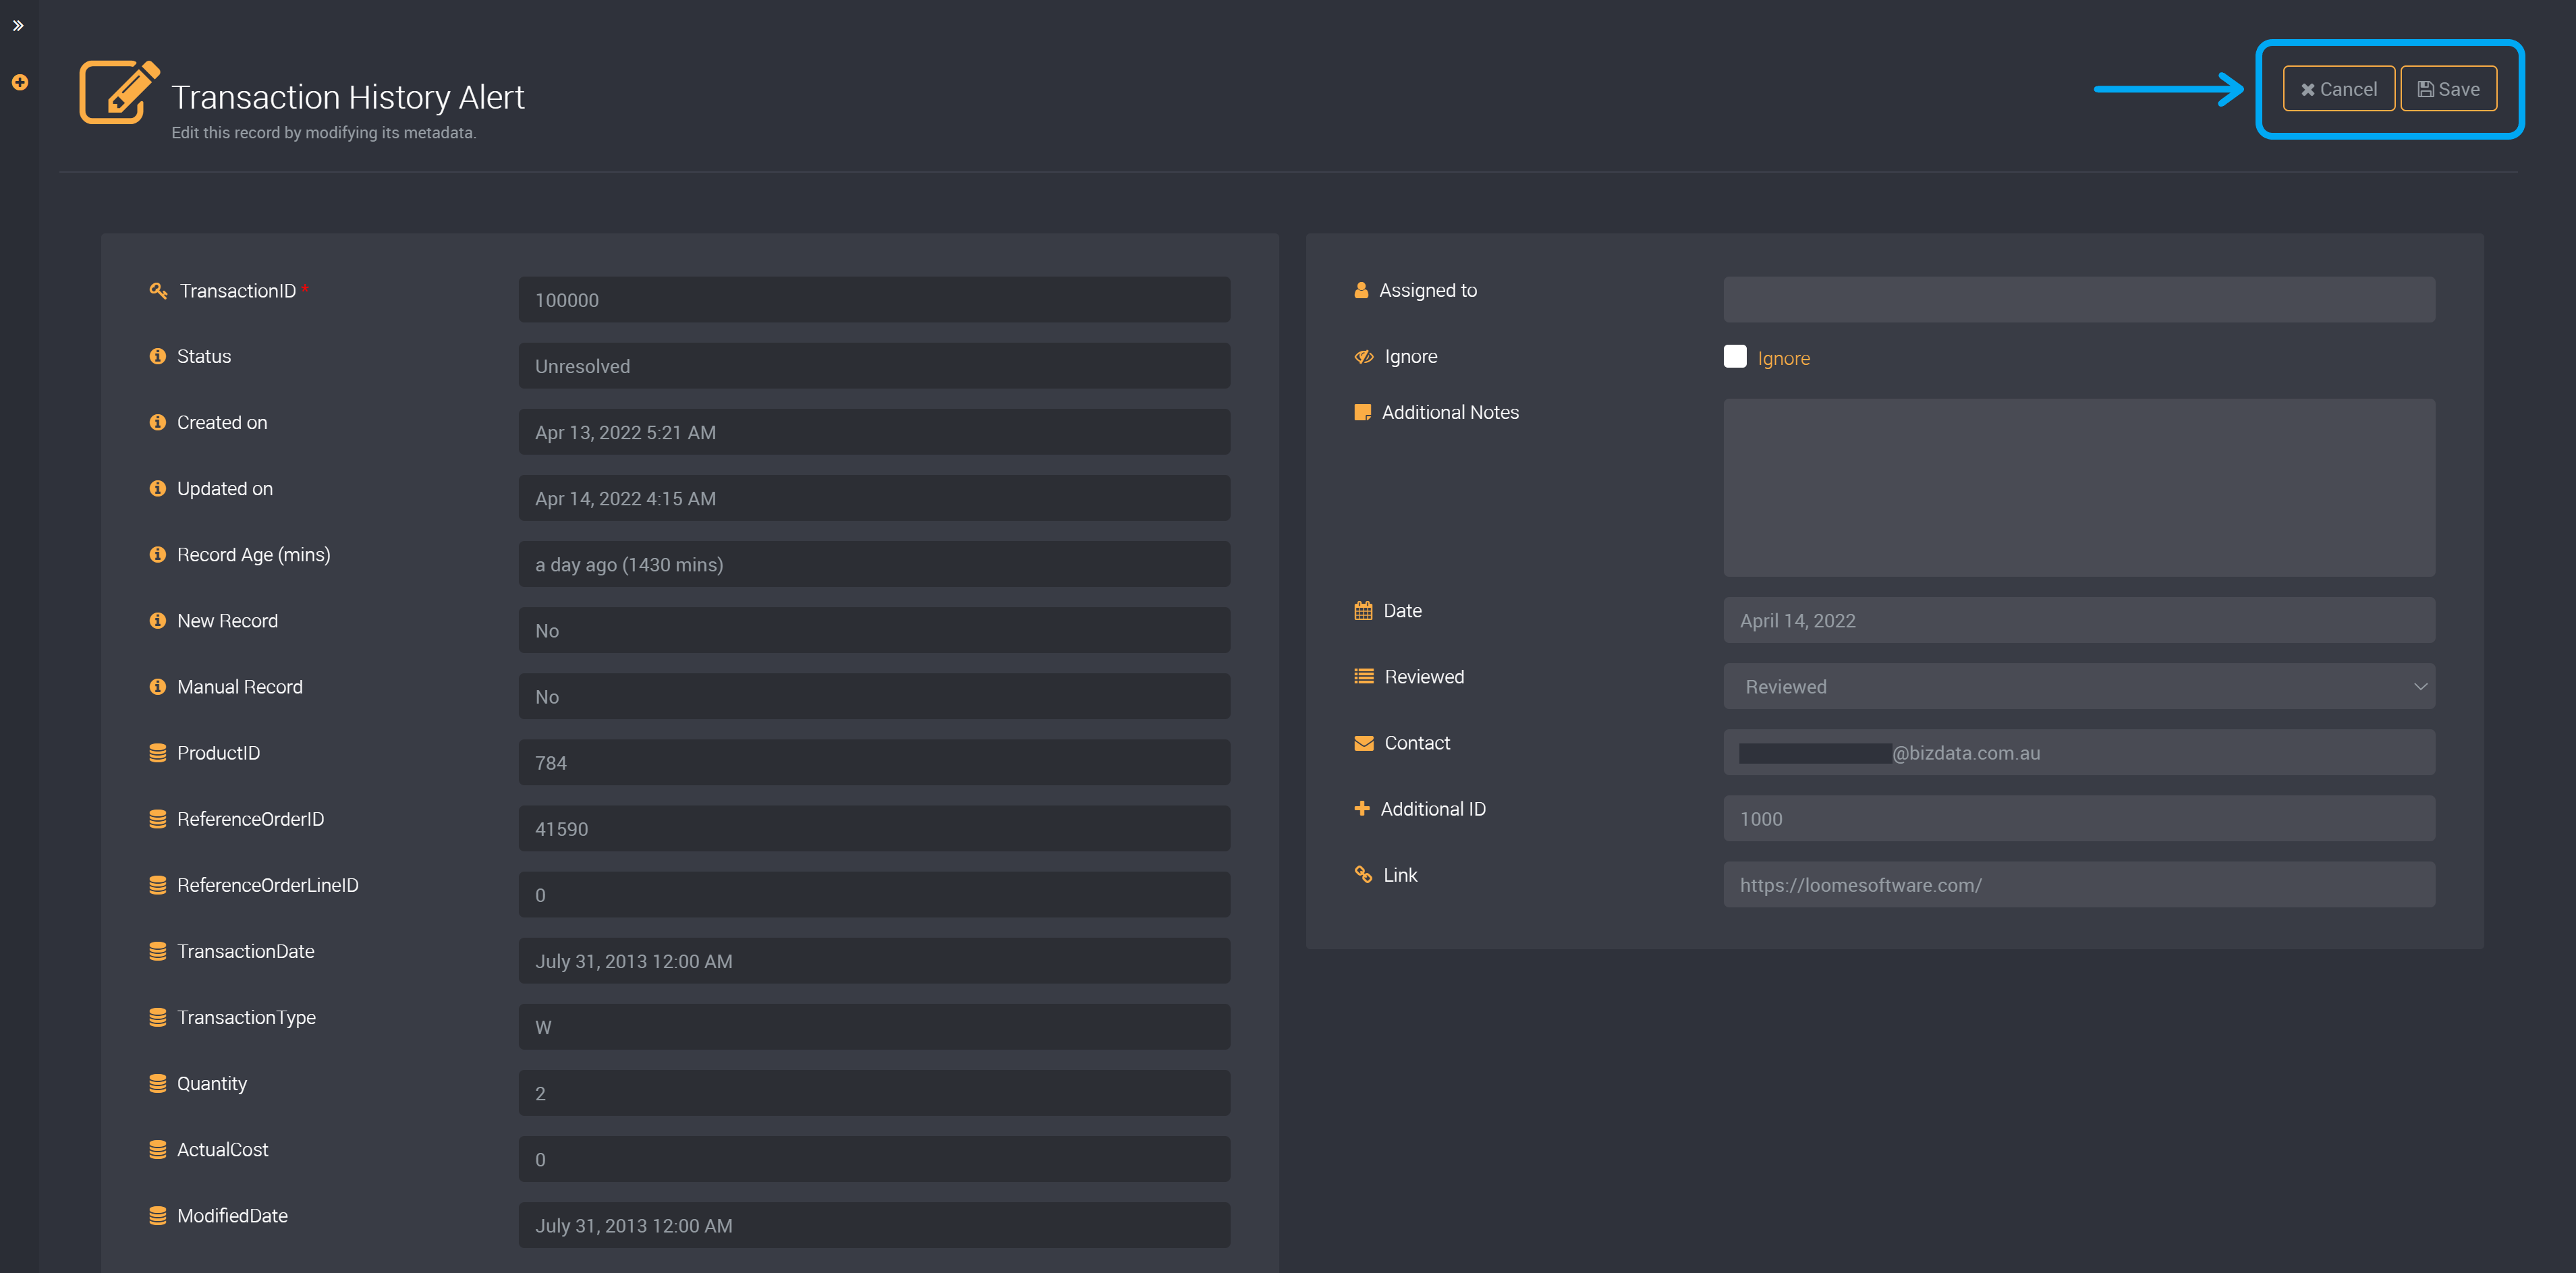
Save Changes
Save your new changes at the top-right of the page.
You can cancel any changes you made to a record by using the Cancel button at the top-right. You will lose any changes and you will be directed to the results page.
After saving, you will then be able to see these changes reflected in your results table.
For any custom fields, a dedicated schema has been created in your selected output connection with these custom fields as metadata columns.
When multiple users are viewing the same results page, if one user edits a row the page will be refreshed so that you can view the latest results. You will be notified if any rows are changed with the rule and row id, and the records will be updated.
Inline Editing
You can also click on Edit Records at the top-right of the results table to start inline editing of all displayed results, instead of editing records one by one.

You can save or cancel your changes at the top-right of the results table.

You can edit customizable fields, such as the assigned user column, whether a record is ignored, and custom fields (if the record is not locked due to a lockout column).
Double click on a field to start editing.
To stop editing, click anywhere outside the field.

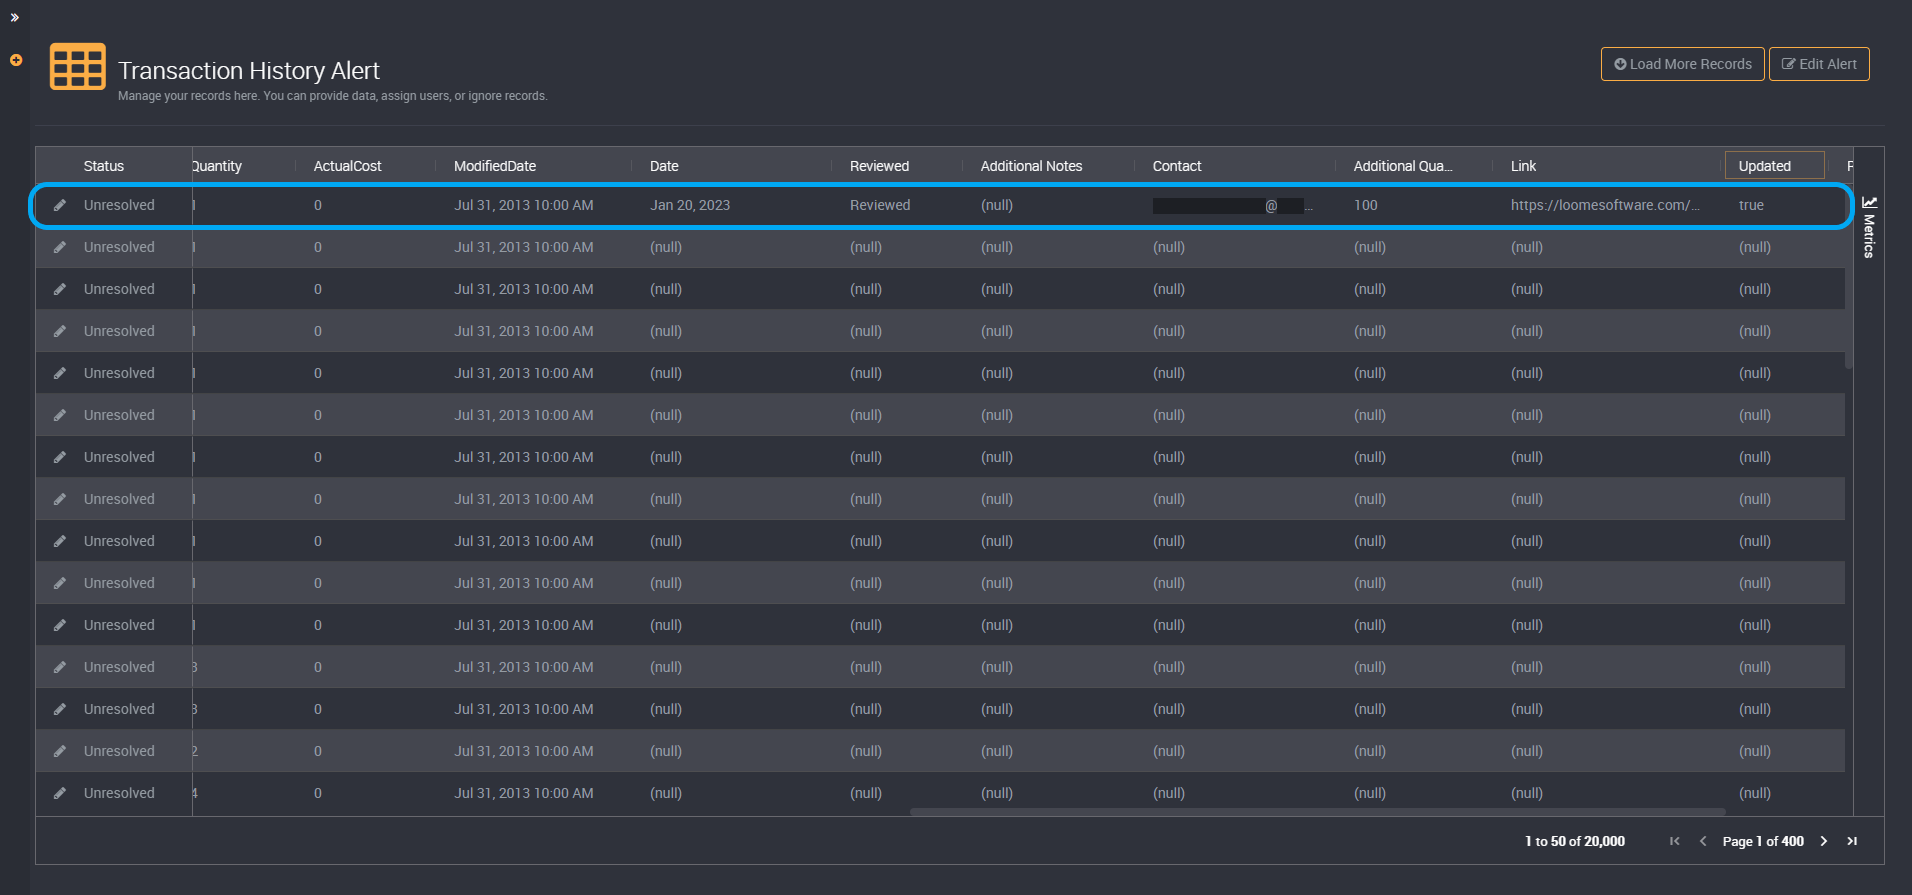
Any fields where you have made changes will be highlighted.
For example, in the following image, the ignore checkbox is selected.

You can also interact with your records using keyboard navigation:
- Use arrow keys to move between cells.
- Press Enter to start and stop editing a cell.
- Press Tab to move to the next cell.
- Press Spacebar to toggle checkbox.
- Press Ctrl + Z/Y to undo or redo changes (you can undo or redo up to 10 changes).
You edit your custom fields navigating using your mouse or keyboard. You can also filter on your table, pin columns, group on columns and then edit your displayed results.

Source data fields cannot be edited.

In Source and Manual rules, you can click on Add New Row at the top-right of the table to add a new empty row.
This will add a new empty record to the results data set.
Provide a key column value. A key column value is a required field and cannot be left blank.
Then provide values to your empty data fields and custom fields.

You can check our quick help guide while editing results at the top-right of the results table by clicking on Help.

Custom Field Lockout Column
If you have selected a Custom Field Lockout Column while creating or editing this rule, whether you can edit a row depends on whether the lockout column is true or false.
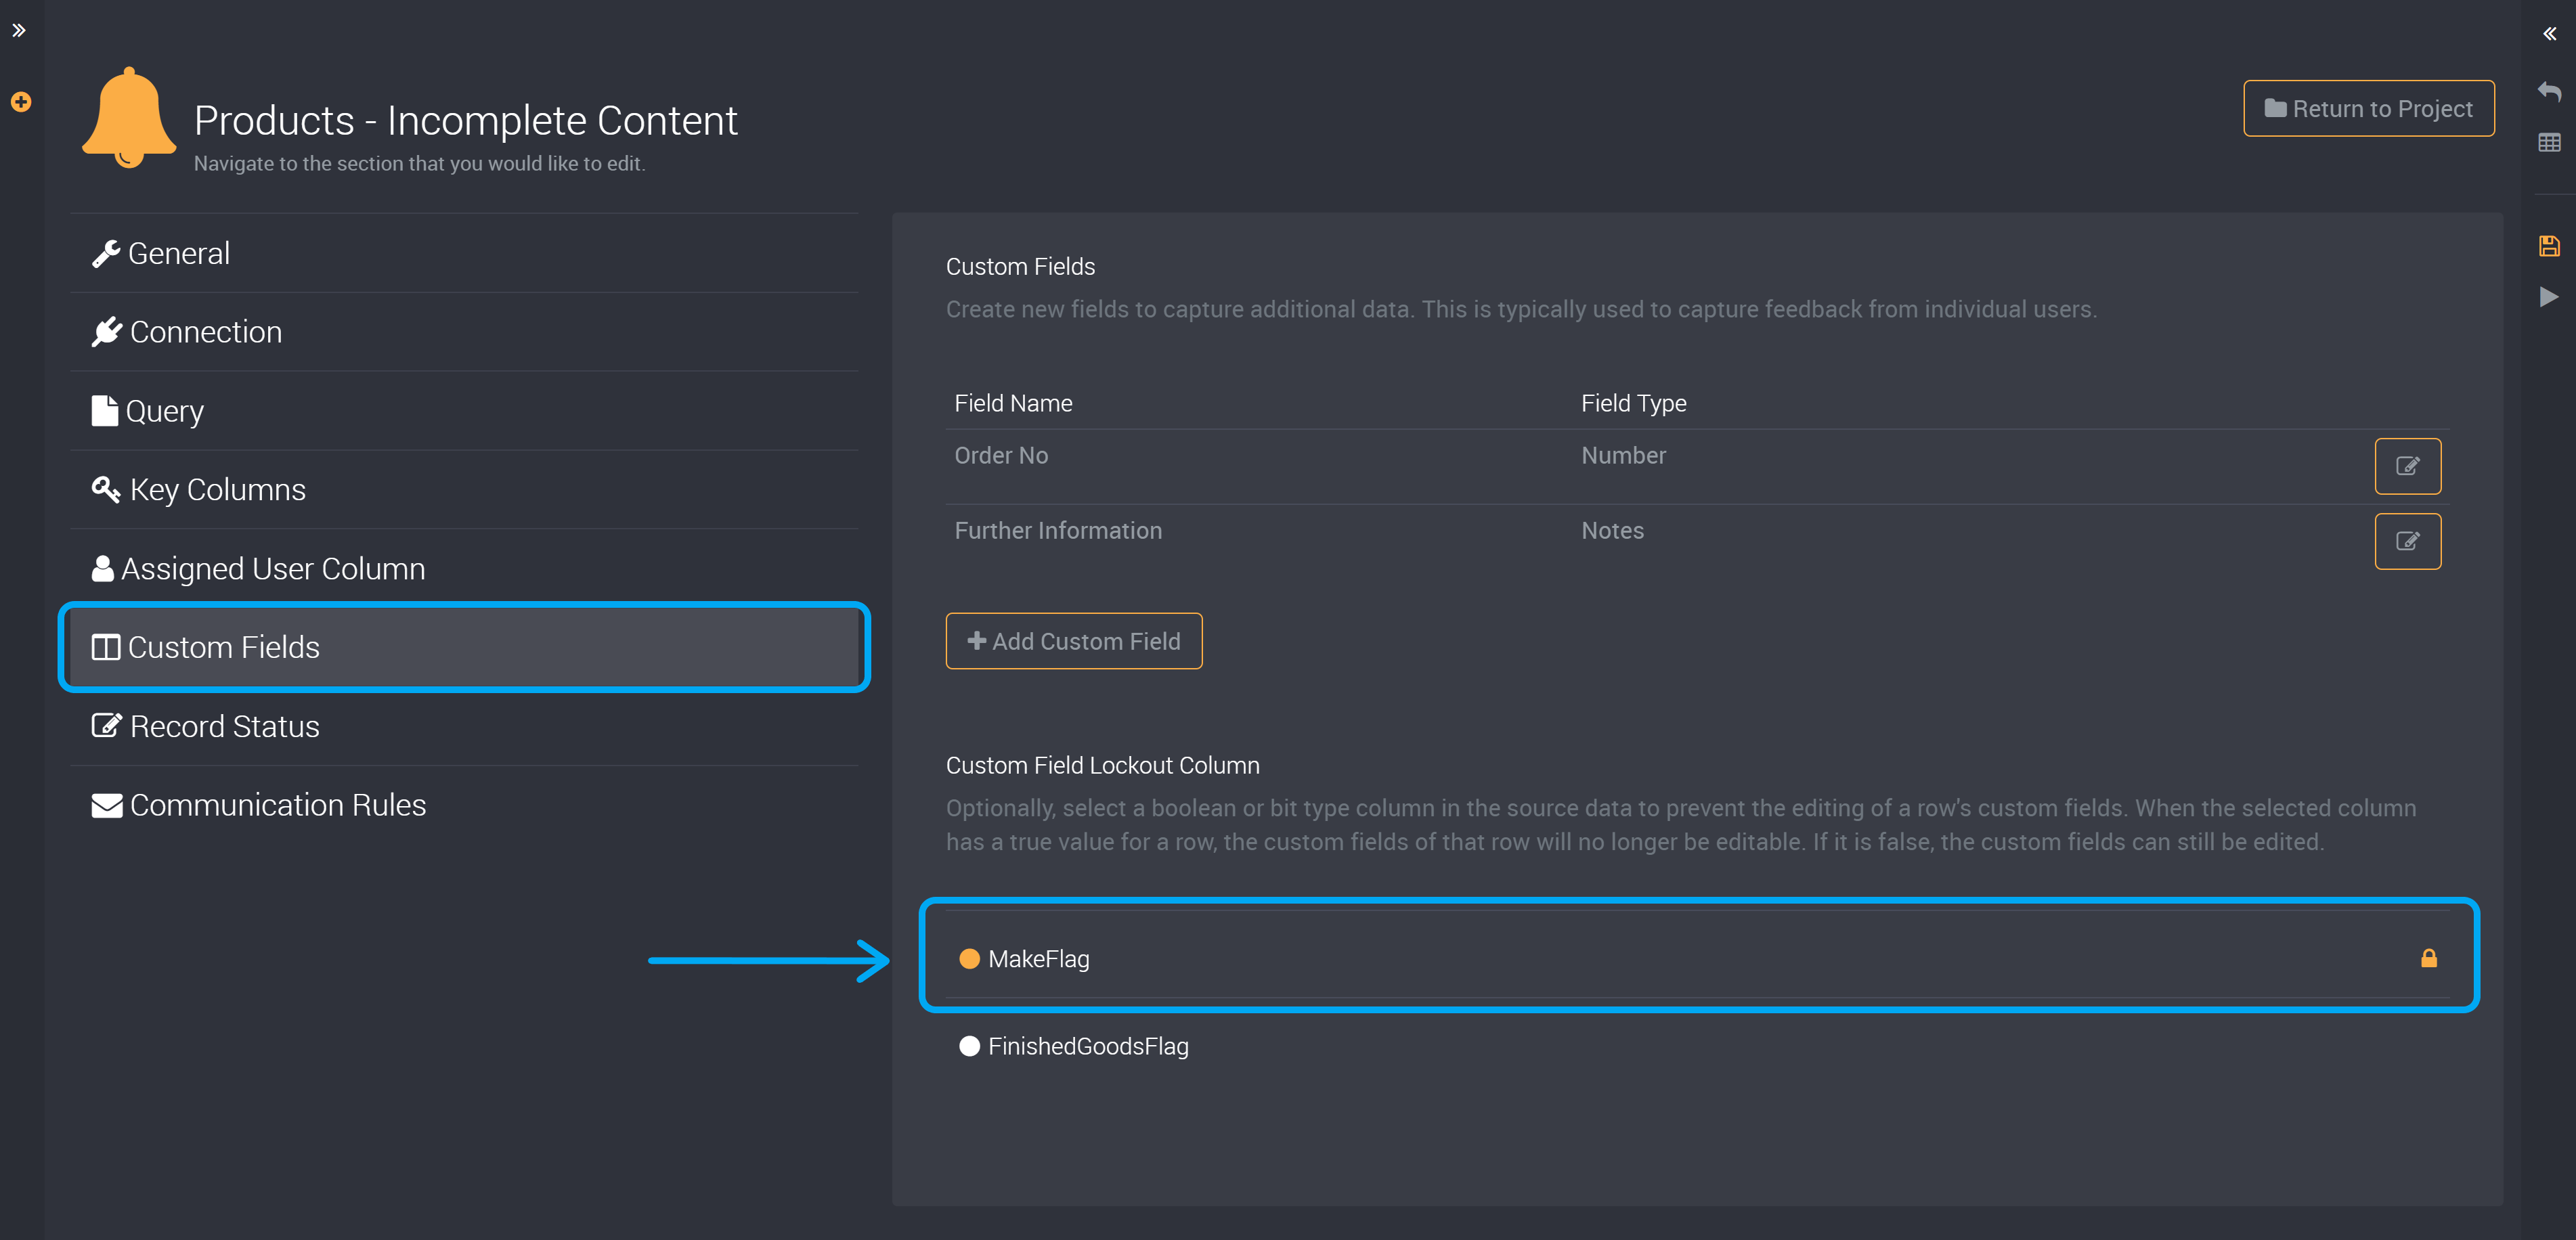
When a row has a true value in this column, the custom fields of the row cannot be edited.

If it is a false value, the custom fields can be edited.