Loome Assist in Teams
How to Add a Project in Microsoft Teams as a Project Tab
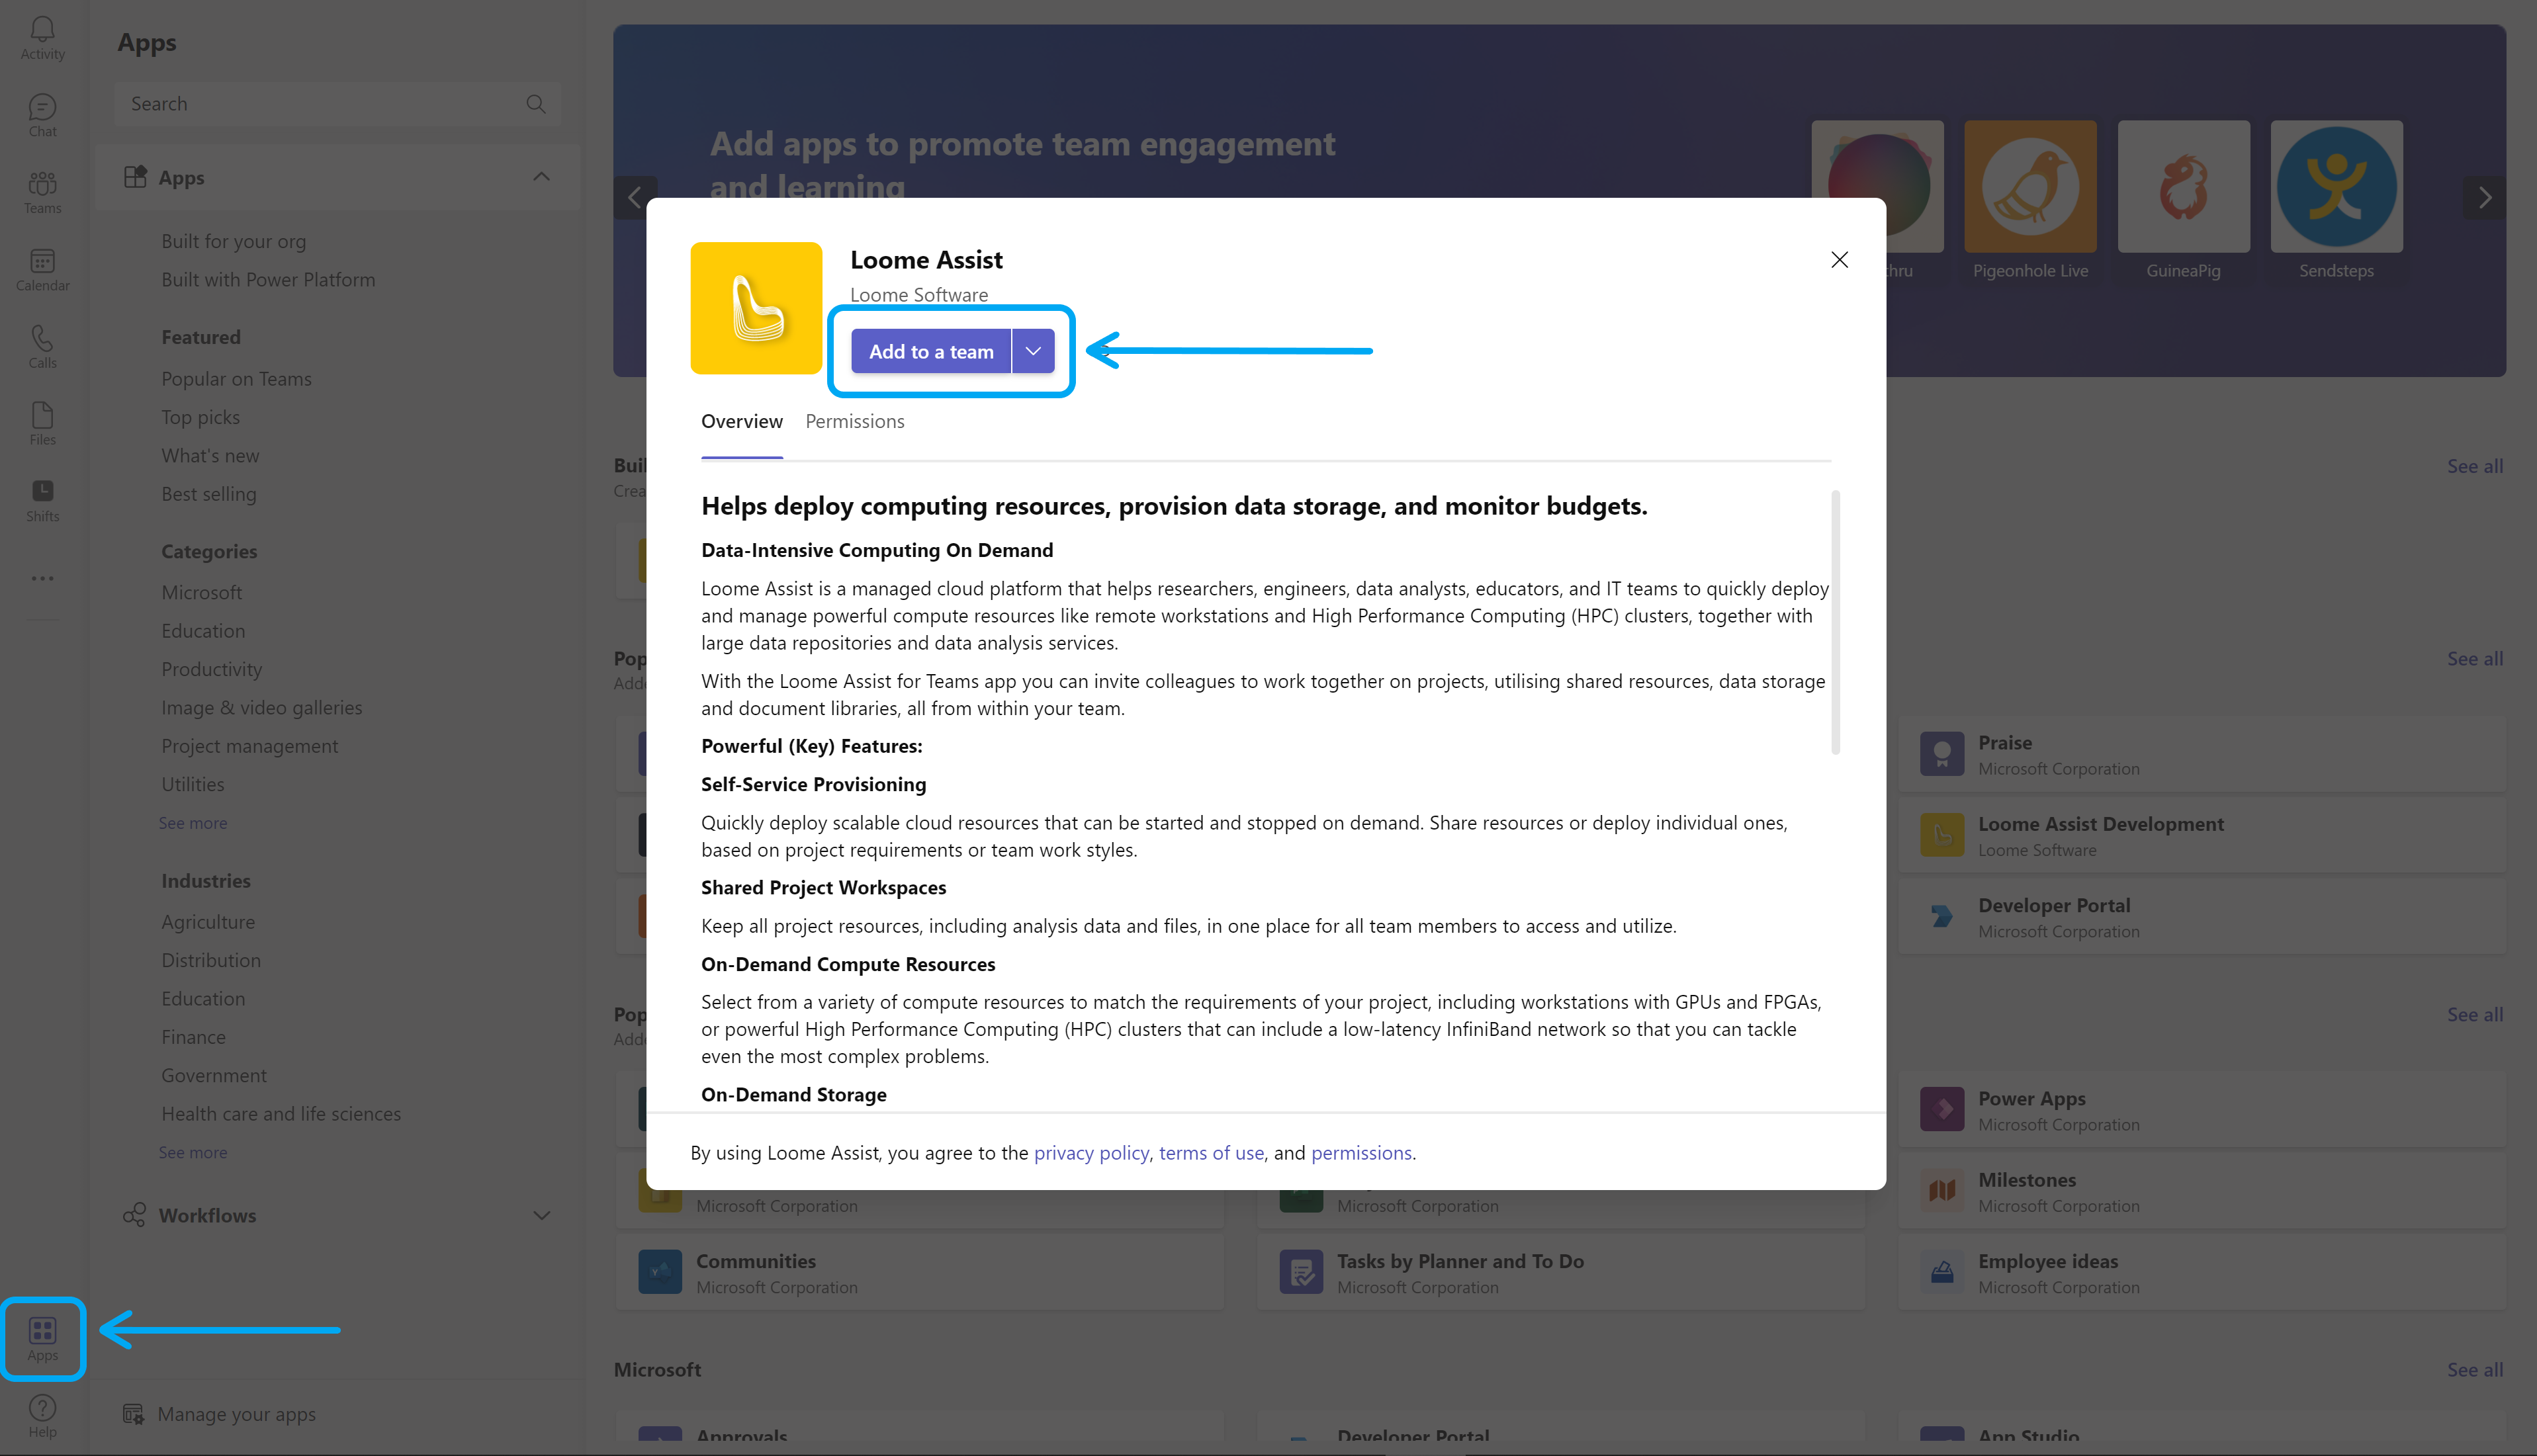
To add a project to your team in Microsoft Teams, you can click Apps in the bottom left of your Microsoft Teams app and then click Add to a team.
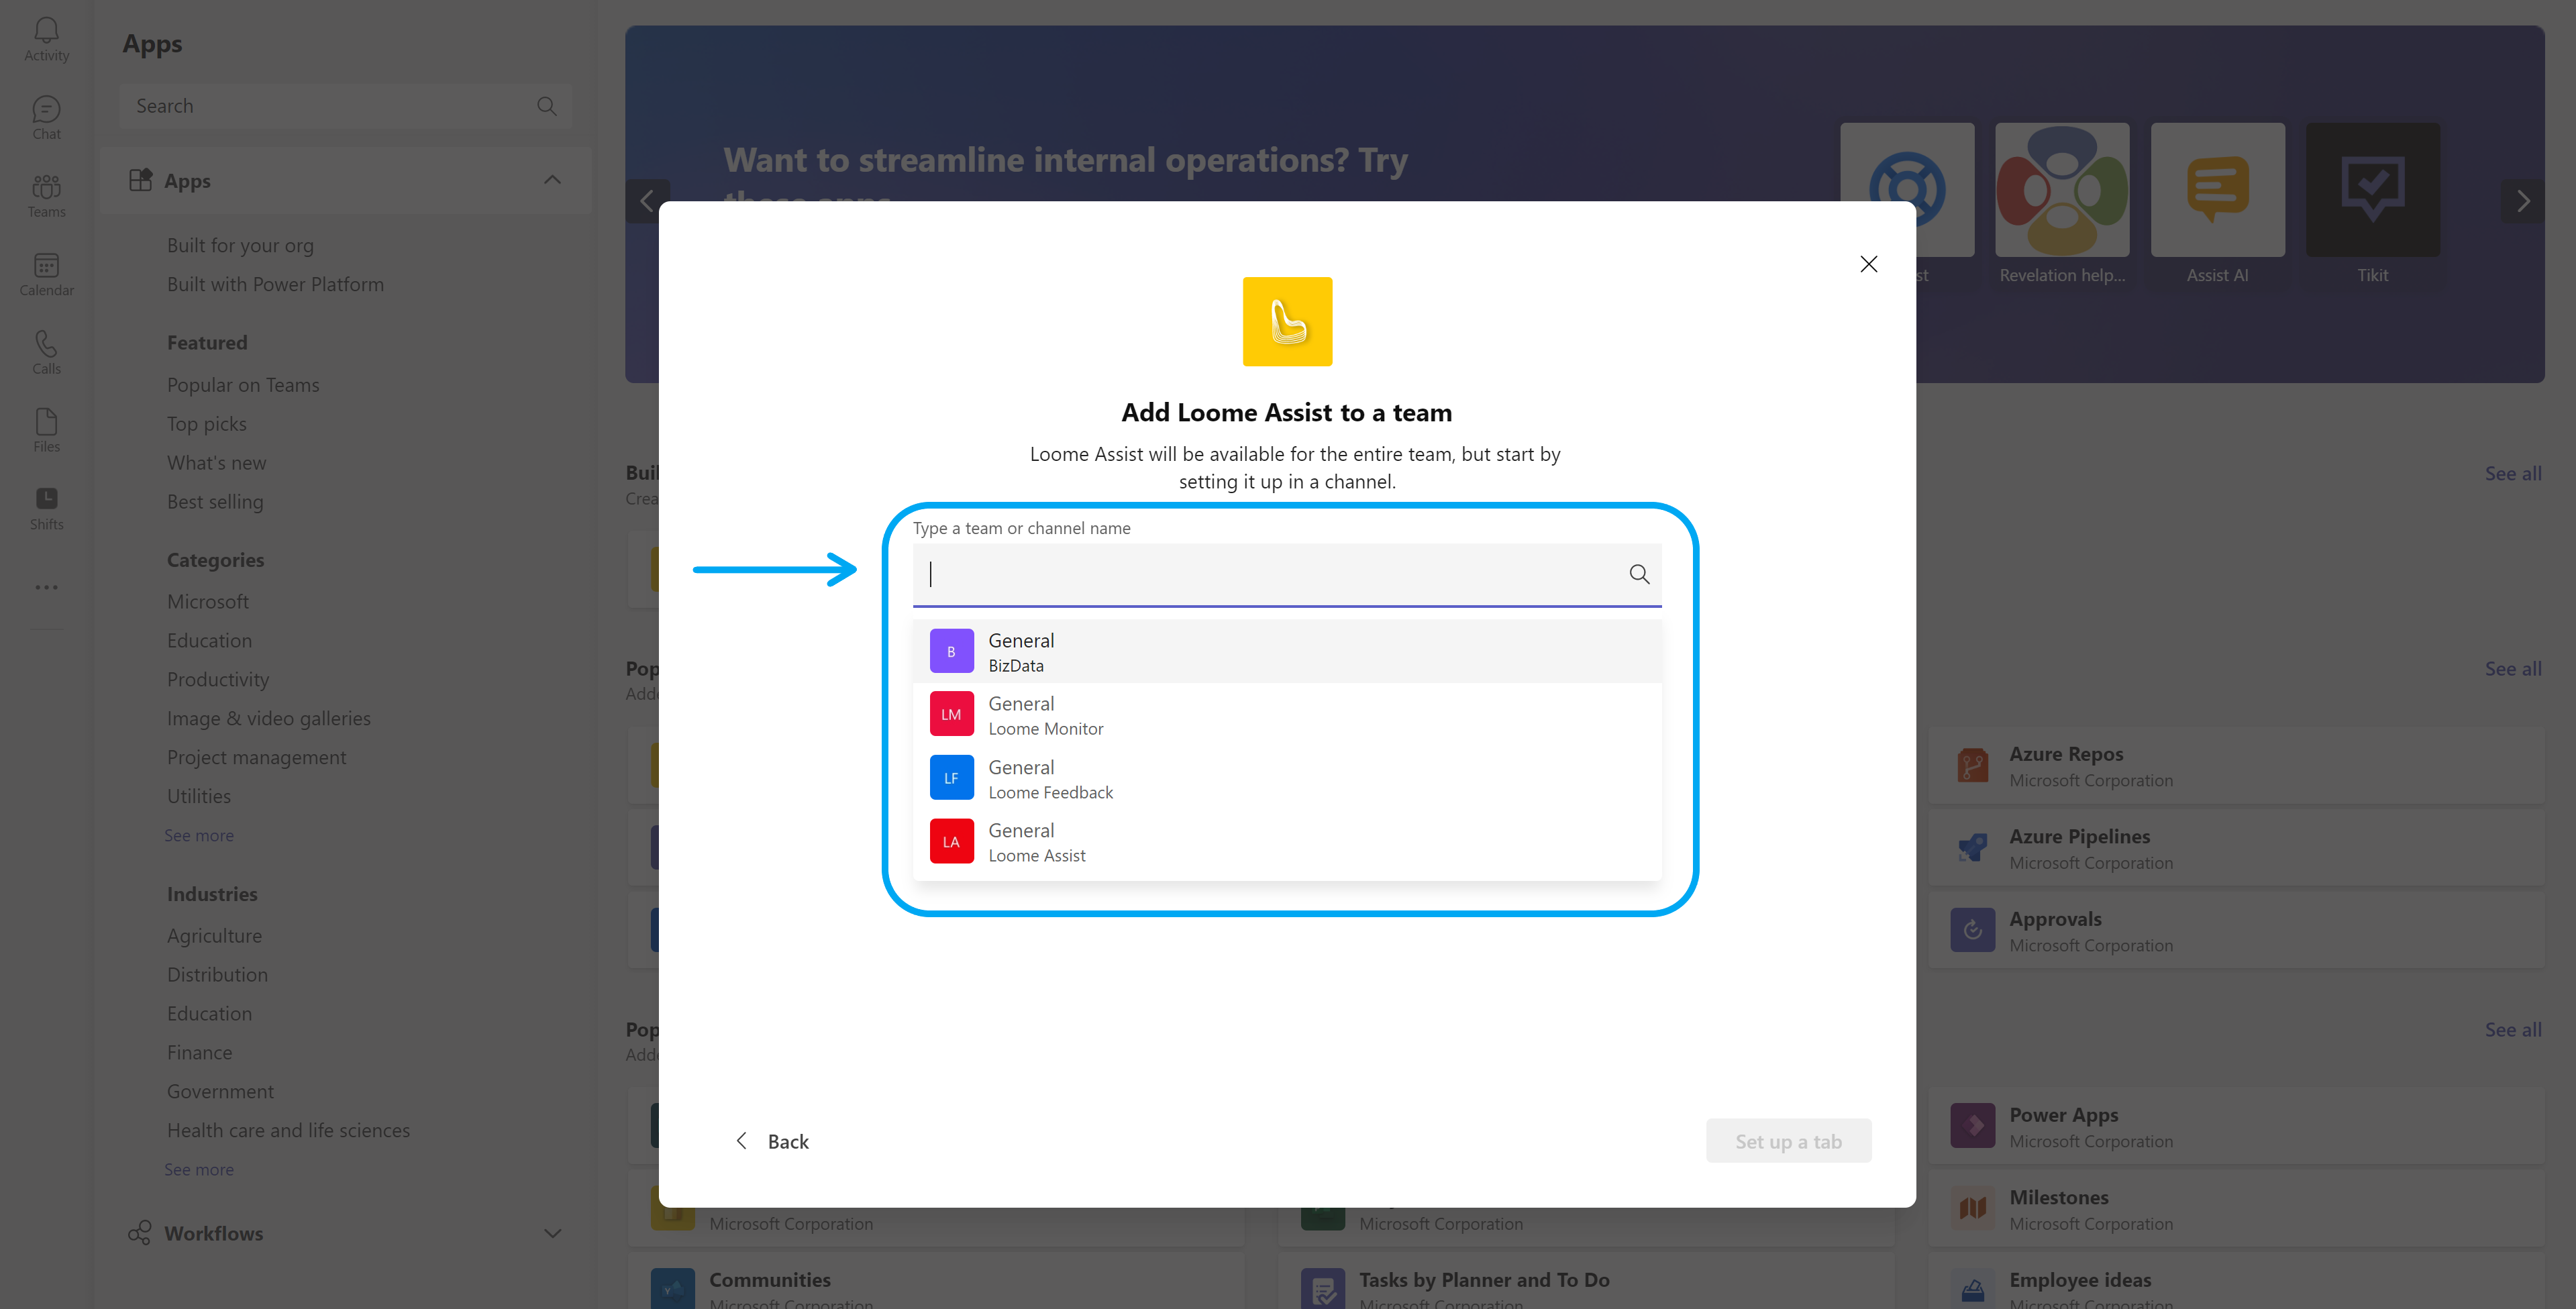
You can then choose the team you would like to add the Loome Assist project to.
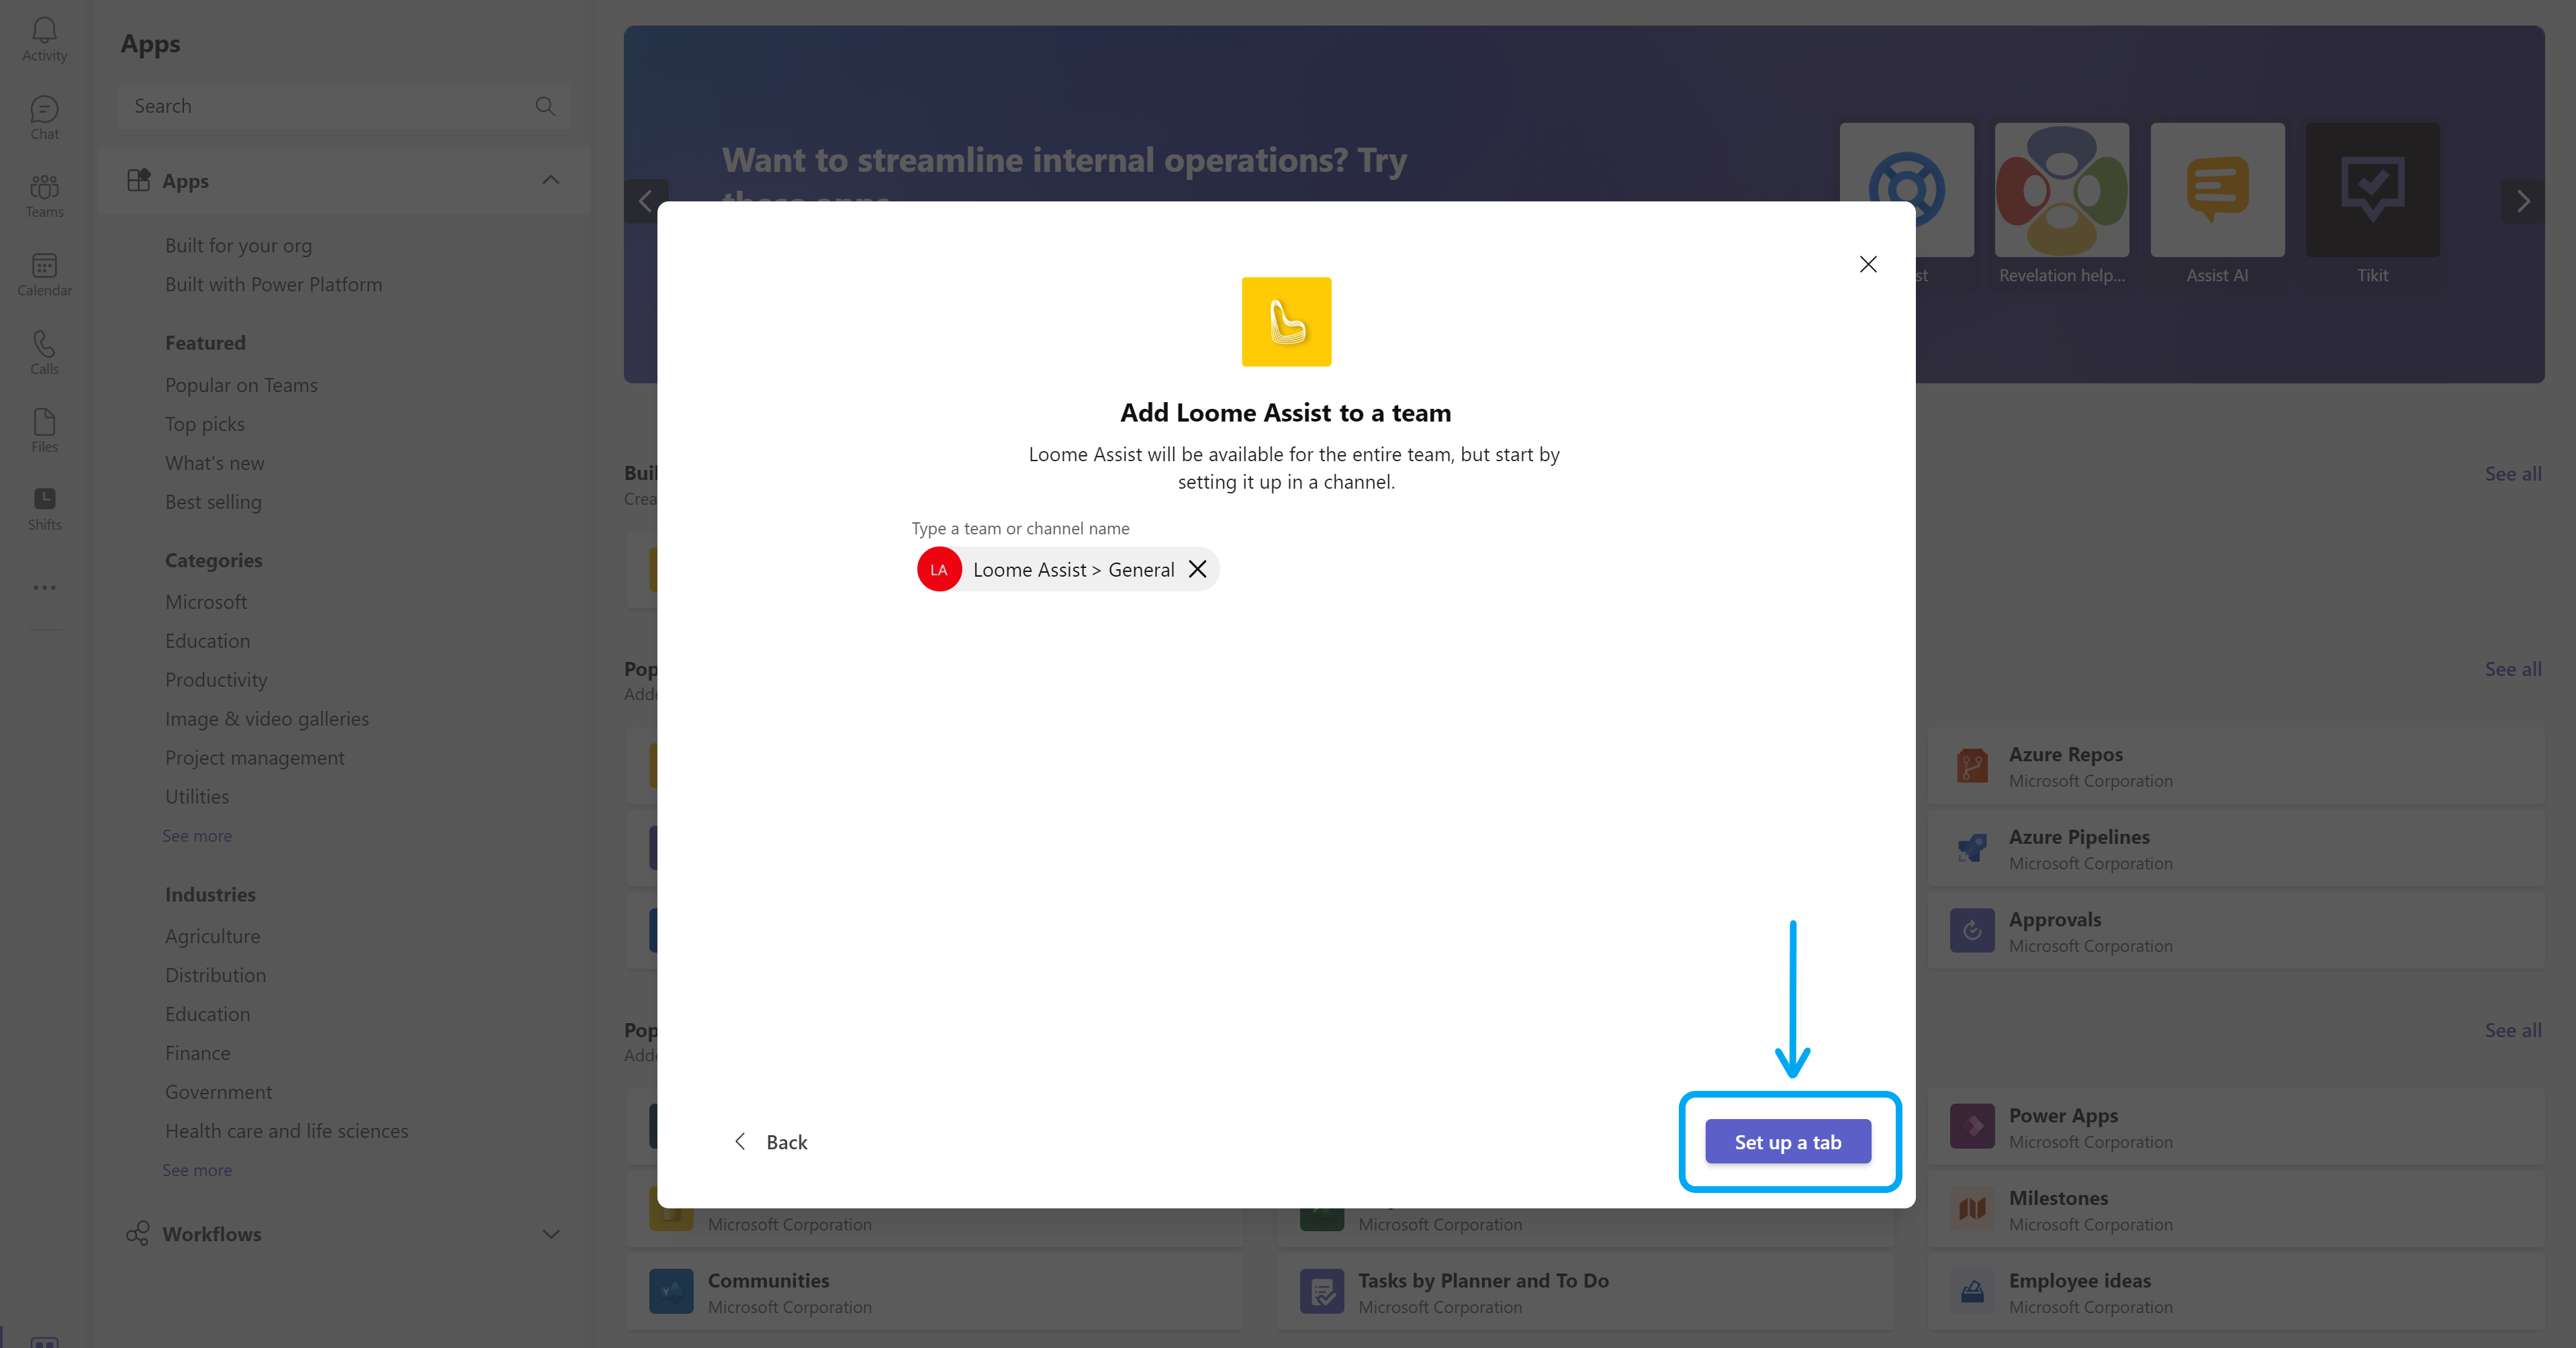
After you have selected your team, click Set up a tab.
If you are asked to review the permissions, click Review Permissions and follow the prompts to accept the application permissions.

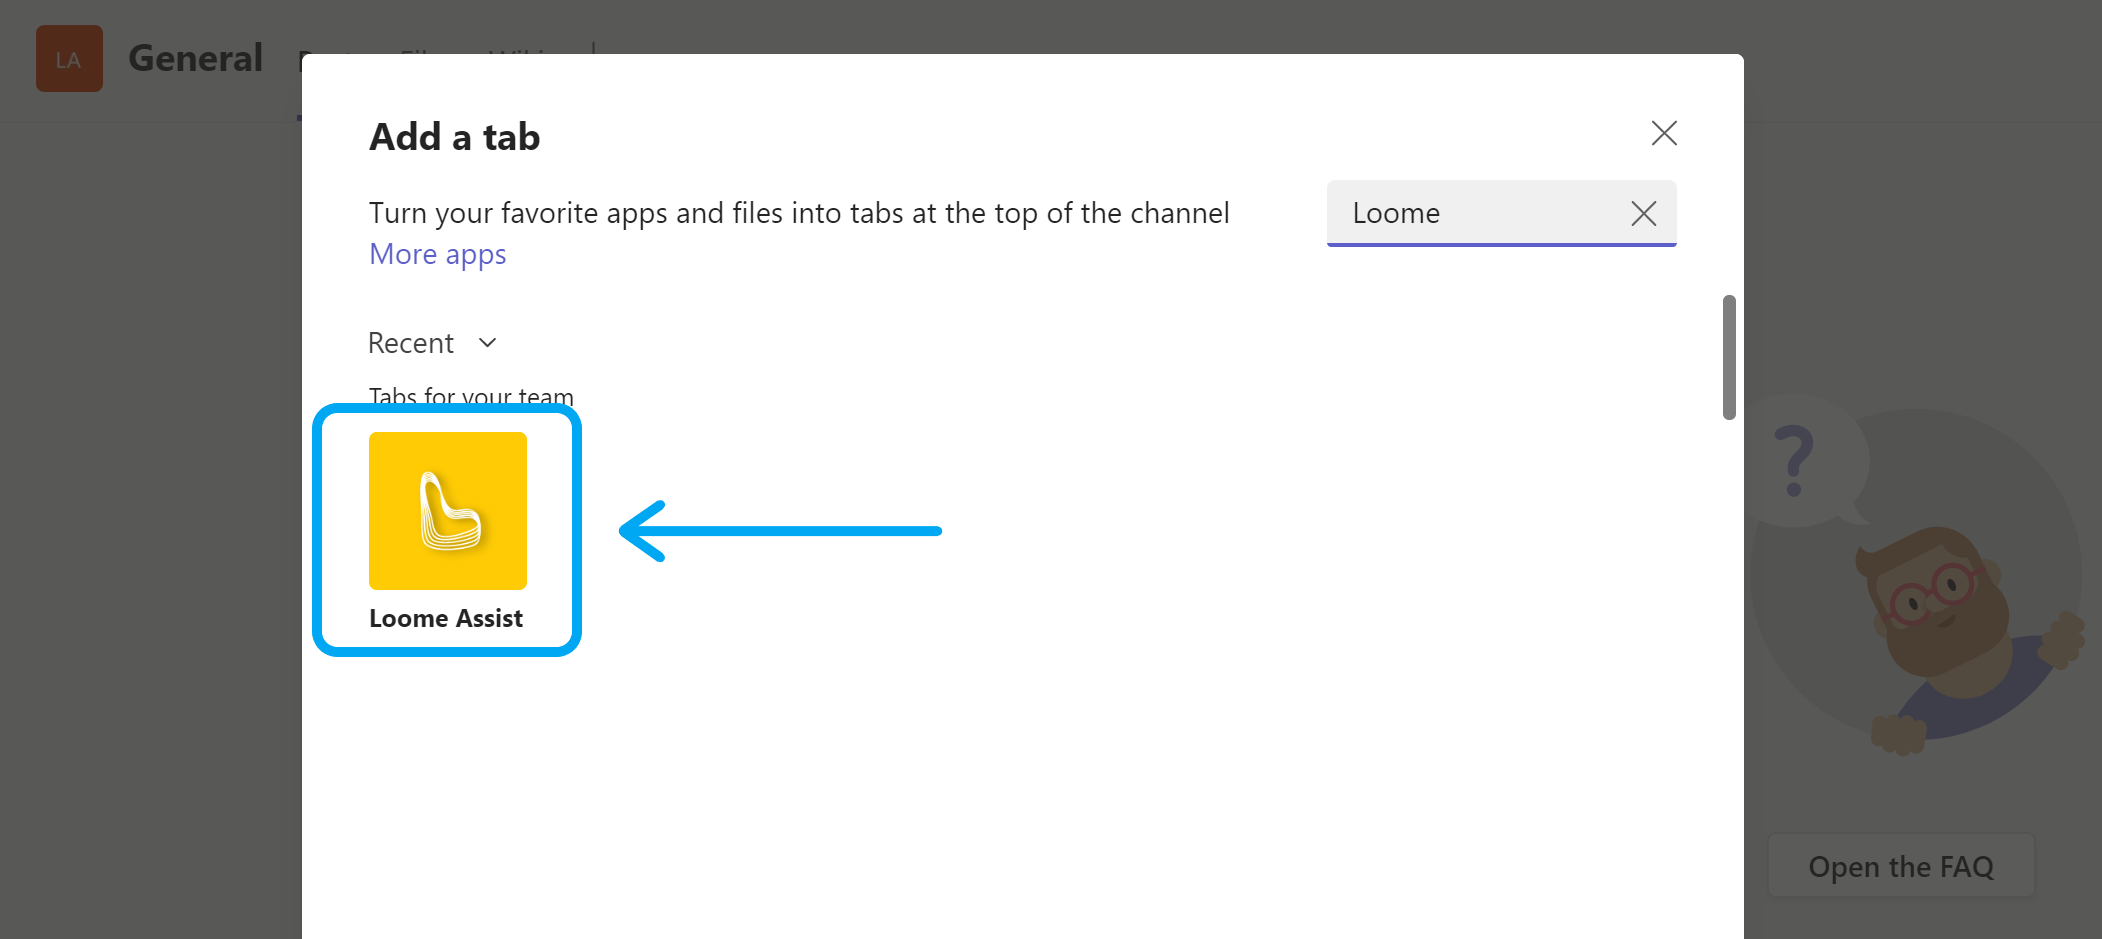
Alternatively, you can also add the app when browsing an existing team: 1. From a team tab, you can click the + that is beside your tabs of that team.
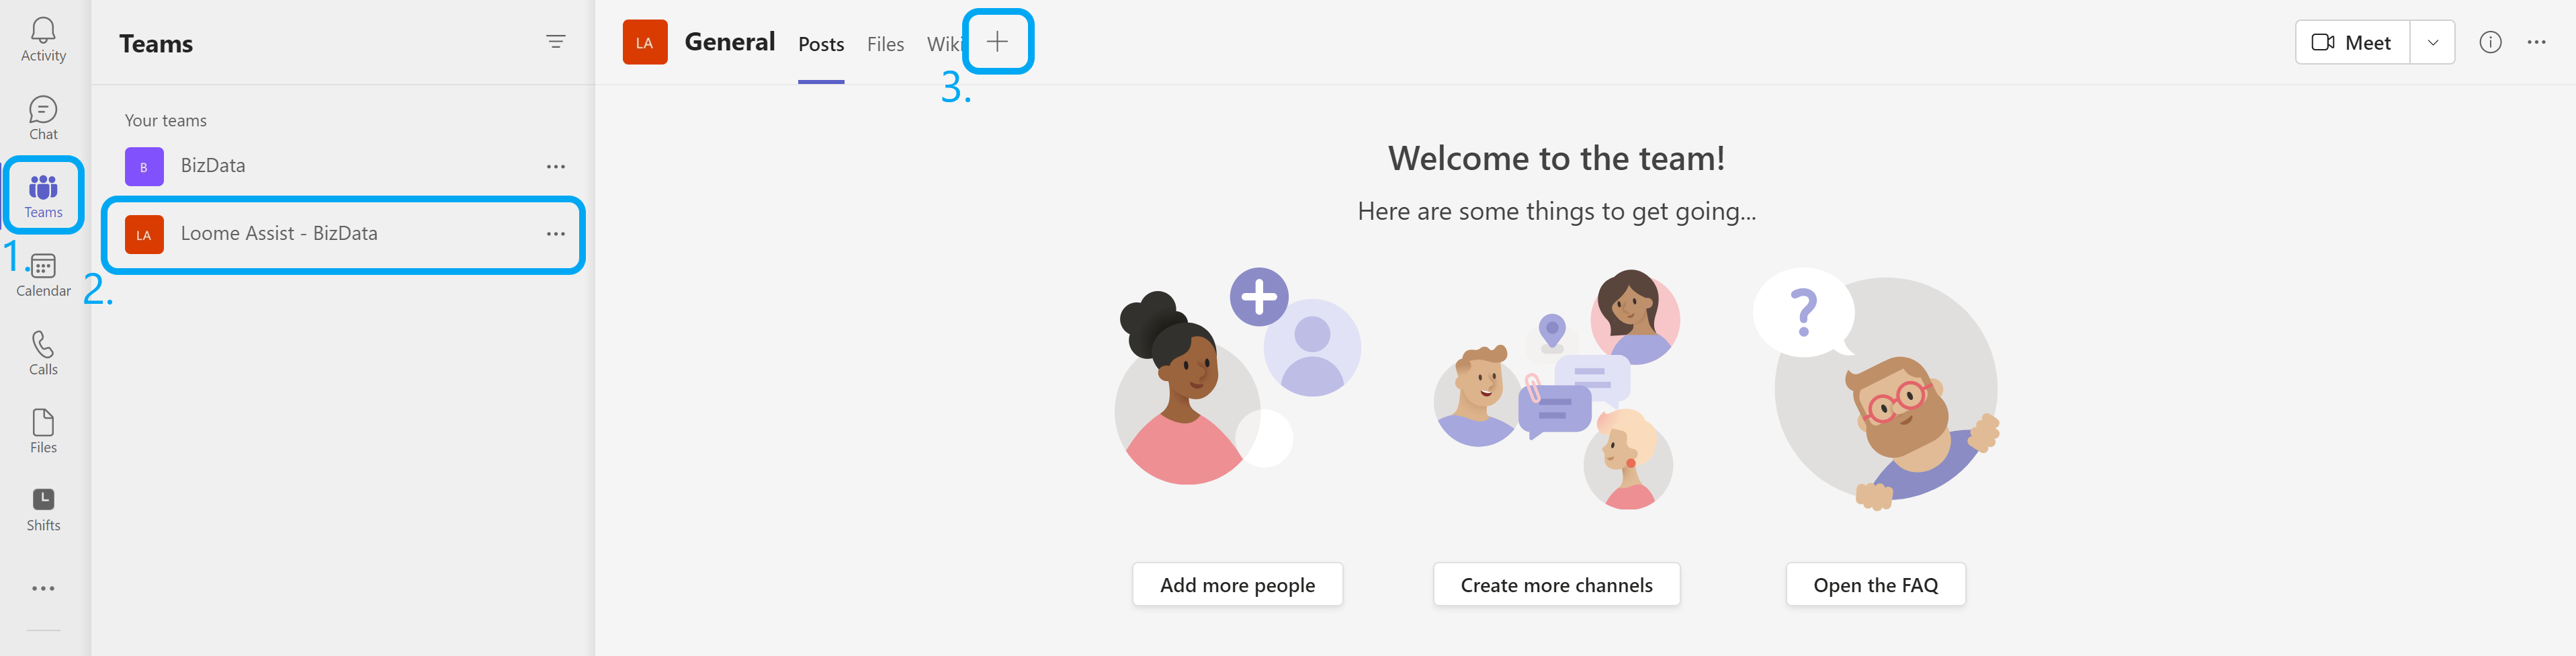
- Search for Loome Assist and you will find the Loome Assist app that will add a project tab to your team.
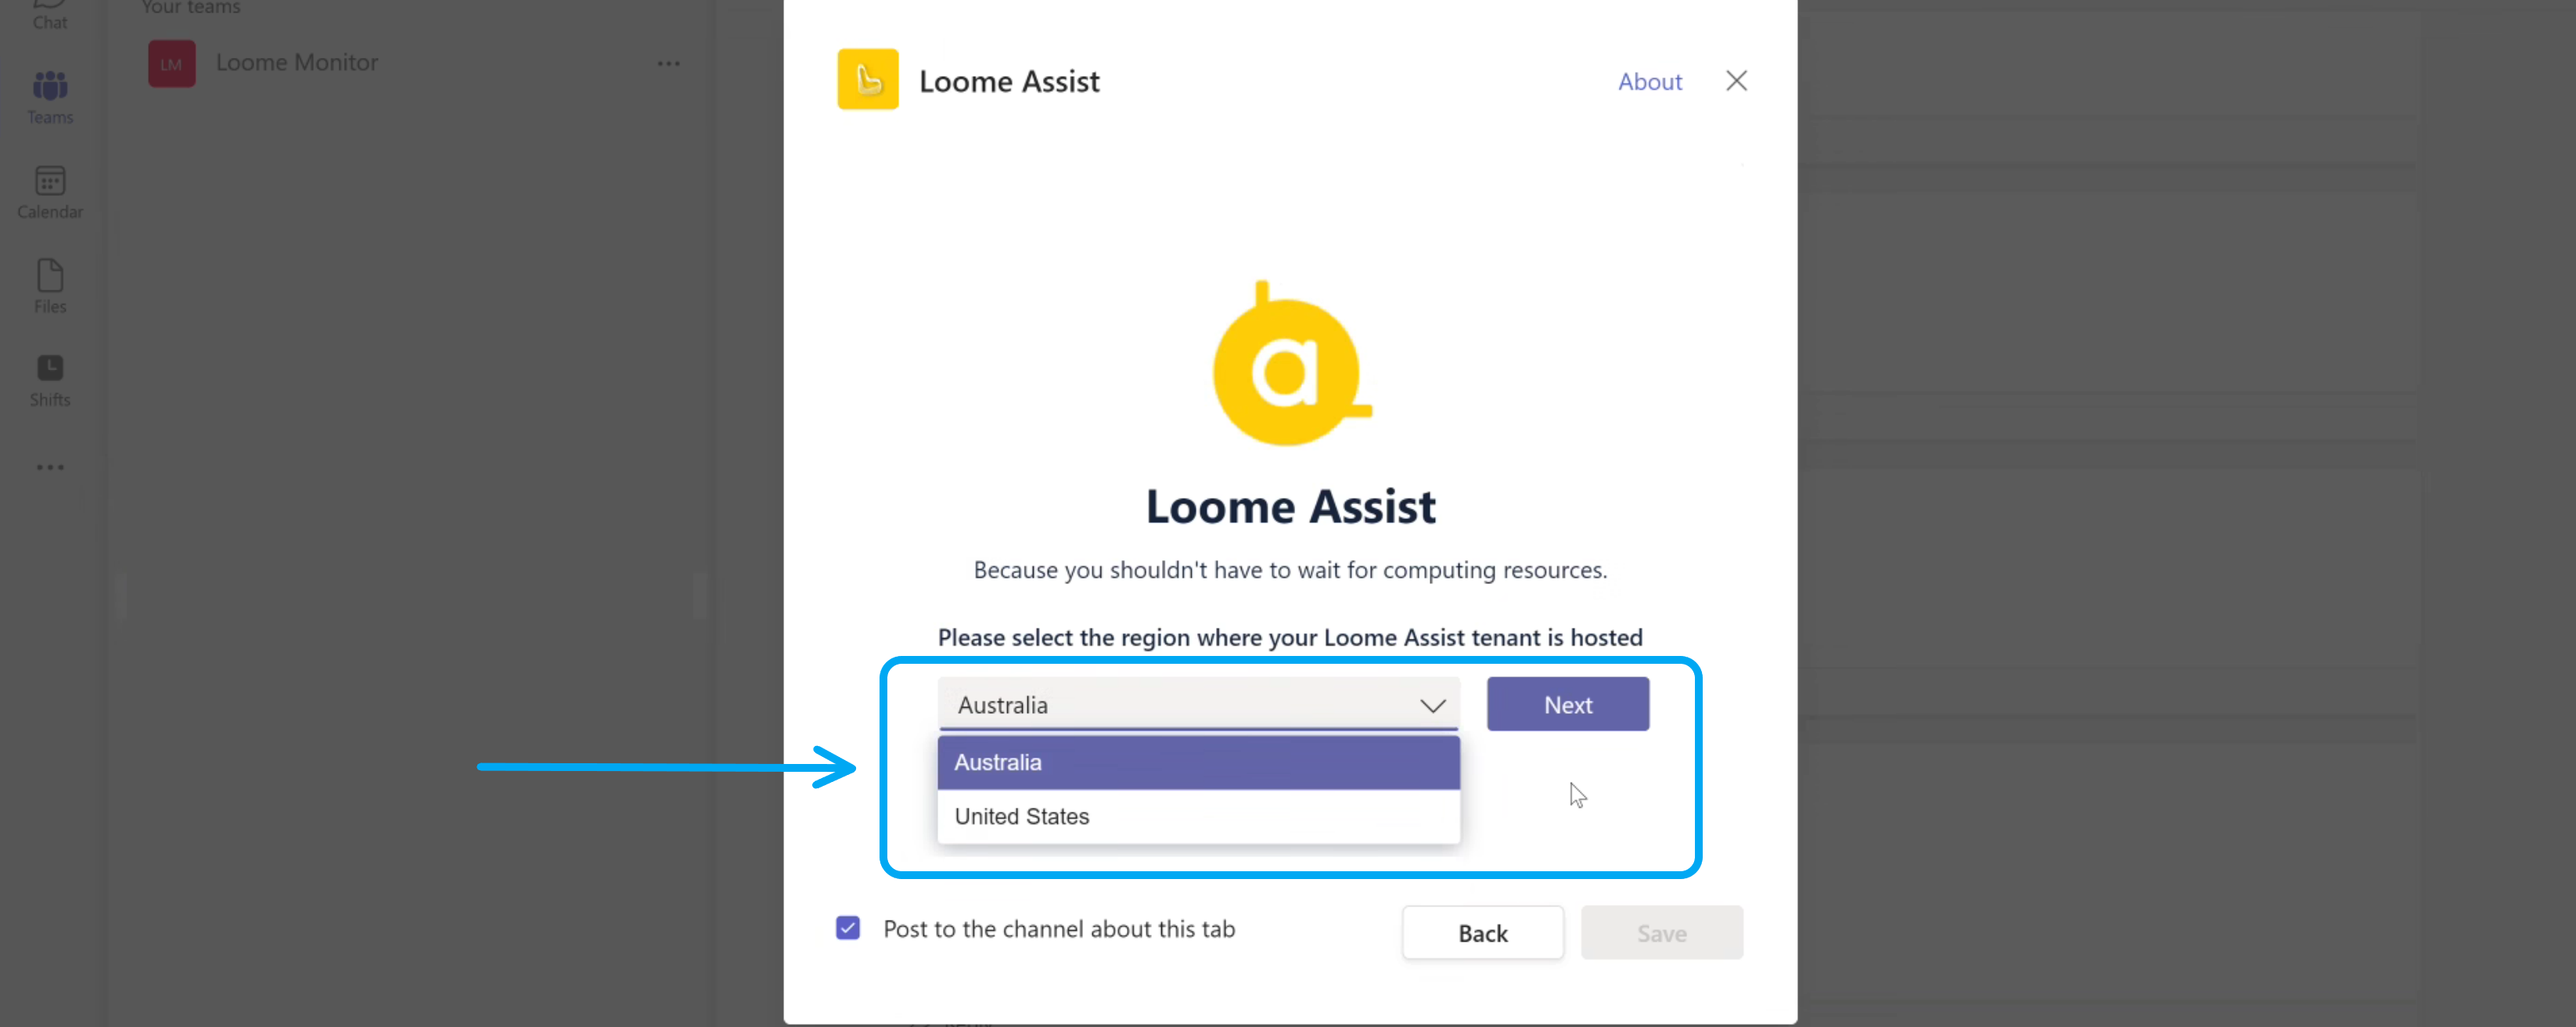
Choose your Region
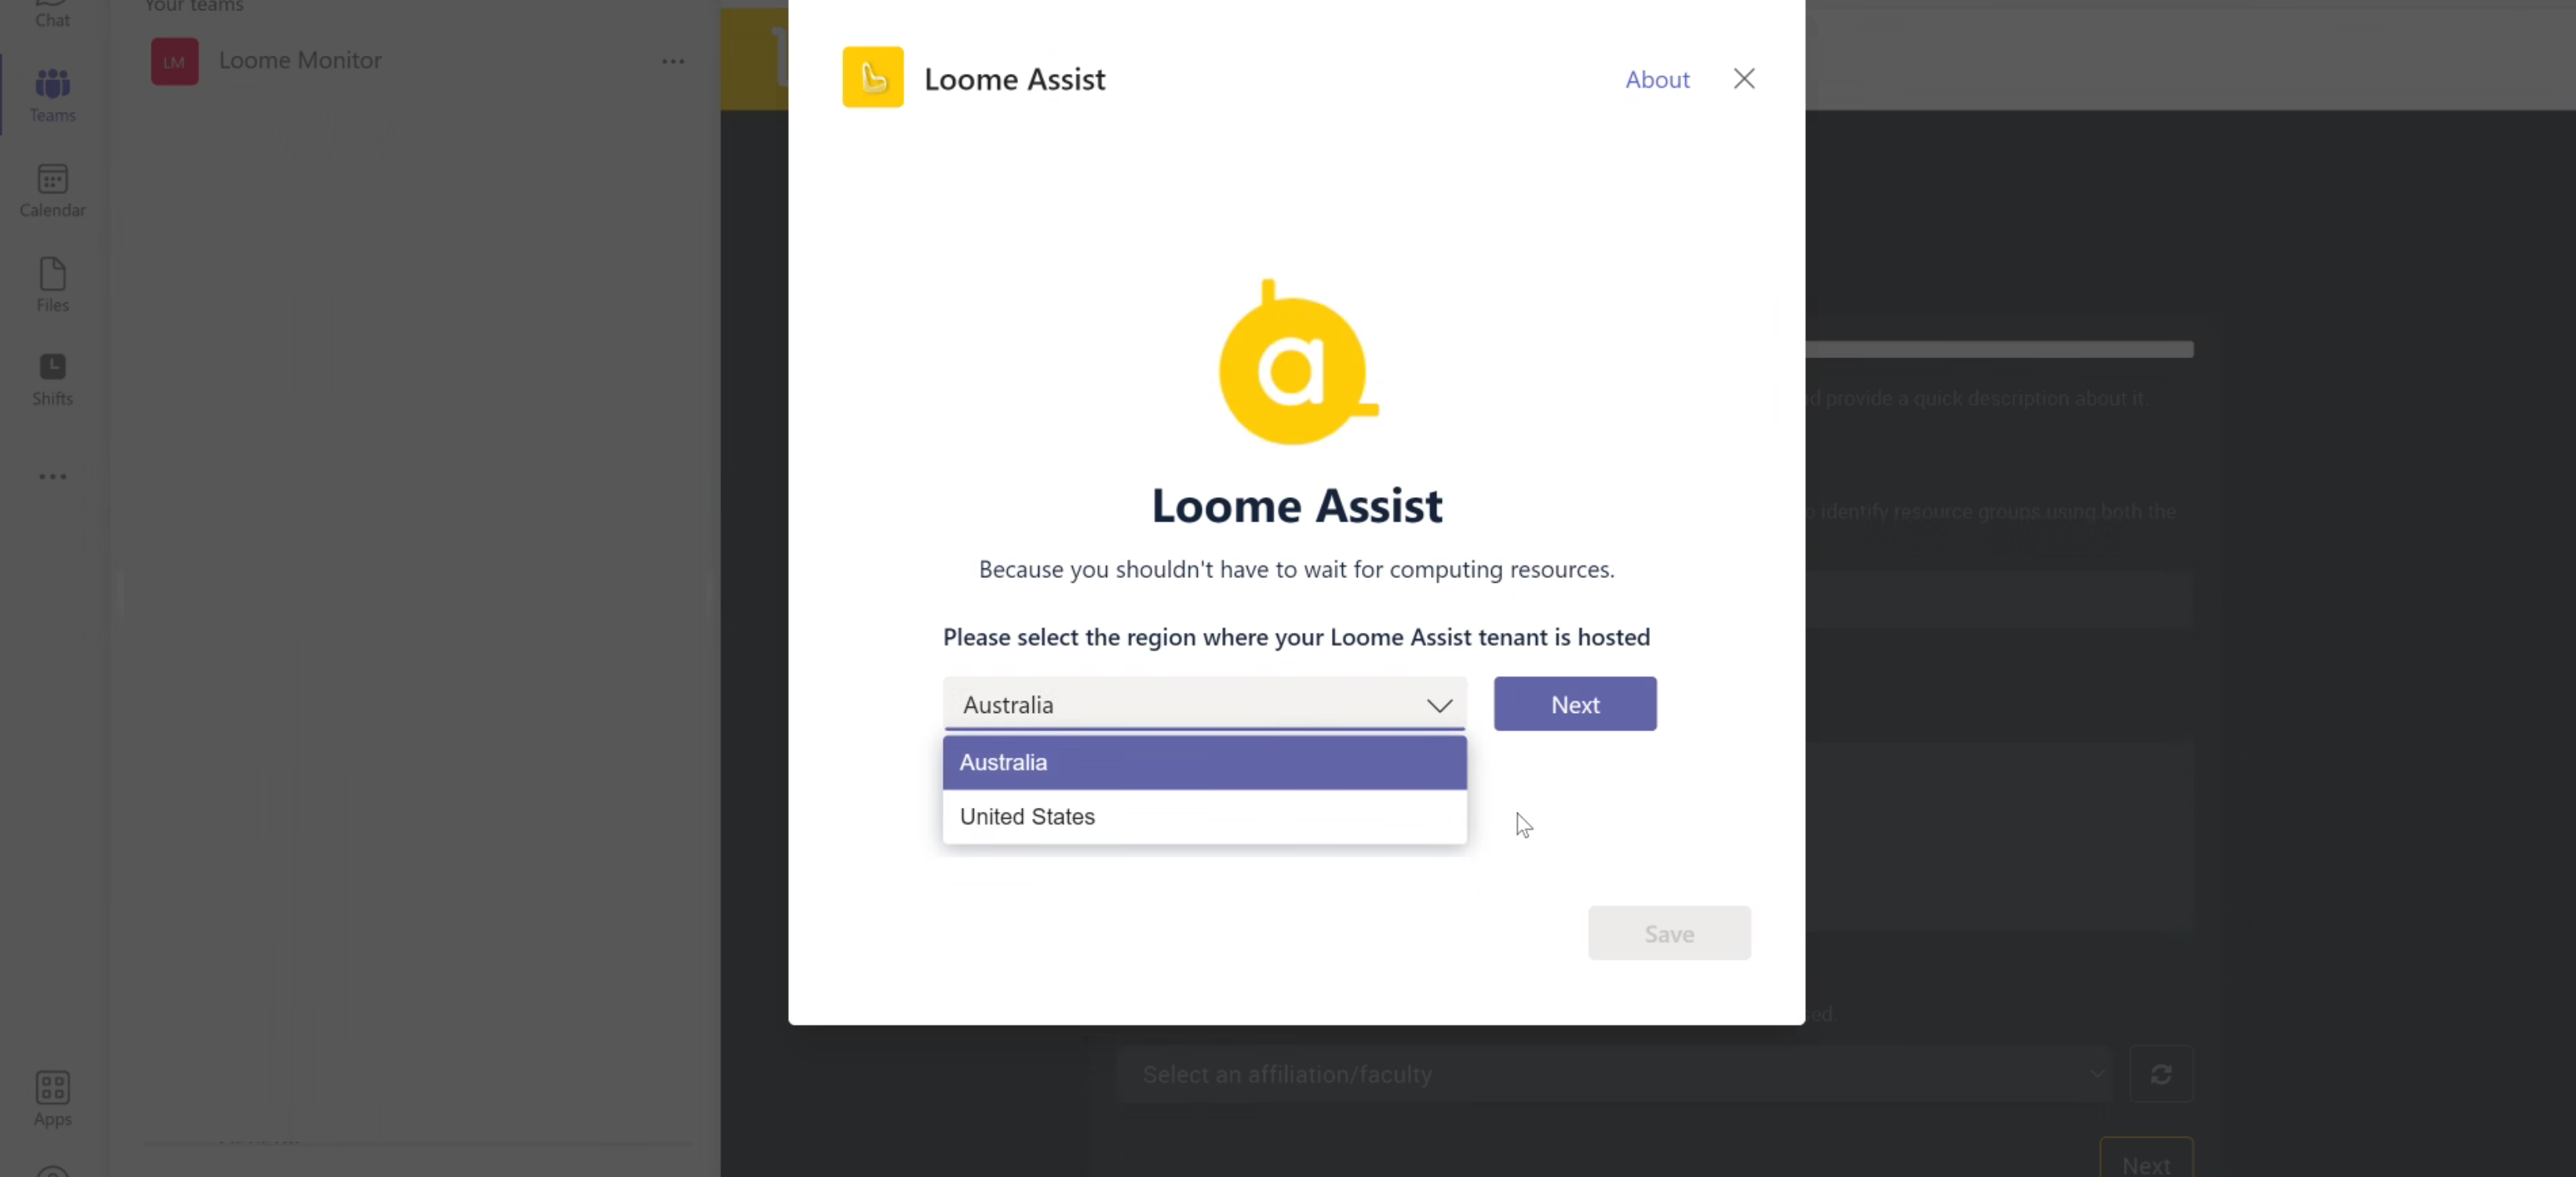
After you choose the app, you will choose the region that your tenant is located in from the dropdown.
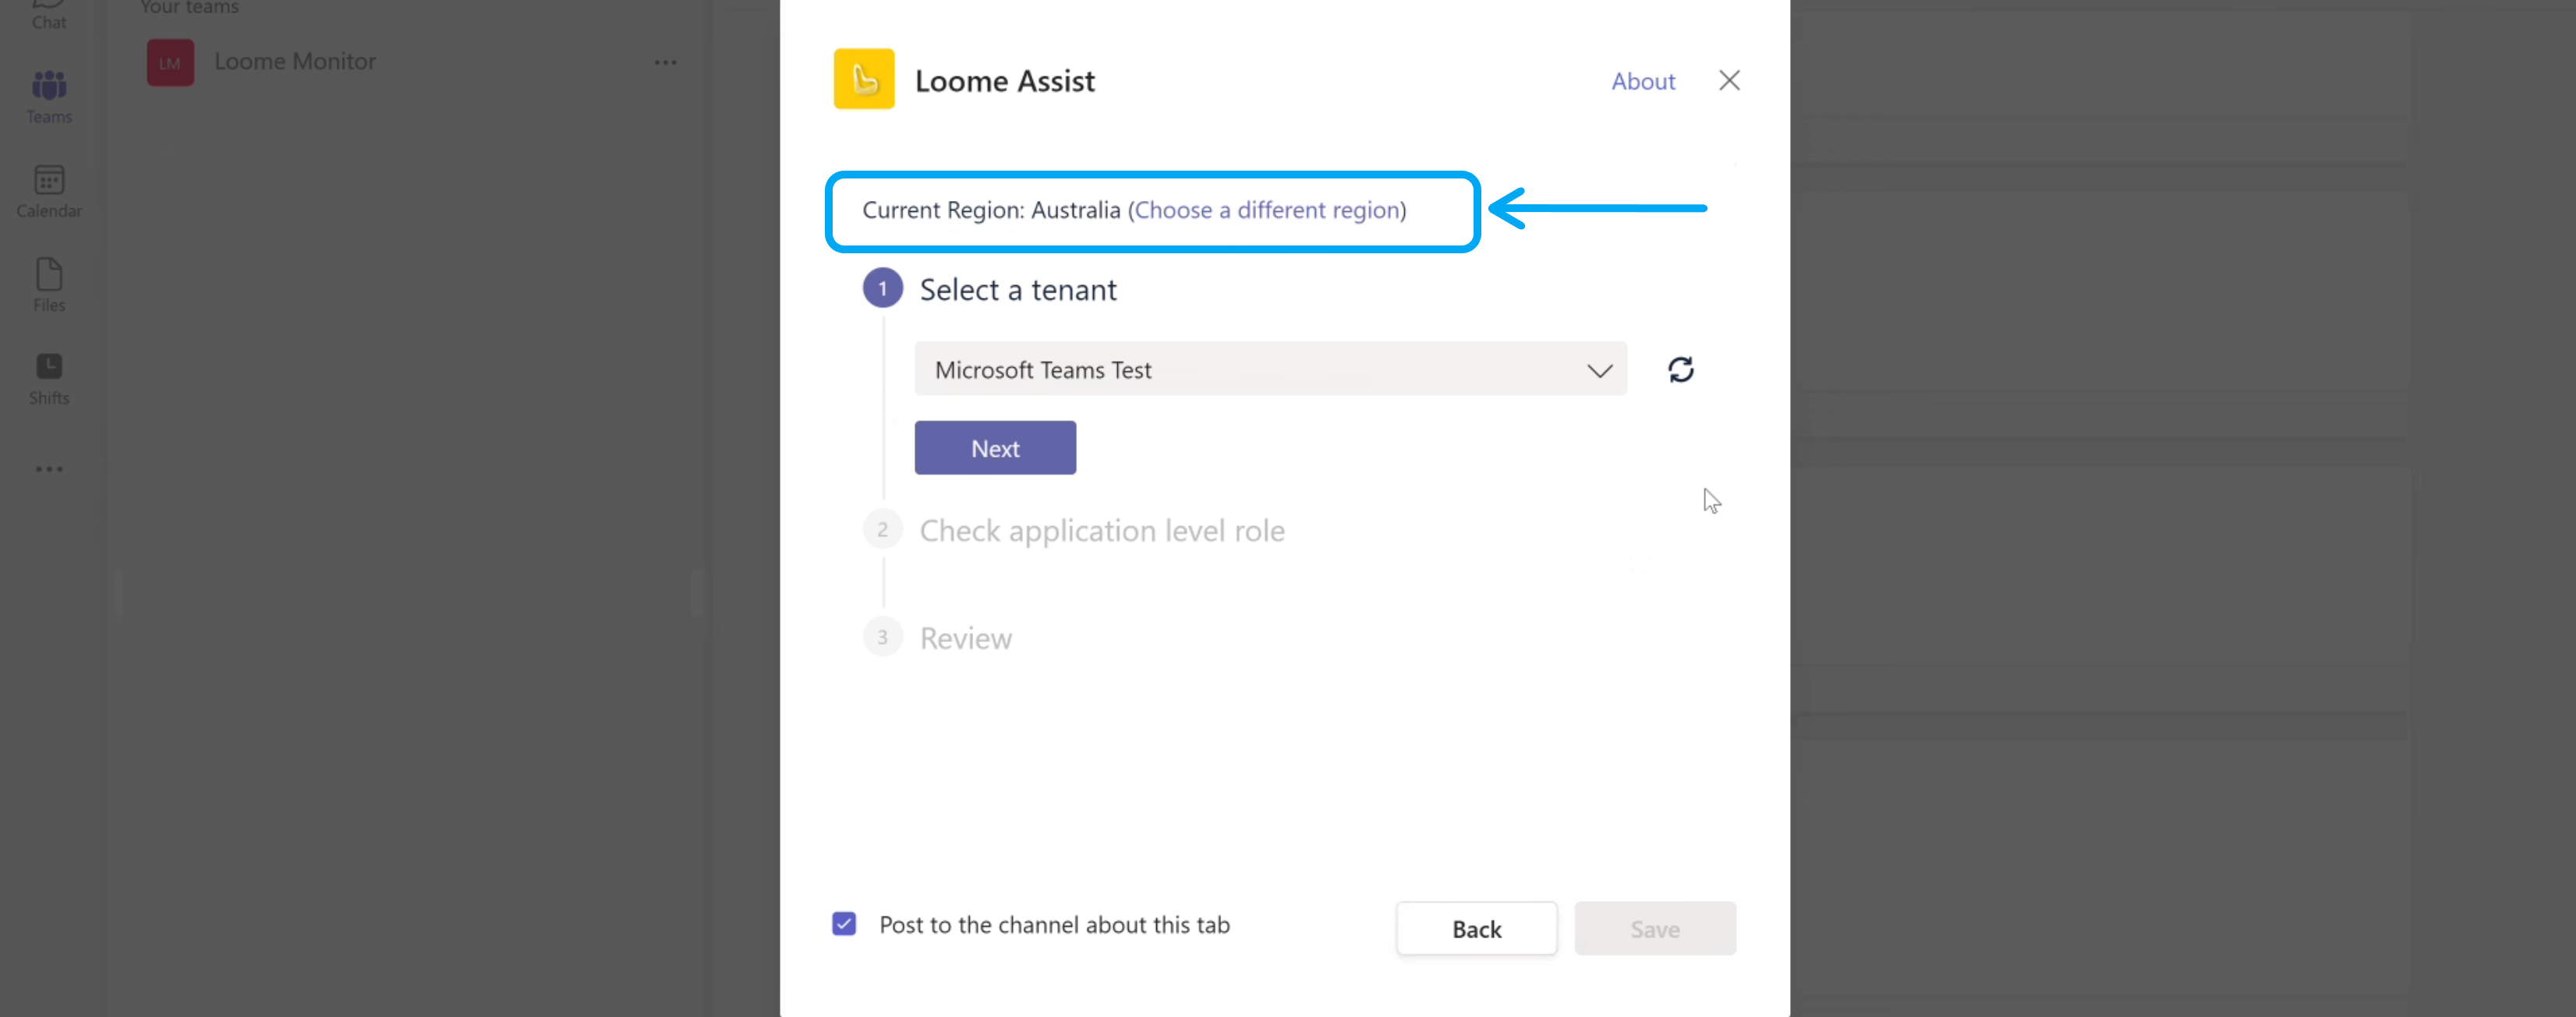
You can edit the region before you create your project in Microsoft Teams. The option is available when selecting your tenant or in the settings while creating your project. After you have created your project you cannot change your region.
You have the option to change the region while choosing the tenant.
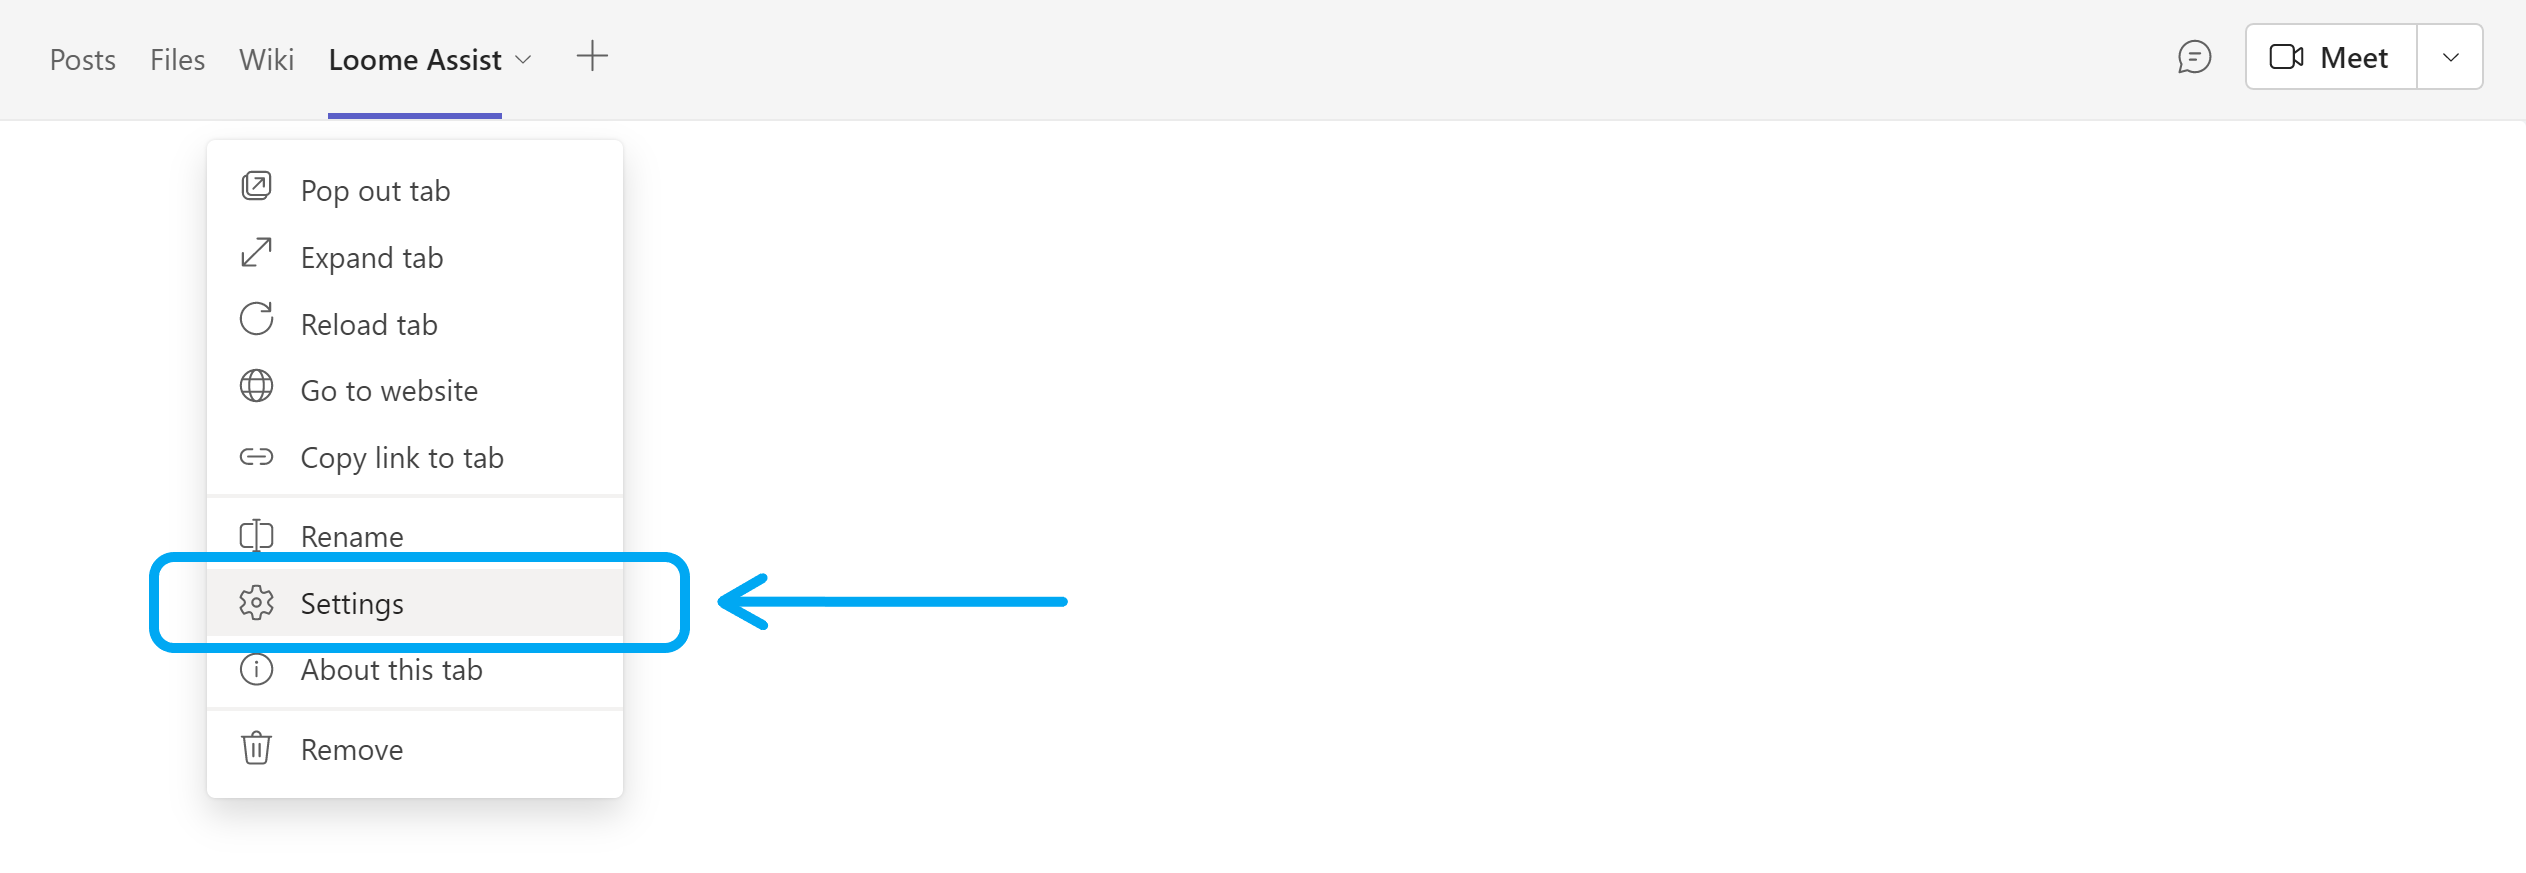
You have the option to change the region while creating the project by clicking Settings in the tab dropdown.
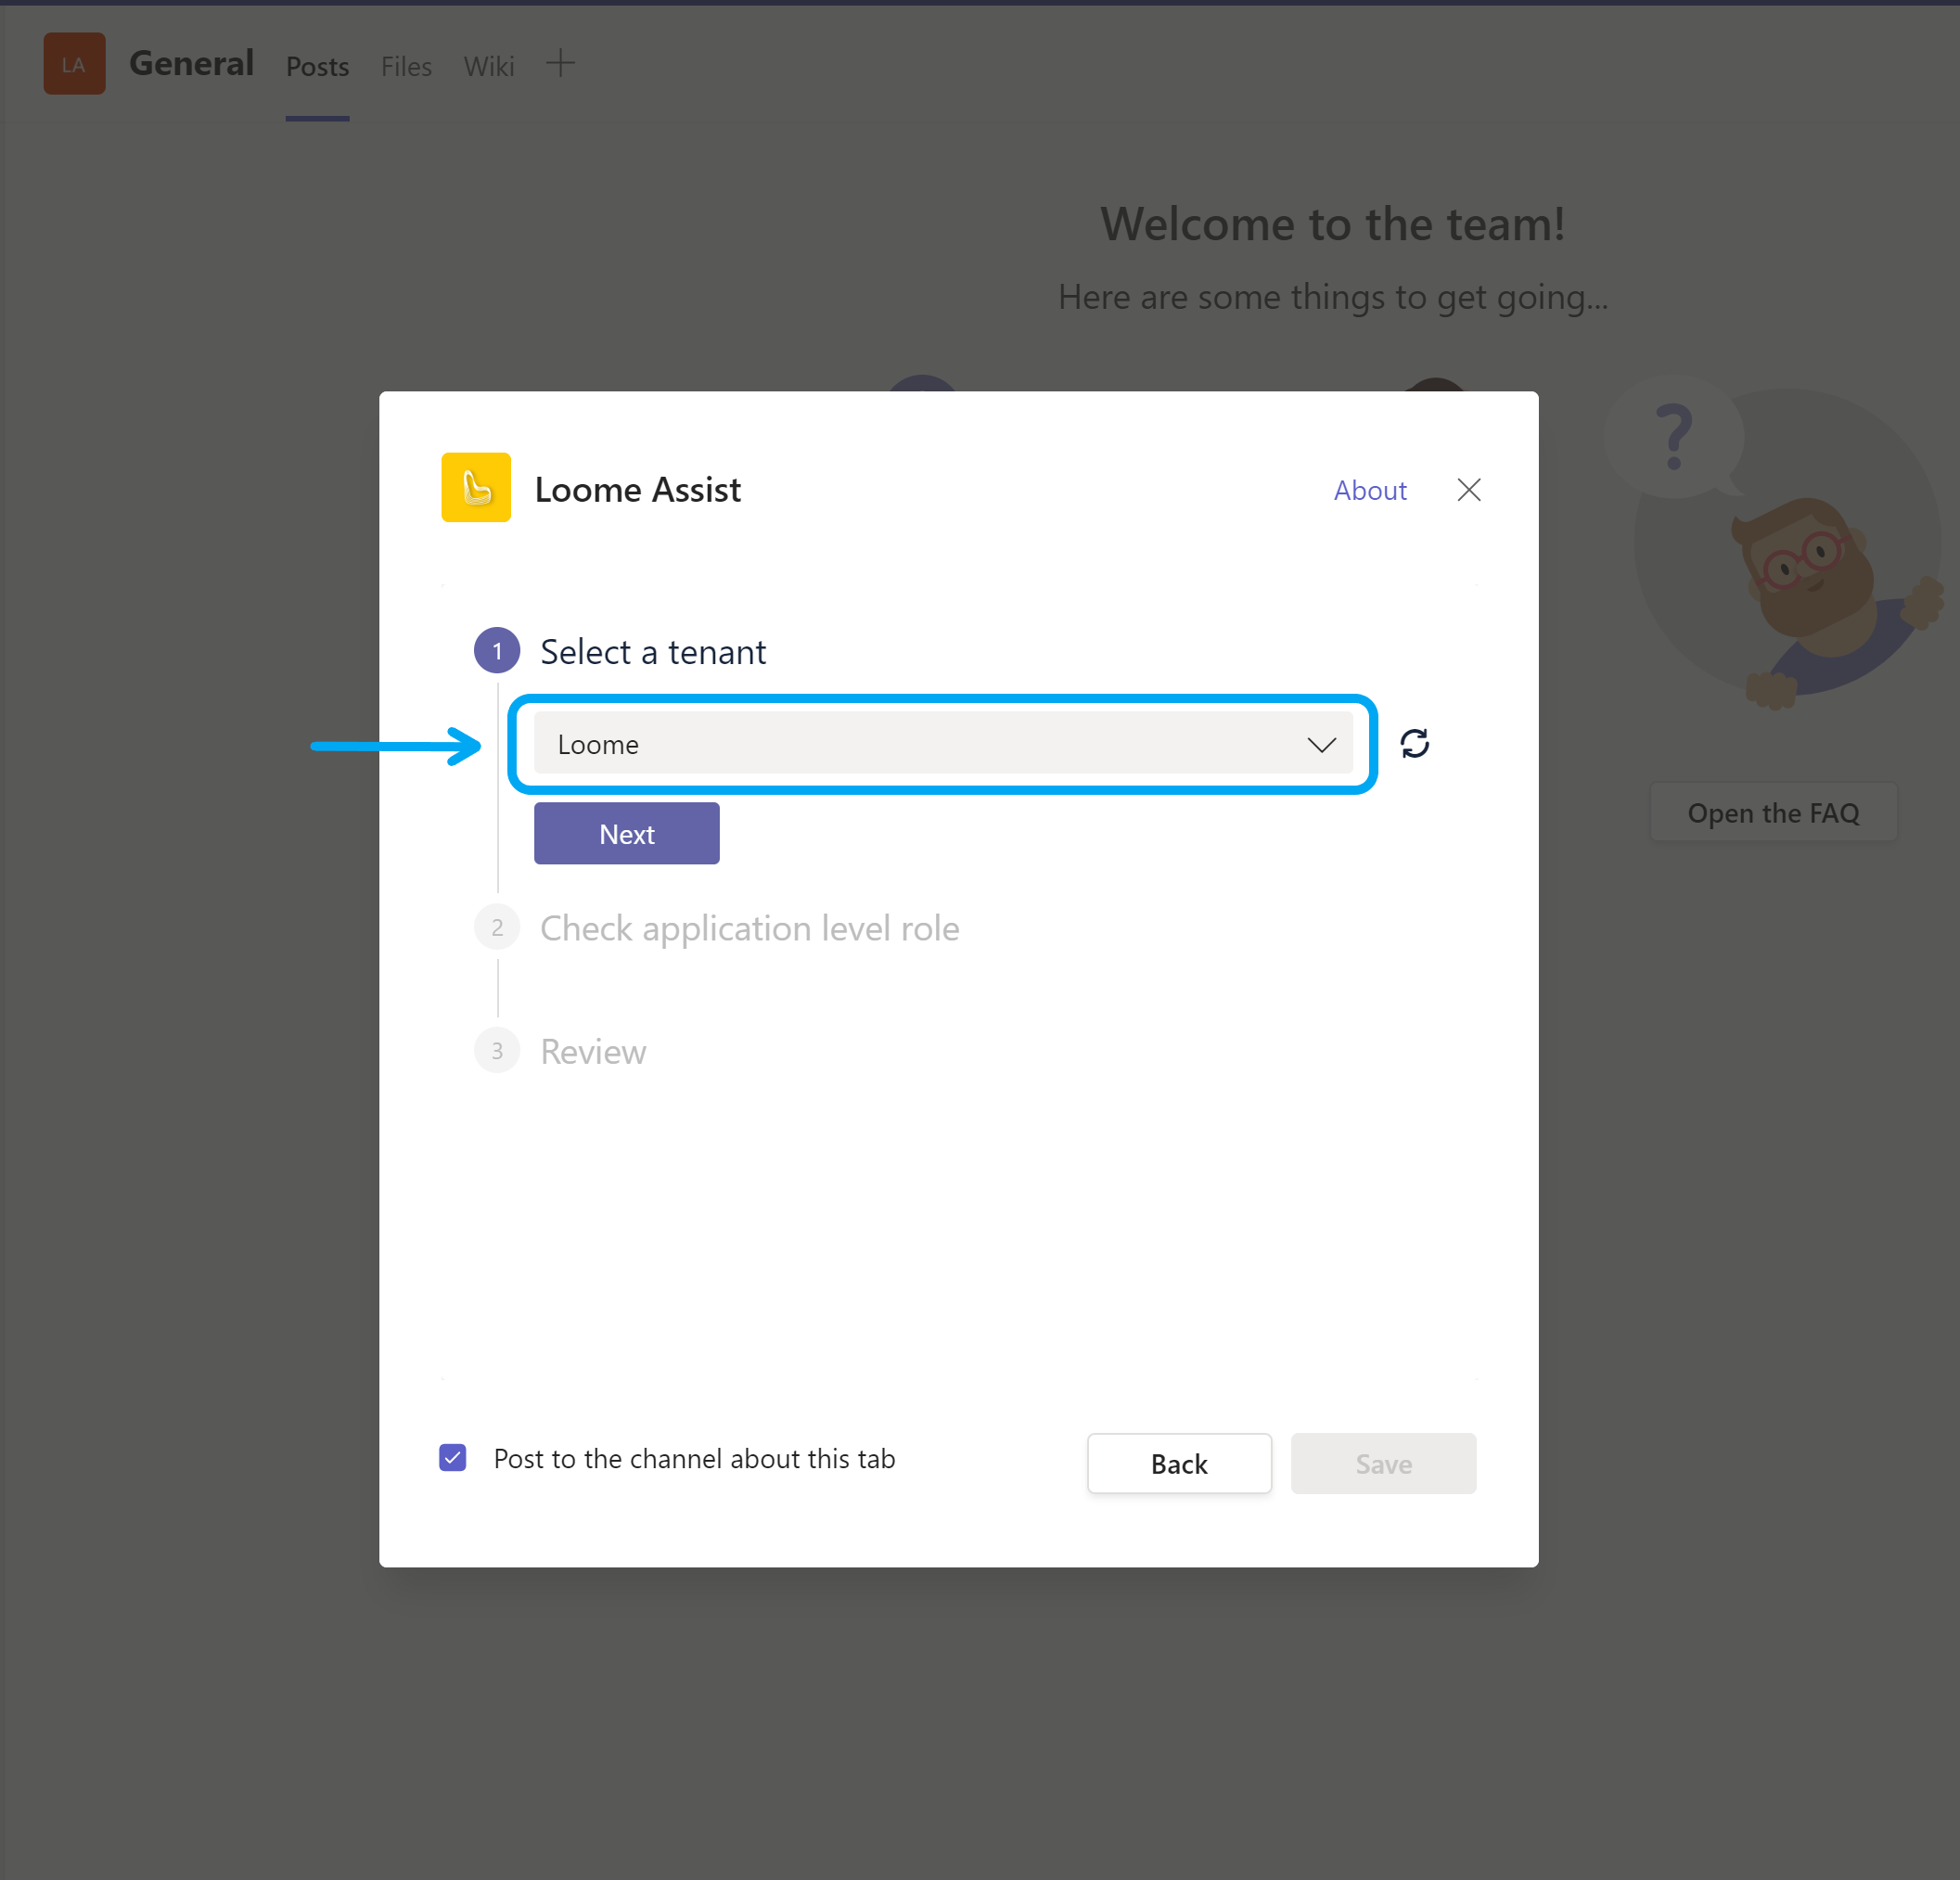
Choose your Tenant
You can choose a tenant from the dropdown of tenants that you are a member of.
Please note that a free trial or a paid license of Loome Assist is required to use this app. To request a free trial version of Loome Assist, please go to: https://assist.loomesoftware.com.
It will check your application role in this tenant and you can proceed to save.
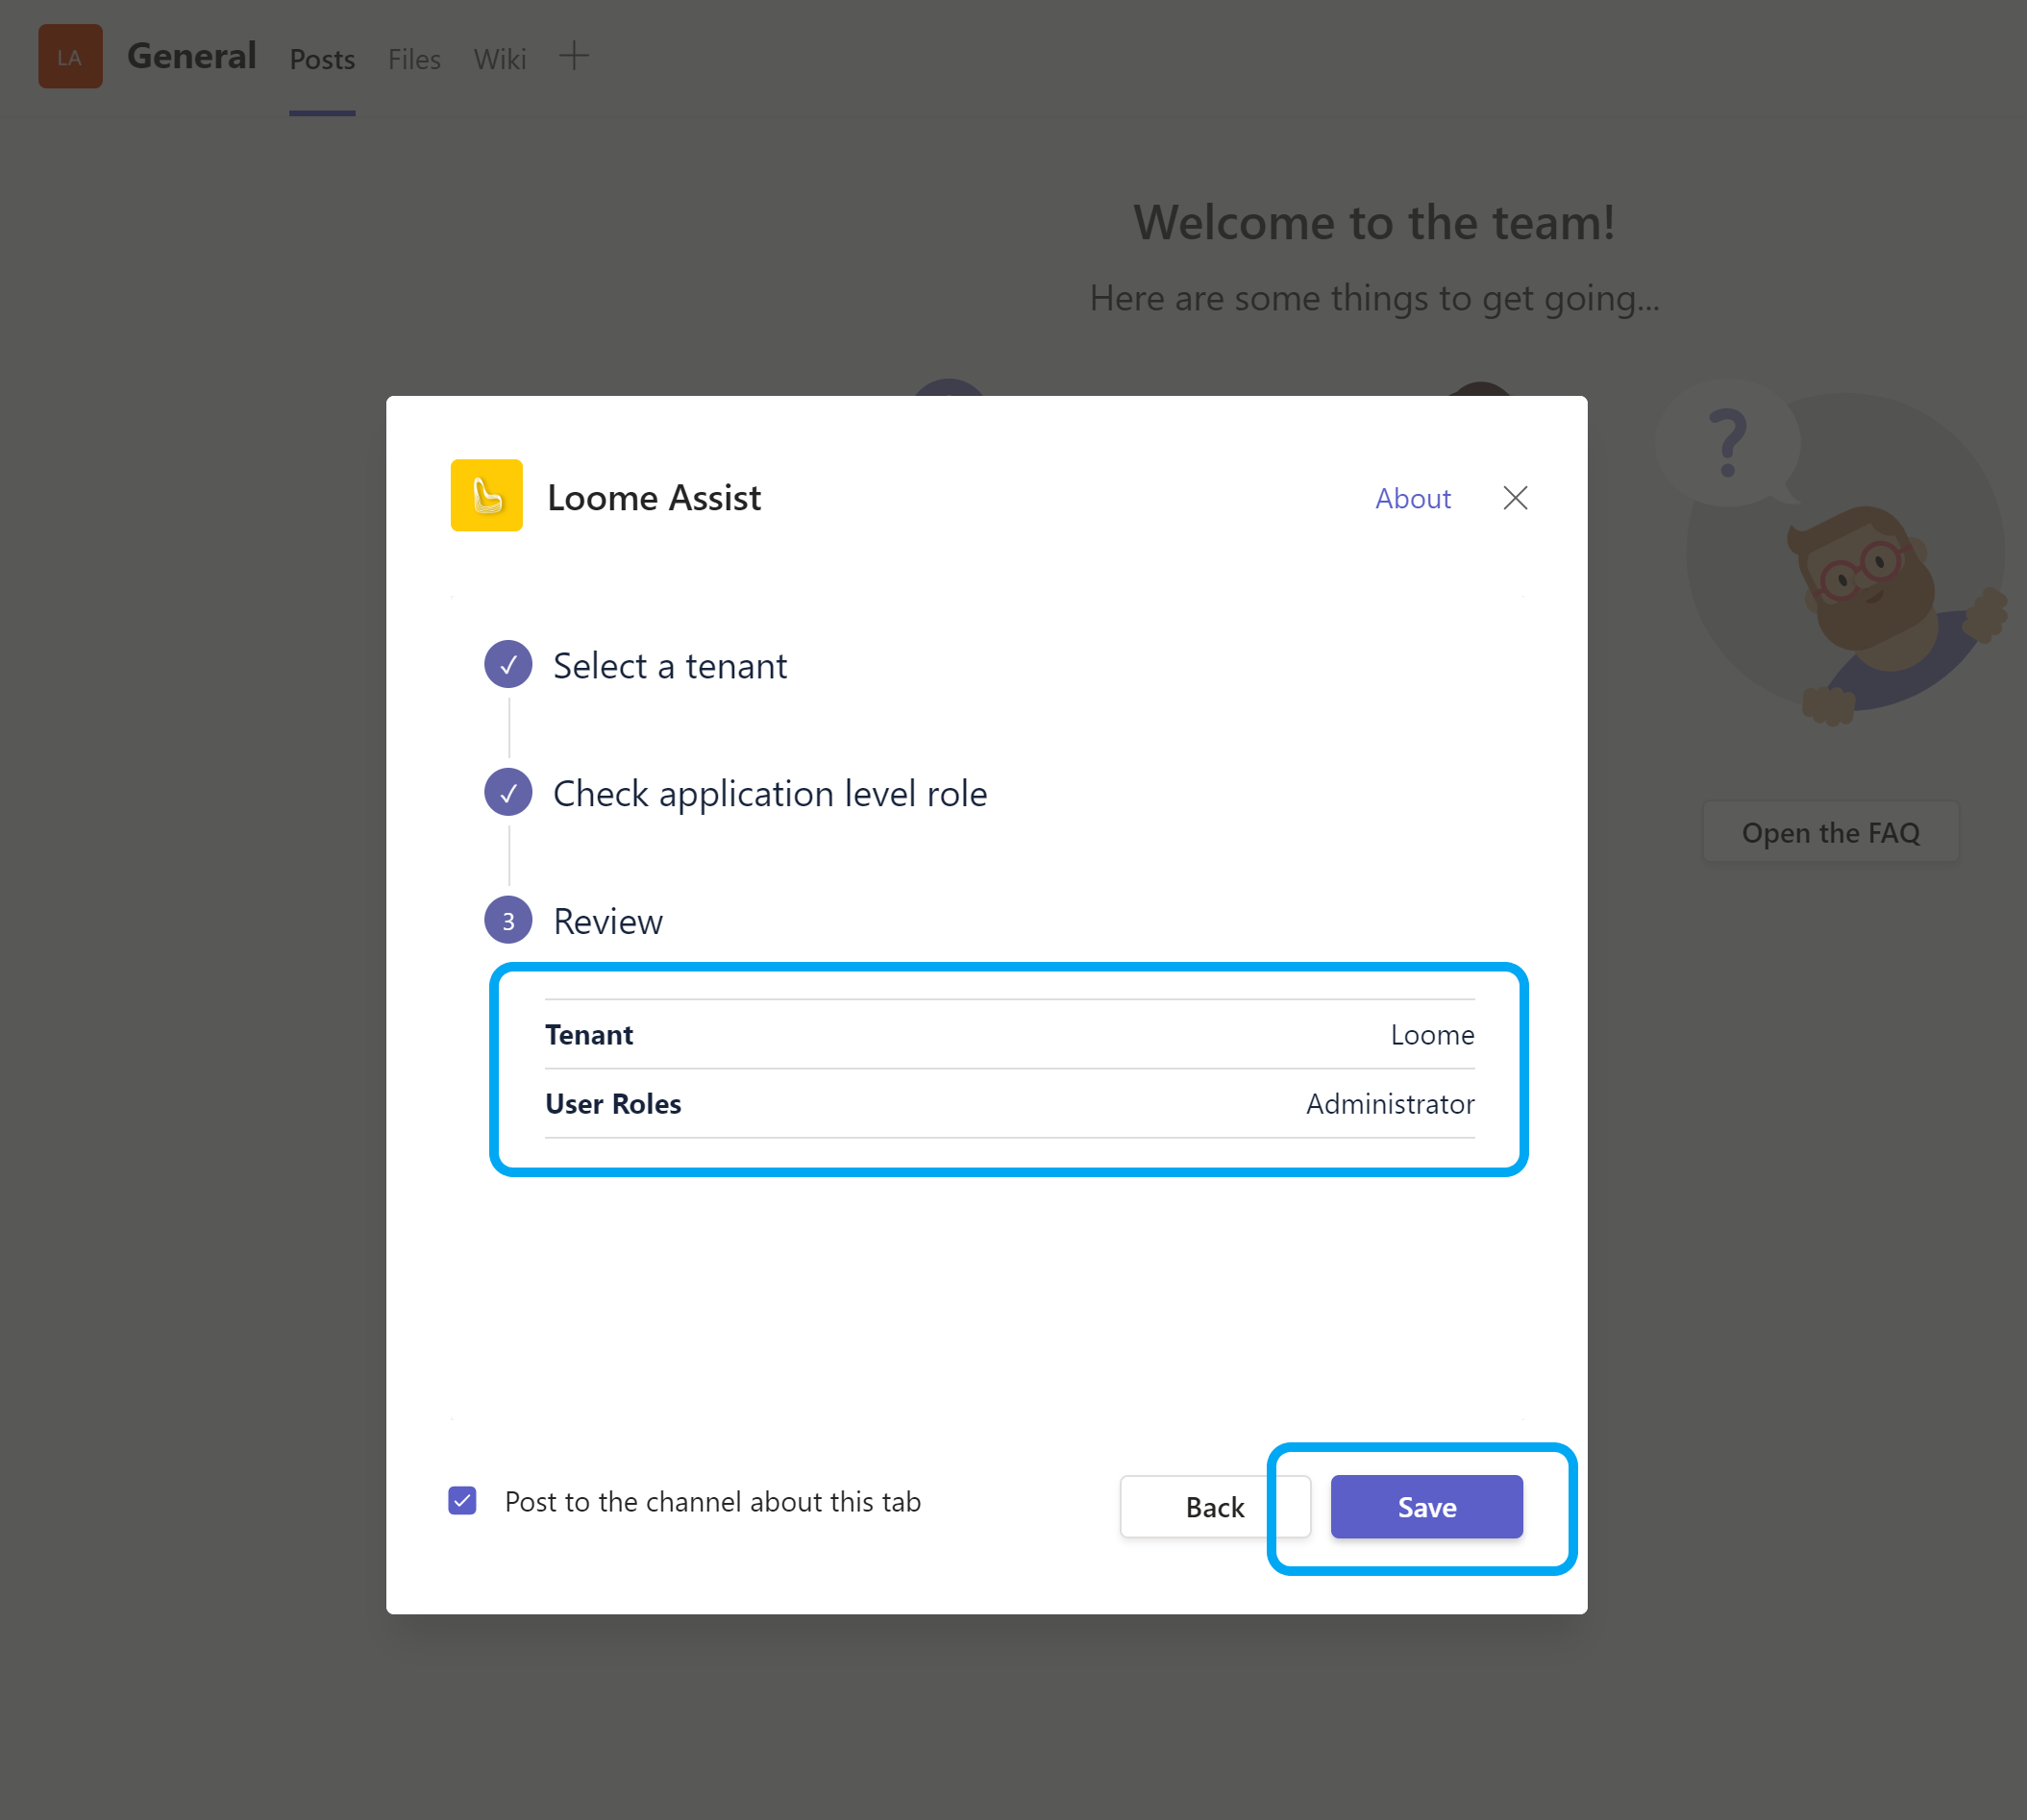
You can then begin the project creation process. You can follow our guide for Teams below or follow the same steps as our project guide, except in Teams this project’s users will be automatically added using the members of this team.
In Microsoft Teams, Project Owners will be added as Owners, and other roles will be added as Members. Any guests in Microsoft Teams will be added as a ‘Reader’ to your project in Assist.
Users that are removed from Microsoft Teams will not be automatically removed as a member in the Loome Assist project.
How to Create your Project in Microsoft Teams
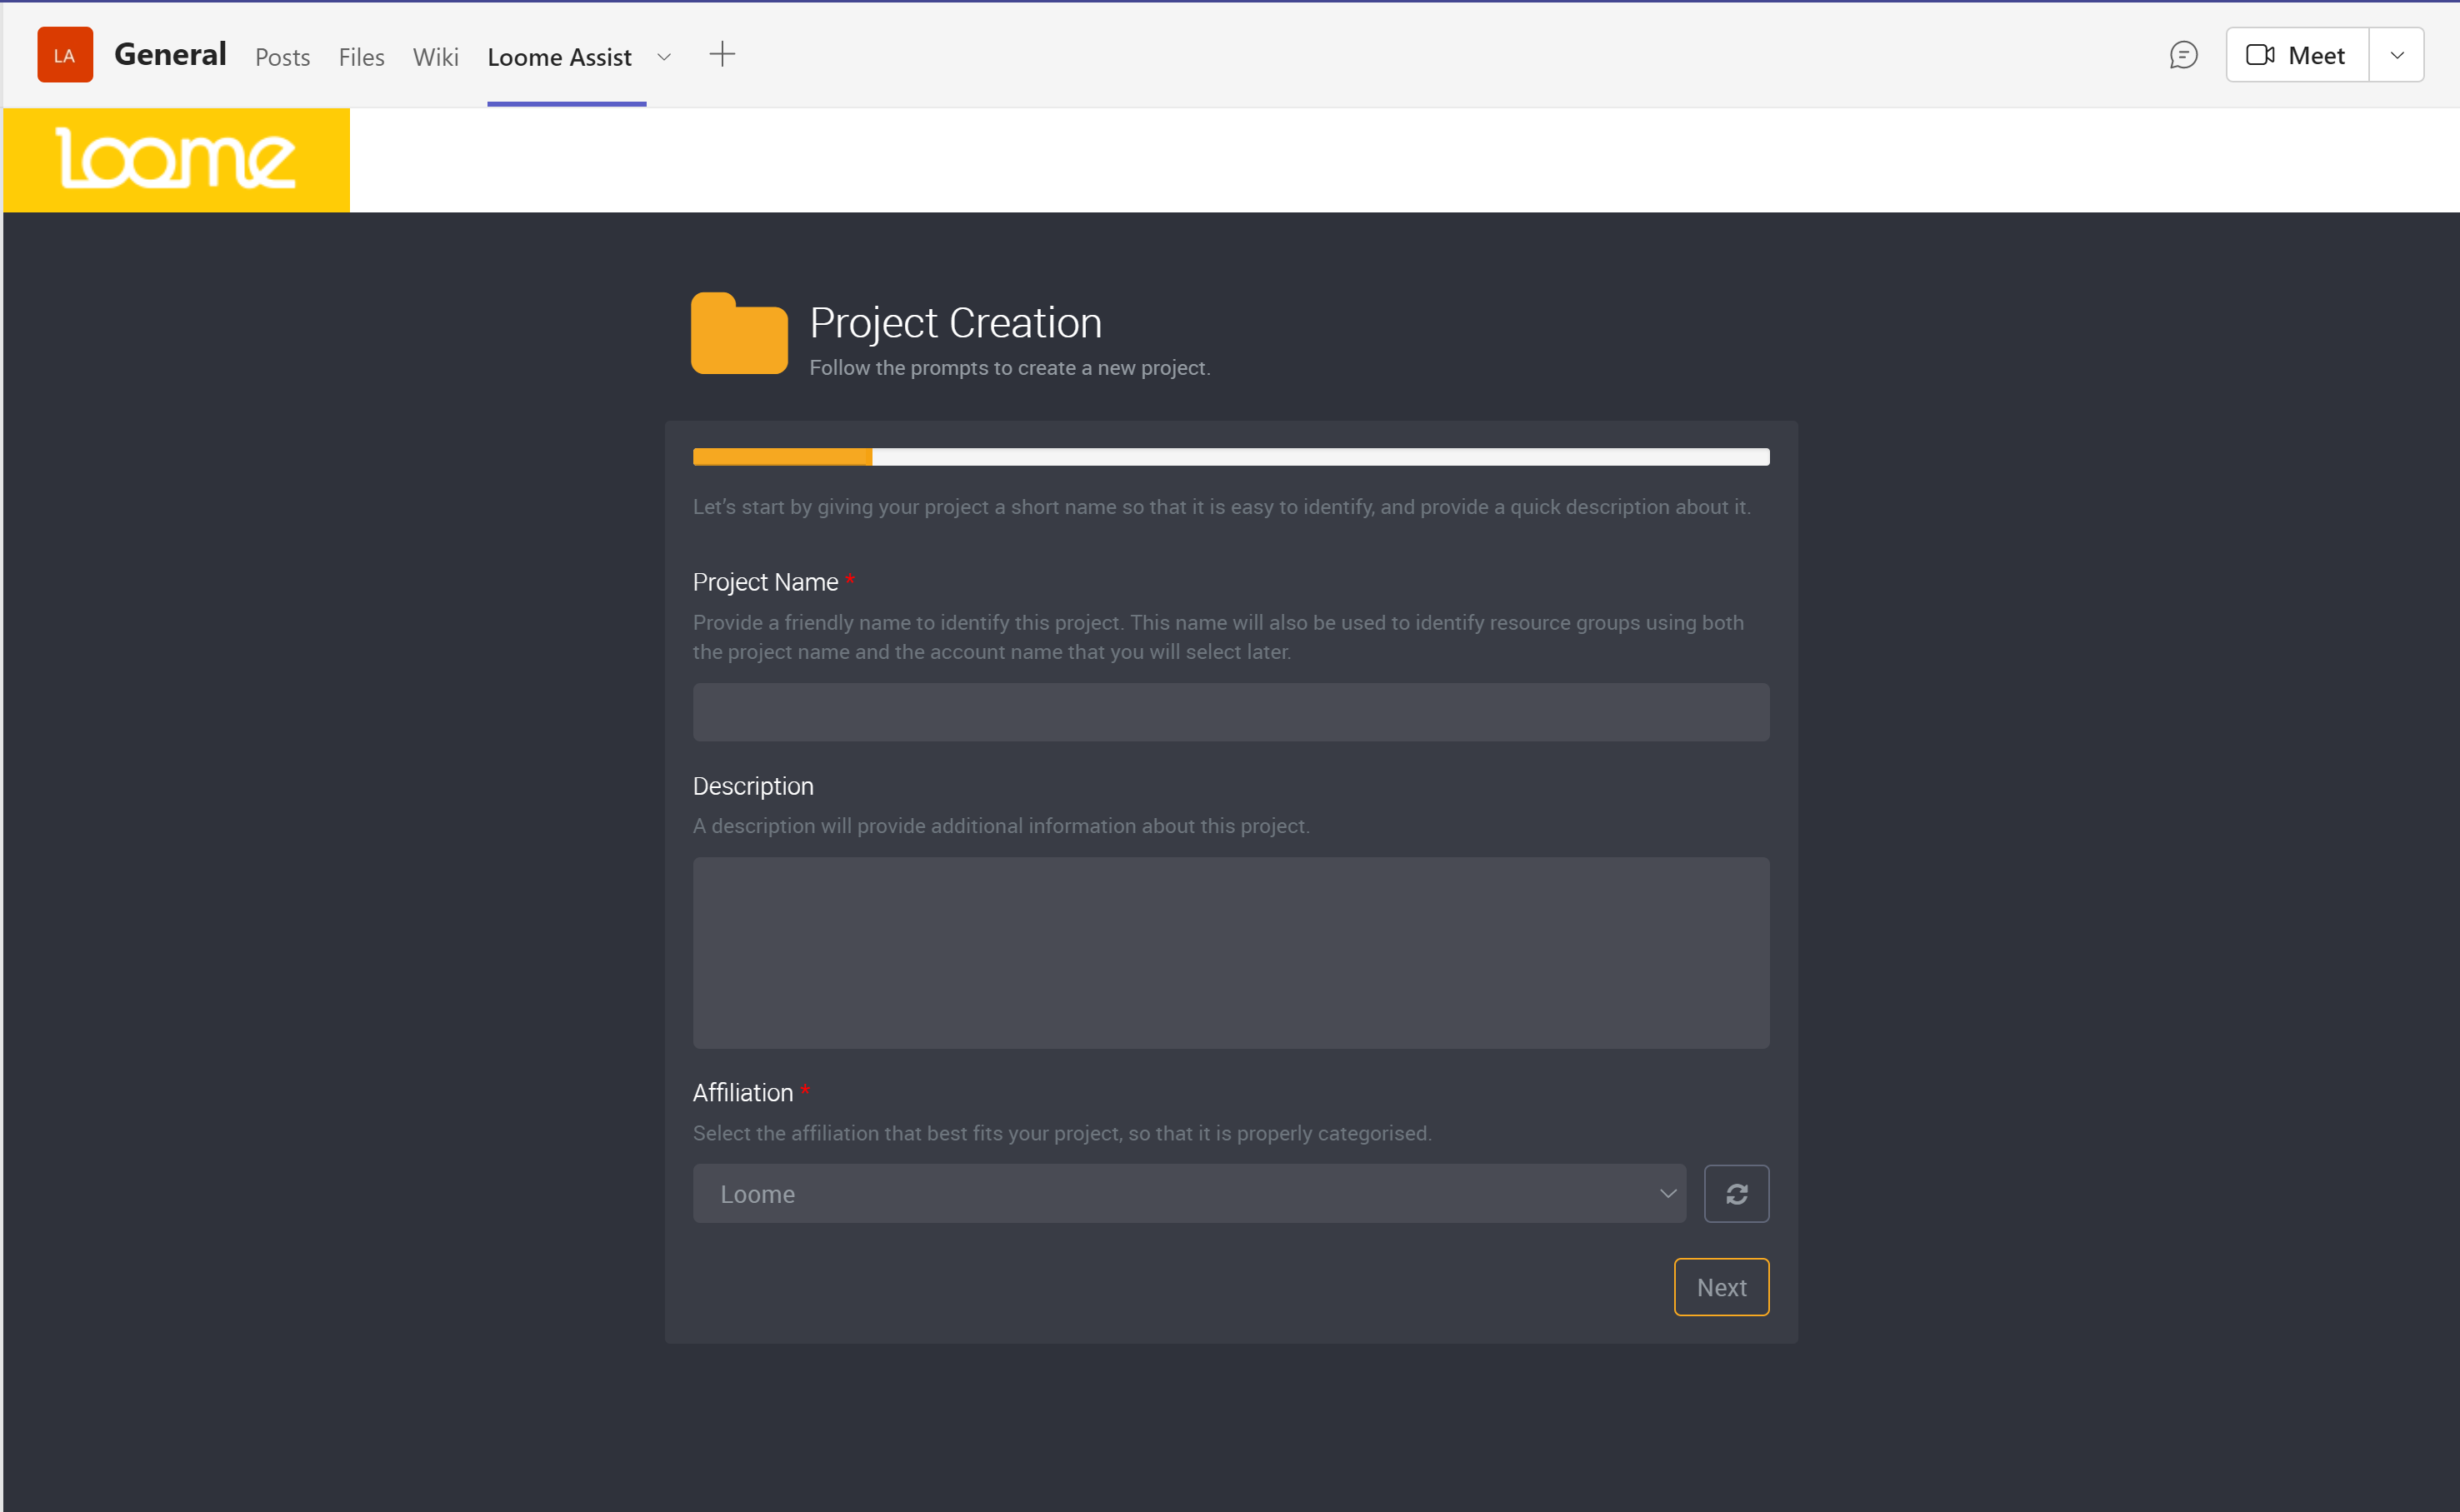
After adding the project tab, you can now begin the project creation process. This project’s users will be automatically added using the members of this team.
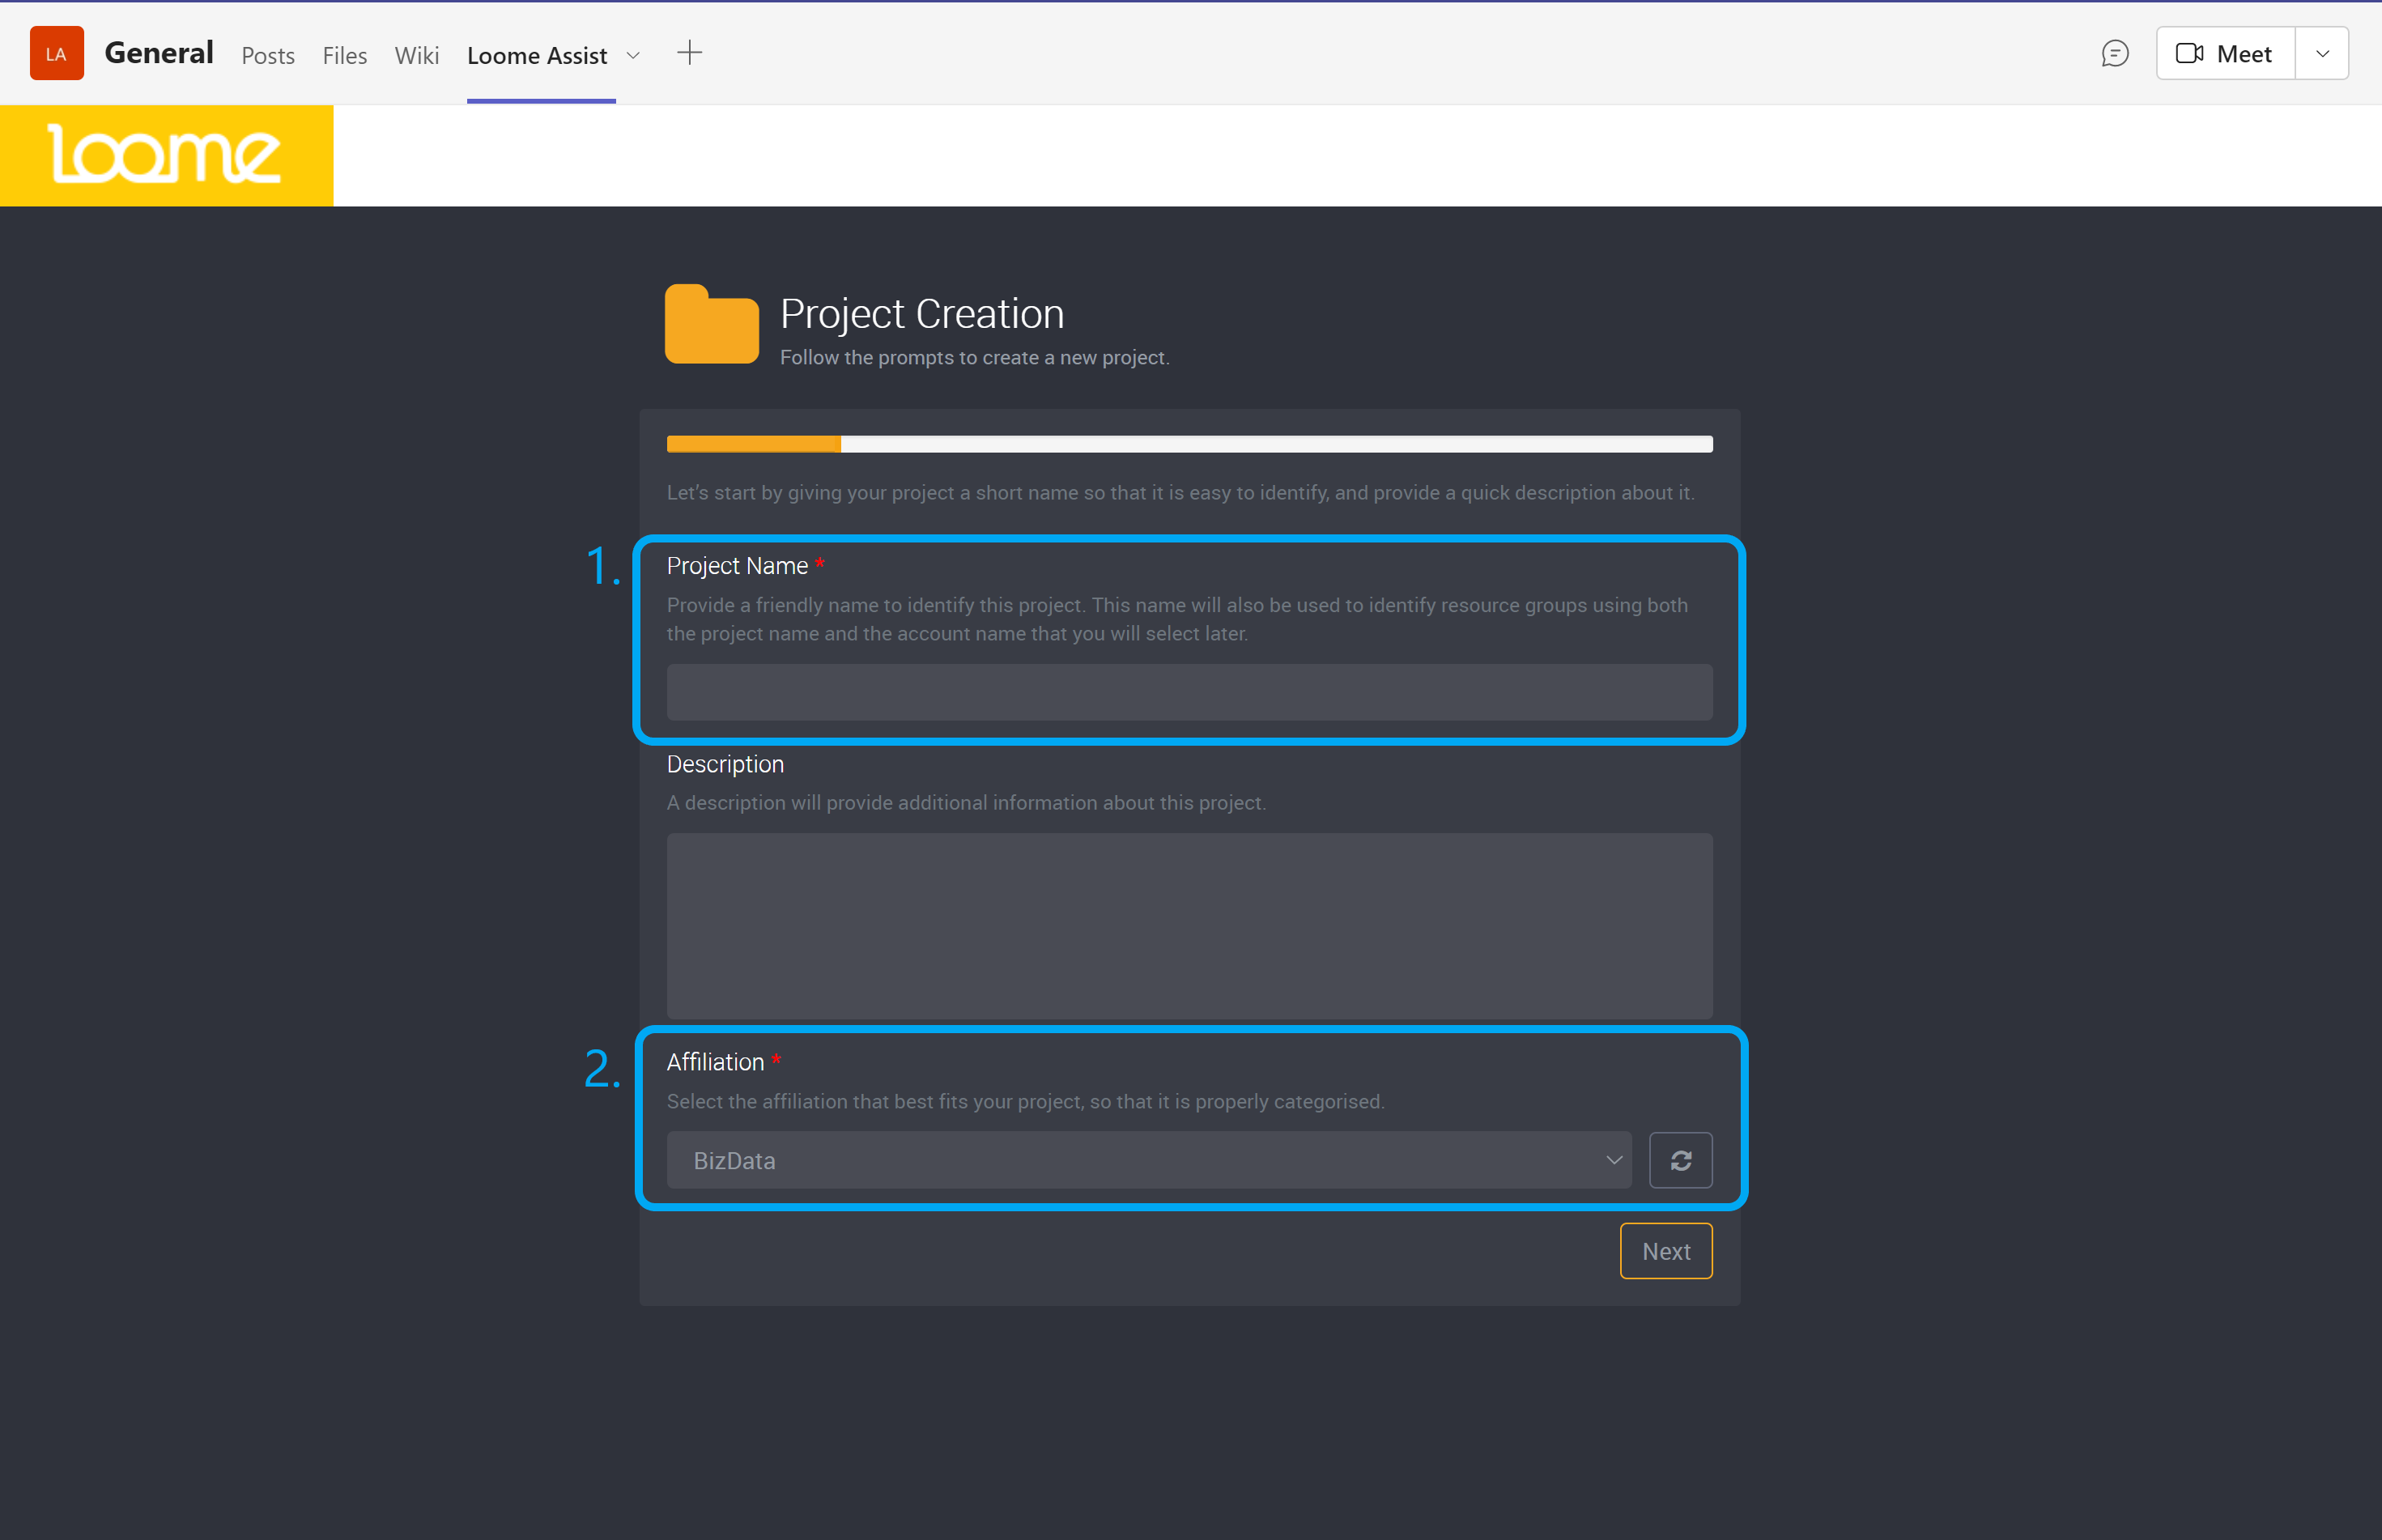
First, provide the project name and description. This should be a friendly name that will identify this project.
Then choose an affiliation from the dropdown.
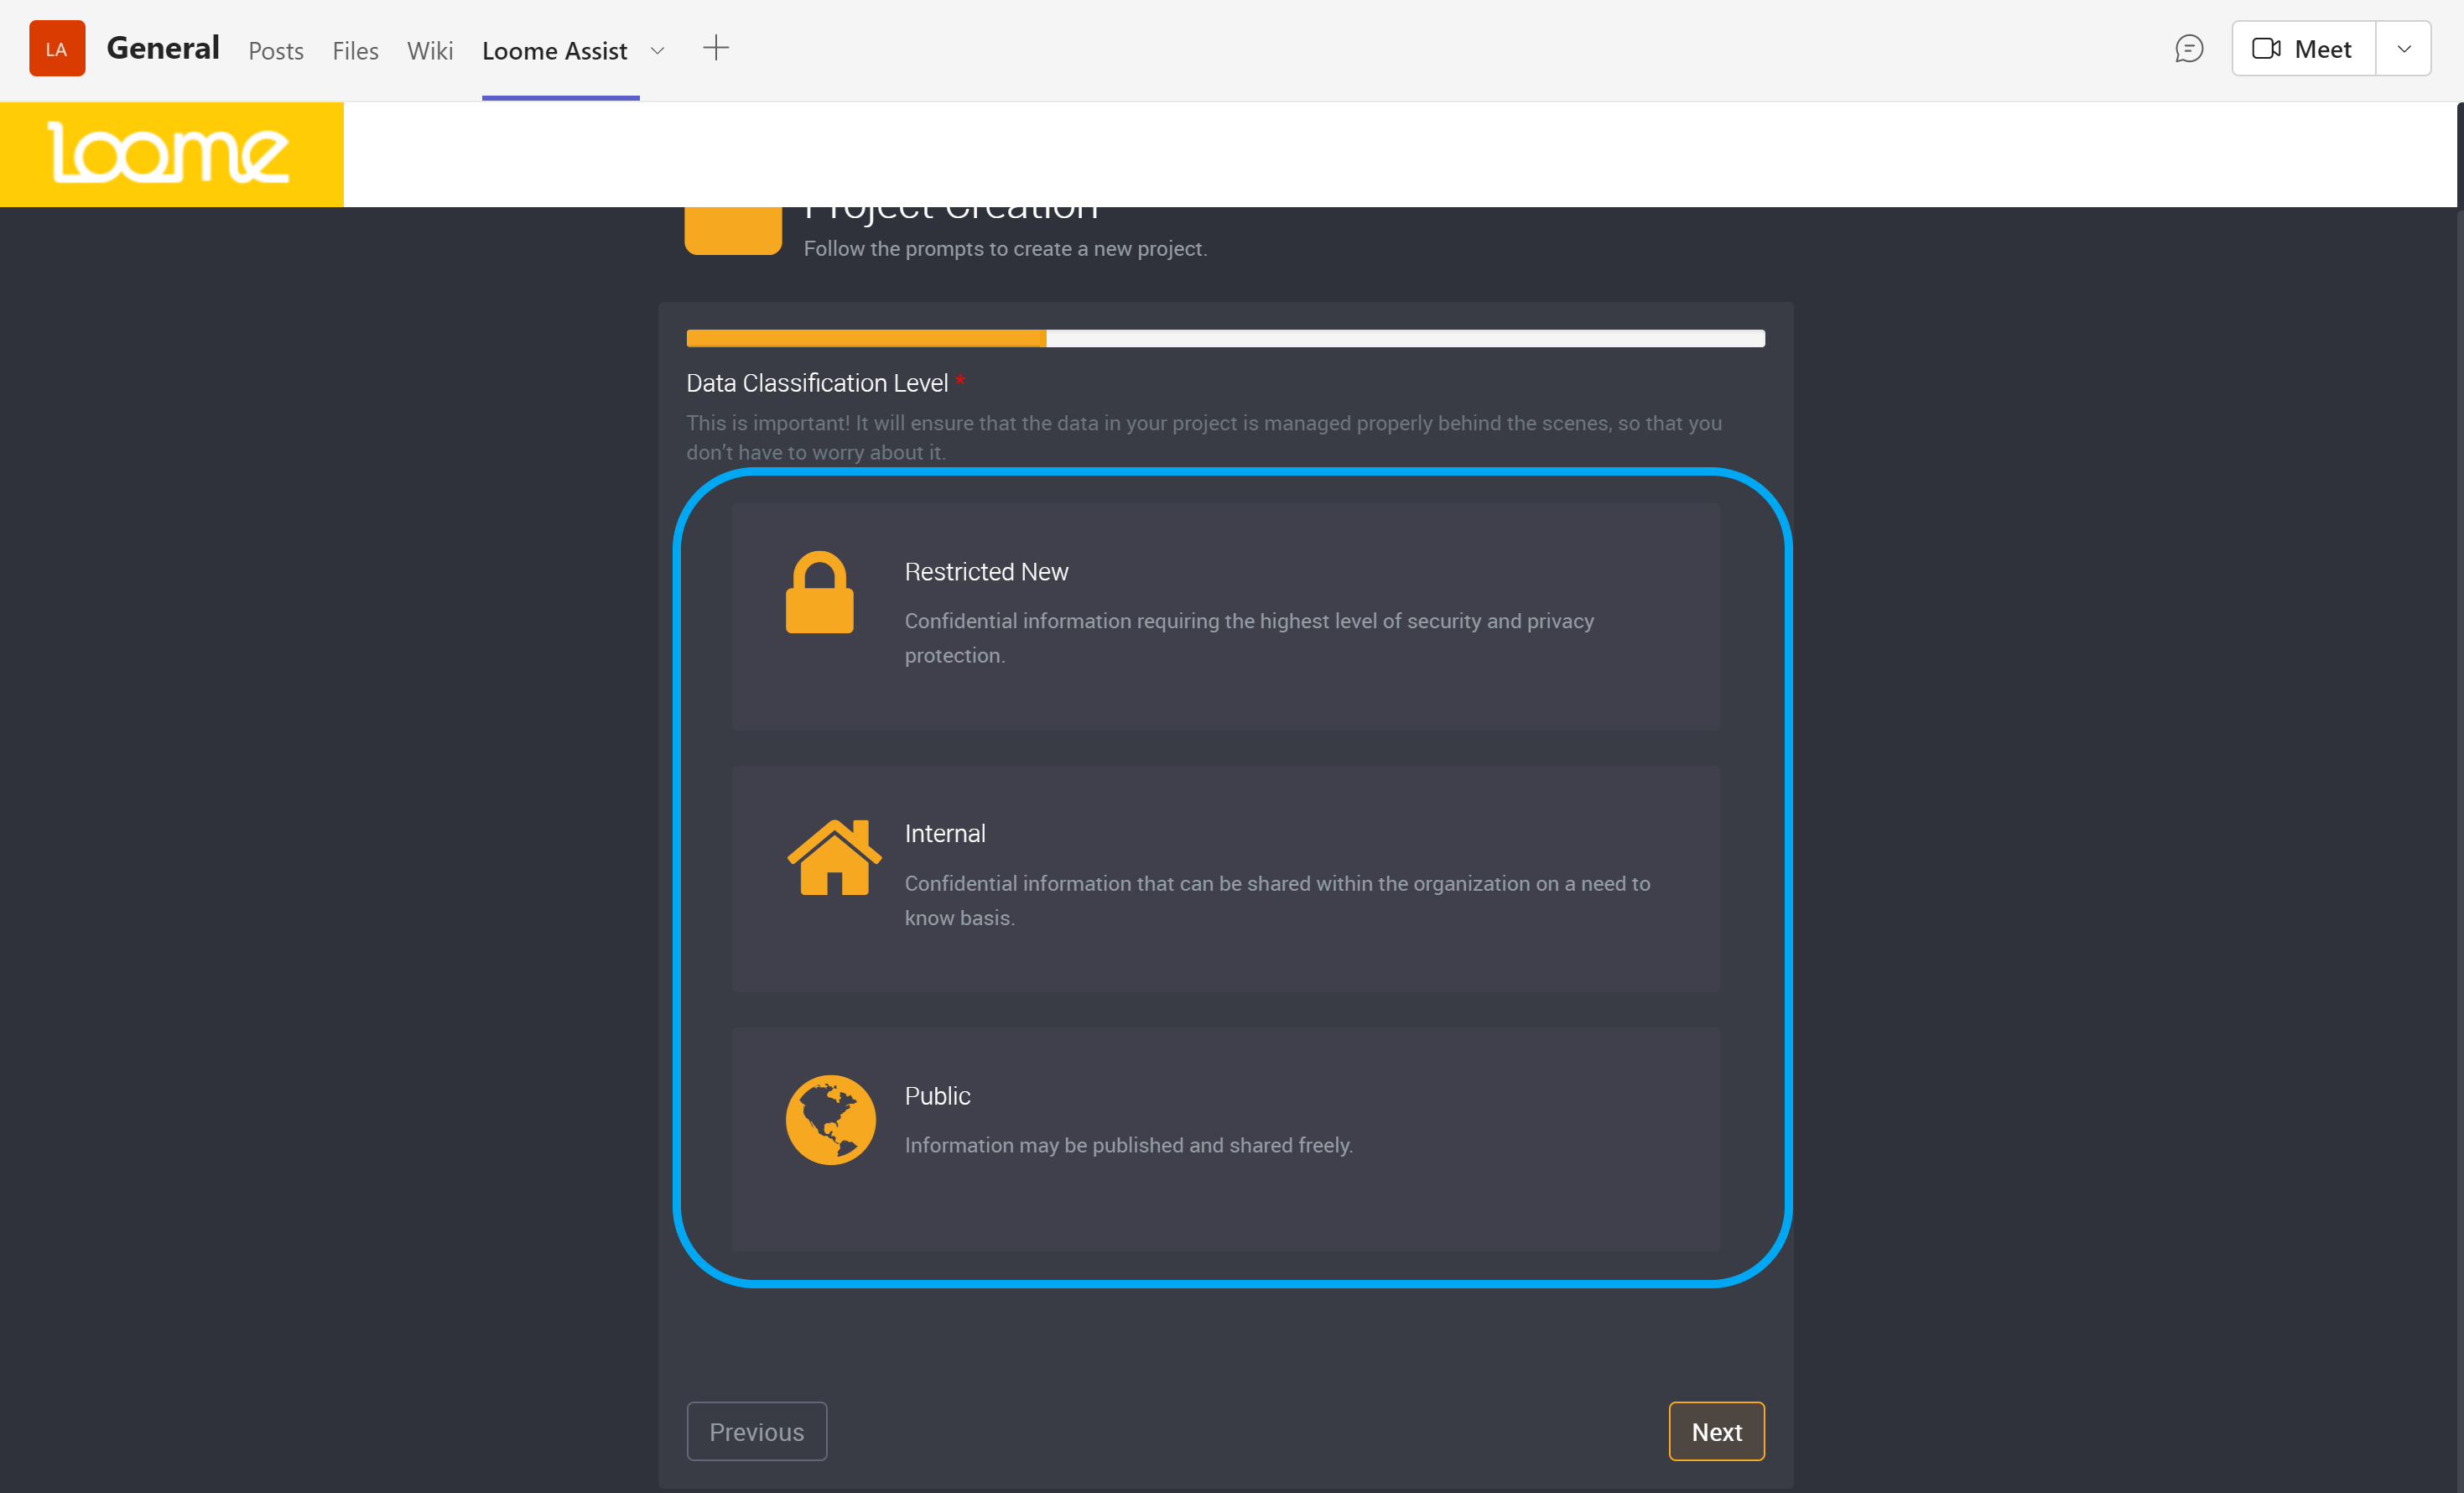
Choose your data classification level. For this example, we have chosen Internal for information that can be shared within the organization.
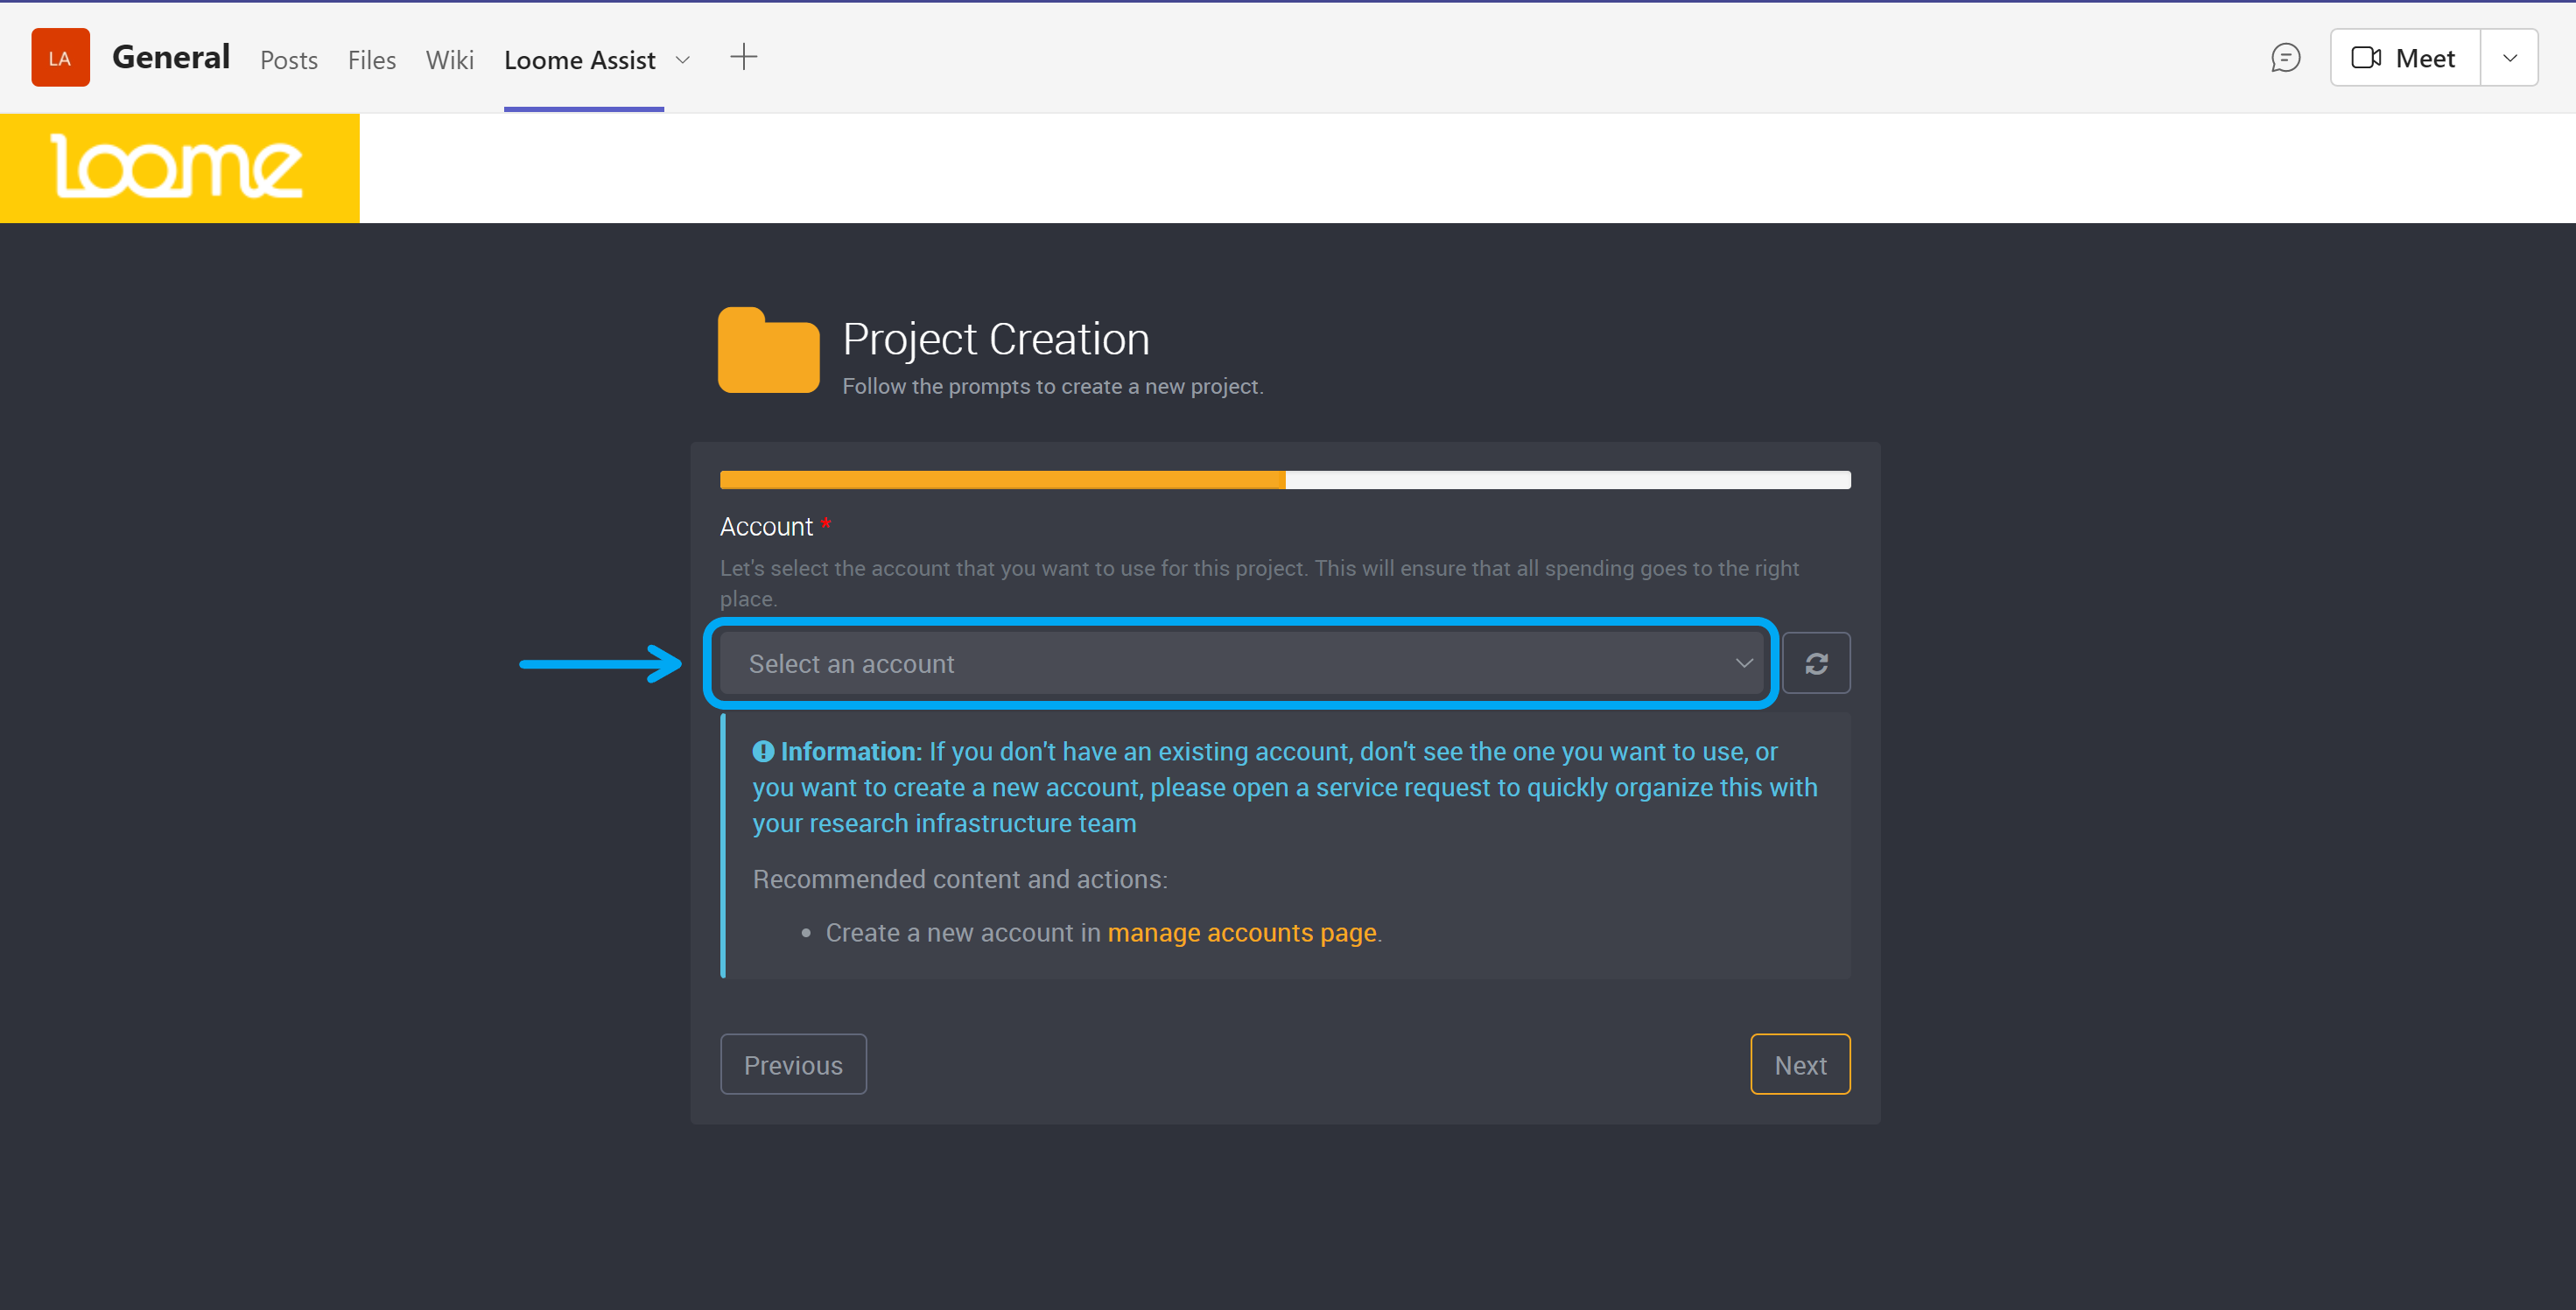
Then choose an account.
Next, you can choose your budget for this project. The value you can choose will depend on the budget amount you chose for the account earlier. For this example, we chose $1000 as the total budget.
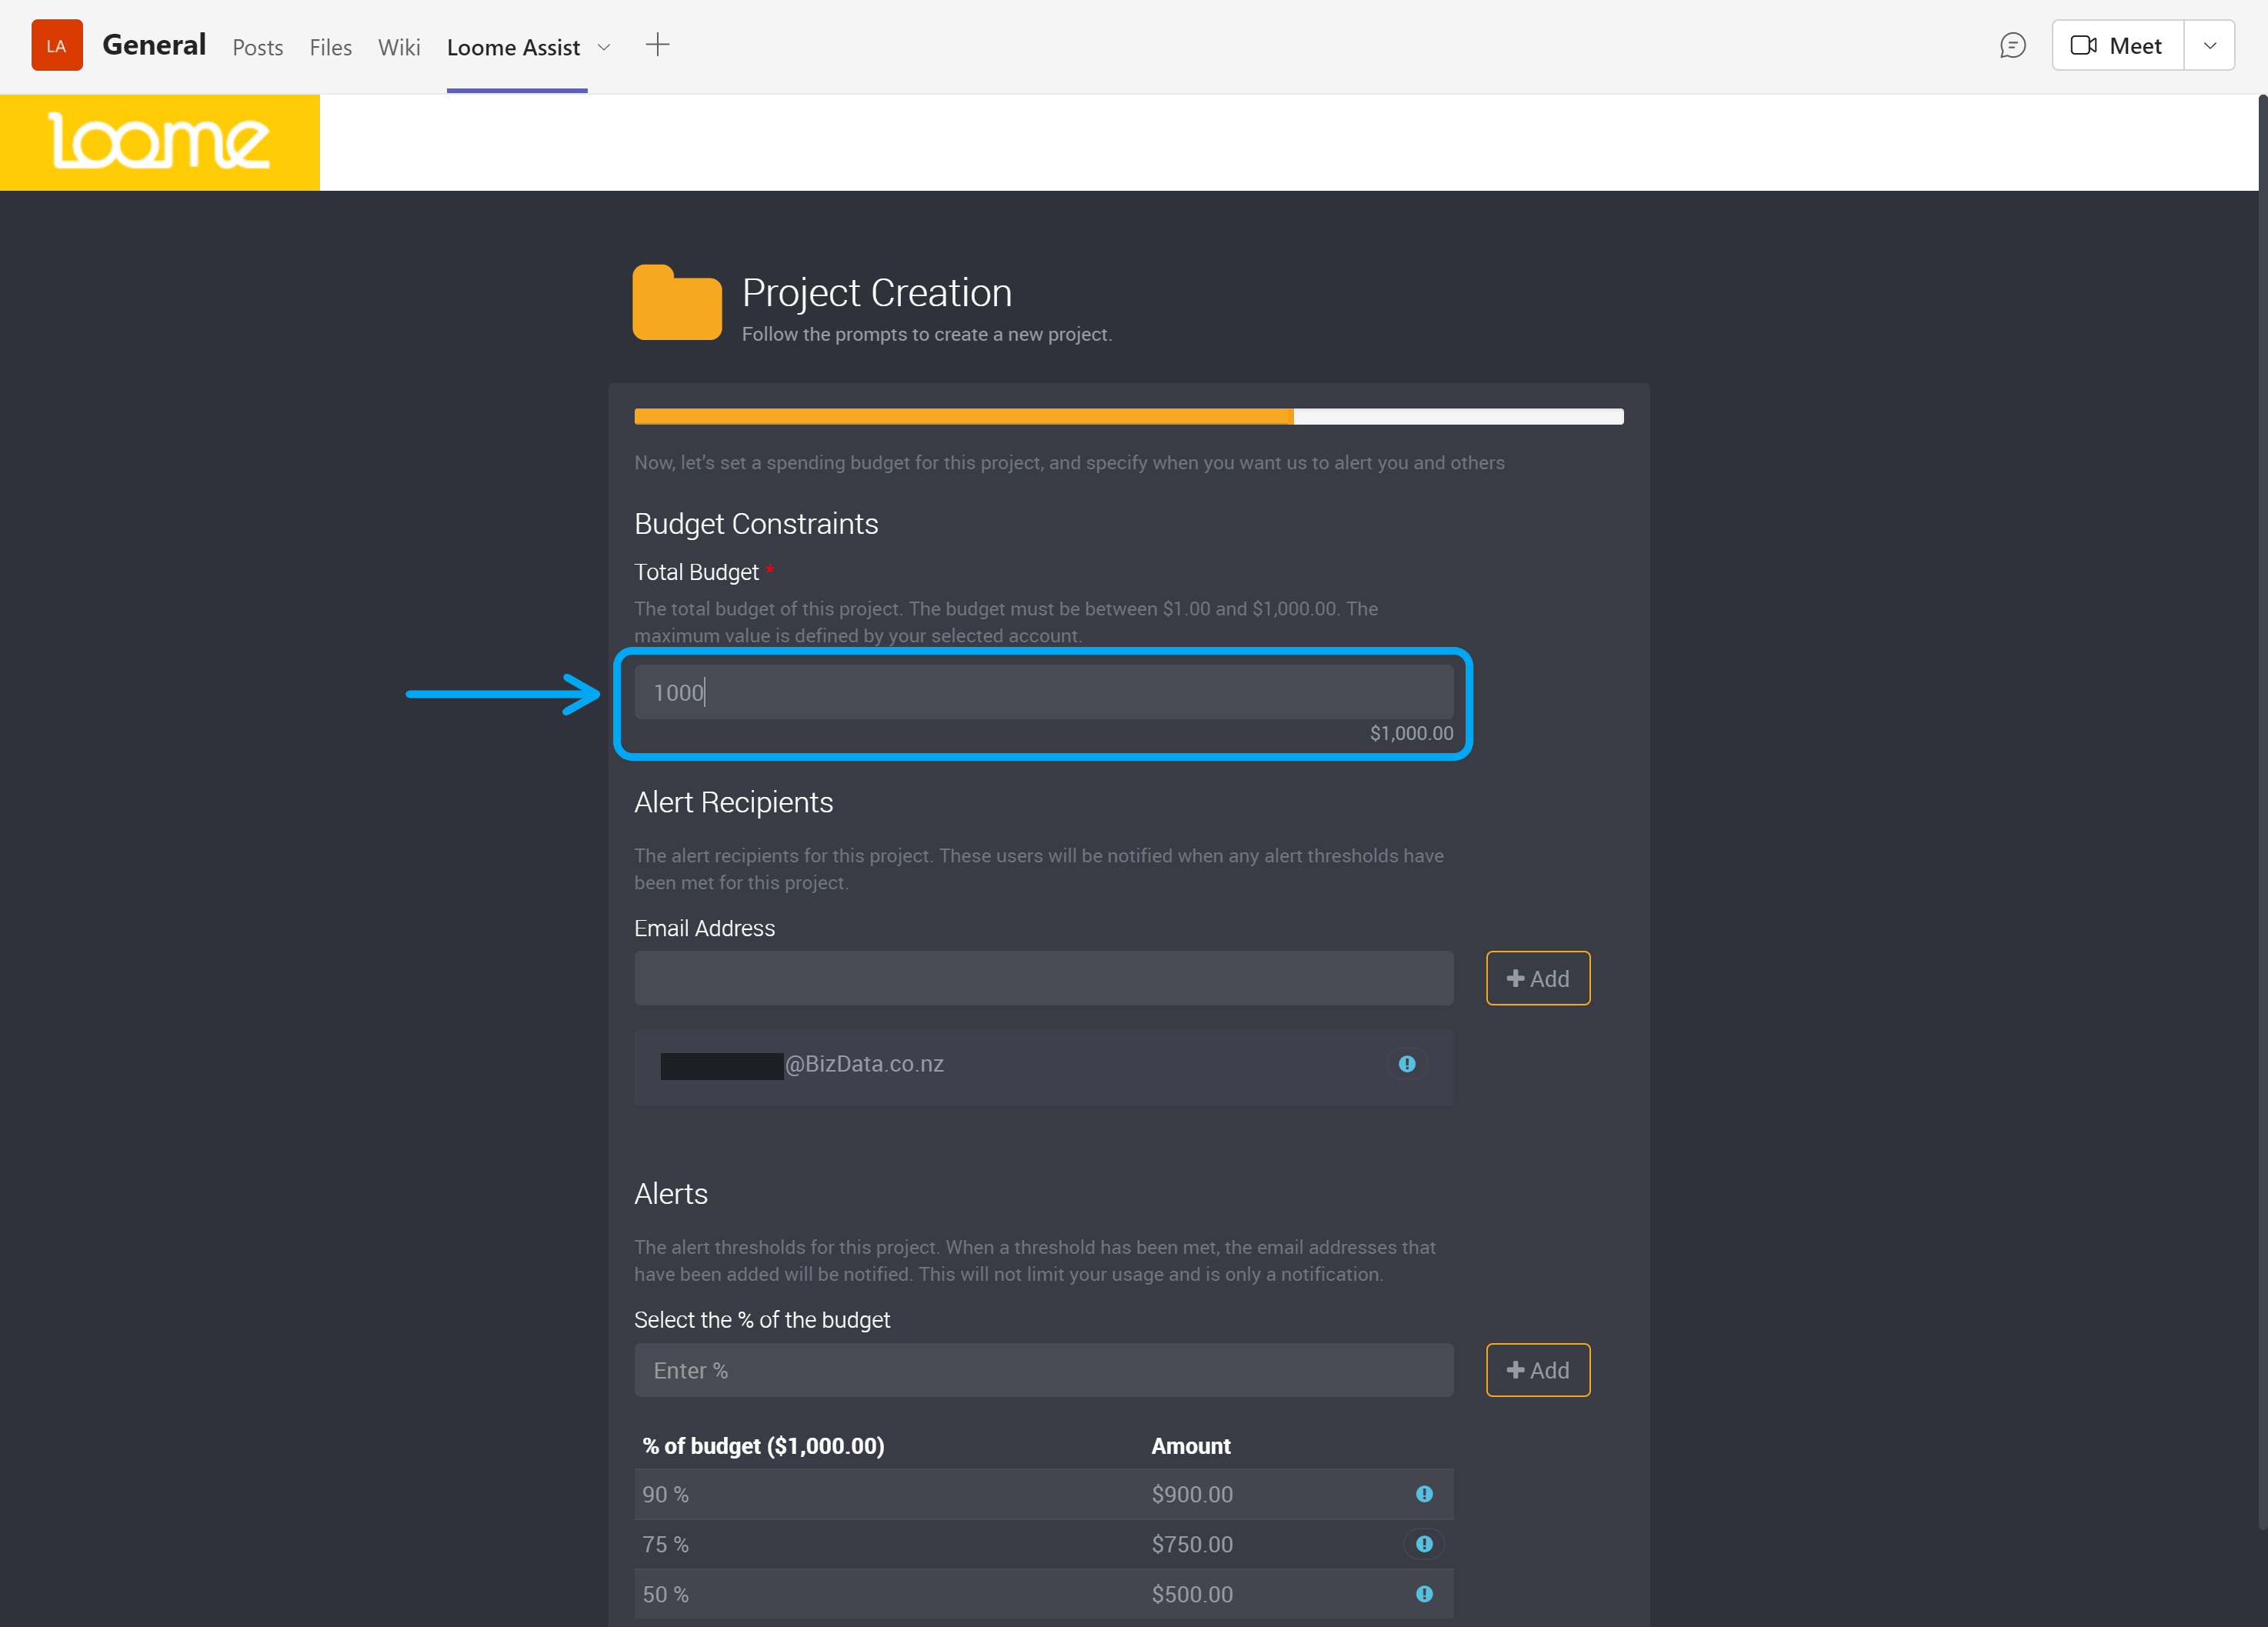
Then choose if you would like to add any other email recipients that will be notified if the project budget reaches an alert threshold.
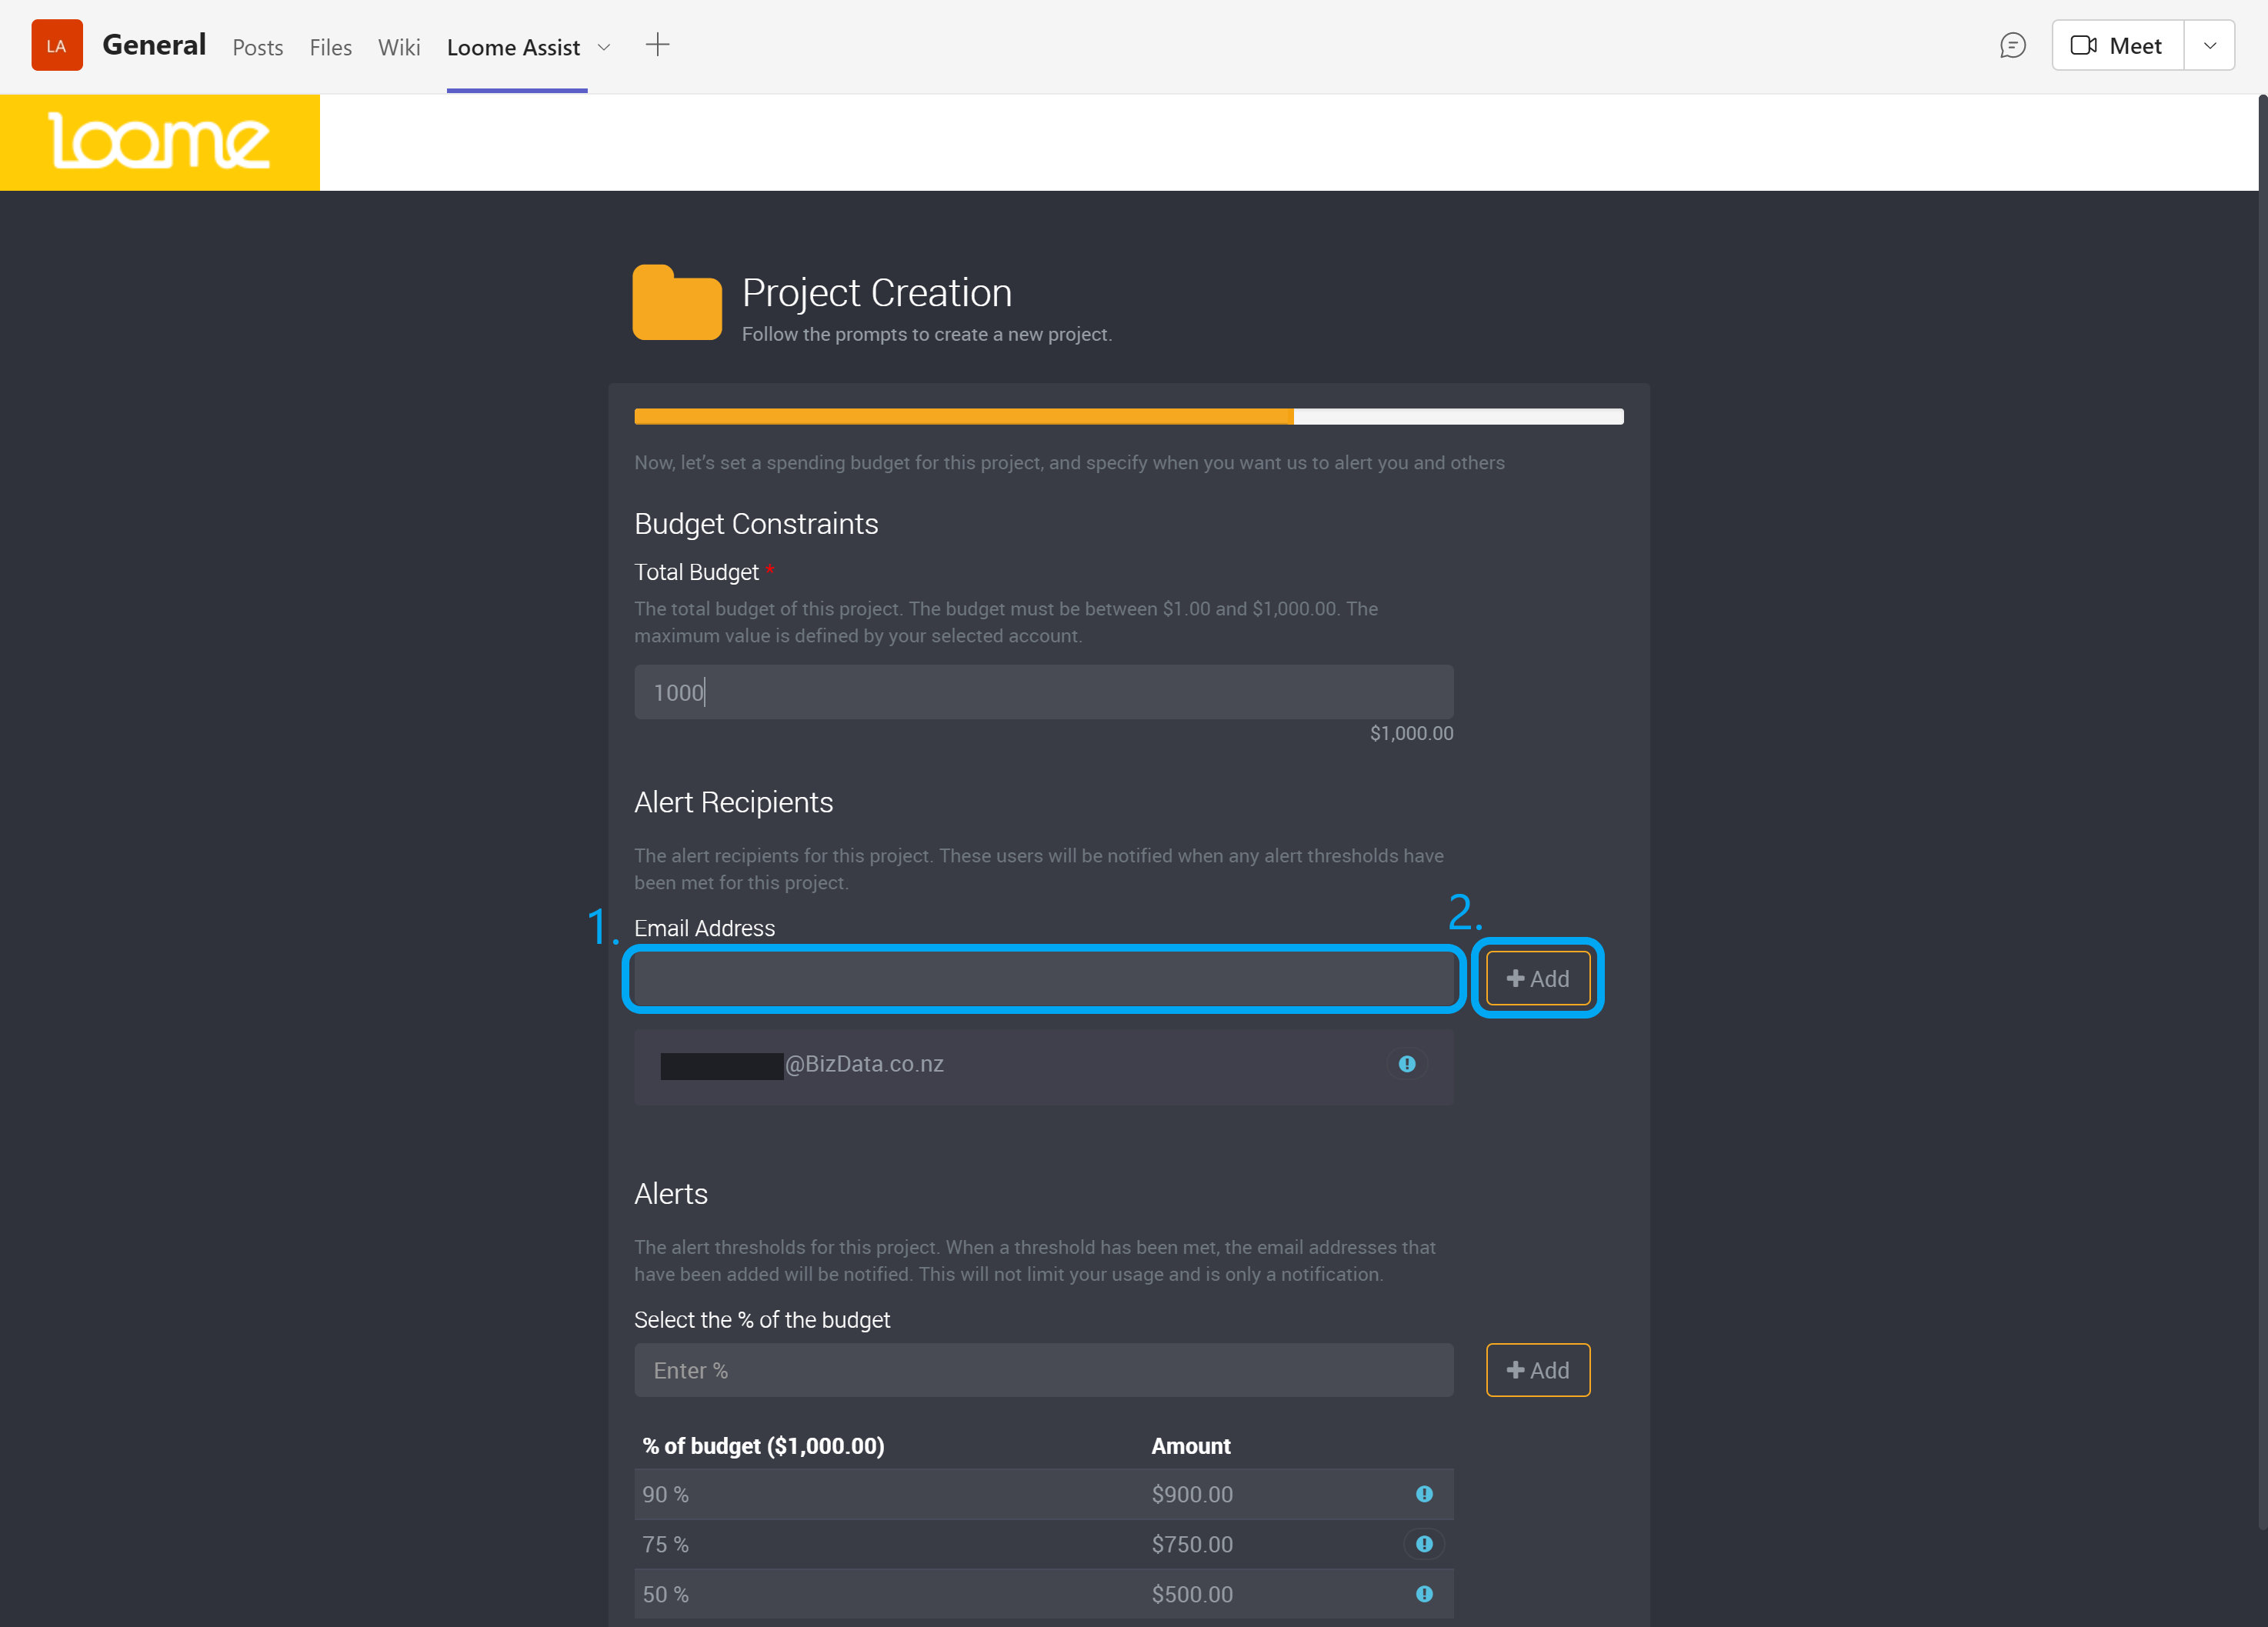
You can then add more alert thresholds by providing the percentage of the budget that needs to be reached for an alert to be sent to alert recipients.
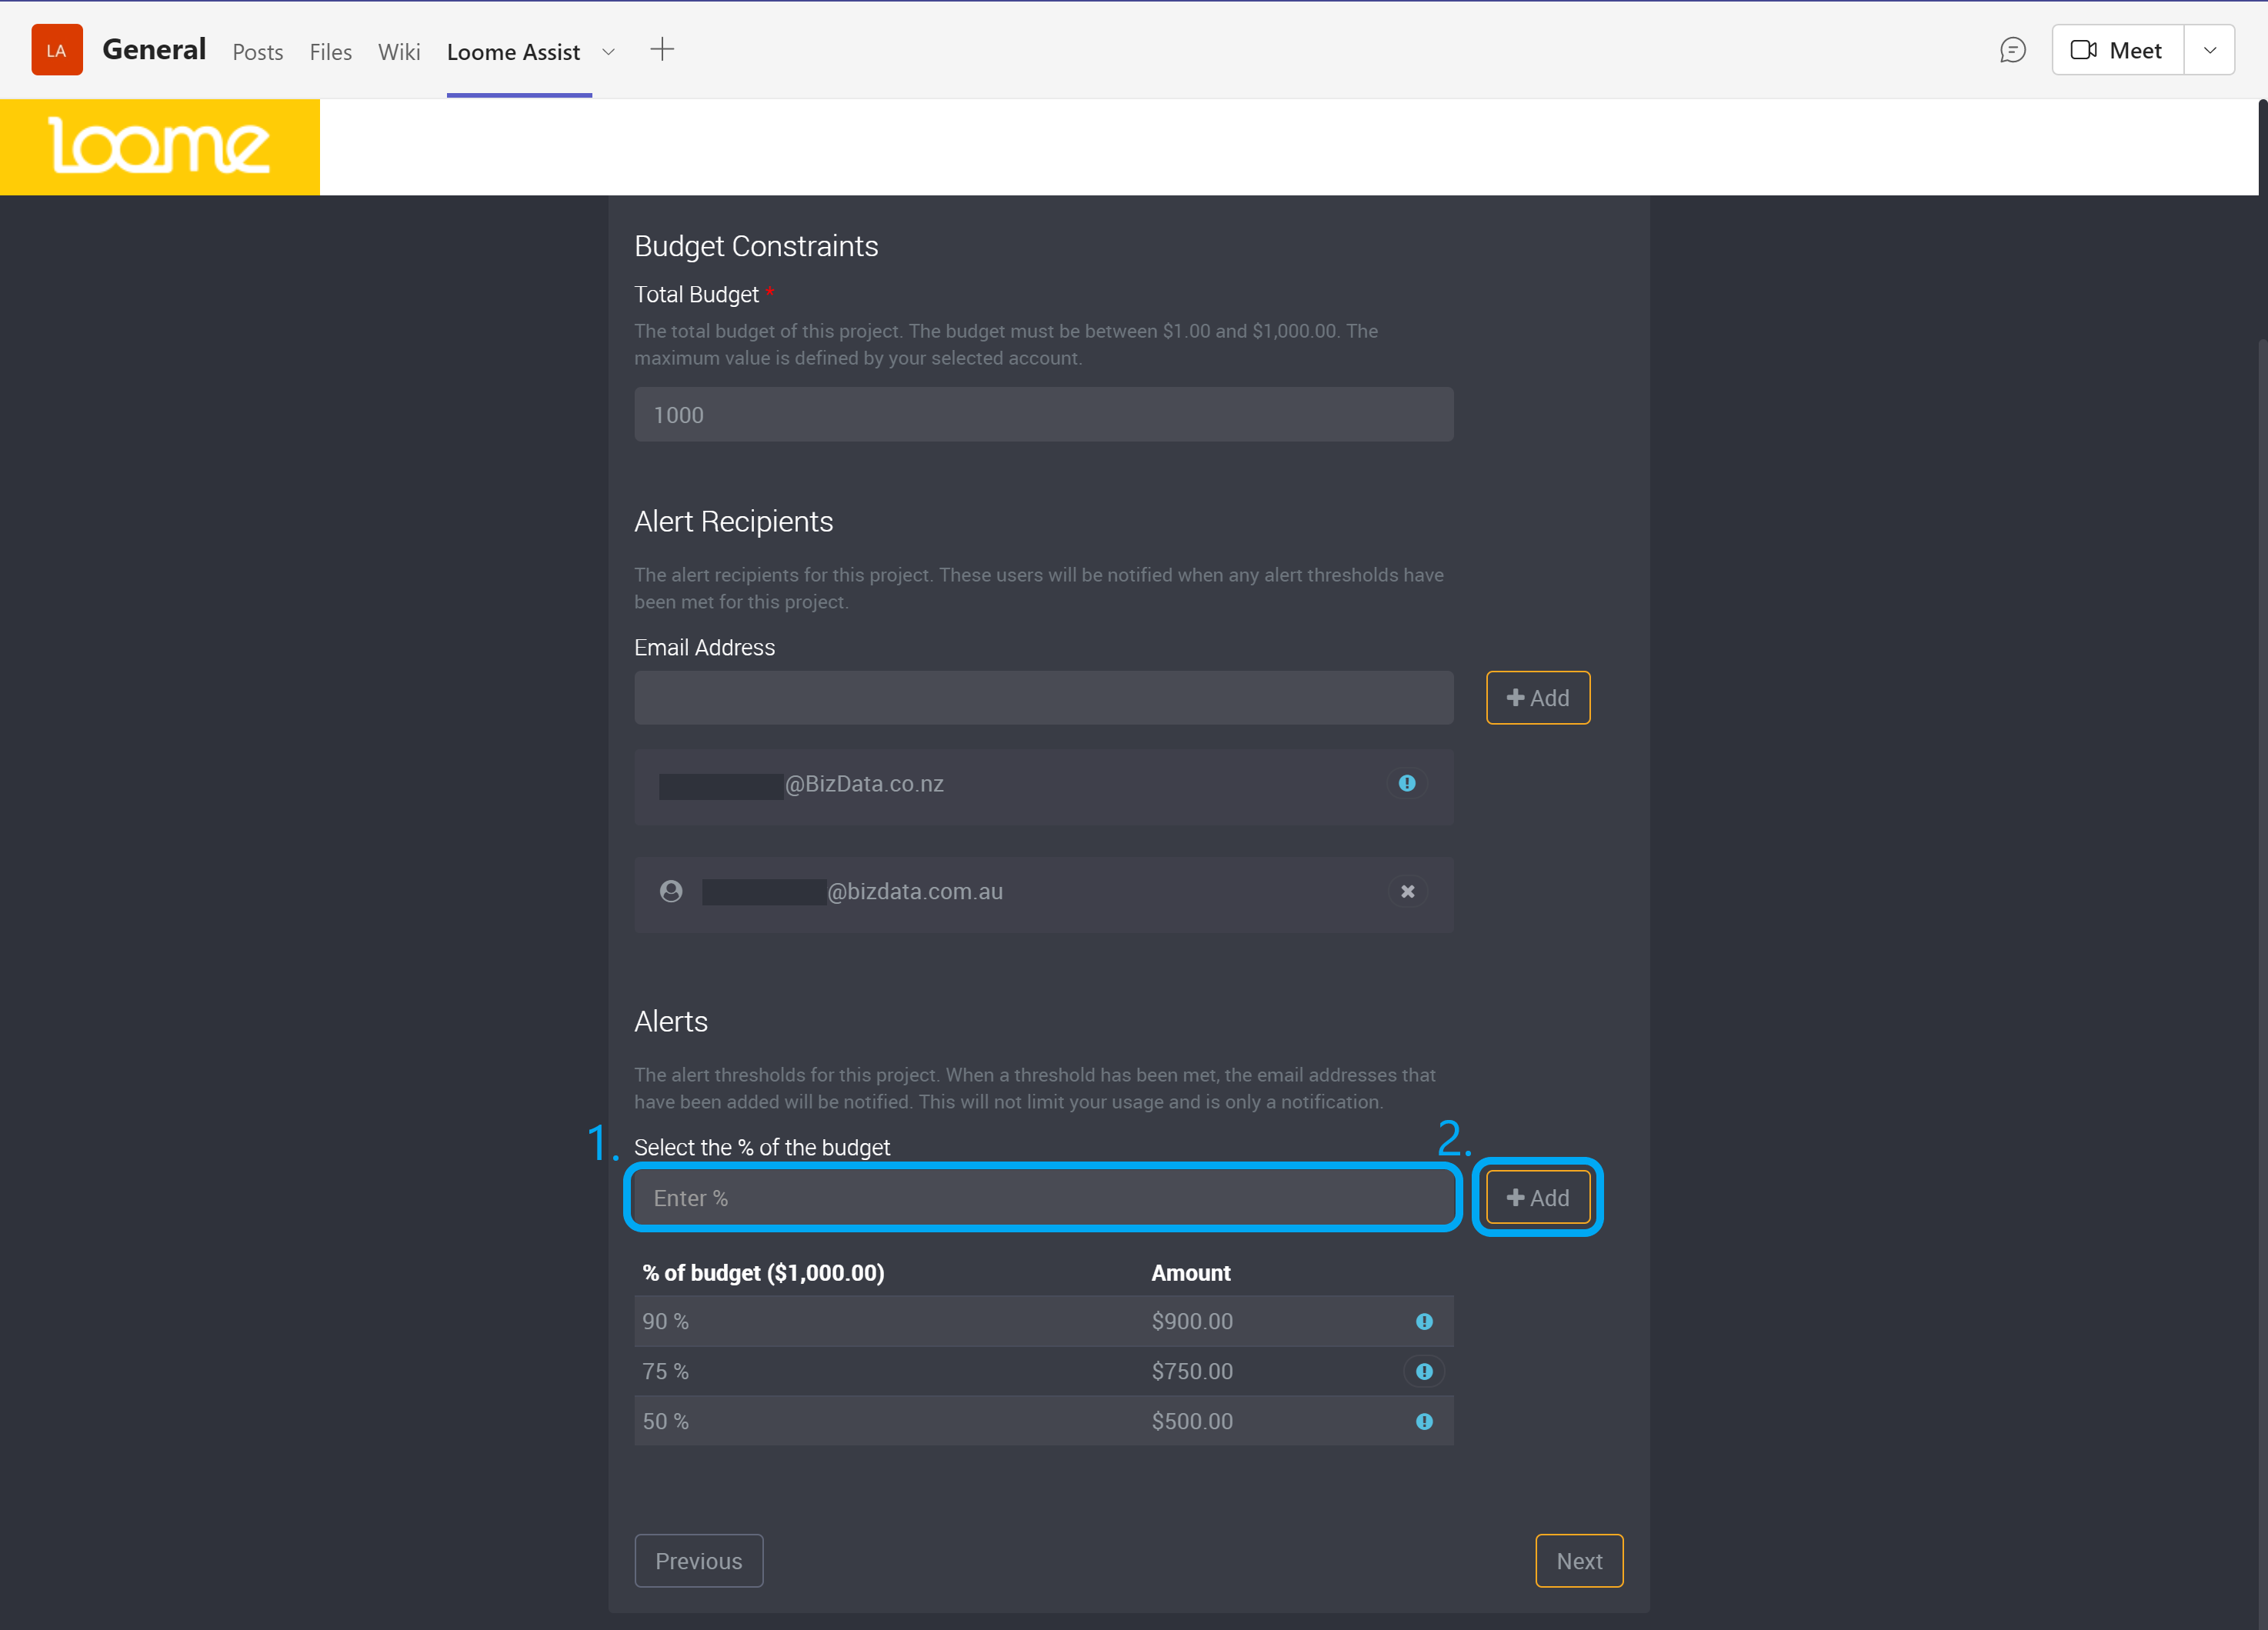
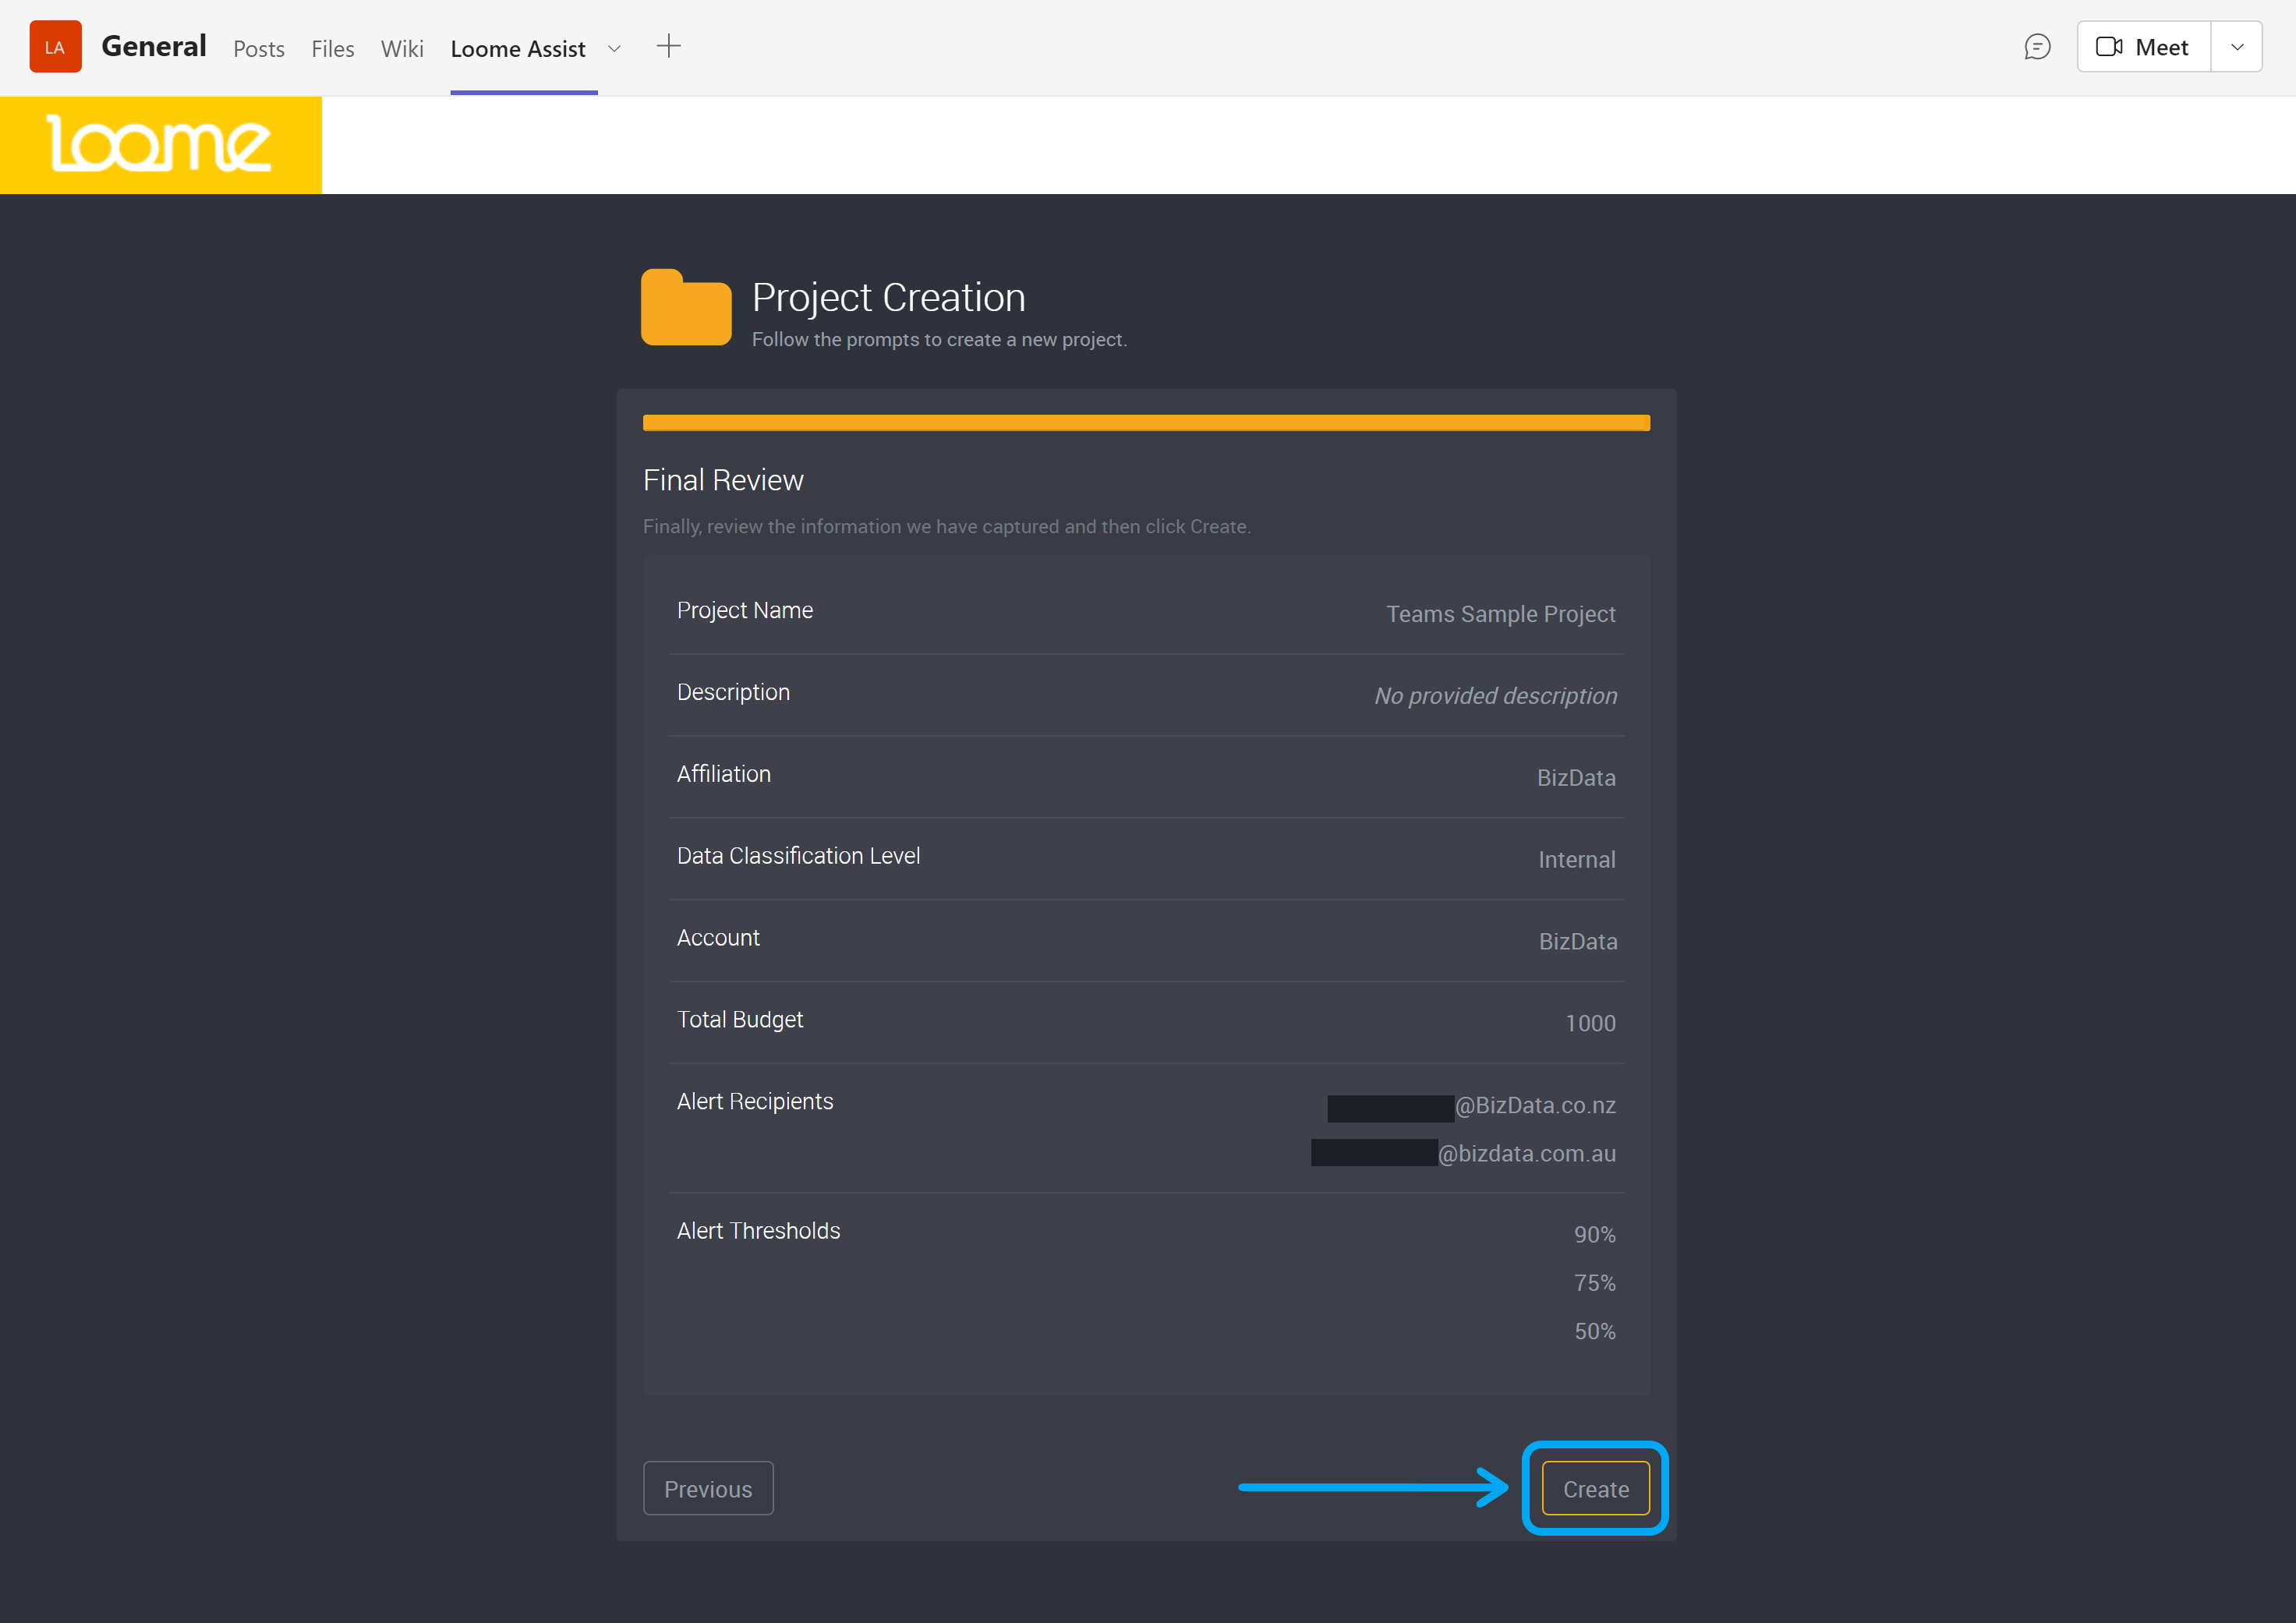
Click Next when you are ready to review your project details.
If you are happy with your selections, click Create and if you would like to make changes, click Previous.
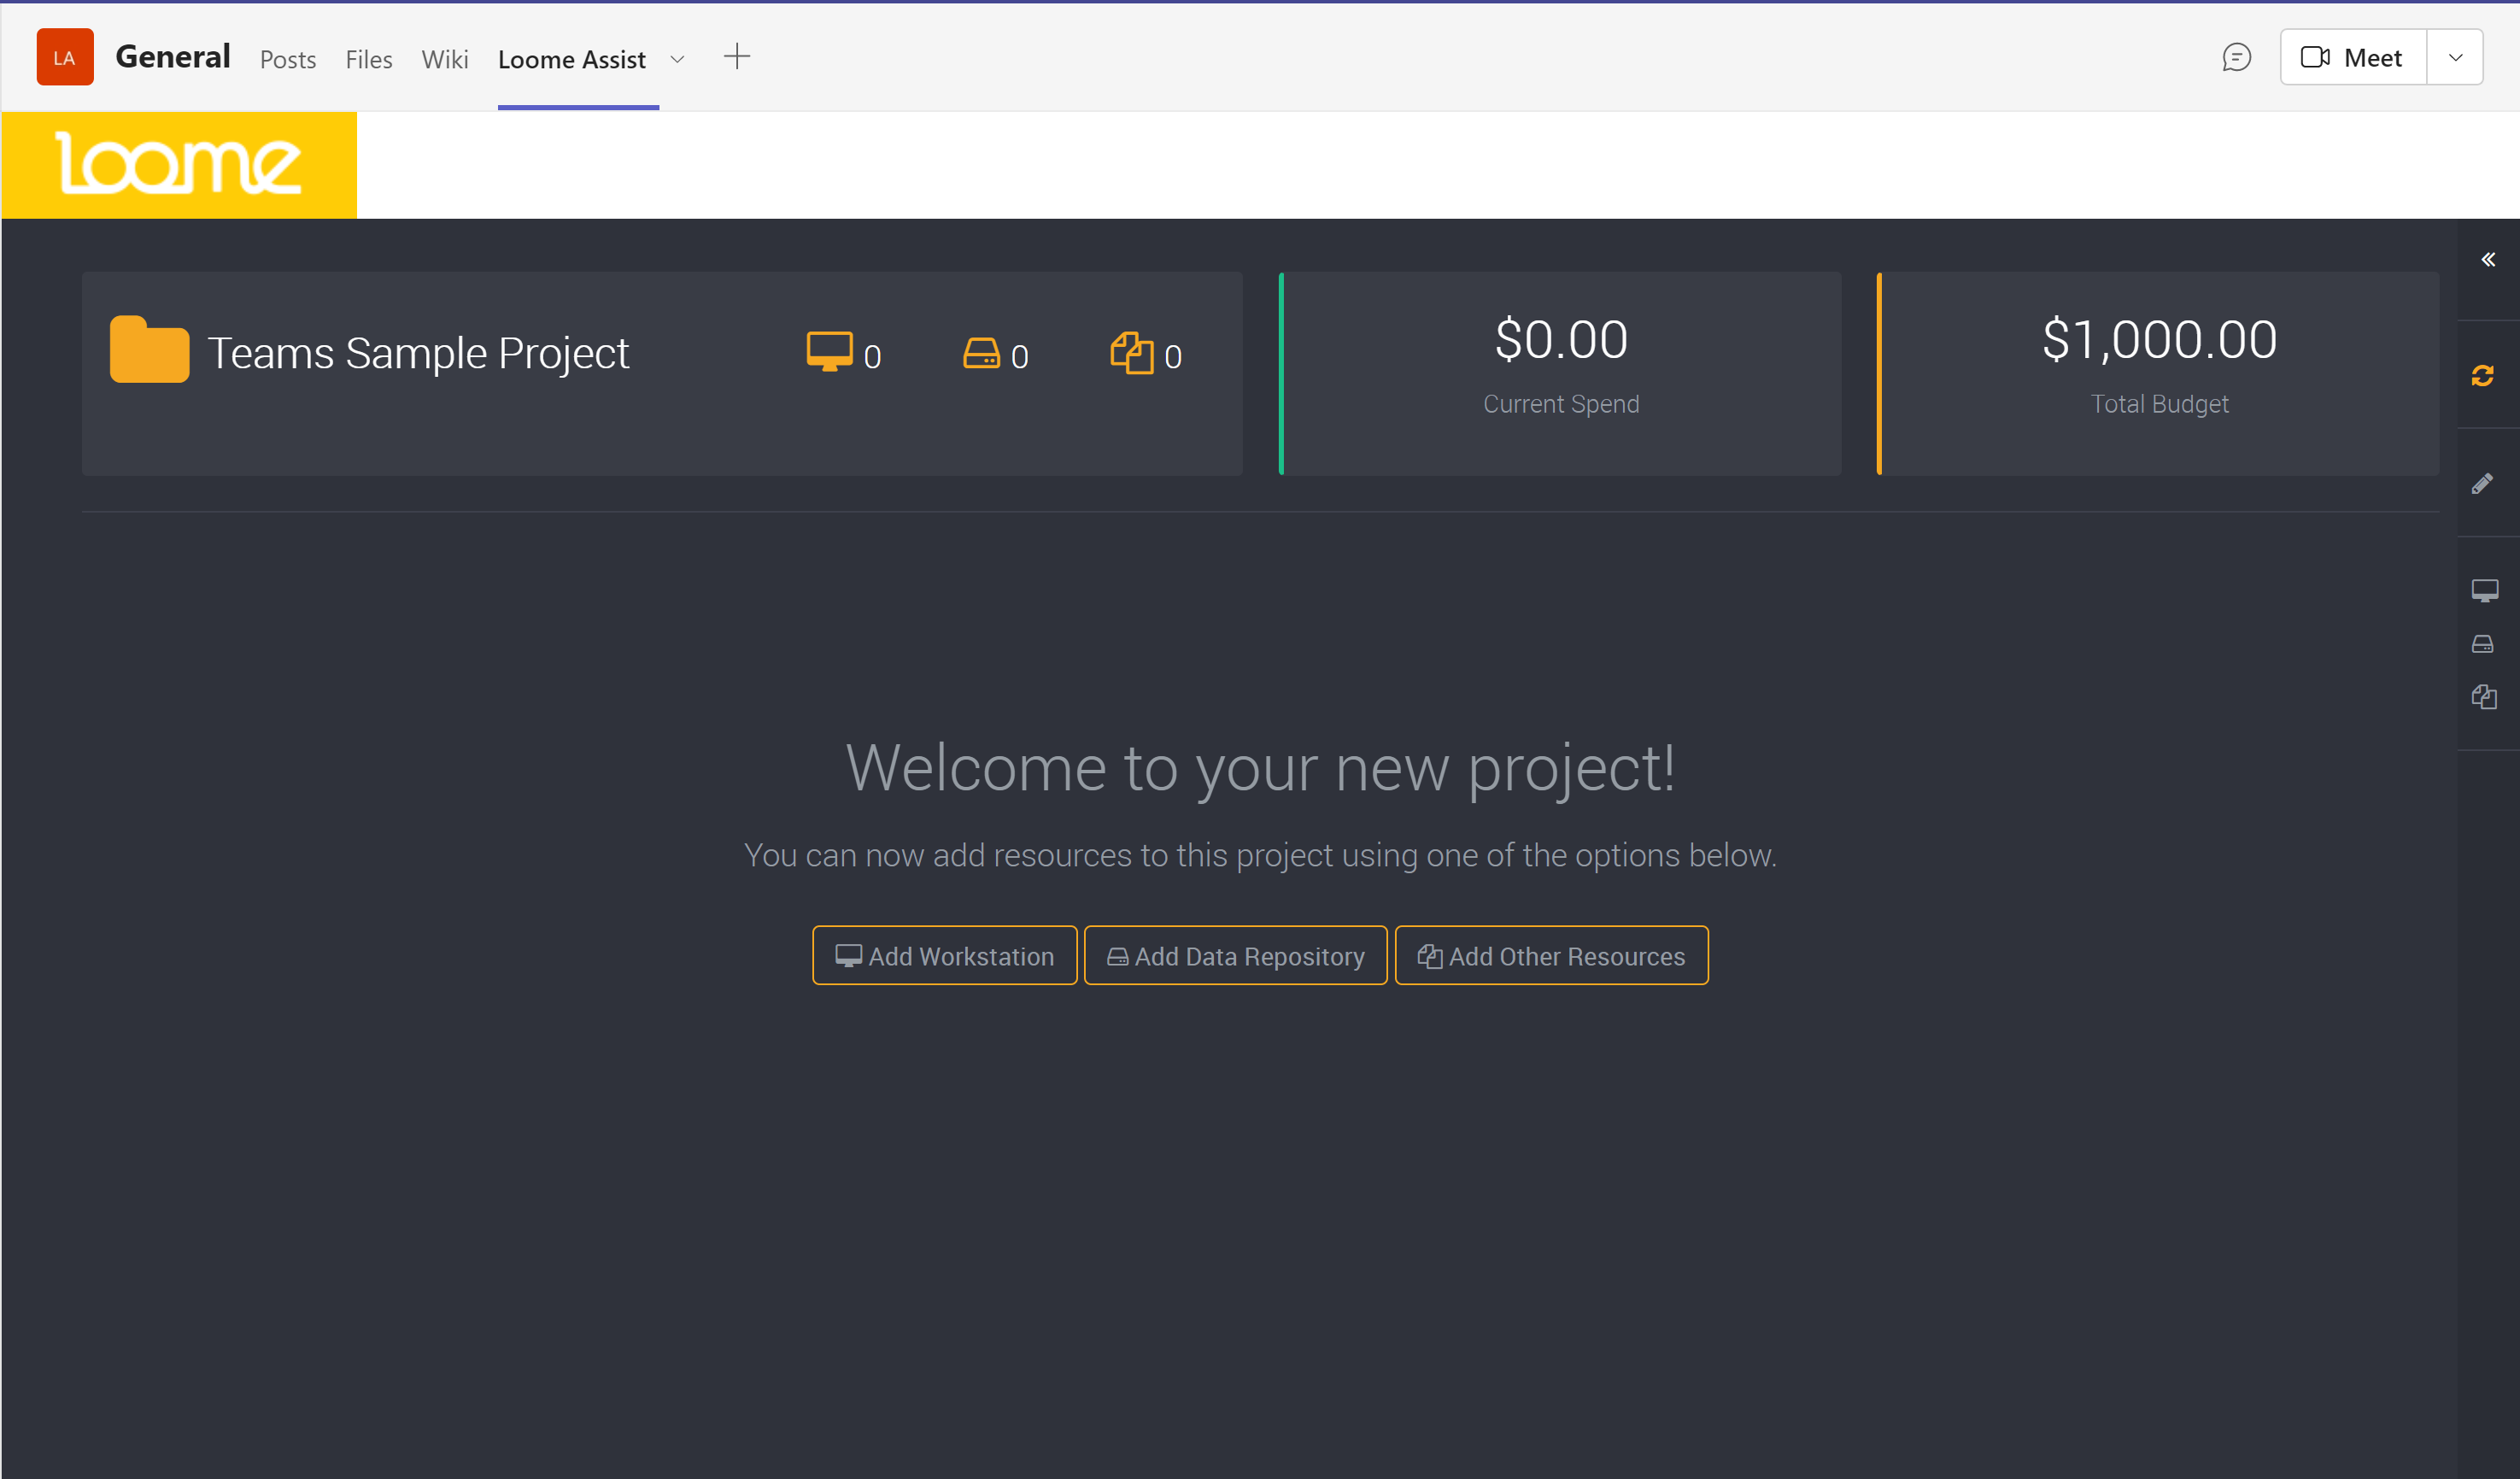
Your project will be created and can then be viewed in this Microsoft Teams tab. You can now add resources, such as workstations, data repositories and solution collections, to this project.
To edit a project after you have created it, you can click Edit in the slide-out at the top right of your project view. Learn more about editing projects here. Please note that you cannot edit a project’s memberships in Teams and will need to edit it in Loome Assist.
Deploy Resources into the Project
After you have finished configuring the Loome tenant and your project is ready to go, you can start deploying resources like workstations, storage, and much more.
You can add resources to a project using the same steps as you would in Loome Assist.
To learn how to add a Workstation, follow our guide here.
To learn how to add a Data Repository, follow our guide here.
To learn more about Solution Collections, follow our guide here.
After you have deployed resources, you can refresh your resources using the Refresh button in the right-hand slide-out.
How to View your Project Configuration Details
After you have set up your project in Microsoft Teams, you can view its configuration details from the dropdown tab menu.
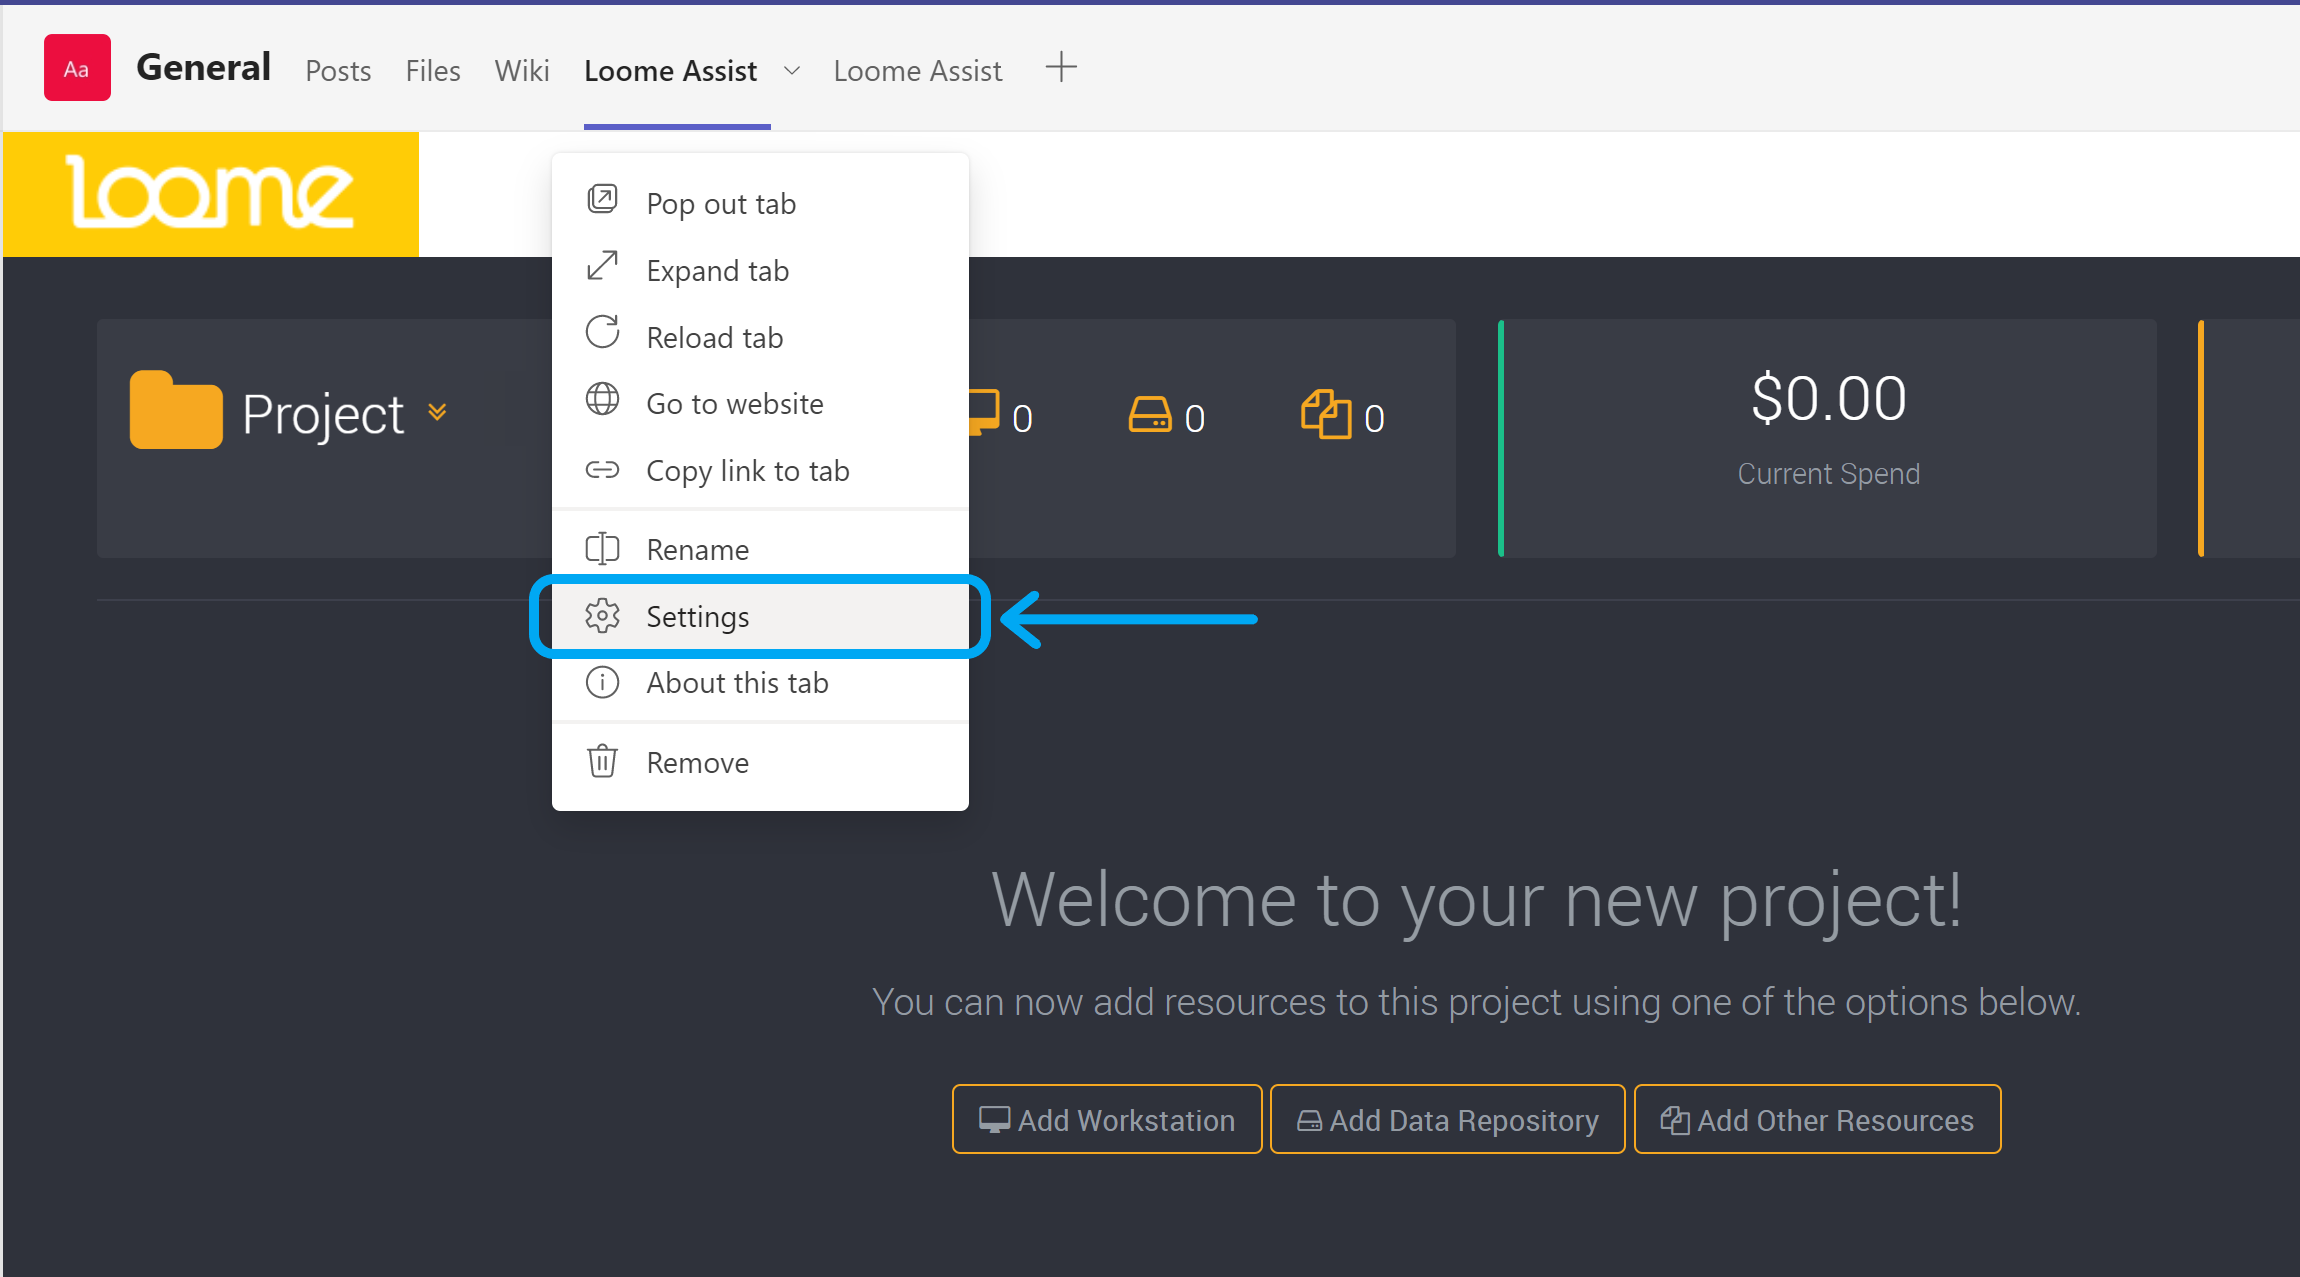
You will be able to view the name of the tenant of your project and the project’s URL.
You can also find a link to our documentation for Assist, as well as our contact email for any questions you have about Loome.

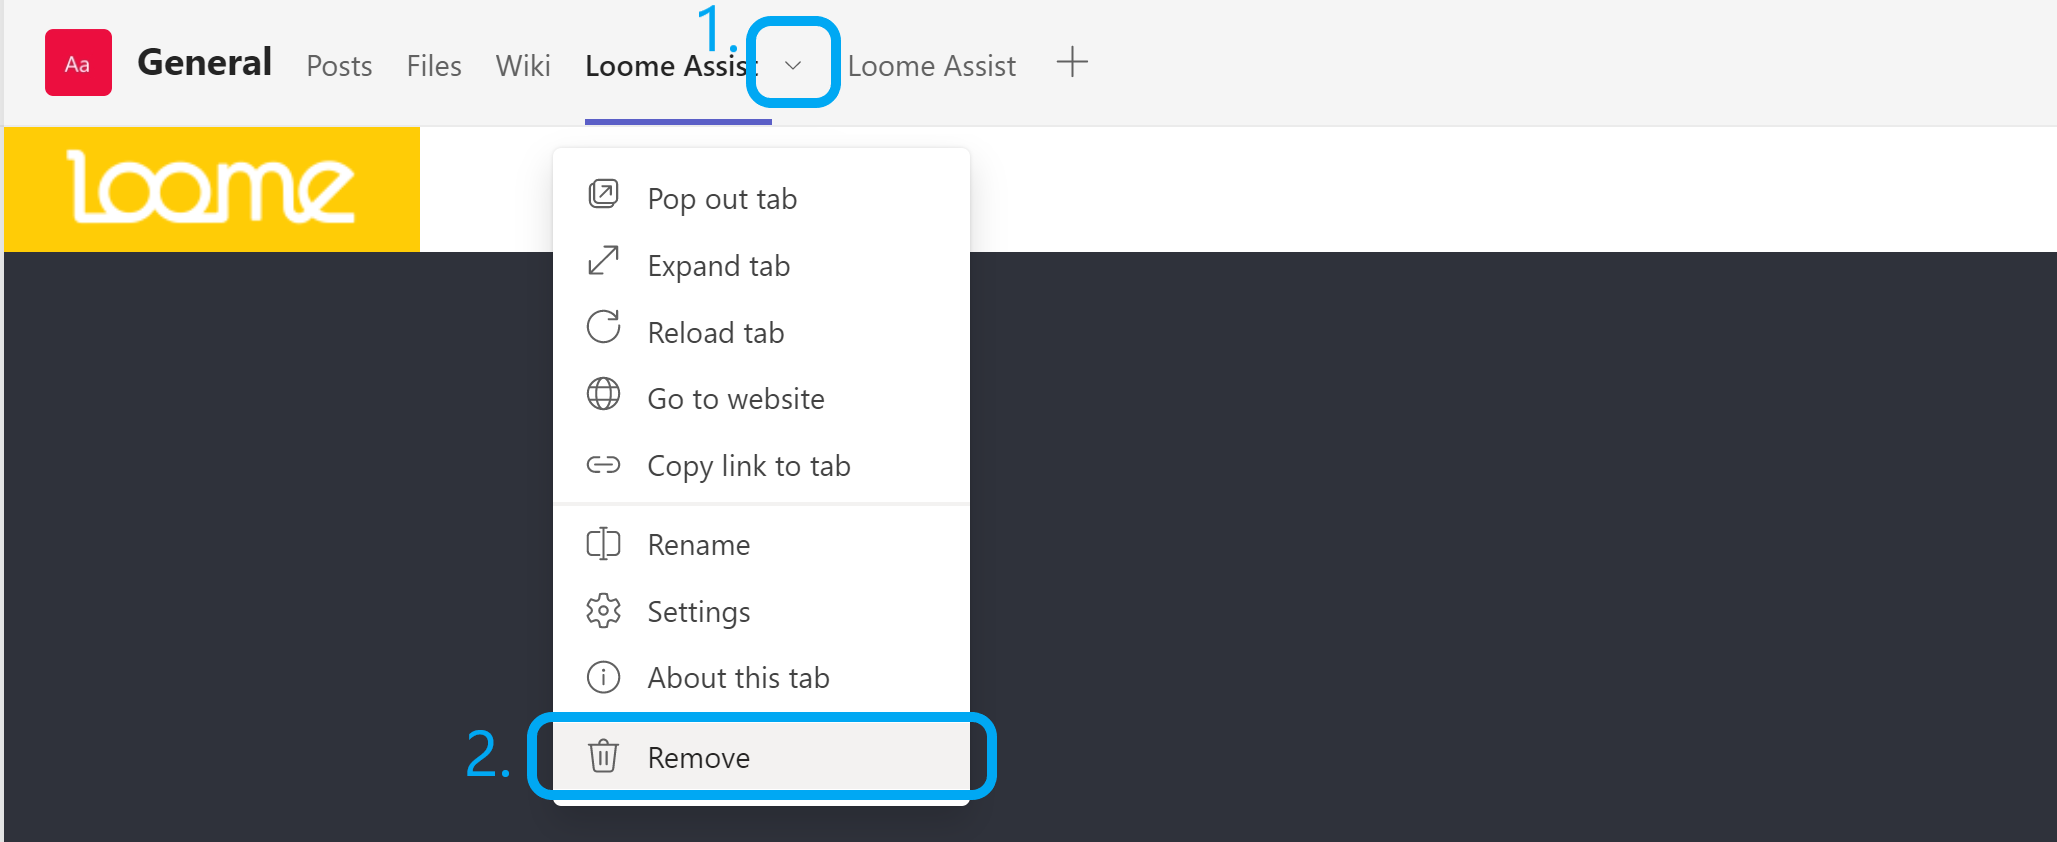
How to Remove a Project Tab from Microsoft Teams
To remove a project tab from Microsoft Teams, click on the dropdown tab menu and click ‘Remove’.
You will be prompted to confirm that you would like to remove this tab. This will remove the project tab in Microsoft teams, but the project will still remain in Loome Assist.
You can follow the link here to view the project in Loome Assist.
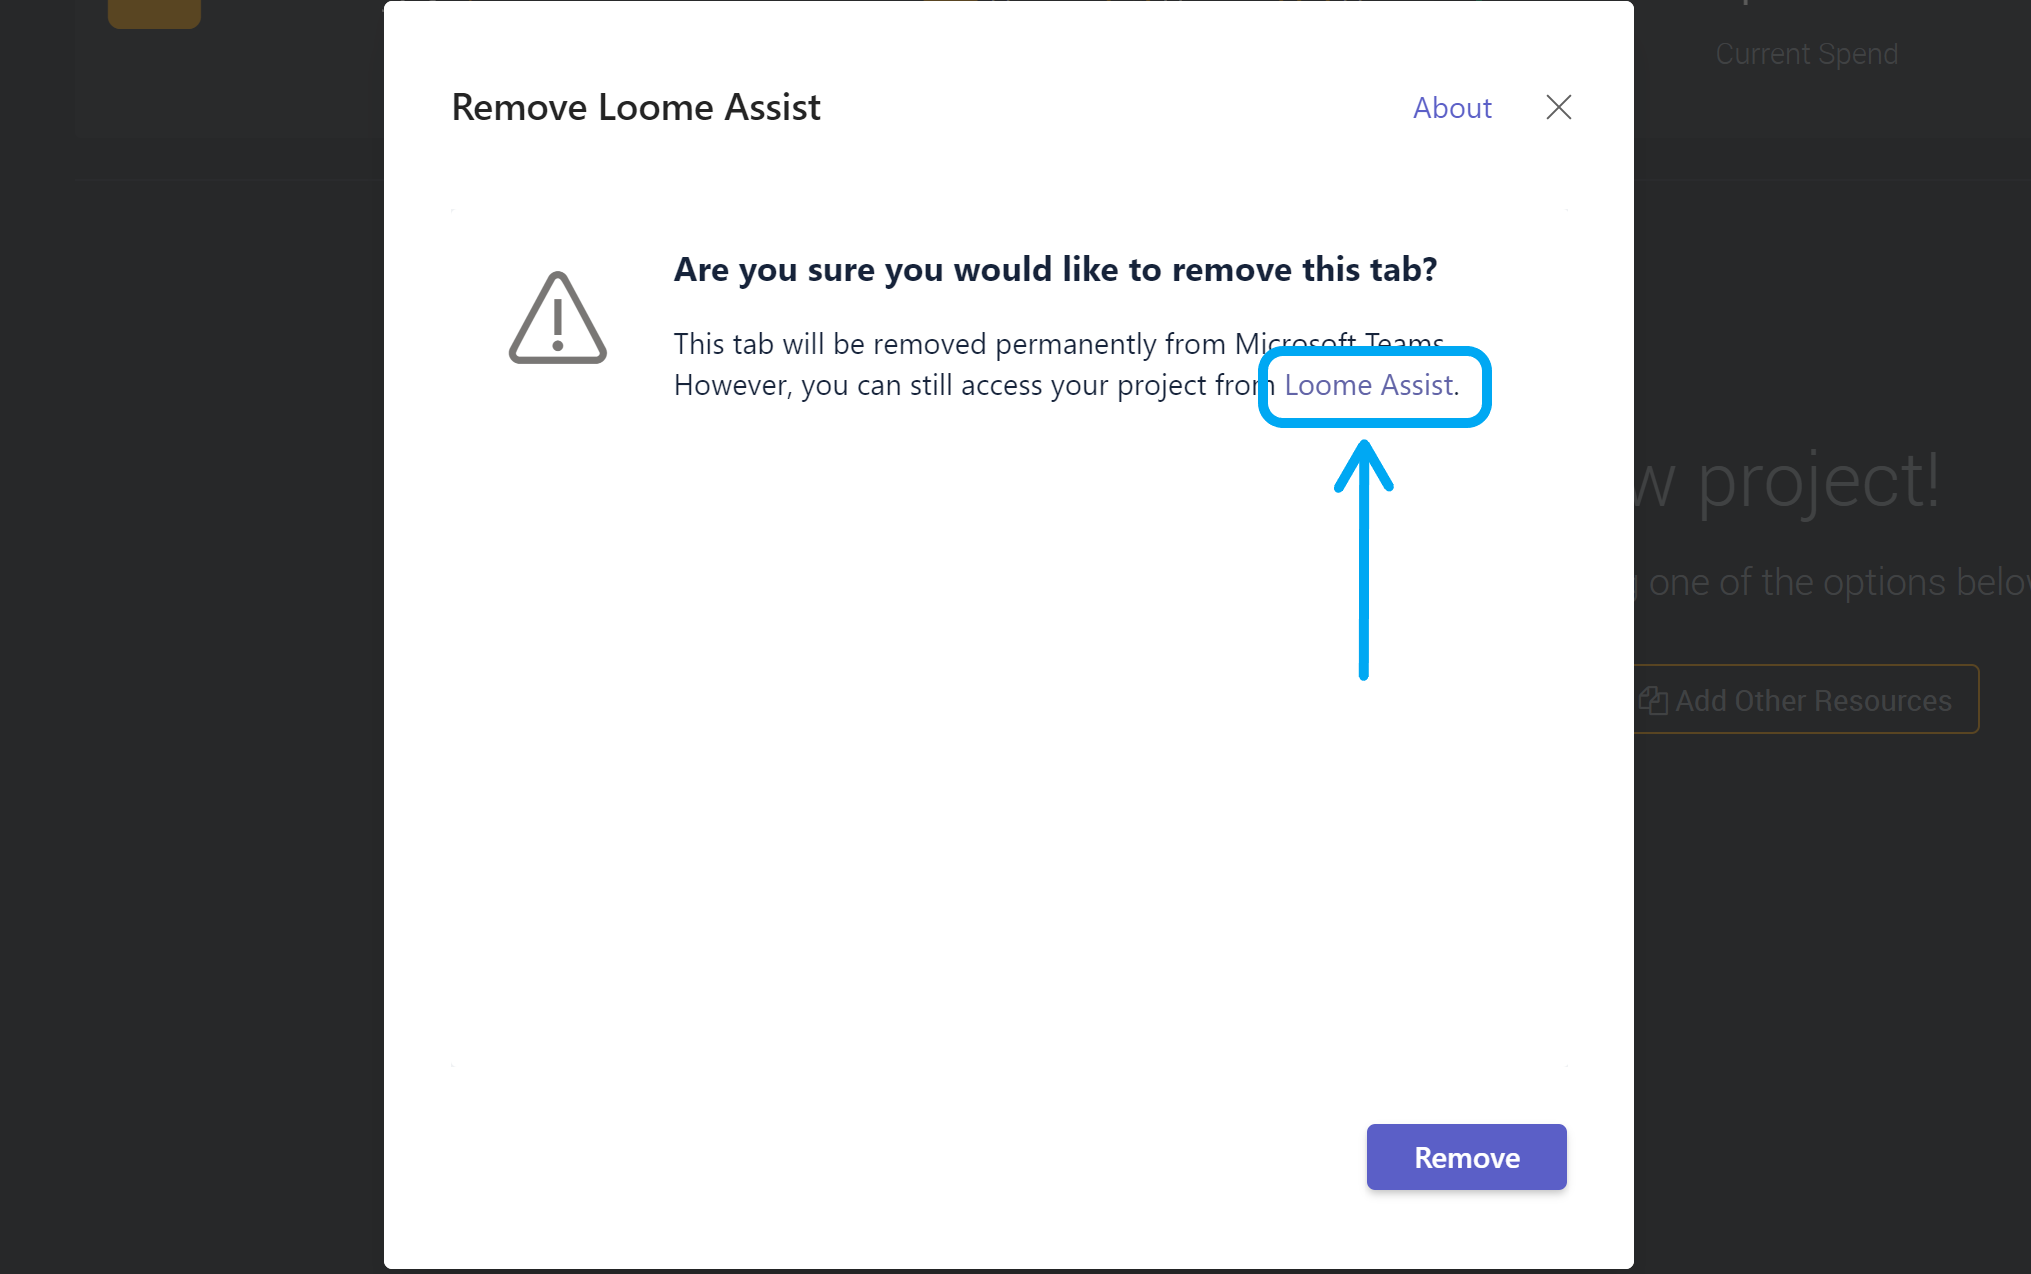
Please note that this tab will be removed permanently from Microsoft Teams. But you can still access your project from Loome Assist.
Users
When you create a project in Microsoft Teams, your Teams members will be added as Loome Assist users. Owners will be added as Project Owners in Loome Assist, and other roles will be added as Members. Any guests in Microsoft Teams will be added as a Reader to your project.
If any of your team haven’t used Loome Assist before, once added they will be able to access the project in Teams. They will also receive an invitation to the tenant. They can follow the link in the invitation email to the Loome Assist website.
The following table lists the corresponding roles in the project and tenant a user will be added to if they are a part of your team.
| Microsoft Teams Role | Loome Assist Project Role | Loome Assist Application Role |
|---|---|---|
| Owner | Project Owner | Project Creator |
| Member | Project Contributor | Consumer |
| Guest | Project Reader | Consumer |
Users that are removed from Microsoft Teams will not be automatically removed as a member in the Loome Assist project.
You can only remove a user from a project’s membership by editing the project in Loome Assist. To also remove a user from the Loome Assist tenant, you will also need to delete the user in Application Roles.