View and Edit your Results
Find the following sections below:
You can learn how to edit your records here, group and aggregate your records, and create a saved view of your records in the guide in this link here.
View Your Results
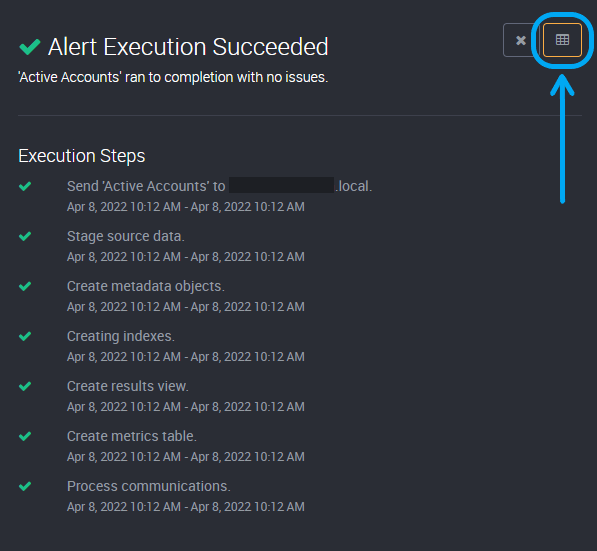
You can view your results once you have executed a rule. You can access them by clicking on the results icon at the top-right of the Execution Steps slide-out.
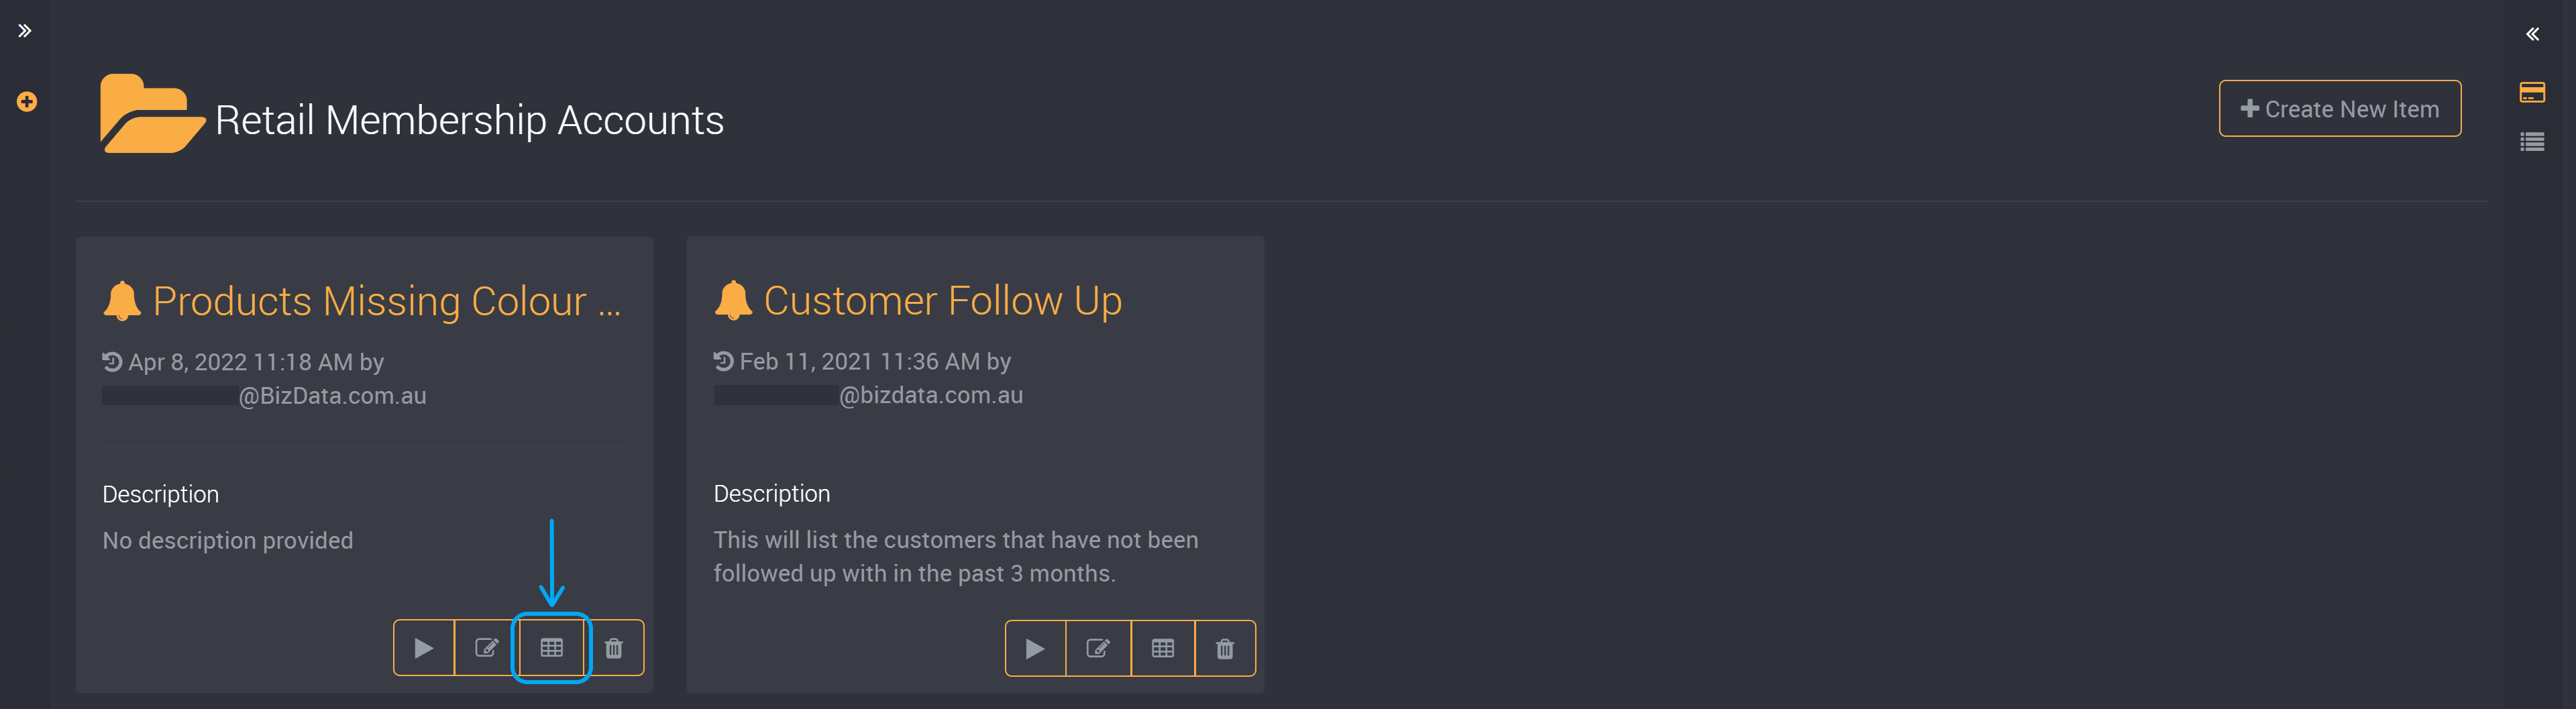
You can also access your results from the card or row of a rule on its project page in the bottom right corner if you have already executed this rule.
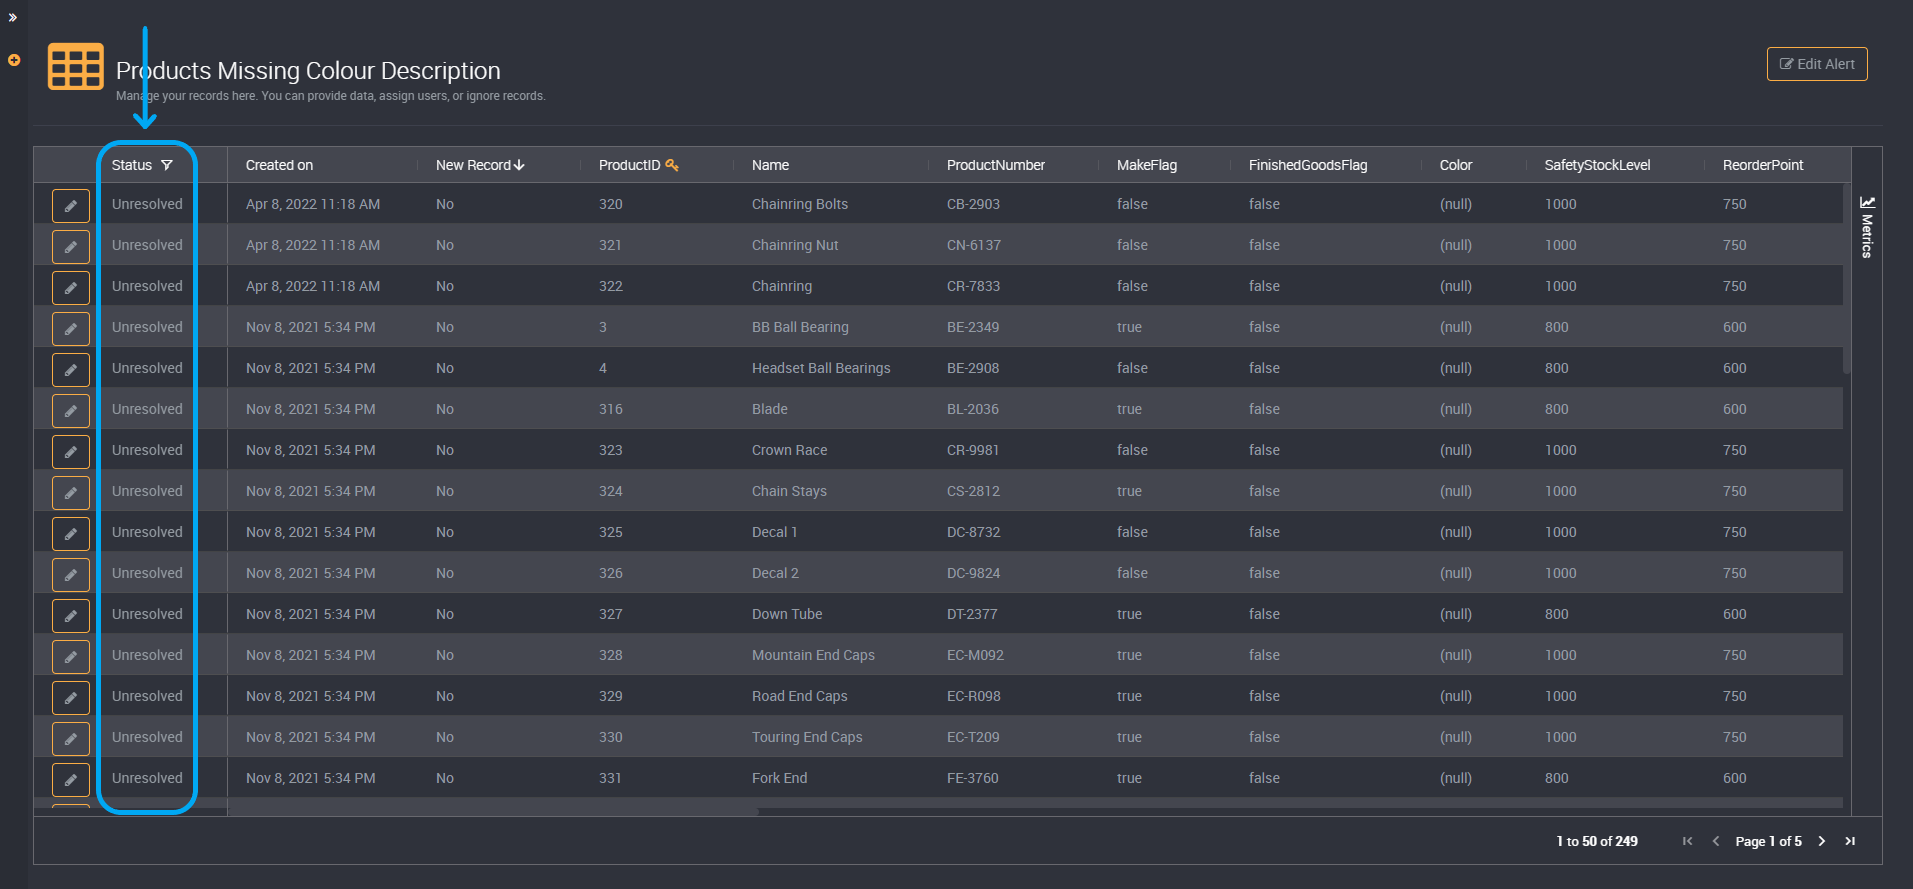
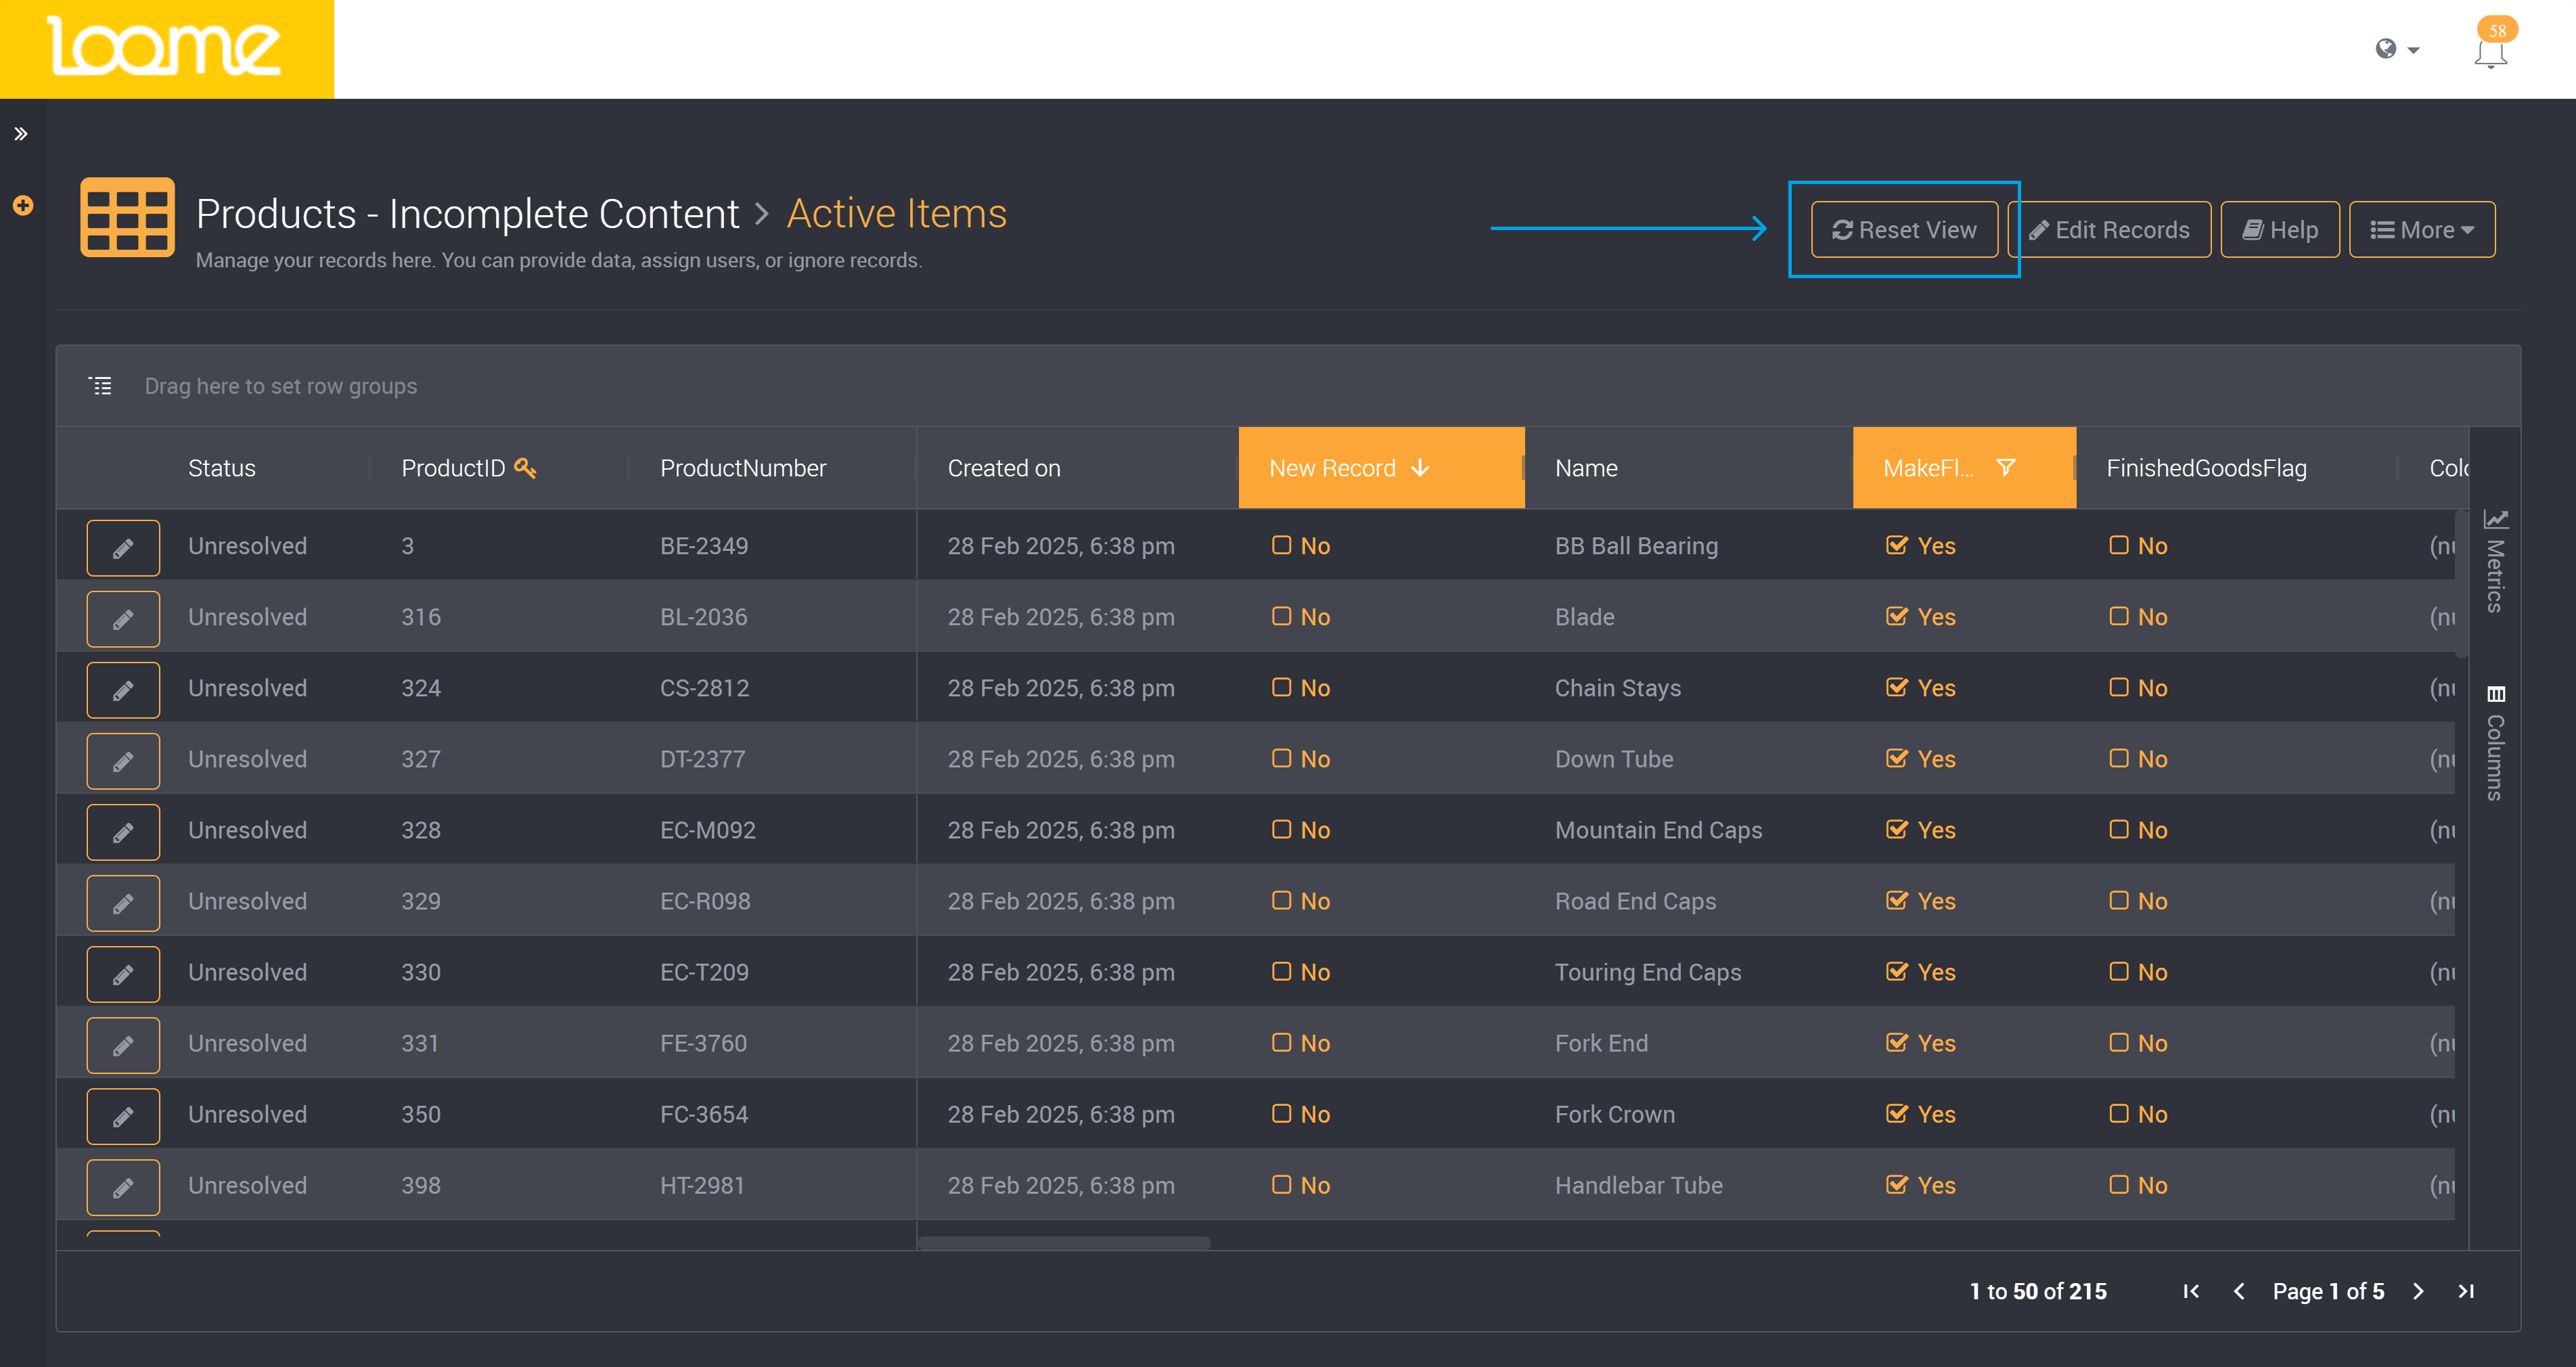
In the following image you can see that there are unresolved results for an alert.
If a rule has been run by another user or schedule while you are viewing its results, you will be notified that there may have been changes. The results will then be refreshed so you can always view the latest updated records.
What are Resolved and Unresolved Results?
When a record is unresolved, it has been included in the result set created by the rule’s query. You can edit the custom fields of unresolved results following our guide below.
A resolved result means that at some point the record was available in the results for the provided query (as an unresolved result), however changes to the data have meant it is no longer included within the queries filters and so, is considered to be dealt with.
You cannot edit the custom fields of resolved results, as your query filters out records that are not relevant. So if the issue causing a record was solved, it will no longer be included in the results of the query and so, the new version of this record will not be able to be edited.
What is the Record Age?
You will be able to see whether a record has been added to the results with the last execution of a rule in this column. This is generated by Loome and will be present on the results page of any executed rule.
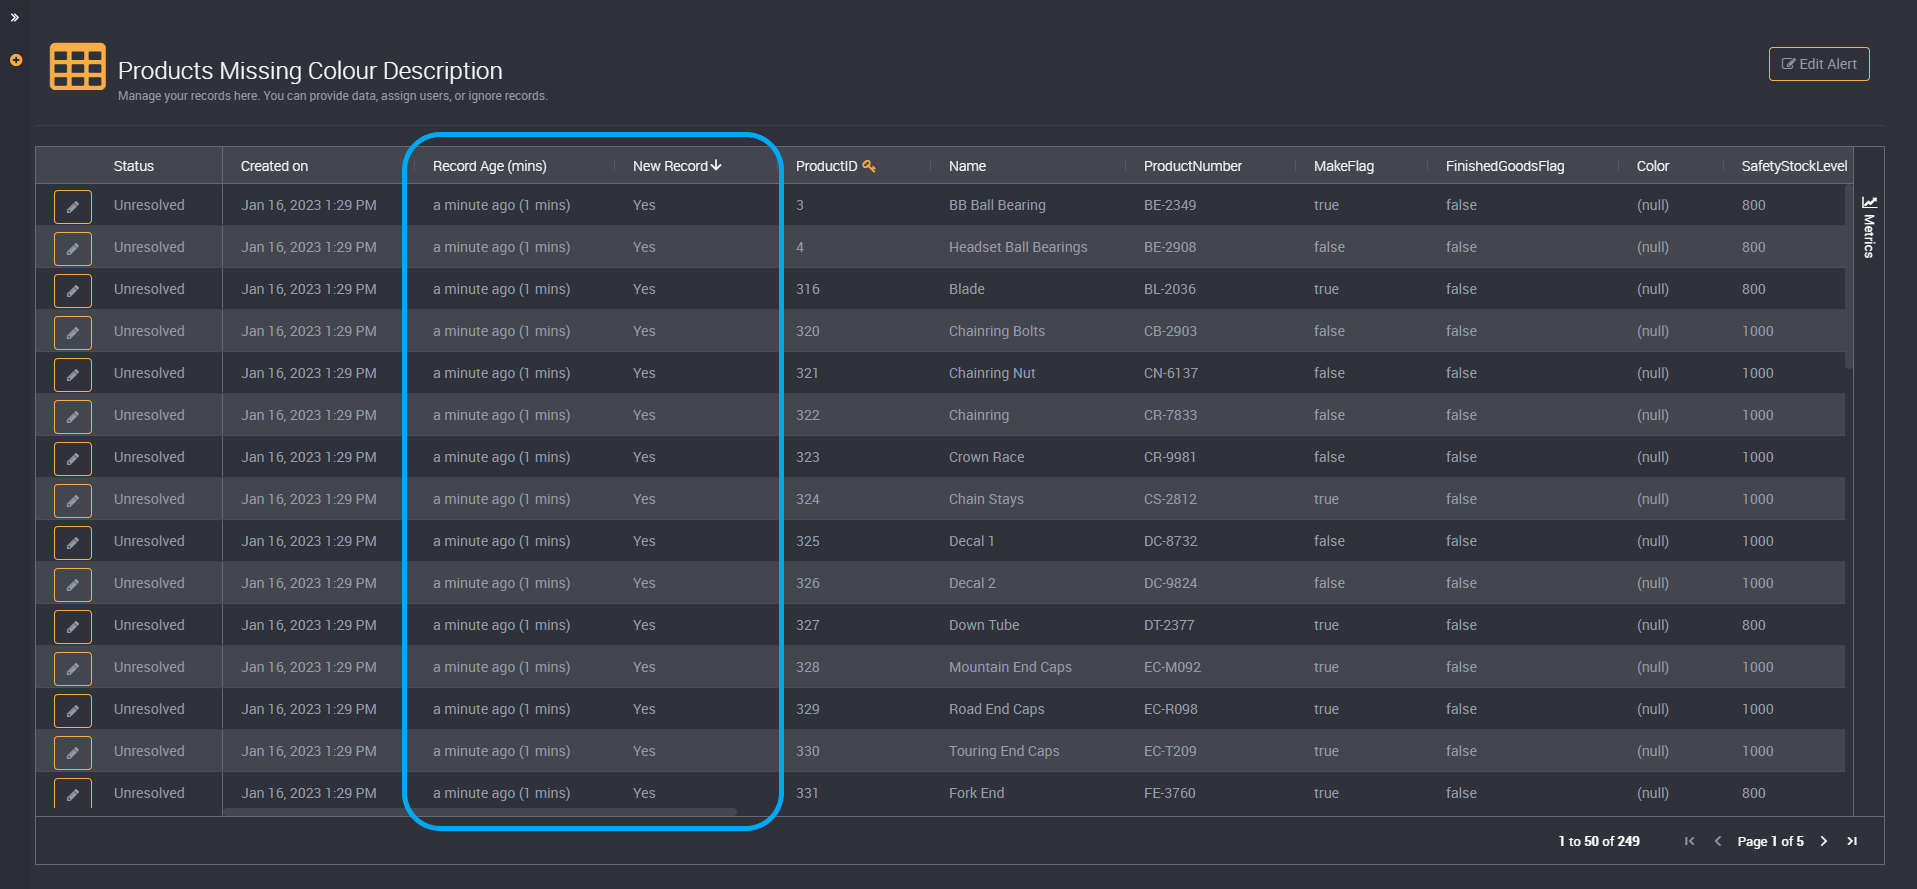
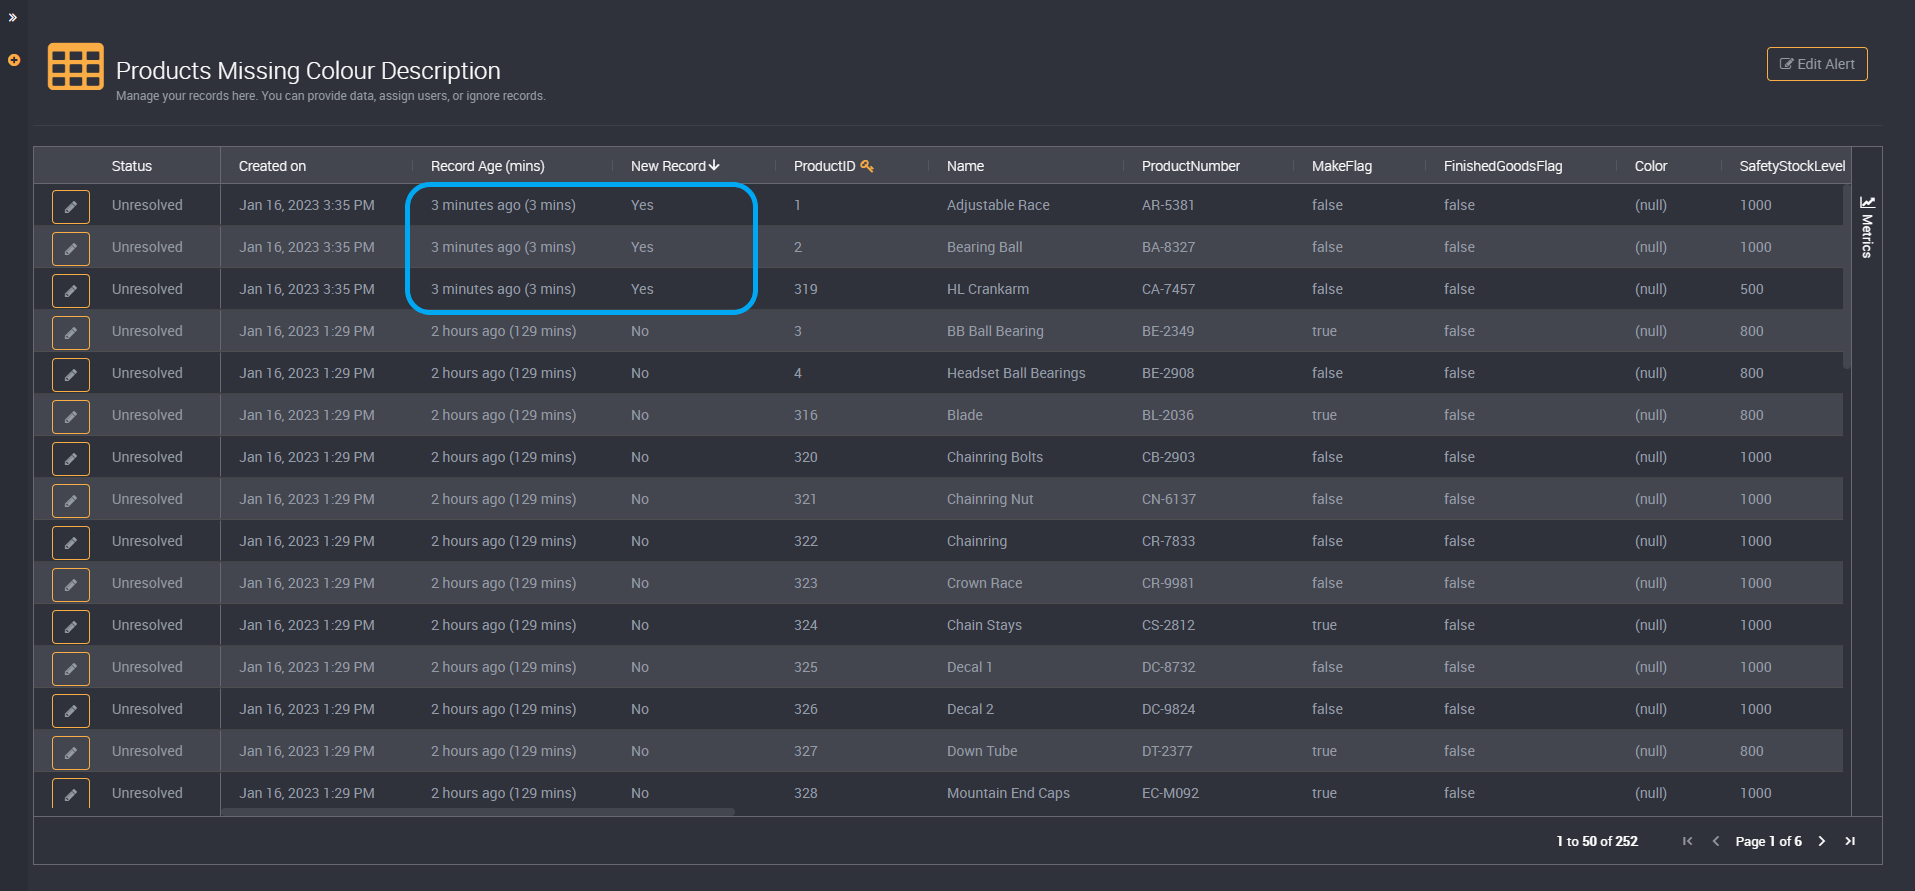
You can also view the age of a record. The record age will note how long ago an individual record was added to the results of this rule. When you run a rule, results will first be ordered by record age, to display any new records, and then by the key column by default. This is a hidden column by default, and can be viewed via the filters.
New record will state whether a row was added in the most recent execution of a rule.
In the image below, all rows of this rule were added when this rule was last run.
In the next example, there has been three new records added.
The column New Record will state which rows have been added in the last execution of a rule.
You can use the Record Age column in communication rules to send notifications when a record has remained unresolved for a long period of time. Learn how to create a condition for this scenario in our guide here.
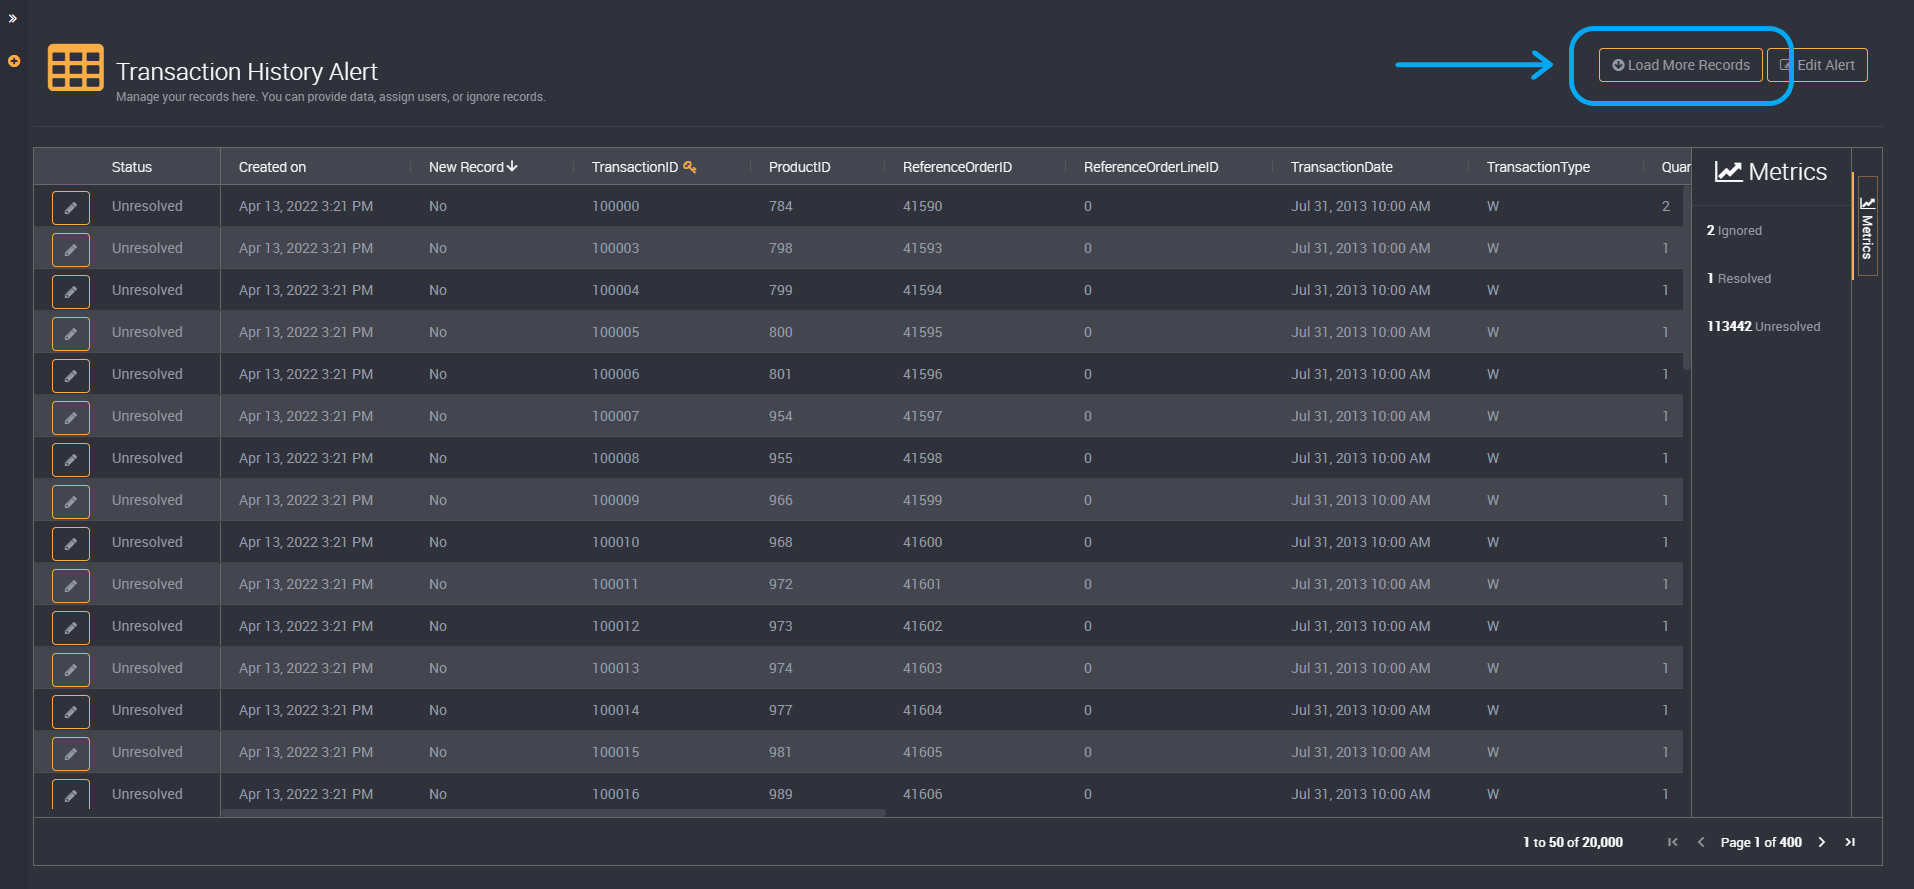
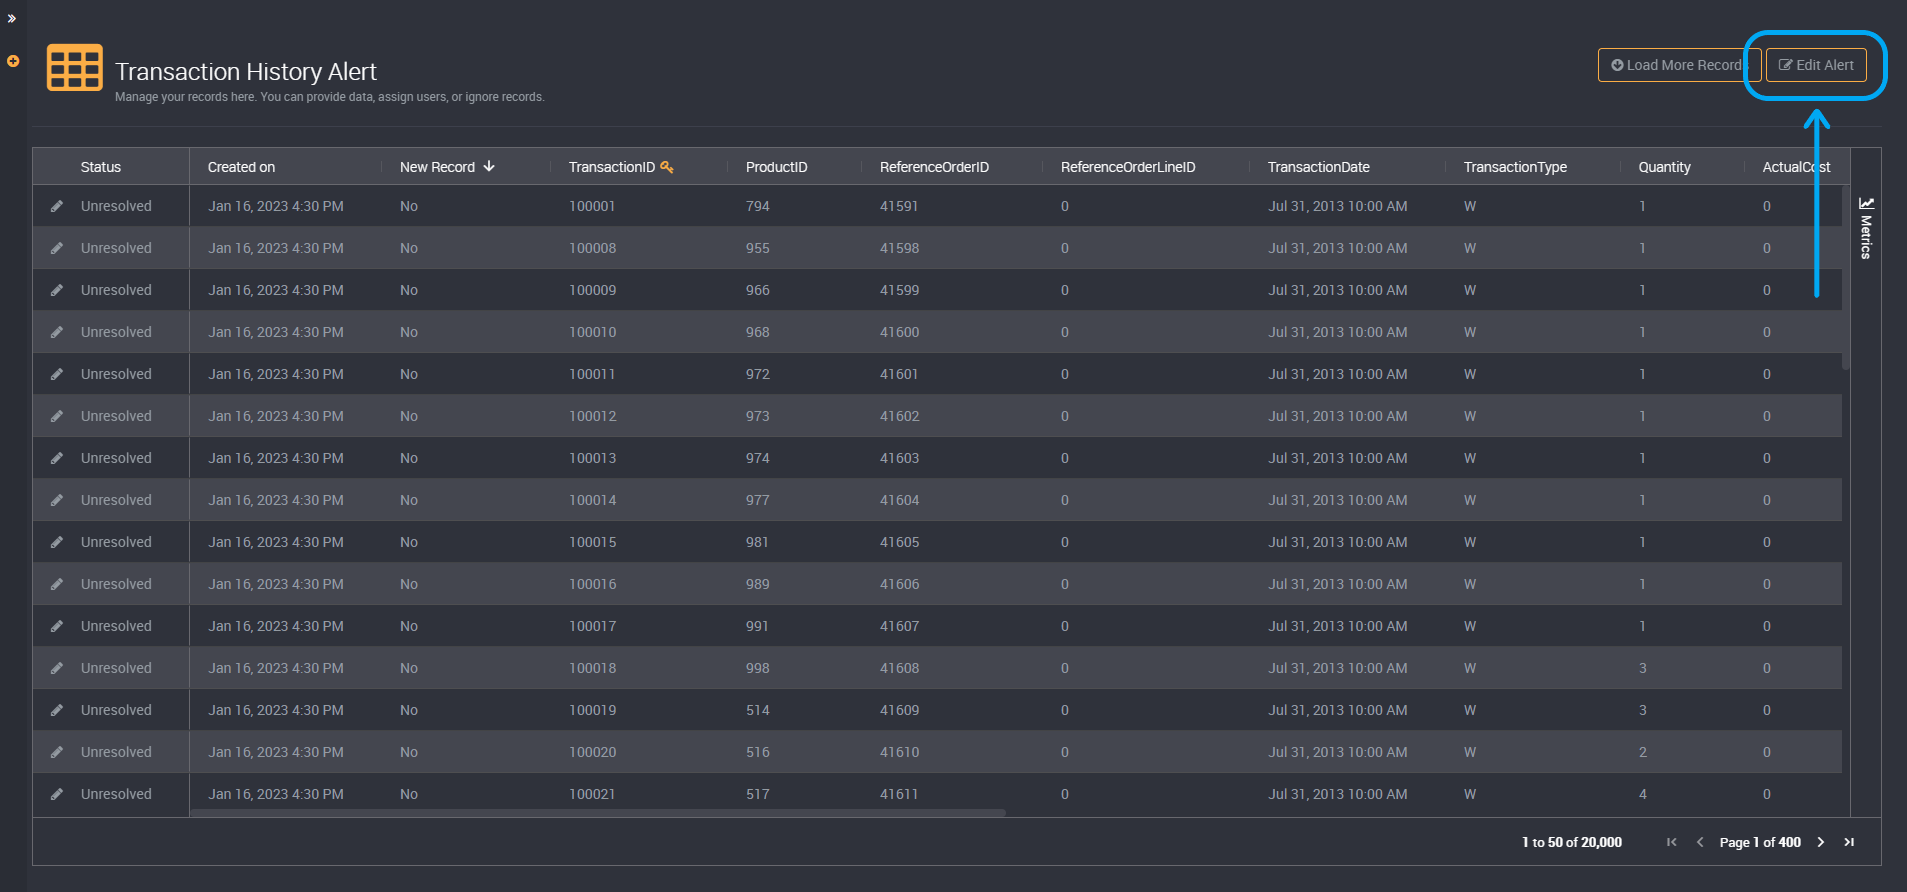
Load More Results
If your rule contains more than 20,000 records, you can load more results using the Load More Records button at the top right of this results page to load another 20,000 records at a time.
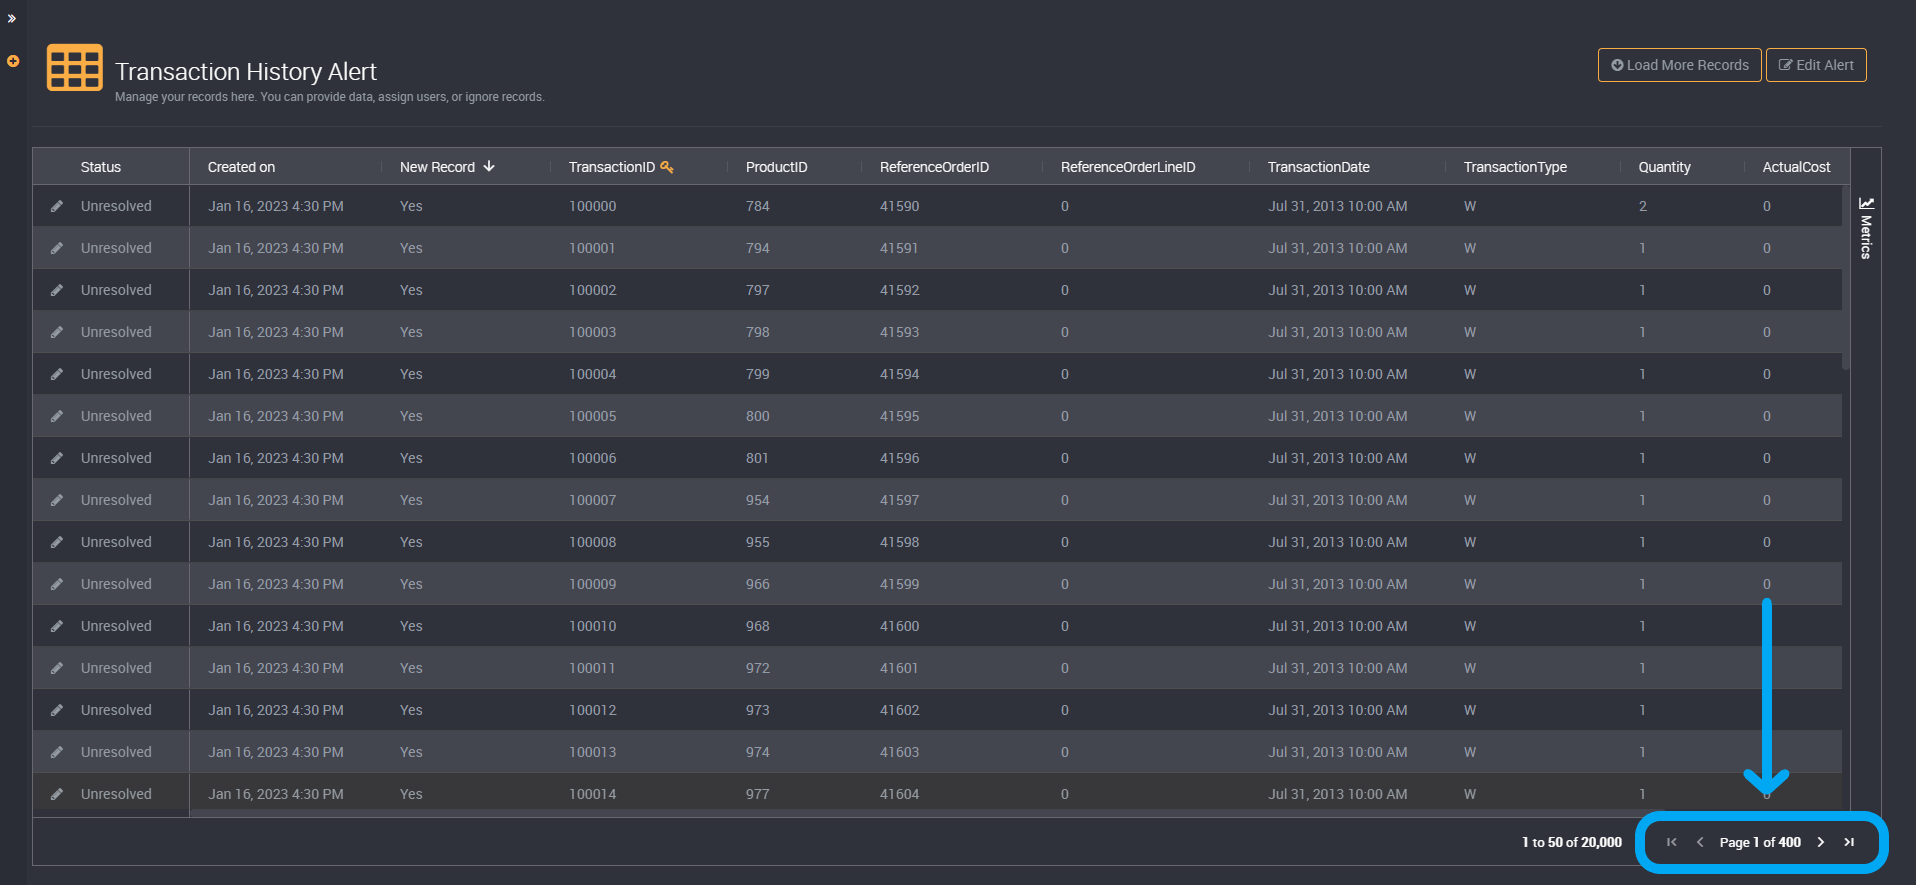
Pagination
You can use pagination to navigate through your data. You can also find the total number of records that have been currently loaded beside the page navigation.
You can navigate the pages of your results using the arrows at the bottom right of the results table.
You can progress to the end or start of the loaded data set or navigate page by page.
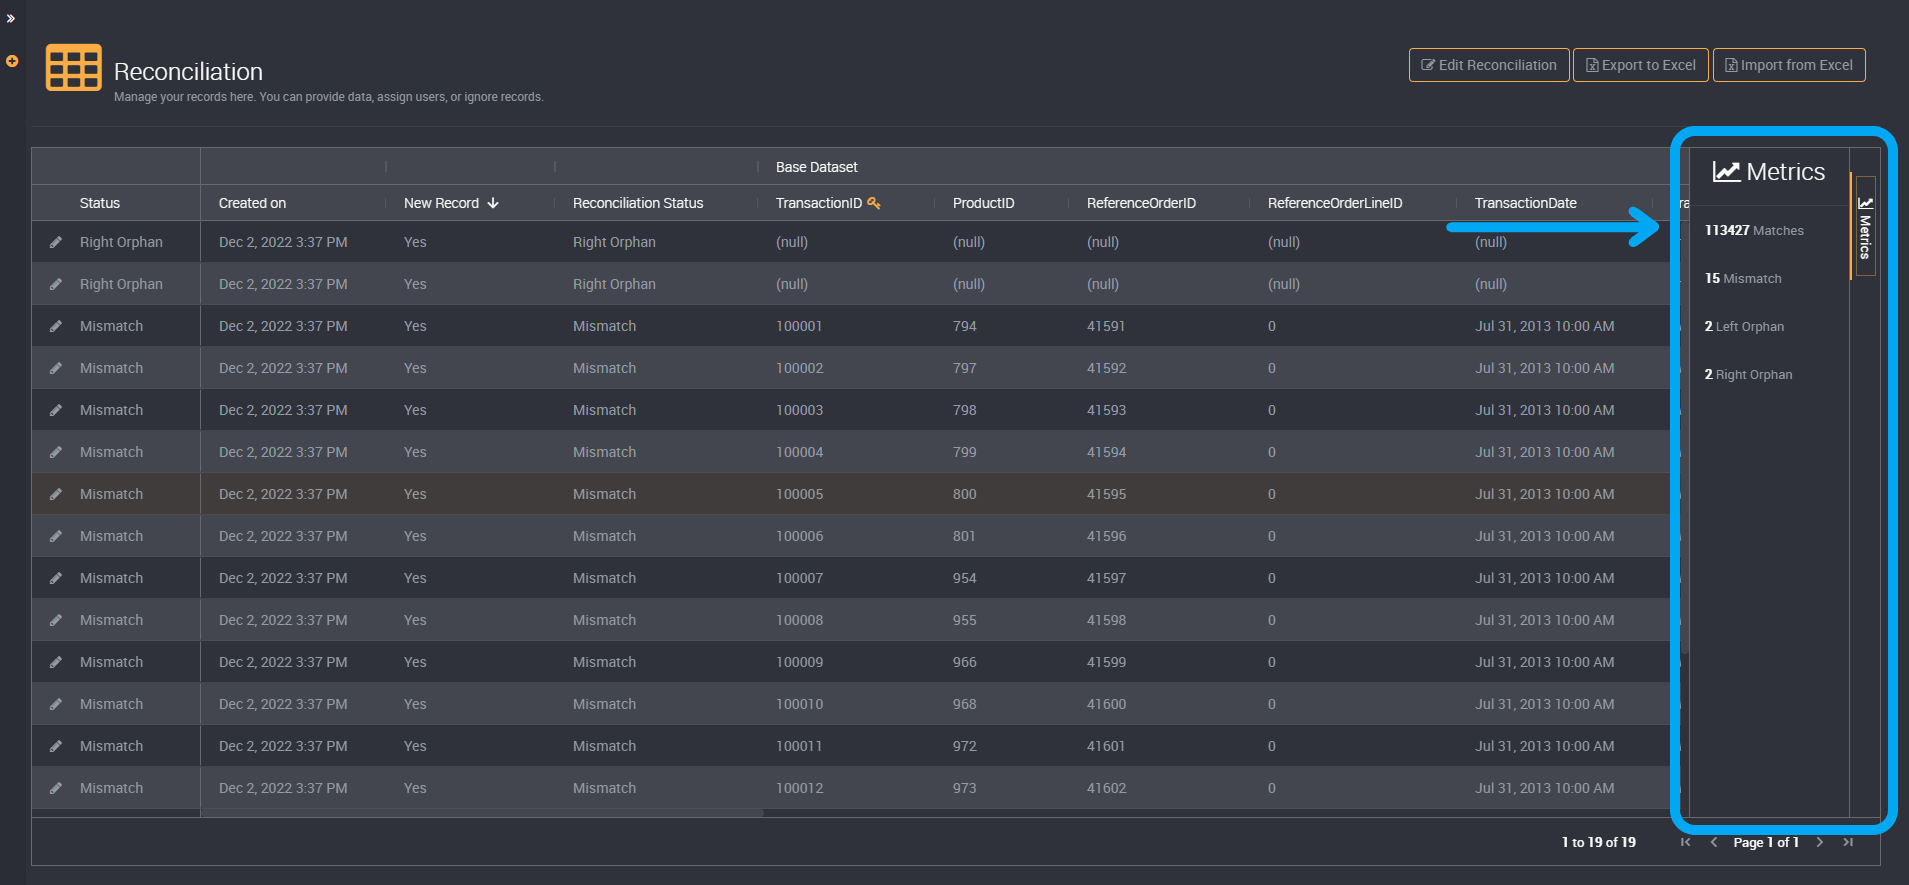
Metrics
The metrics of the rule’s records can be found in a slideout on the right of the results table. It will show how many records belong to each status. The metrics displayed will be all existing statuses of the records in your data set.
It will also be available as a table in your target connection under ‘LMProject Number.LMRule Number__Metrics’.
How to Apply Filters
You can select filters using the icon with three bars that appears when you hover over each column.
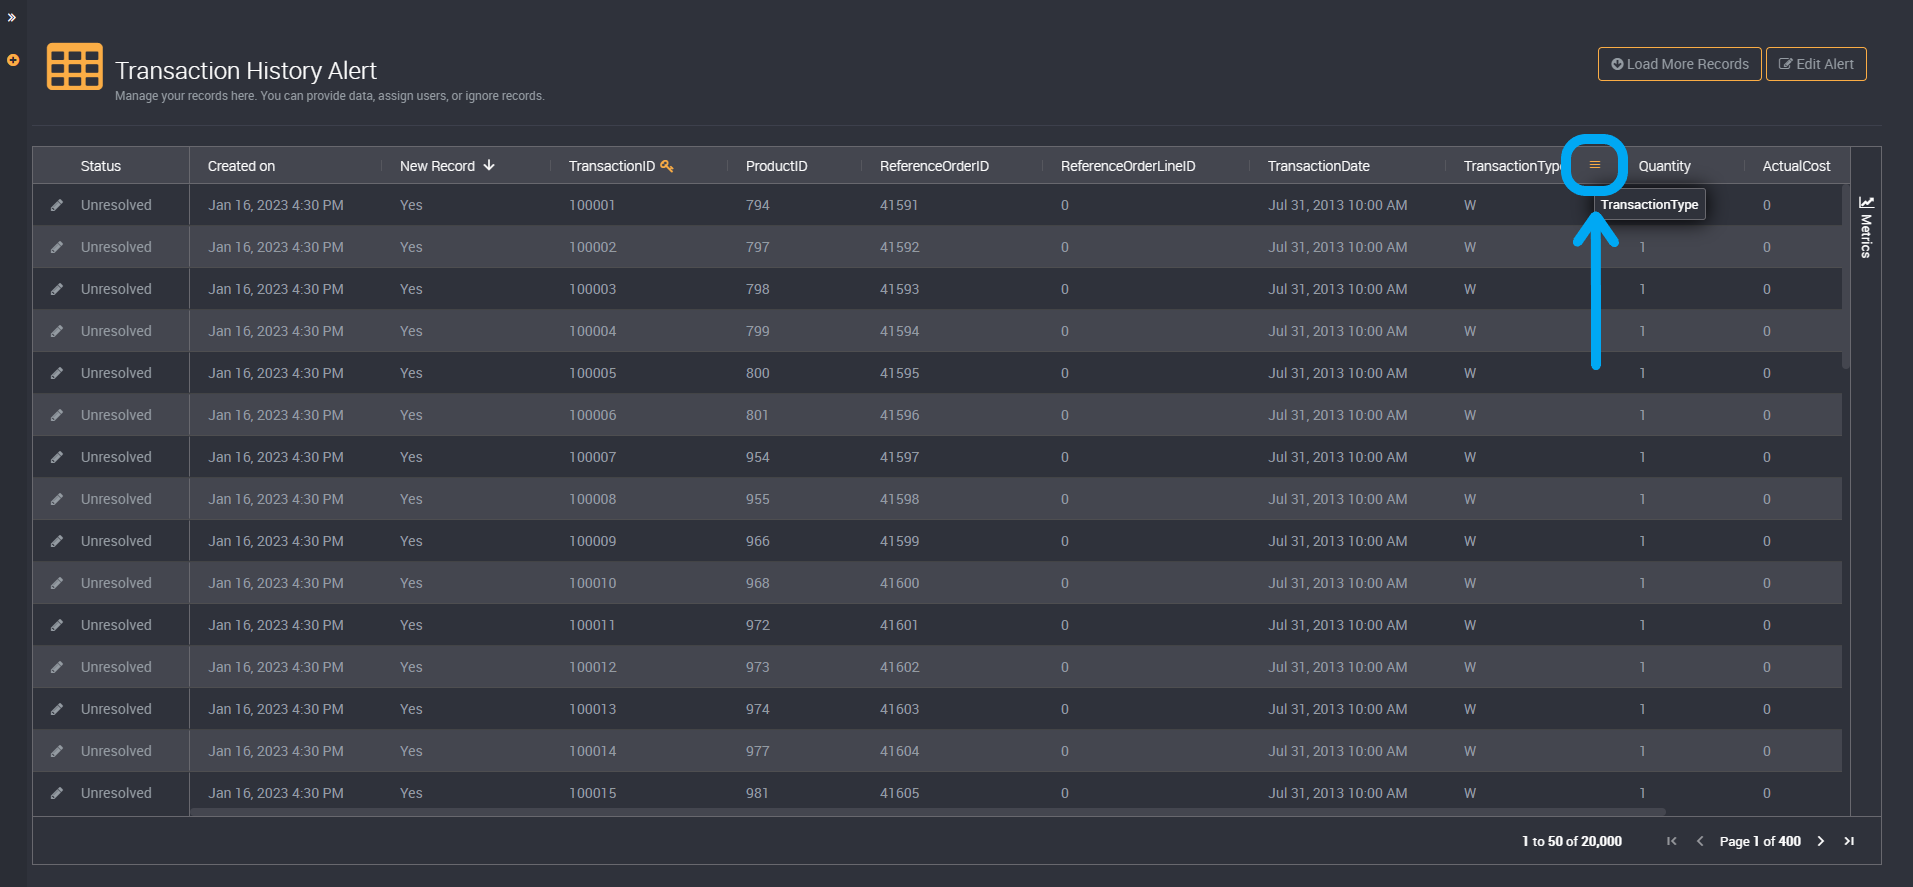
You can click on the filter icon here to choose what you would like to see in the results.
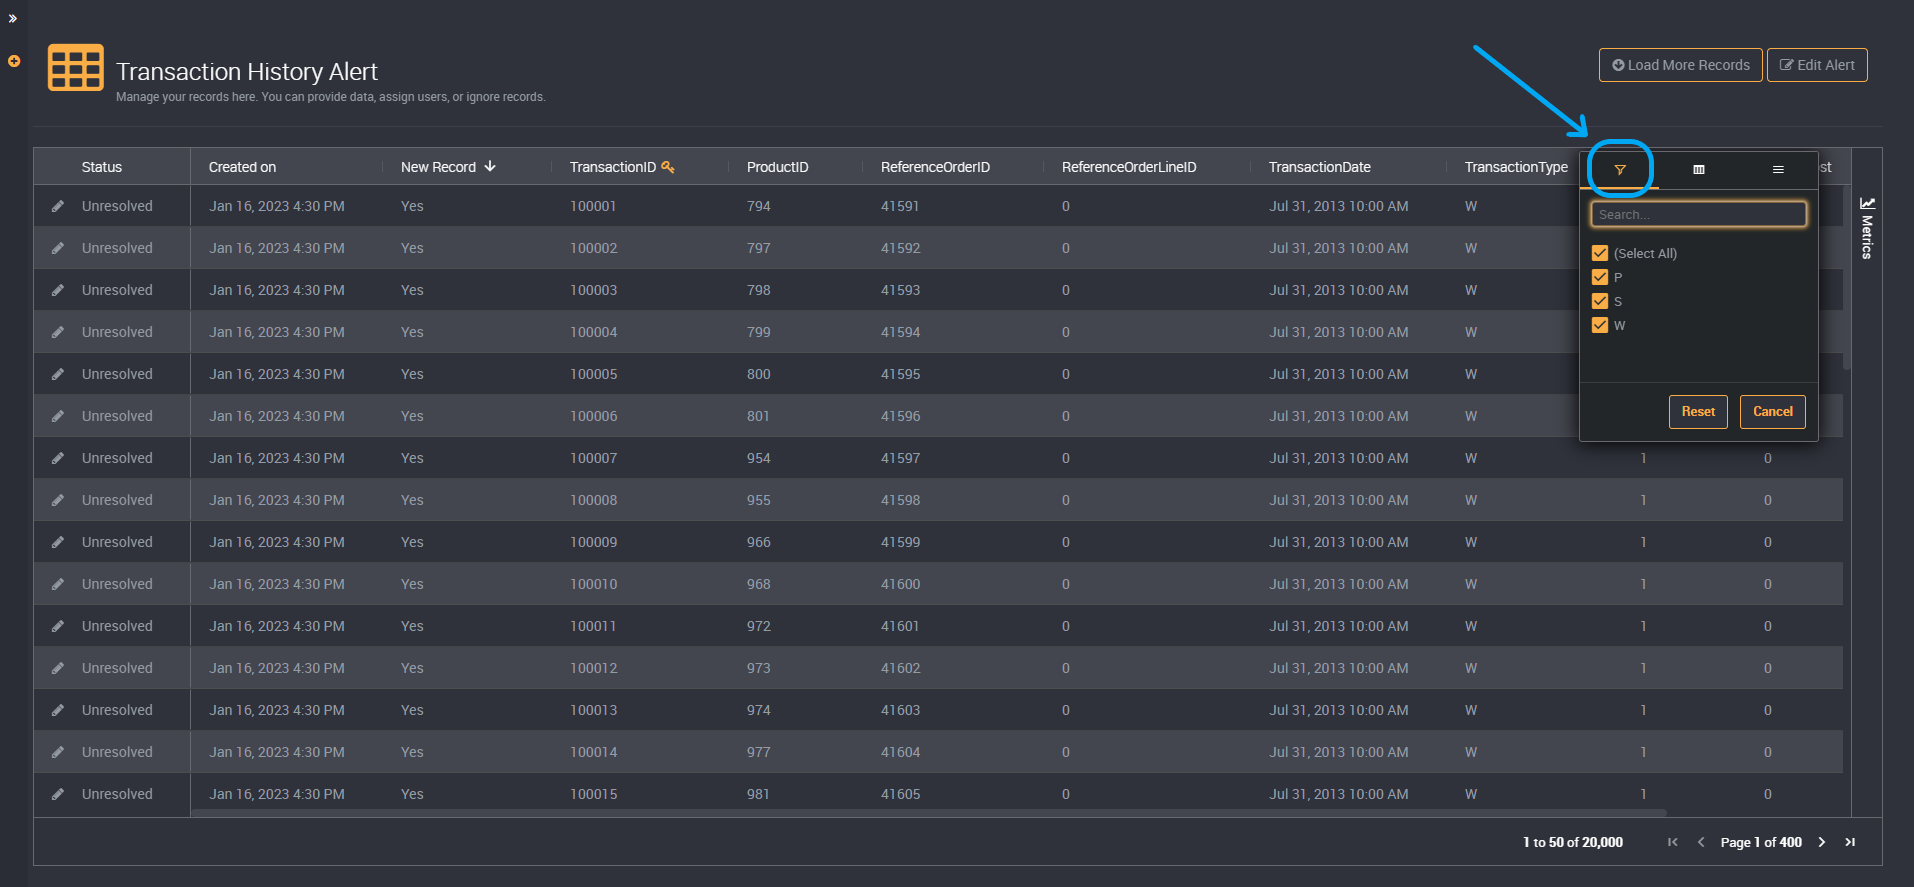
The filters that are available depend on your data. A column will not be available as a filter:
- If there are no values in a column and all fields are empty
- If your results do not vary and each row displays the same data
The column will not be available as a filter unless data in that column has changed. For example, if all results are unresolved you will not be able to filter on resolved and unresolved rows until an issue has been solved for at least one row. The resolved rows will then be seen when the ‘Resolved’ filter is then applied.
To apply a filter, click on a checkbox or select a condition in a number filter. The moment you click on a filter, it will be applied to the currently loaded results.
If you have chosen a condition, you can then add the value.
For example, if you wanted to display results with an ID greater than and equal to 500, you can select ‘greater than and equal to’ as the condition and ‘500’ as the value.
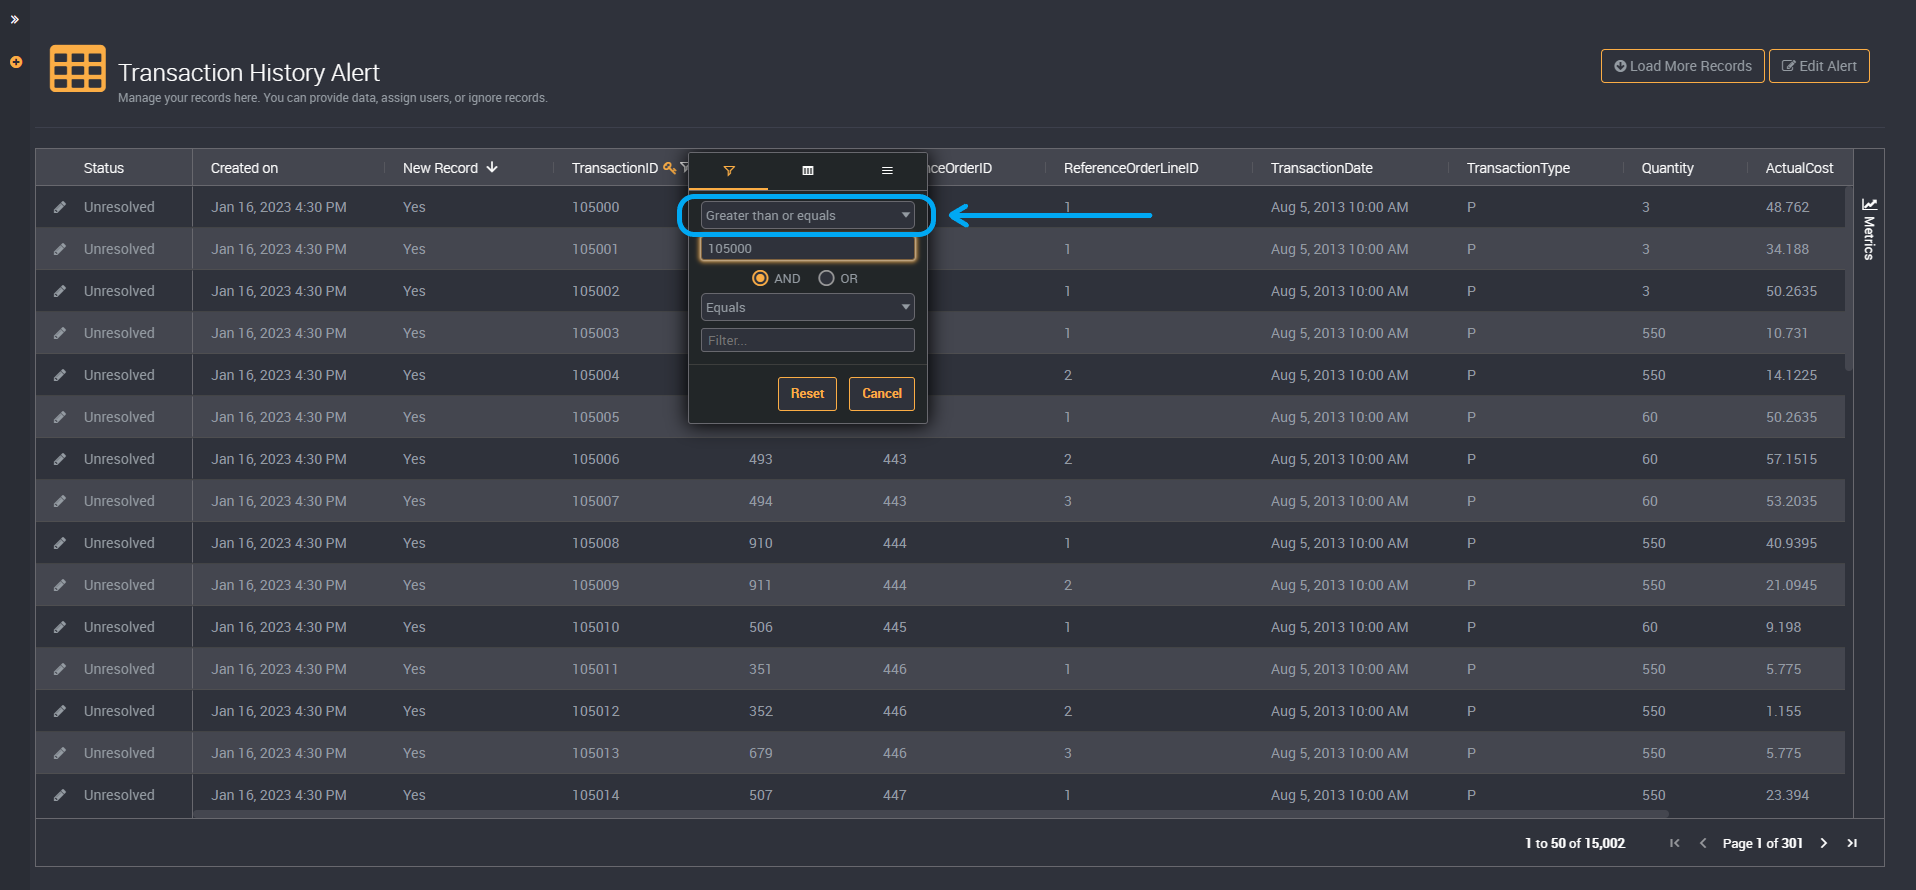
You can then add another condition as a filter, by choosing whether it will be ‘AND’ or ‘OR’ and providing the condition and filter value below.
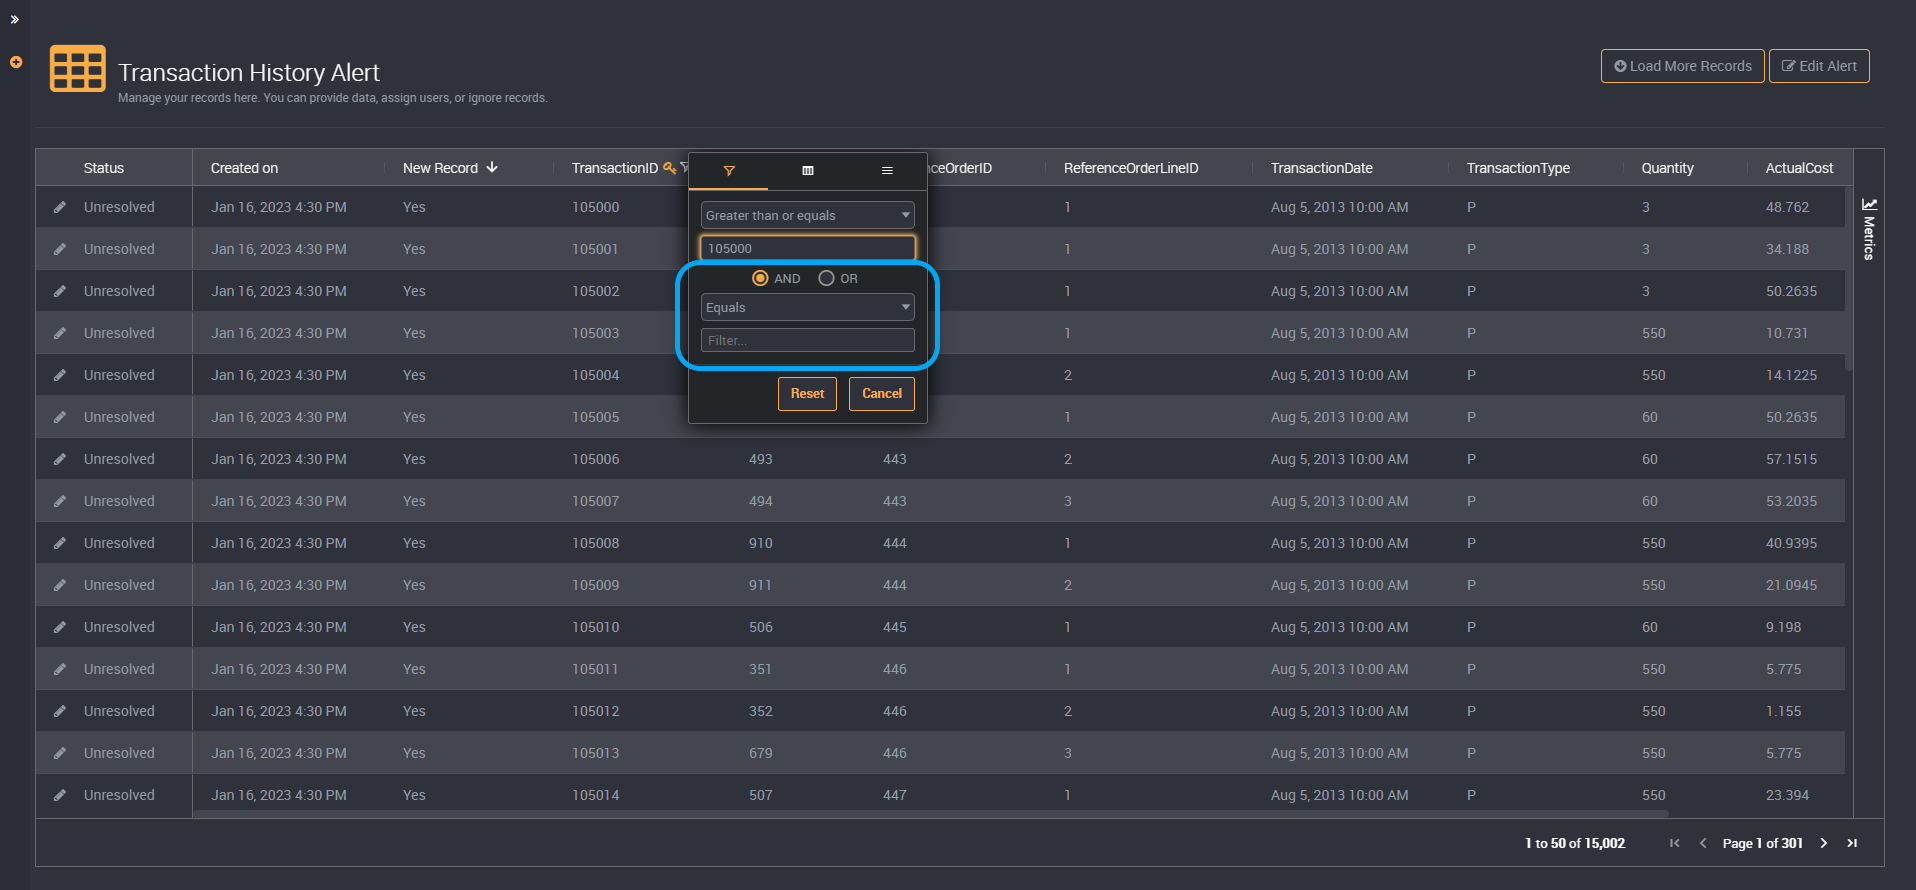
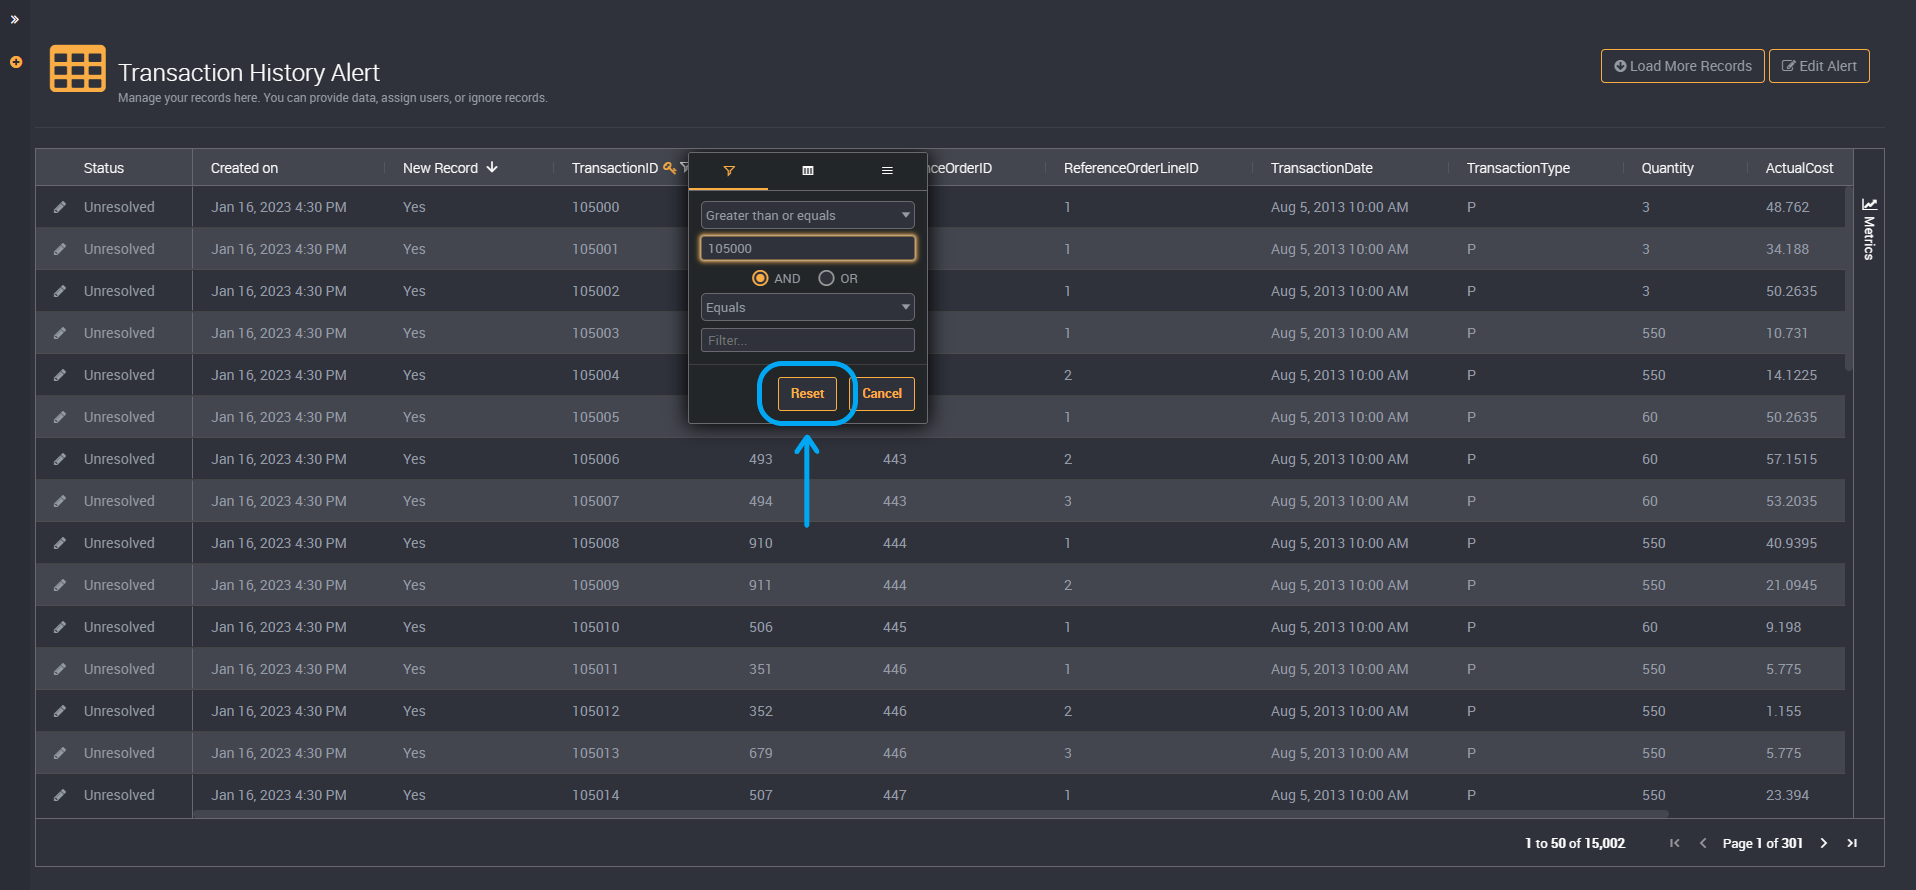
To cancel and exit filters, click on Cancel.
Or to reset all applied filters, click on Reset.
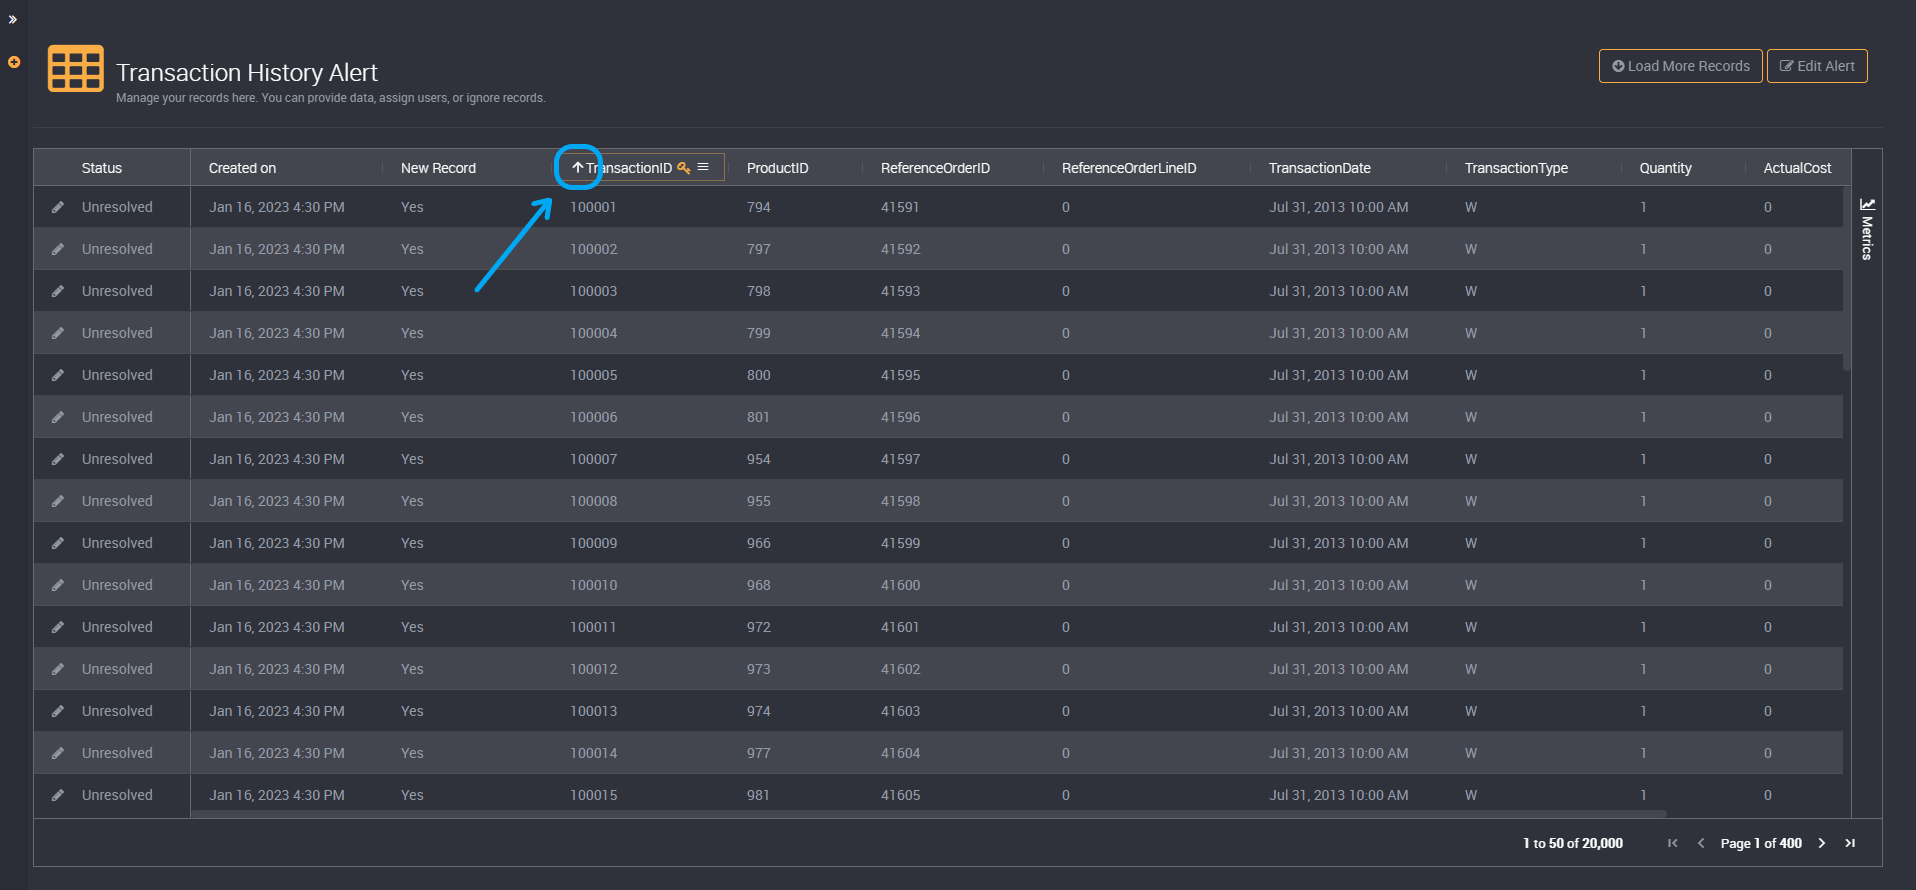
Sorting
You can also sort on any column by clicking your chosen column name.
Results Default Sorting Order
By default, the results will load the records of the default status first. So for example, if you have 100,000 records with 40,000 ‘Active’ records and ‘Active’ is the default status, it will load all 40,000 ‘Active’ records before the 60,000 ‘Inactive’ records. It will then show any new records in this default status first, followed by the other records in the key column order.
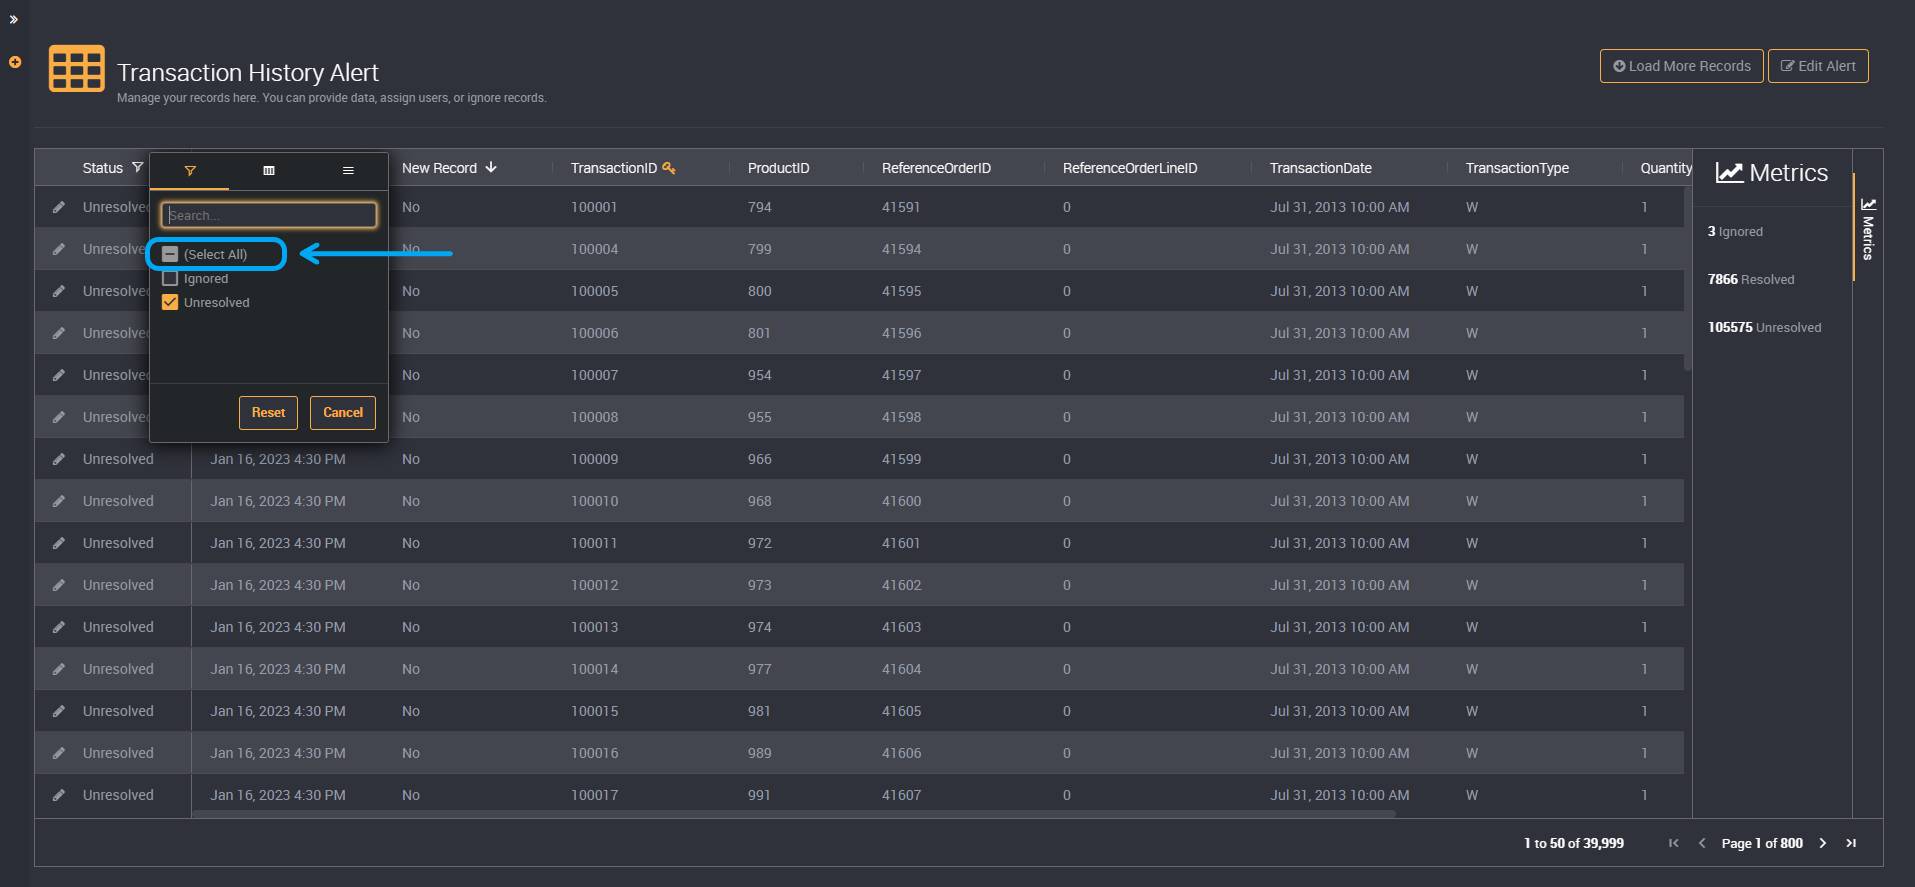
Filter by Status
You can also filter your results by status using the slicer button beside the status column heading. It will display the statuses that are available such as resolved or unresolved.
Click on the status you want to see in the results and the table will be updated.
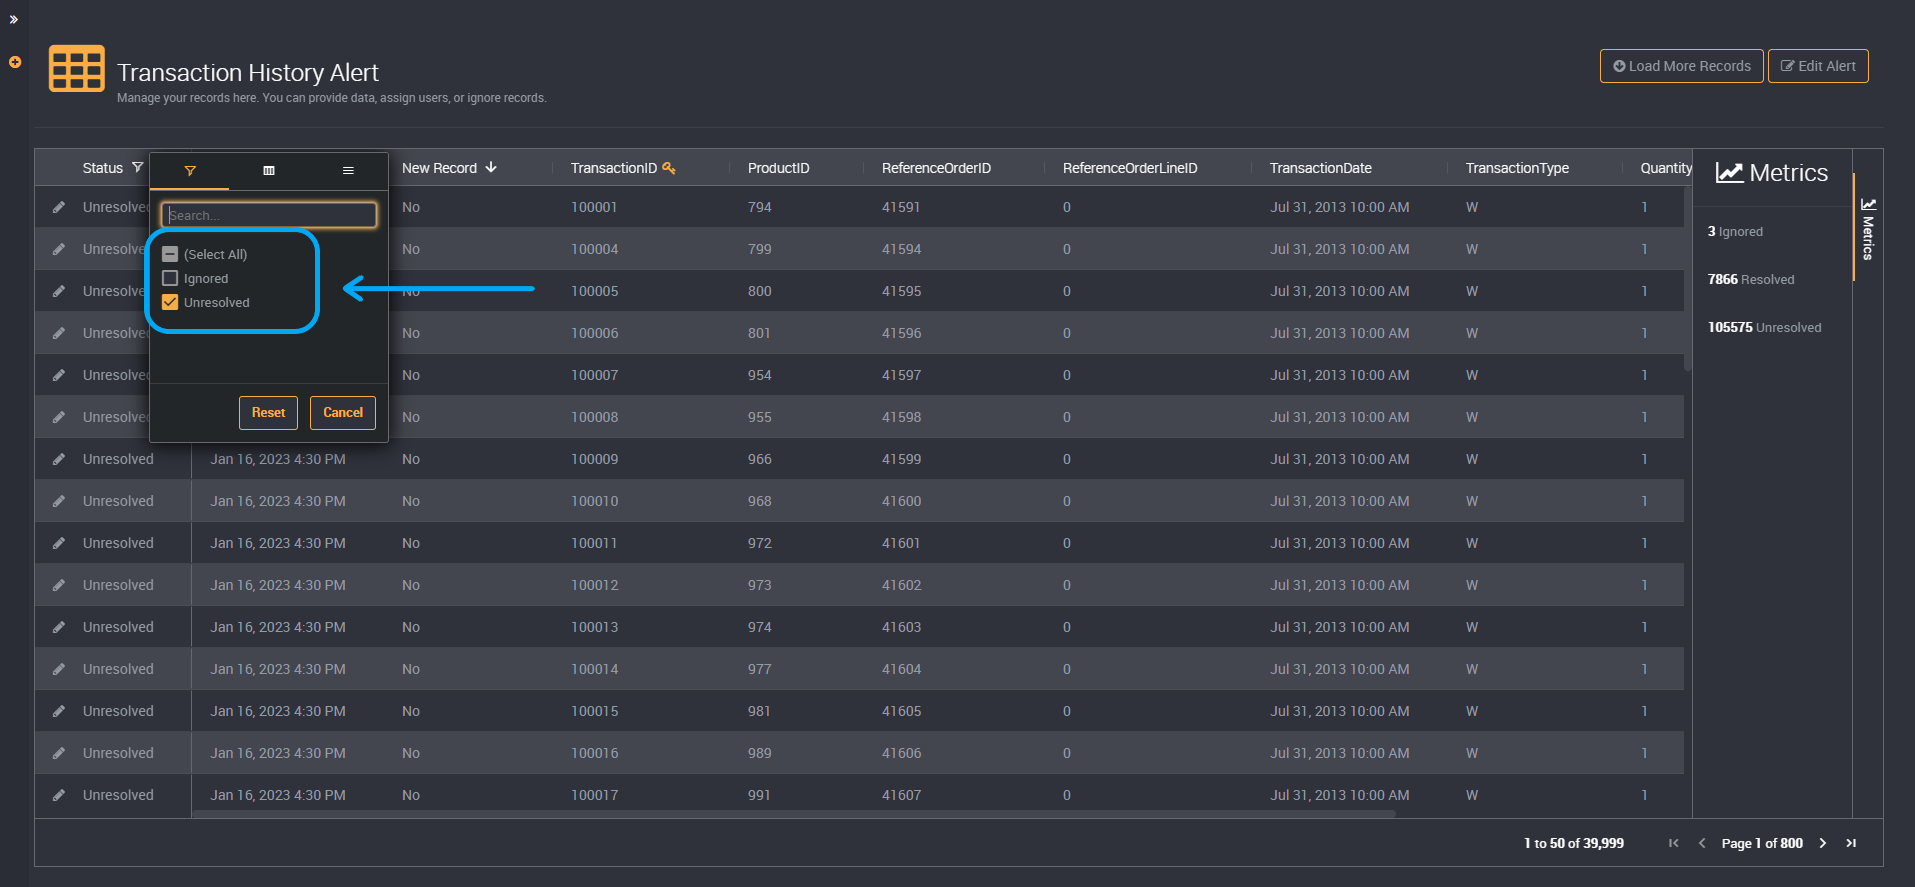
You can also apply all status options using Select All.
Filter by Ignored Results
You can also view any results that have been ignored by clicking on Ignored.
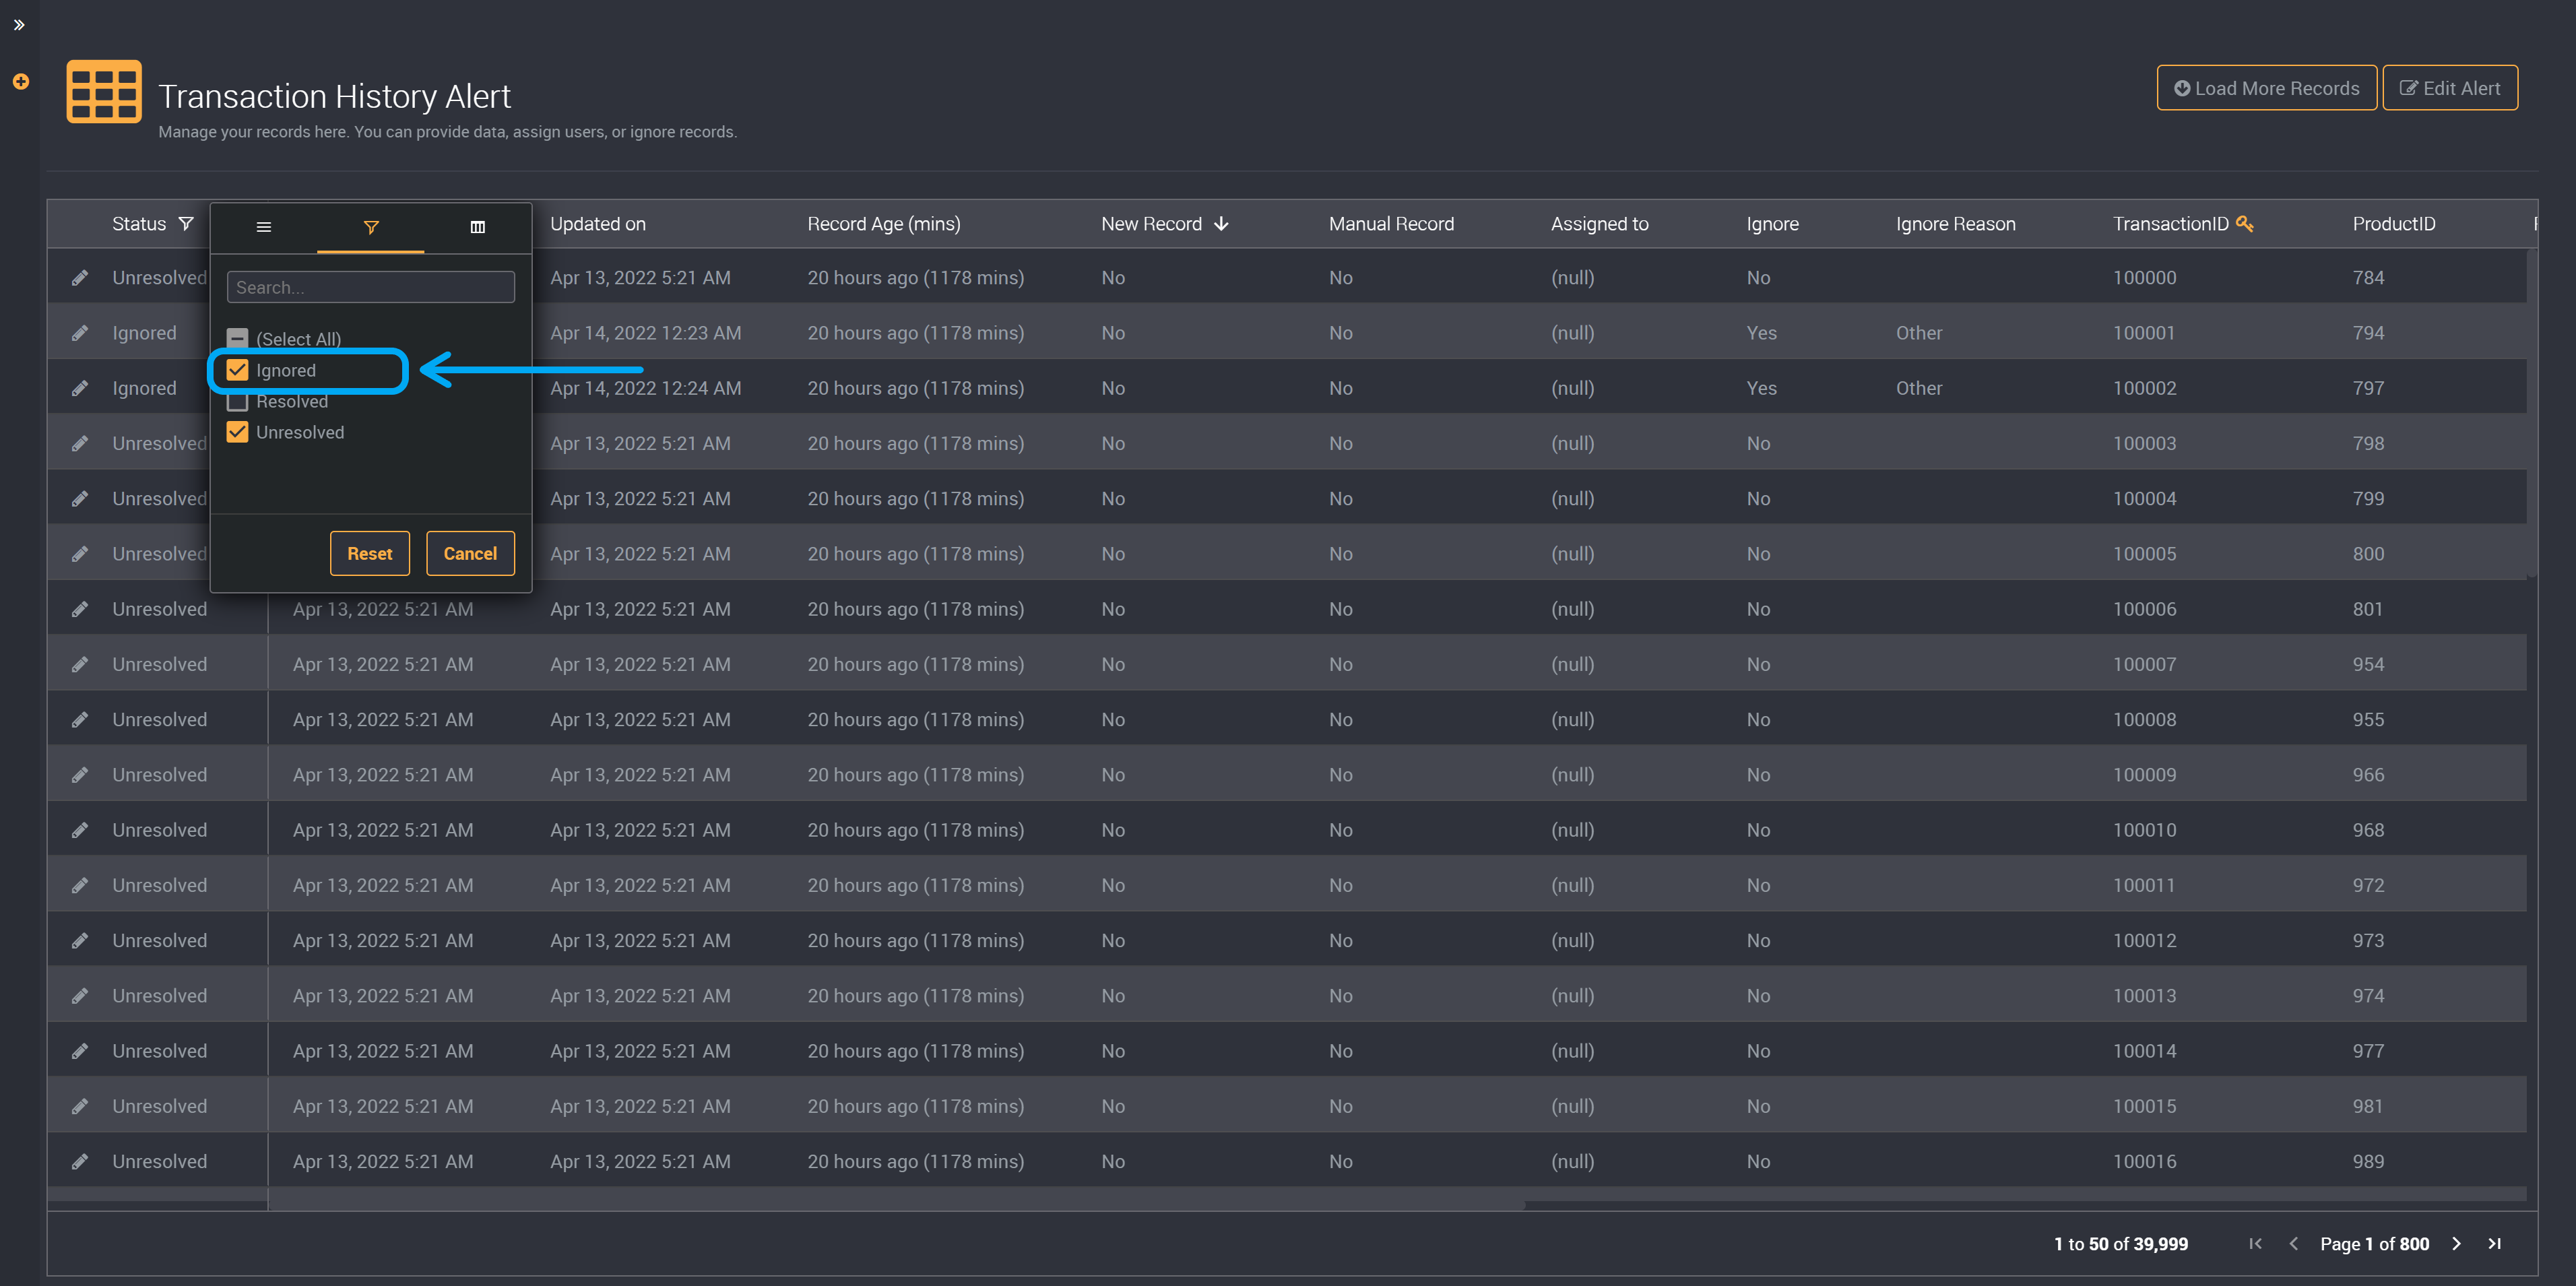
This will also display the reason why a result was ignored.
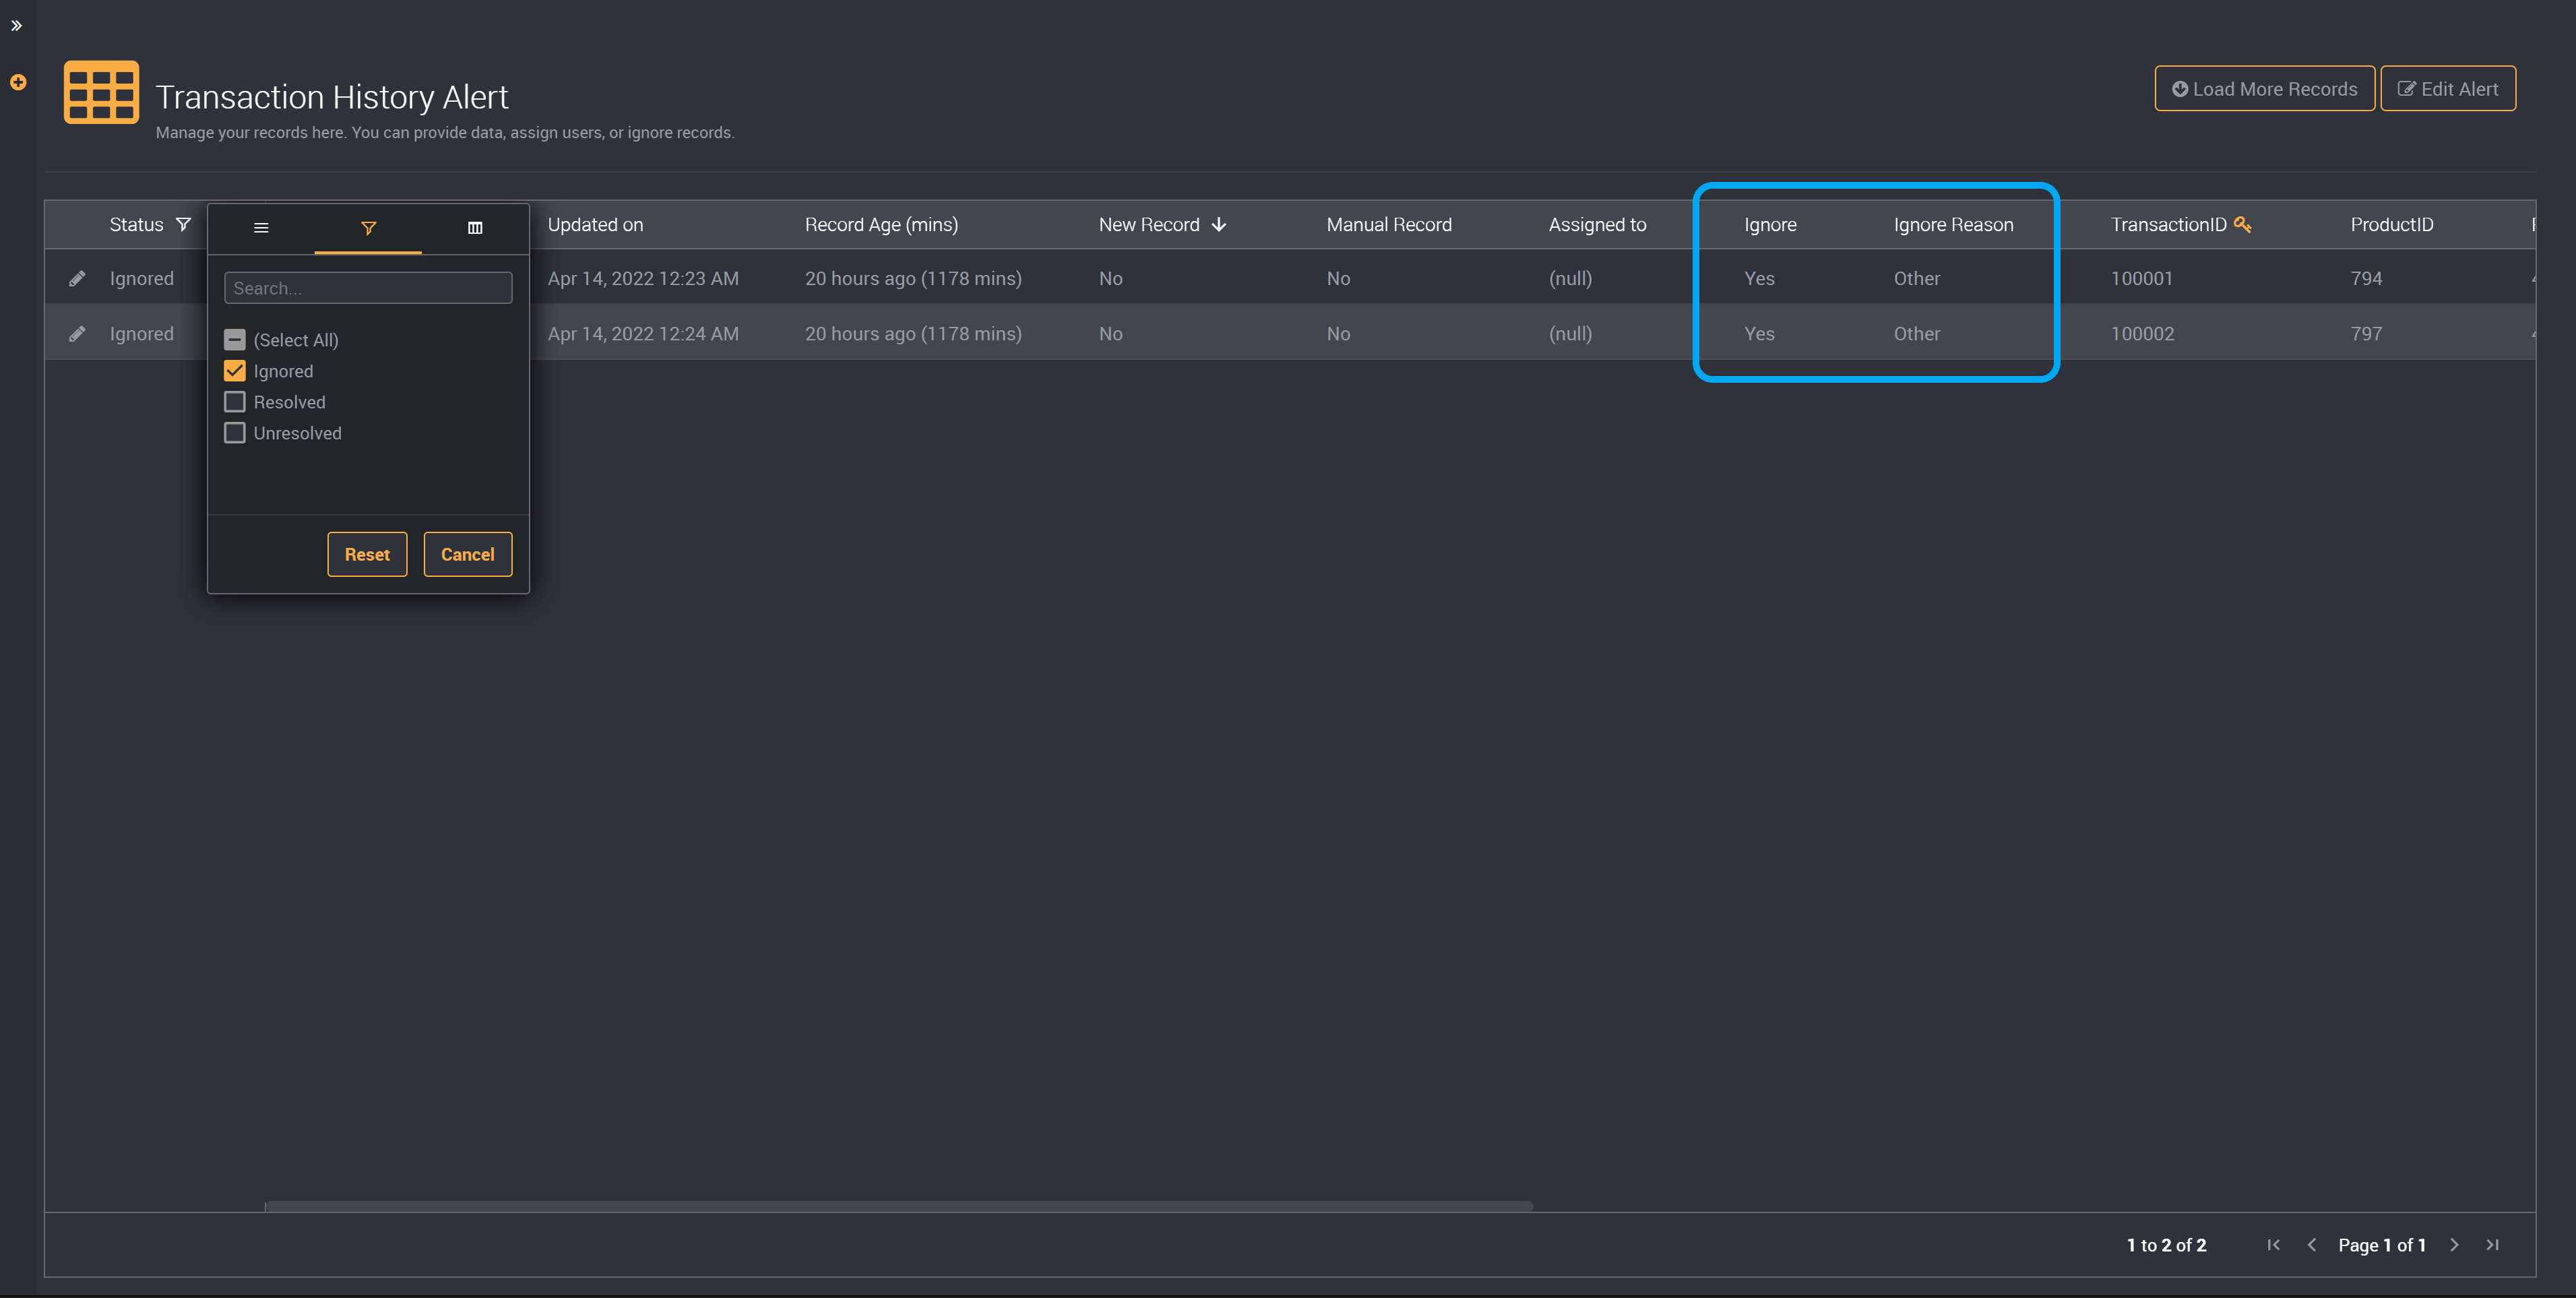
If all results have been resolved or ignored, depending on the default status you have set, the results table will be empty and you will be able to filter between these statuses in the slicers.
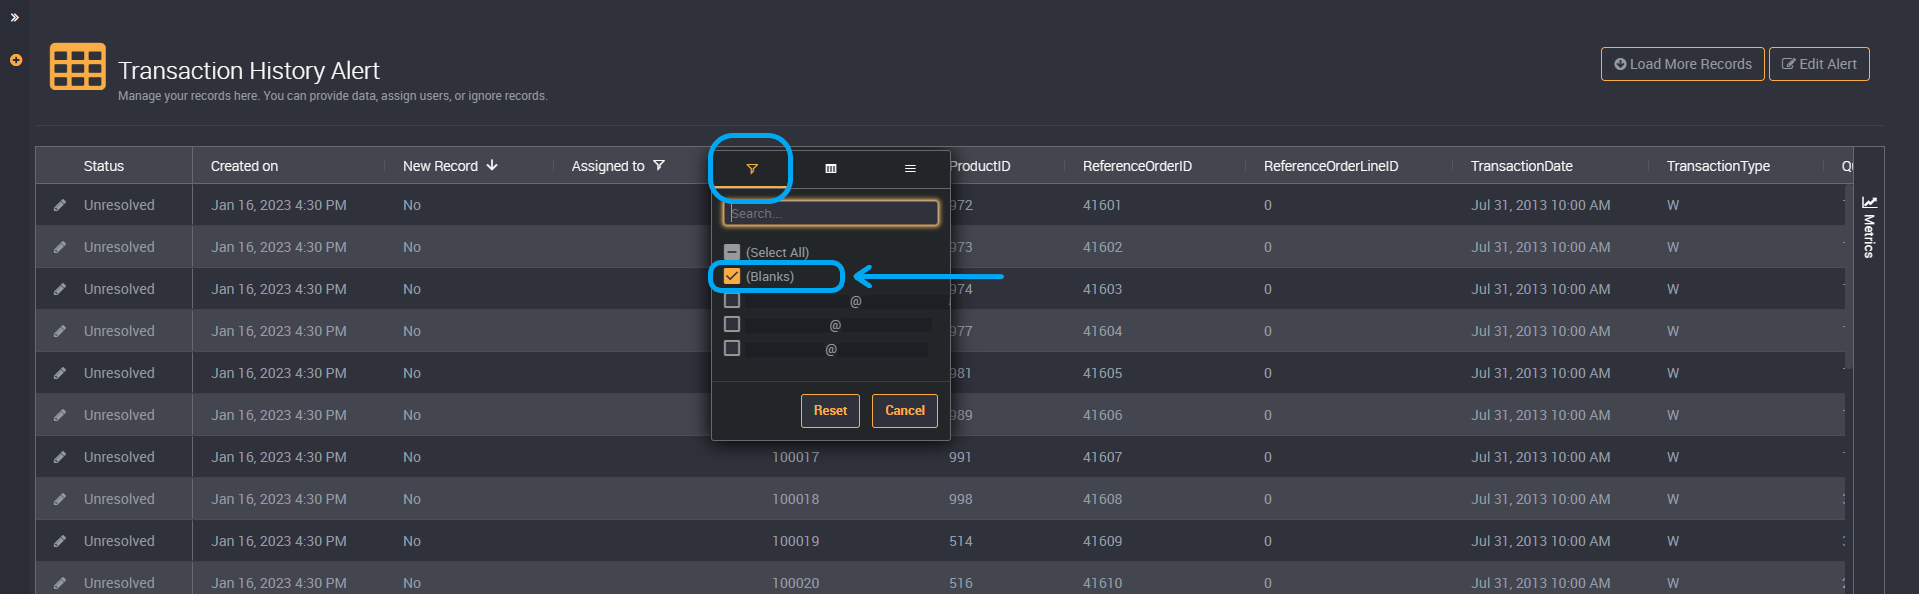
Filter by Assigned Users
You can also filter your results by the user a row is assigned to.
The ‘Assigned to’ column is hidden by default. Click on the column header of any column and in the second tab you can choose the ‘Assigned to’ checkbox.
You can then click on the filter of the ‘Assigned to’ column.
Click on the checkbox beside a user and you will be able to view each result assigned to them.
In the image below, I have chosen to filter on unassigned records so I can assign each unassigned row to a user that can resolve that record.
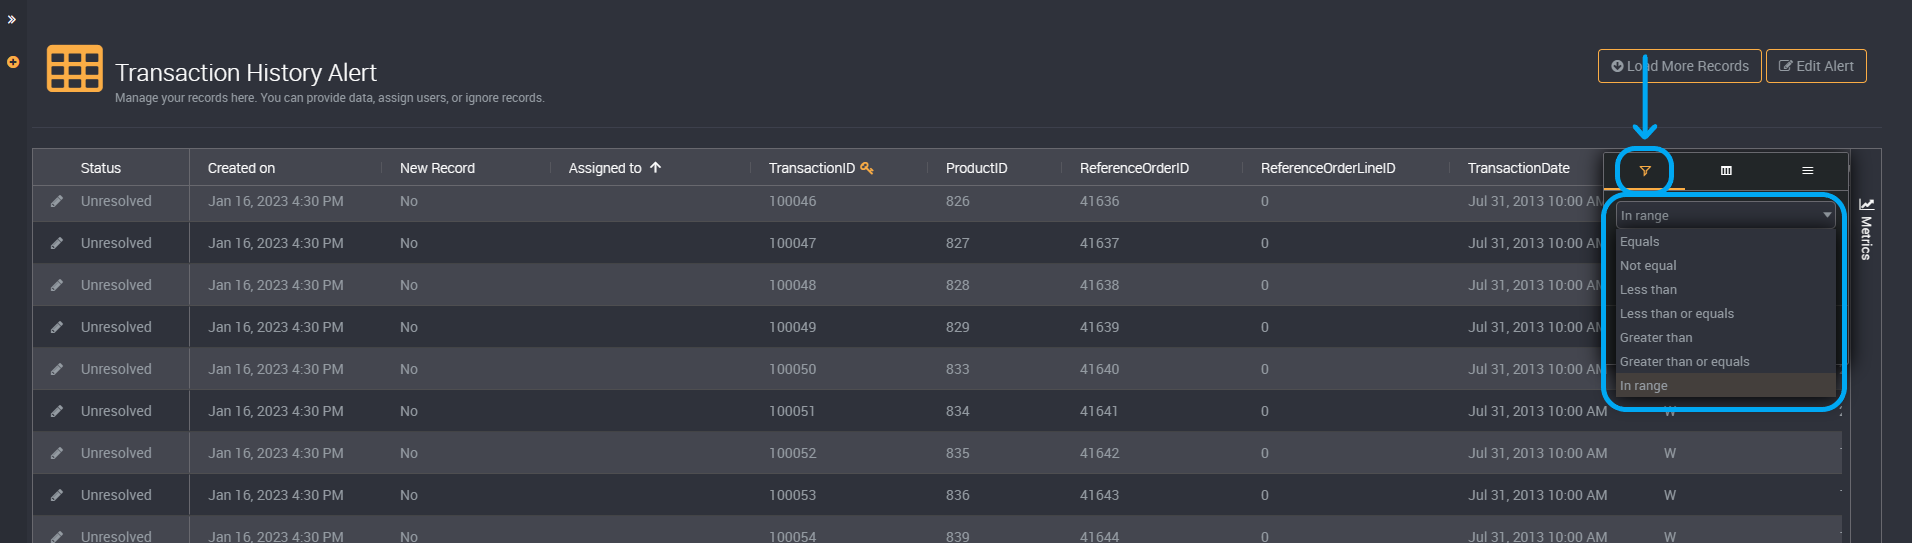
Filter by Date
You can filter a column using a date filter.
Click on the filters beside the column header.
From the dropdown, choose a date condition that is relative or specific:
- Specific: You can choose conditions for your chosen dates such as before, after, between, or blank and not blank.
- Relative: Choosing ‘Since’ in the dropdown means you can choose a number of hours, days, months or years, and Loome will show the records since your chosen time value.
Specific:
Choose the month and year by clicking on the month or left and right arrows in the first section.
Choose the date in the calendar.
Choose the time you would like to filter on by moving the sliders left and right. The slider on the top is for the hour and the second slider beneath it is for the minutes.
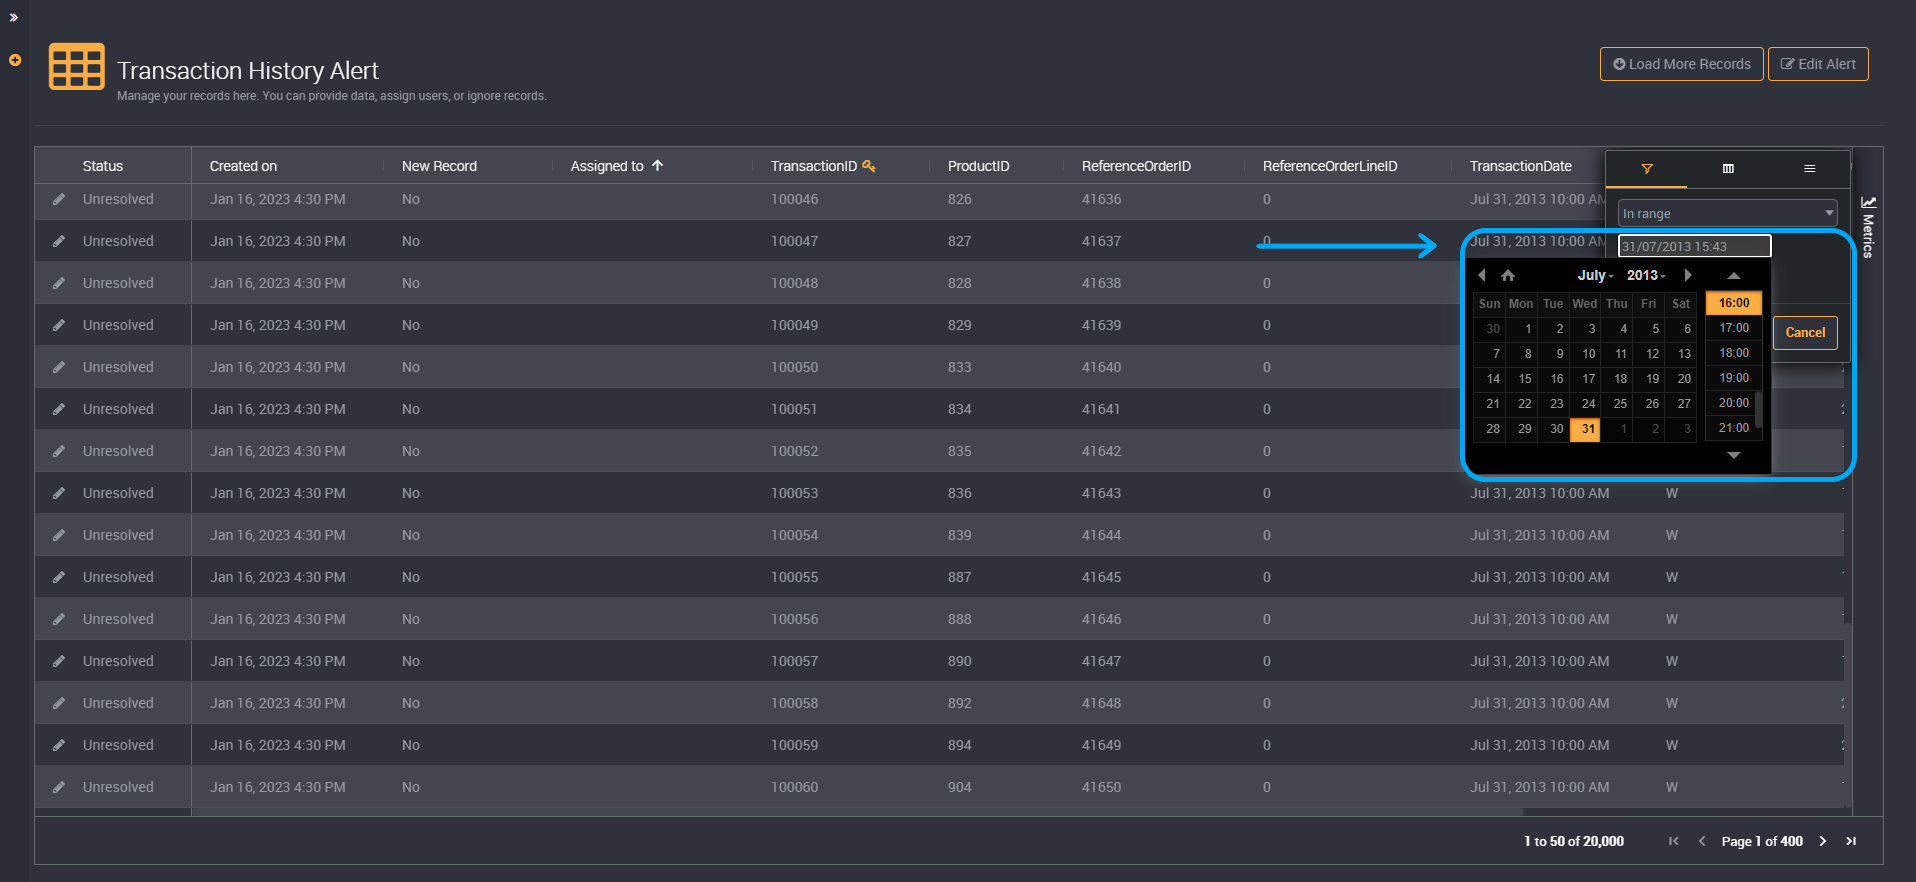
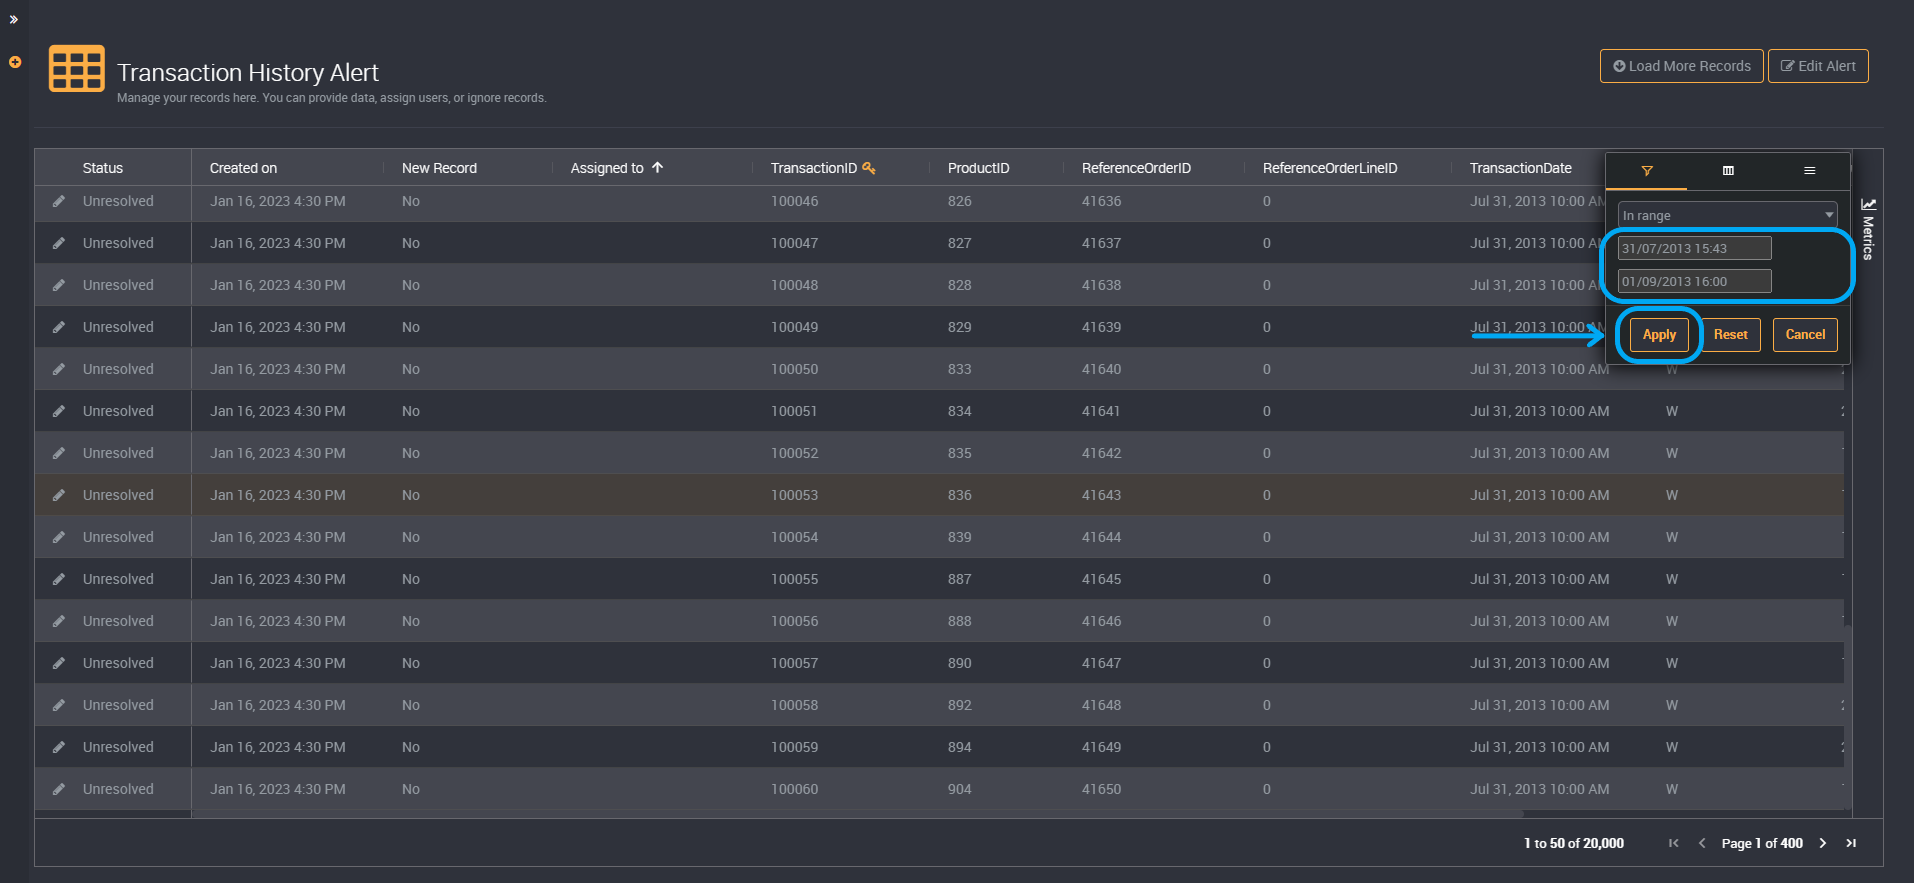
Click Apply to view applicable records.
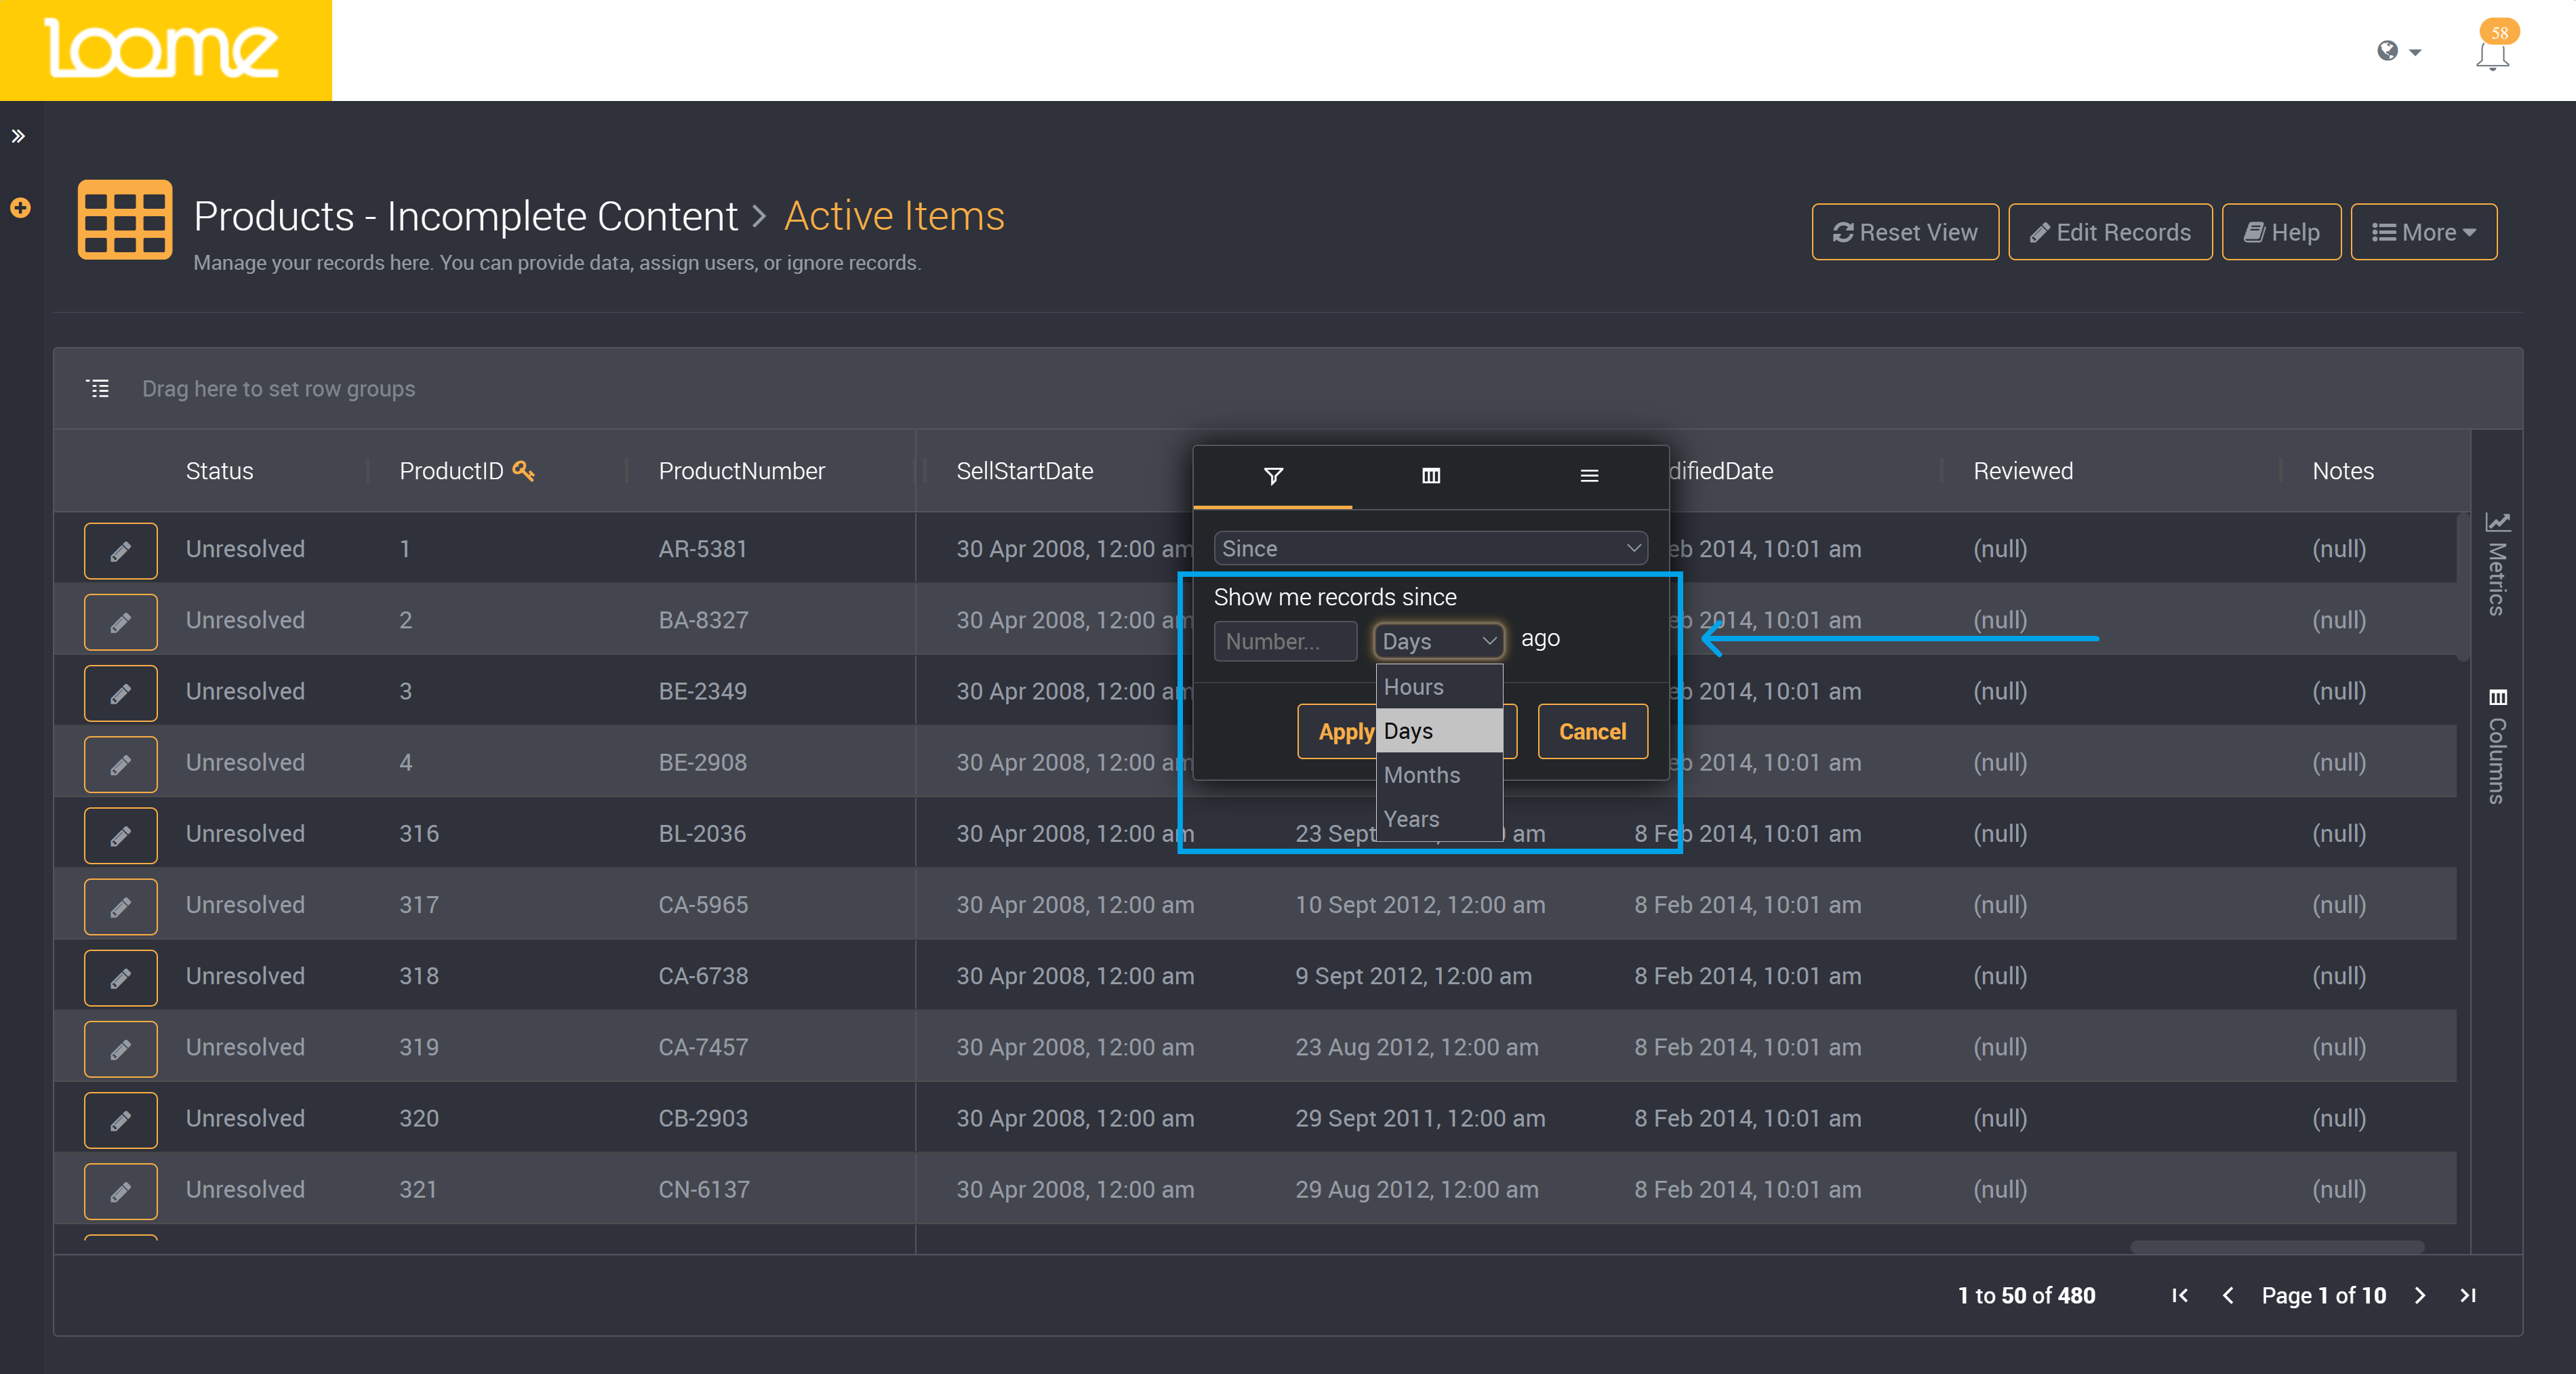
Relative:
Choose ‘Since’ in the condition dropdown.
Provide a number in the number field. For example, show records since 7 days ago.
From the dropdown, choose hours, days, months or years.
Loome will show records since your chosen time value.
Hide Columns
You can hide columns in your results table.
Click on the column header of any column and in the second tab, you can view a list of all columns available in the results table.
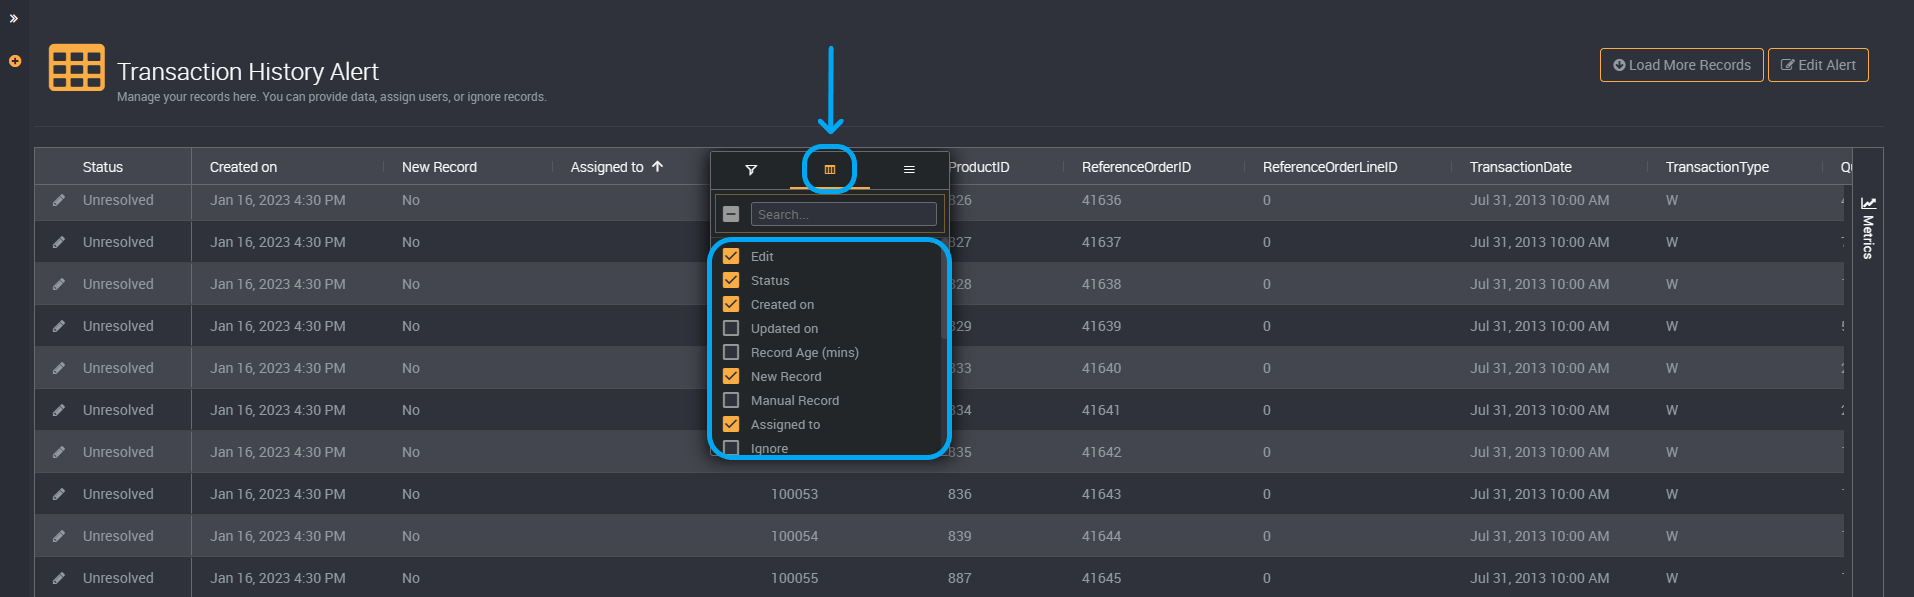
You can deselect a column to hide it. You can deselect columns until your preferred dataset columns remain.
For example, the columns ‘Created by’ and ‘Updated by’ are hidden by default.
Pin Columns
You can also pin columns to the right or left of the results table. This will move columns and freeze them in place as you scroll through the table.
Click on the filter button on the column you would like to pin.
Click on the third filter tab.
Click on Pin column.
You can choose to either pin it to the left or right of the table.
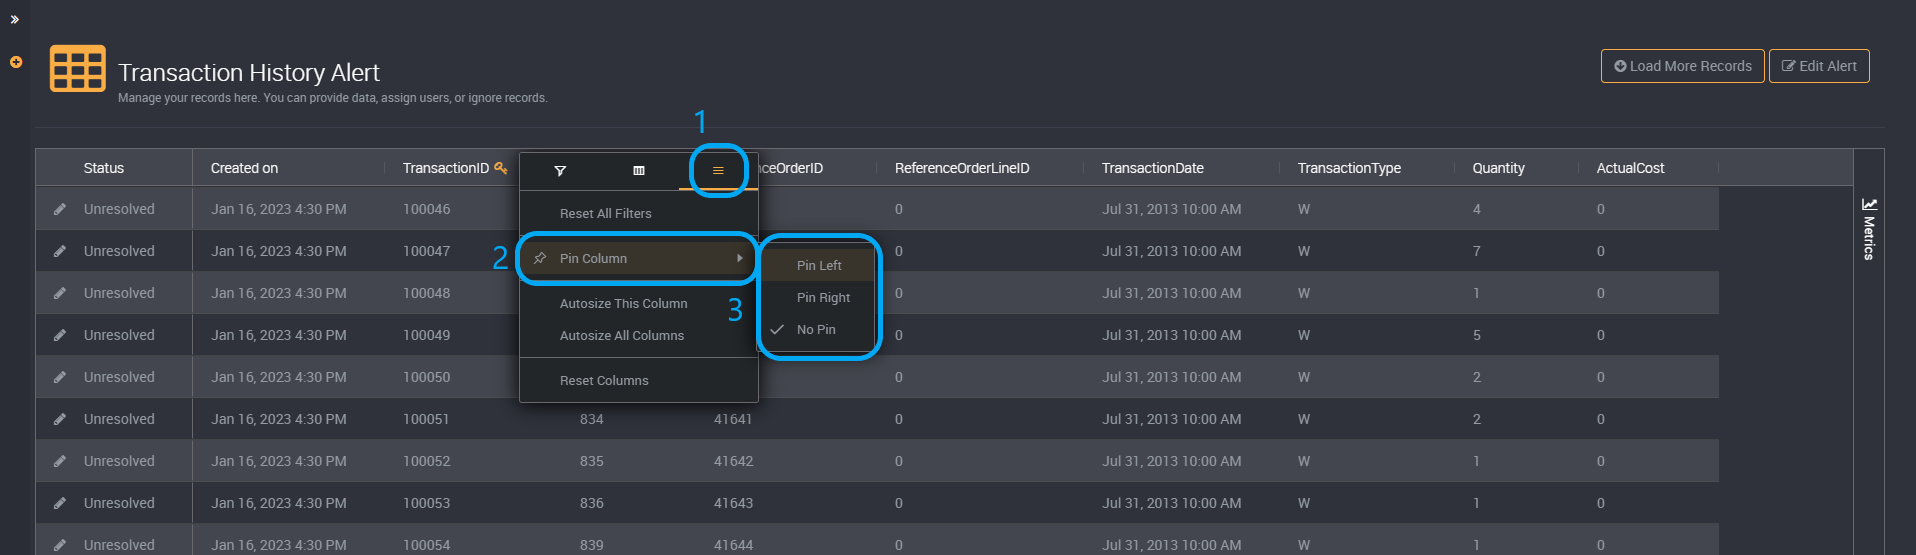
You can unpin a column by choosing No pin.
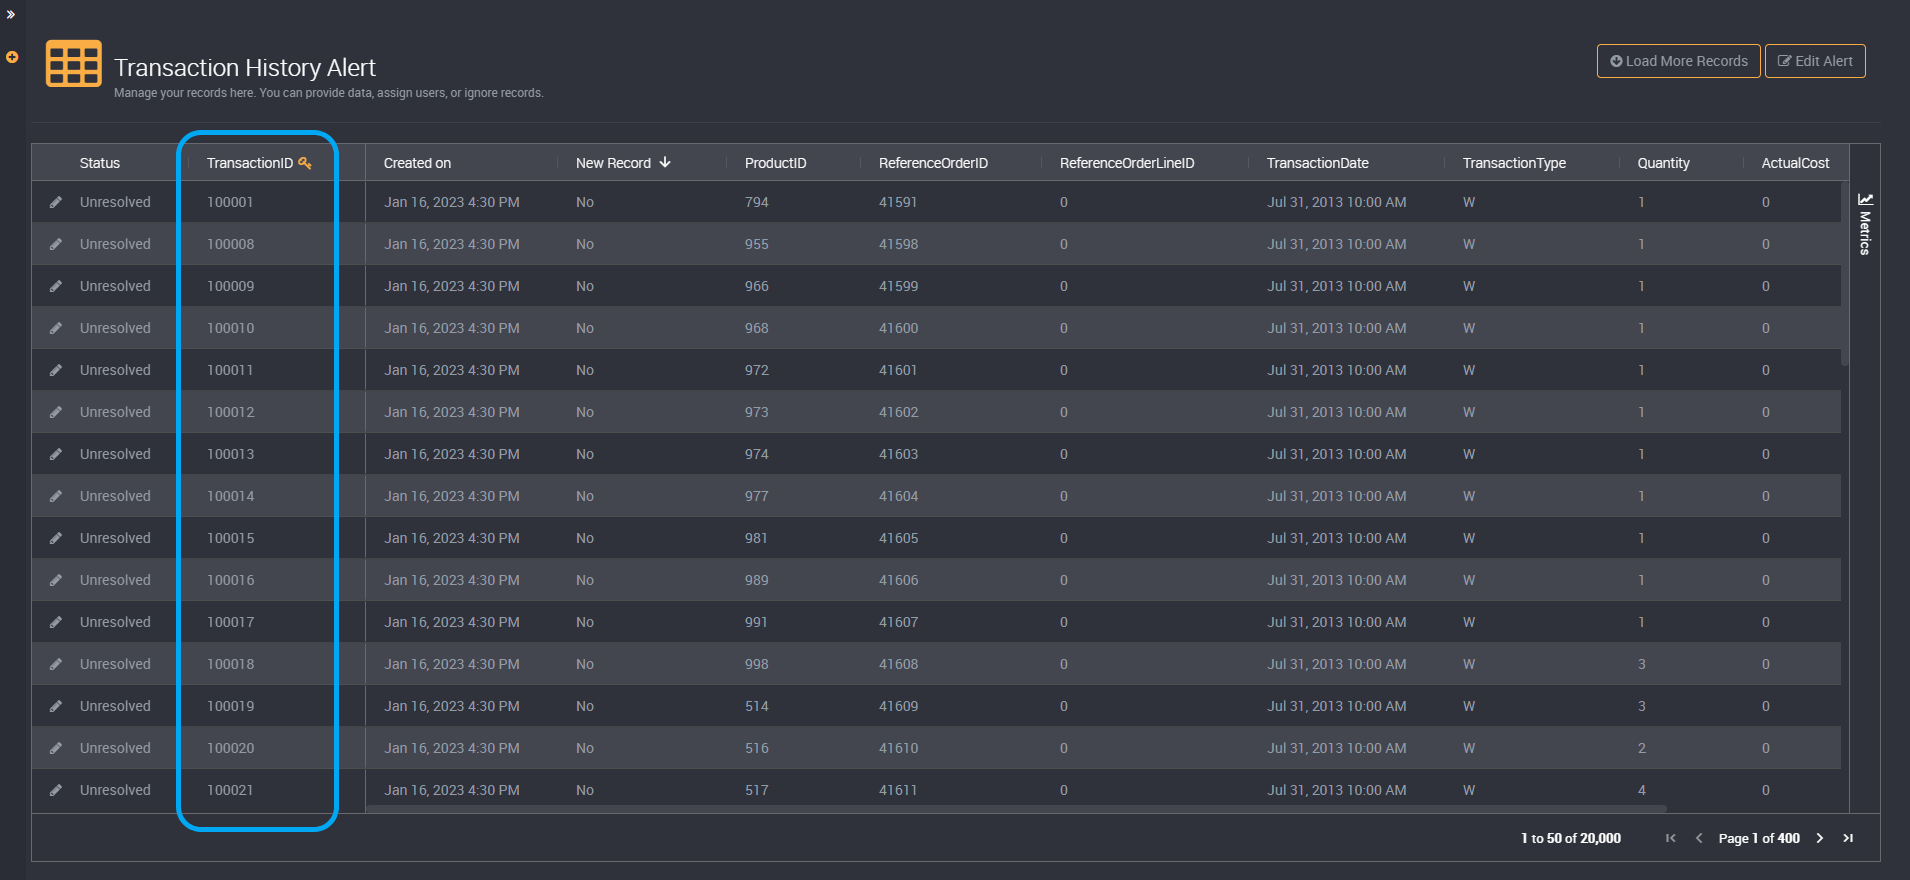
In the example below, we have pinned the column ‘ProductID’.
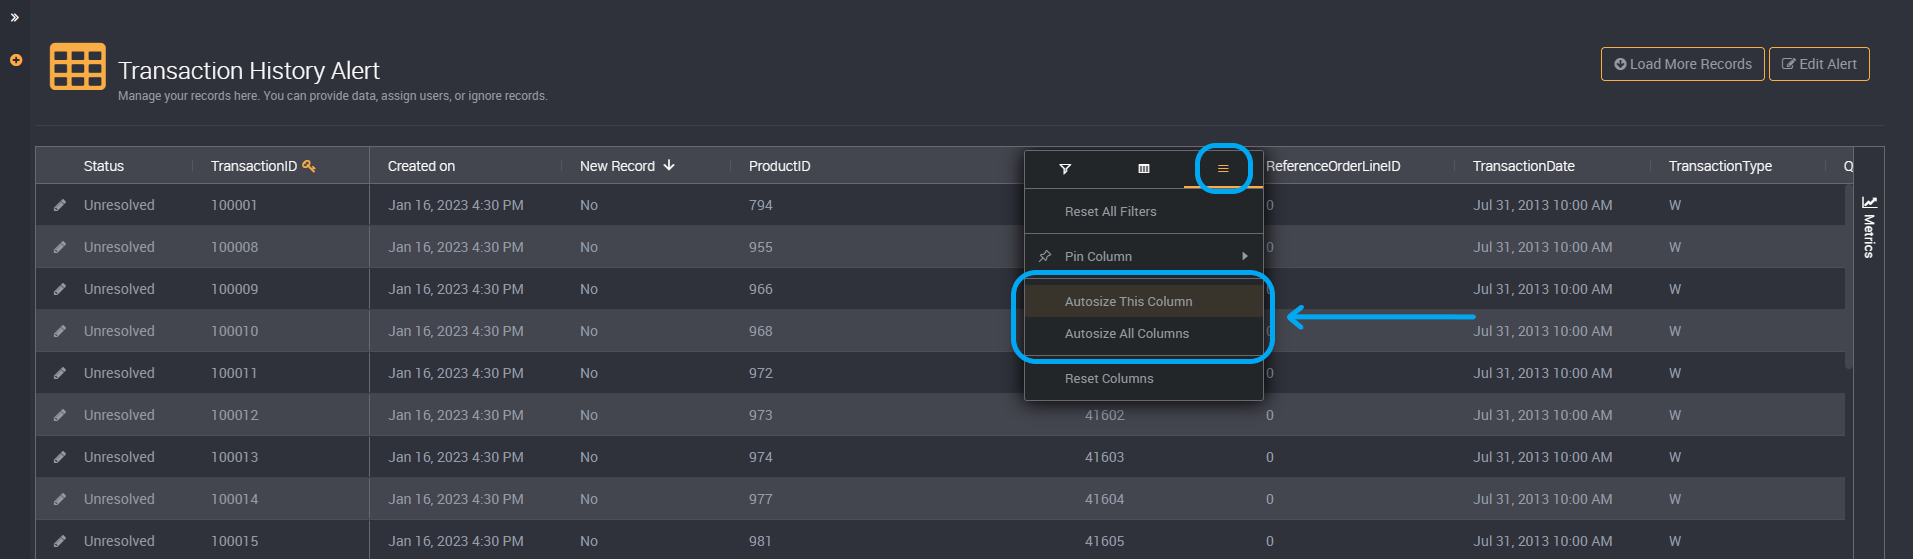
Auto Size Columns
Auto-sizing a table or column will minimize unnecessary space taken by that column.
Click on the filter button on the column you would like to auto size.
Under the option to pin columns, you can choose to auto size the column you have currently clicked on or you can auto size all columns in the table.
Applied Filters and Formatting
When you have applied filters, pinned columns or sorted on a column, the column title will be highlighted. You can also tell that filtering or sorting, or changing columns that are displayed or hidden, has been applied to the results table when the Reset View button is available in the top-right corner.
After you have applied and viewed filters, grouped records or enabled pivot mode, you can return to the default view by clicking on Reset View at the top-right of the results table.
Edit your Rule
From this page you can edit the rule of these results by clicking on Edit in the top right corner. This will direct you to the rule editor and you can make your changes. Learn more about editing rules here.
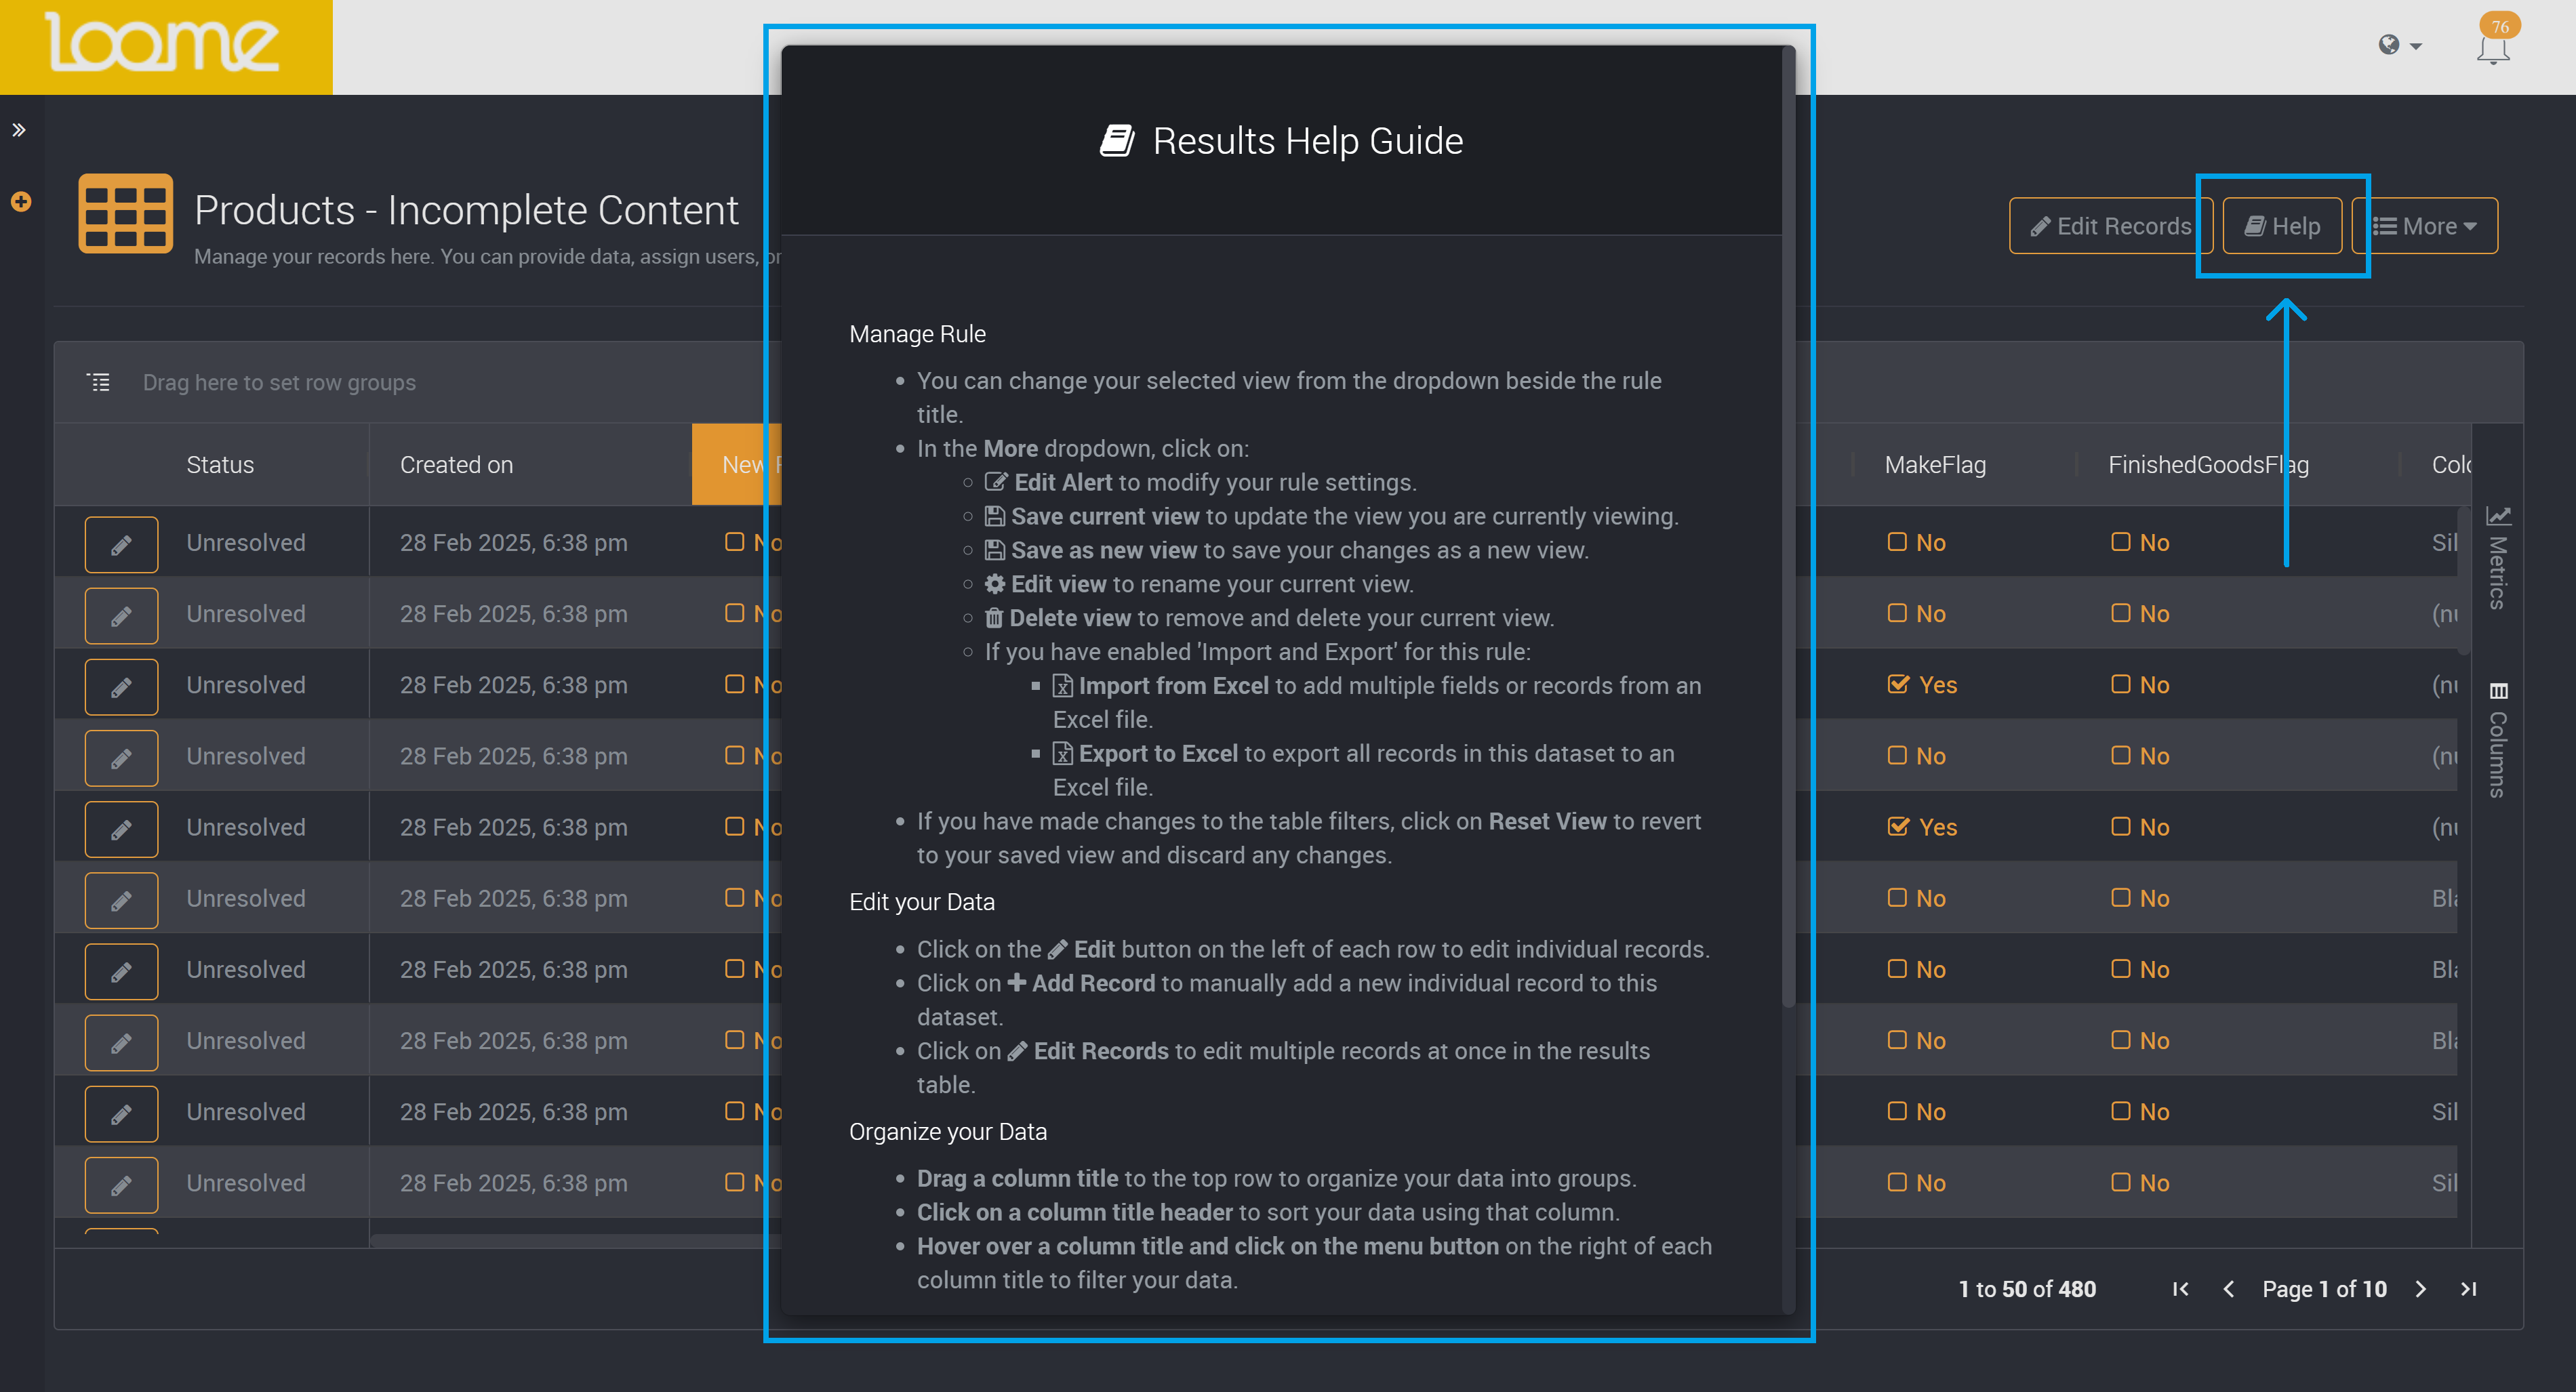
Results Help Guide
You can always view a quick help guide on the results page to help while navigating your results. Click on Help at the top-right of the results table.