Projects
Skip ahead to these sections using these links:
How to Create a Project
You can create a project from either the action slideout on the right or you can use the Add Project button in the left-hand slideout.
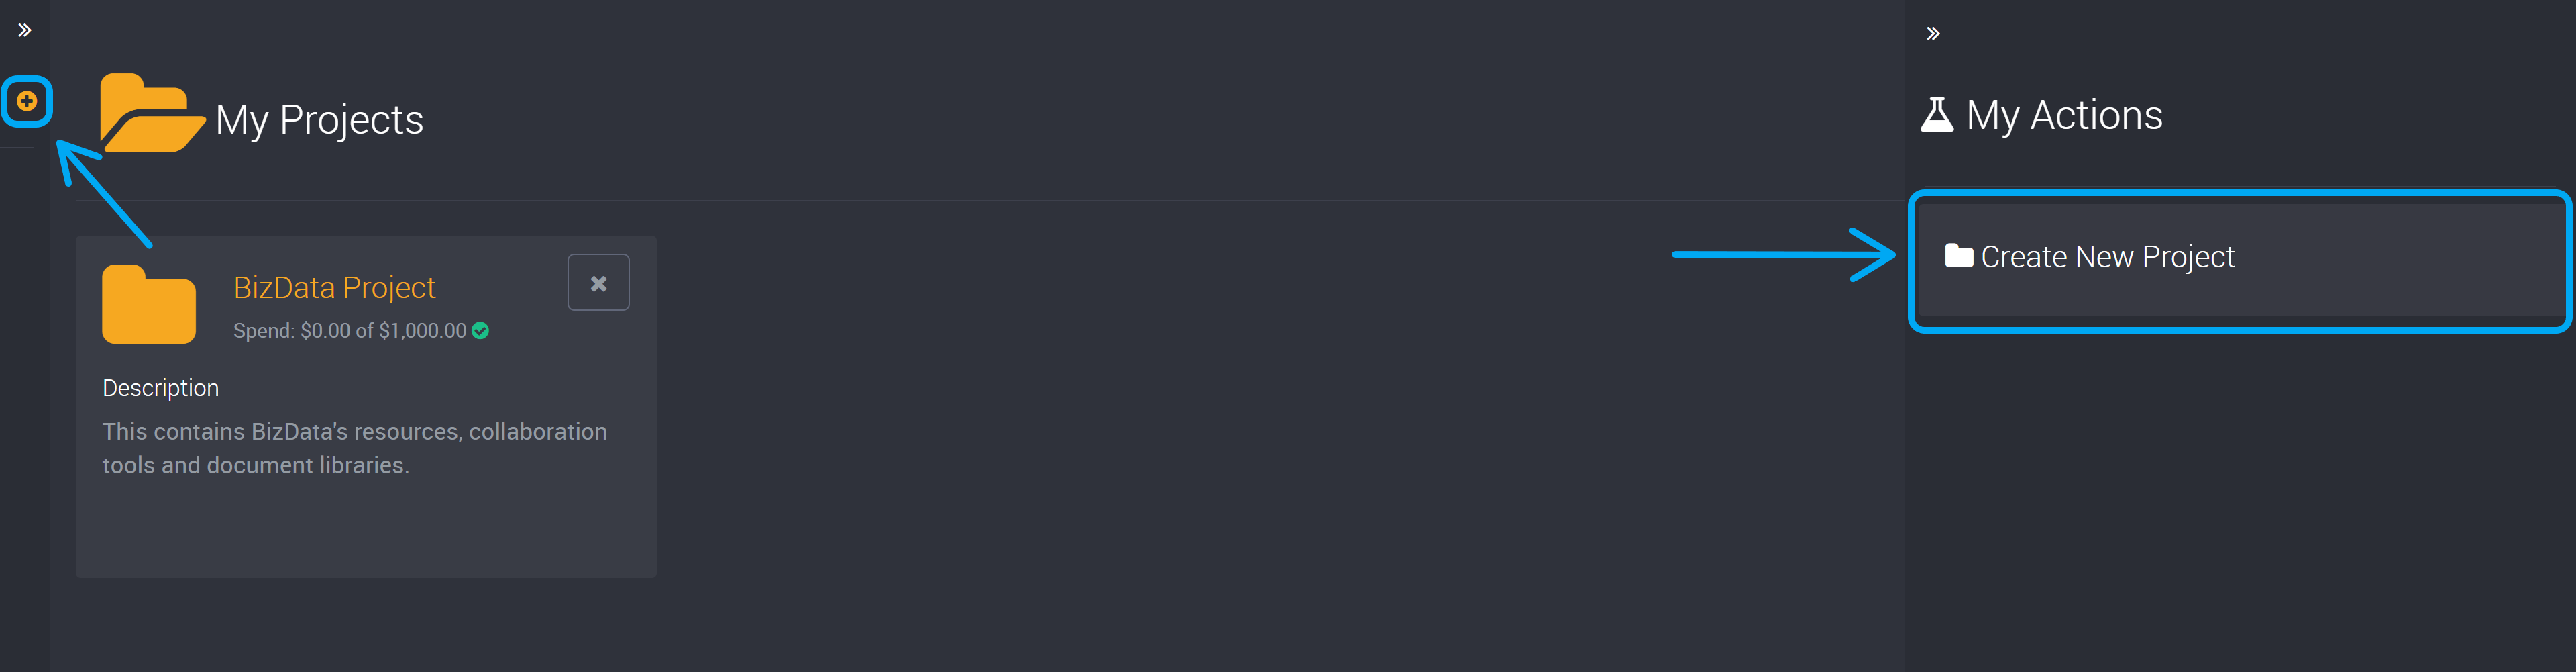
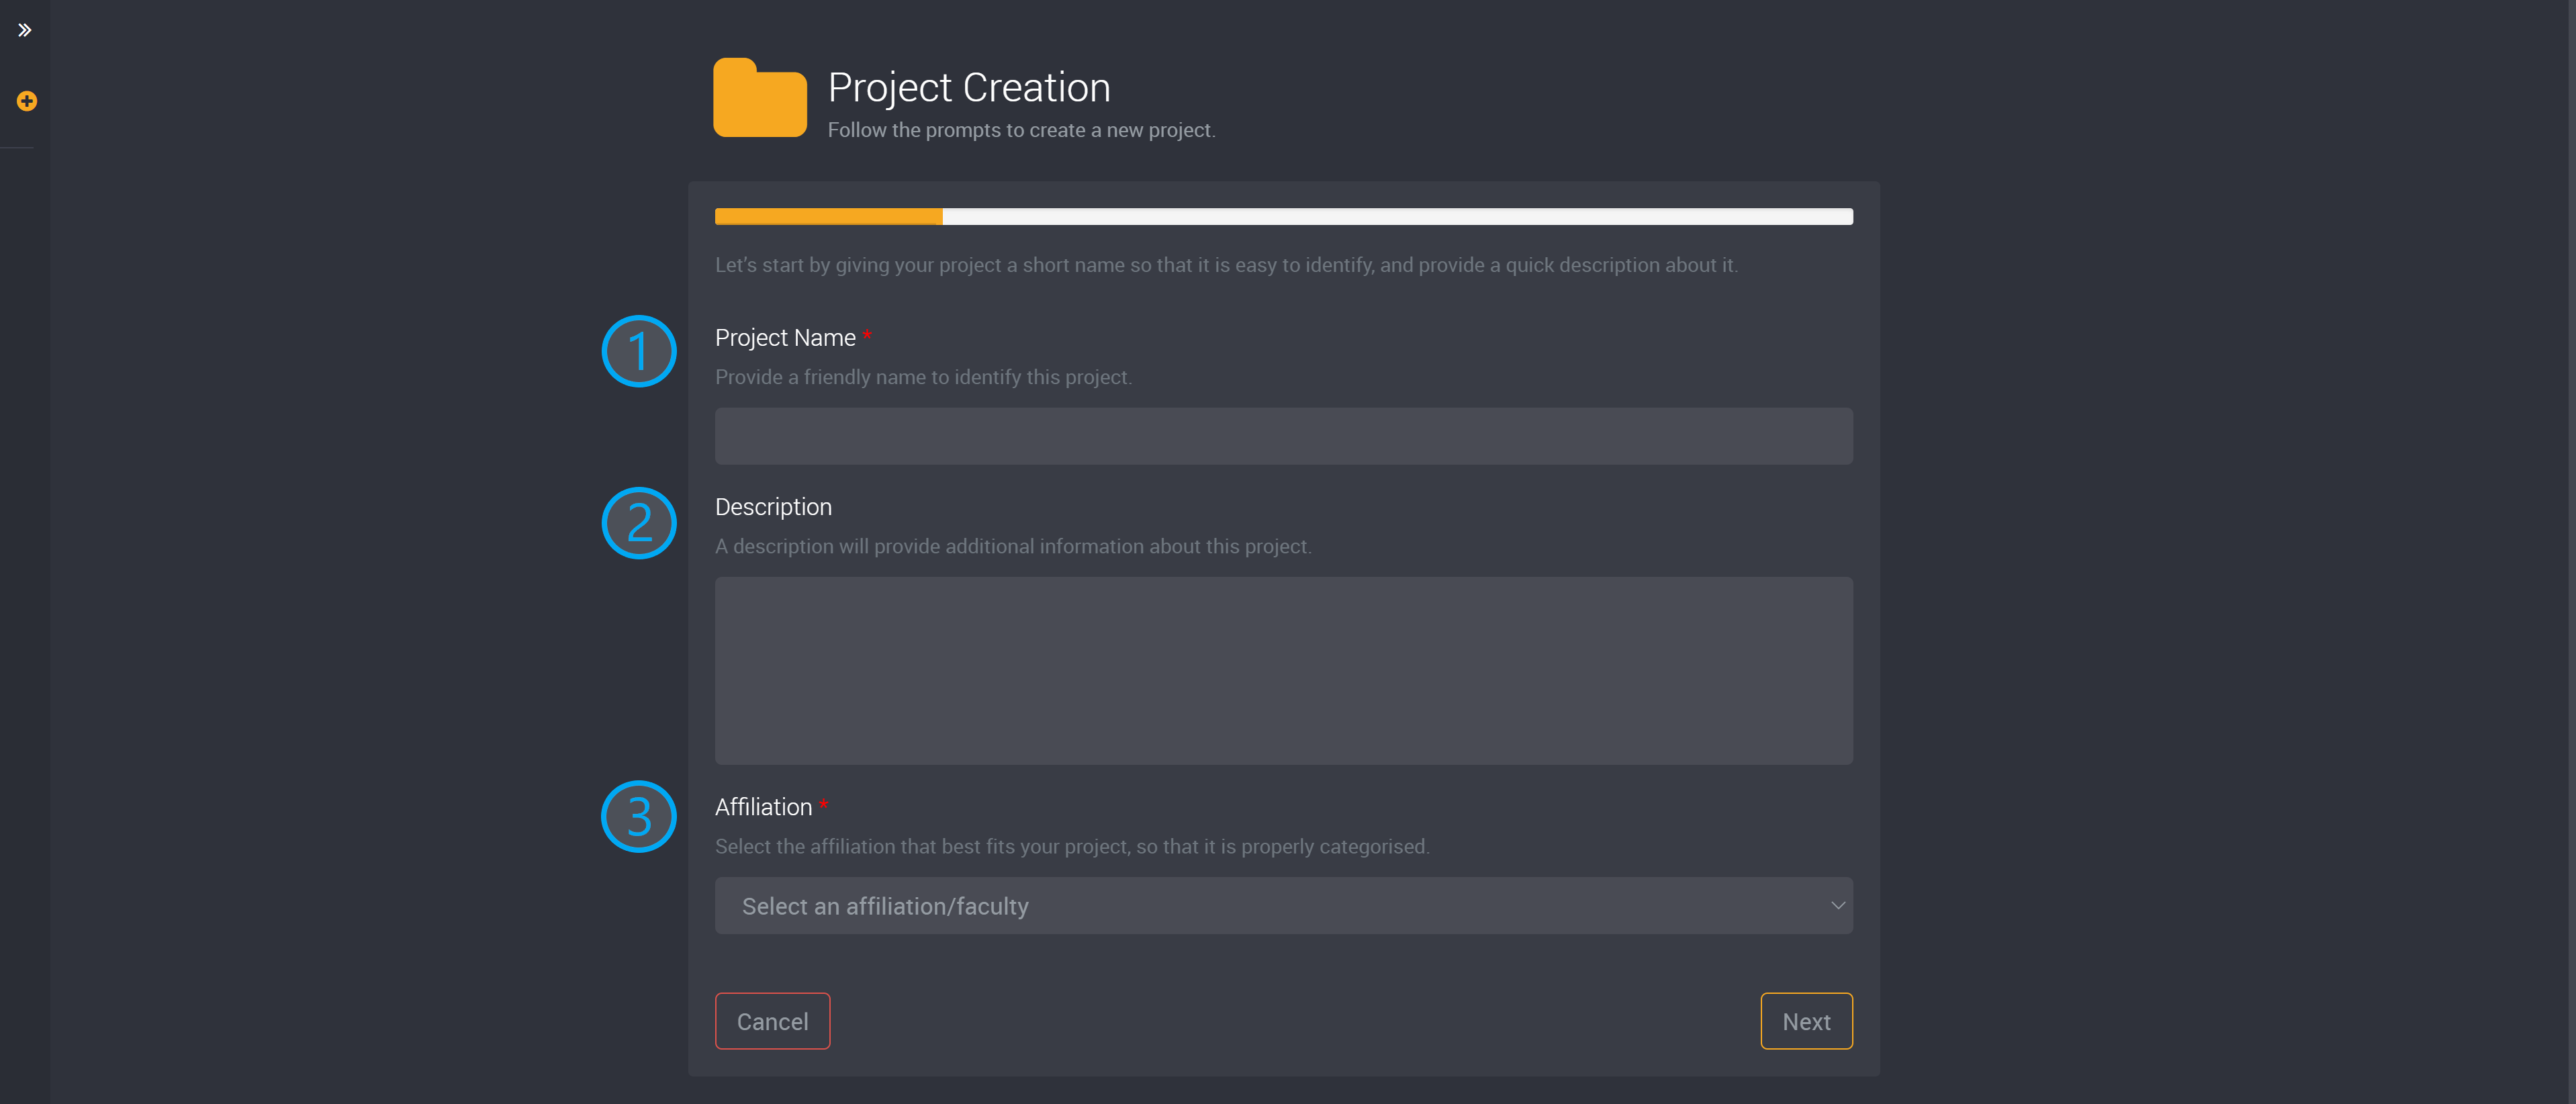
The first step is to provide a name that will easily identify this project.
Please note that this name will also later be used to identify resource groups. Loome will use both the project name and your chosen account to create the resource group name and resources deployed to these resource groups.
You can also add a description to provide further information.
The next step is to choose an affiliation from the dropdown. (You can manage affiliations following our guide here.)
Data Classification Level
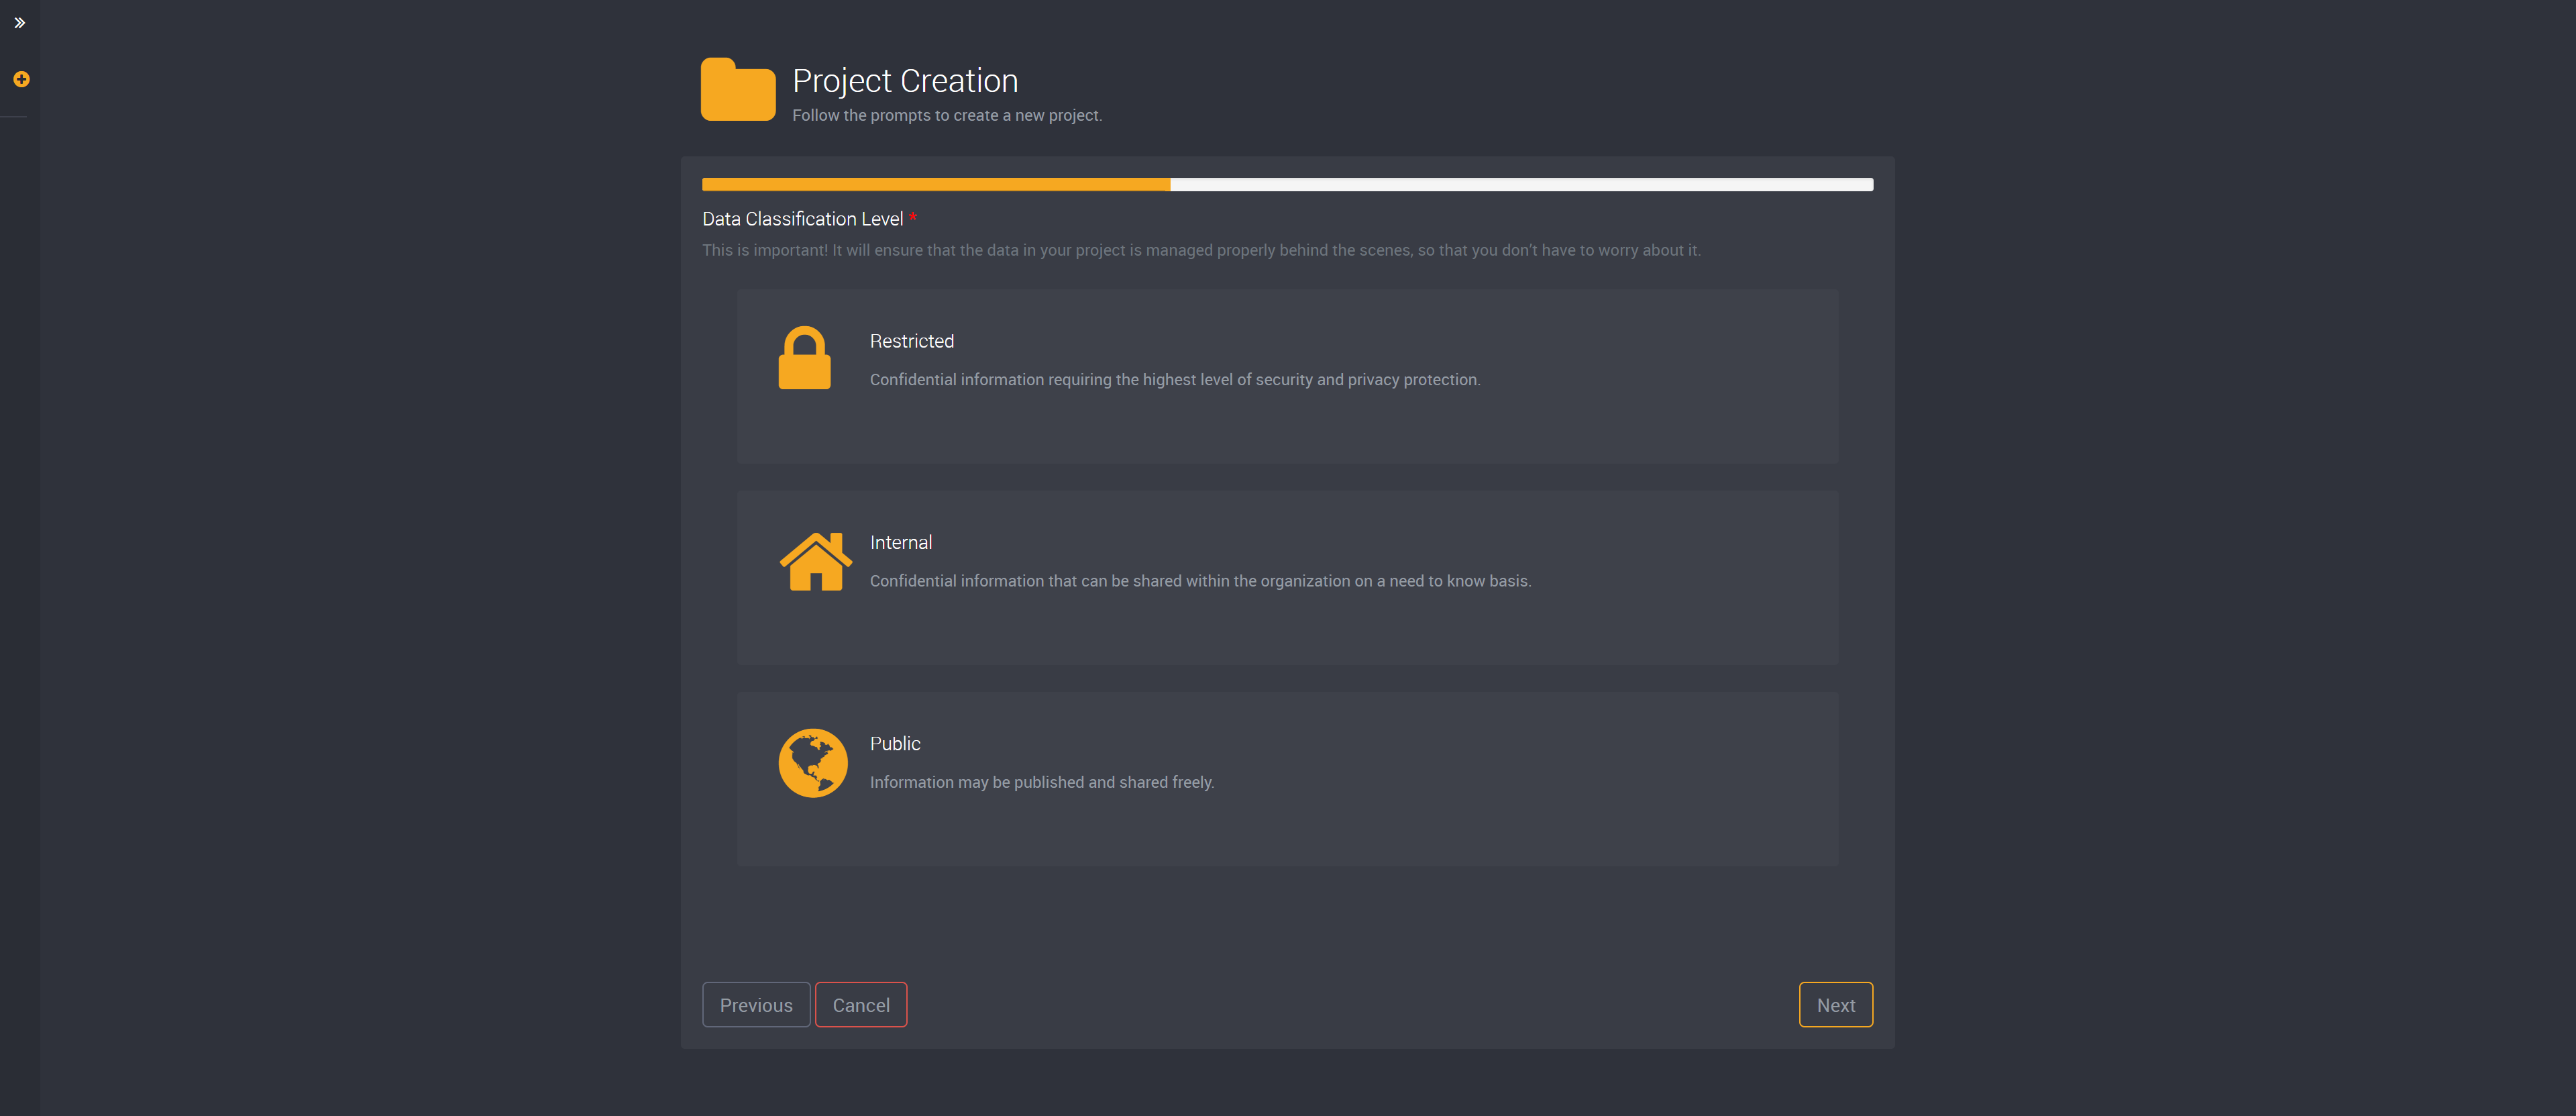
On this next page, you can choose the data classification level.
The data classification level will ensure that the data in your project is managed properly behind the scenes.
You can choose from:
| Data Classification Level | Description |
|---|---|
| Restricted | Confidential information requiring the highest level of security and privacy protection. |
| Internal | Confidential information that can be shared within the organization on a need to know basis. |
| Public | Information may be published and shared freely. |
Account
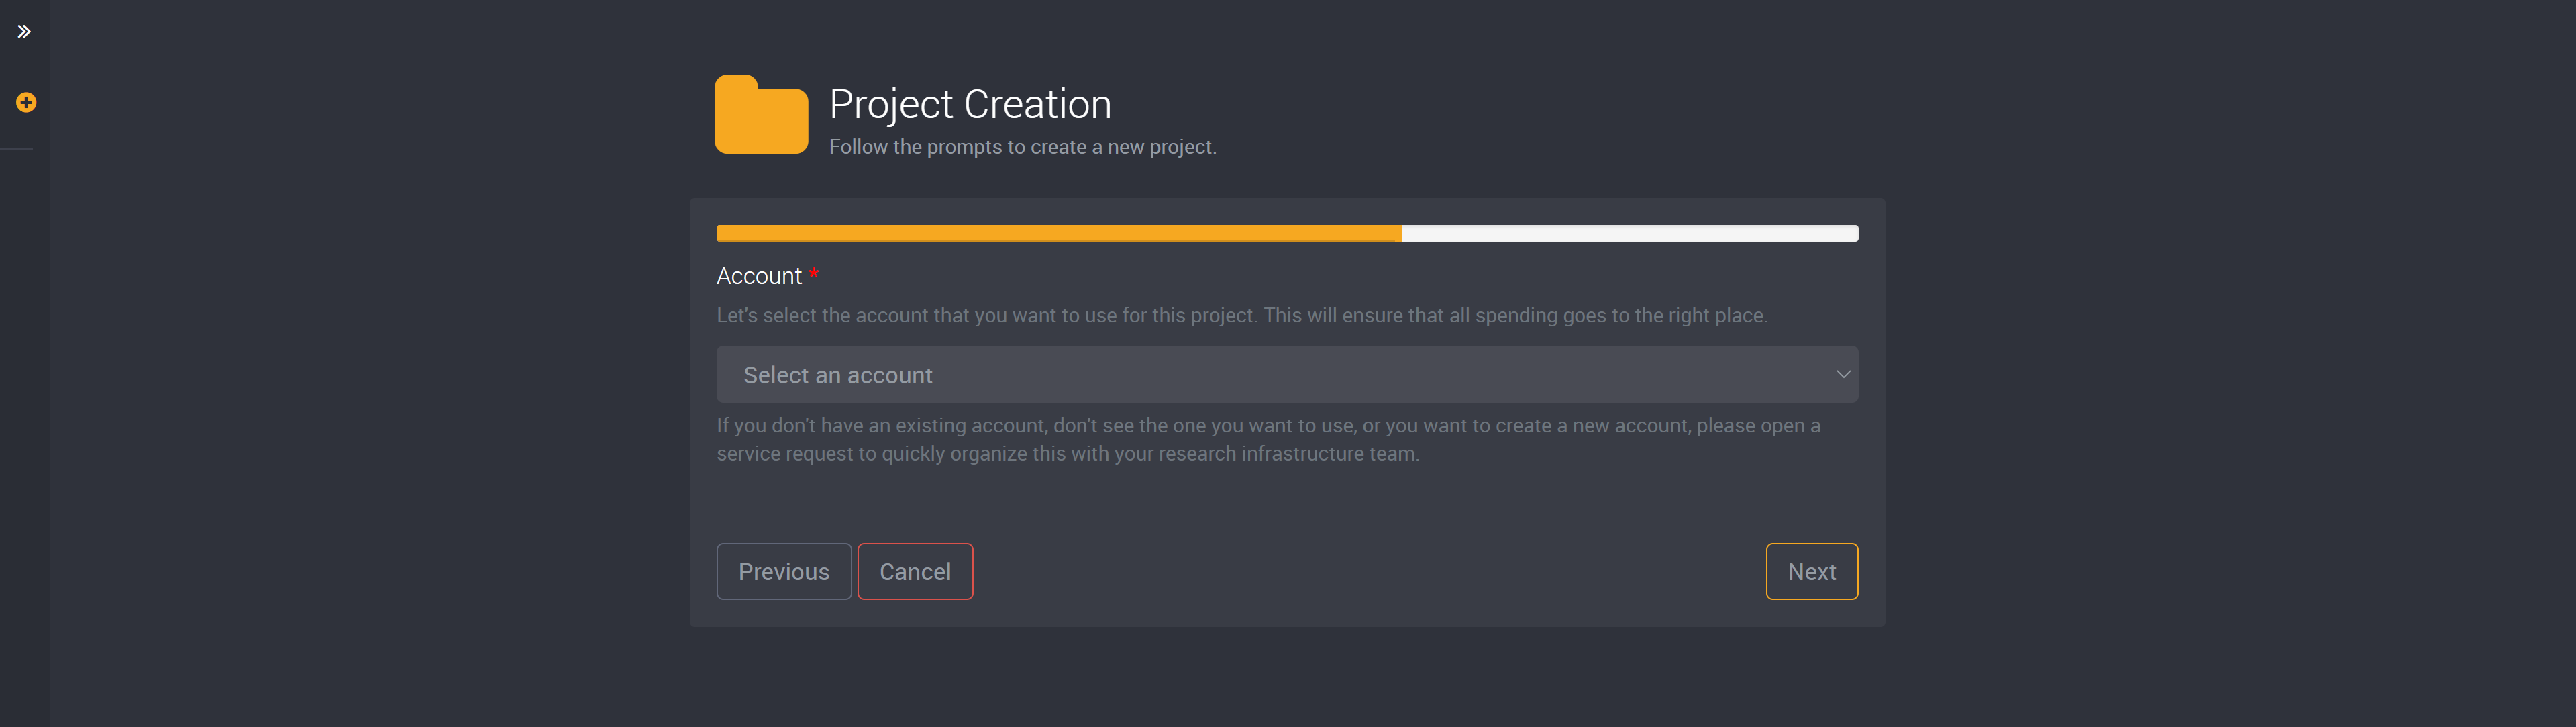
Then we can select the account that will be used for this project. This account will link your project to your Azure subscription and region so that any spending will be through this account.
Loome will create tags in your Azure Resource Group for all resources created in this project and its resource group such as ‘Loome-Module : Assist’, ‘Loome-Project : PROJECT NAME’, and ‘Loome-Account : ACCOUNT NAME’.
If you don’t have an existing account, don’t see the one you want to use, or if you want to create a new account, you can open a service request to organize this with your research infrastructure team. If you are an administrator, you can follow our steps in this link to create an account.
After you have selected an account you will have the option to add collaboration tools and document libraries to this project.
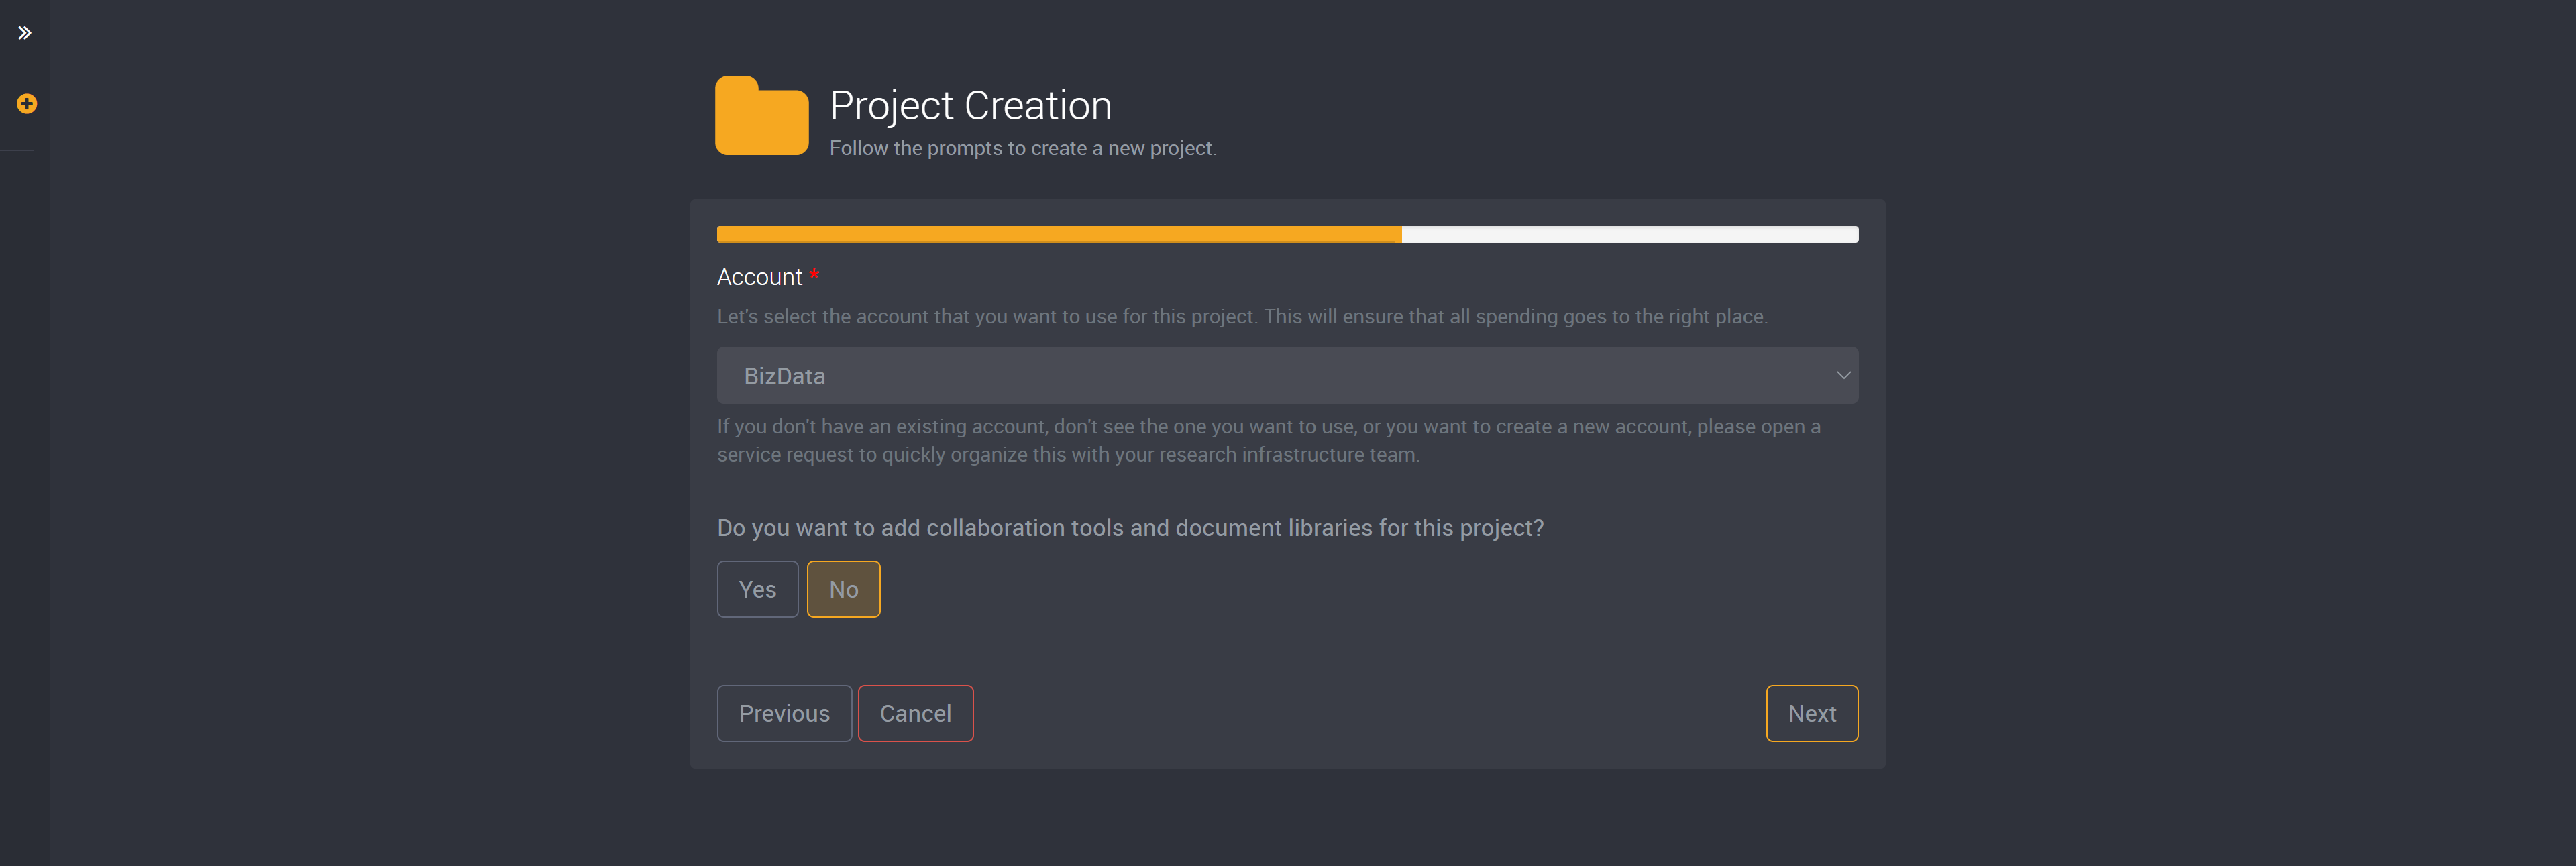
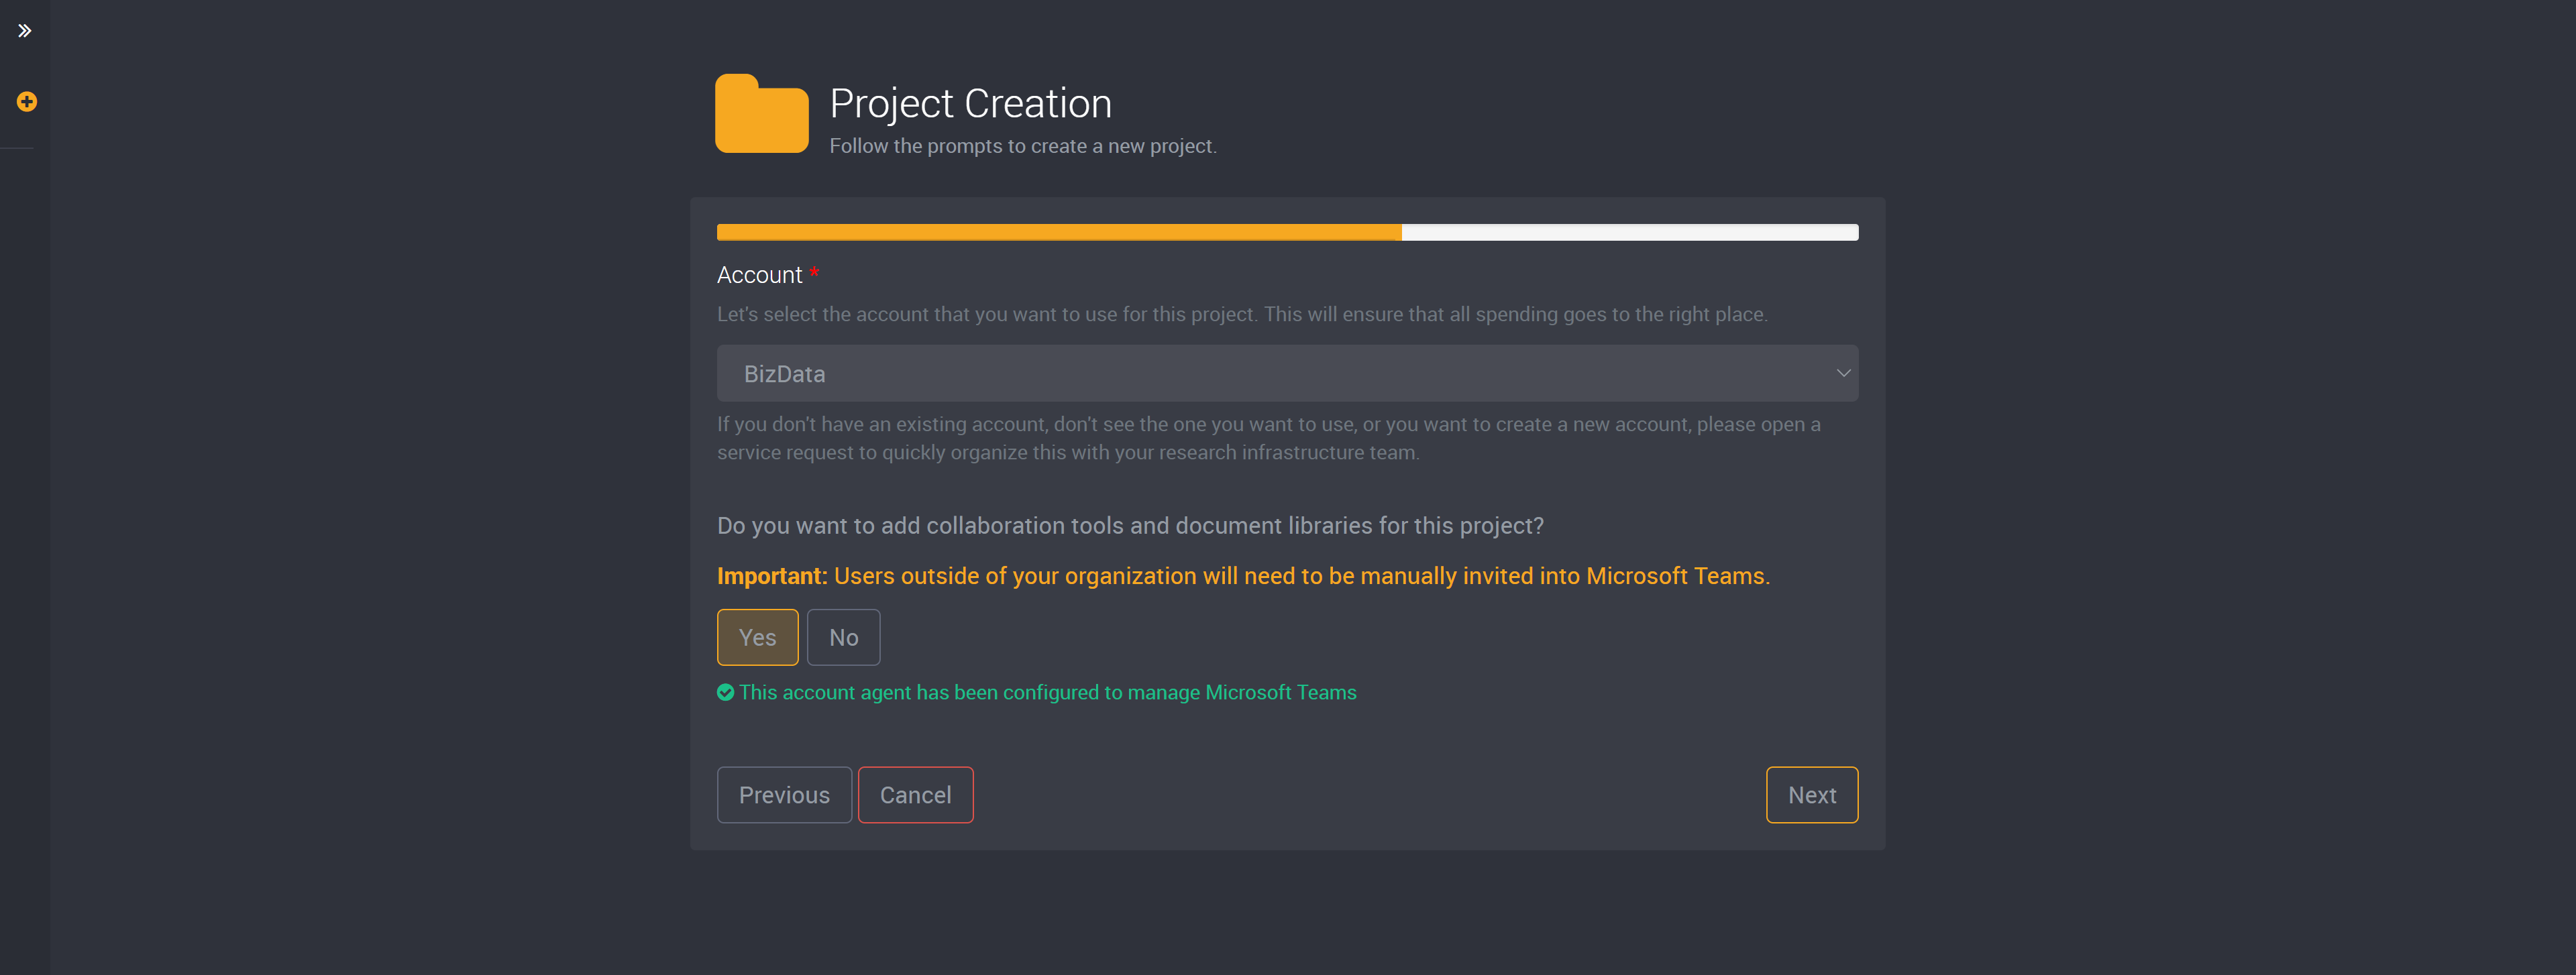
If you would like to add collaboration tools, select ‘Yes’.
If an administrator has set the collaboration settings to ‘No Collaboration’ you will not have this option to add collaboration tools and document libraries. Please contact your administrator to discuss your settings if you would like to use collaboration tools.
Loome will then check that the account agent has been configured to manage Microsoft Teams.
Budget
You can then choose the total spending budget for this project. You can also set alerts by selecting a percentage of the budget and Loome will send you an alert when that percentage has been reached.
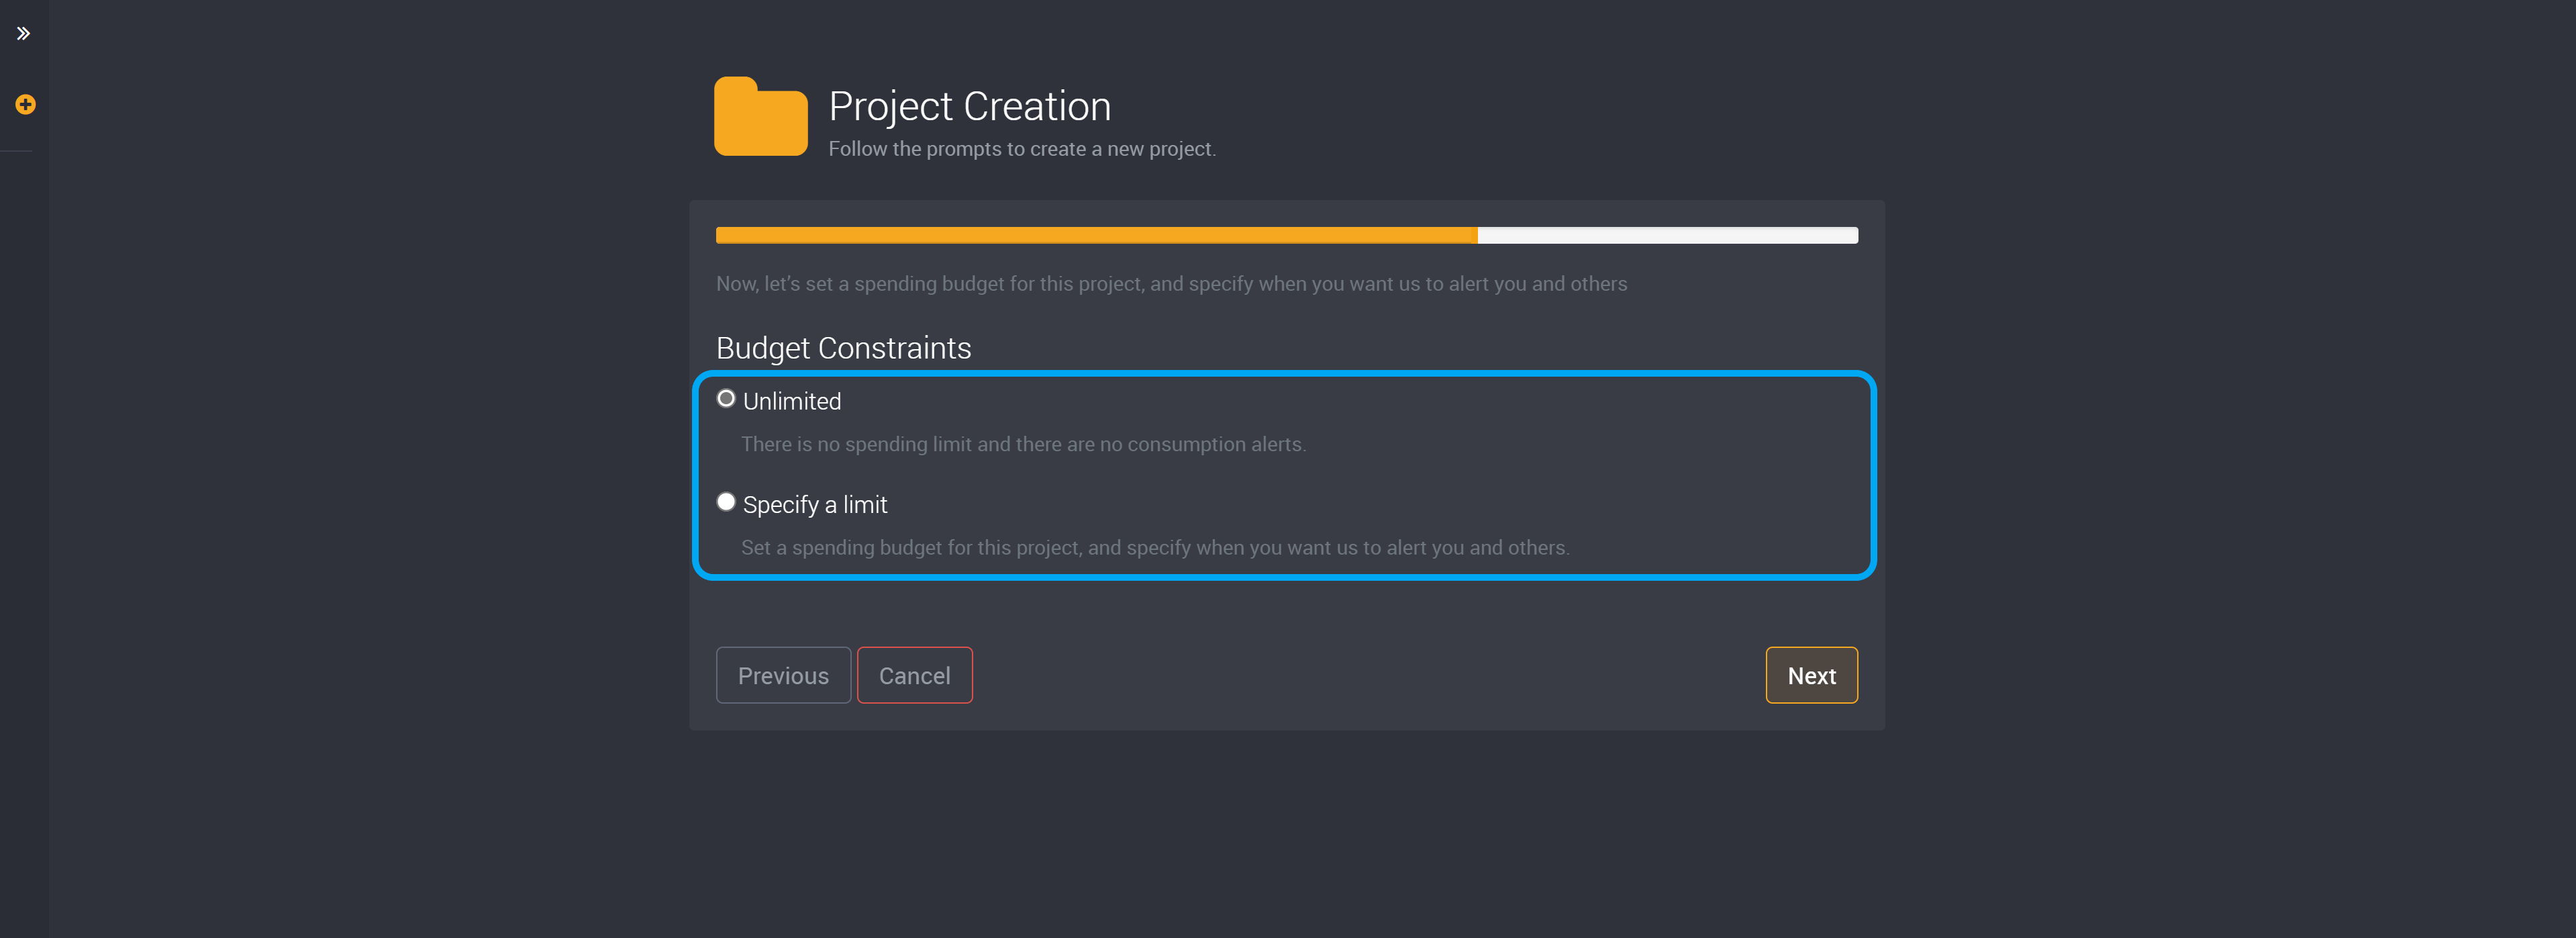
If you have selected an account with an unlimited budget, you will first need to choose between an unlimited budget or limited budget for this project.
- If you choose Unlimited, there is no spending limit and there are no consumption alerts.
- If you specify a limit, you can set a spending budget for this project and specify when you want Loome to alert you and others.
If you have chosen an account with a budget or chose to specify a limit you can type in your budget in the Total Budget field.
The maximum budget that you can choose is dependent on the account you have selected. If your account had a maximum value such as $10,000, it would be the maximum value that you can choose here.
If the account had an unlimited budget, it would be reflected on this page and you can move on to the next step.
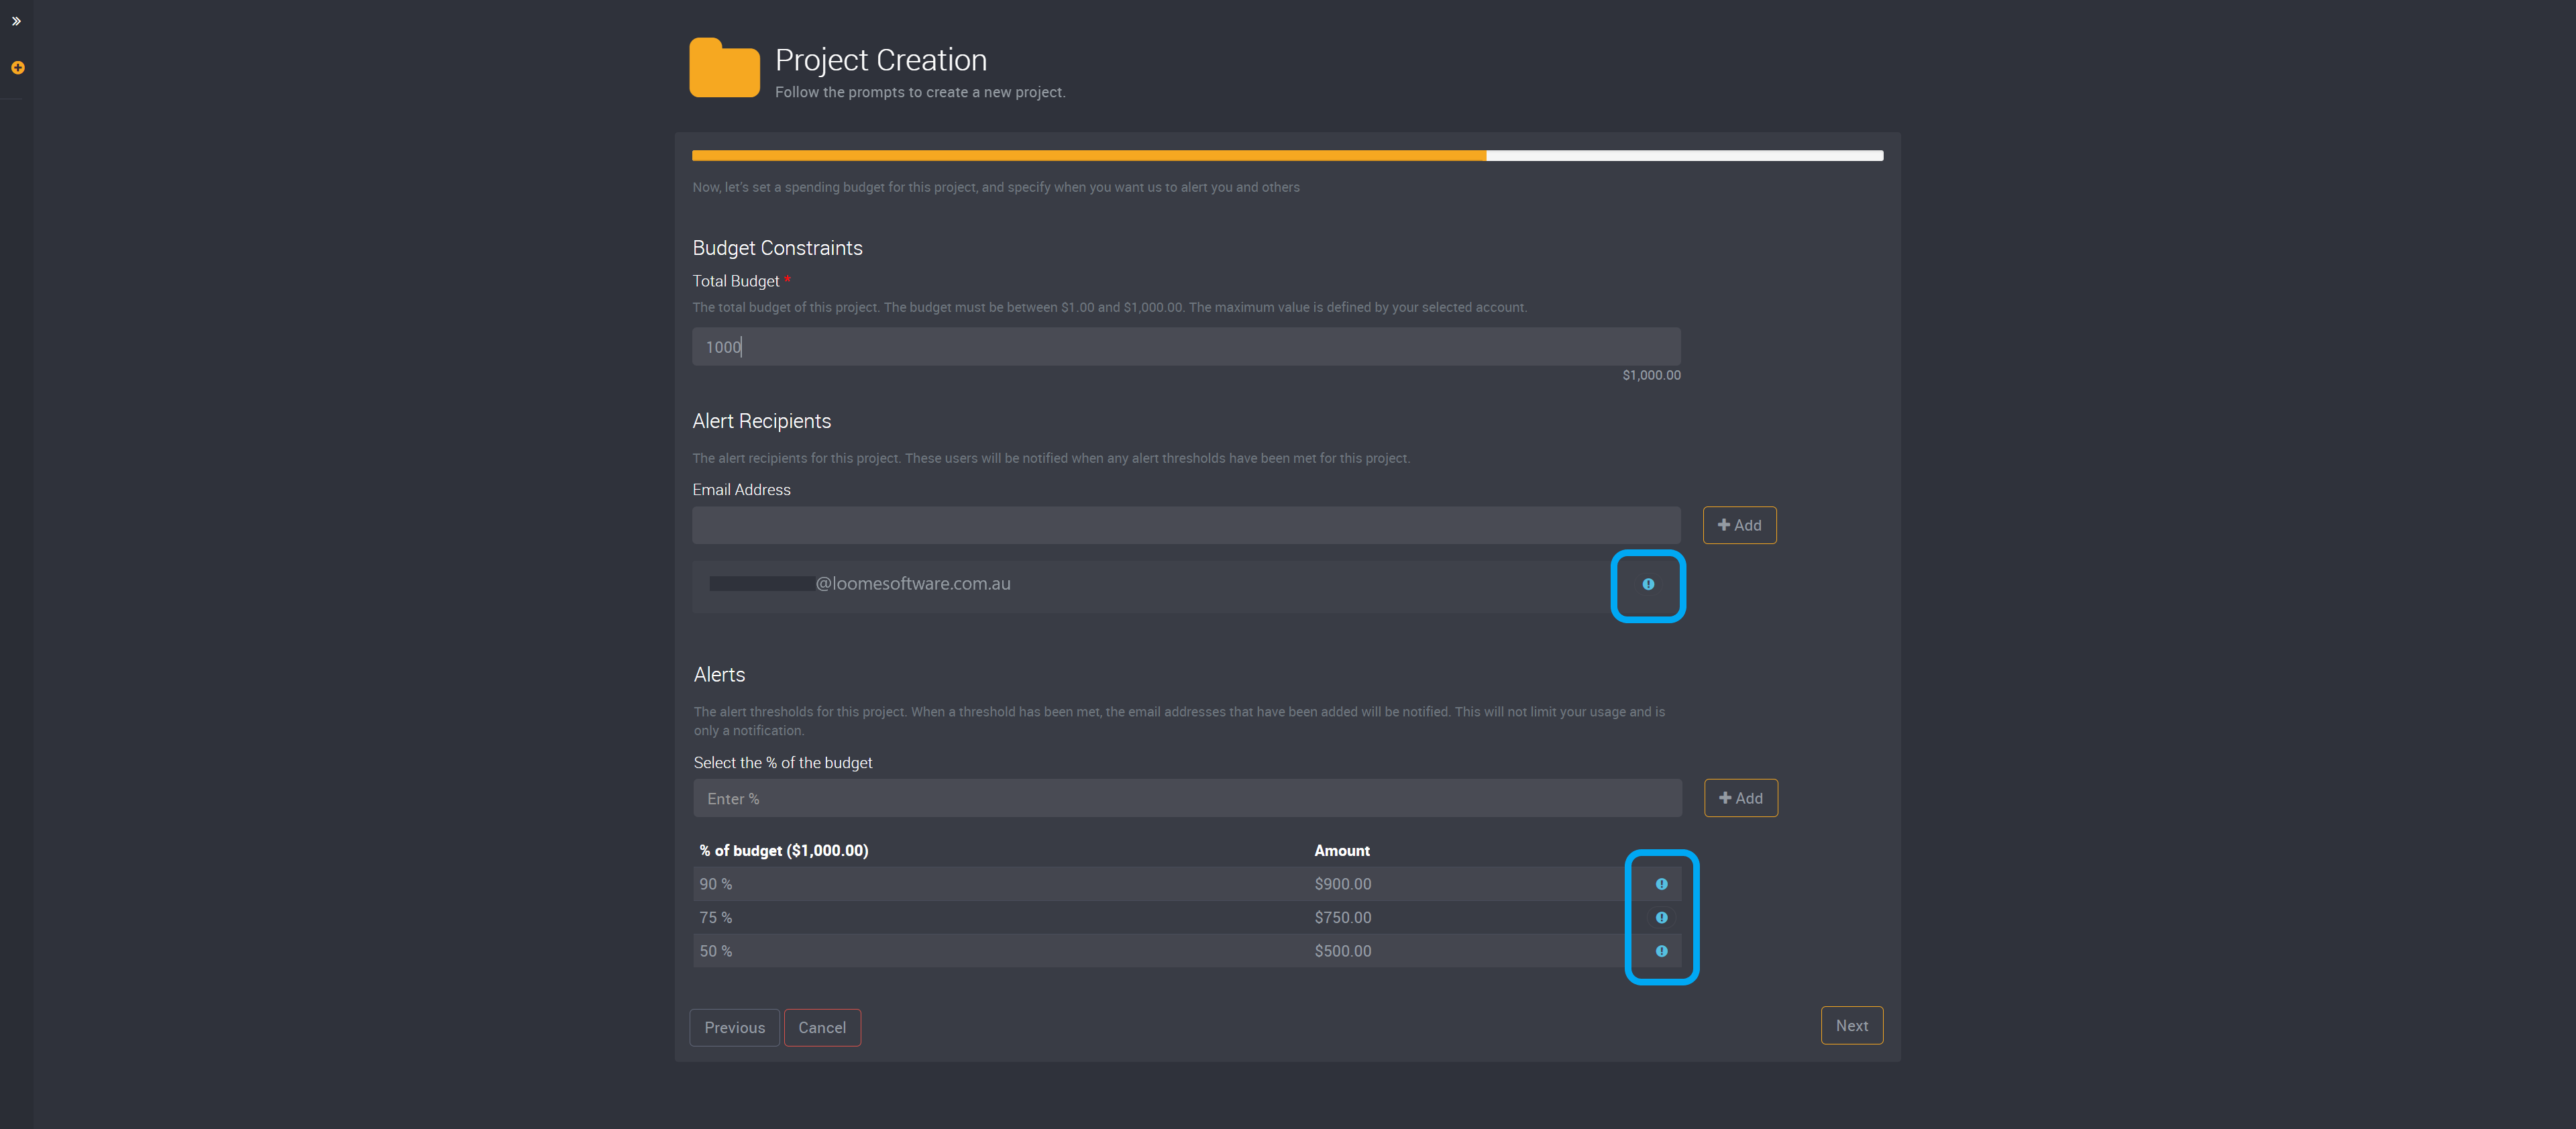
In the image below, the maximum budget is $1,000 due to the account I selected on the previous page.
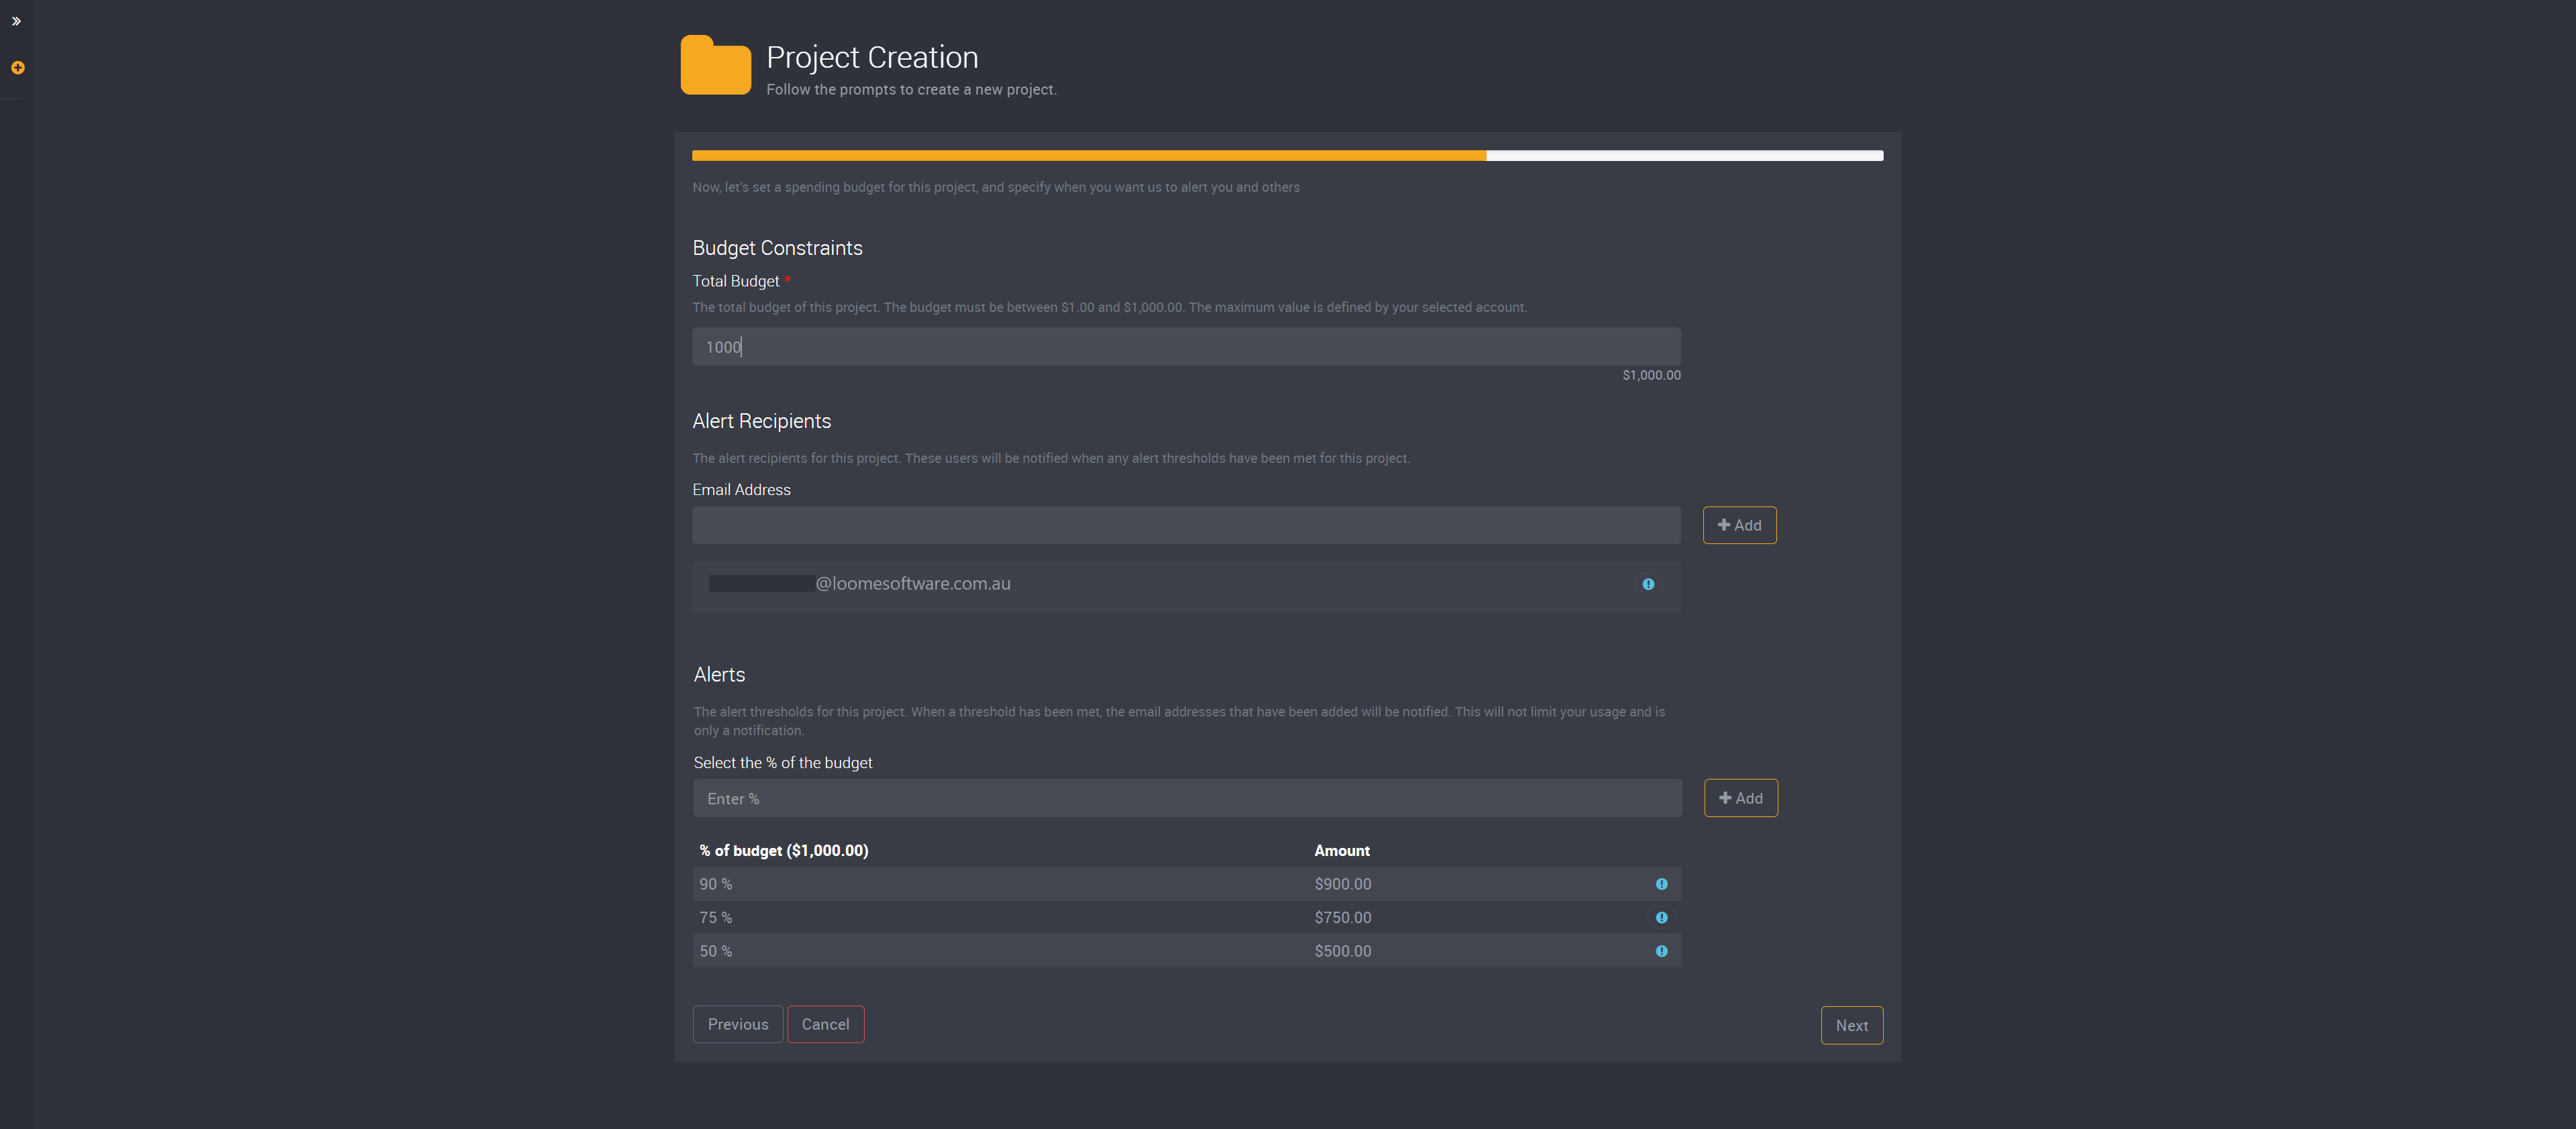
Then select your Alert Recipients. These recipients are the people that should be notified if the project passes your selected budget.
When your budget spend reaches the alert percentage, Loome will send an email to these users.
Your account may have pre-selected email addresses that have been automatically added to this field. These have been added by the account creator as required alert recipients and cannot be removed.
Please note that an alert threshold is only a notification and not a limit, so if a budget exceeds your set threshold Loome cannot stop a workstation from continuing to use this account. You will need to log in and stop the workstation manually. Learn more about workstations here.
You can then choose Alerts. These are the percentages that when met will trigger an alert to be sent to the users you have selected above.
In the image below, you can see that there has been pre-set alert thresholds. These have been selected by the account creator and cannot be deleted. When the budget has been spent and reaches the selected percentage, for example at 50% therefore $5000 in the image below, an email will be sent to all added recipients.
You cannot delete these account set fields, but you can add more alerts and recipients. The alerts and recipients set at the project level can be deleted.
The blue icon highlighted in the image below displays which values have been provided by the account.
Project Roles
The next step is adding members to roles in this project. These users will find this project when they log in on their home page. This project will be hidden from all other users except administrators (administrators can see all projects). Project roles won’t allow users access to any other projects except the project they are added to.
When you add members to this project, you can choose from these project specific roles:
| Project Level Role | Description |
|---|---|
| Project Owners | A project owner can deploy and use resources, and manages that specific project. The person that creates the project automatically belongs to the project owner role. |
| Project Contributors | This user can deploy and use resources, but cannot add other users to a project. |
| Project Readers | Users with this role can use resources, but cannot deploy them or make changes to a project. |
If you add an email address to a project role that is not a member of the Loome Assist tenant, this user will also be added to the ‘Consumer’ role in your Loome Assist tenant. This user will receive an email invitation with a link to Loome Assist. Learn more about application roles here.
| Permission | Project Owner | Project Contributor | Project Reader |
|---|---|---|---|
| Create projects | ✔ | ✖ | ✖ |
| Manage assigned projects | ✔ | ✖ | ✖ |
| Add users to a project | ✔ | ✖ | ✖ |
| Deploy and use resources | ✔ | ✔ | ✖ |
| Create and delete resources, such as Data Repositories and Workstations | ✔ | ✔ | ✖ |
| Browse and manage data repository files, download and upload files in a Data repository | ✔ | ✔ | ✔ |
| View project | ✔ | ✔ | ✔ |
Add Project Users
To add a user to a role, choose a role from the tabs at the top of this section.
Then click on Add Members at the top-right of the page.
The person who created this project will automatically be added as the project owner. You cannot delete your own email from this role.

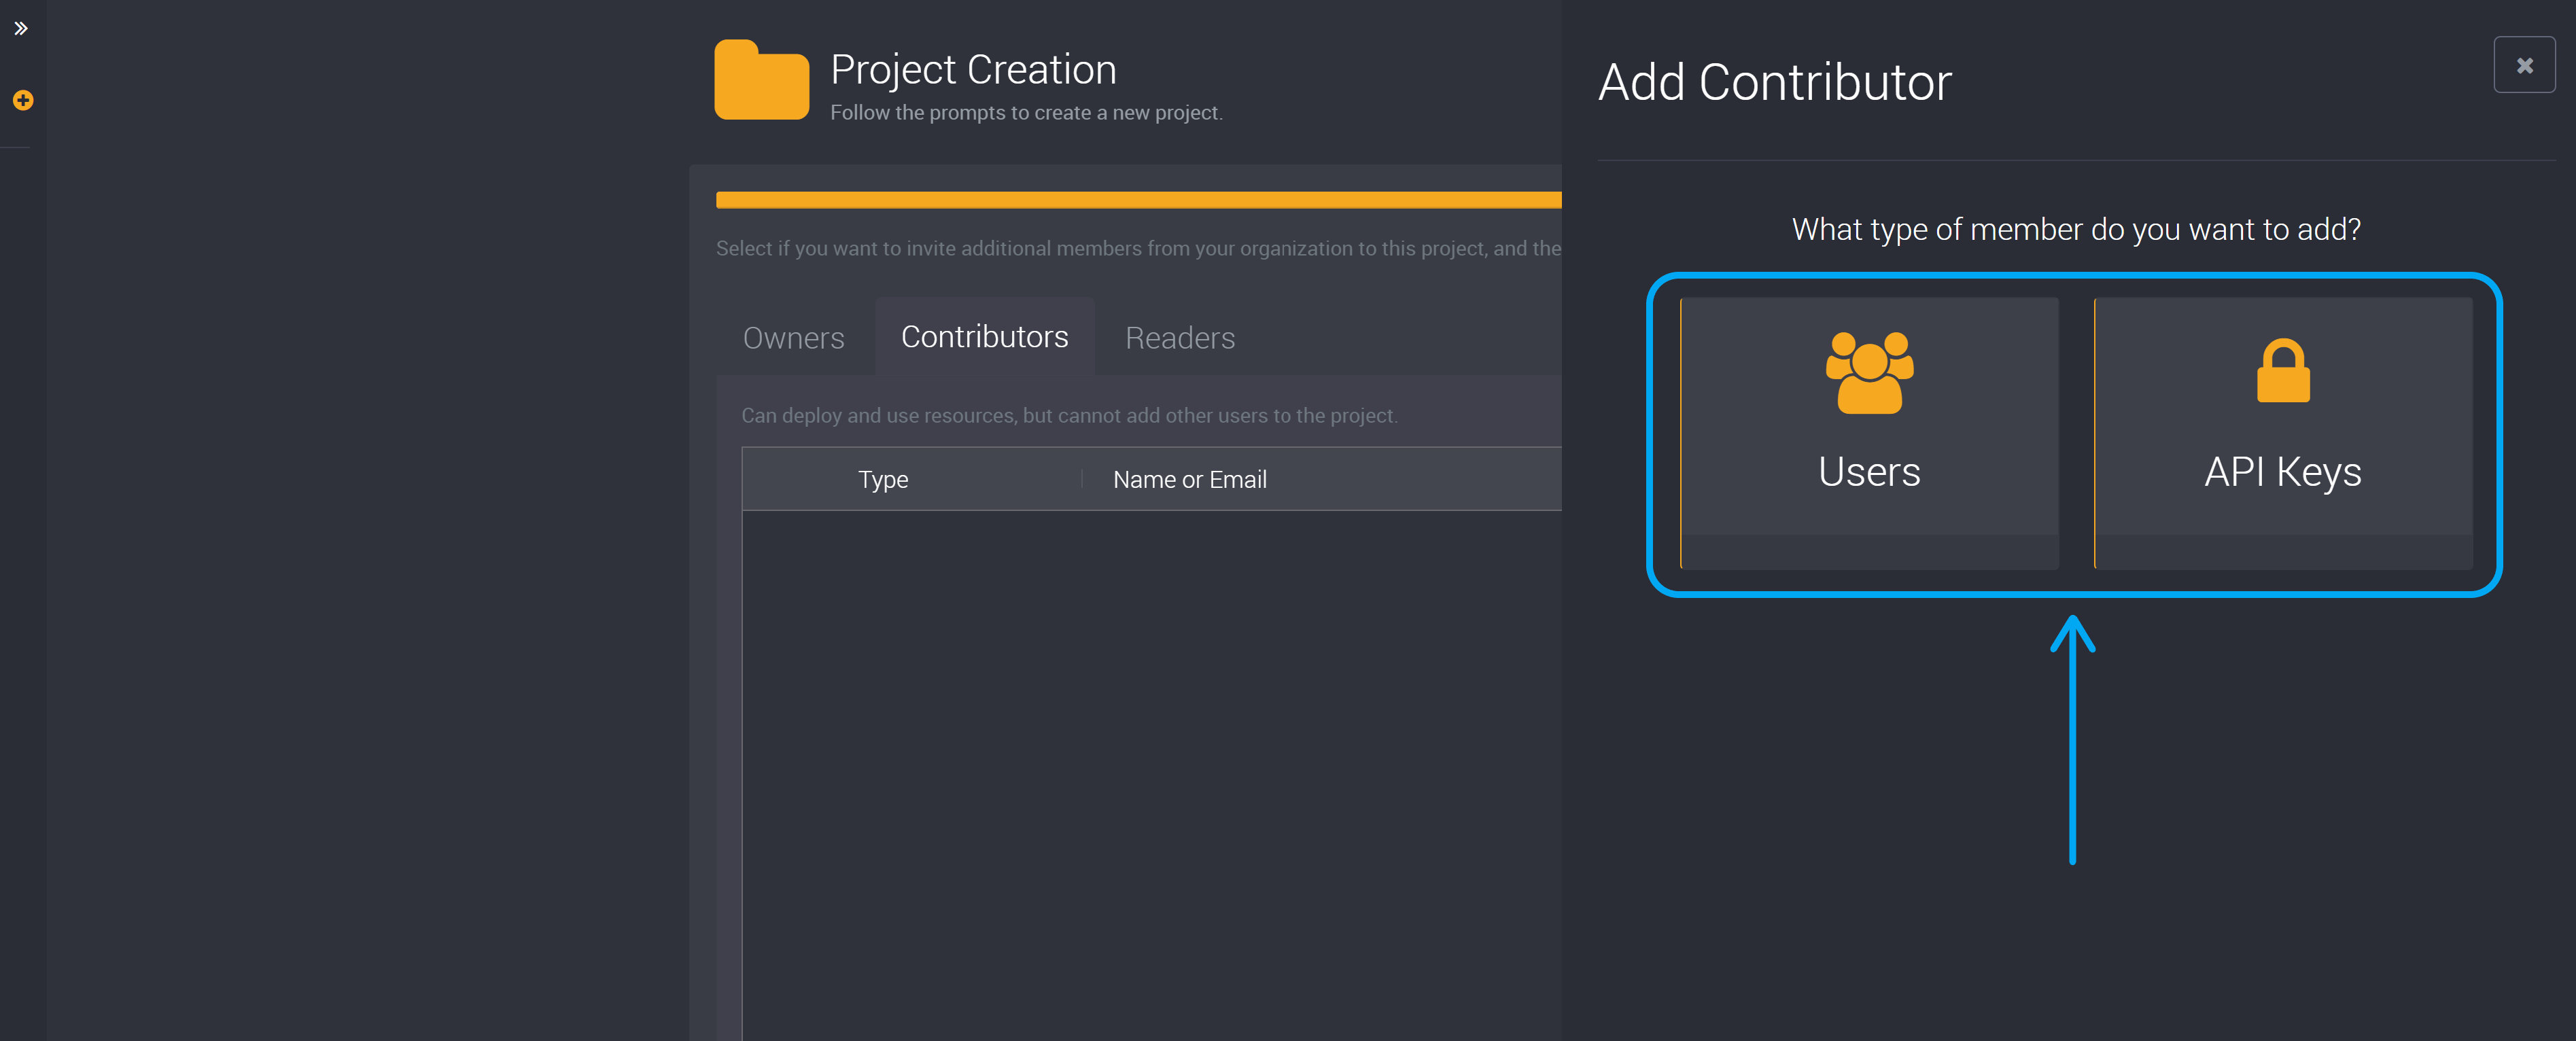
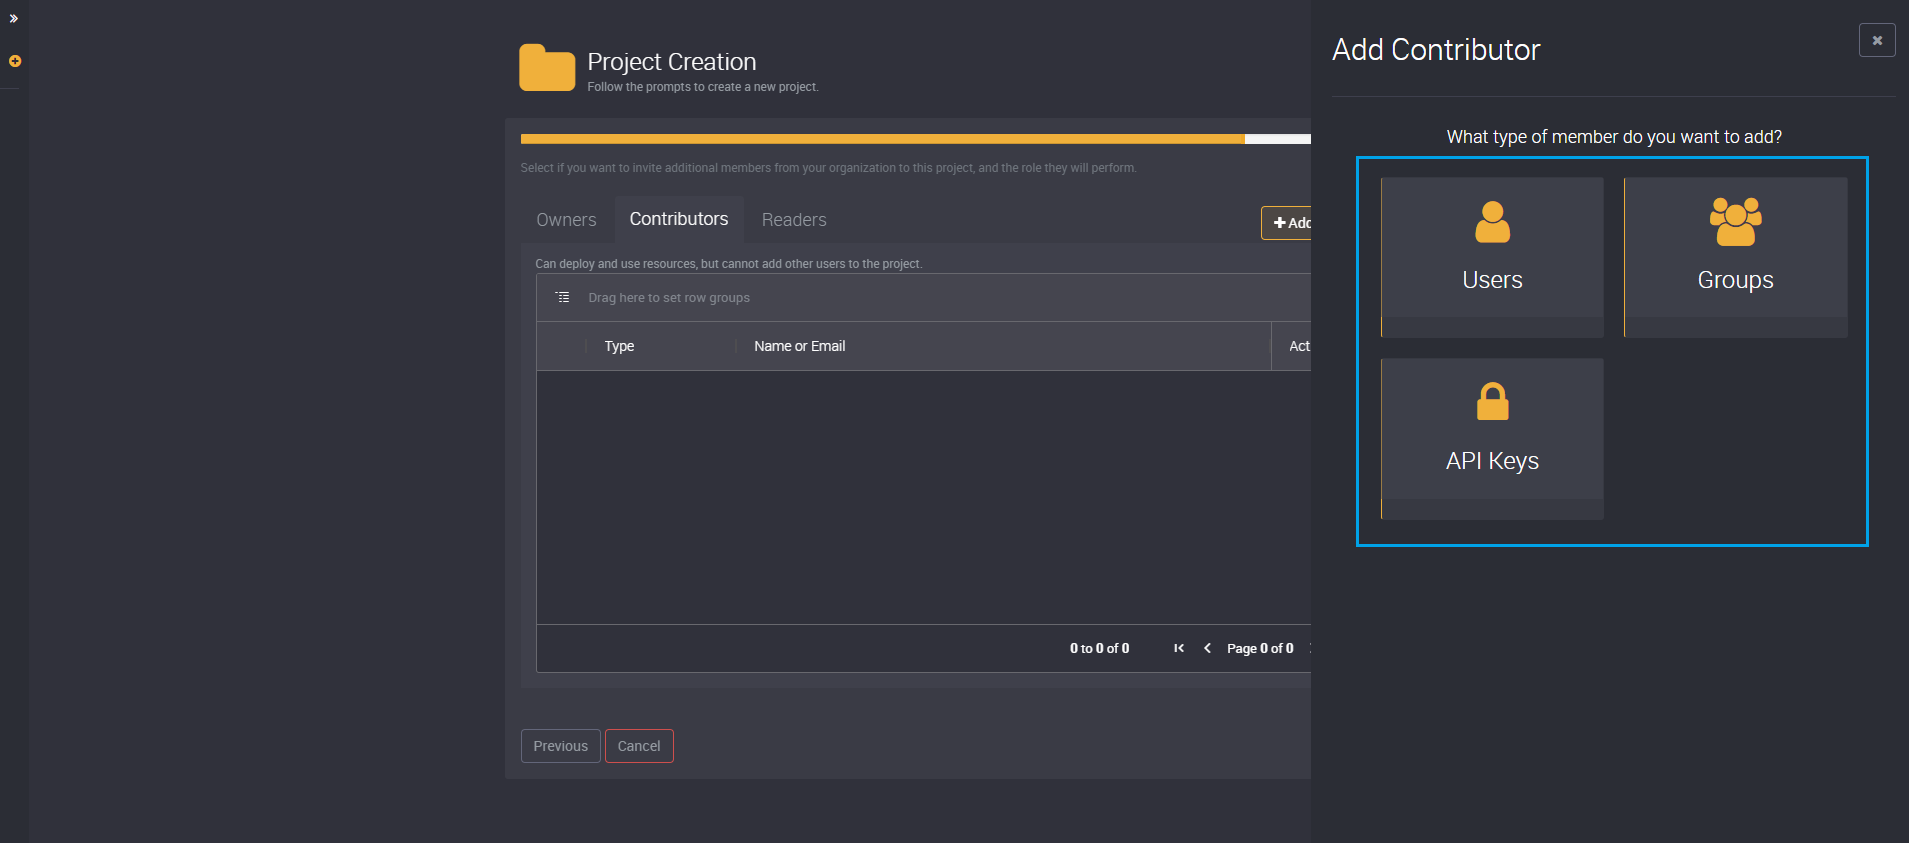
Choose whether you would like to add a user, a group or an API Key.
The following steps vary depending on whether your organization has enabled user or group lookup. Please contact your administrator if you would like to enable this.
Manually Add Users
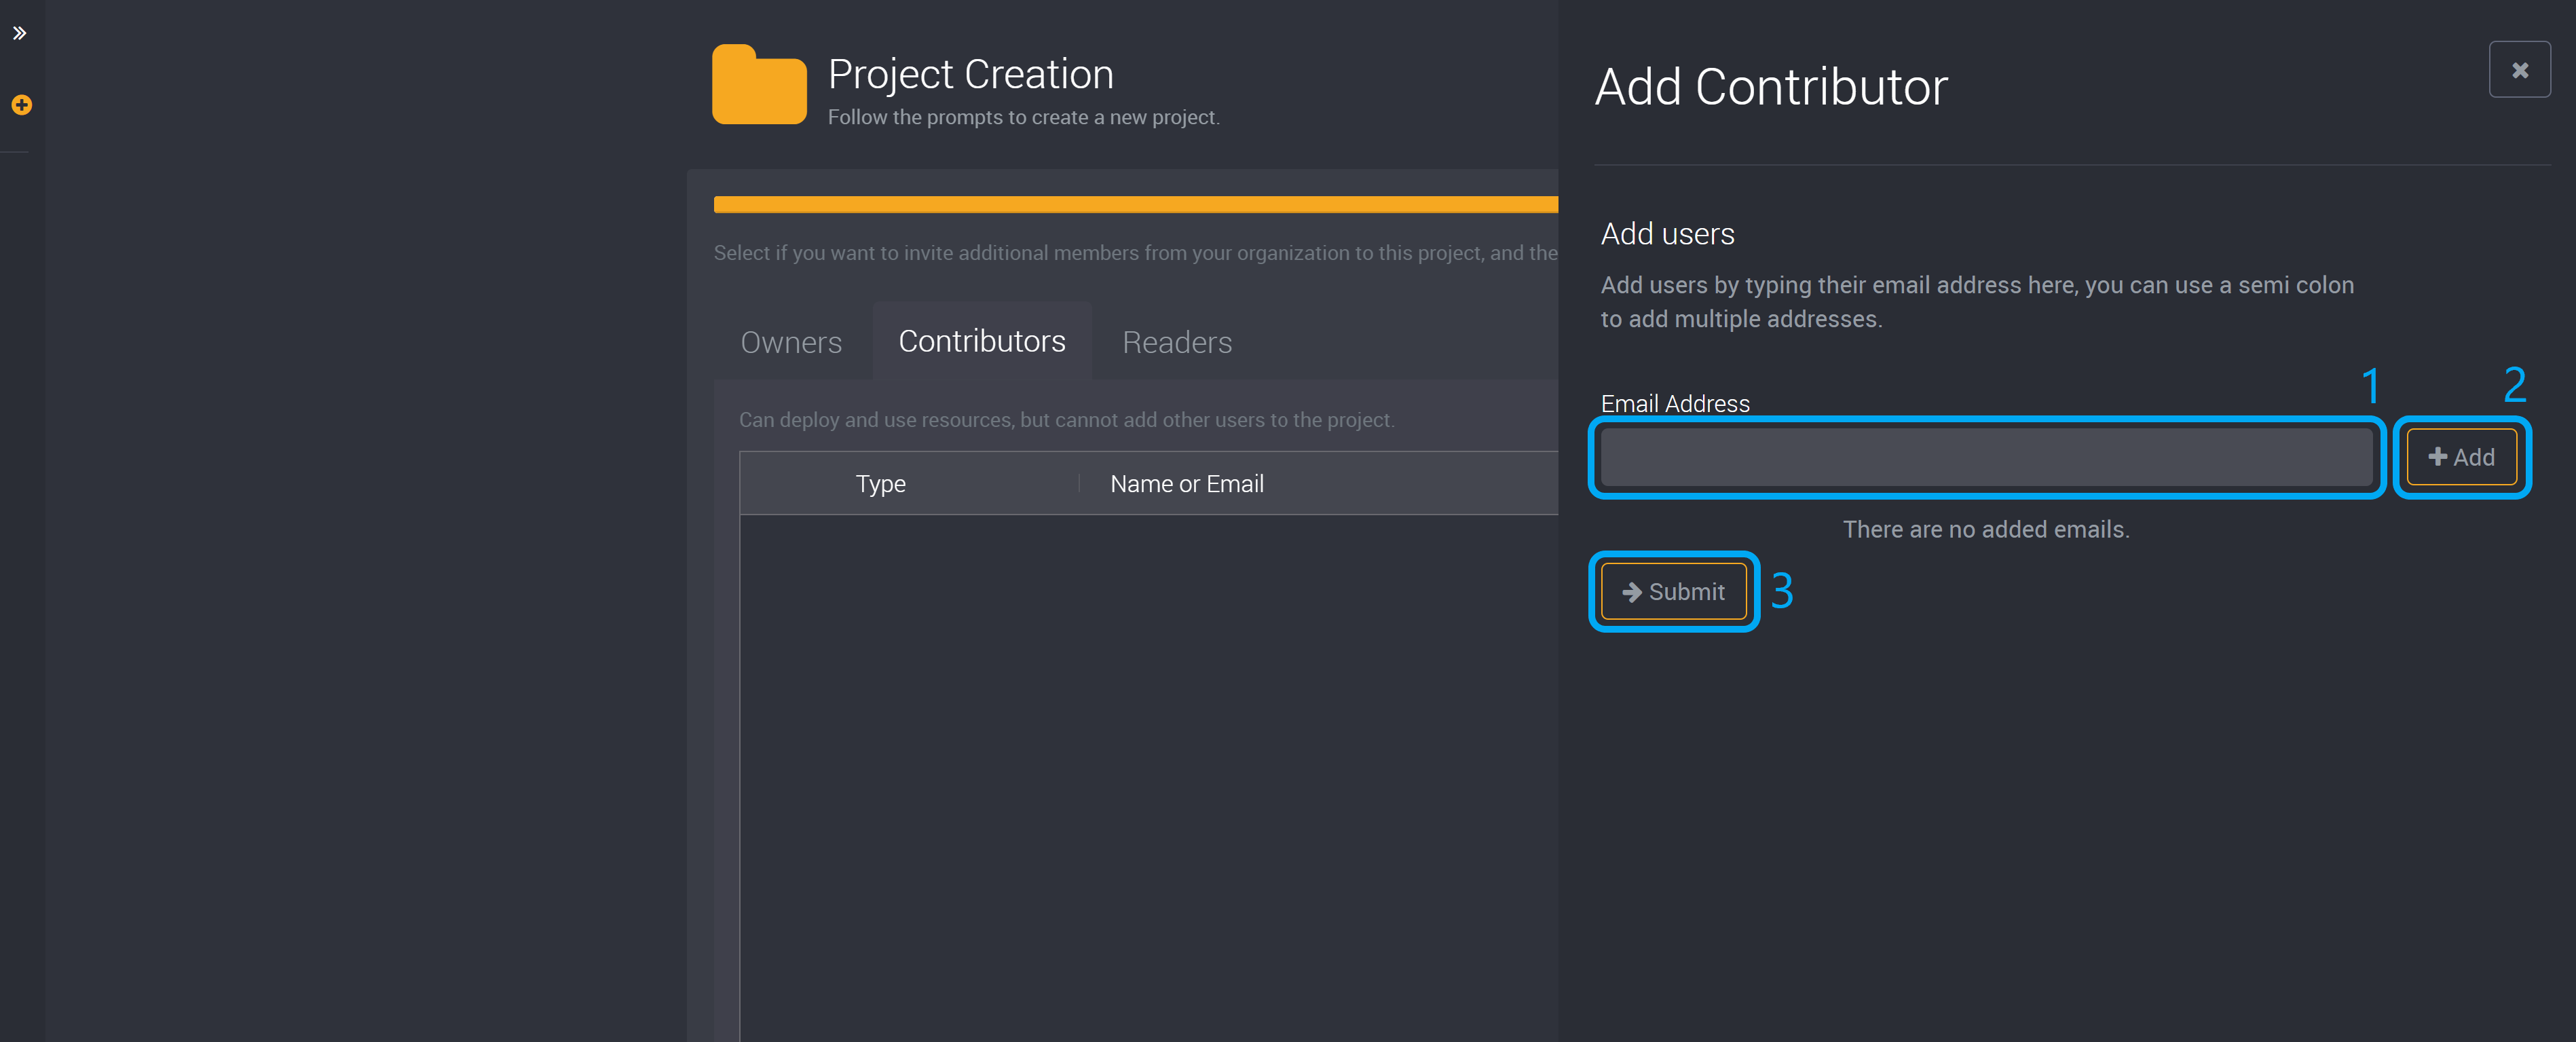
To add a user, type in their email address and click Add.
If you are adding more than one email address, you can separate them with a semi-colon.
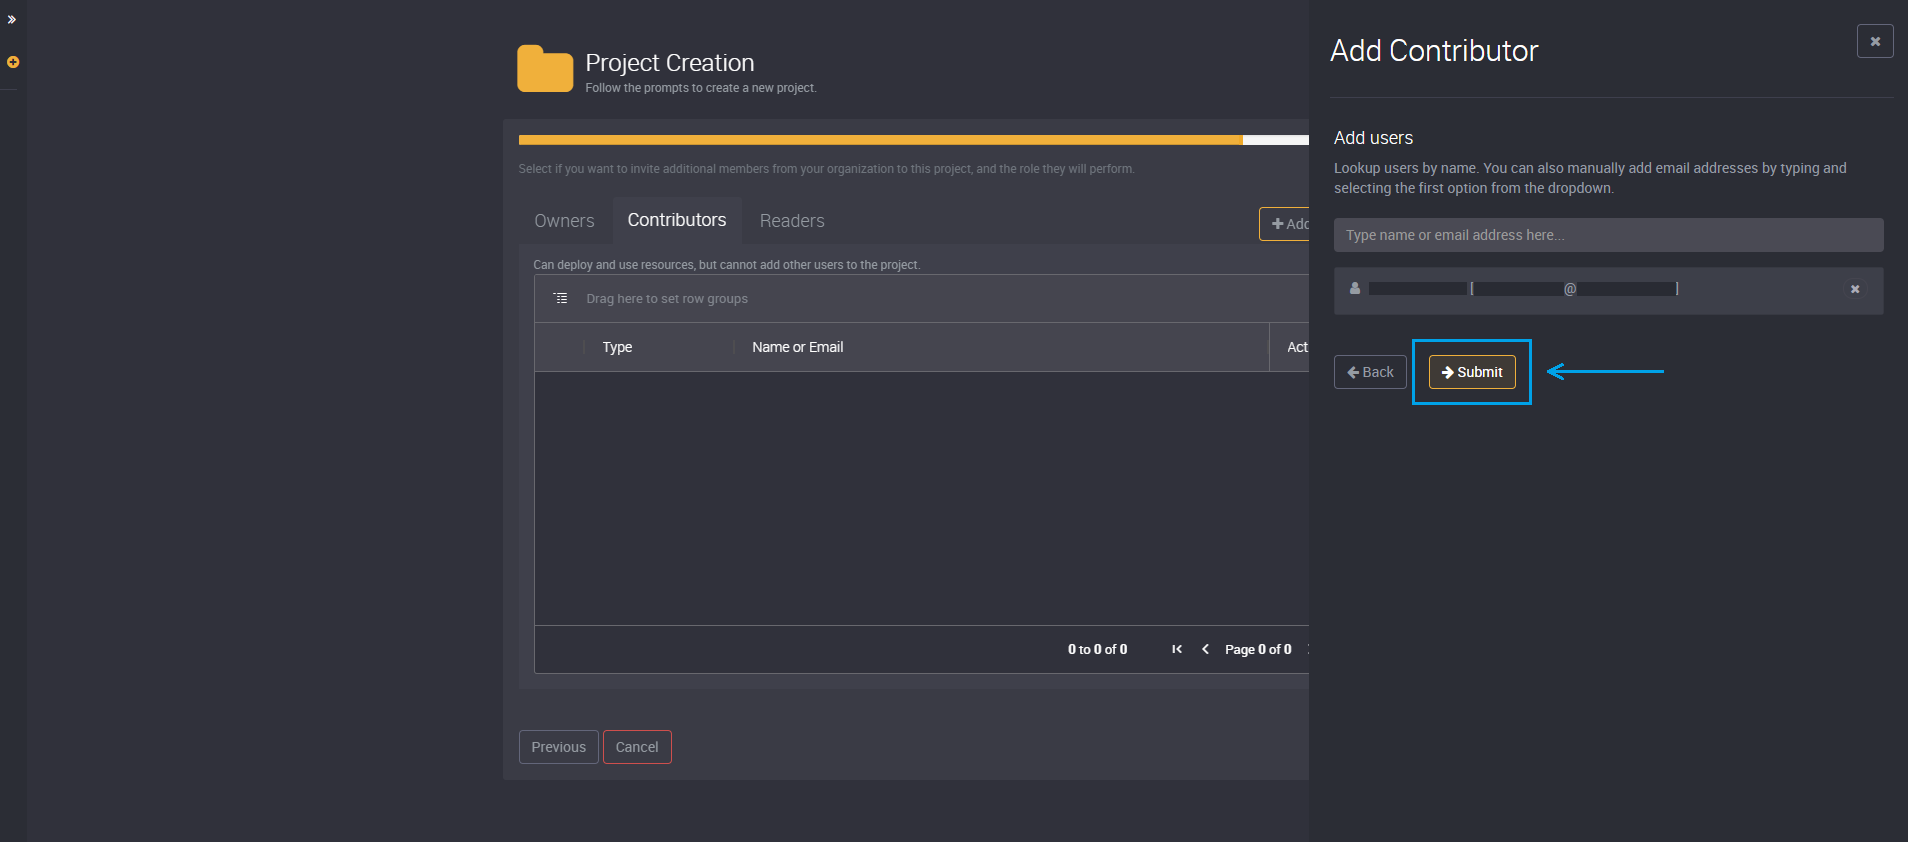
Click on Submit to add these users to the project.
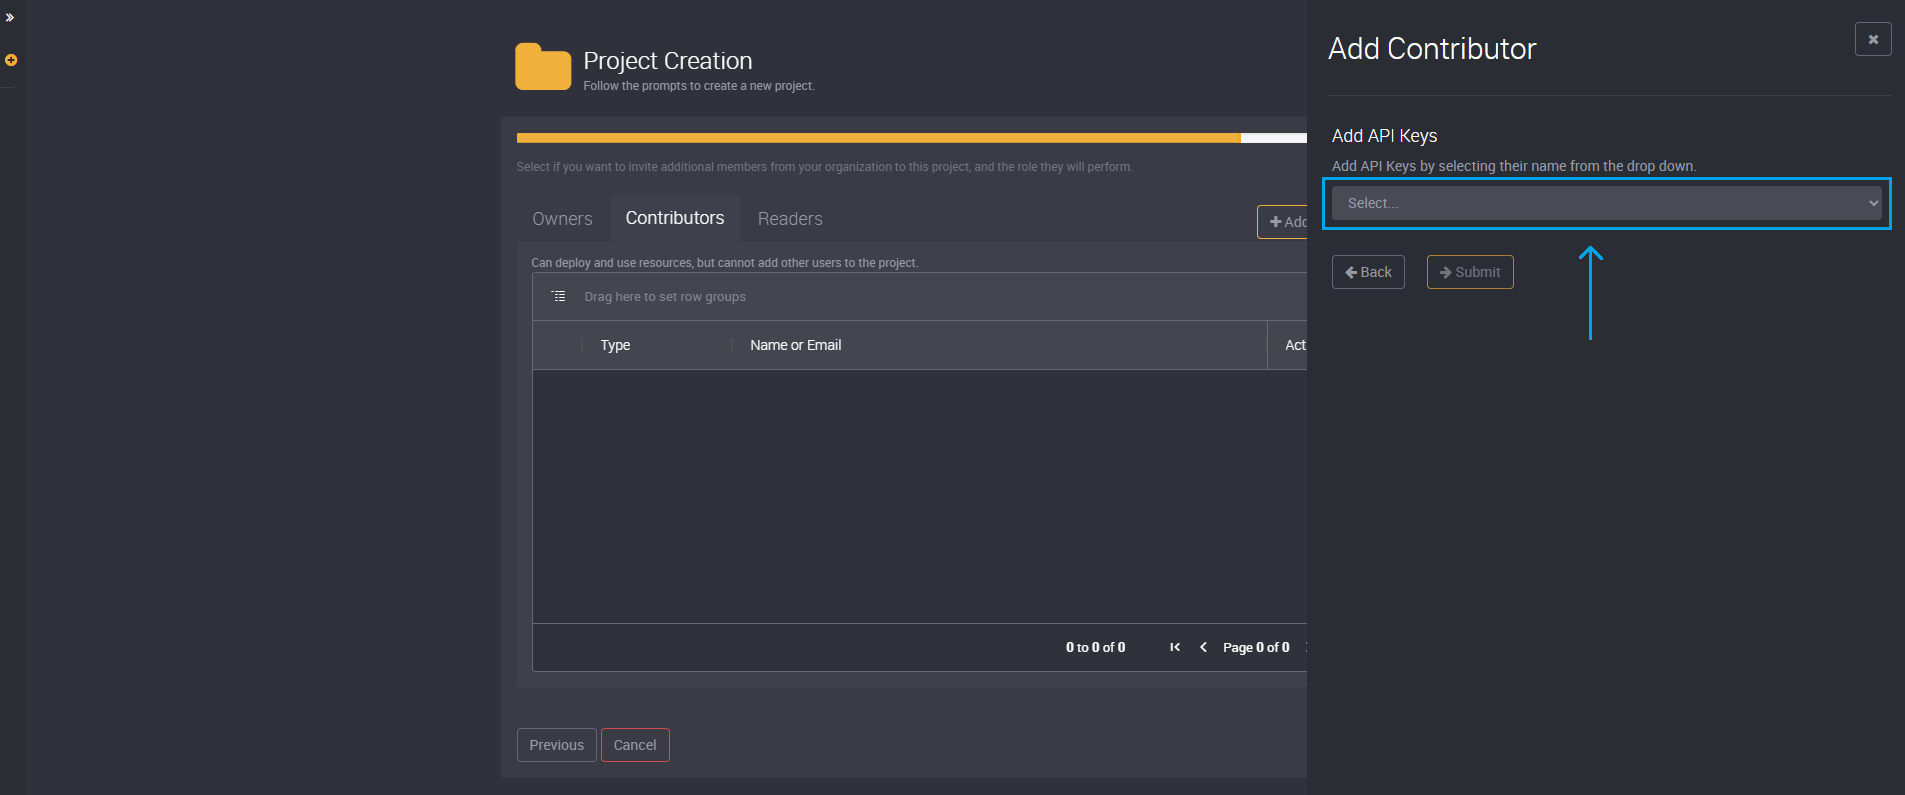
To add an API Key, choose an API key from the dropdown and click Submit. Learn more about API Keys here.
Search for Users and Groups
If your organization has enabled lookup, you can search for a user or group in your organization.
Choose whether you want to add a User or Group. The following steps will apply both when adding a user or group.
To add a user or a group, you can search for the user or group by name in the ‘Add User’ field.
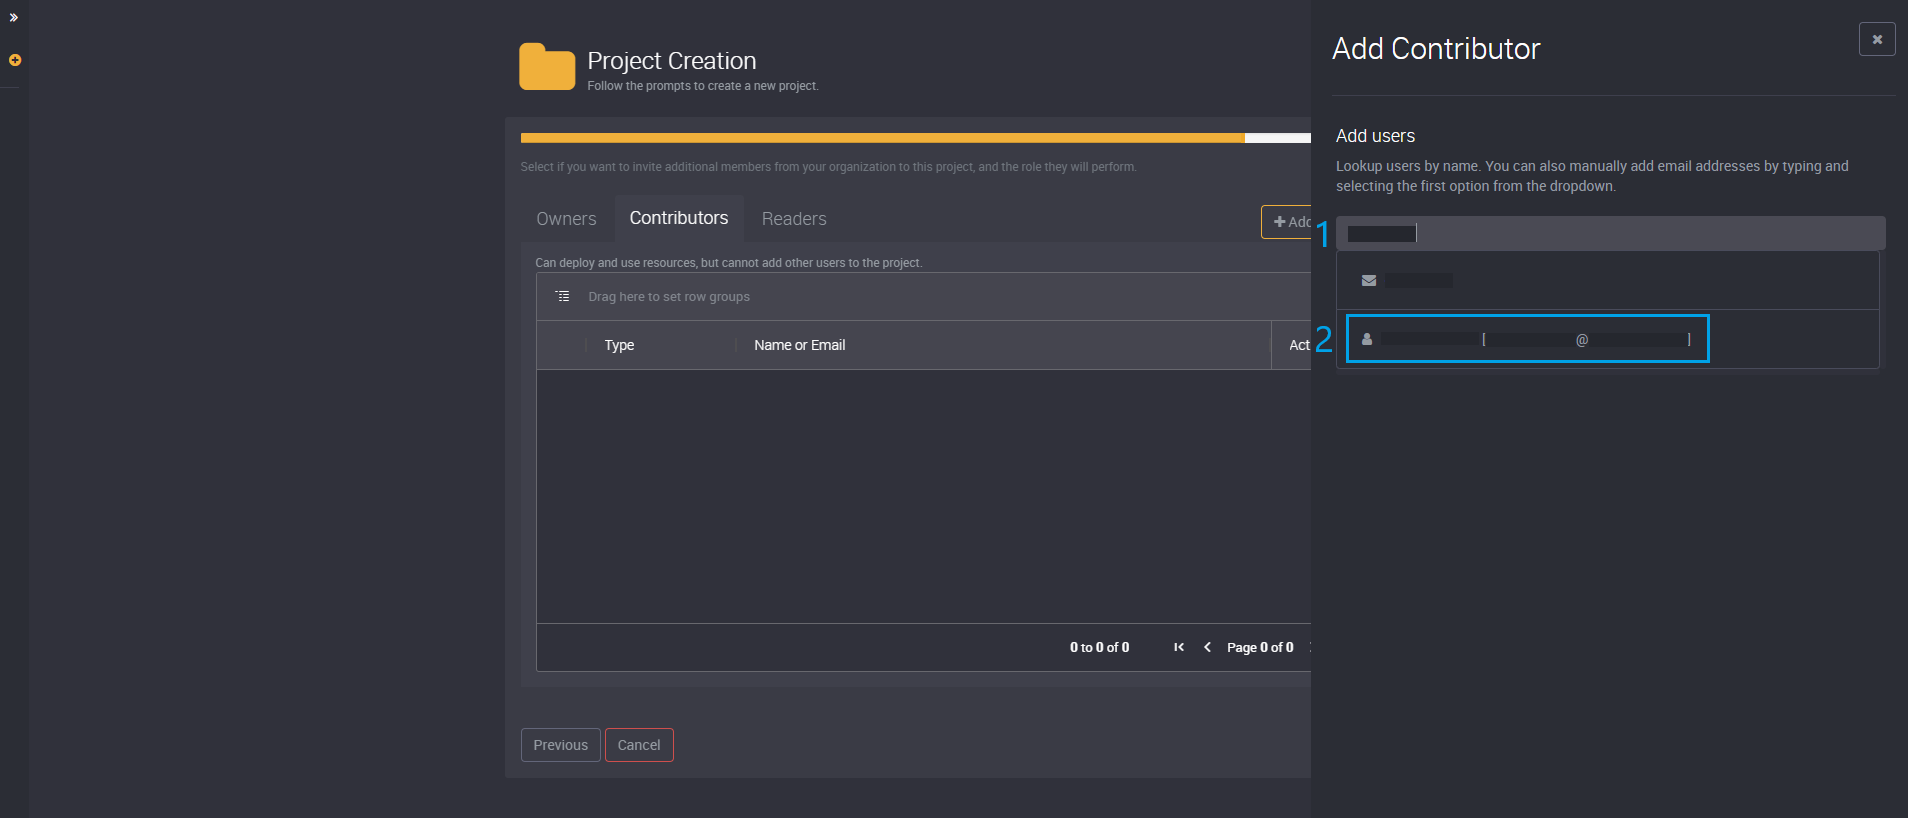
Click on your chosen users or groups. They will be displayed beneath the dropdown.
(Optionally, you can also type out an email address and select the first option from the dropdown to add it manually.)
You can view the members of a chosen group by selecting the group from the dropdown and clicking on the group icon beside it. Loome will also display the email address, if available, for the group beside it.
Click on Submit to add the chosen user(s) or groups.
Click on Next.
Review your Project
Review the details of this project. If you are happy with your selections, click Create in the bottom-right corner to save and create this project. If you would like to make changes, click Previous at the bottom-left to go back and make changes.
Loome will create tags in your Azure Resource Group for all resources created in this project and its resource group such as ‘Loome-Module : Assist’, ‘Loome-Project : PROJECT NAME’, and ‘Loome-Account : ACCOUNT NAME’.
Your Project is Created
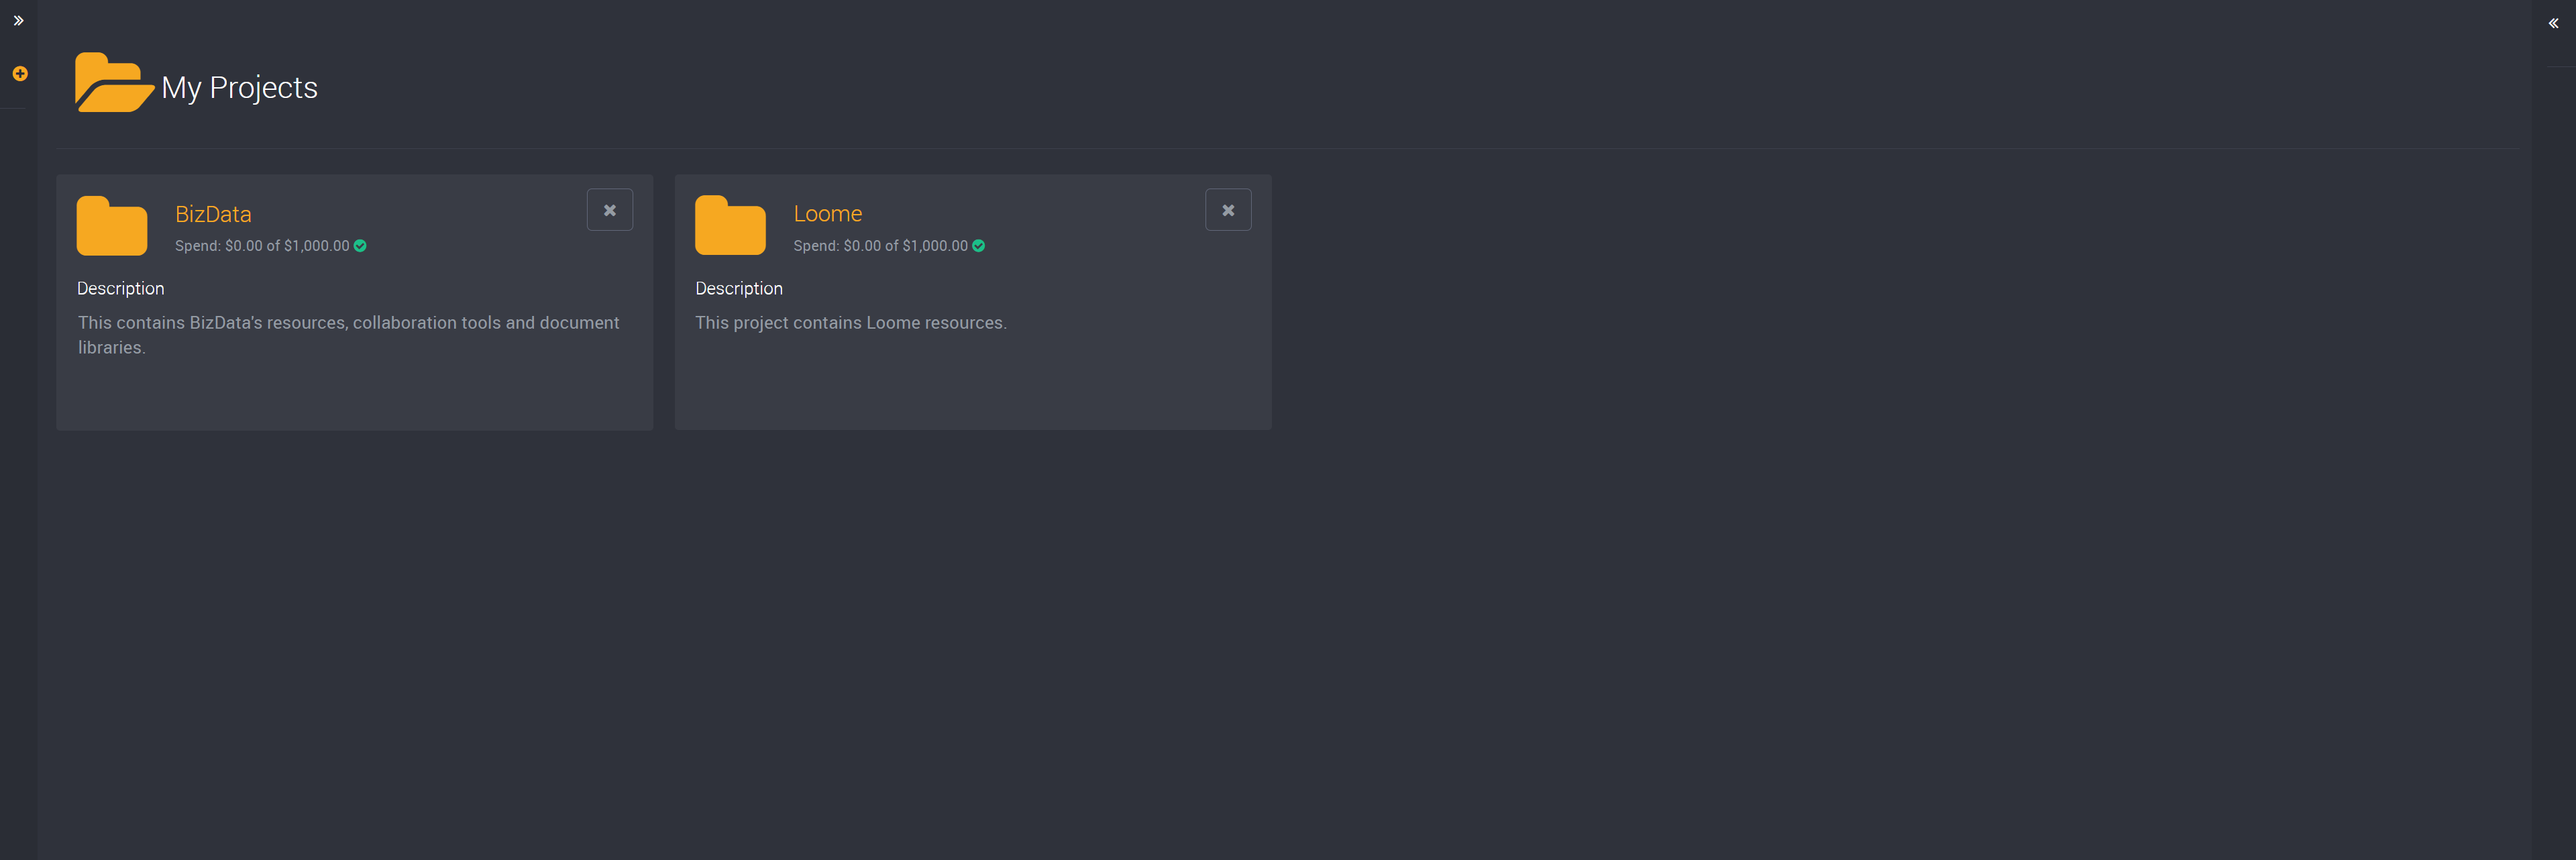
You can then view this project on the ‘My Projects’ page. On each project card you can view the description and spend. It will display the spend of a project and whether it is an unlimited budget, or if it is currently over or under budget.
Project Status
The budget usage will display on the project card. It will display whether the project is in budget, over budget or if there is an error.
If there is an error and it cannot retrieve the spend, Loome will show a warning on the project card when you hover over the error status and it will note that the agent is unavailable.
In the image below, you can see each status for the budget usage.
The first project is in its budget, the second project is over its budget and the third project could not retrieve its budget spend.

Please note that when the project budget has been exceeded, users that are not administrators will not be able to access the project.
Managing a Project
If you click into a project, you can view its workstations and data repositories as shown in the sample project we have created below. You can refresh either of these using the refresh button in the top right corner of each section.
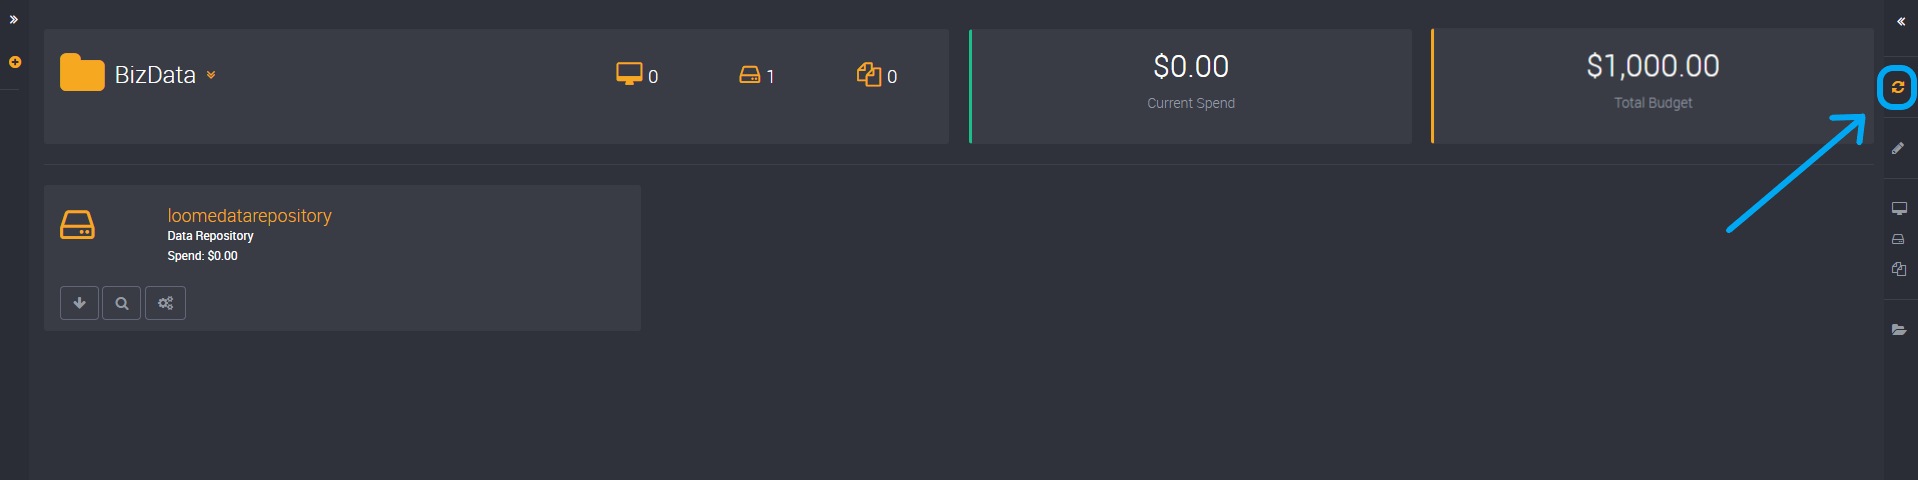
View Workstations and Data Repositories
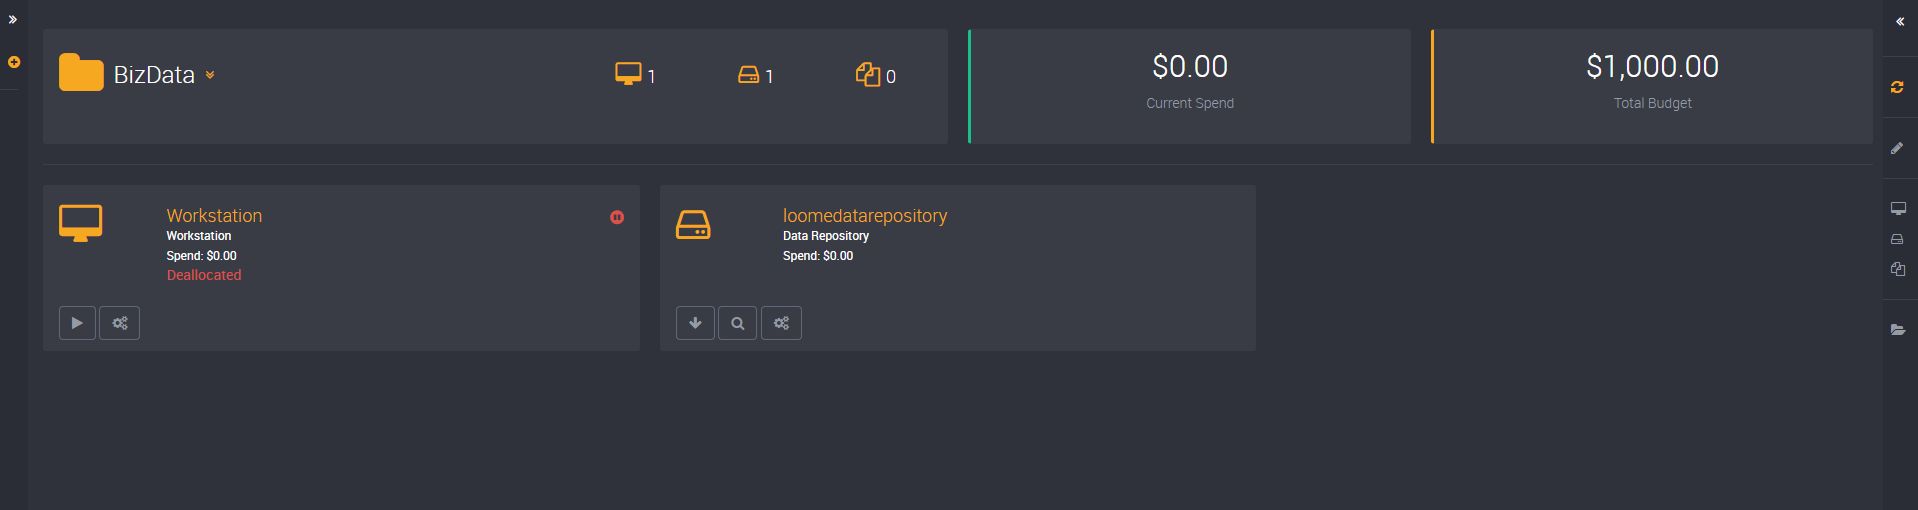
You will be able to view any workstations and data repositories that have been added to this project on this project page. Read about how to add a data repository using our guide in this link. And learn how to add a workstation using the guide in this link.
You can see that we have added a workstation and data repository to this project in the image below.
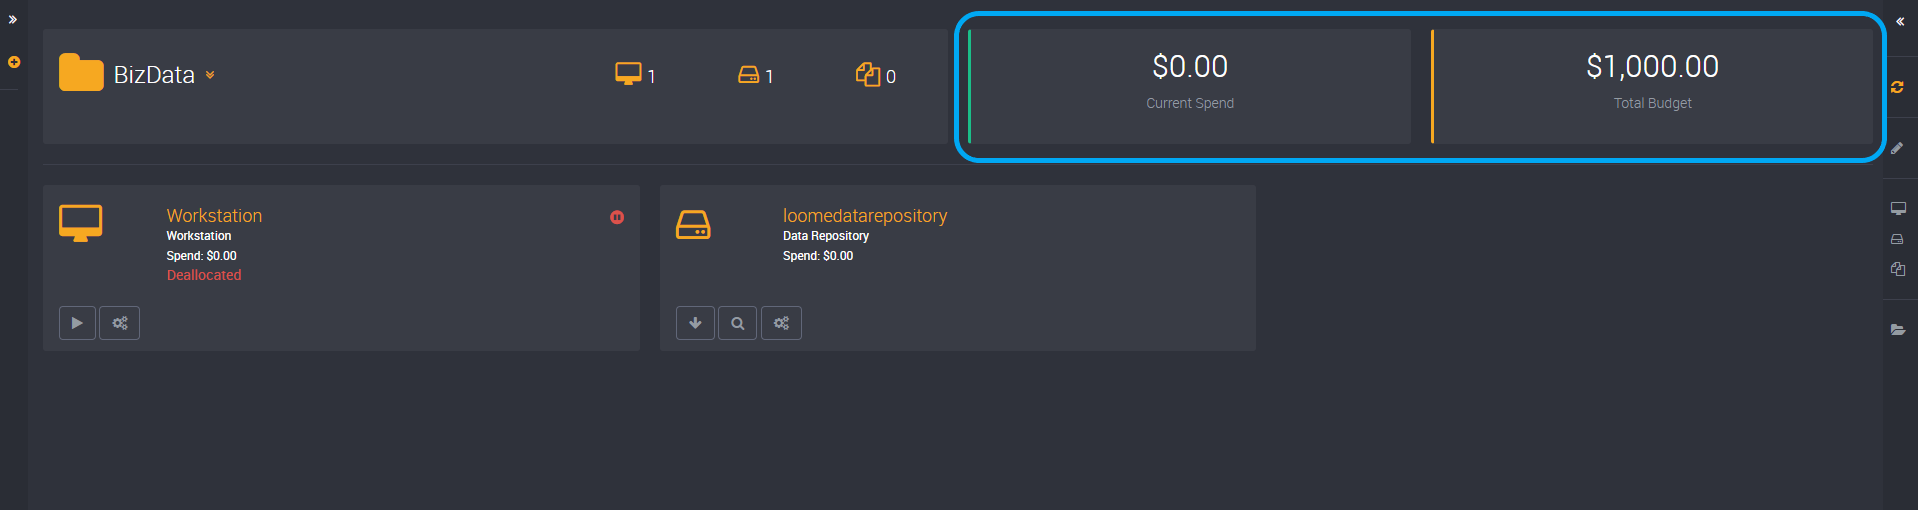
Spend and Usage
You can view how much of the budget has been spent at the top-right corner of this page.
The project status will be reflected by green, blue, and red beside the current spend on the project page and by an icon on the project card on the home page.
Project Status:
- Green: Within budget
- Blue: Over budget
- Red: Error (e.g., it could not retrieve its budget spend as the agent is not online.)
When the project budget has been exceeded, users that are not administrators will no longer be able to access the project.
The spend of any deleted solution collection resources will still be included in the total project spend.
Your currency icon type in the spend, e.g., AUD displayed as $, will display according to your currency code type in your currency column. If this currency code is null, the dollar icon will display as default.
Project Actions
You can use the slideout on the right of the page to add workstations and data repositories, or to return to the home page.
In Microsoft Azure, any resources created in Loome will have the tag ‘Loome-Tenant’ along with the tenant name of the resource.
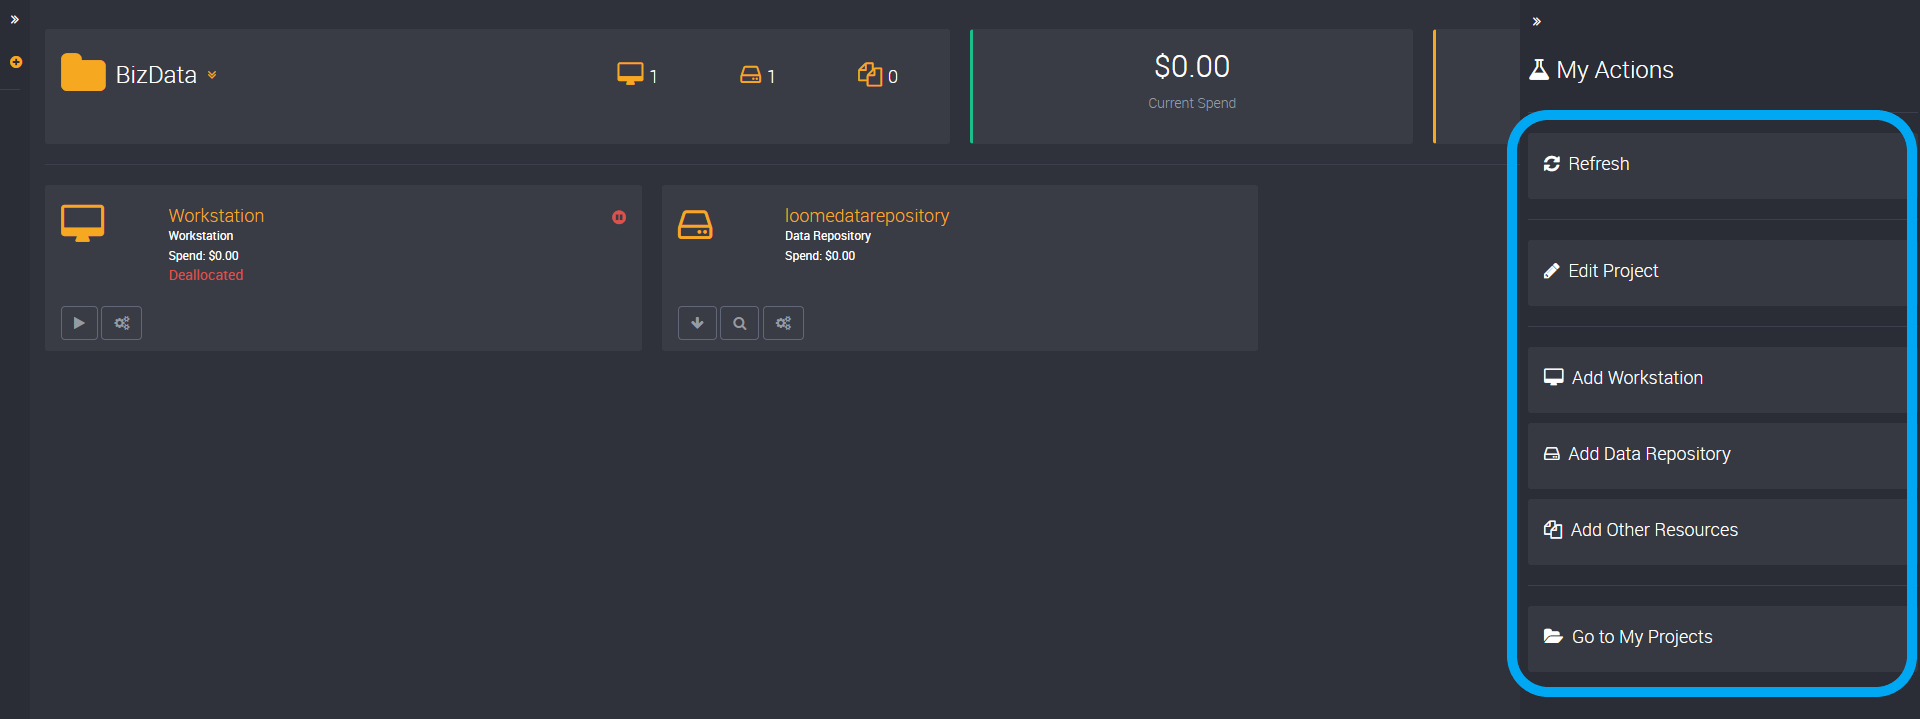
Click Add Workstation to add a workstation from the slideout.
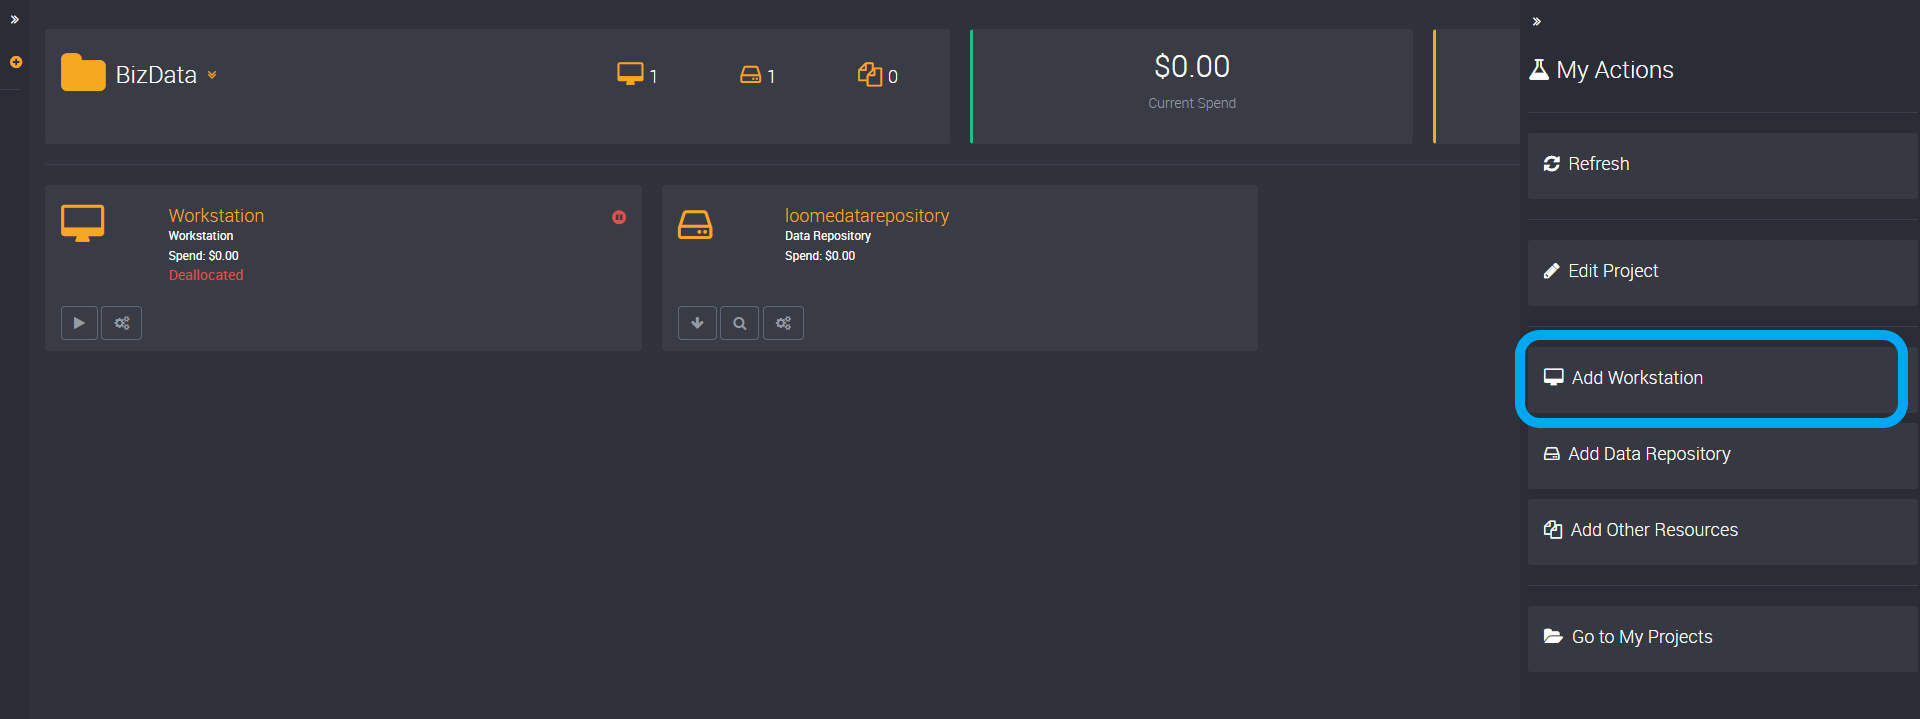
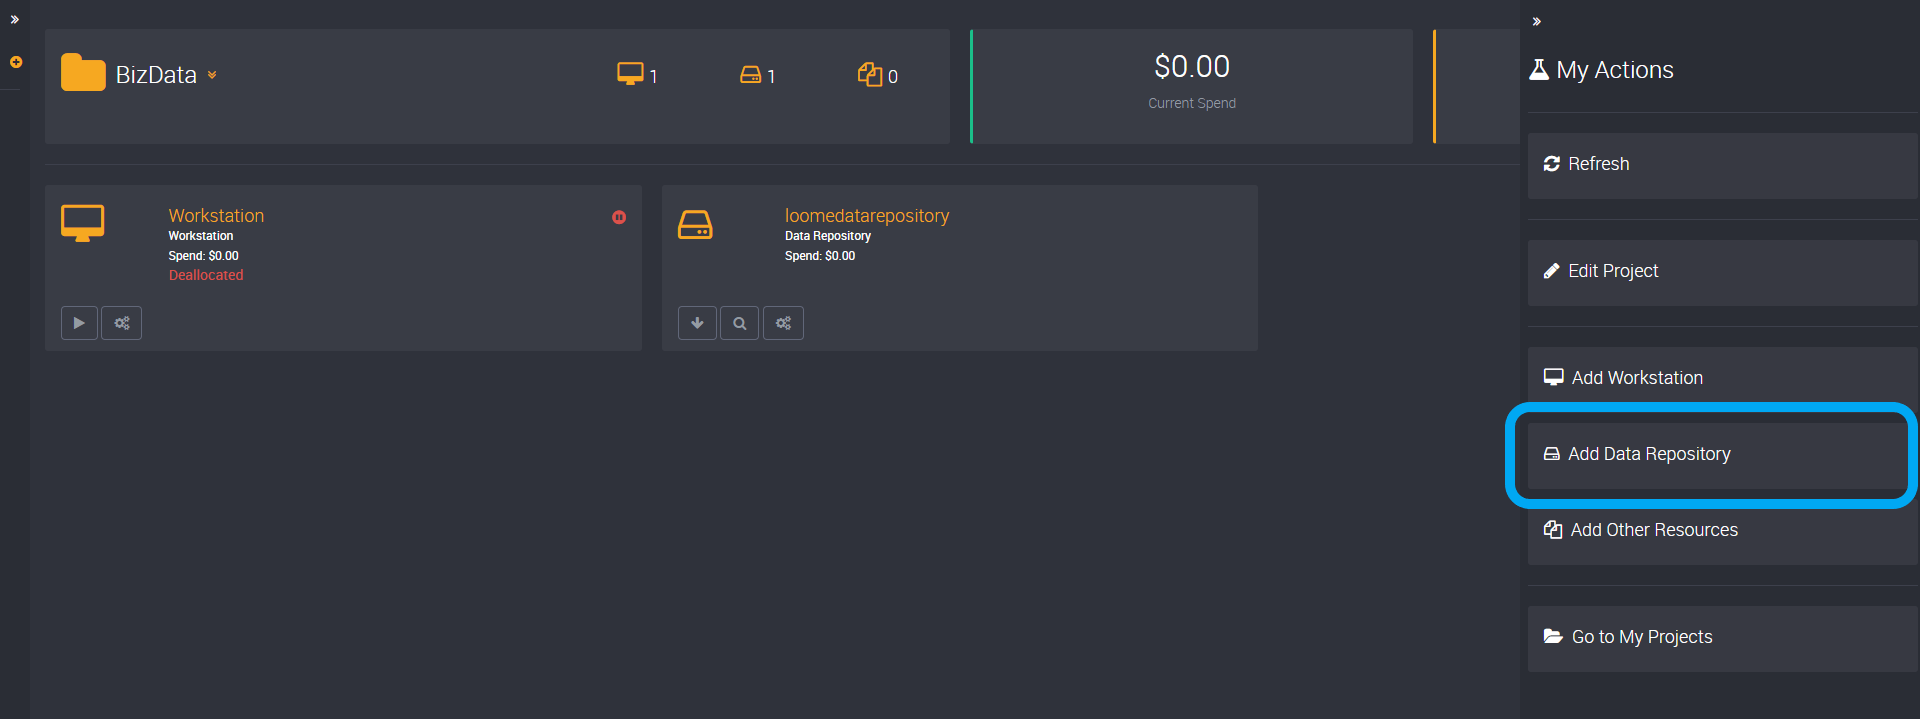
Click Add Data Repository to add a data repository from the slideout.
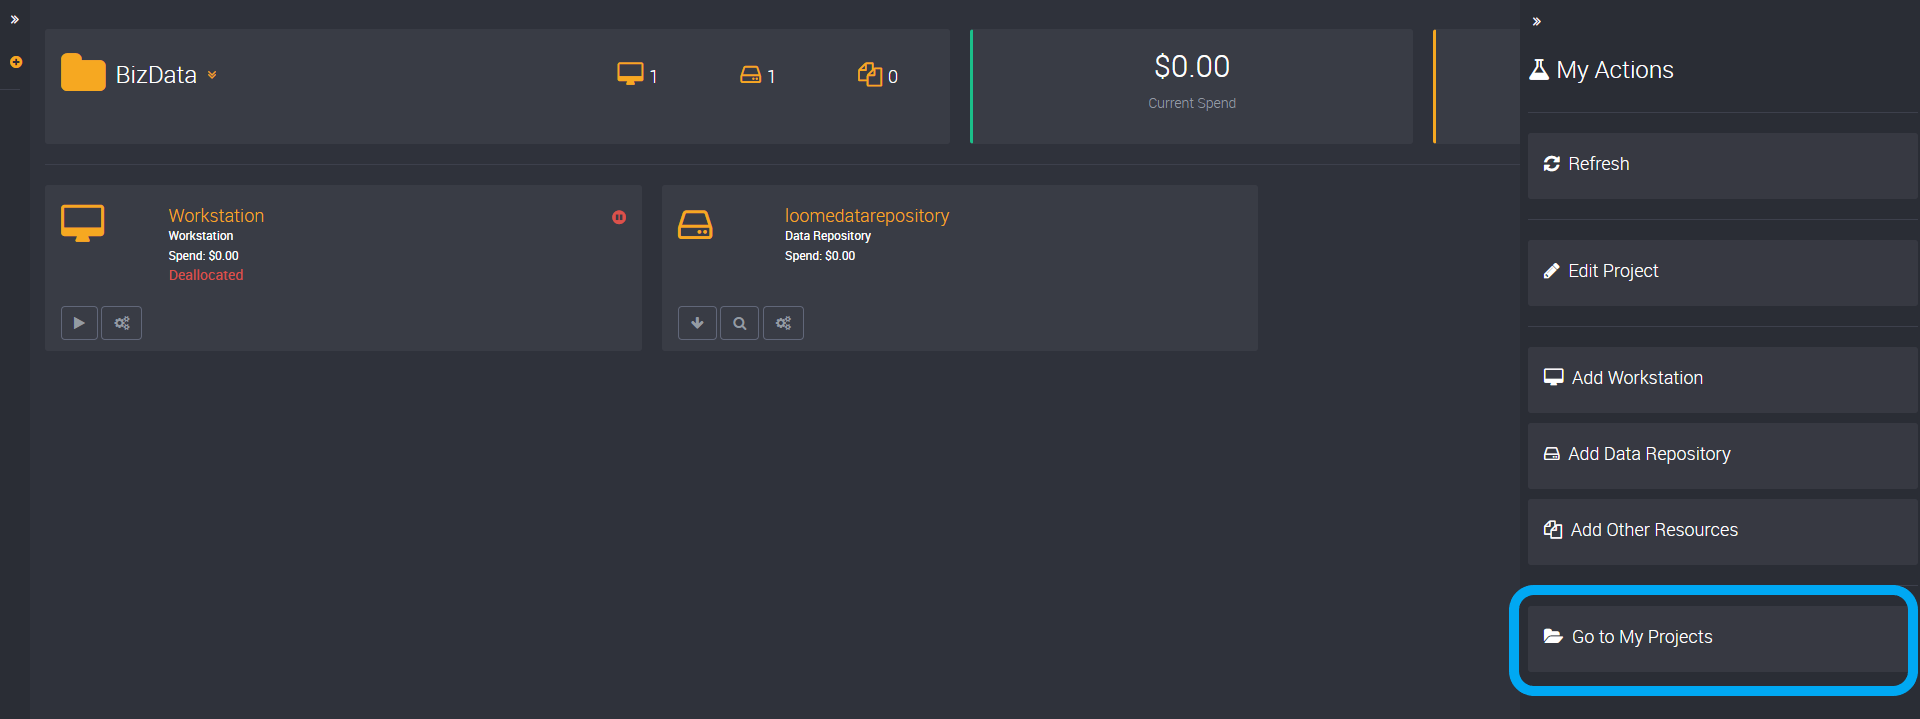
Click Go to My Projects to return to the home page.
If you have enabled collaboration in a project, you can also view the collaboration options.
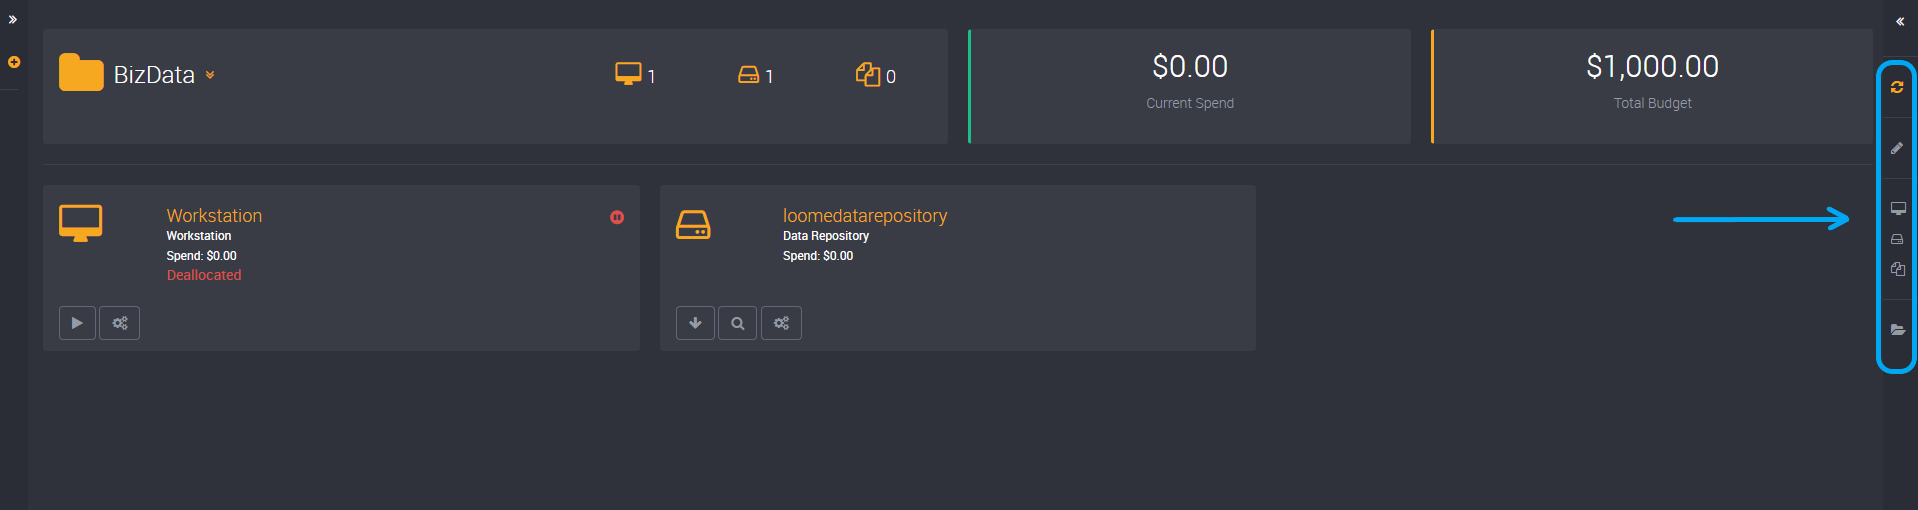
You can click on each button in the slideout when it is not expanded as a shortcut.
How to Edit a Project
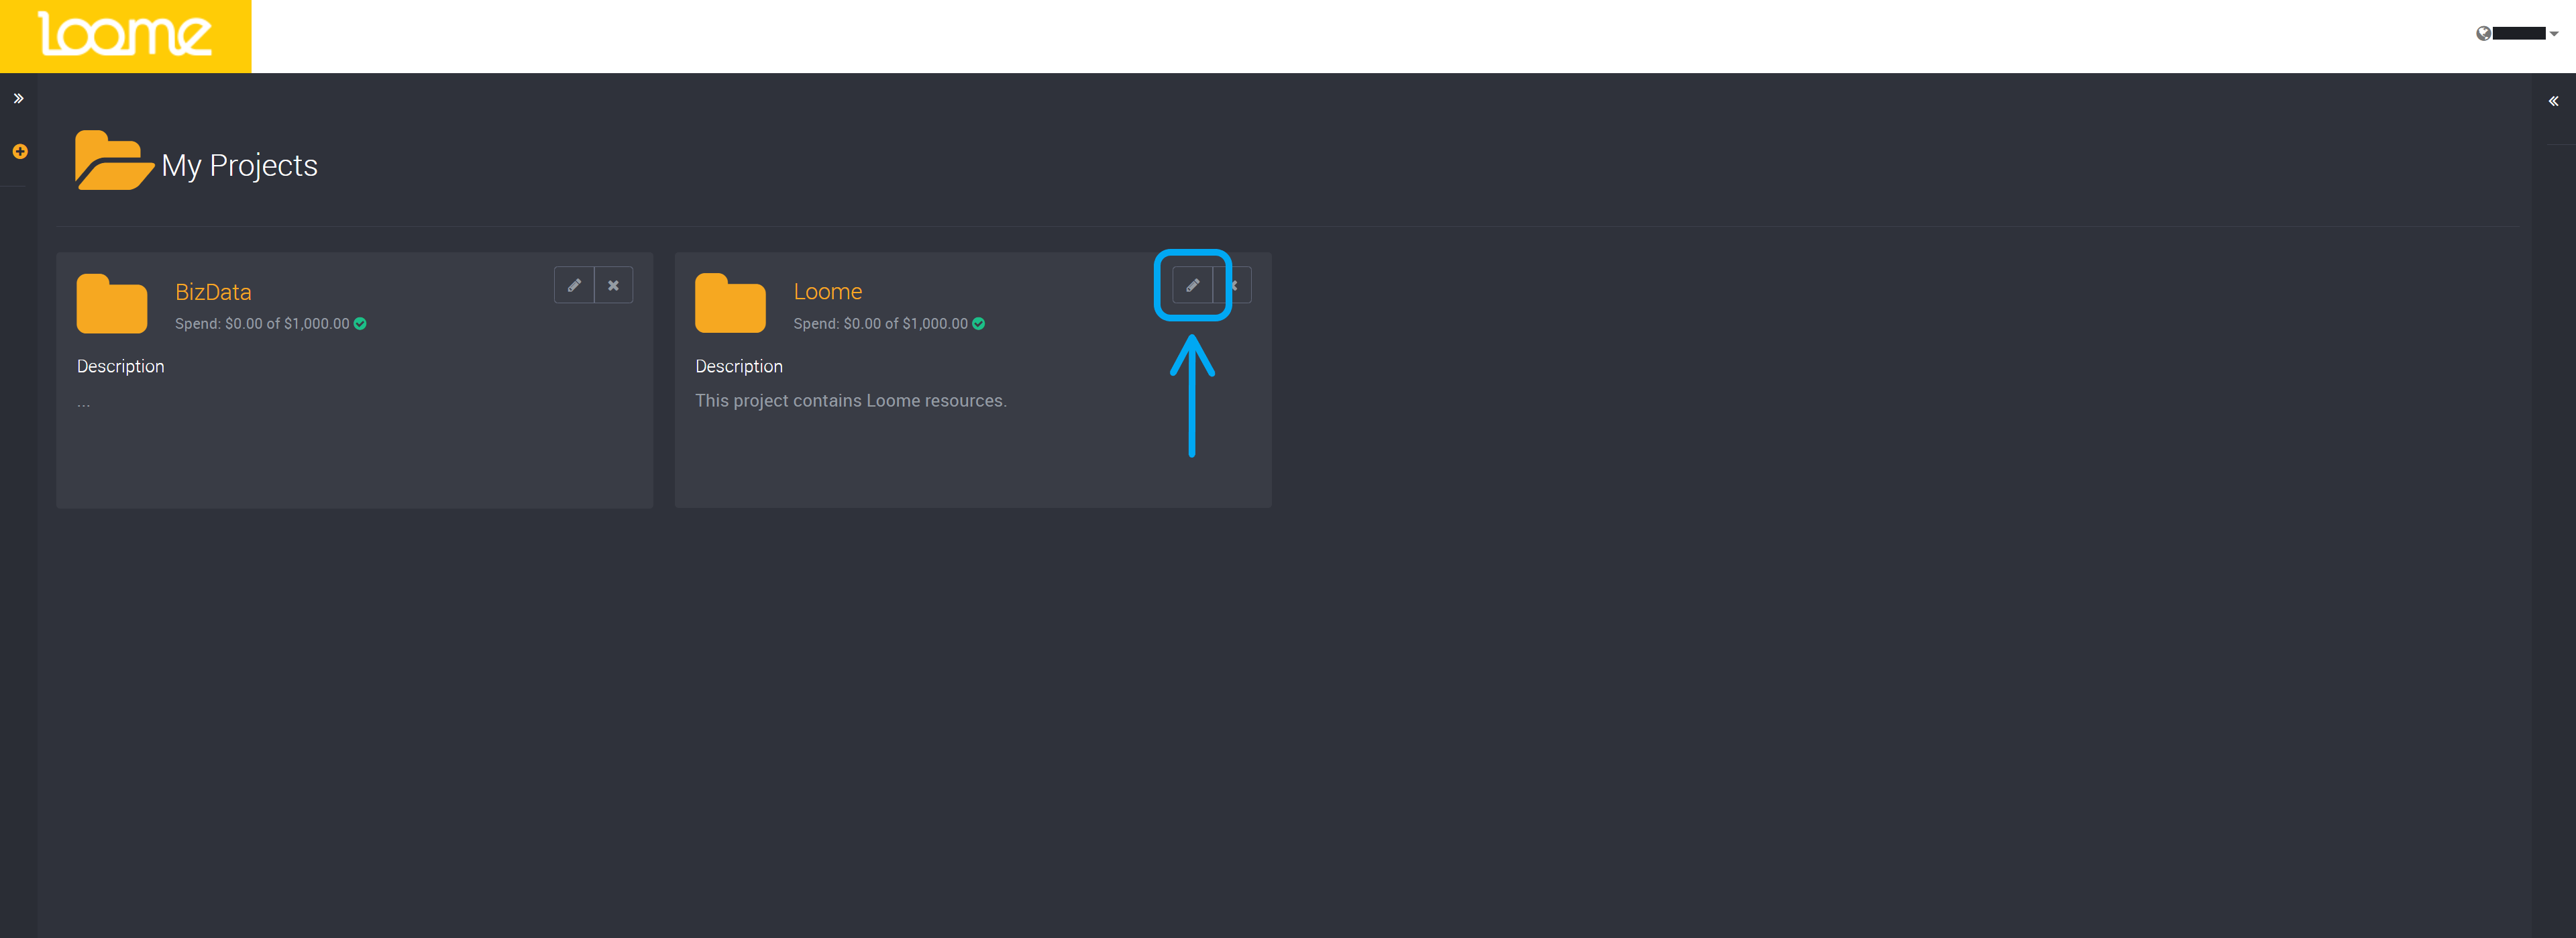
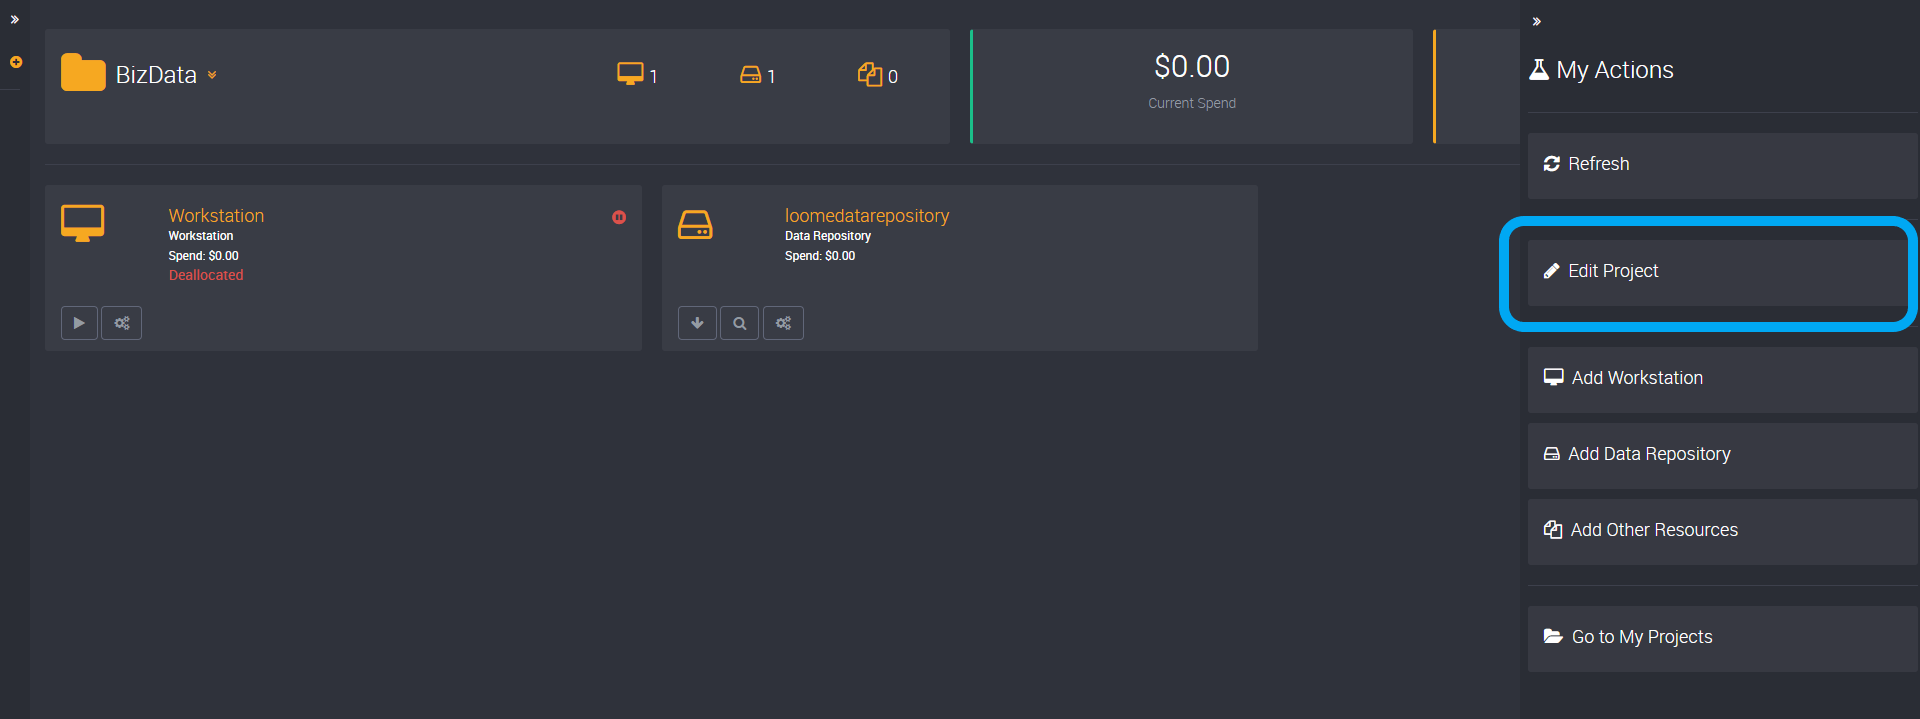
Edit a project via the Edit button on a project card or from the project page in the right-hand slideout.
You can then edit the project using the tabs on the left.
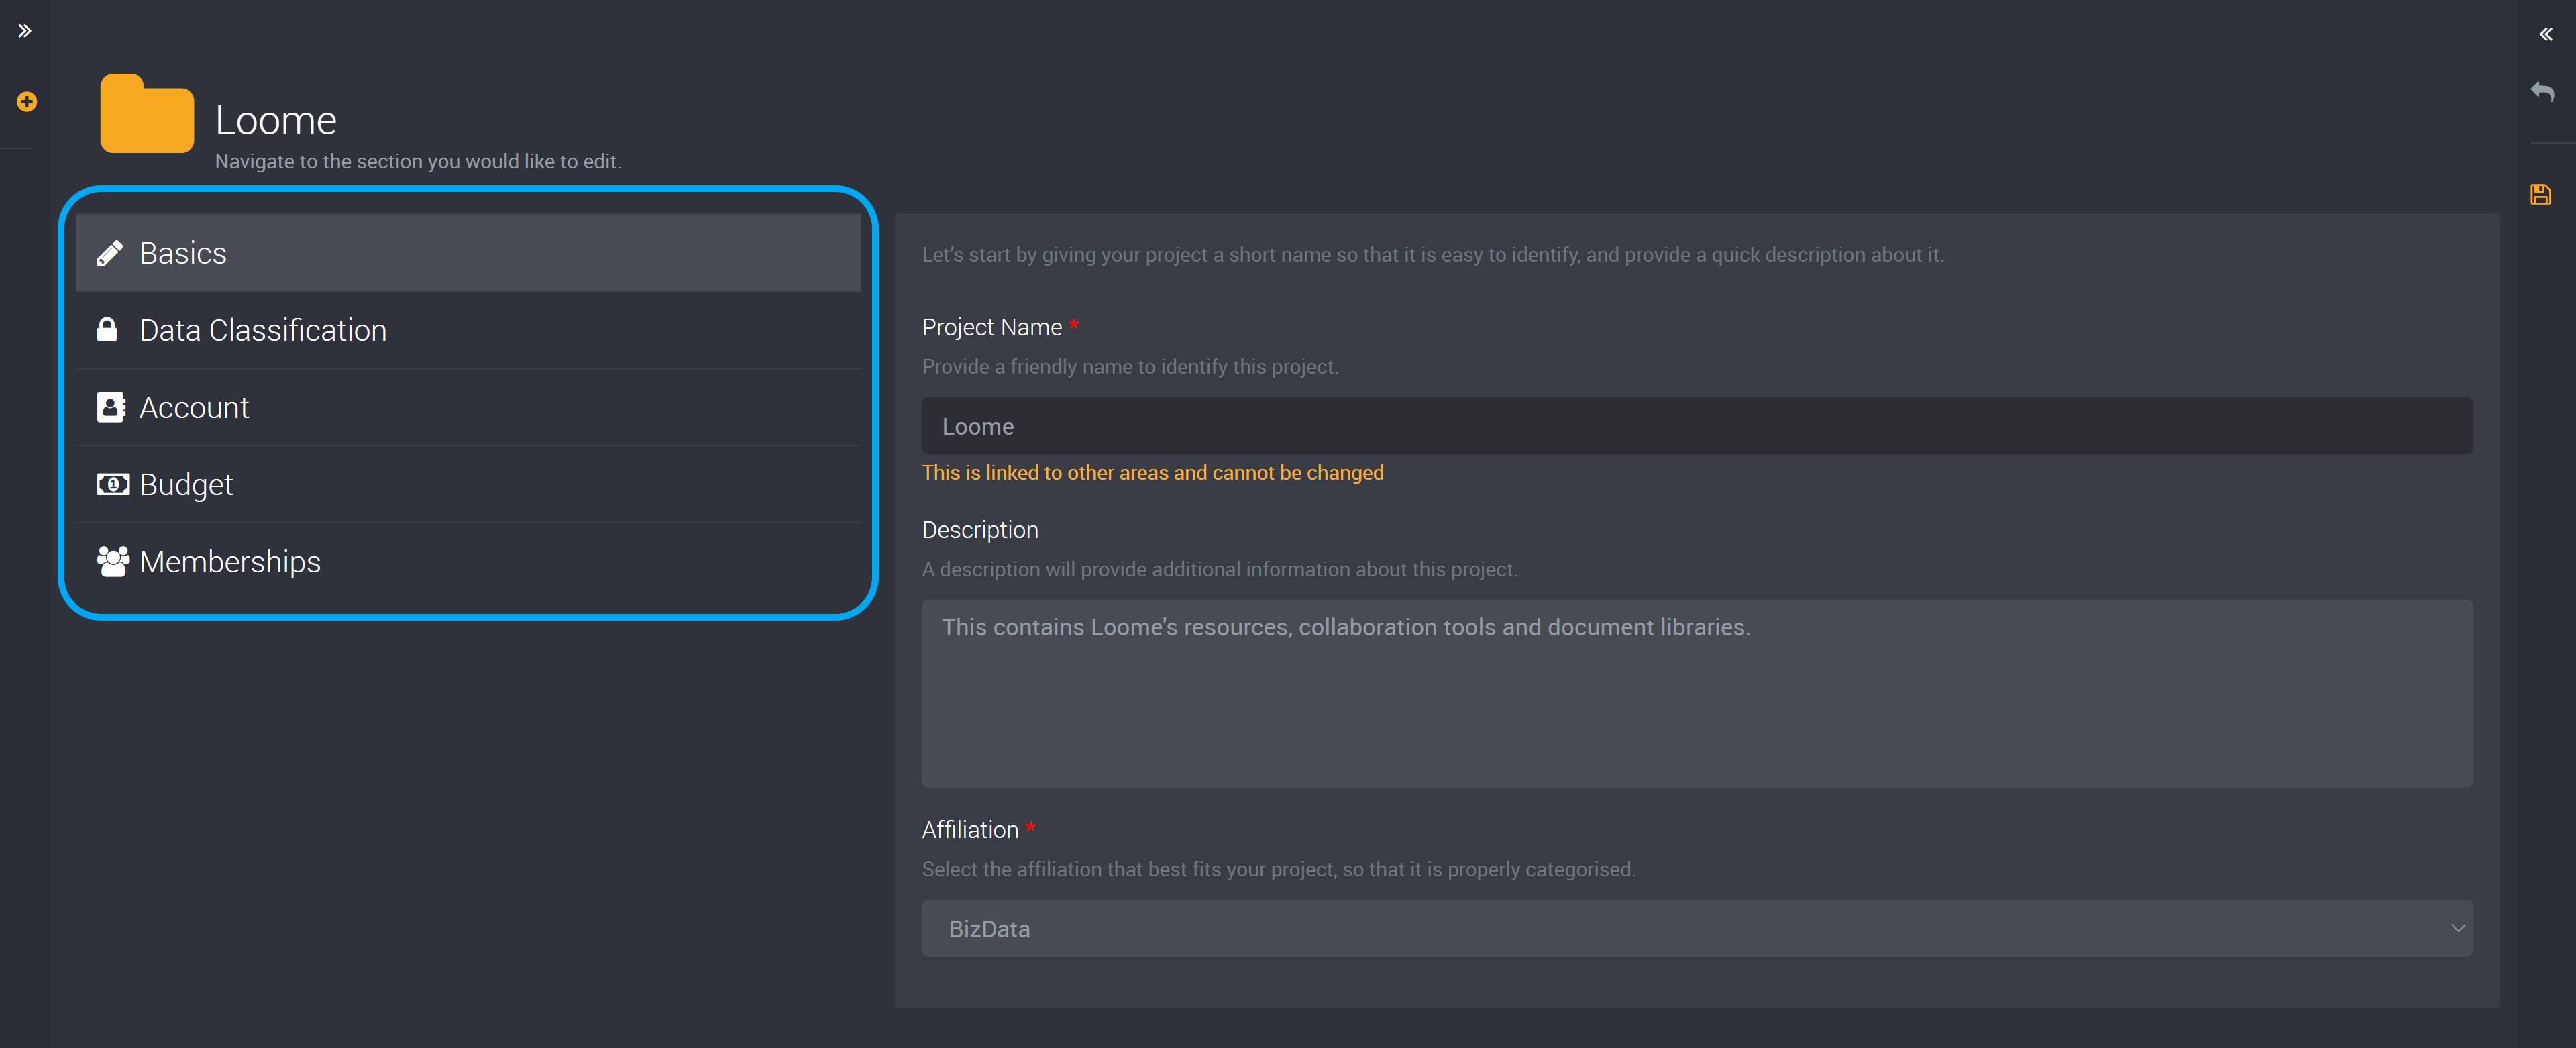
You cannot change the name and account of a project as they are linked to other areas of Loome Assist. You also may not be able to change the data classification if an administrator has restricted this change. Learn more about data classifications here.
Please note that you cannot edit a project’s membership in the Loome Assist Teams app and can edit it via Loome Assist as shown above.
The Project Slide-out and Homepage
Your homepage will display all projects that are available to you.
You can also select a project from the left-hand project slideout. It will display all available projects.
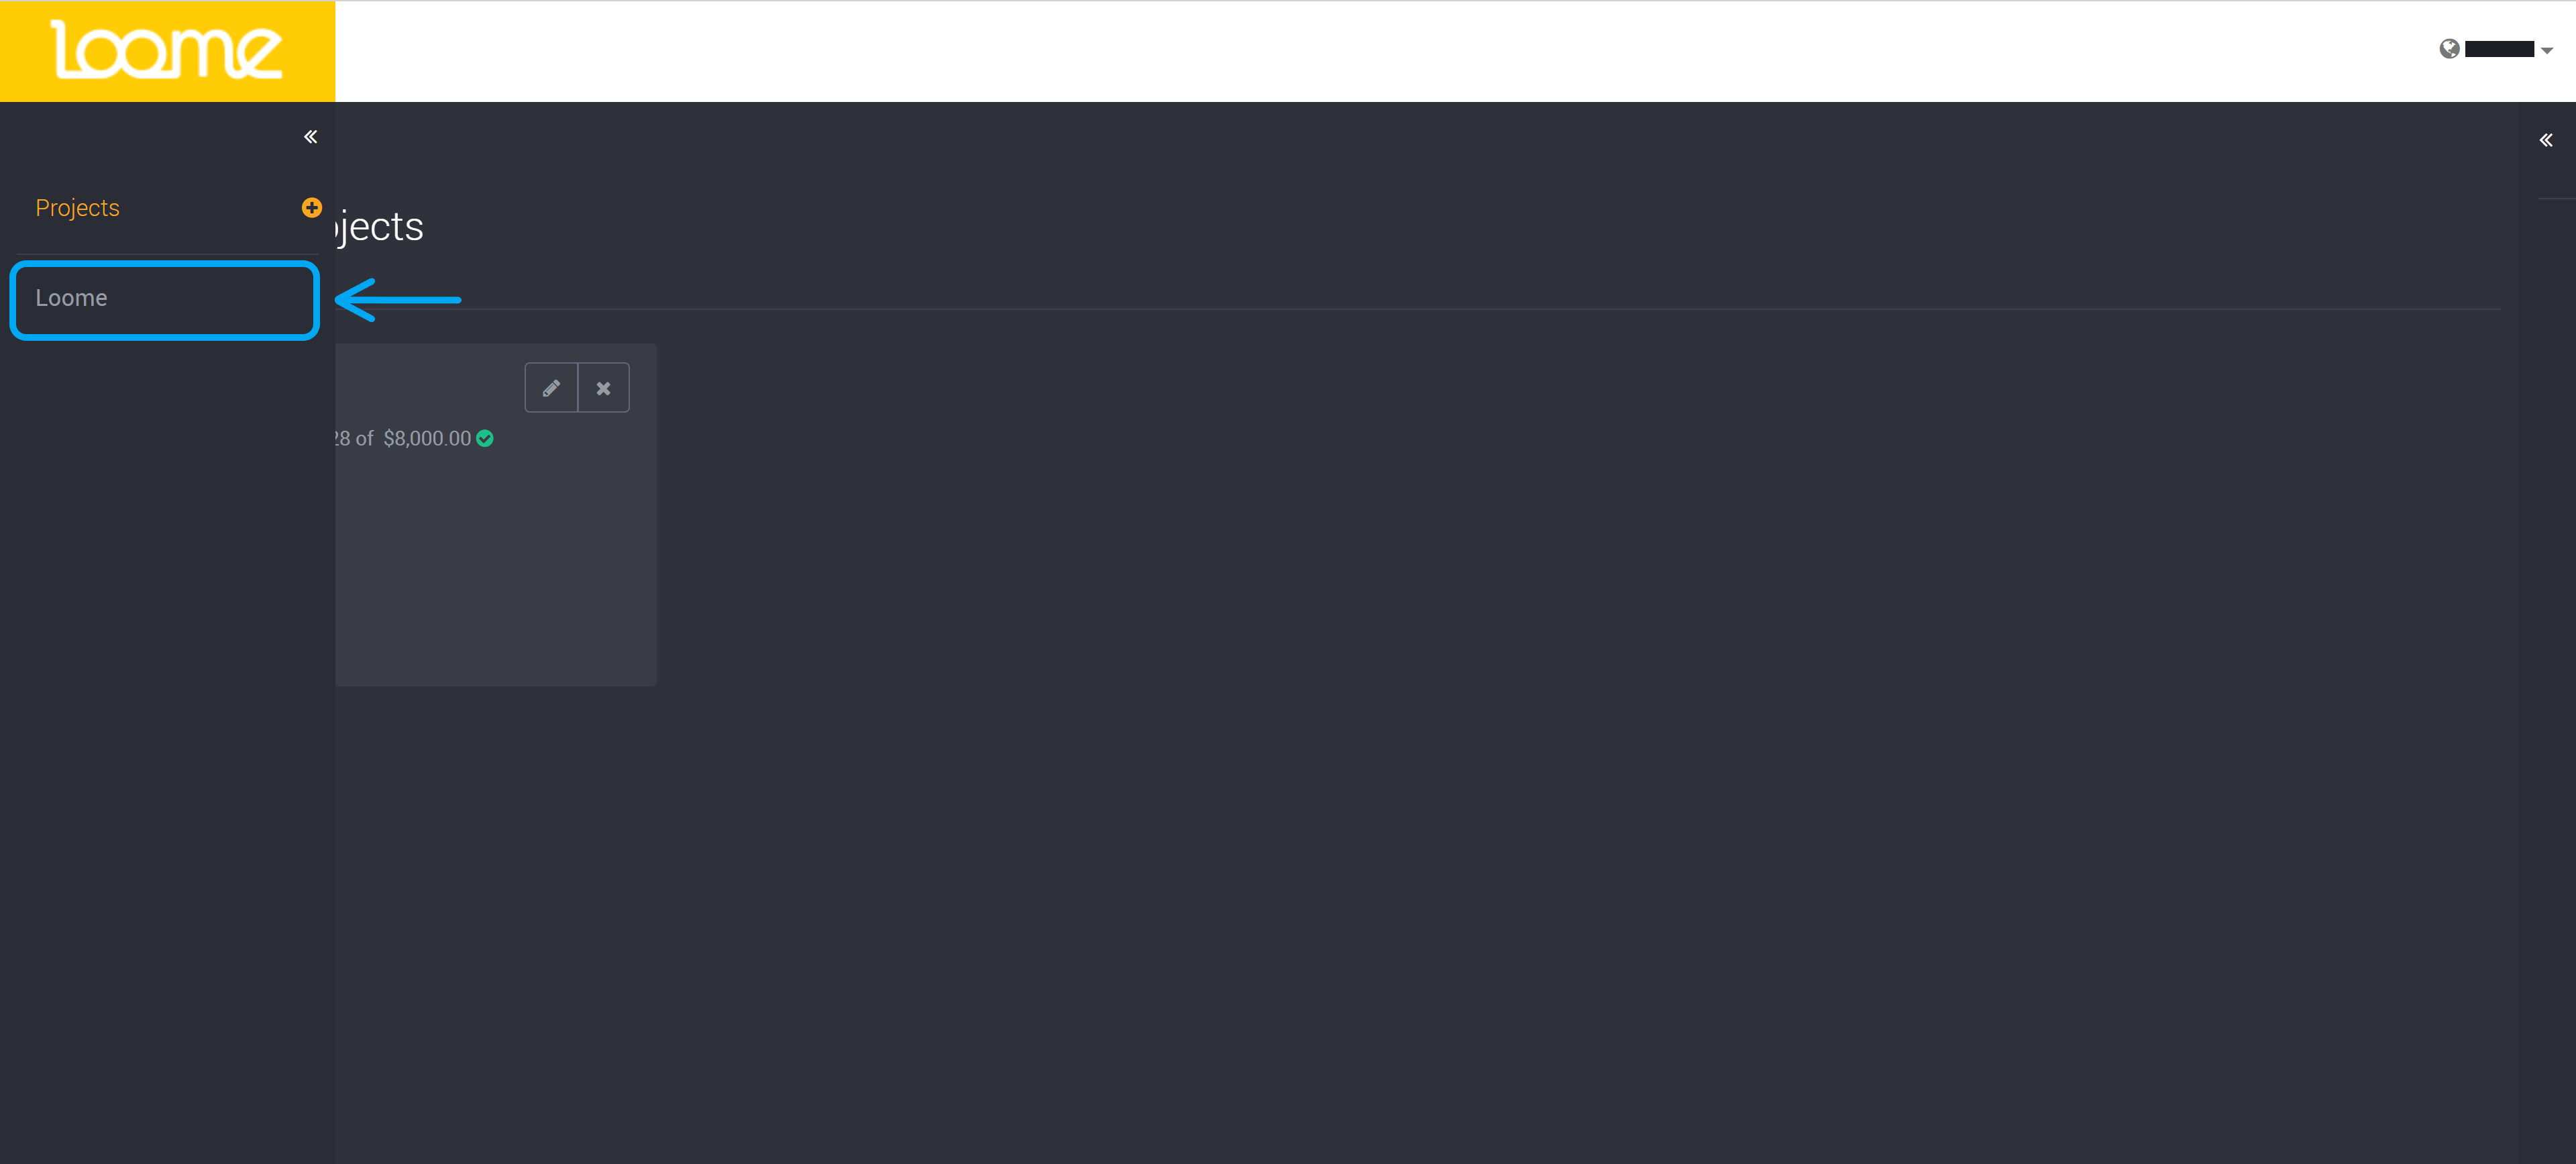
You can also create a project from this slideout.
