Project Creators
Getting Started
As a project creator, your administrator will have created the resources you need to get started creating a project.
The following sections will show you how to complete each step needed to start your project.
| Step | Description | Related Documentation |
|---|---|---|
| Step 1: Create your Project | A project will contain its resources and keep track of its budget. | Read about projects here. |
| Step 2: Add a Data Repository (Optional) | You can choose the storage size you want to be available in a Data Repository and you can then upload data. | Find out more about data repositories here. |
| Step 3: Add a Workstation (Optional) | A workstation will be specific to this project and can be enabled and disabled. | Learn more about workstations here. |
See our application roles page to learn more about the permissions of different roles.
Create your Project
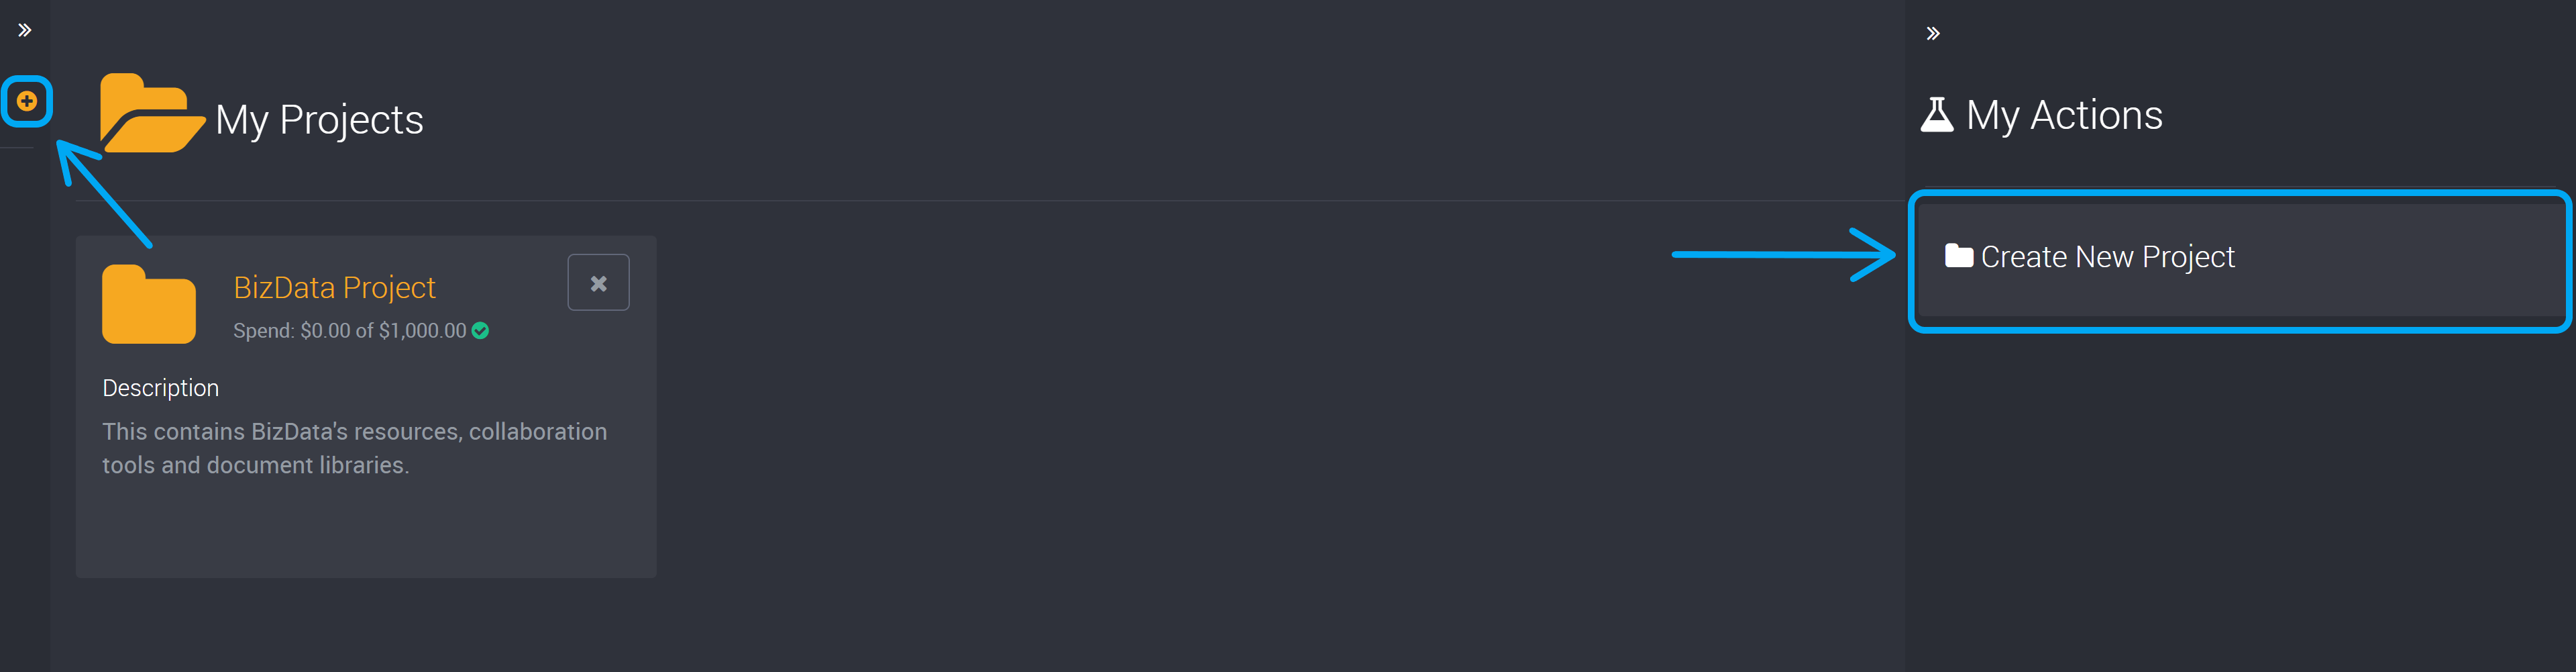
You can create a project from both the action slideout on the right, or you can use the ‘Add Project’ button in the left-hand slideout.
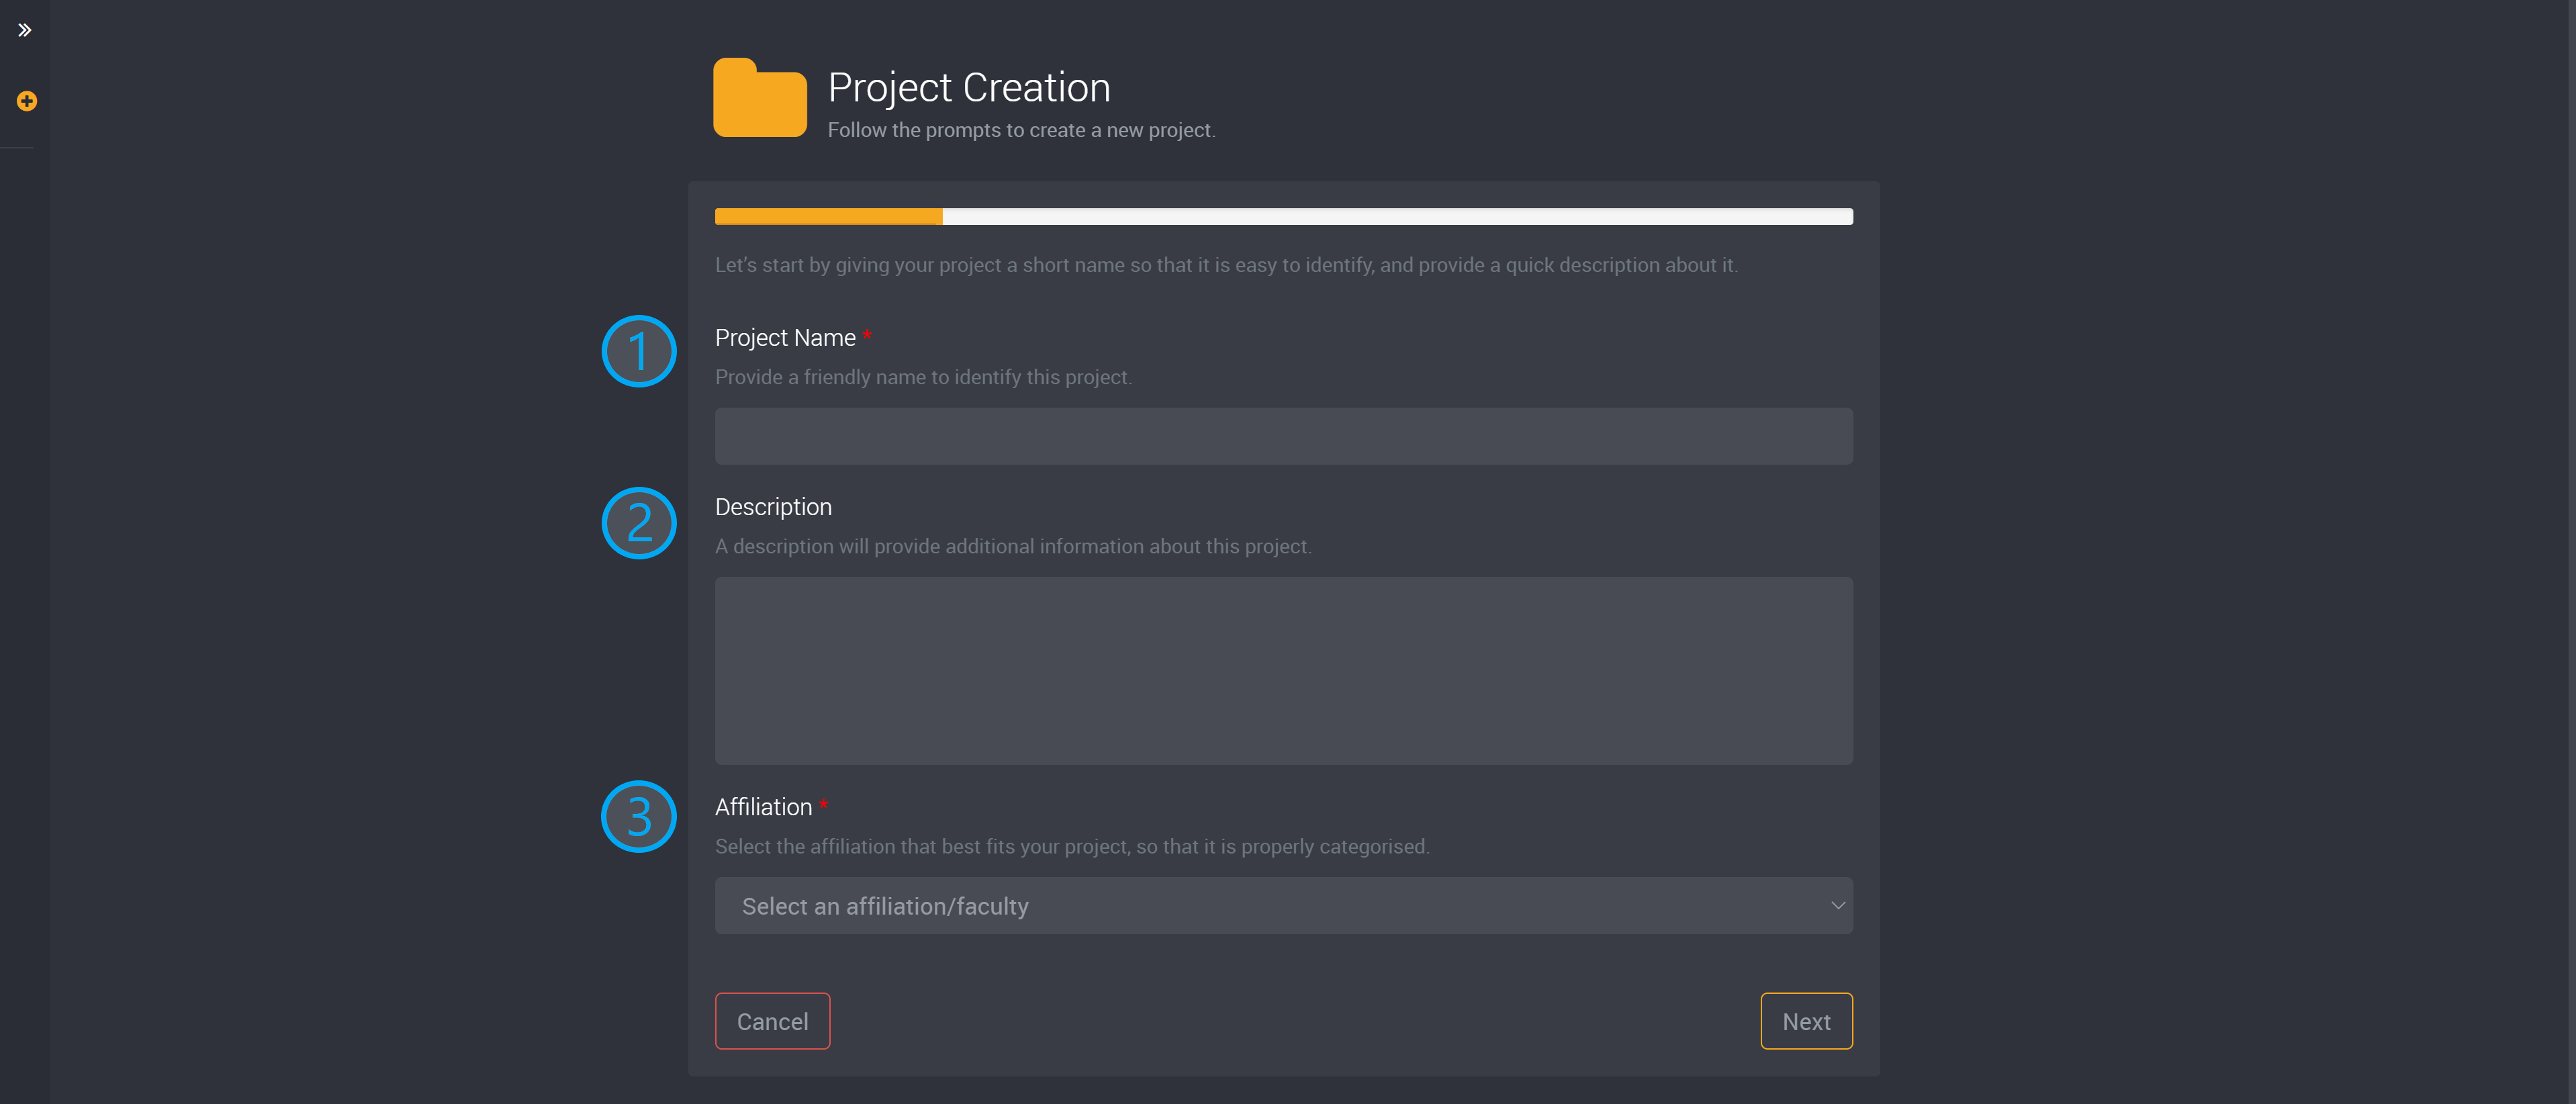
Provide a name that will easily identify this project.
You can also add a description to provide further information about this project.
Next choose an affiliation.
Data Classification Level
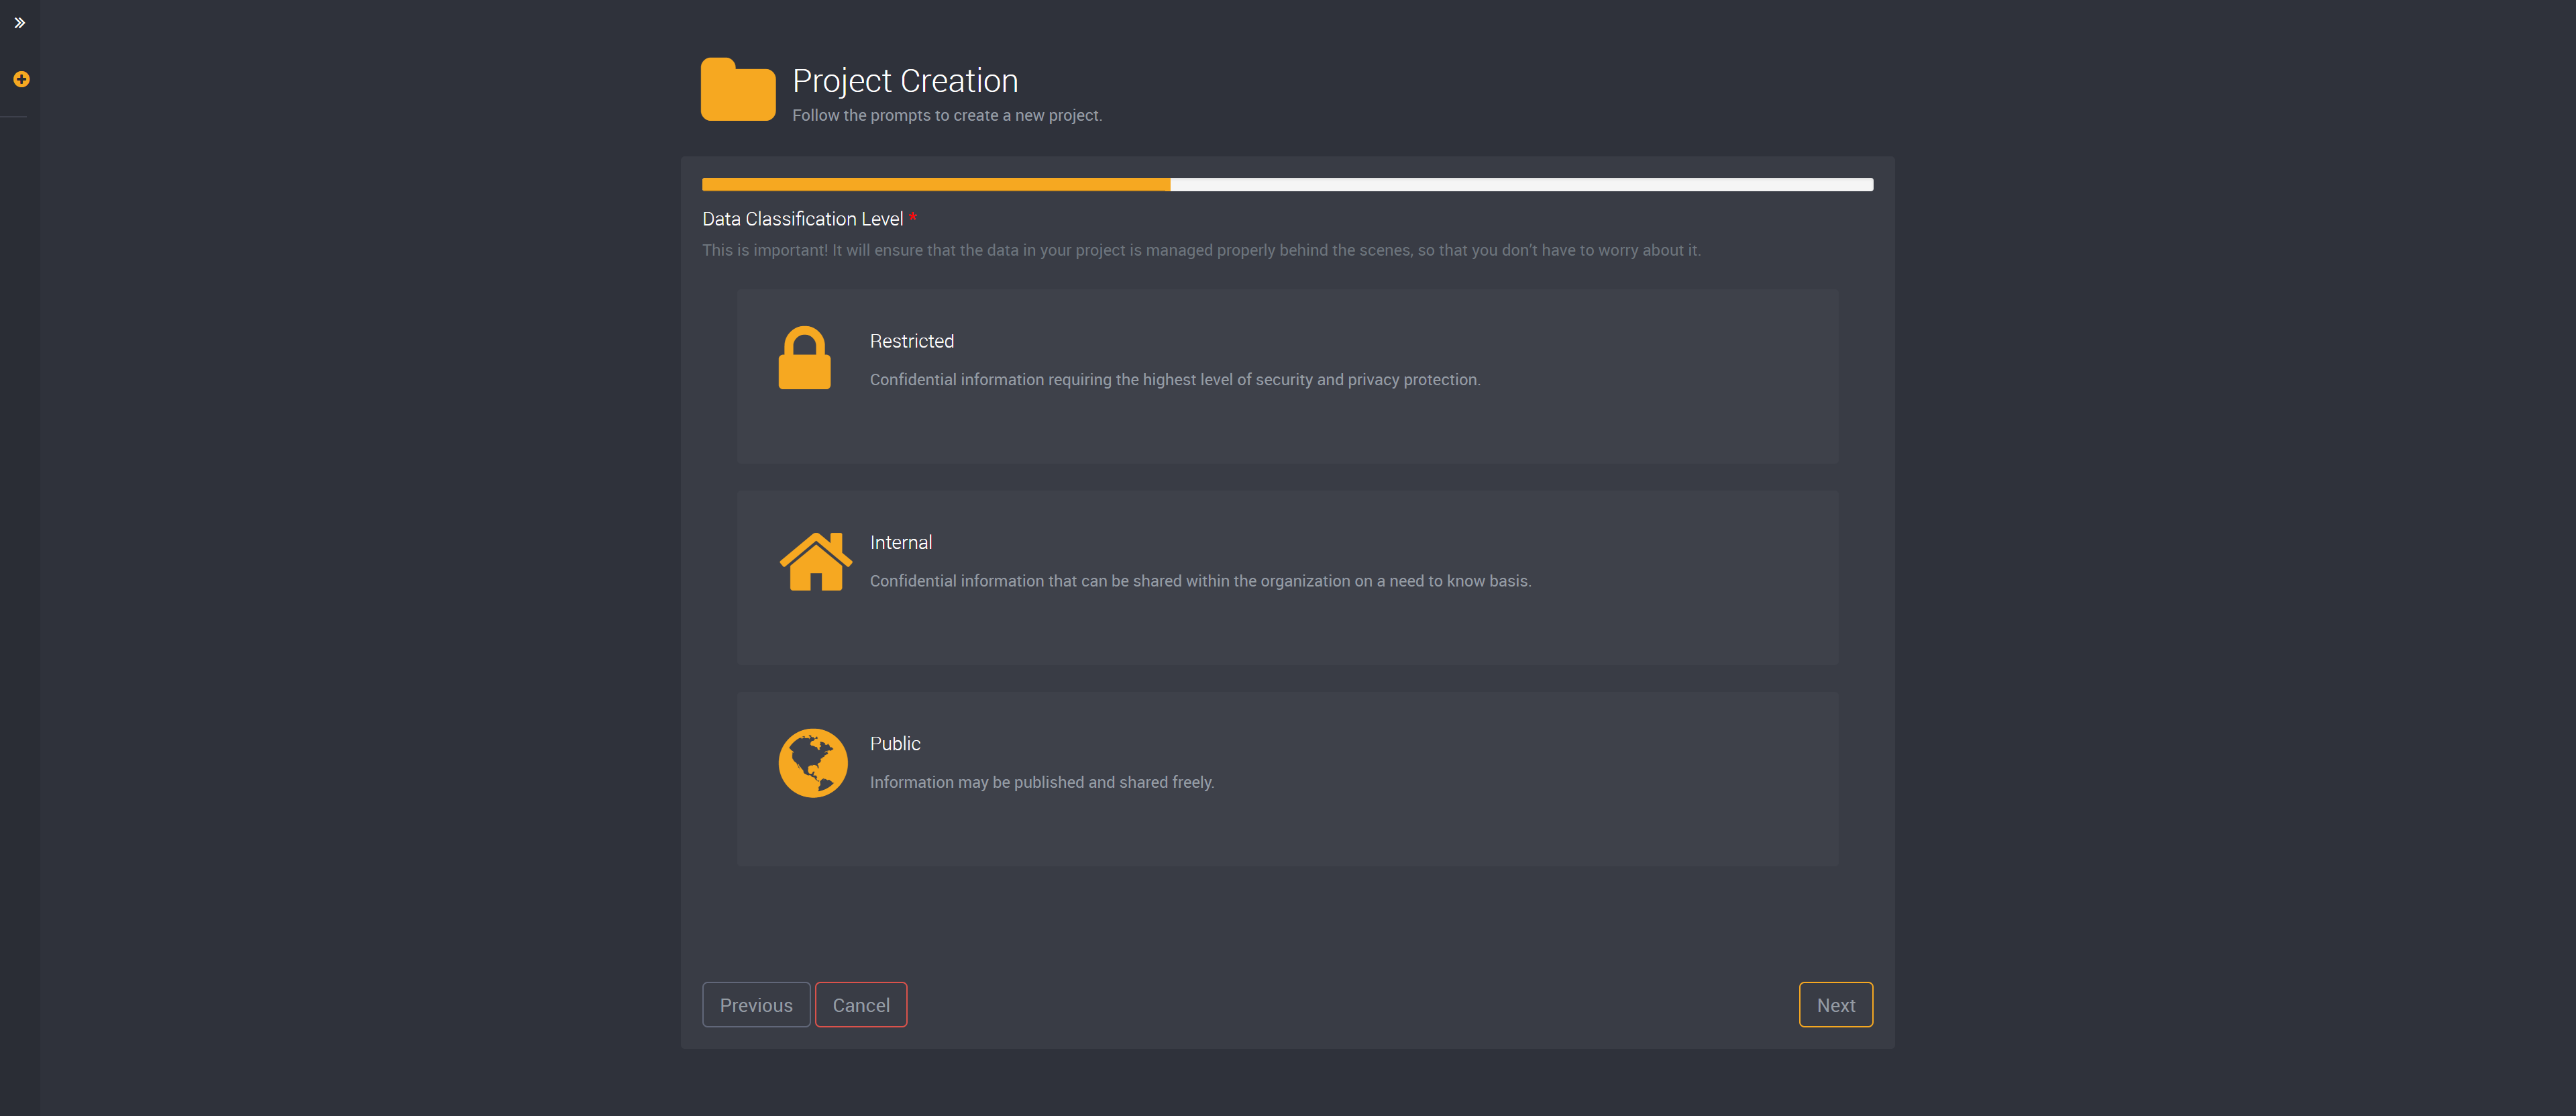
On this next page, you can choose the data classification level, which will direct how data in your project is managed behind the scenes.
You can choose from:
| Data Classification Level | Description |
|---|---|
| Restricted | Confidential information requiring the highest level of security and privacy protection. |
| Internal | Confidential information that can be shared within the organization on a need to know basis. |
| Public | Information may be published and shared freely. |
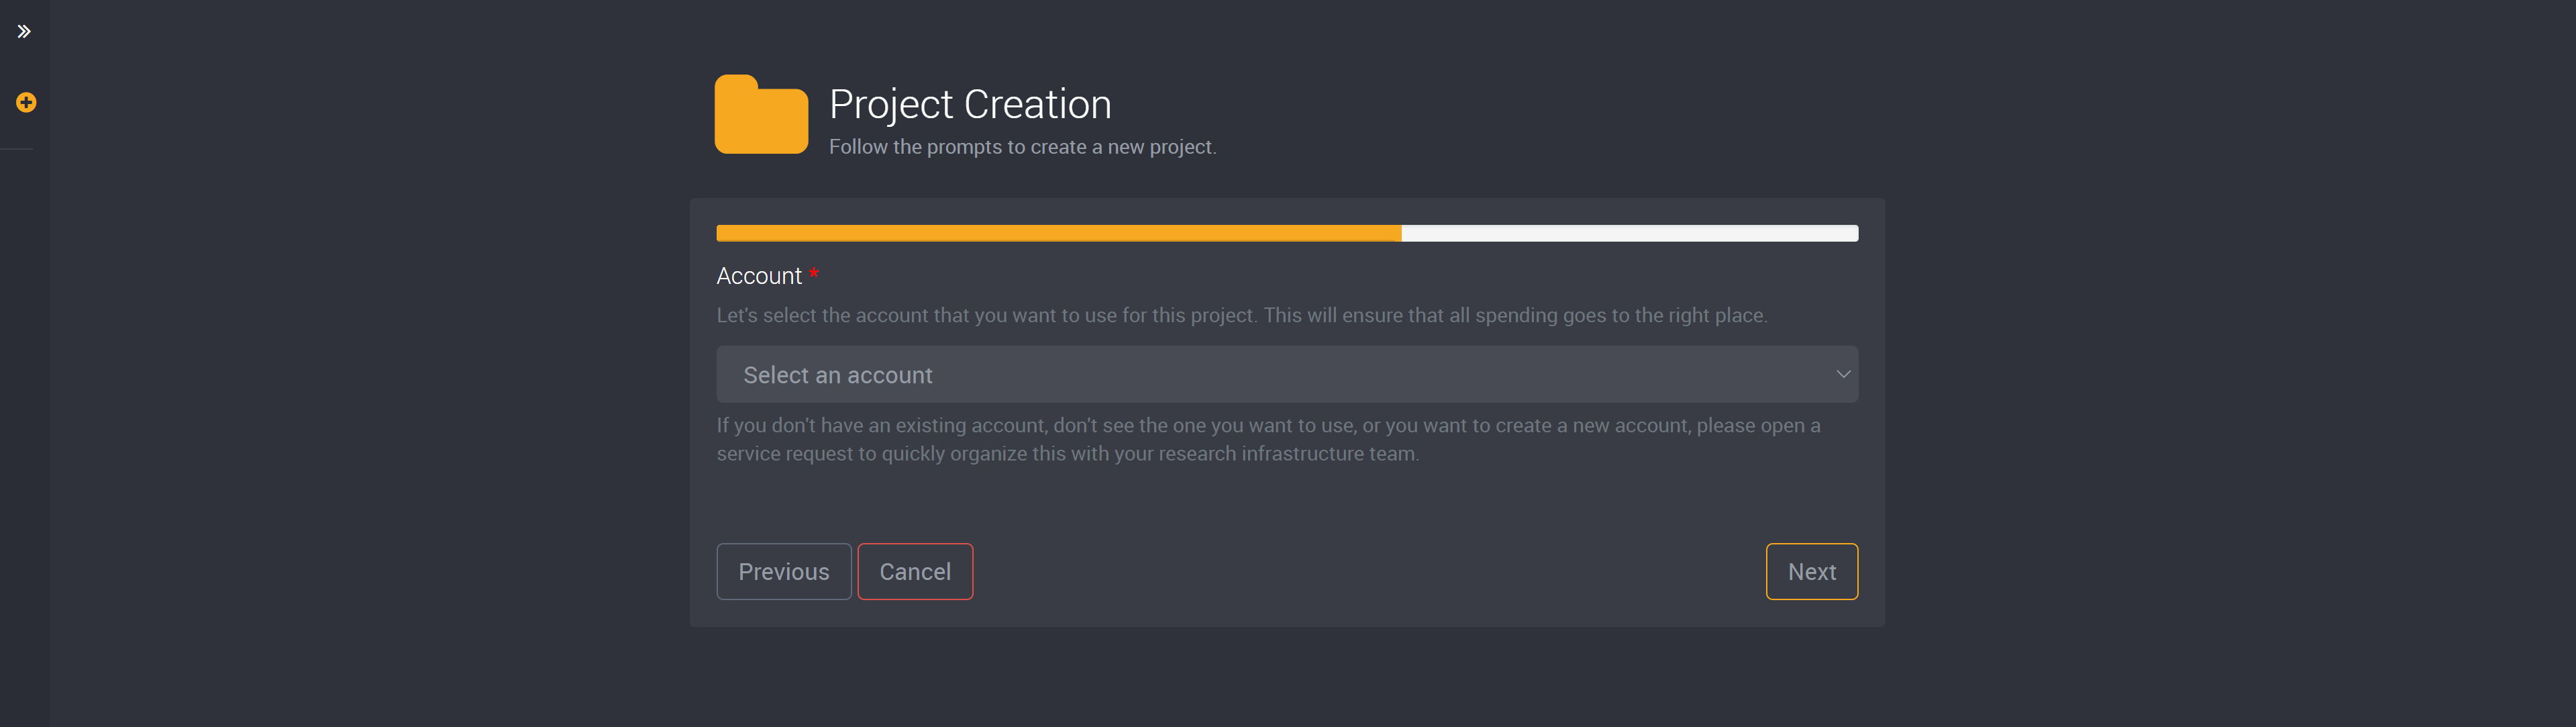
Account
Then we can select the account that will be used for this project. This account will link your project to your Azure subscription and region so that any spending will be through this account.
After you have selected an account you will have the option to add collaboration tools and document libraries.
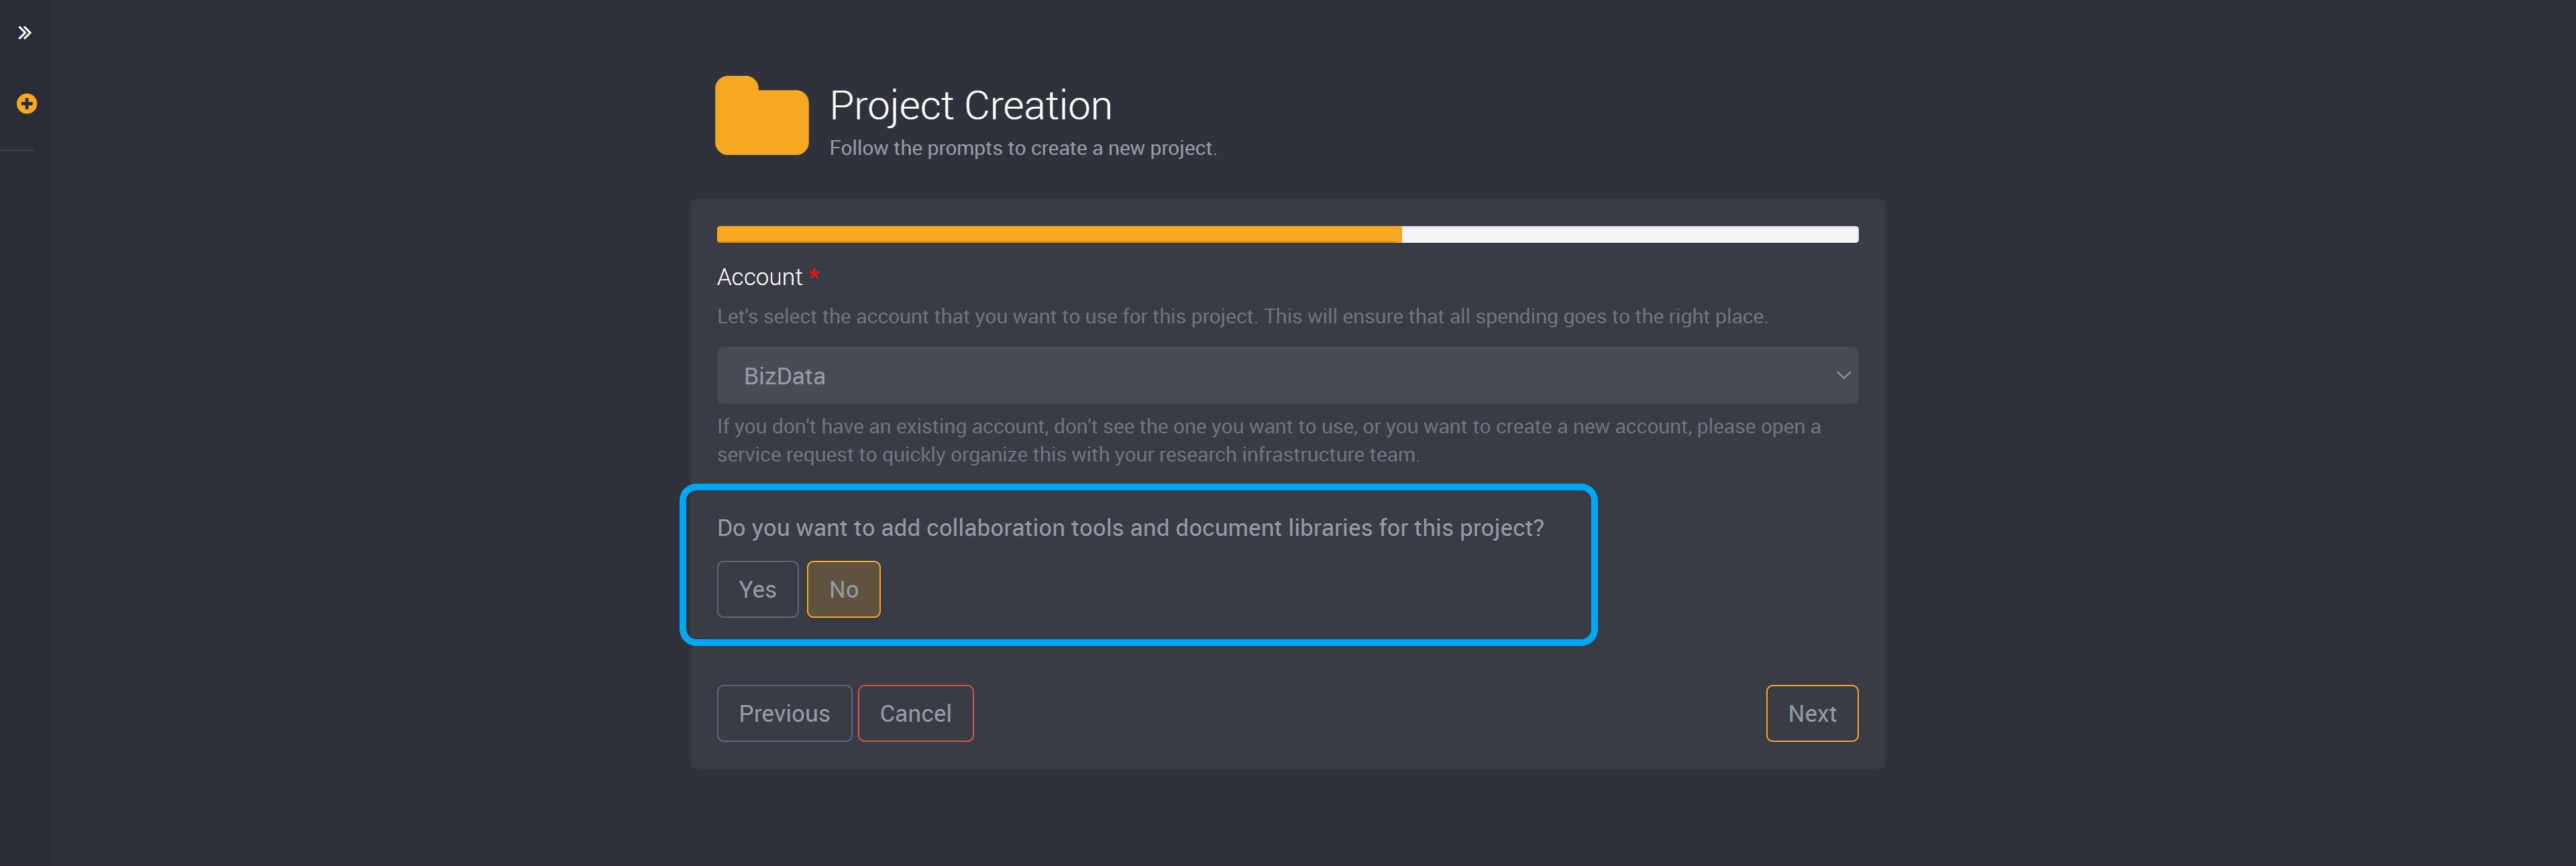
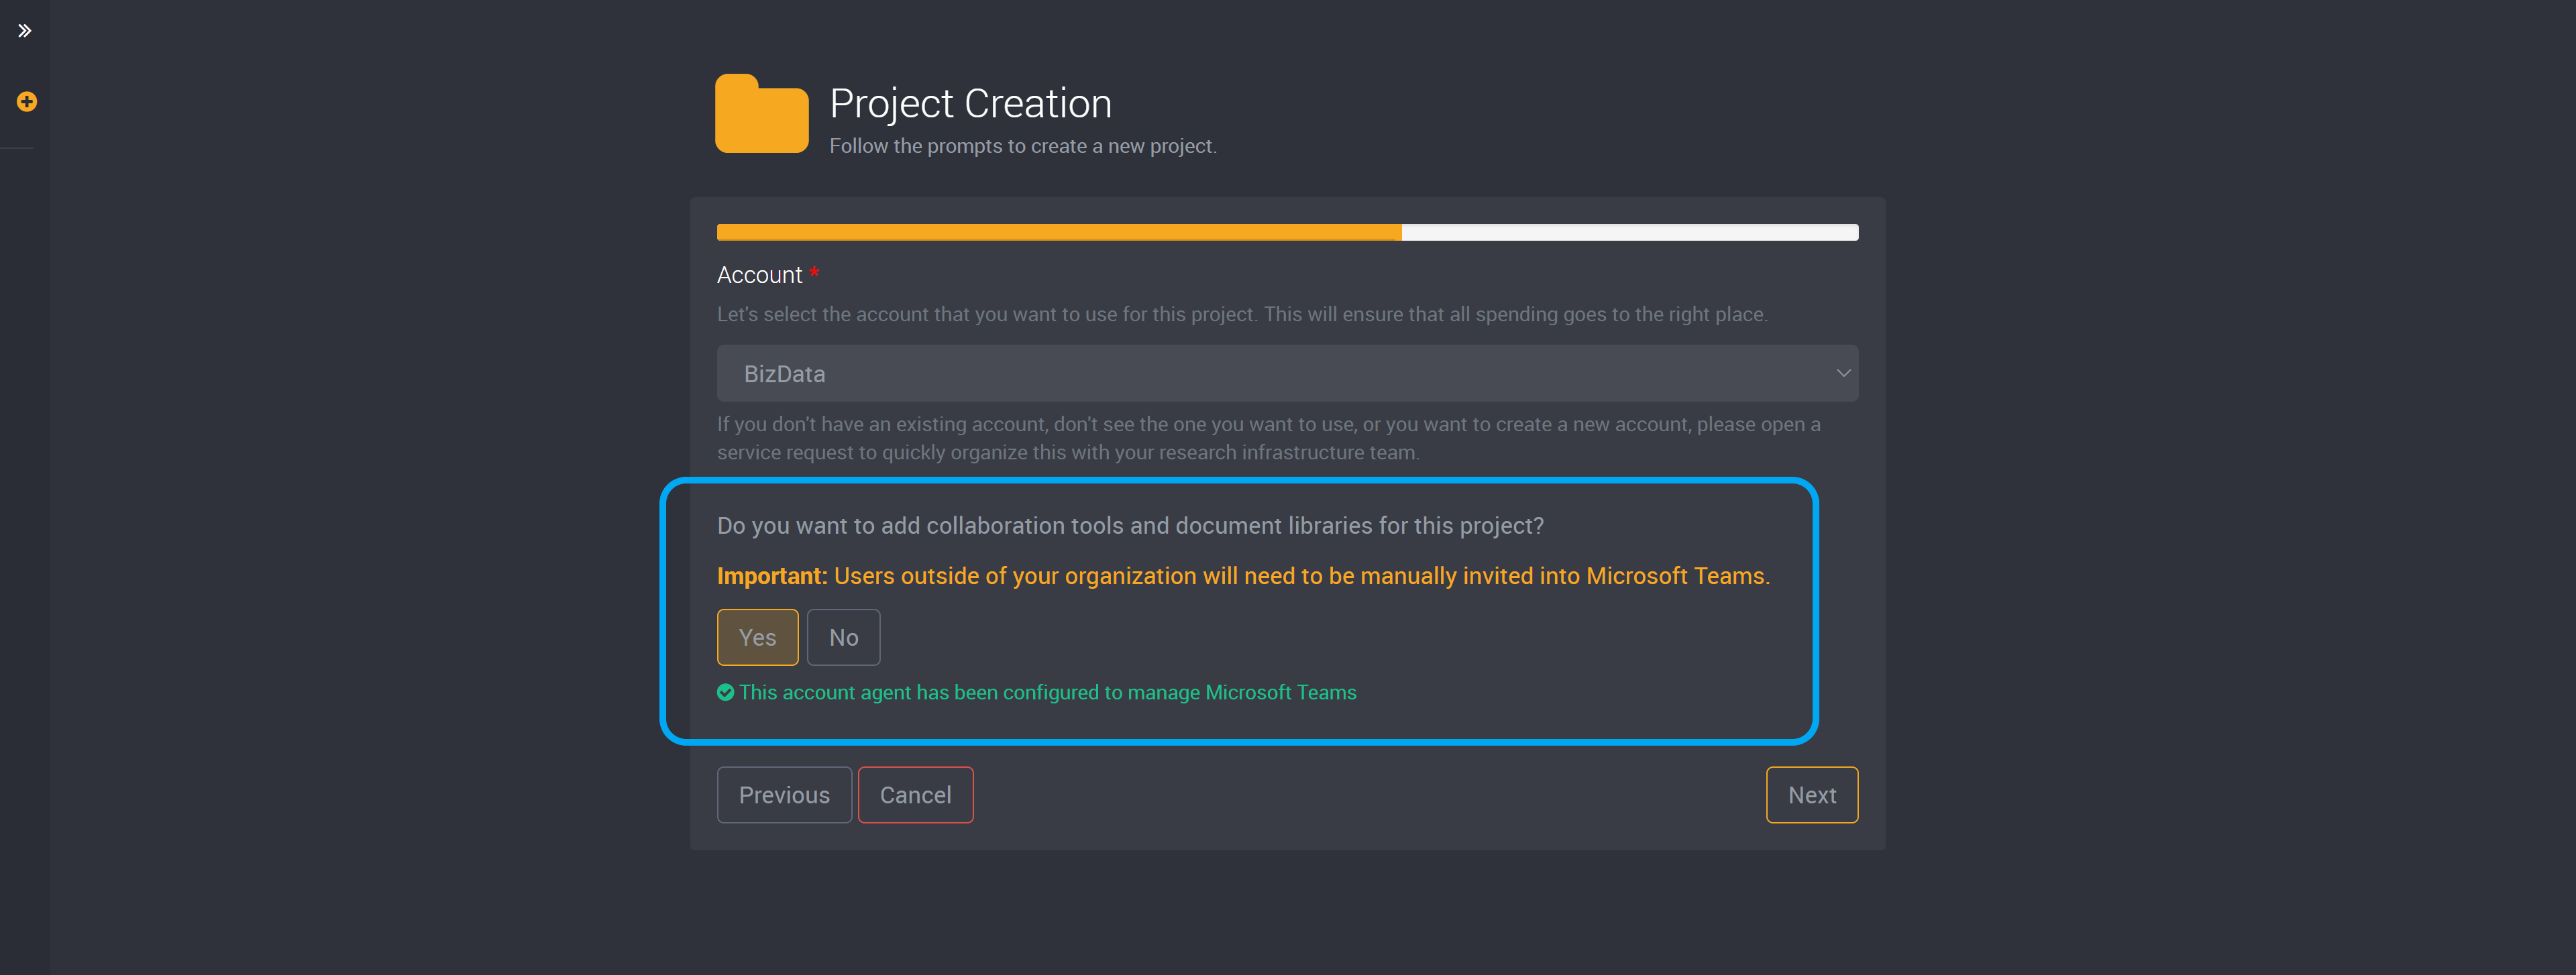
If you would like to add collaboration tools, select ‘Yes’.
If an administrator has set the collaboration settings to ‘No Collaboration’ you will not have this option to add collaboration tools and document libraries. Please contact your administrator to discuss your settings if you would like to use collaboration tools.
Loome will then check that the account agent has been configured to manage Microsoft Teams.
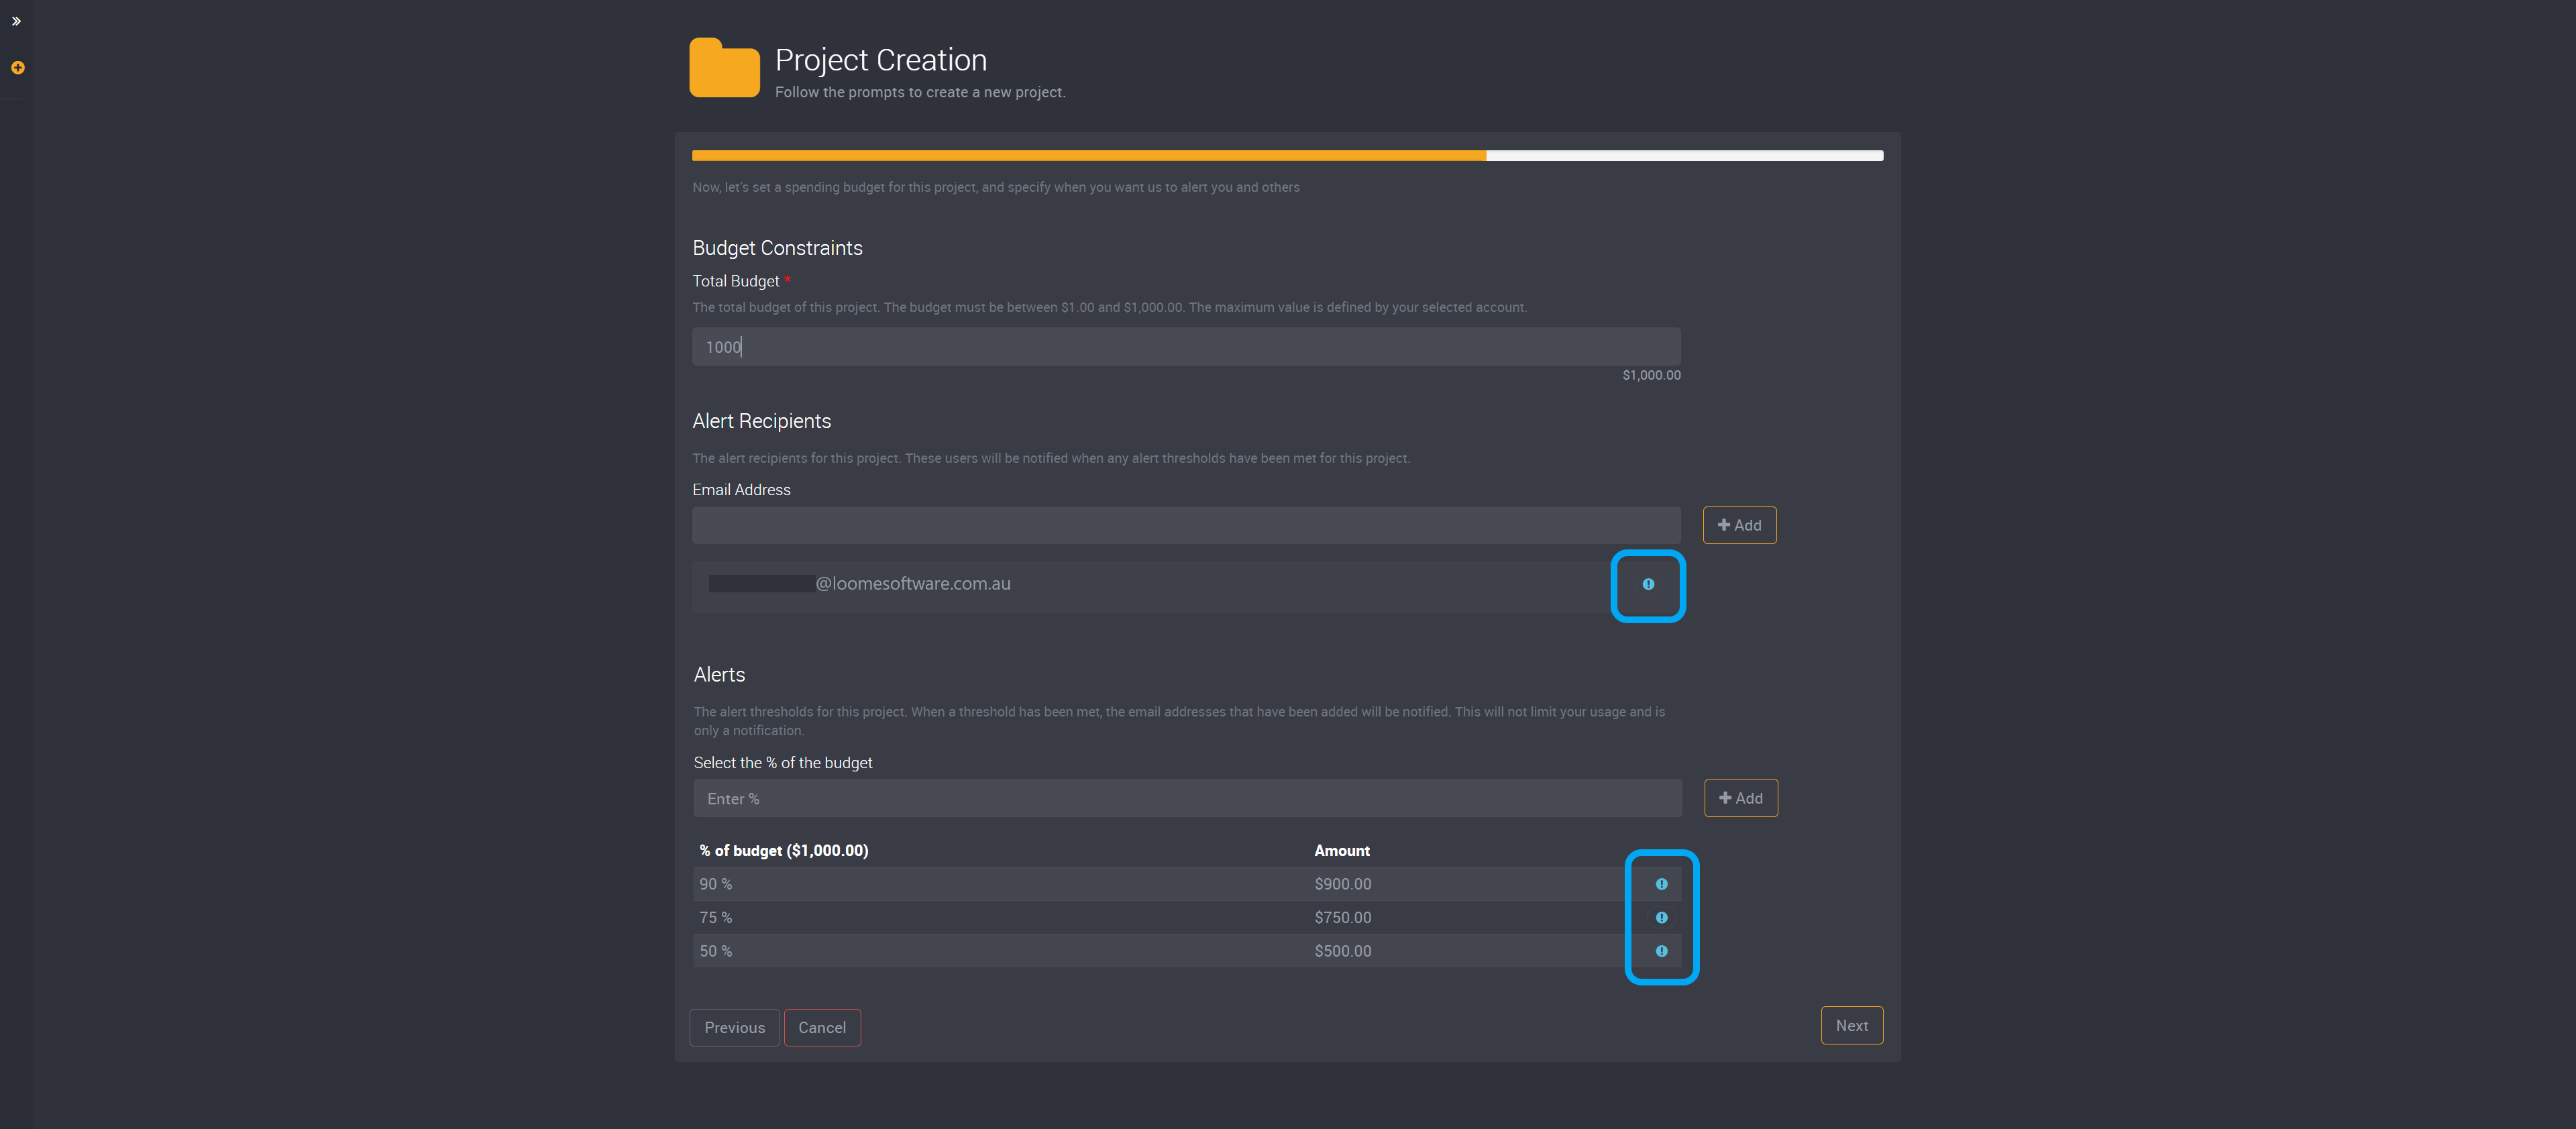
Budget
You can then choose the total spending budget for this project. You can also set alerts by selecting a percentage of the budget and Loome will send you an alert when that percentage has been reached.
Type in your budget in the Total Budget field.
The maximum budget that you can choose is dependent on your previously selected account.
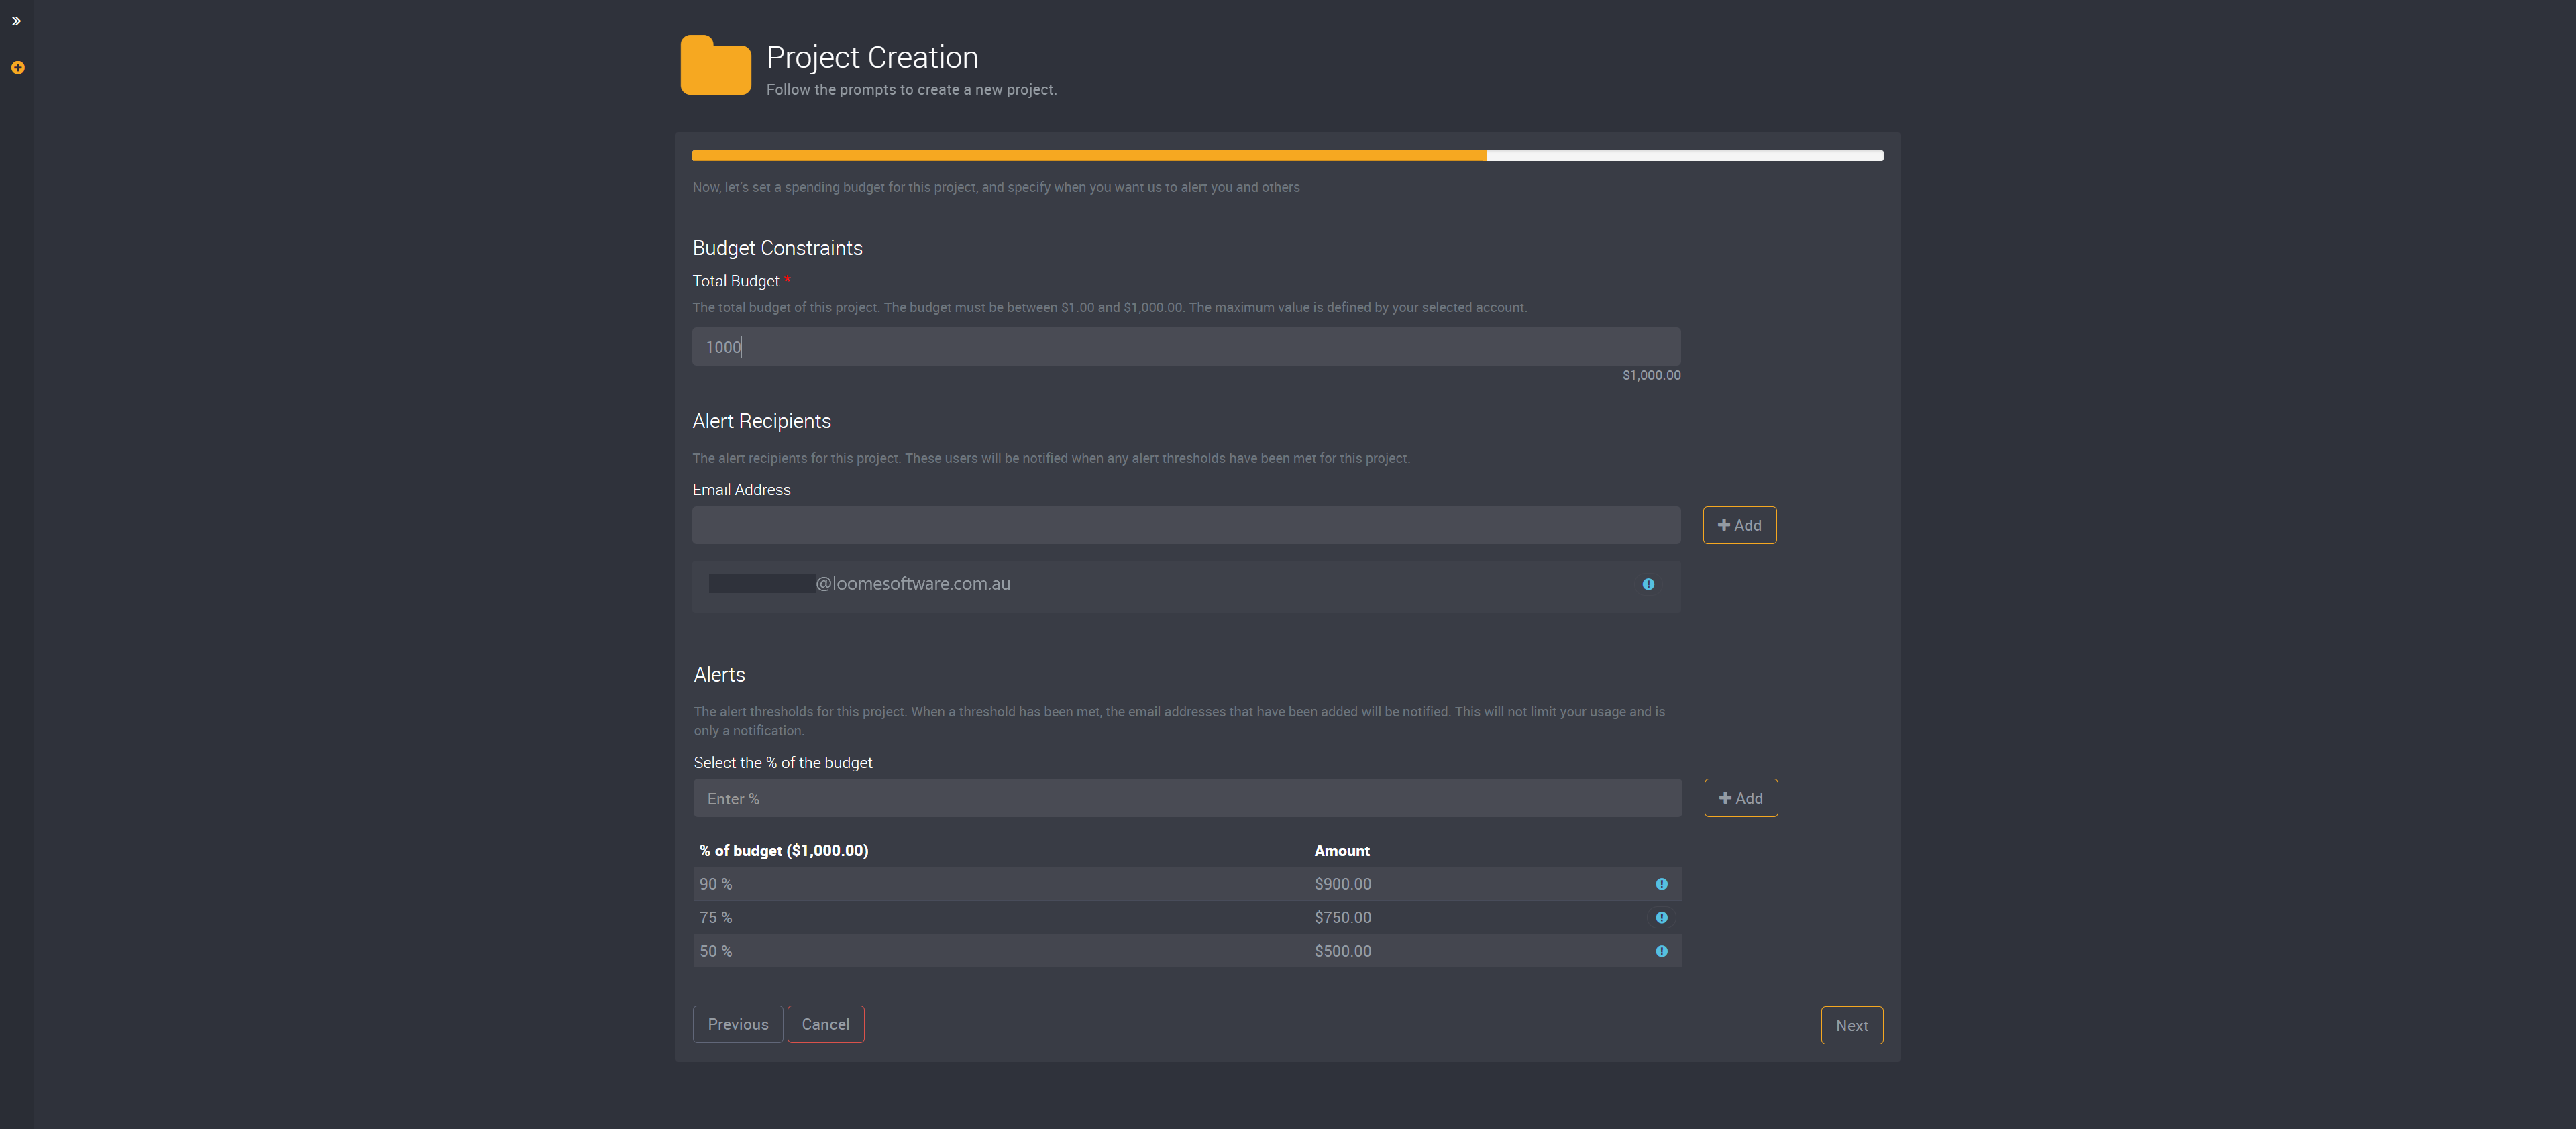
Then select your Alert Recipients. These recipients are the people that should be notified if the project passes your selected budget.
When your budget spend reaches the alert percentage, Loome will send an email to these users.
Your account may have pre-selected email addresses that have been automatically added to this field. These have been added by the account creator as required alert recipients and cannot be removed.
You can then add Alerts. These are the percentages that when met will trigger an alert to be sent to the users you have selected above.
In the image below, you can see that there has been pre-set alert thresholds. These have been selected by the account creator and cannot be deleted. When the budget has been spent and reaches the selected percentage, for example at 50% therefore $5000 in the image below, an email will be sent to all recipients.
The blue icon highlighted in the image below displays which values have been provided by the account.
Project Members
The next step is choosing the other members of this project and their roles. These users will be able to find this project when they log in on their home page. This project will be hidden from all other users except administrators (administrators can see all projects).
The person who created this project will automatically be added as the project owner. You cannot delete your own email from this role.
When you add members to this project, you can choose from these project specific roles:
| Project Level Role | Description |
|---|---|
| Project Owners | A project owner can deploy and use resources, and manages that specific project. |
| Project Contributors | This user can deploy and use resources, but cannot add other users to a project. |
| Project Readers | Users with this role can use resources, but cannot deploy them or make changes to a project. |
These roles won’t allow these users access to any other projects except the project you have added them to.
If you add an email address that has not been added to your Loome Assist tenant before, this user will be added to the ‘Consumer’ role for your Loome Assist tenant. Learn more about application roles here.
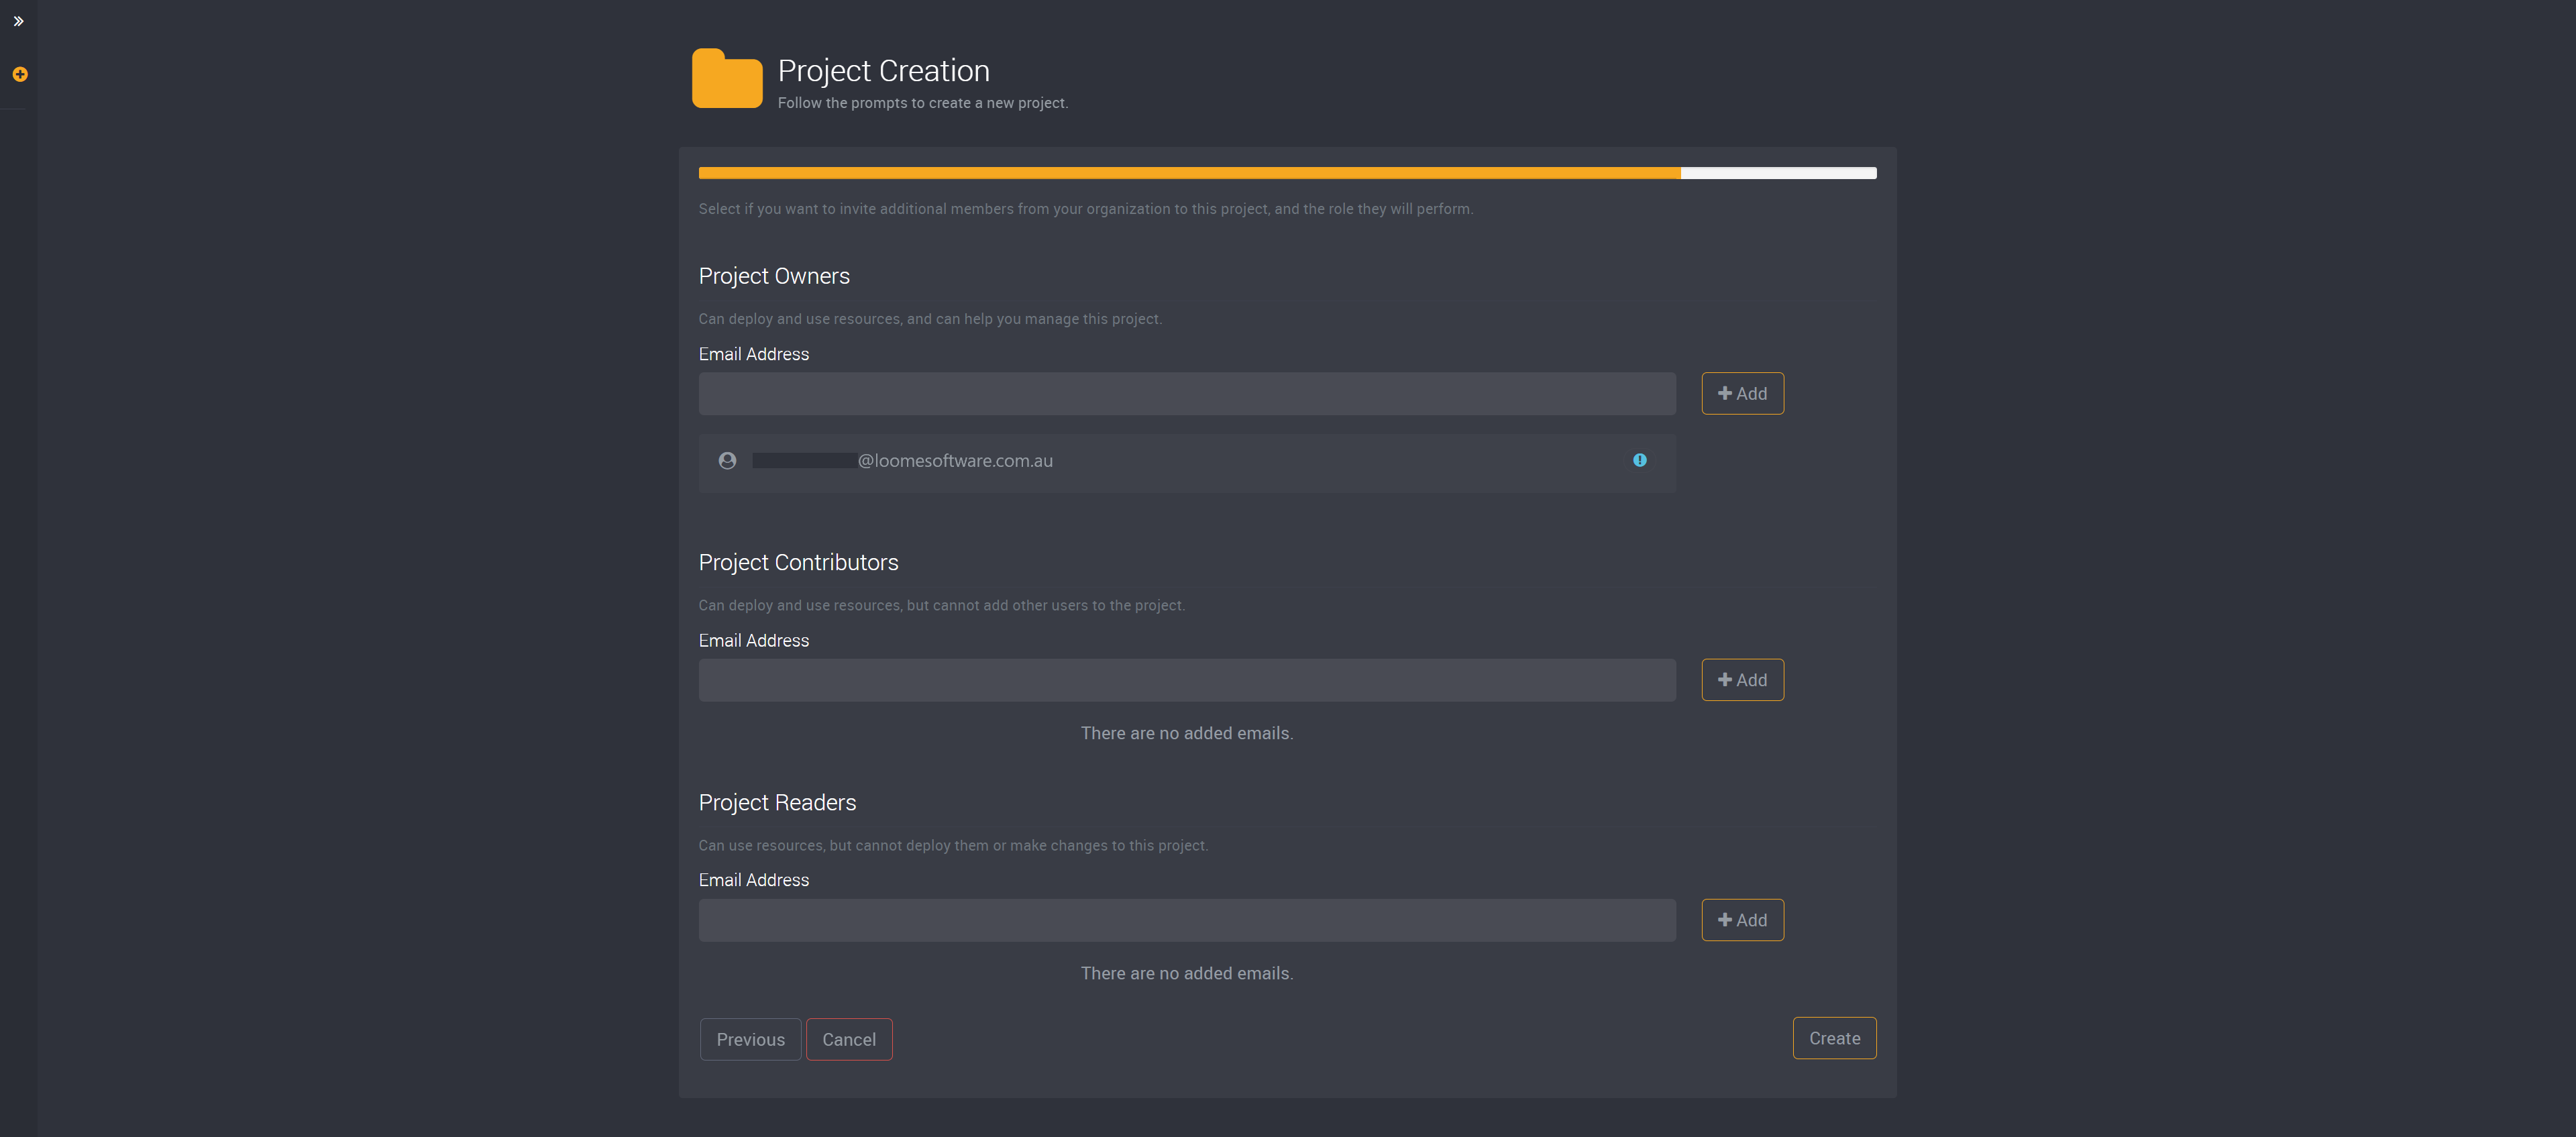
To add a user to a role, type in their email address into your selected role. If you are adding more than one email address, you can separate them with a semi-colon, and then click on add.
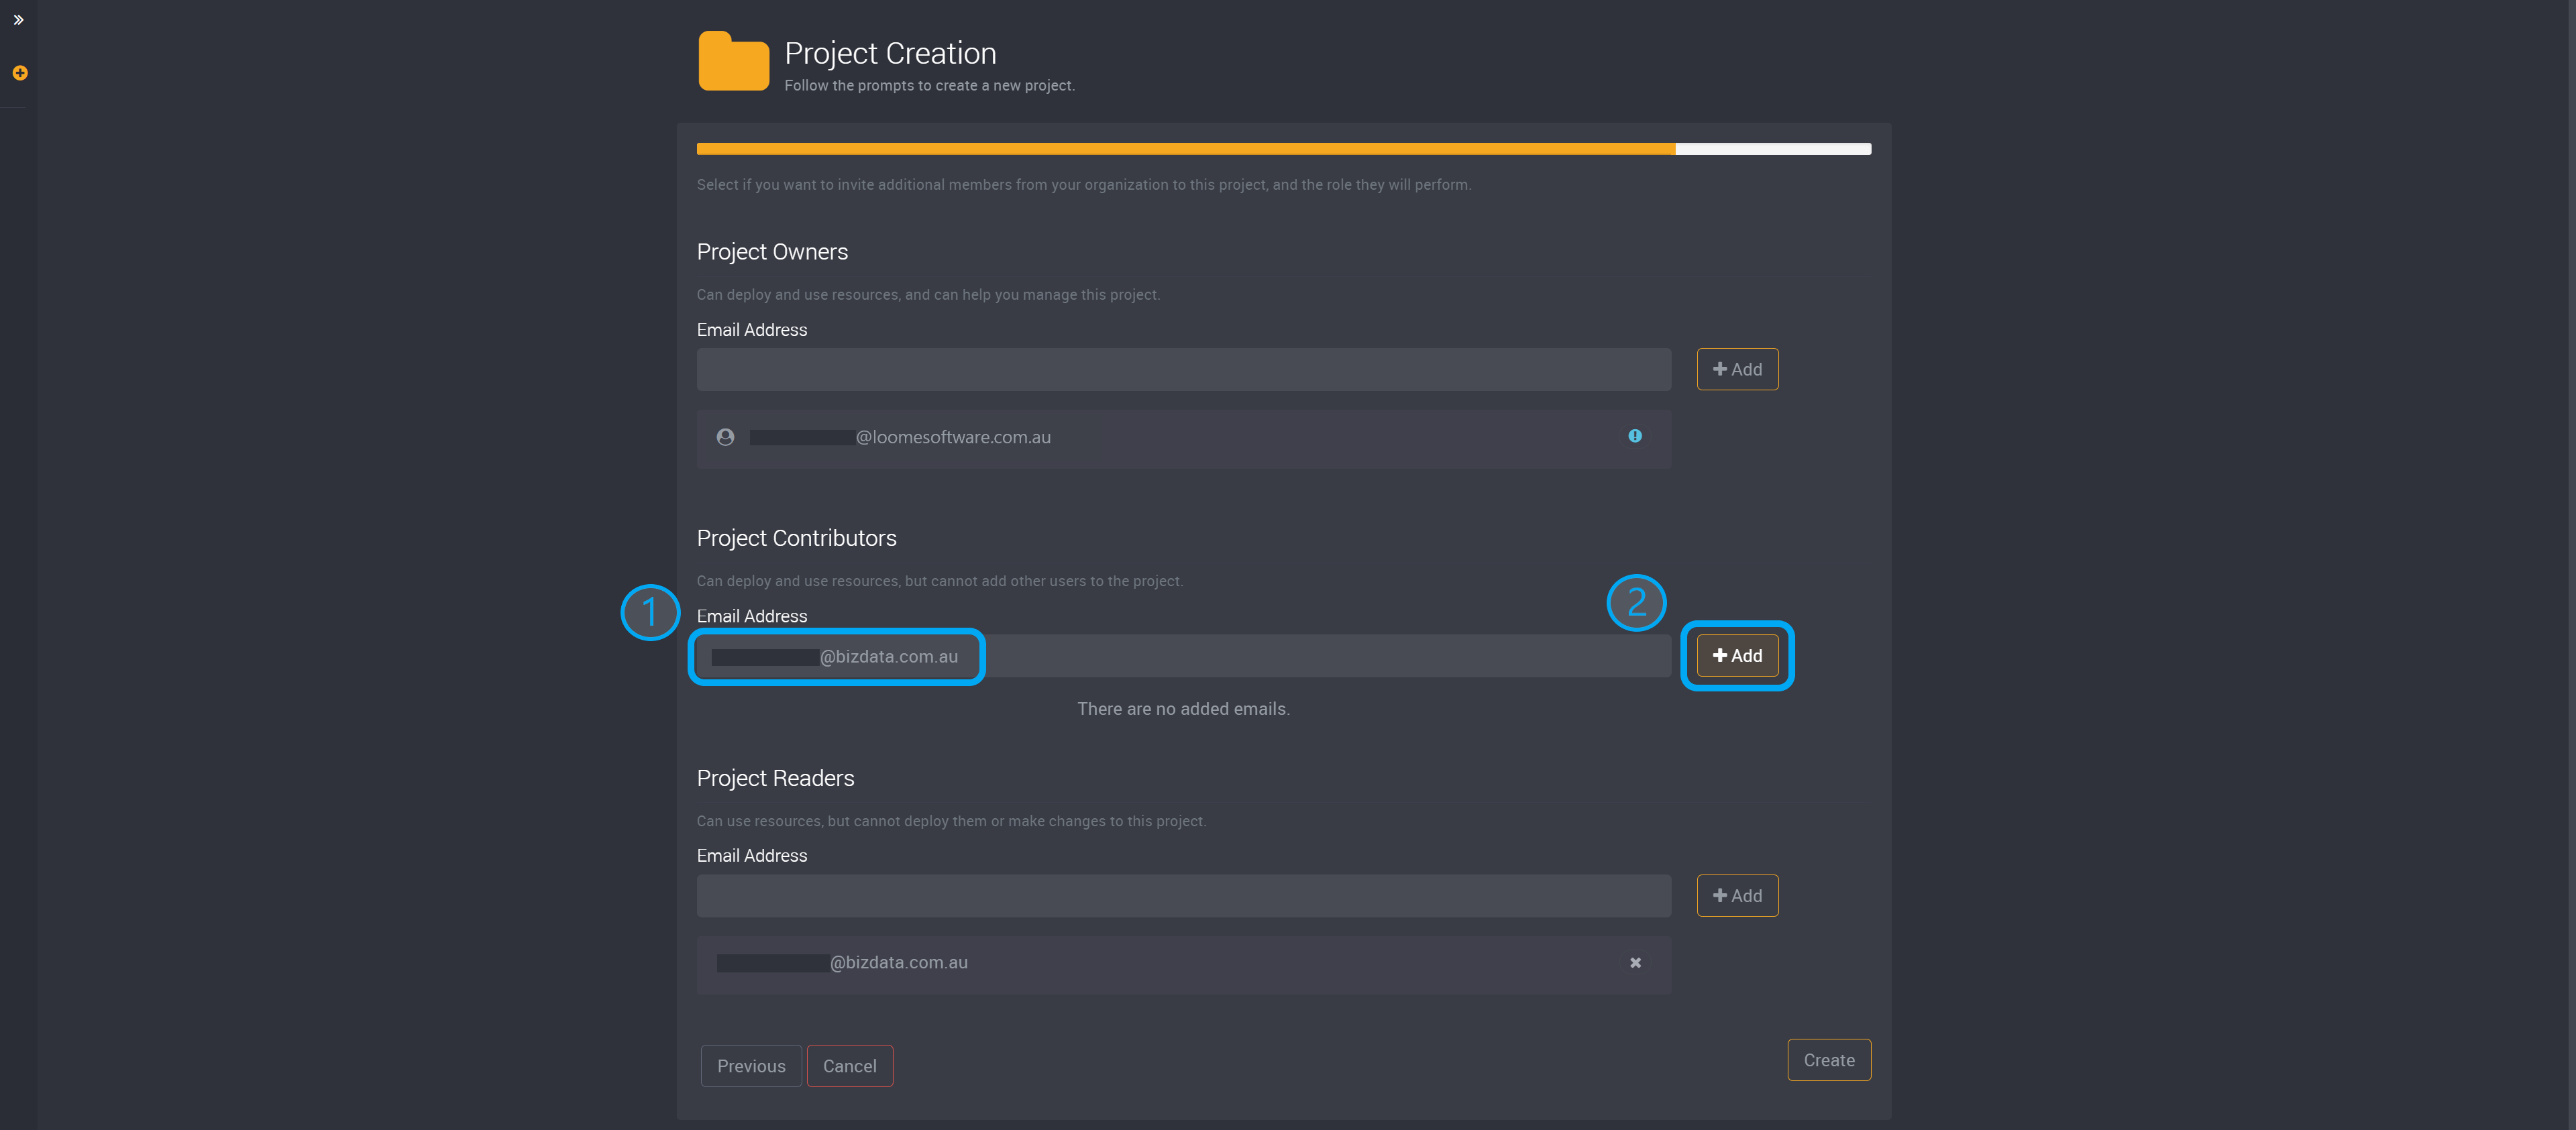
Once you complete these fields, you can click Create in the bottom right corner to save this project.
You can then view this project on the ‘My Projects’ page. On each project card you can view the description and spend.
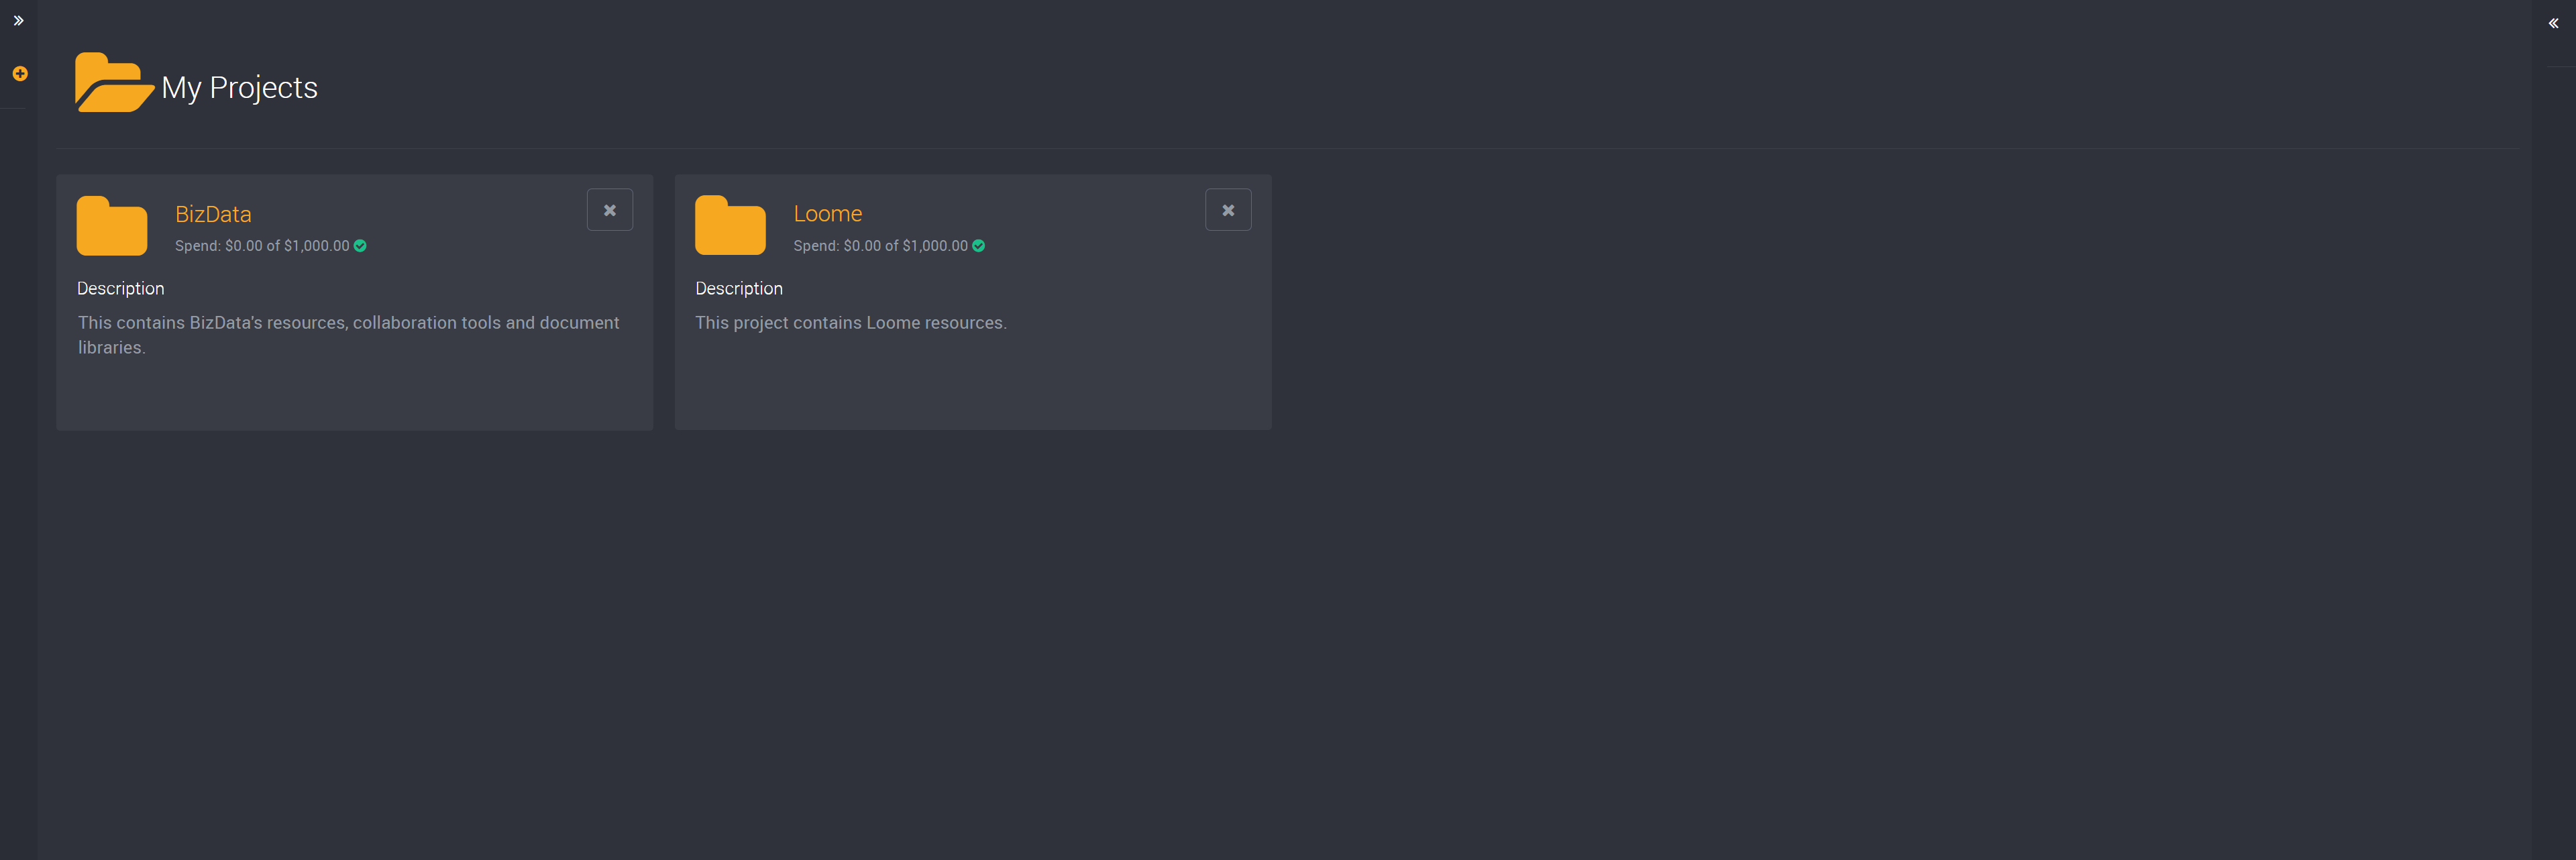
Your homepage and left-hand project slide-out will display all projects that are available.
You can read more about creating projects in our guide here.
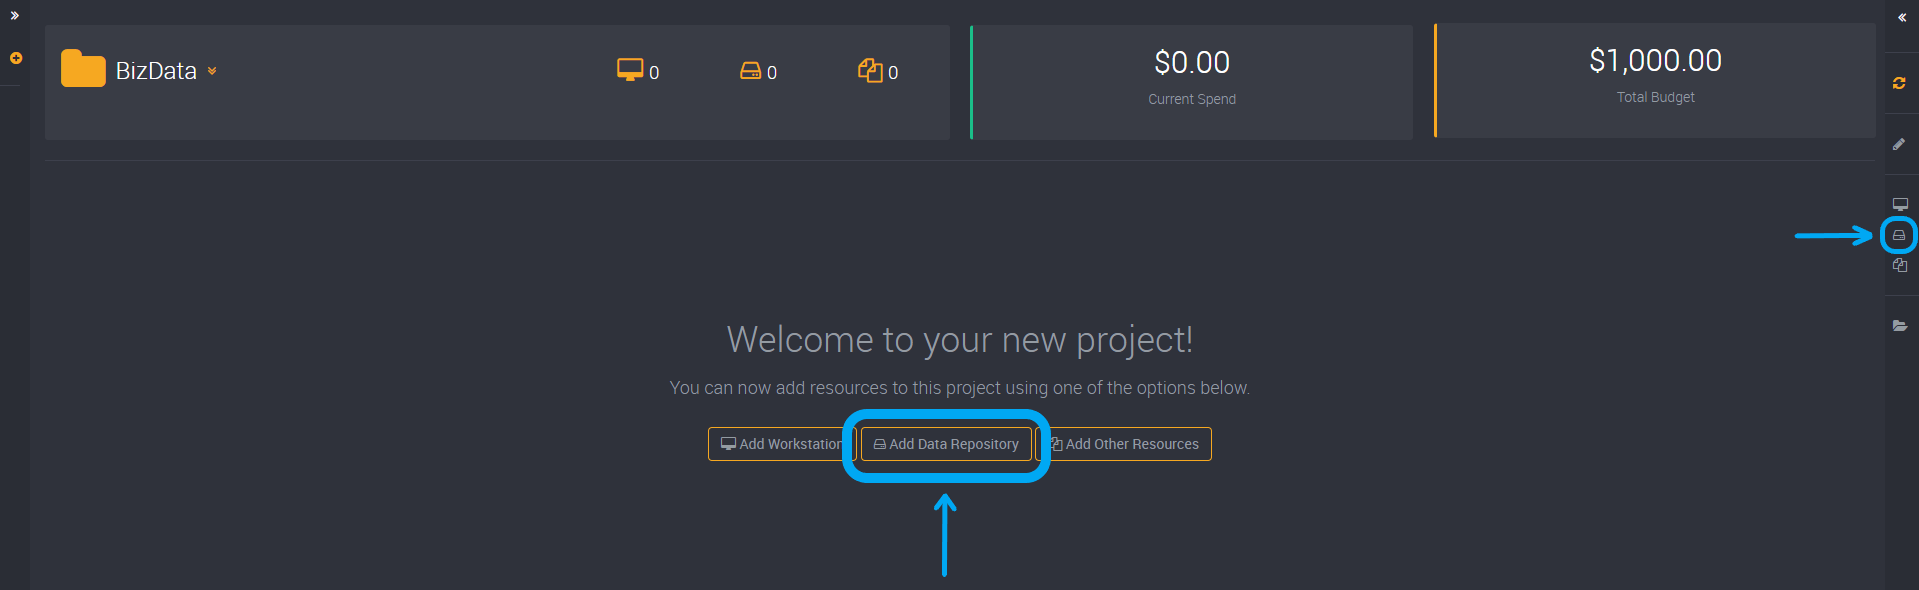
Add a Data Repository (Optional)
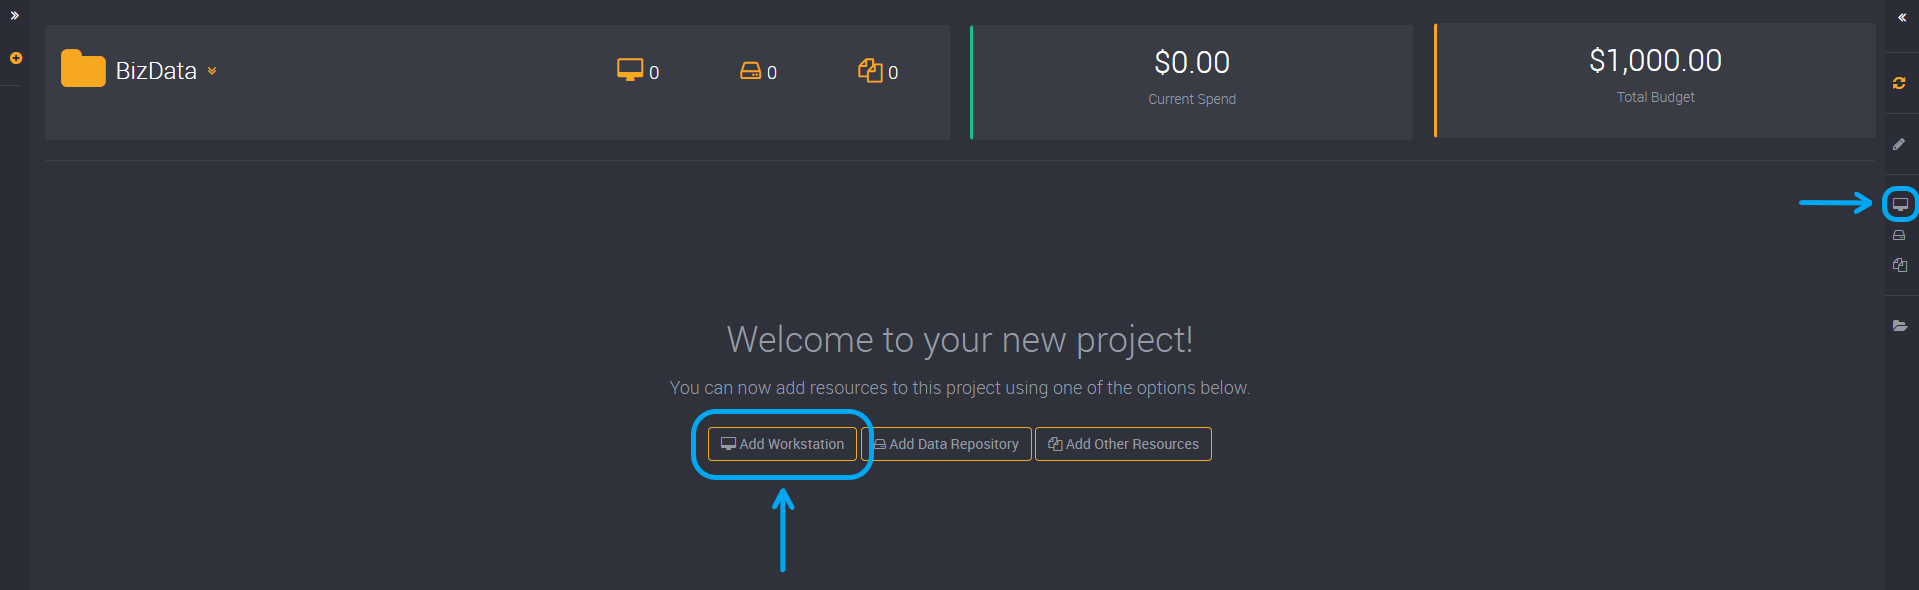
In the project you would like to add this data repository to, find the option to add a data repository in the right action slide-out.
Provide a name so that you can easily identify this data repository.
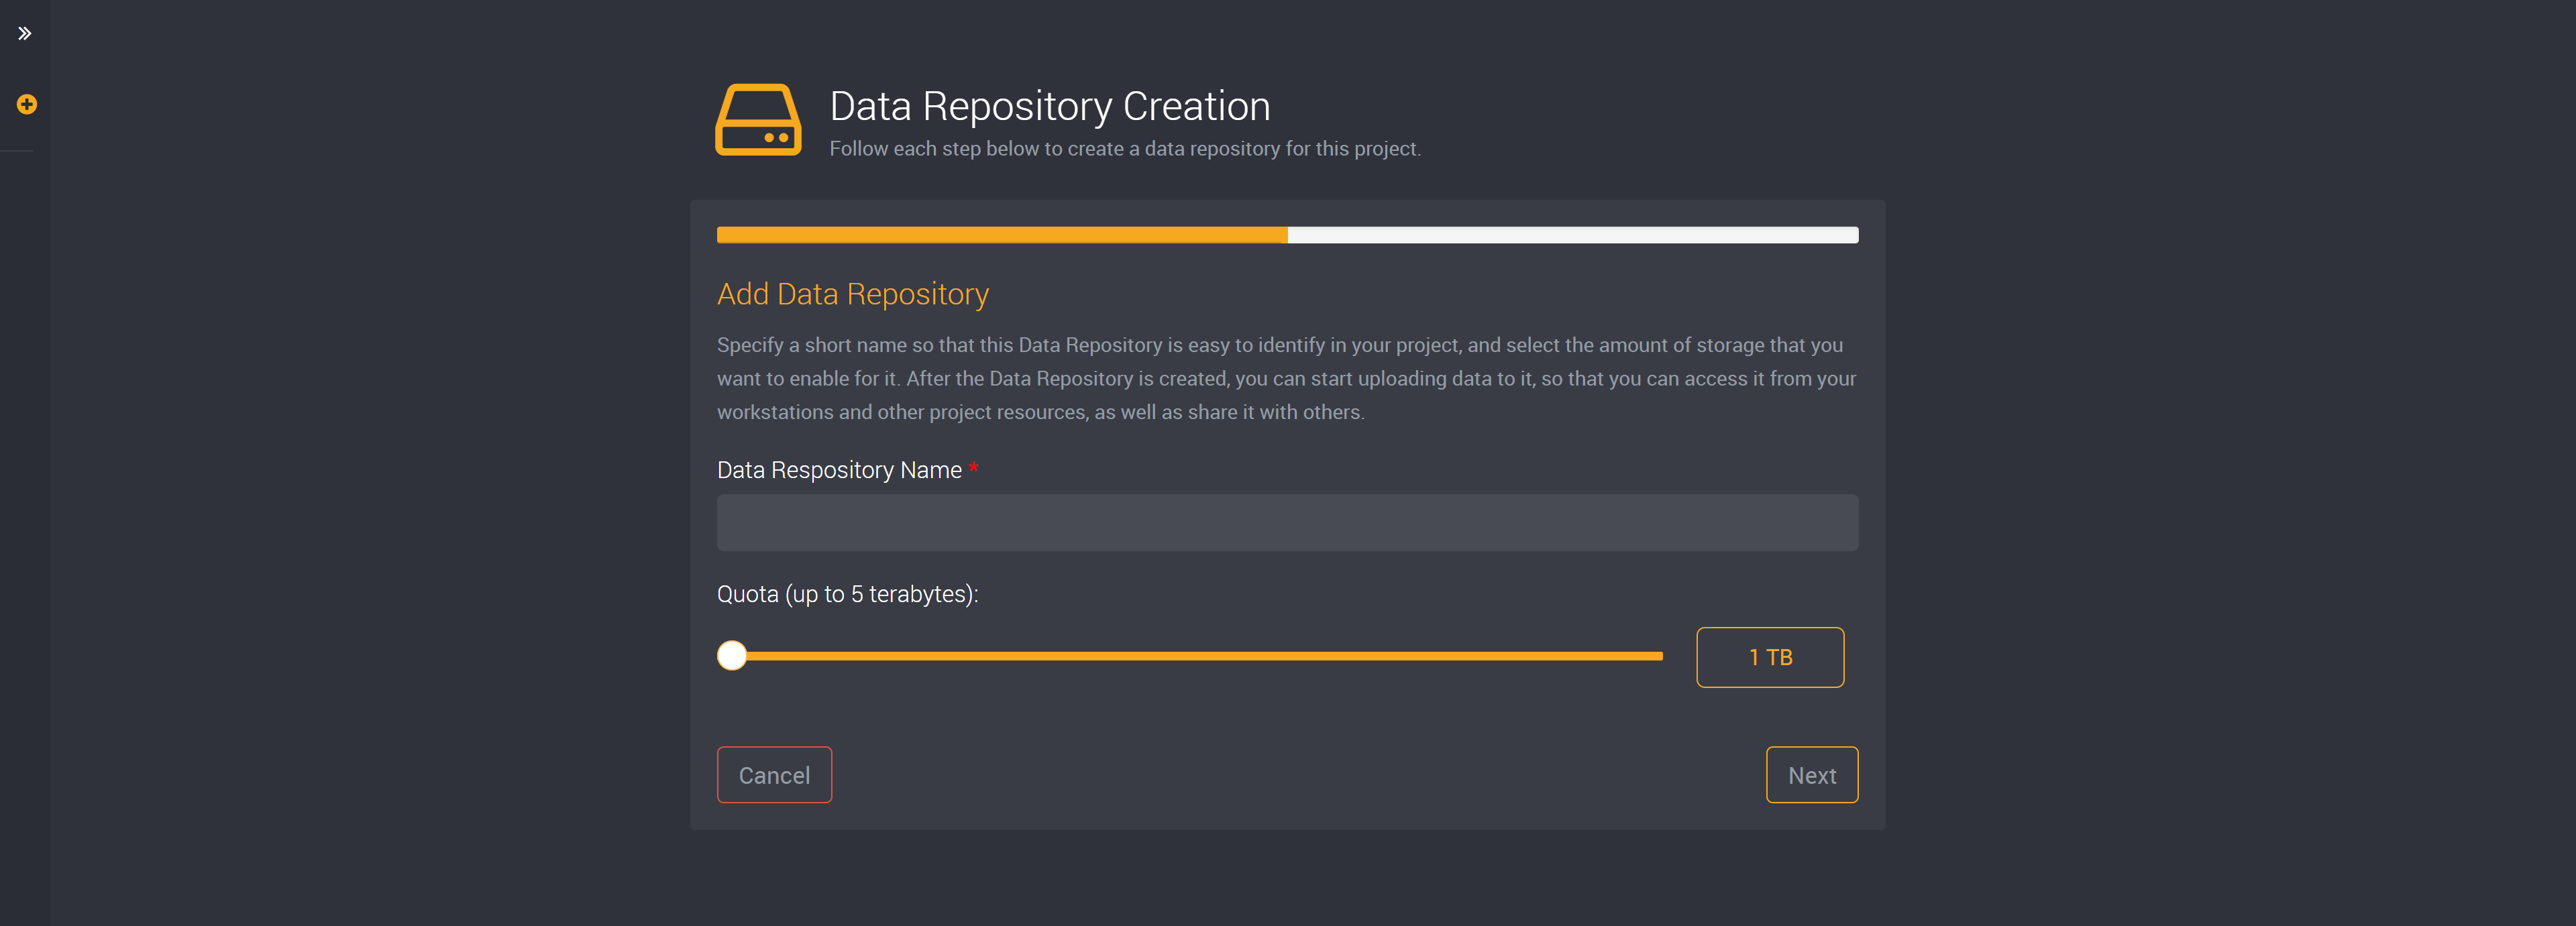
Select your quota. This is the amount of storage that you want to enable.
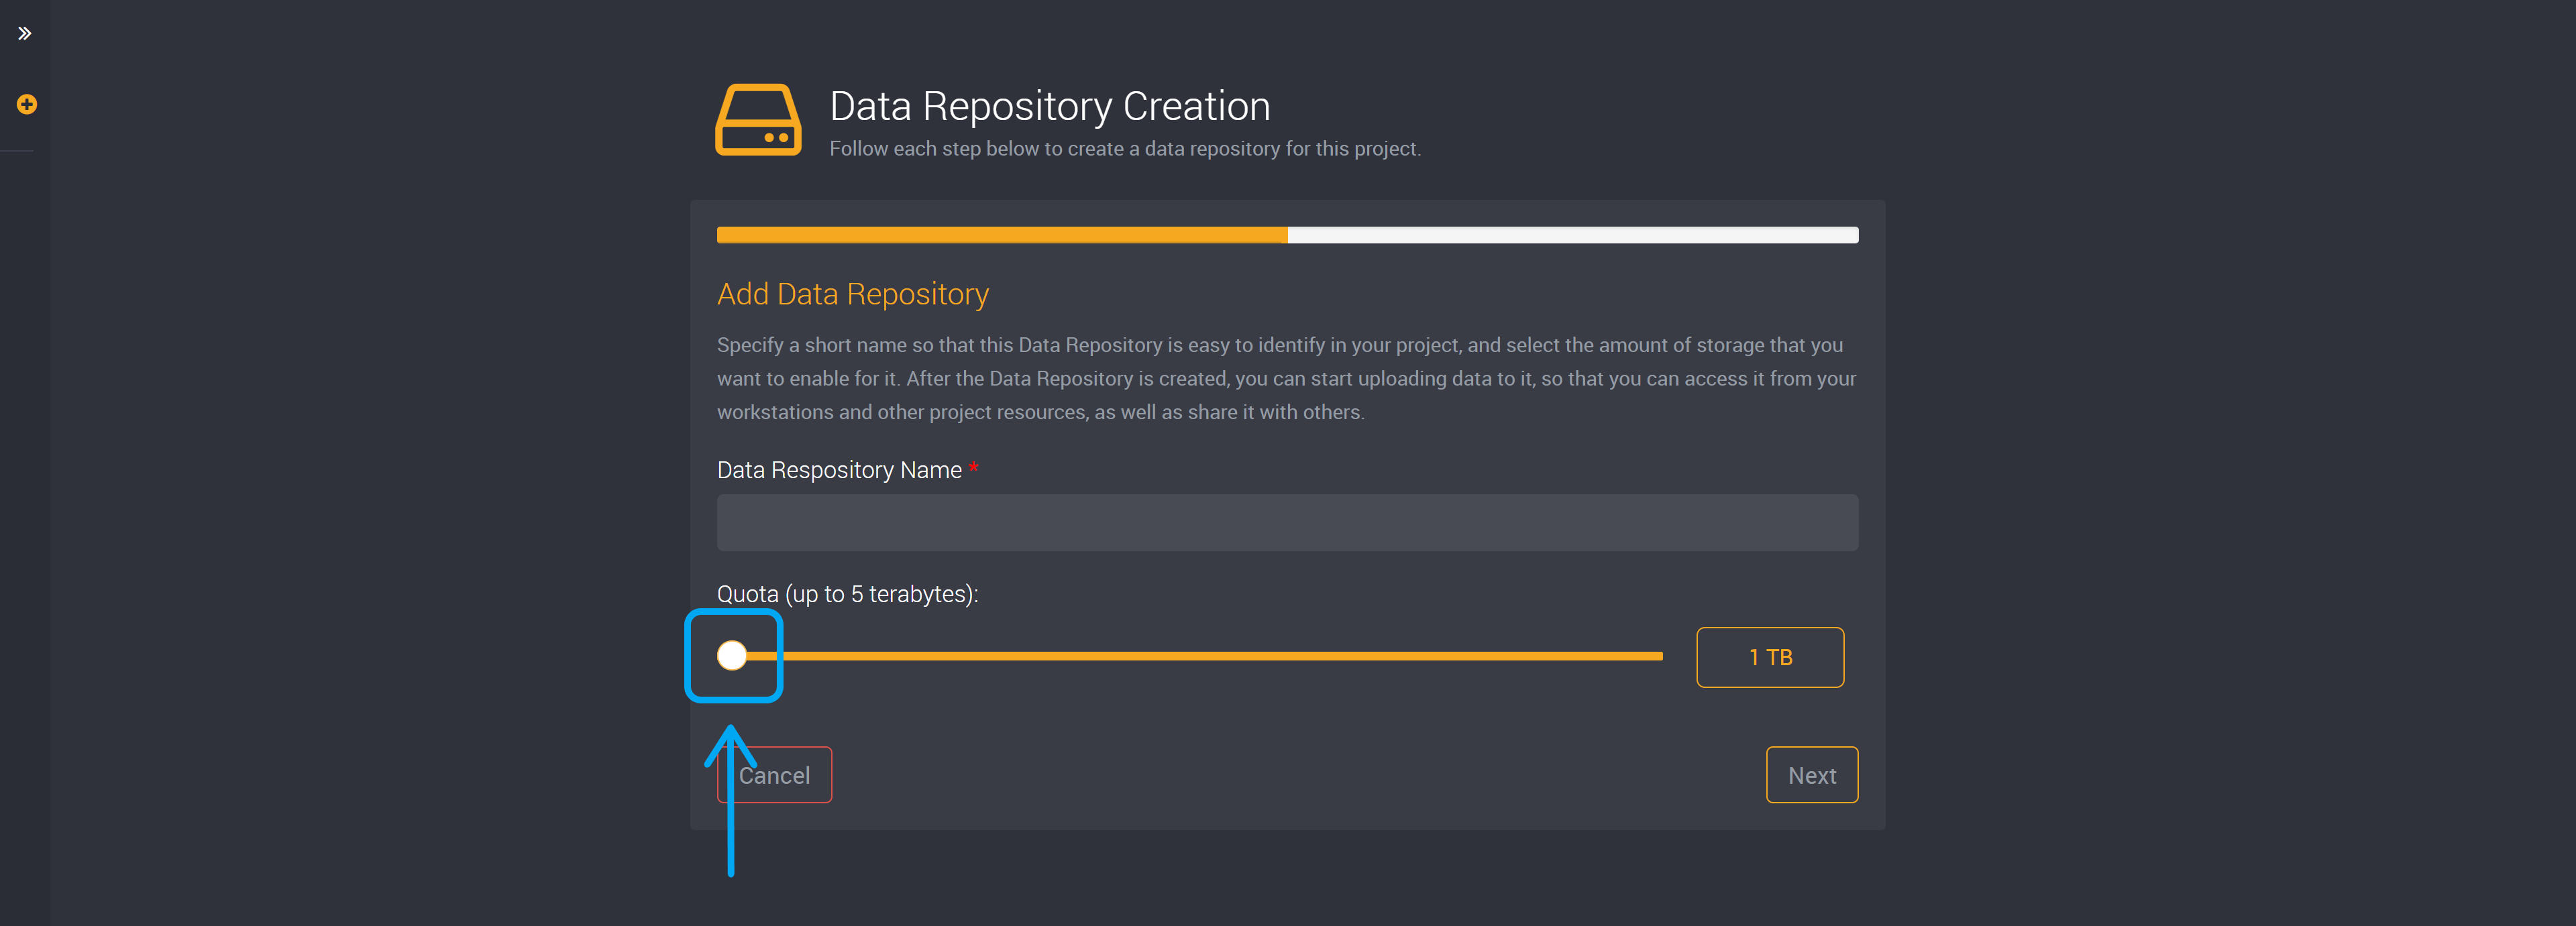
You can change this value by dragging the slider left and right. You can view the amount of TB from the display on the right of the slider.
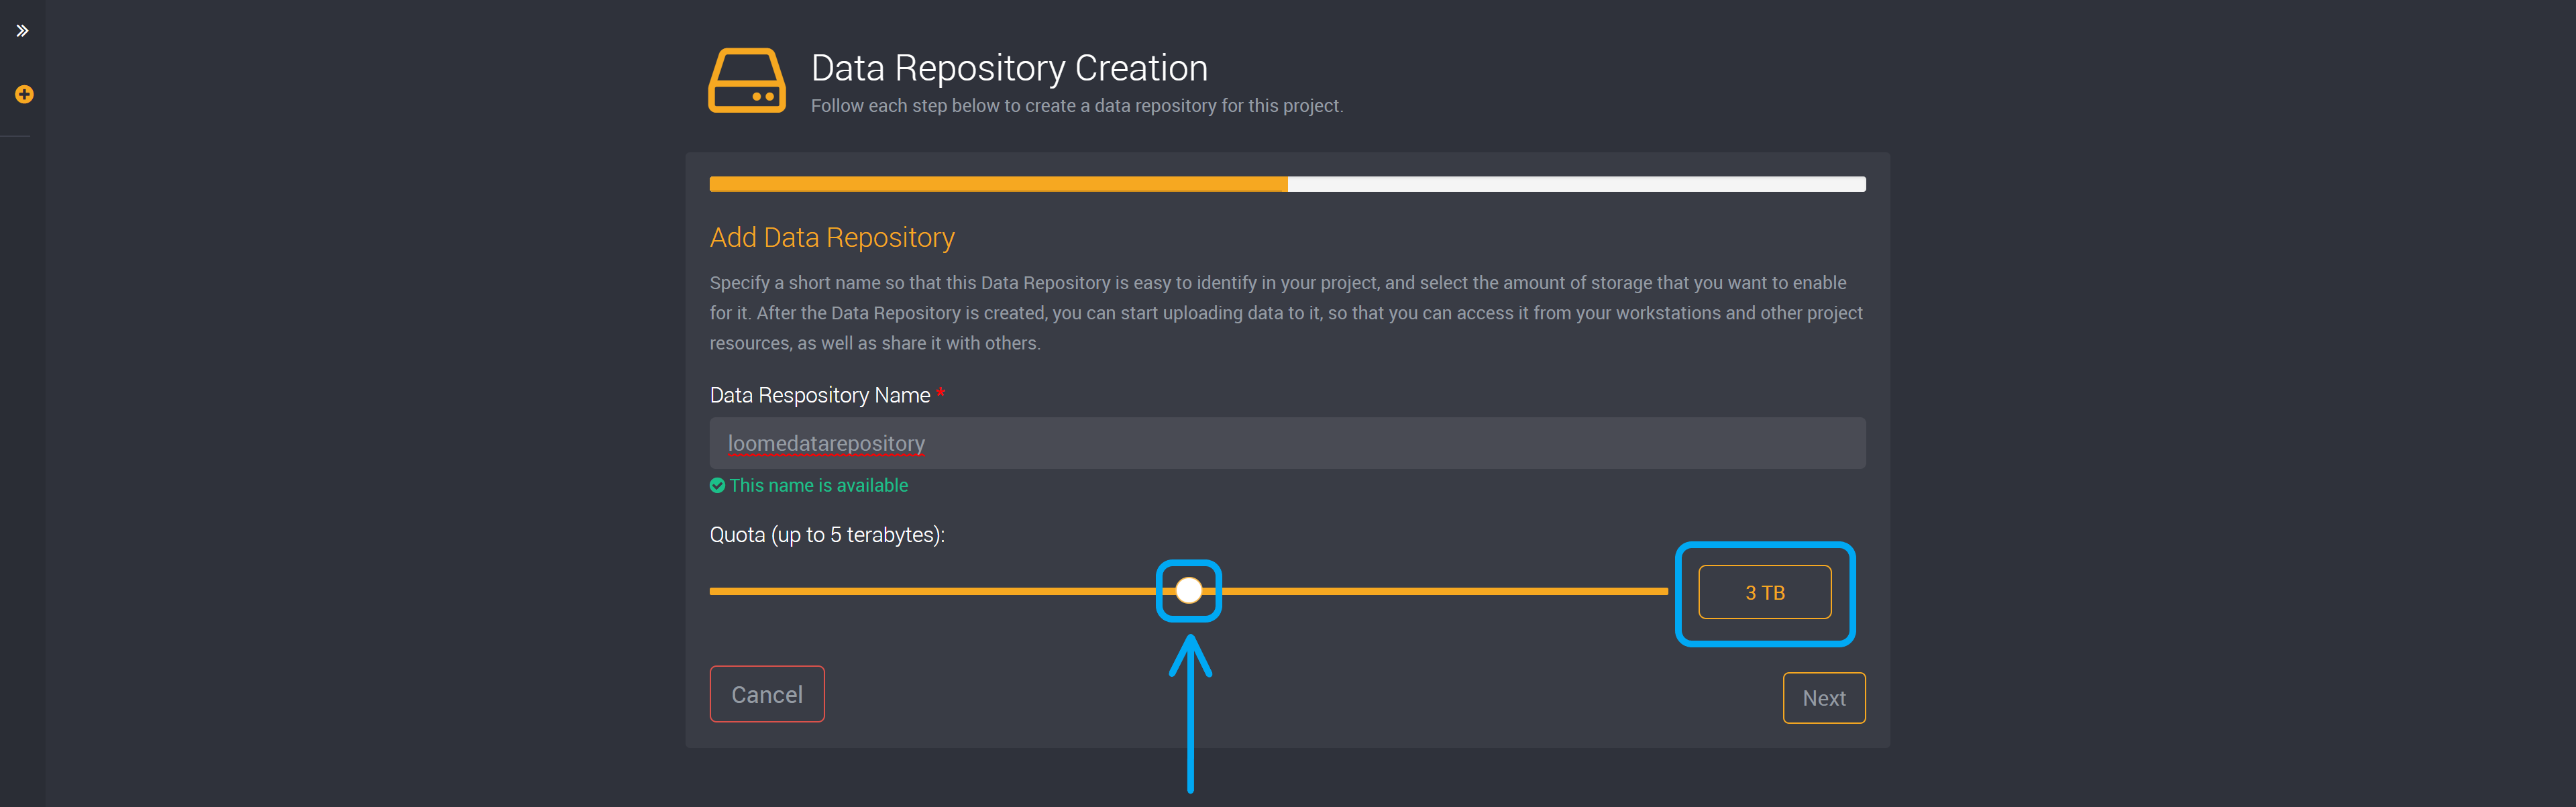
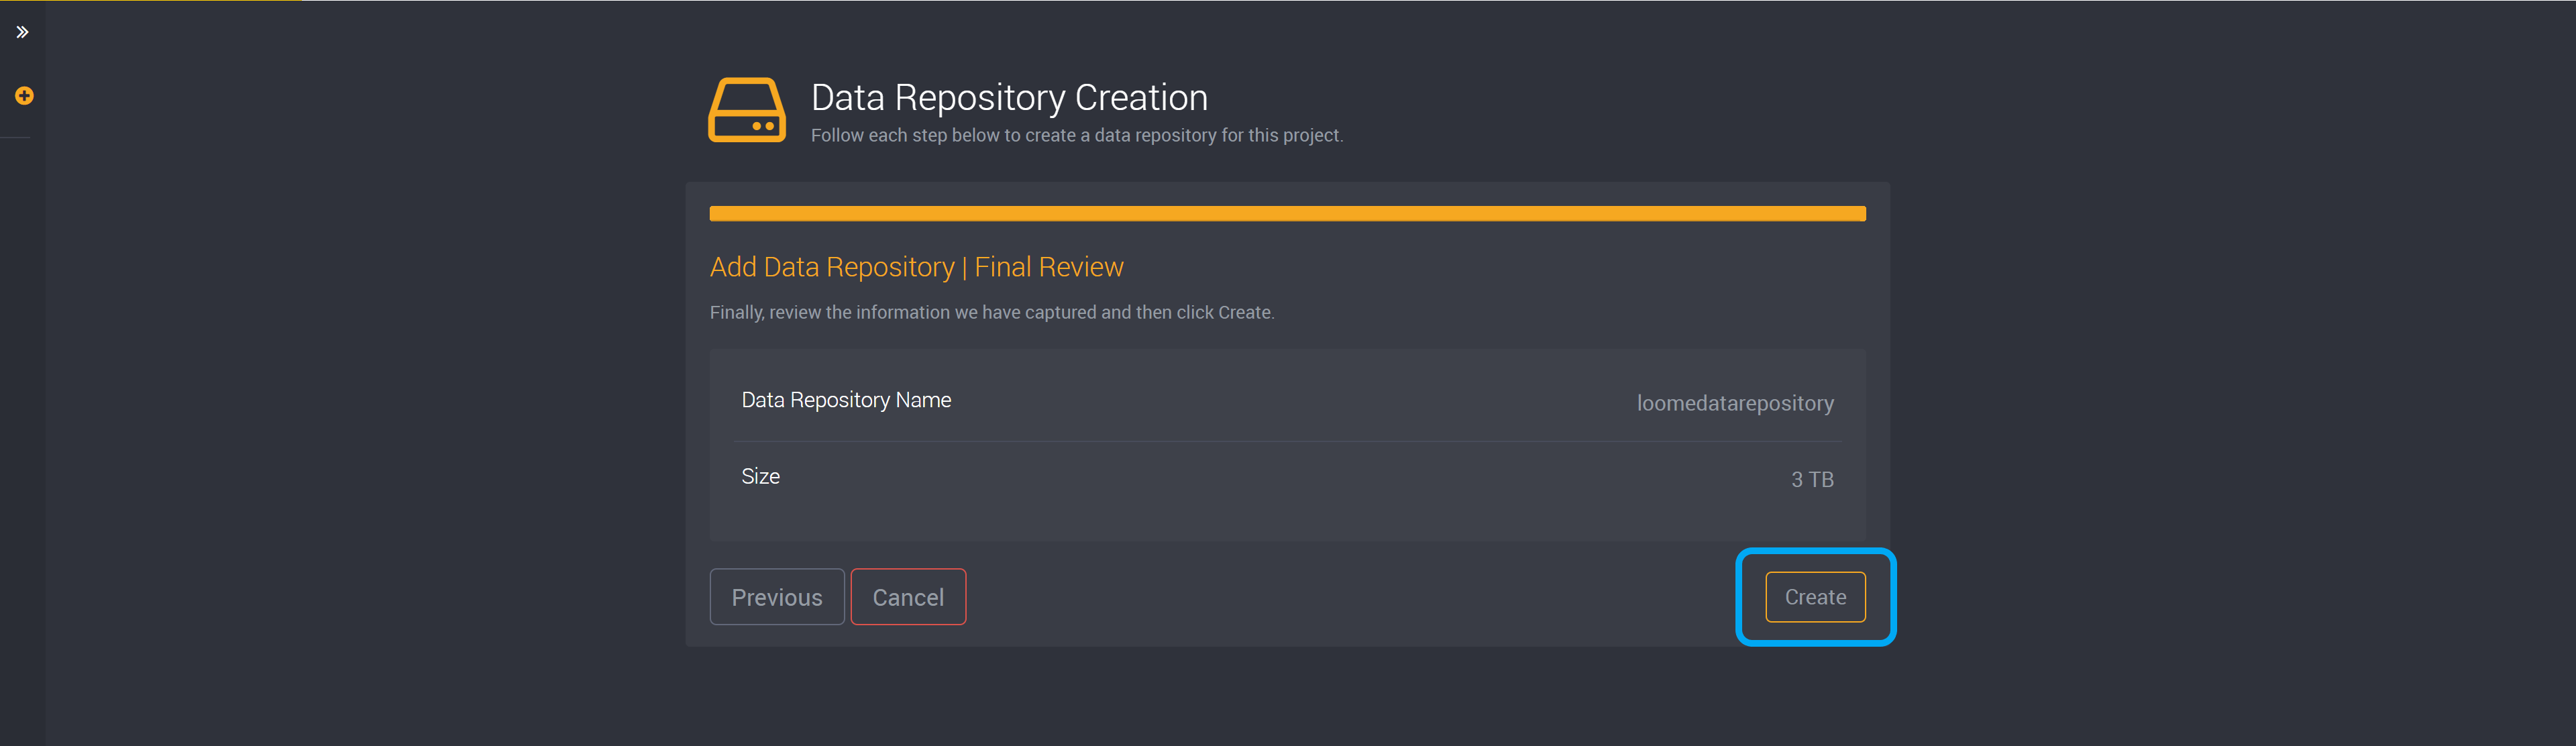
You can then review this data repository and click Create to save.
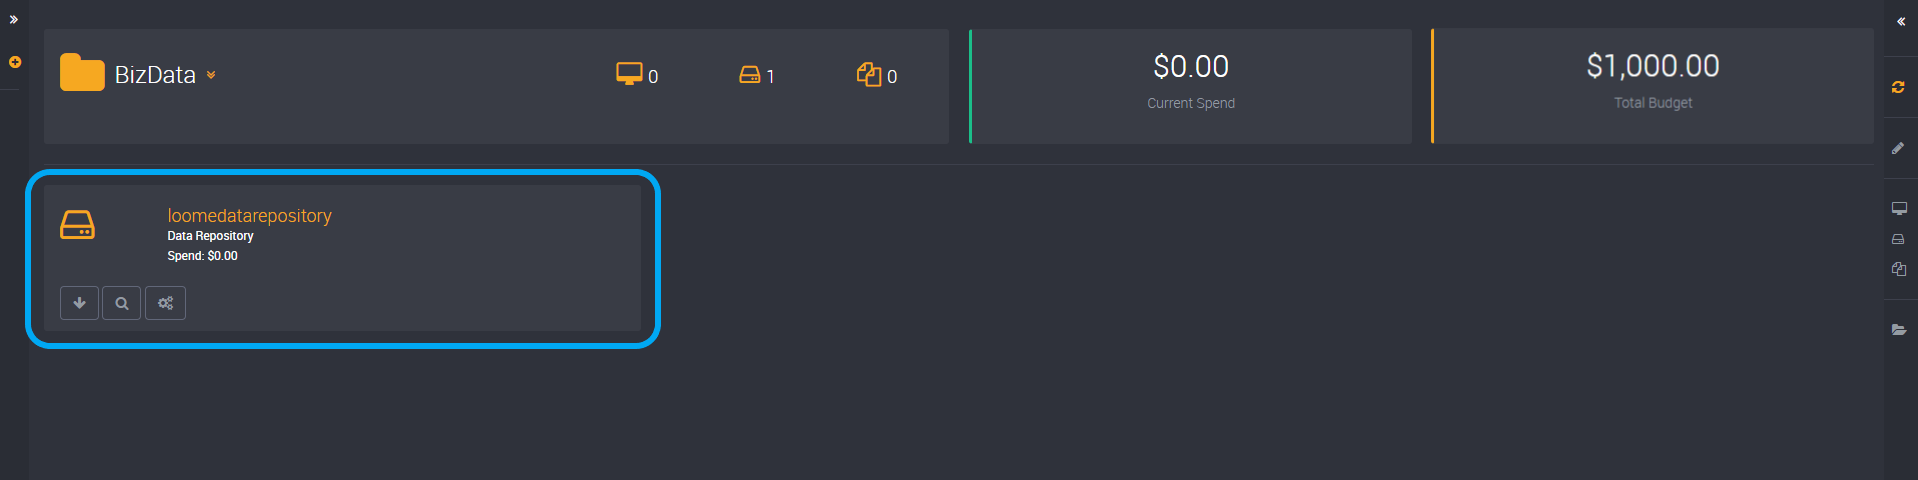
You can then view this added data repository in your project.
Find out more about data repositories here.
Add a Workstation (Optional)
Find Add Workstation in the right action slide-out of your selected project.
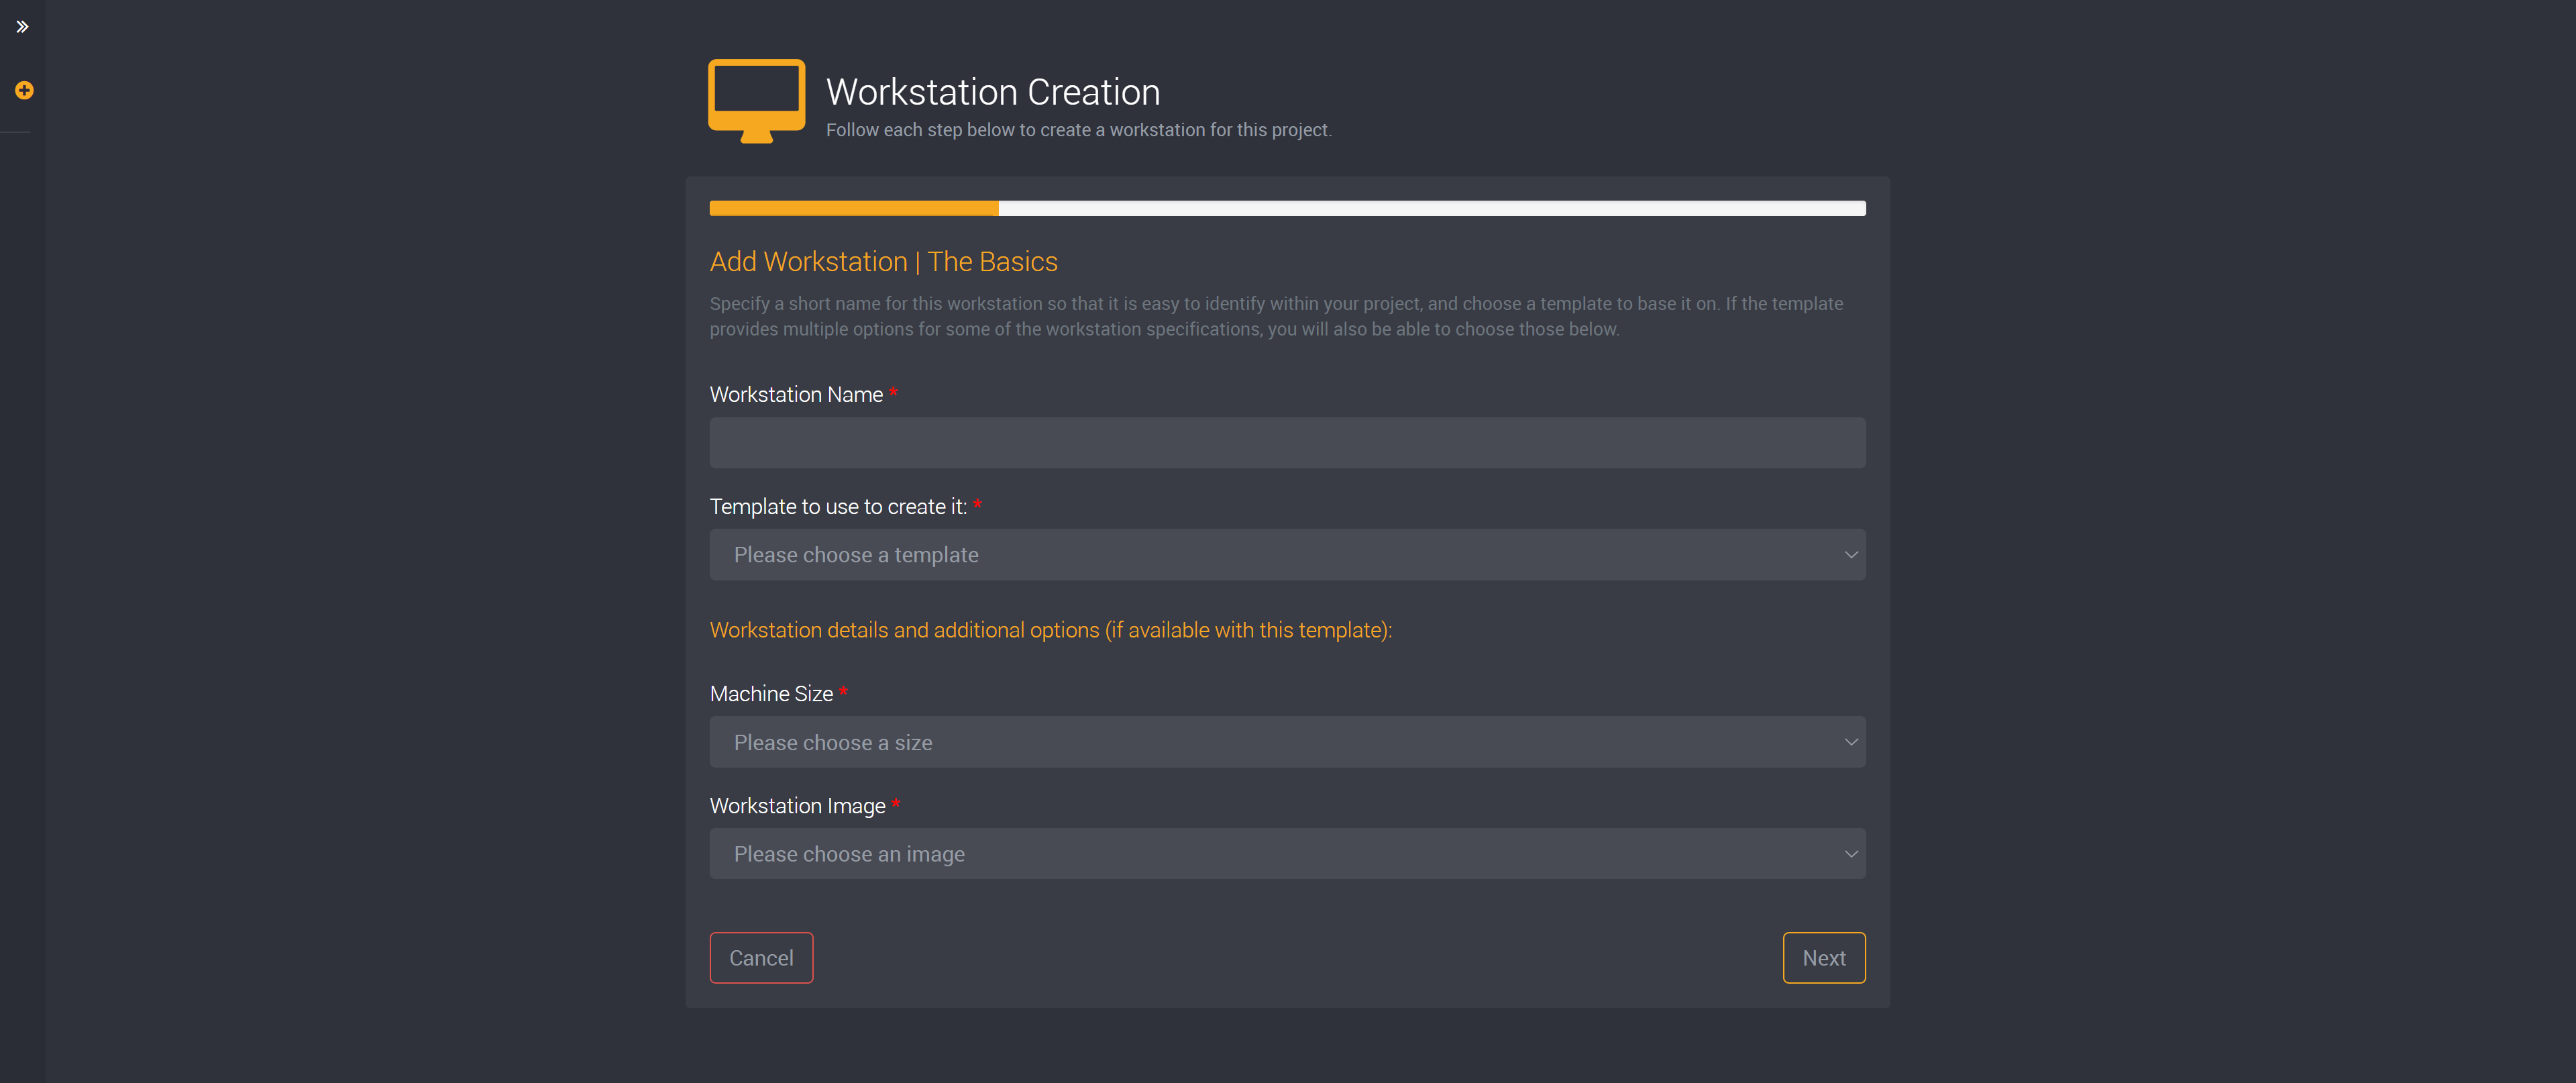
First, provide a name so you can easily identify this workstation later.
Then select a template from the dropdown below. Machine size and workstation image will be populated depending on your selected template.
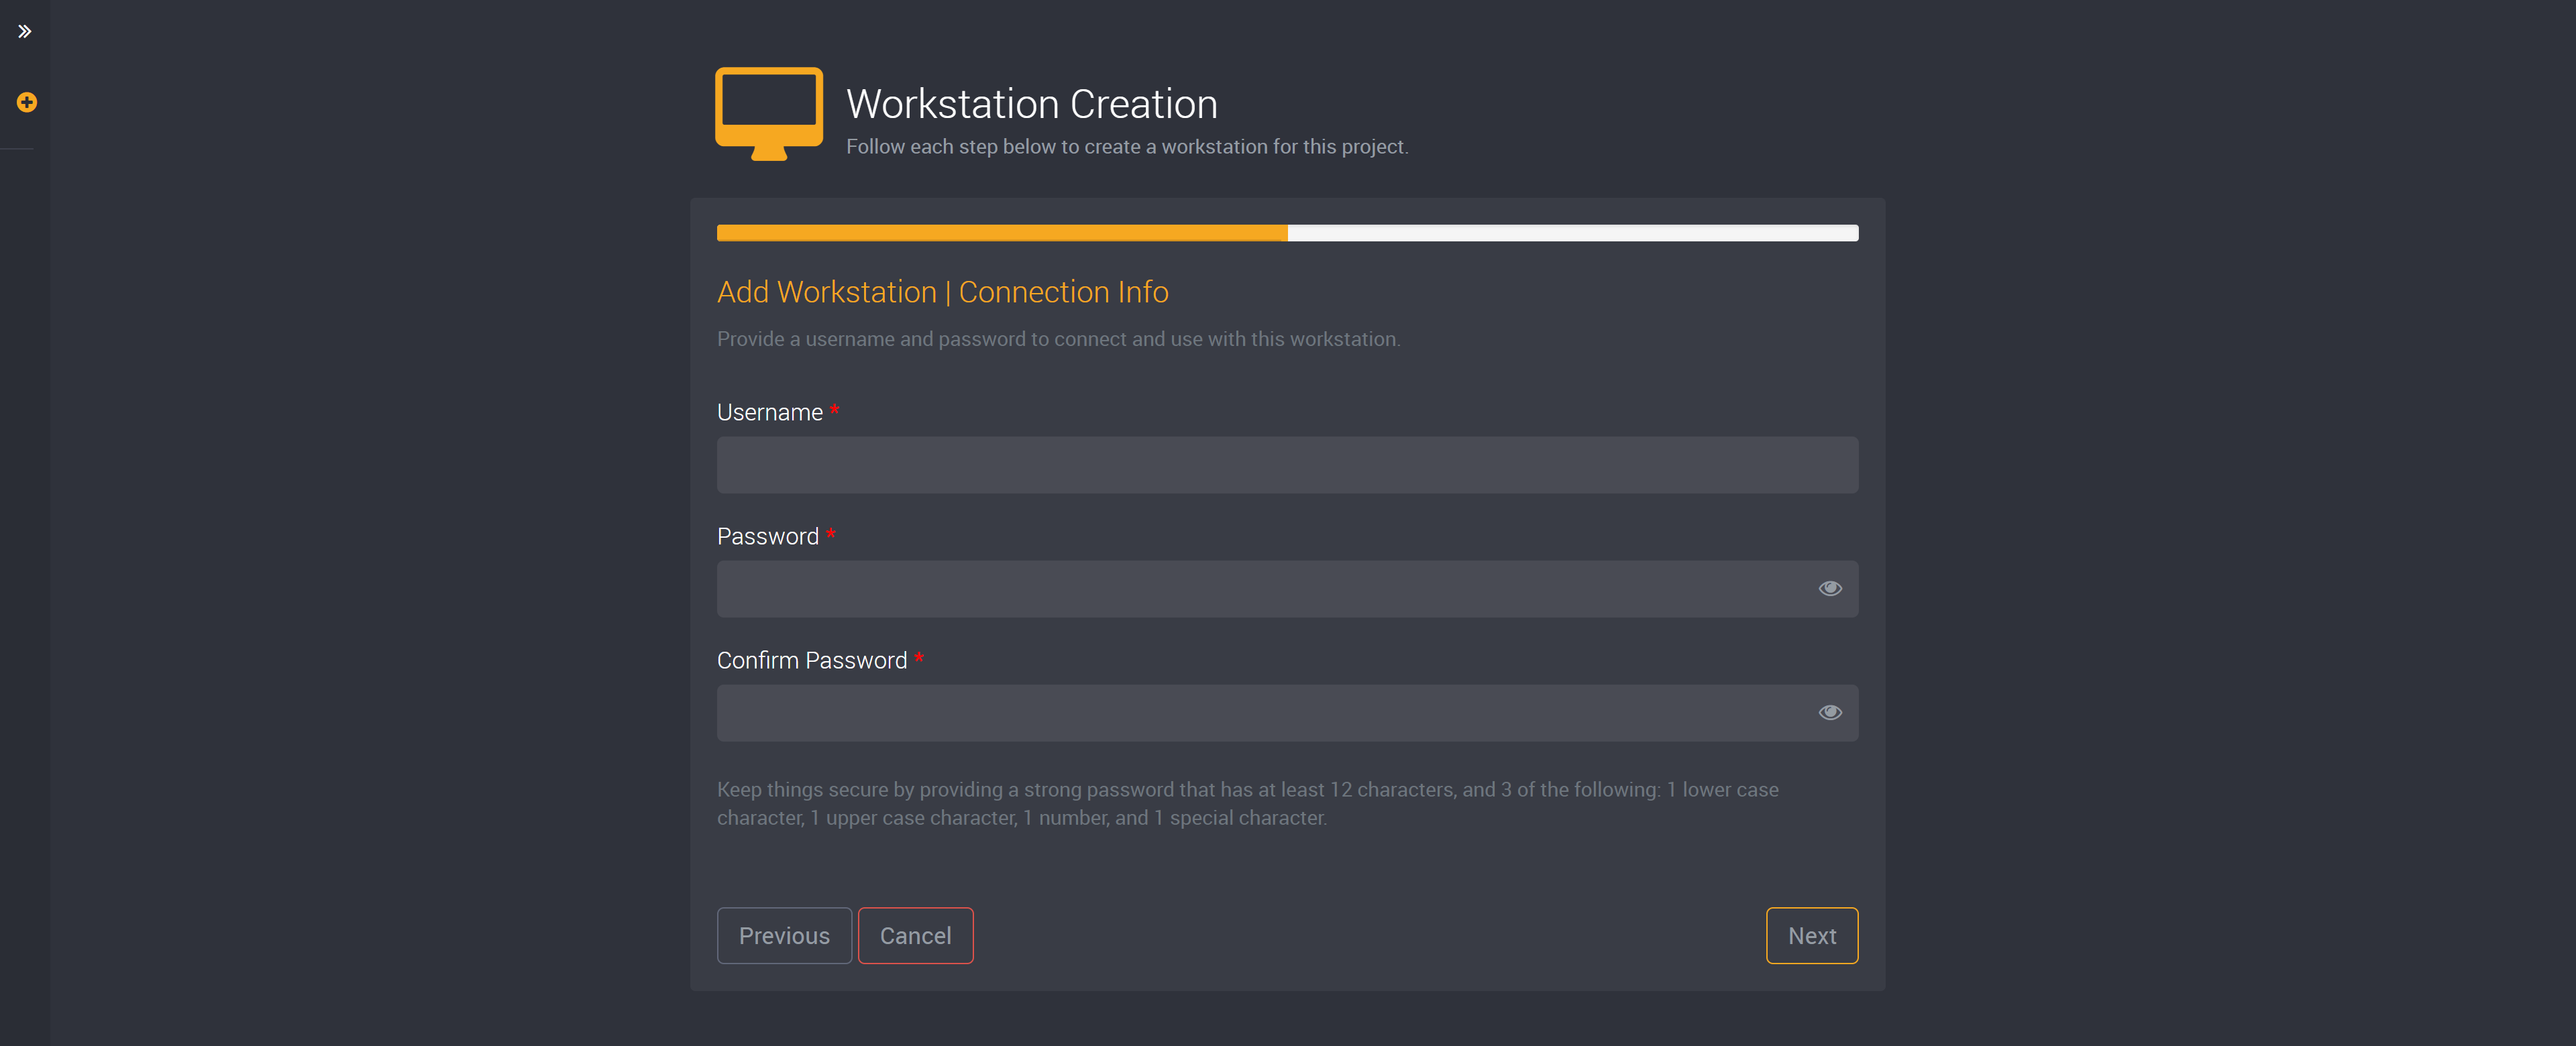
Next create a username and password to connect to this workstation.
You will need a password with a minimum of 12 characters. It must also include at least one uppercase character, one lowercase character, one number and special character.
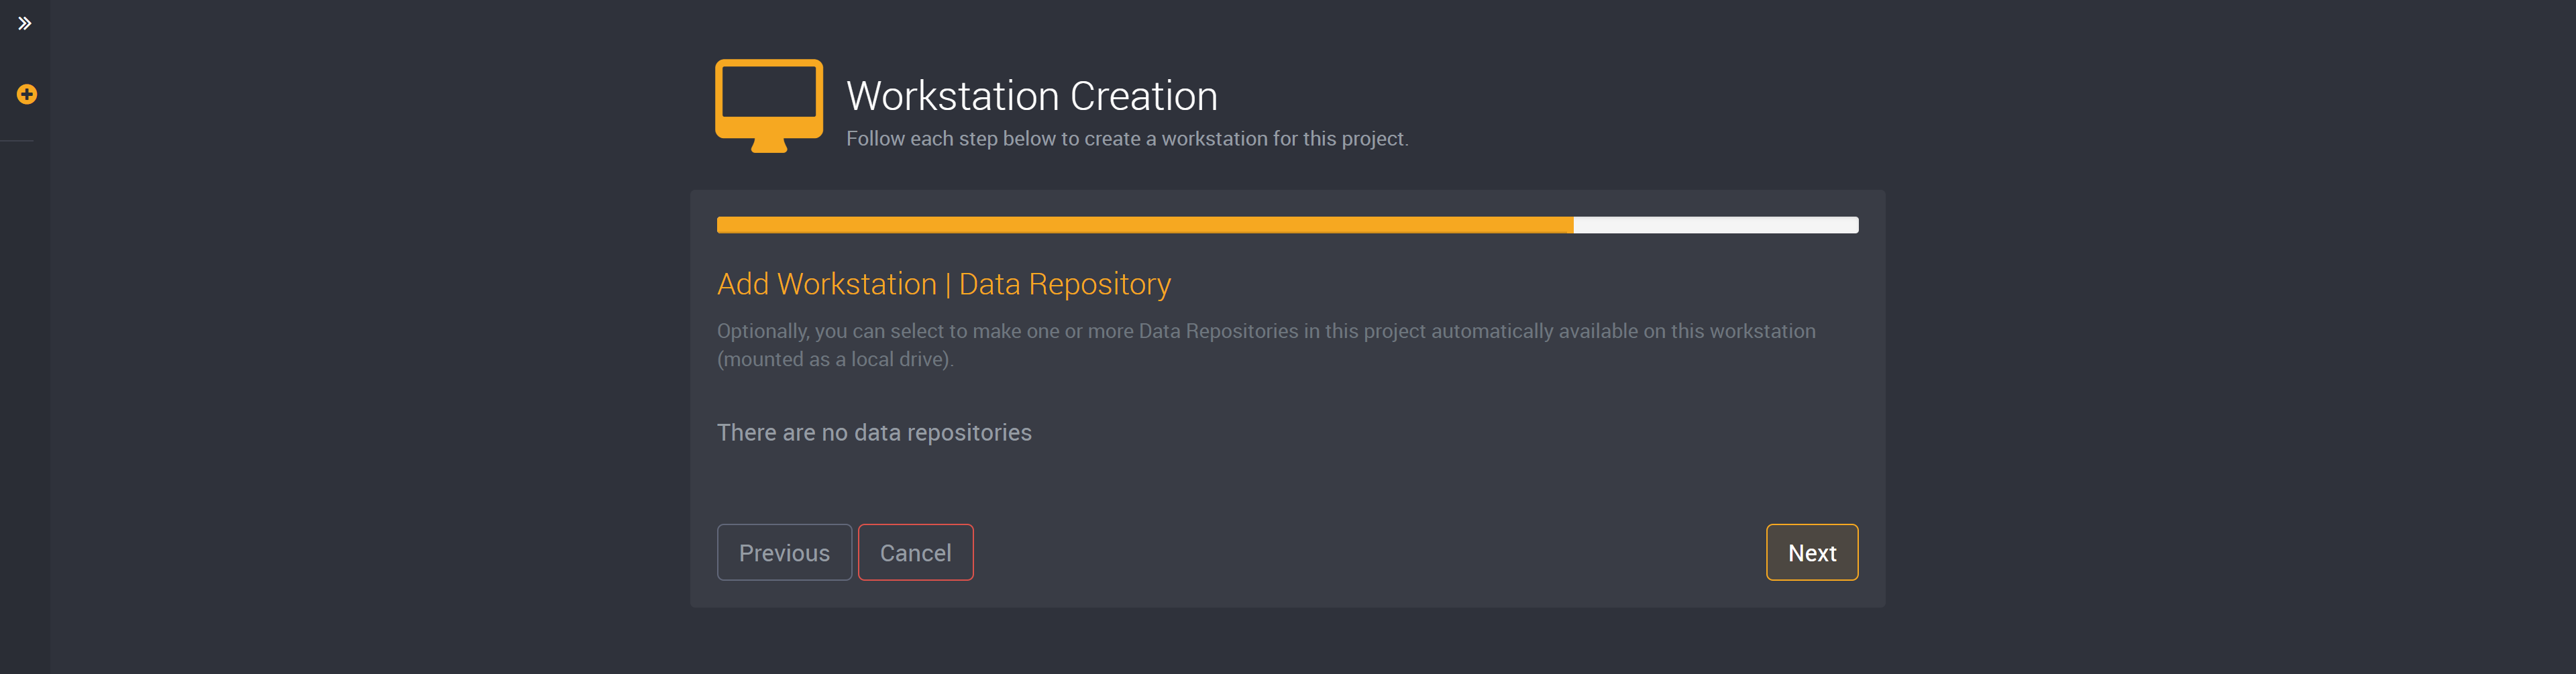
You can choose to select a data repository and it will be available in this workstation as a local drive. You can choose to skip this step and select next if you would not like provide a data repository.
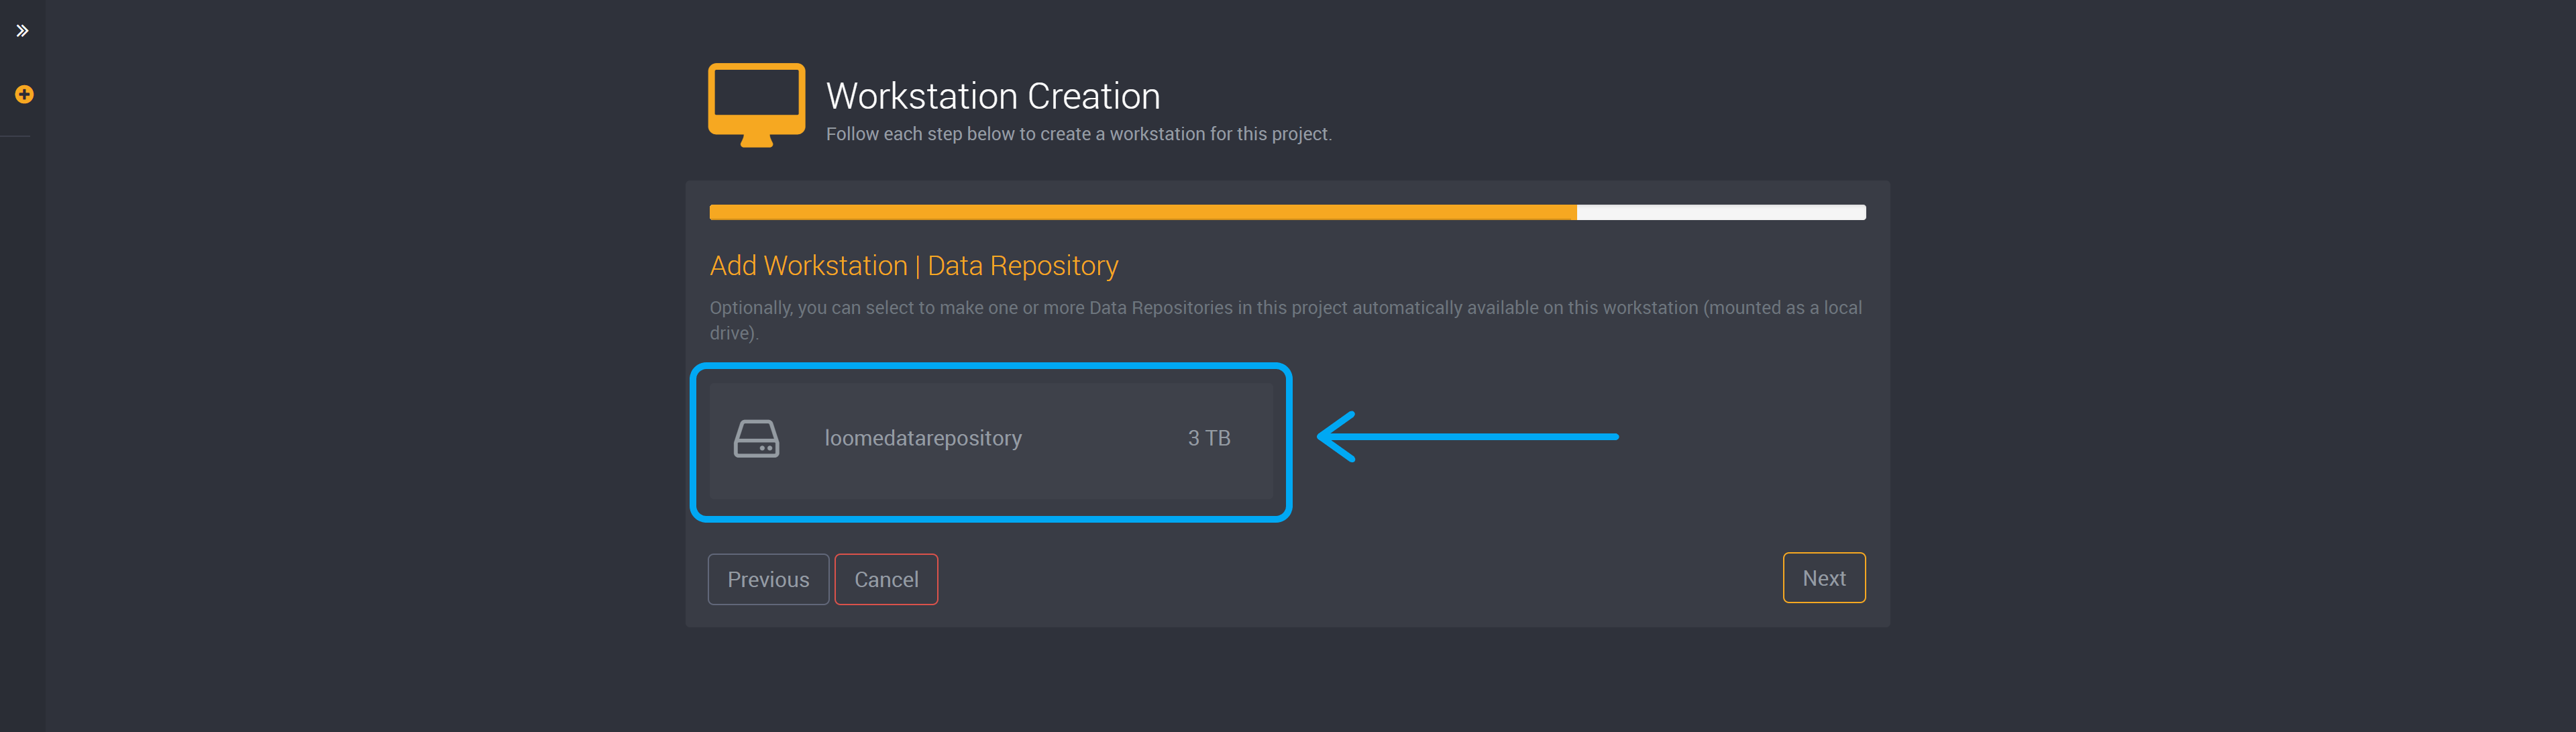
Or you can select a data repository as shown in the image below.
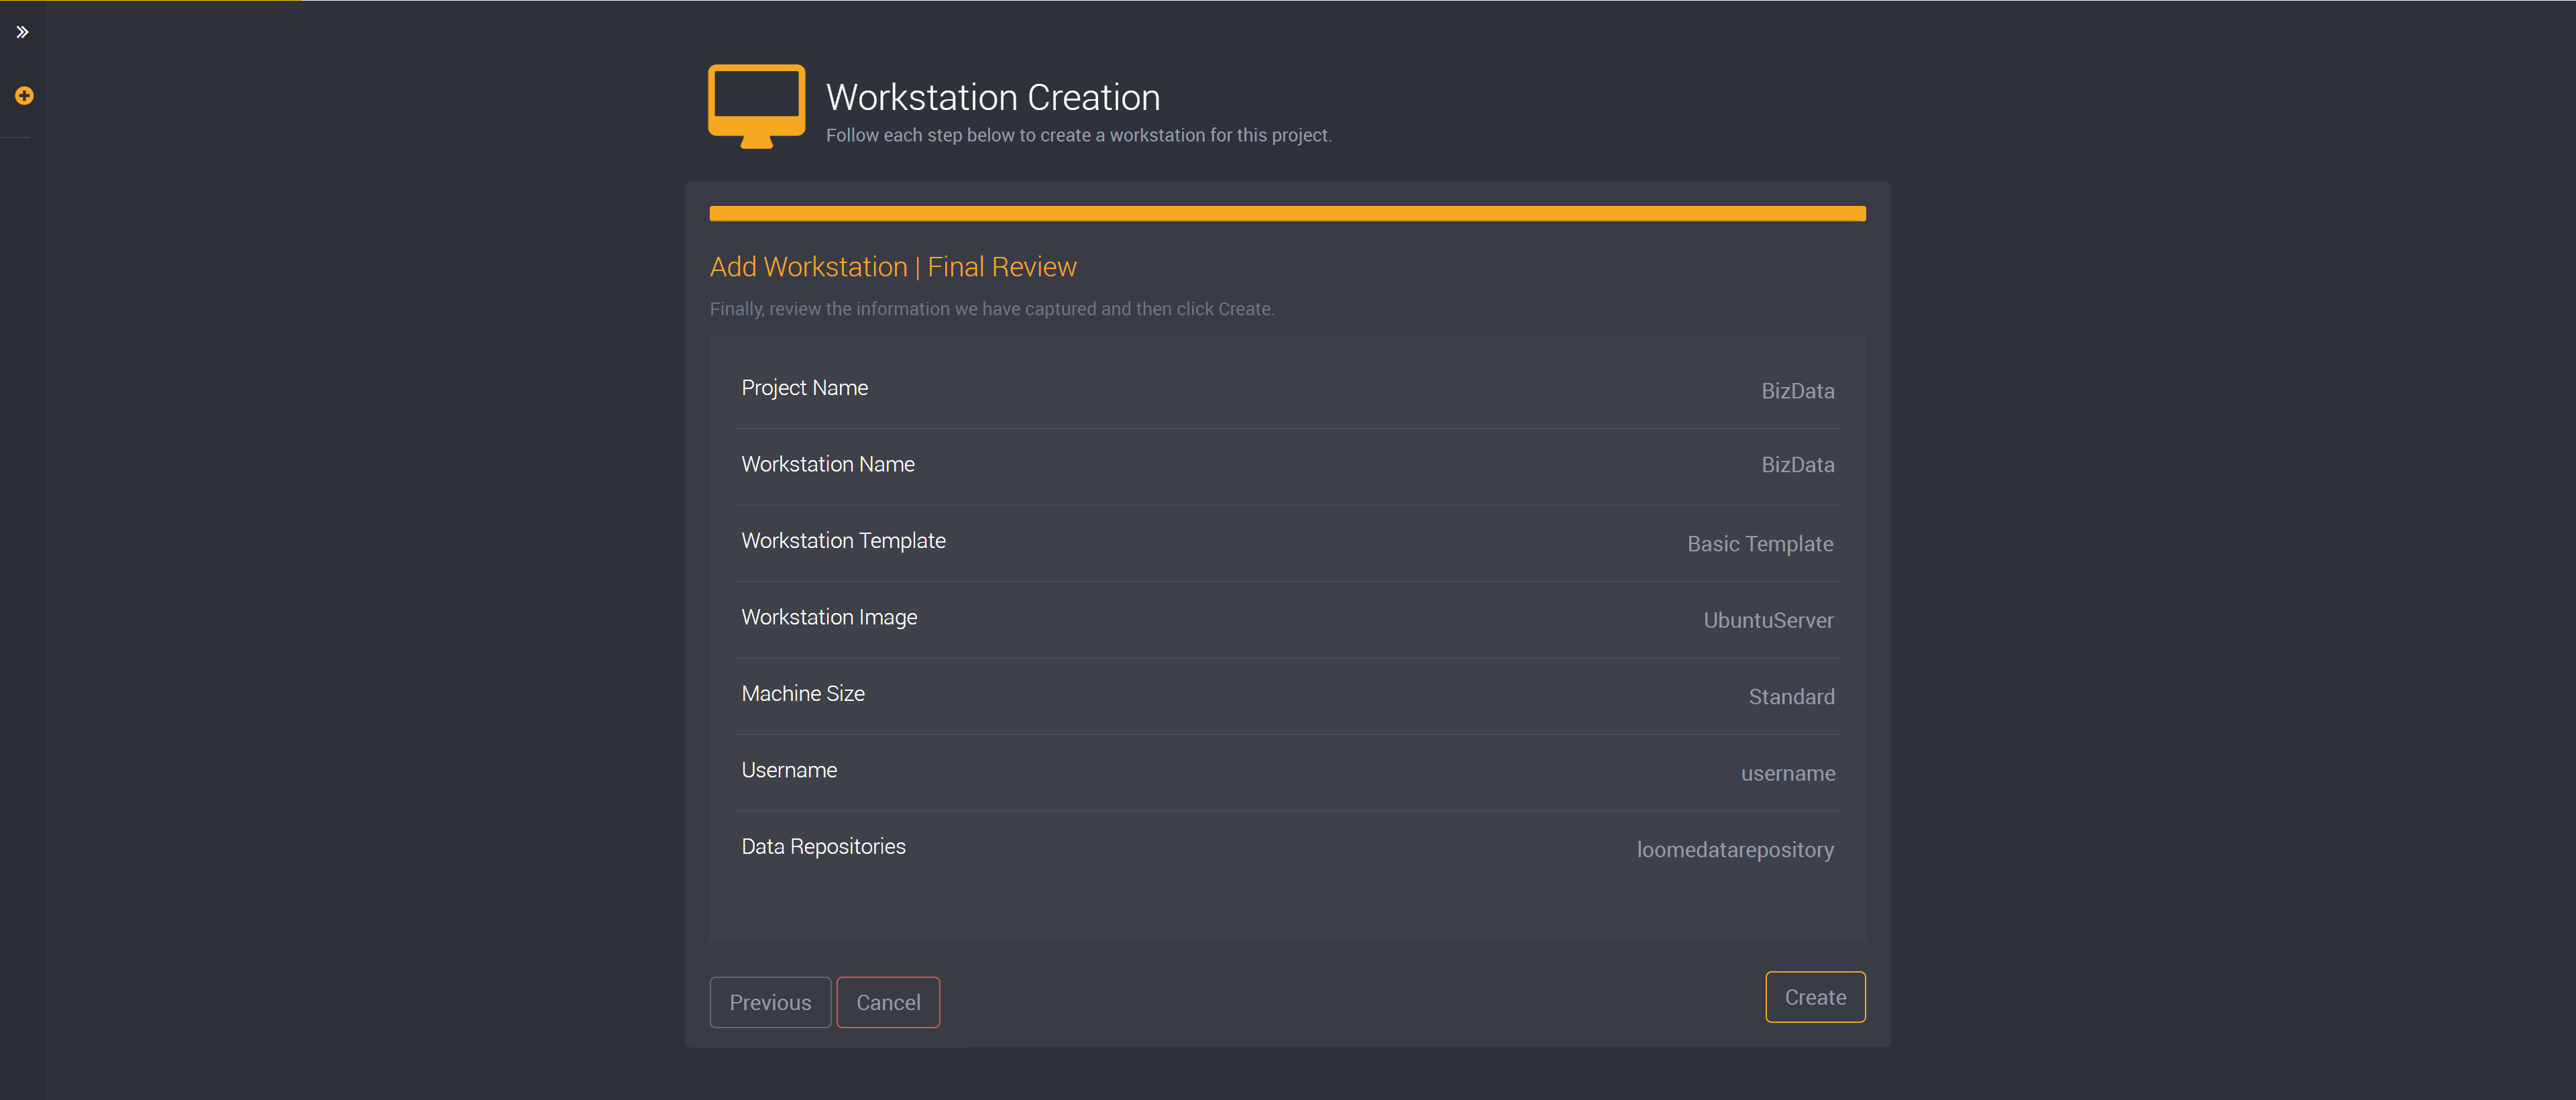
Then you can review all settings for this workstation and click Create to save this workstation.
Learn more about workstations here.
How to Deploy a Workstation (Optional)
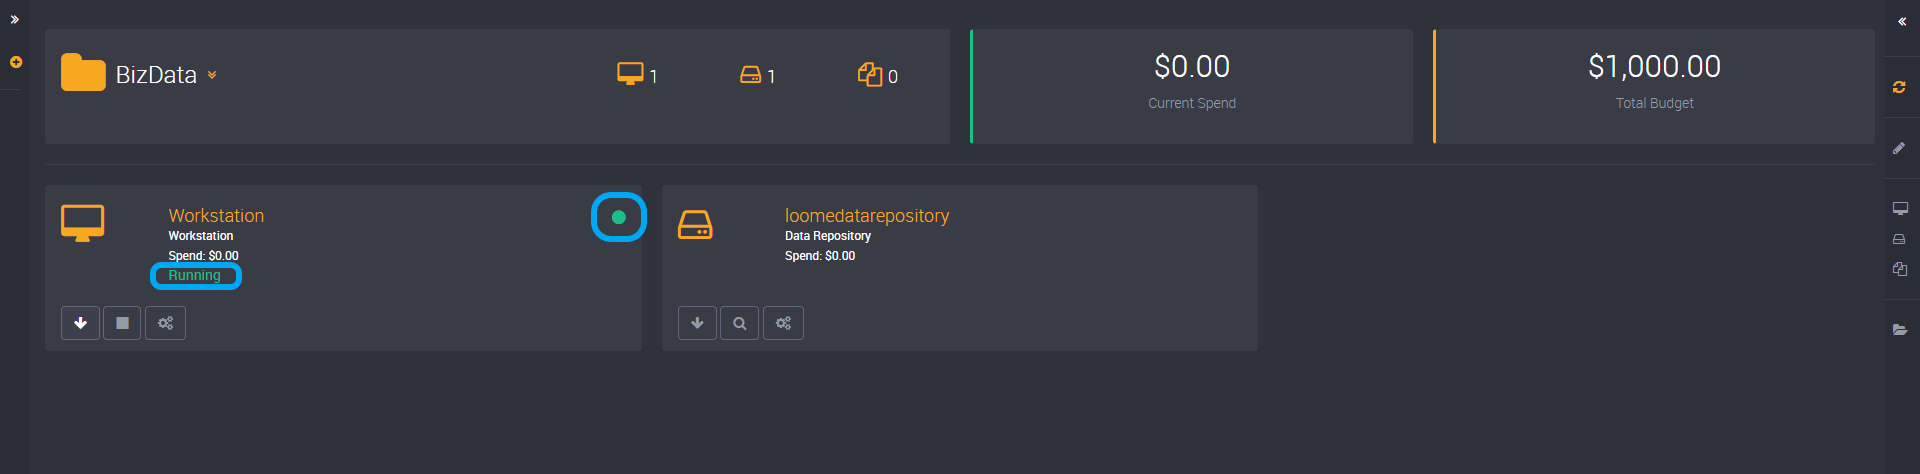
When you have first added a workstation, it will automatically be enabled. The green icon will indicate that it is online.
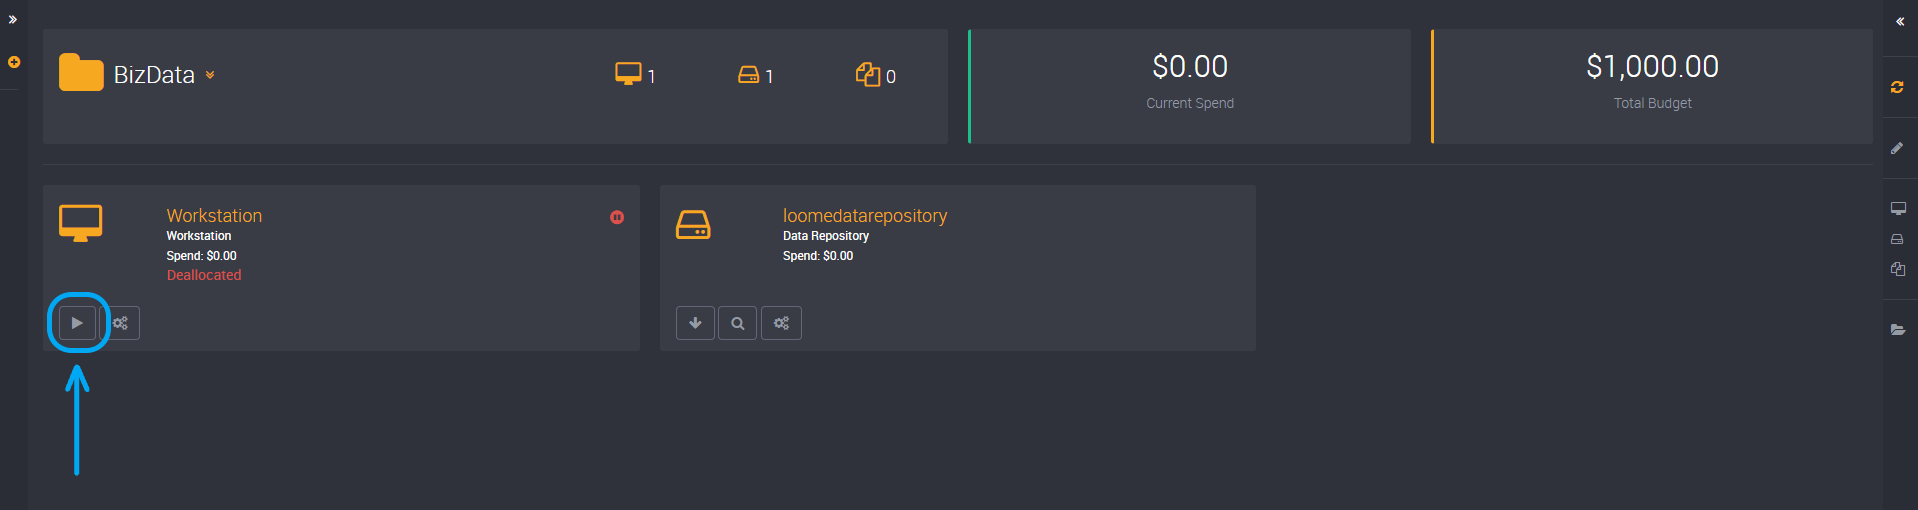
To start an existing workstation, you can find the ‘Start’ button on the workstation card.
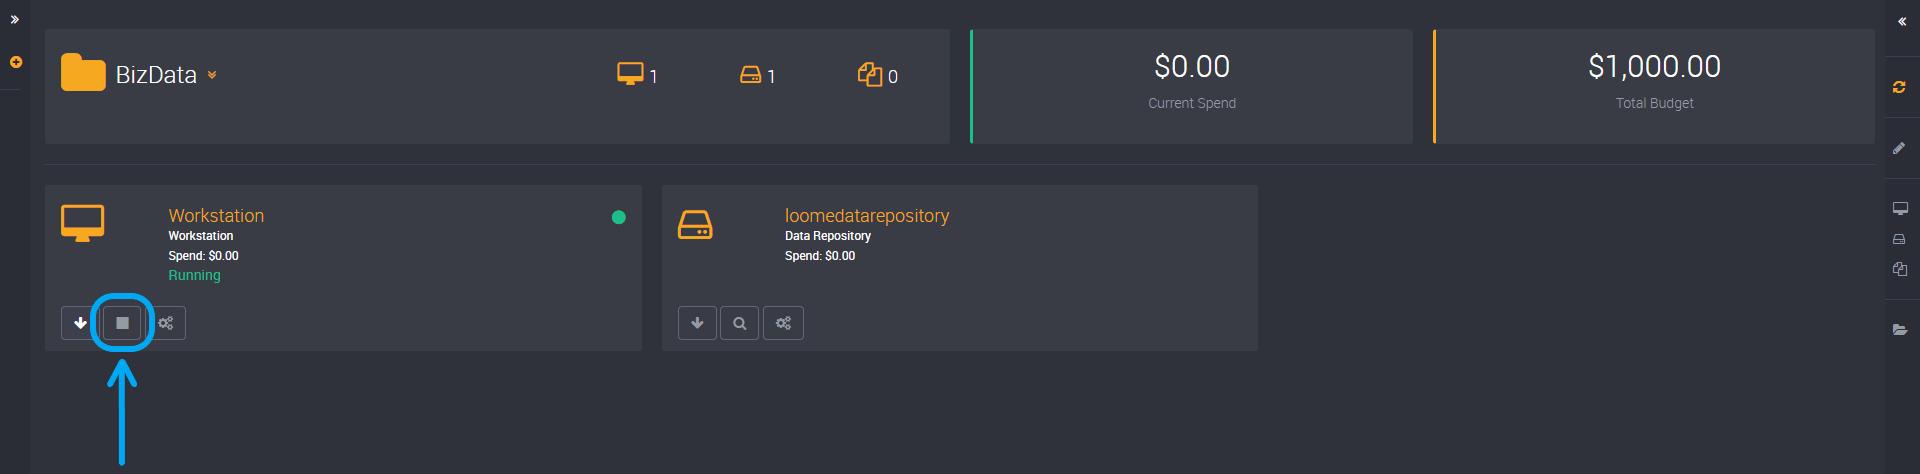
Once enabled, you can connect to this workstation using the ‘Connect’ button on the workstation card, and you can copy the IP address to connect to the workstation or you can download an RDP file.

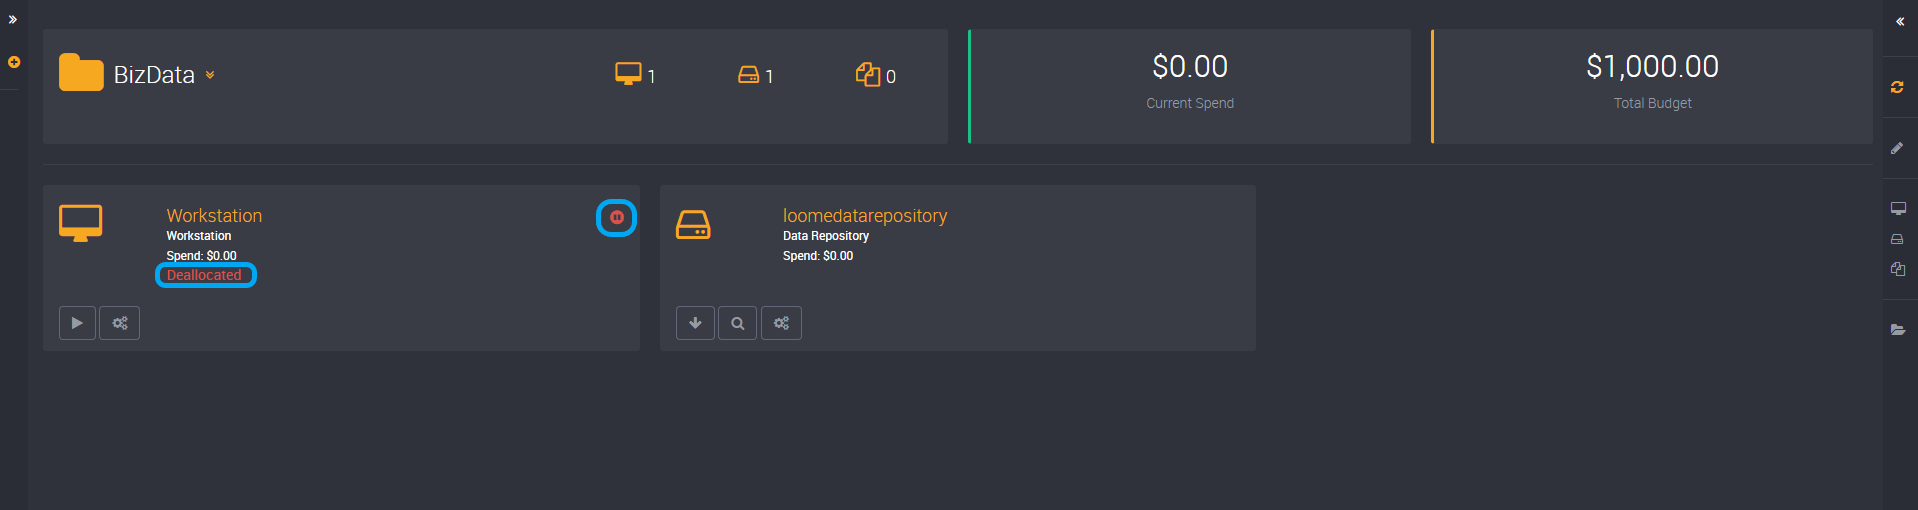
You can find the Stop button on the workstation card to deallocate your workstation.
It will flash red as it deallocates the workstation.
Once it has completed, you will see the pause symbol in the red icon.