How to Create a Rule using Source Data
Creating a New Rule
Click on Create New Item to be guided through each step you need to create a new rule, such as selecting your data platform, entering your query, and adding custom fields and communication rules.
Creating a new business rule in Loome Monitor consists of the following steps:
- Select a Data Source
- Select your Connections
- Add a Query
- Select a Key Column
- Choose an Assigned User Column
- Create a Custom Field
- Run the Rule
- Add Communication Rules (Optional)
- Record Status (Optional)
Choose your Project and Rule Type
Select the project that will contain this rule.
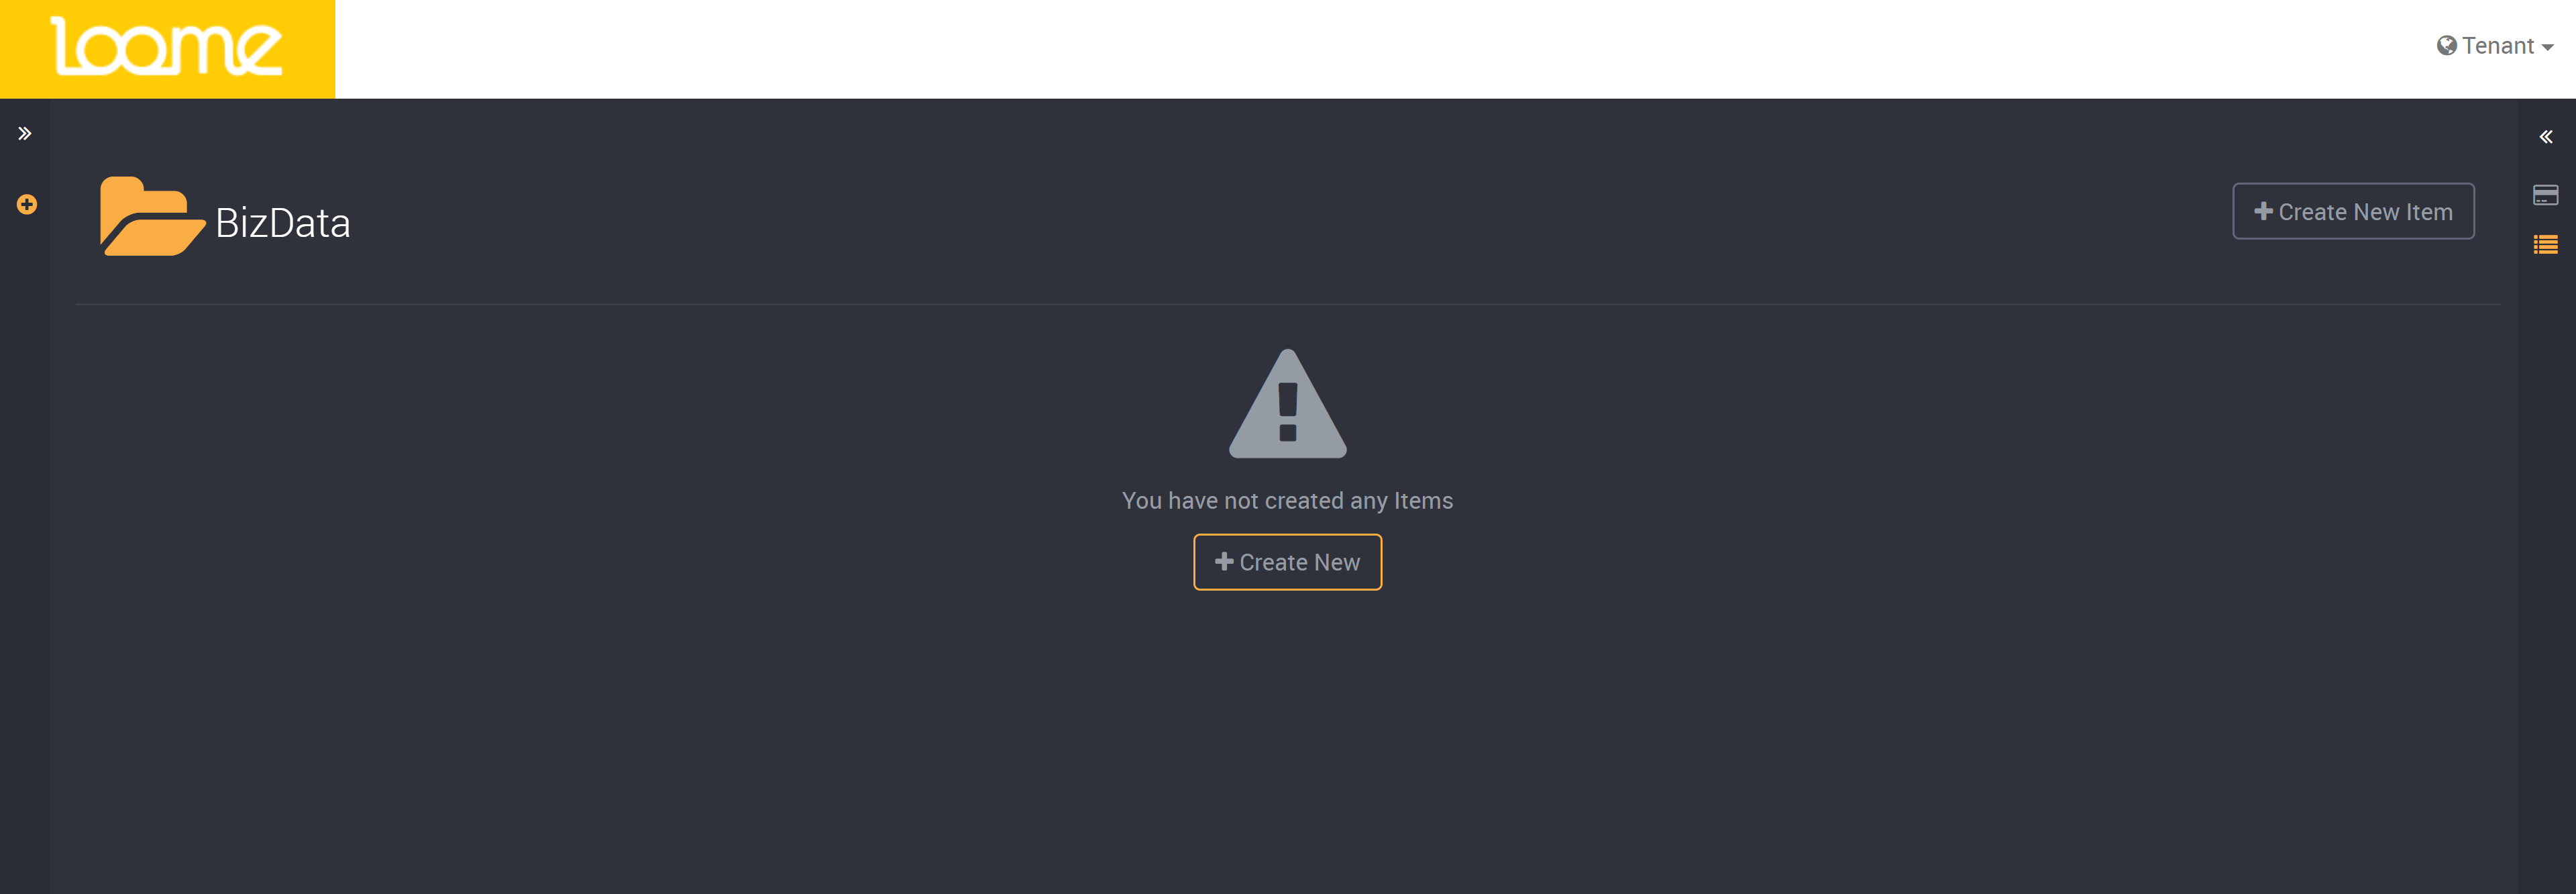
On this page, click on Create New Item. You will be directed to a wizard that will guide you through all the steps you need to create an alert, reference or glossary.
Complete the following sections whether you are creating an alert, reference or glossary rule type. We have chosen an alert for this example but these steps apply to all rule types.
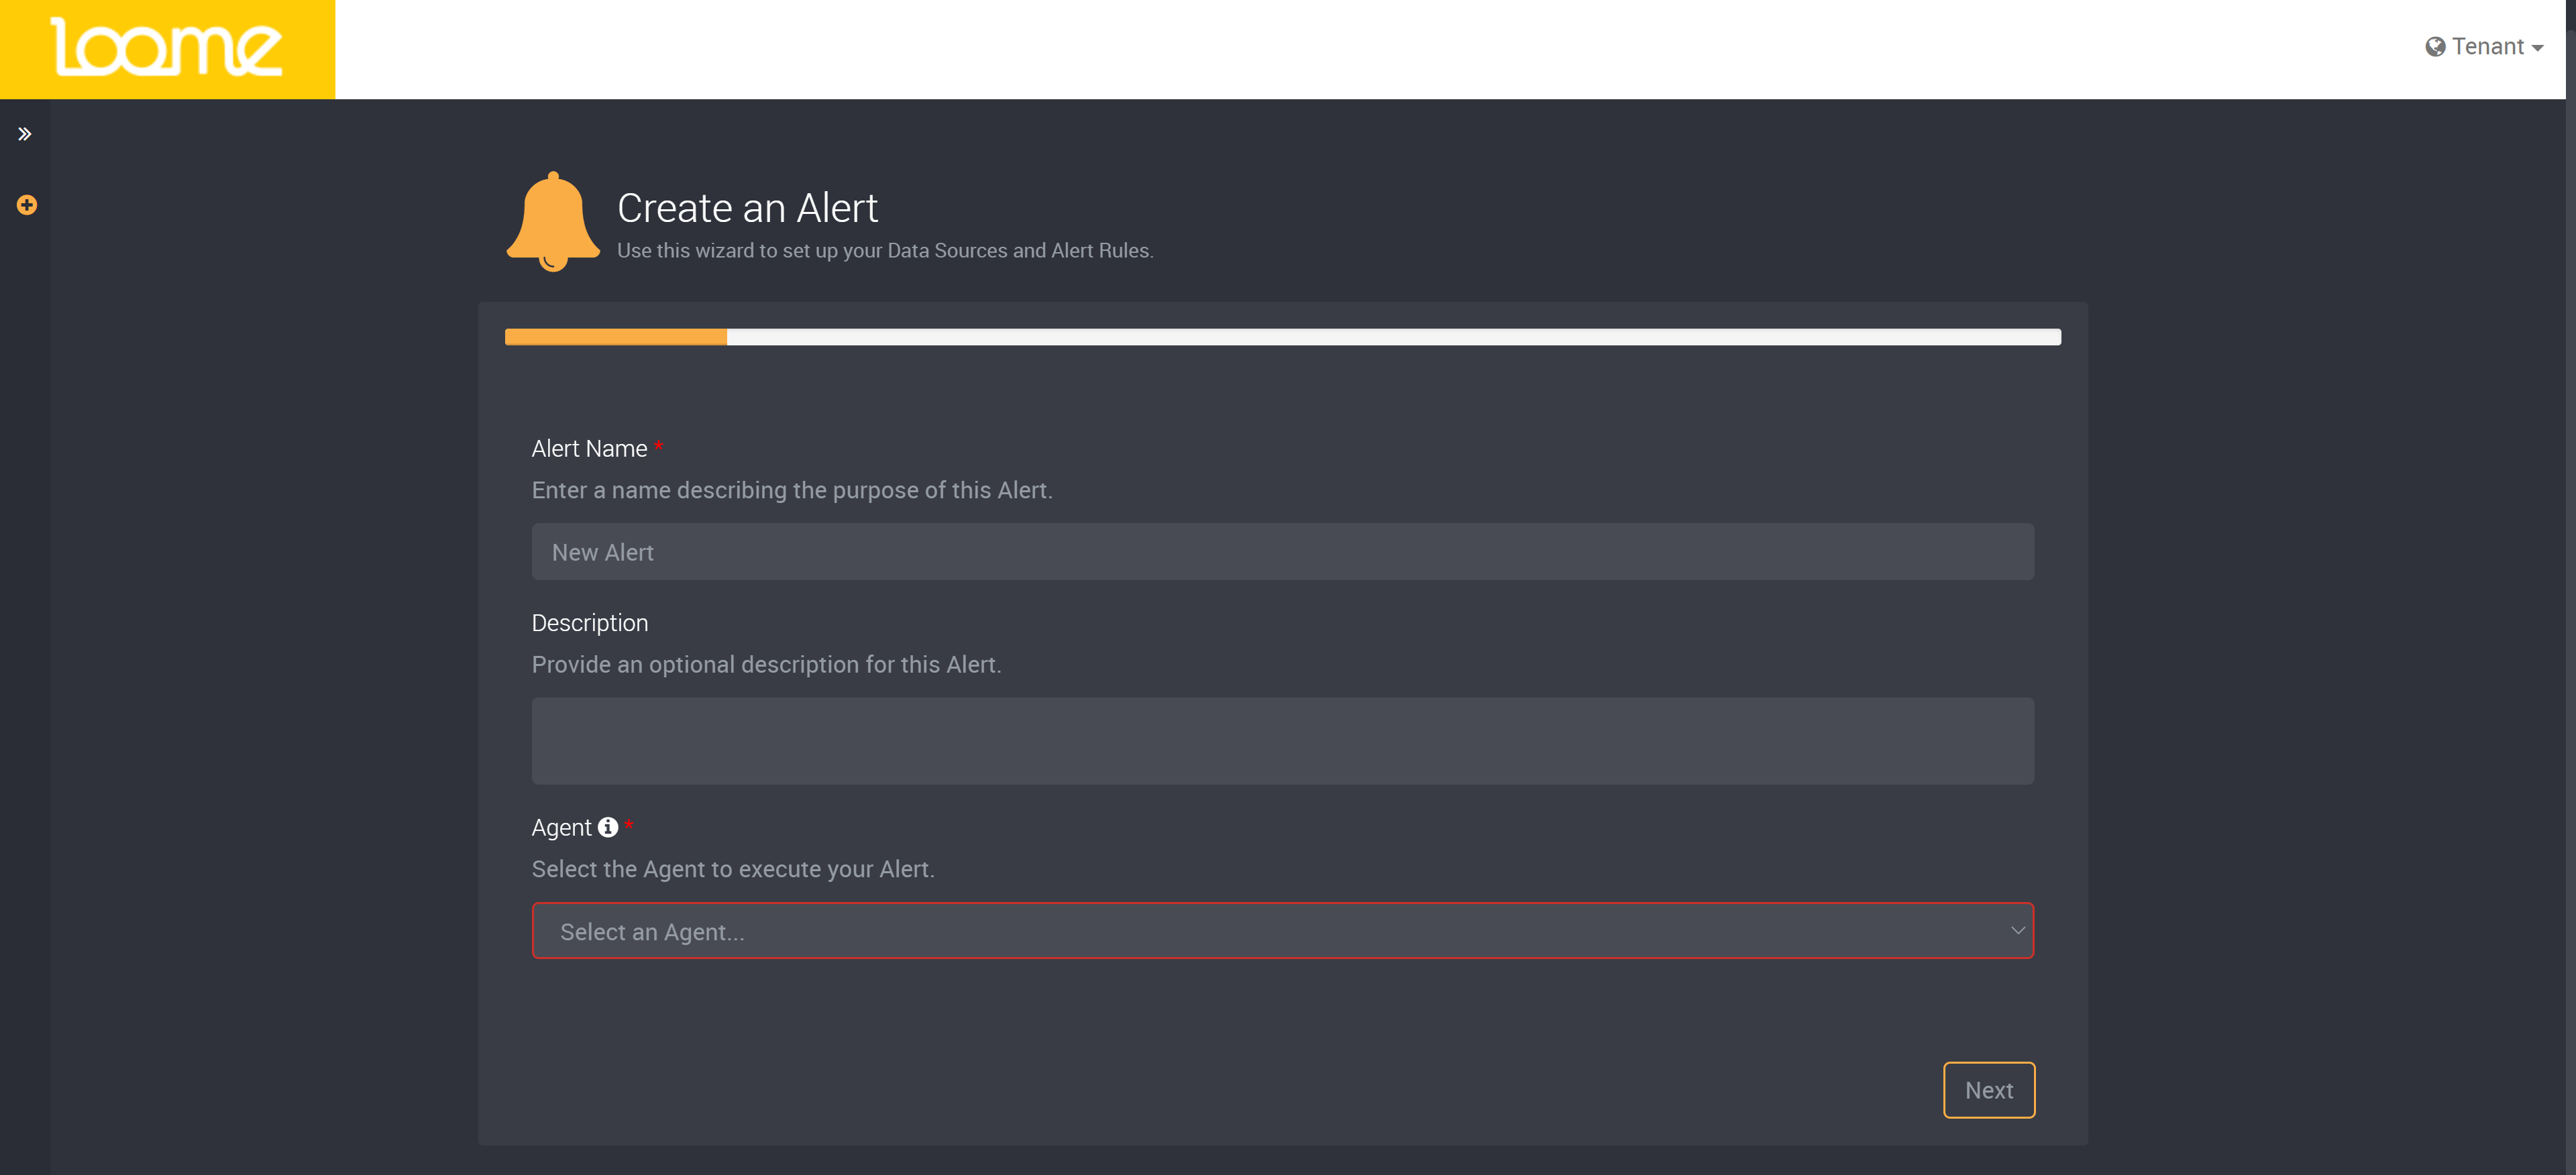
Choose your Name, Description and Agent
The first step in creating a rule, no matter the type, is providing a name for the rule. Rule names should be user friendly, unique, and are summaries of the purpose of the rule.
You also have the option to add a description for this rule. Here you can describe the rule and its purpose in more detail. This will display in card and list view of your project.
Then select an agent that will execute this rule. An agent contains all the code that allows rules to run.
In a Glossary or Reference Choose Between Source or Manual Data
If you have chosen to create a glossary or reference, you will then need to choose whether this rule will obtain its data from a source or if you will manually enter data. You can also choose to select to use both source and manually added data.
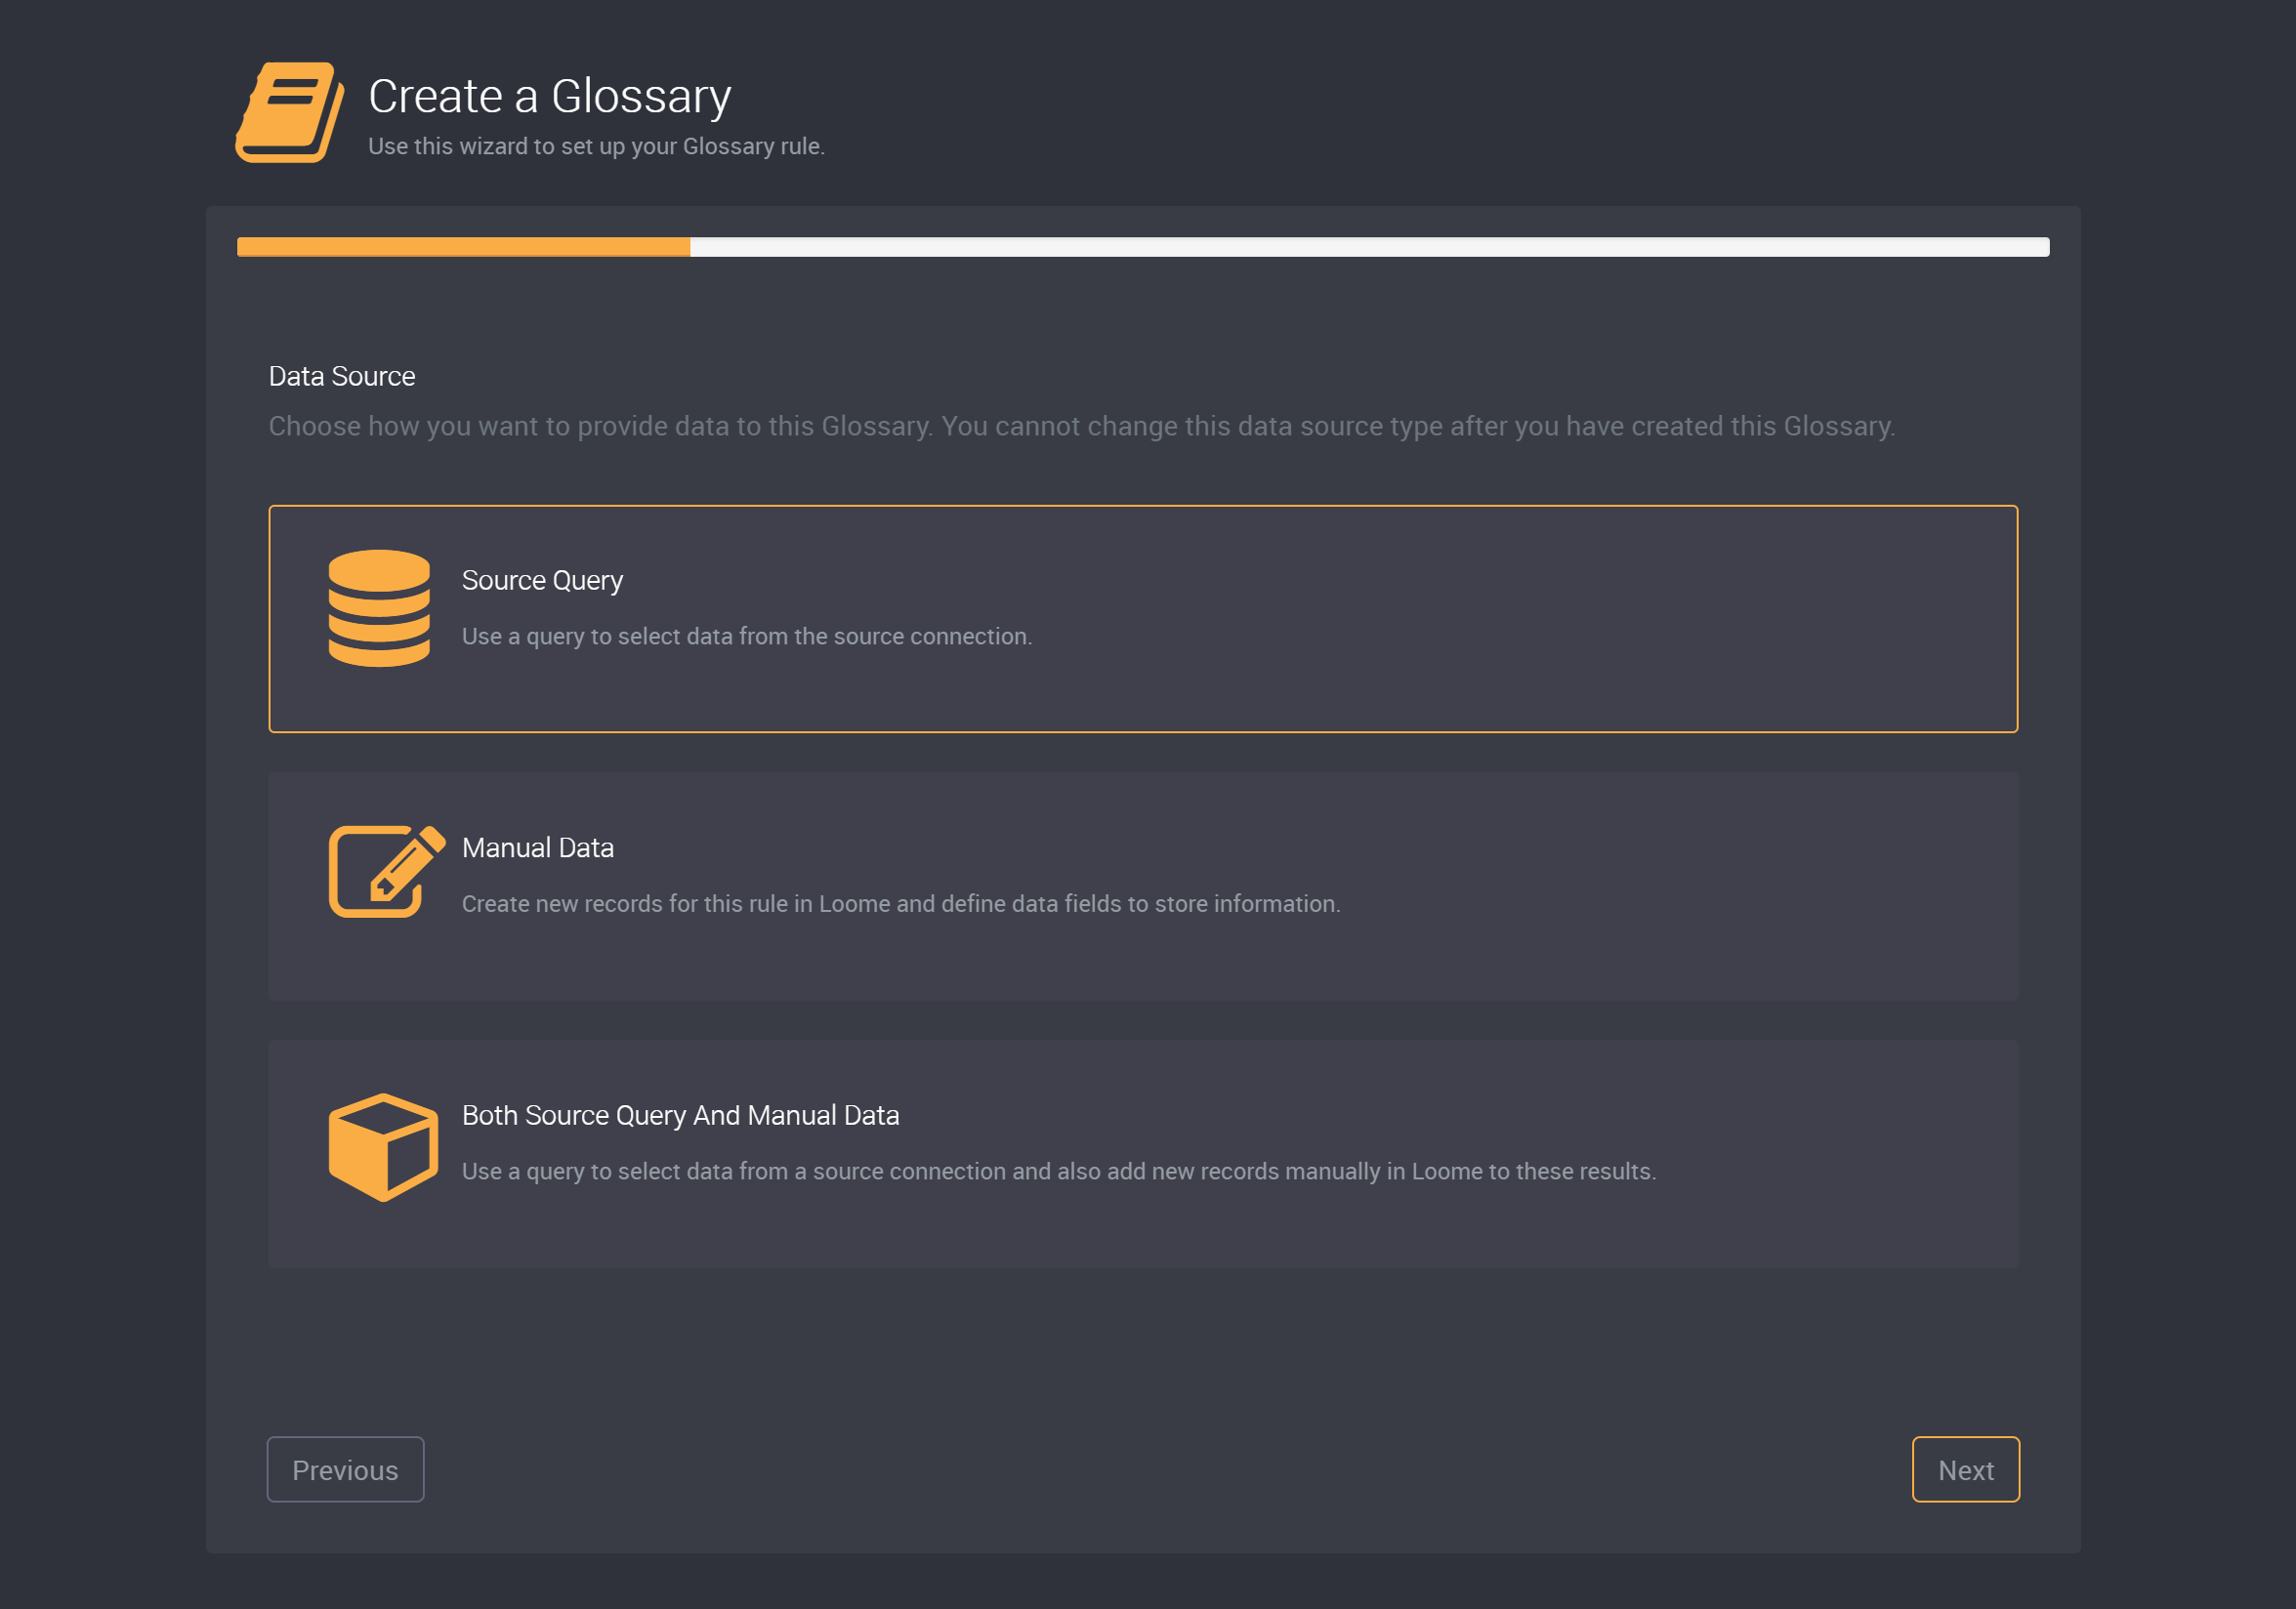
Continue following this guide if you are creating a rule that only uses source data. If you have chosen to create a manual rule follow the guide in this link.
Please note that you cannot change the data source type after you have created and run this rule.
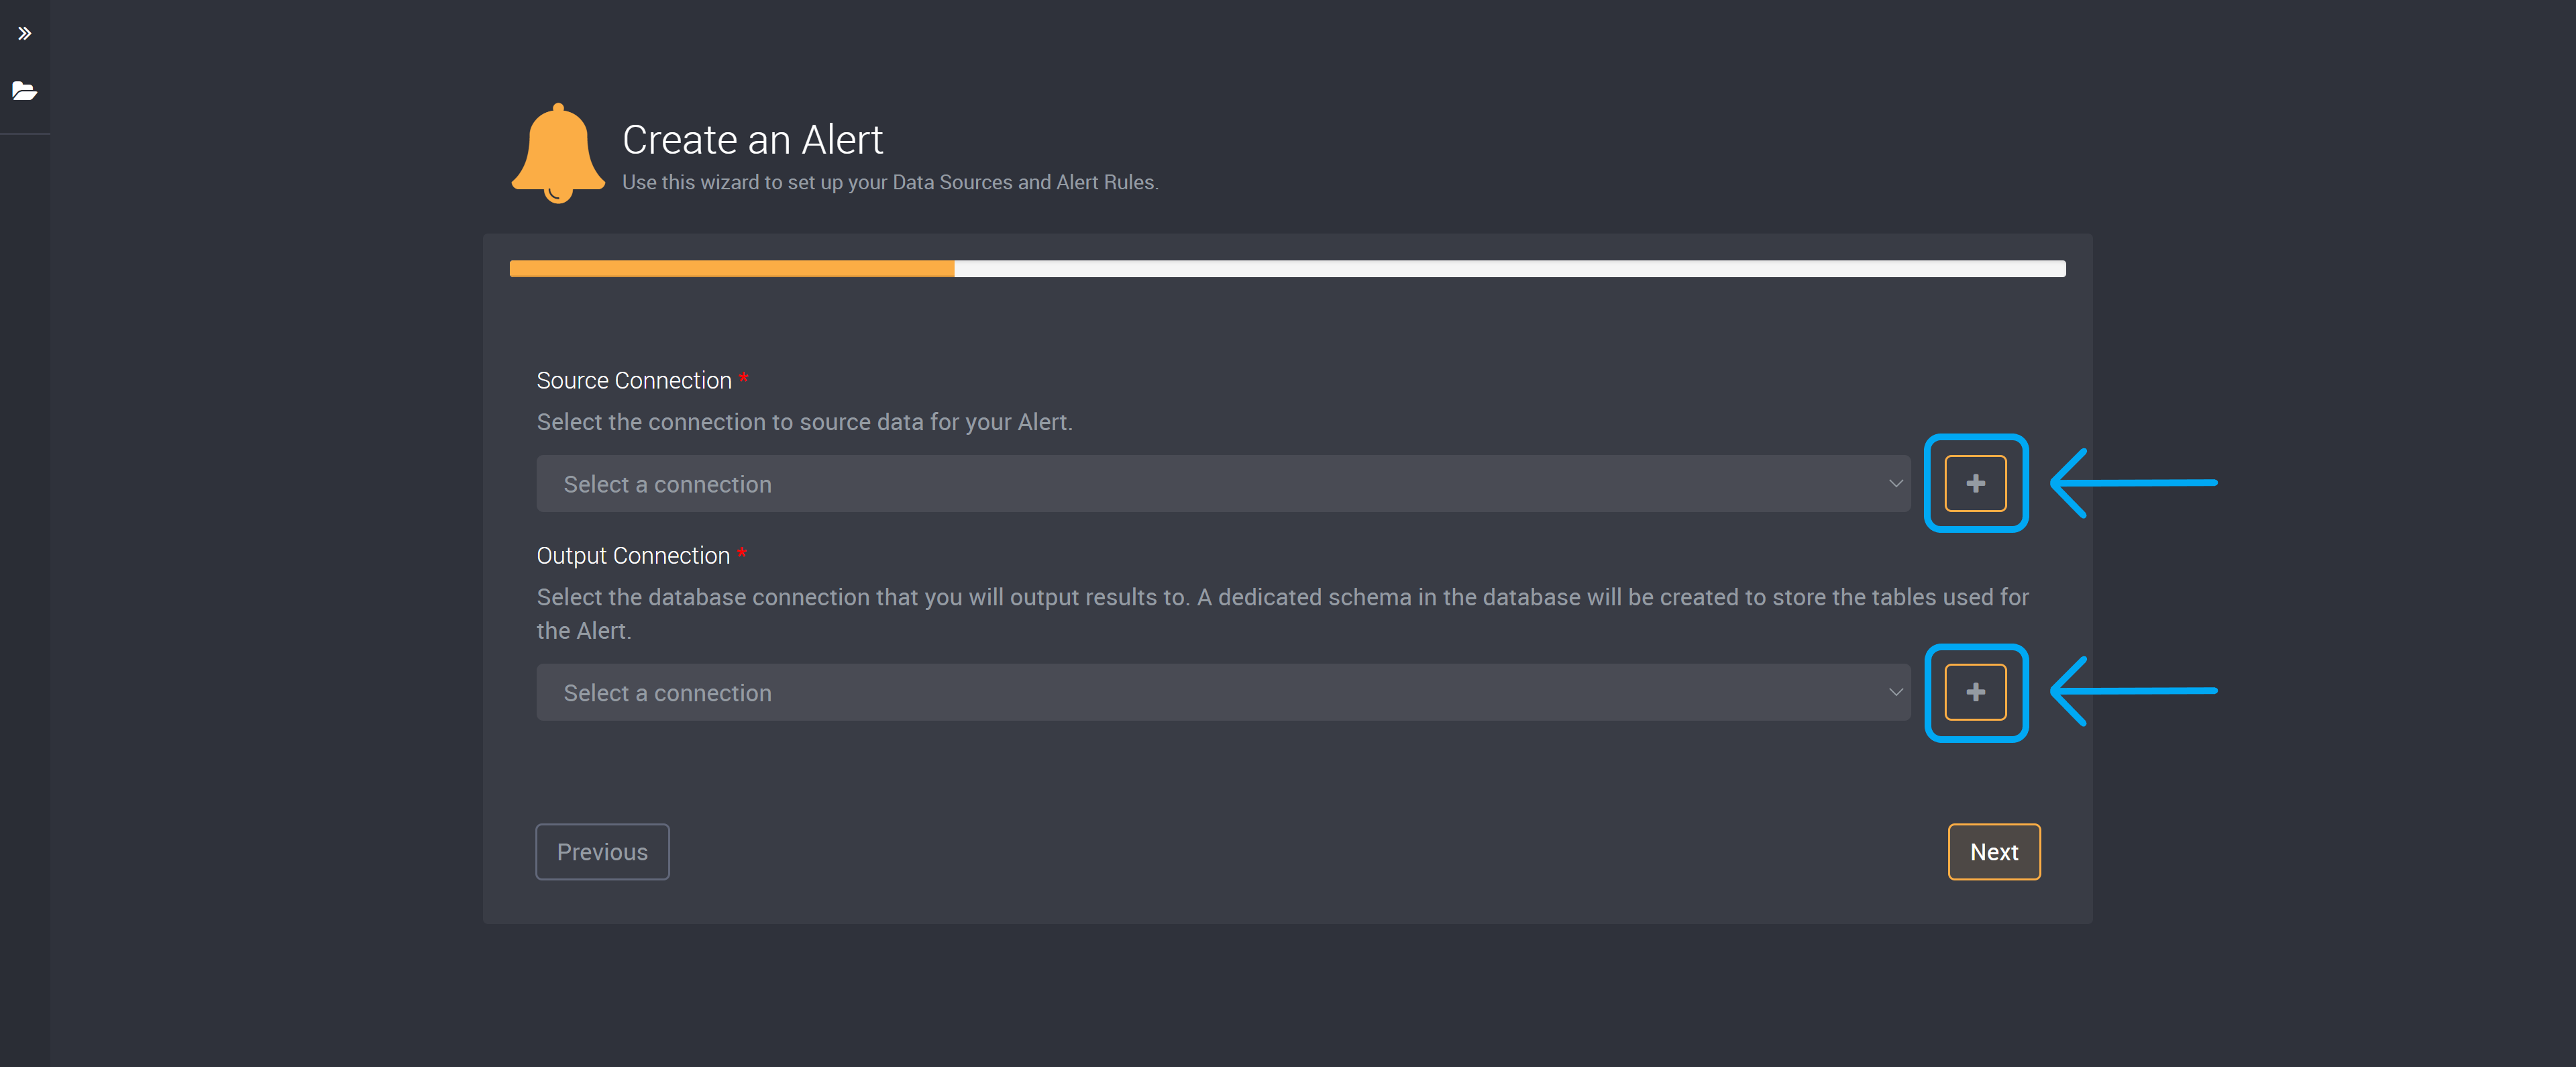
Choose your Connections
Rules consist of two connections; the source connection and the output connection.
First select the source connection, your rule’s query will be retrieving data from this connection.
Then select the output connection and a dedicated schema will be created in this database connection.
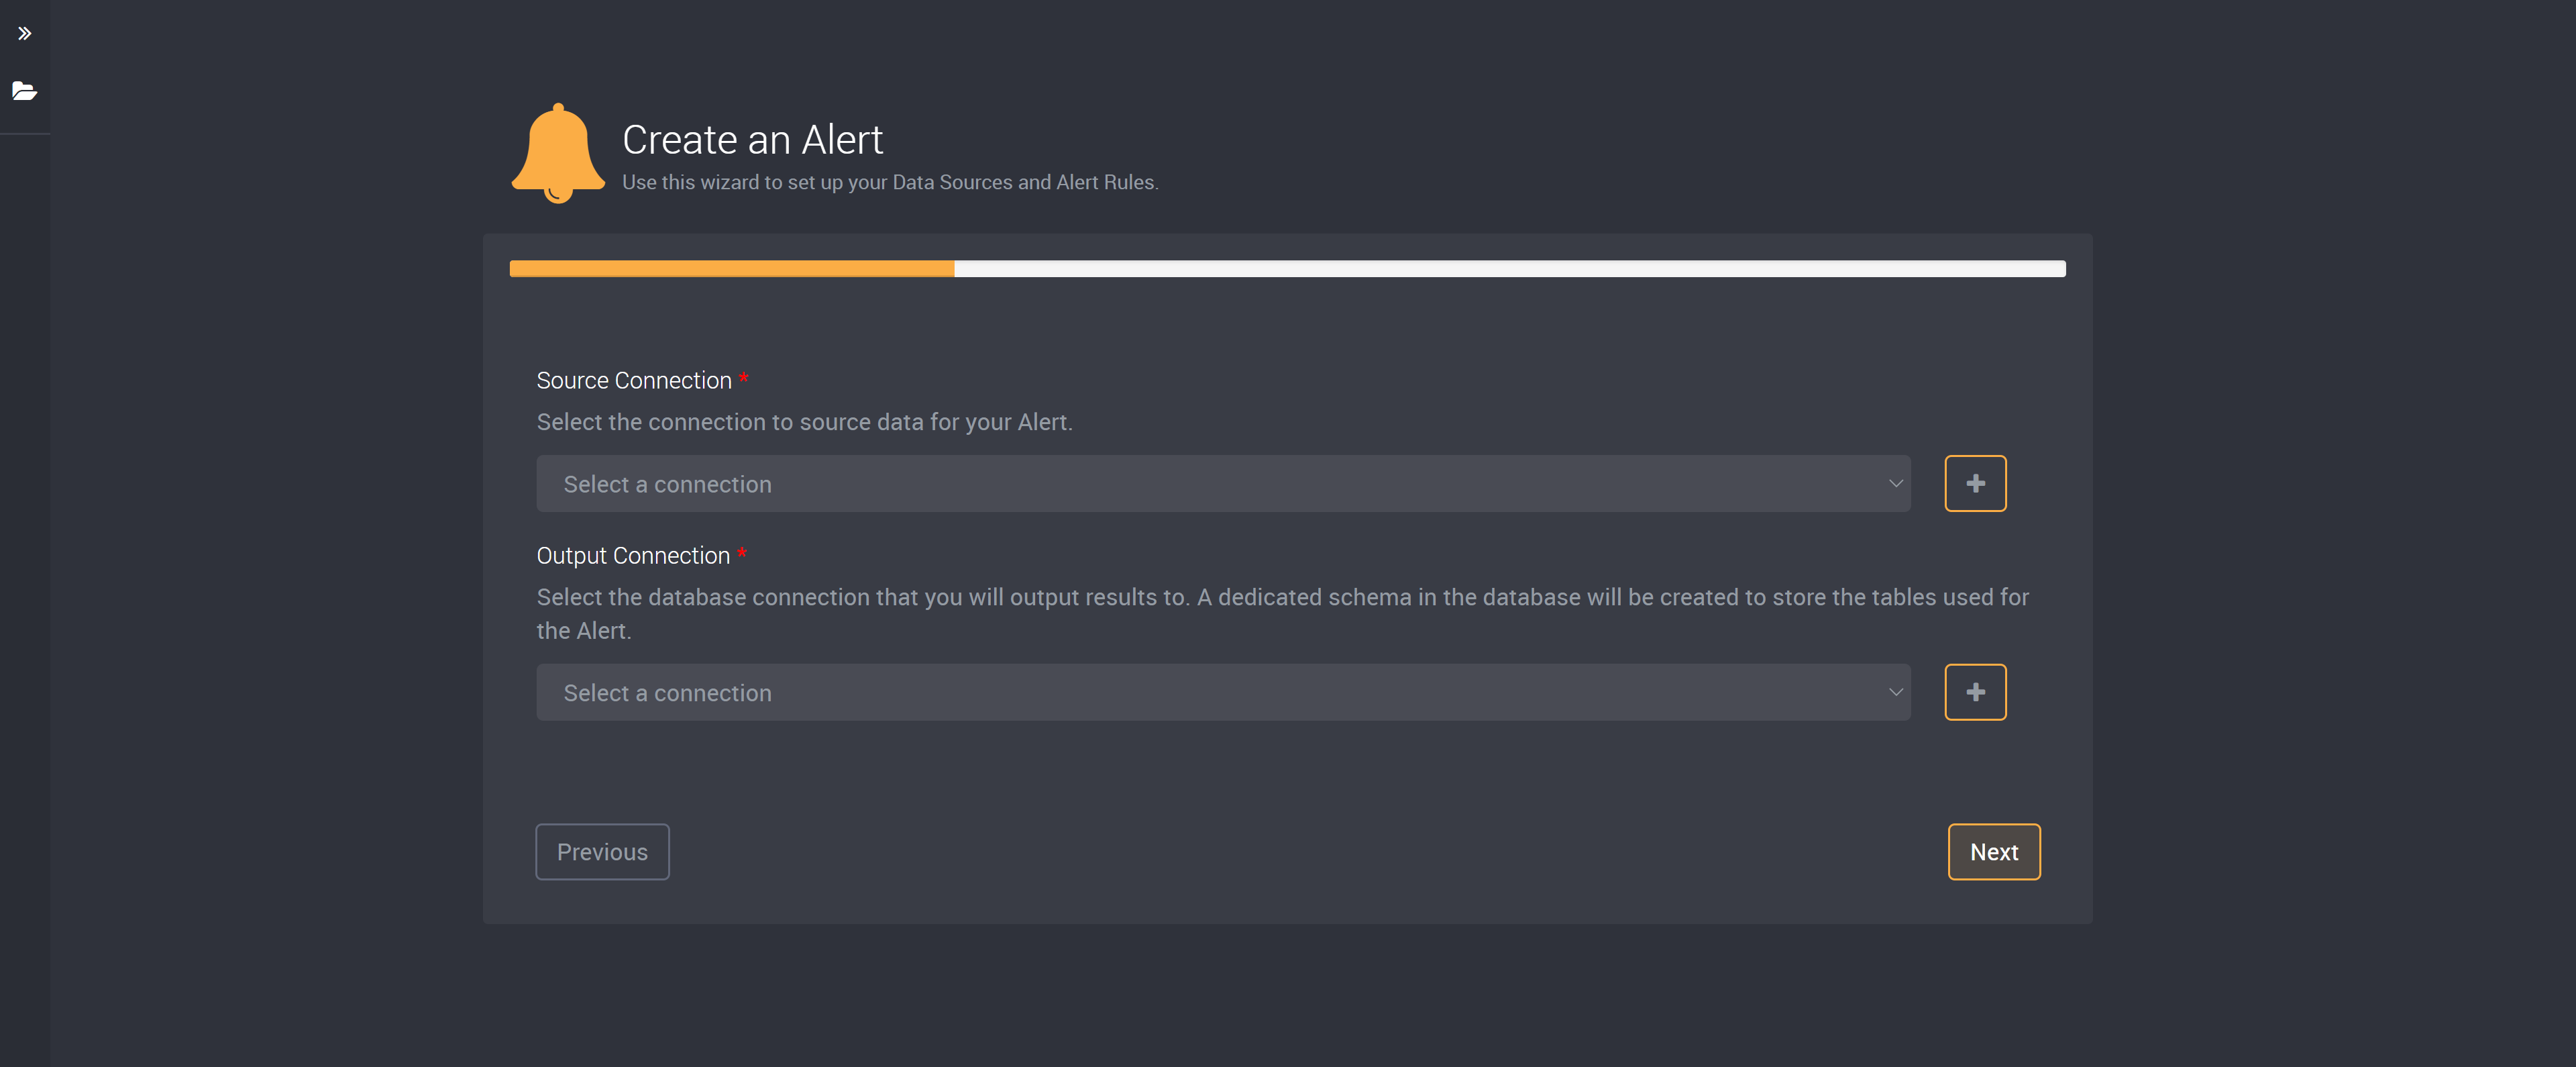
If you would like to use a new connection, you can also choose to create a source or output connection here using the Add button beside the connection dropdown fields on this page.
(If you have already chosen your connections, skip ahead to add your query.)
Choose the connection type you would like to add.
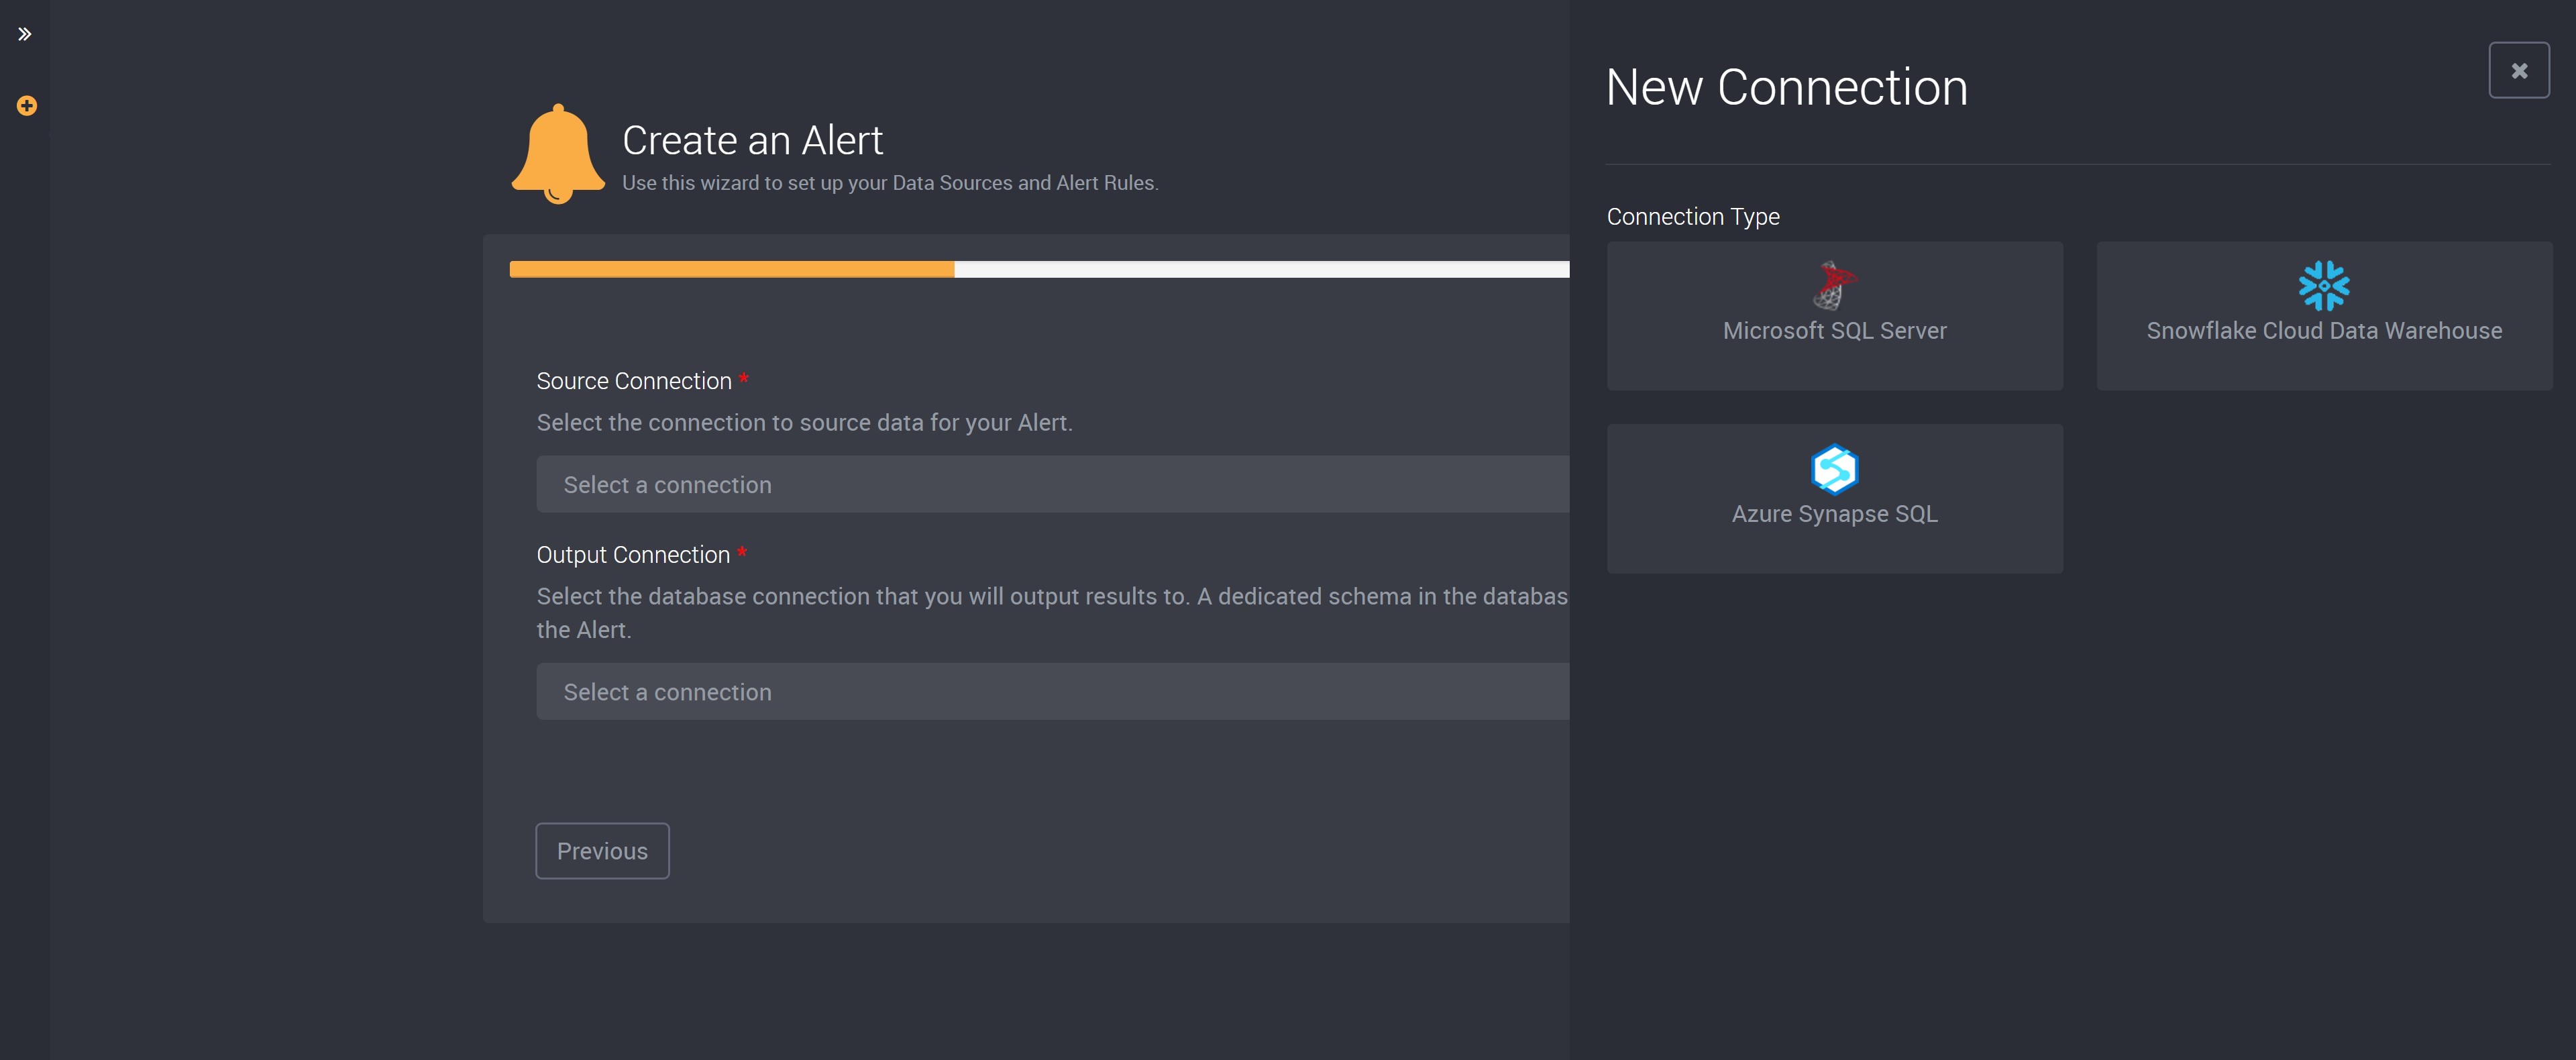
Provide the details you need to connect to your data platform.
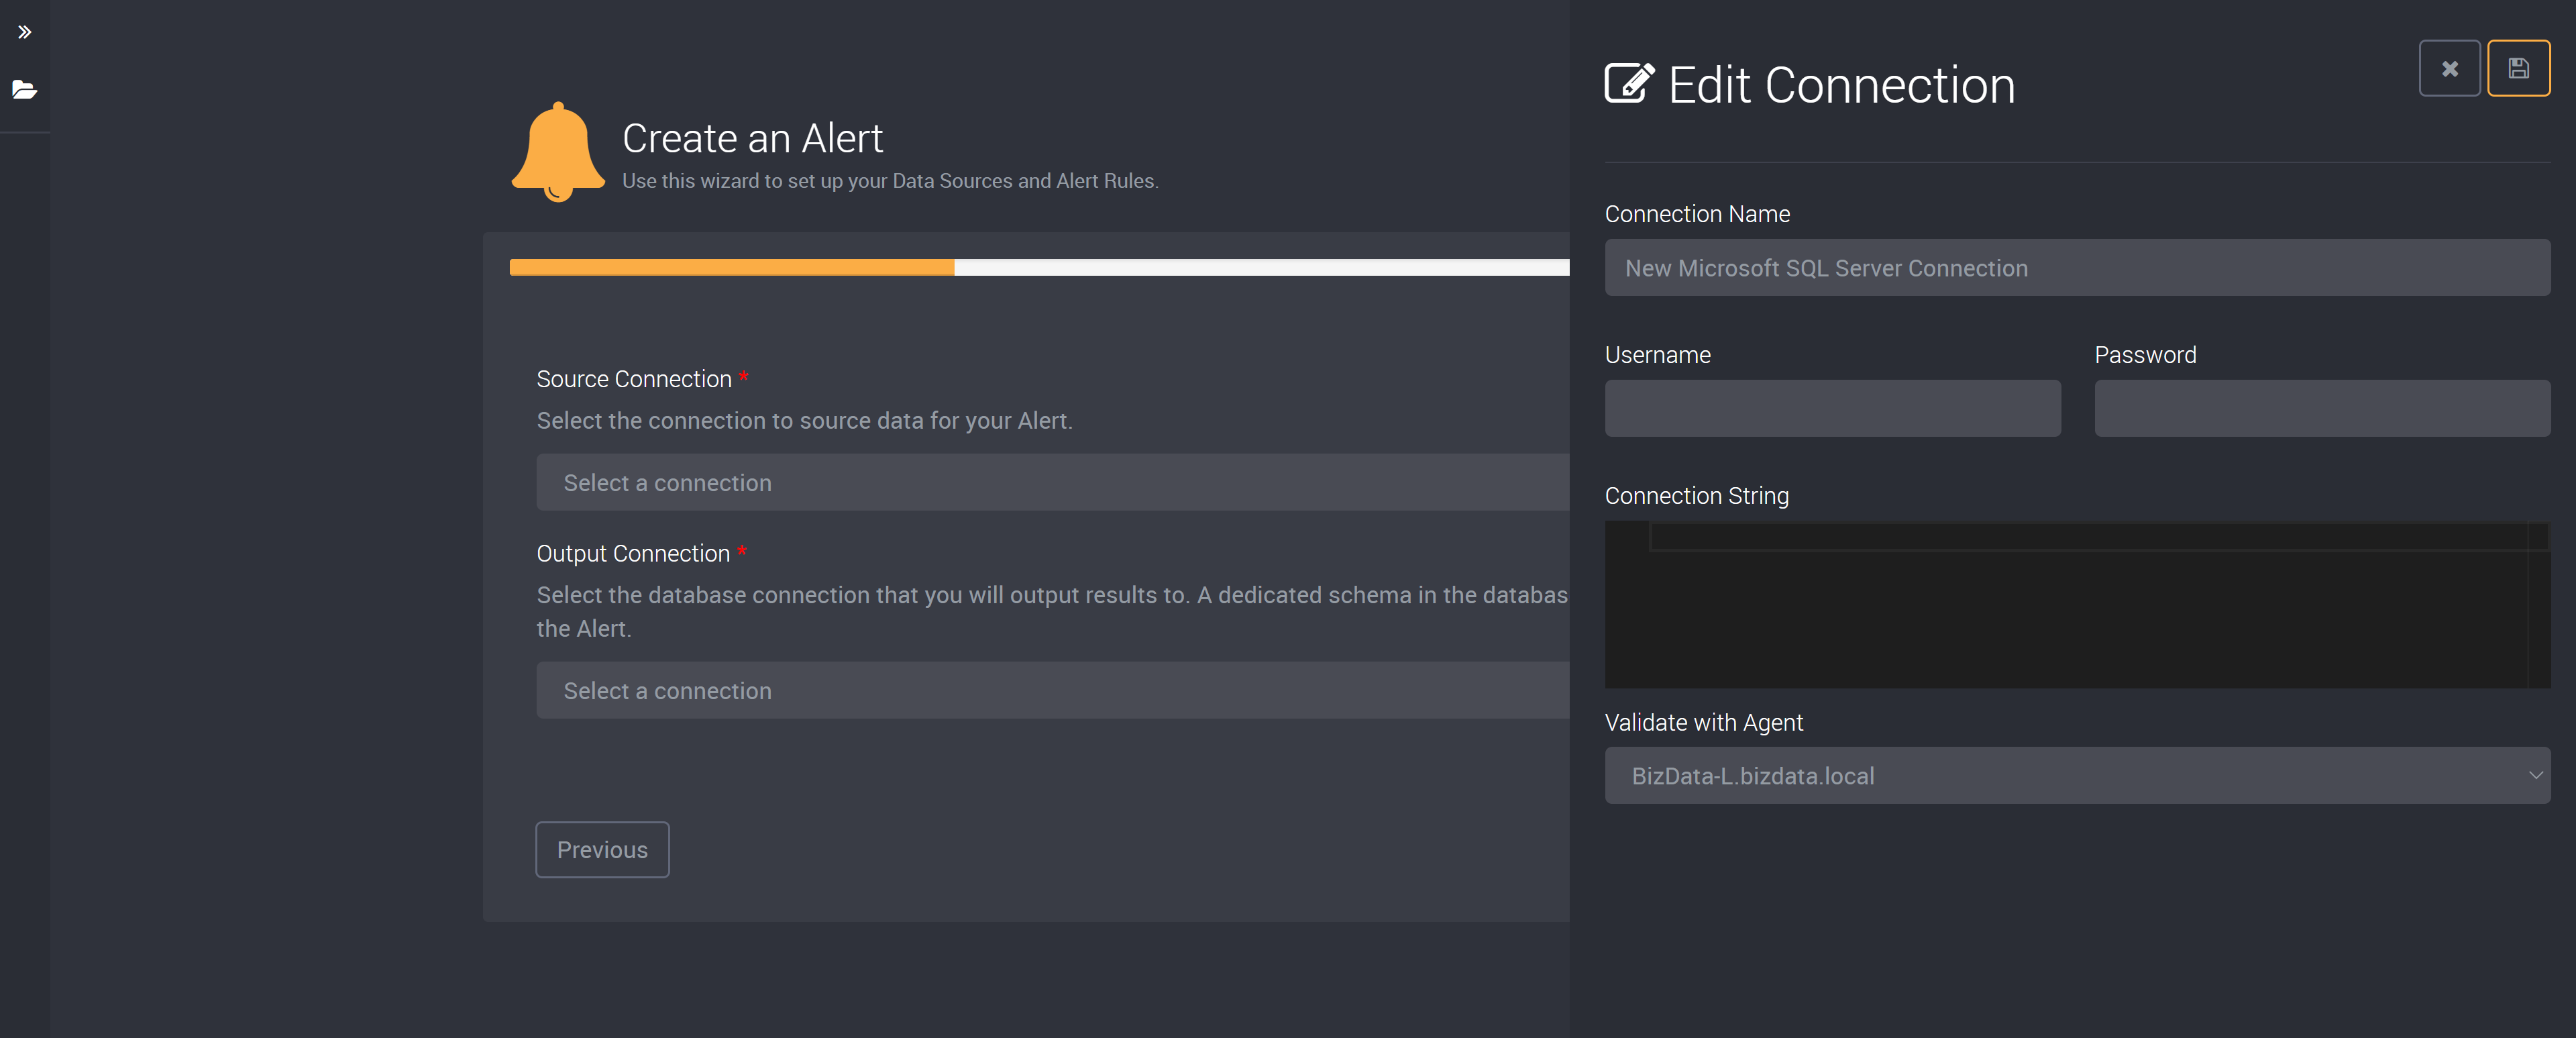
This will add a connection and you will be able to select it in the dropdown.
To learn more about connections and their requirements please read our guide here.
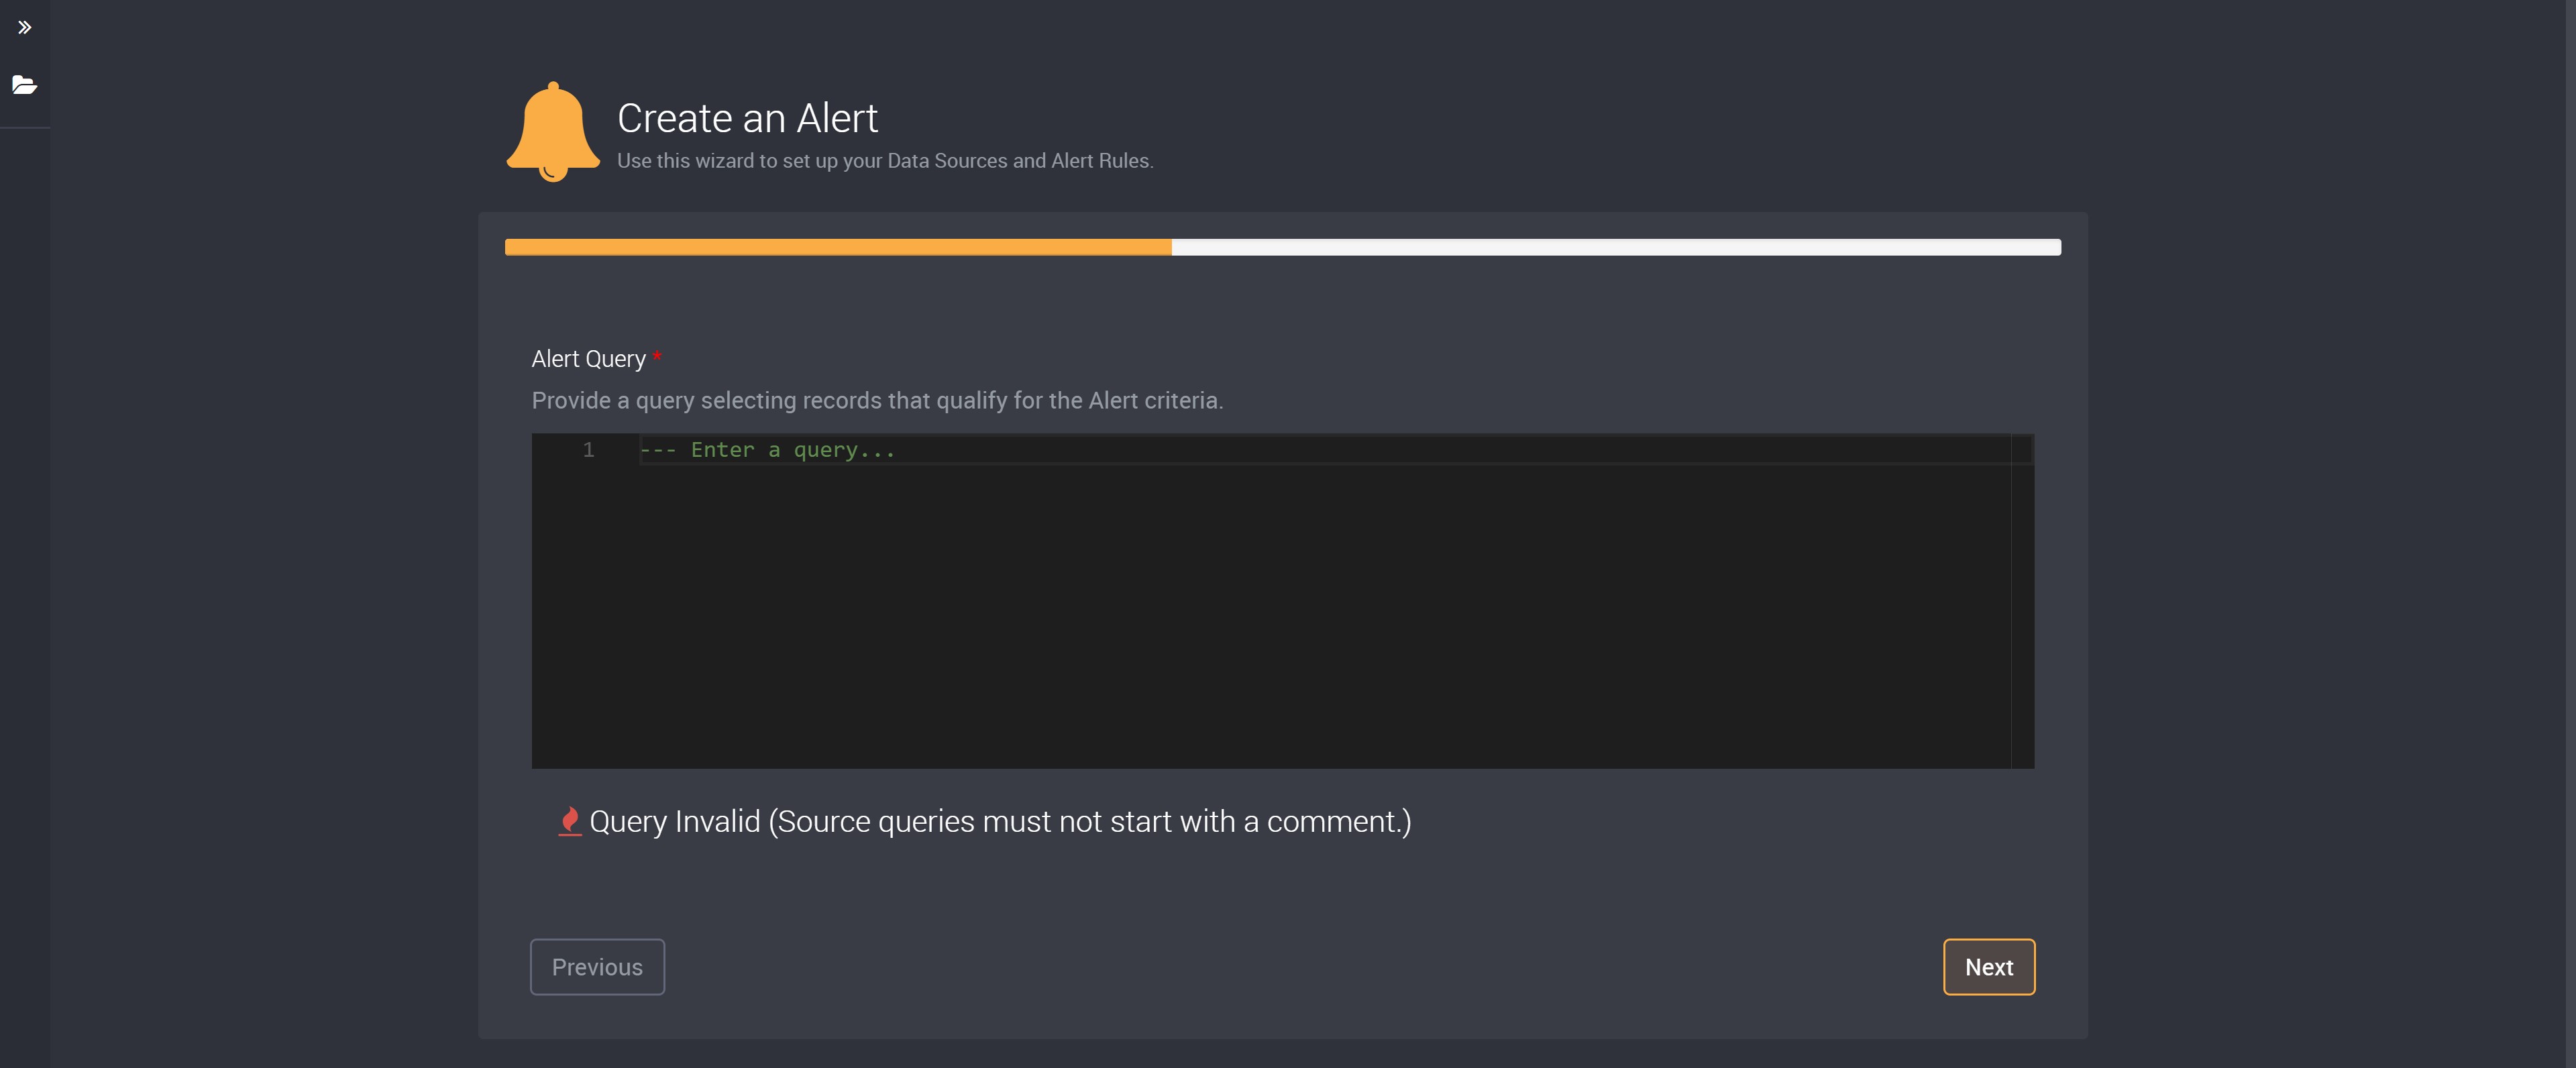
Add a Query
Provide a query here that will select the records from your data source for this rule.
This query should be written using the same SQL variant that your source connection utilizes. Loome Monitor will validate the query as you type and provide any errors or warnings below the query box.
Loome Monitor supports pasting in a query that was written using an external tool such as SQL Server Management Studio or Snowflake Worksheets.
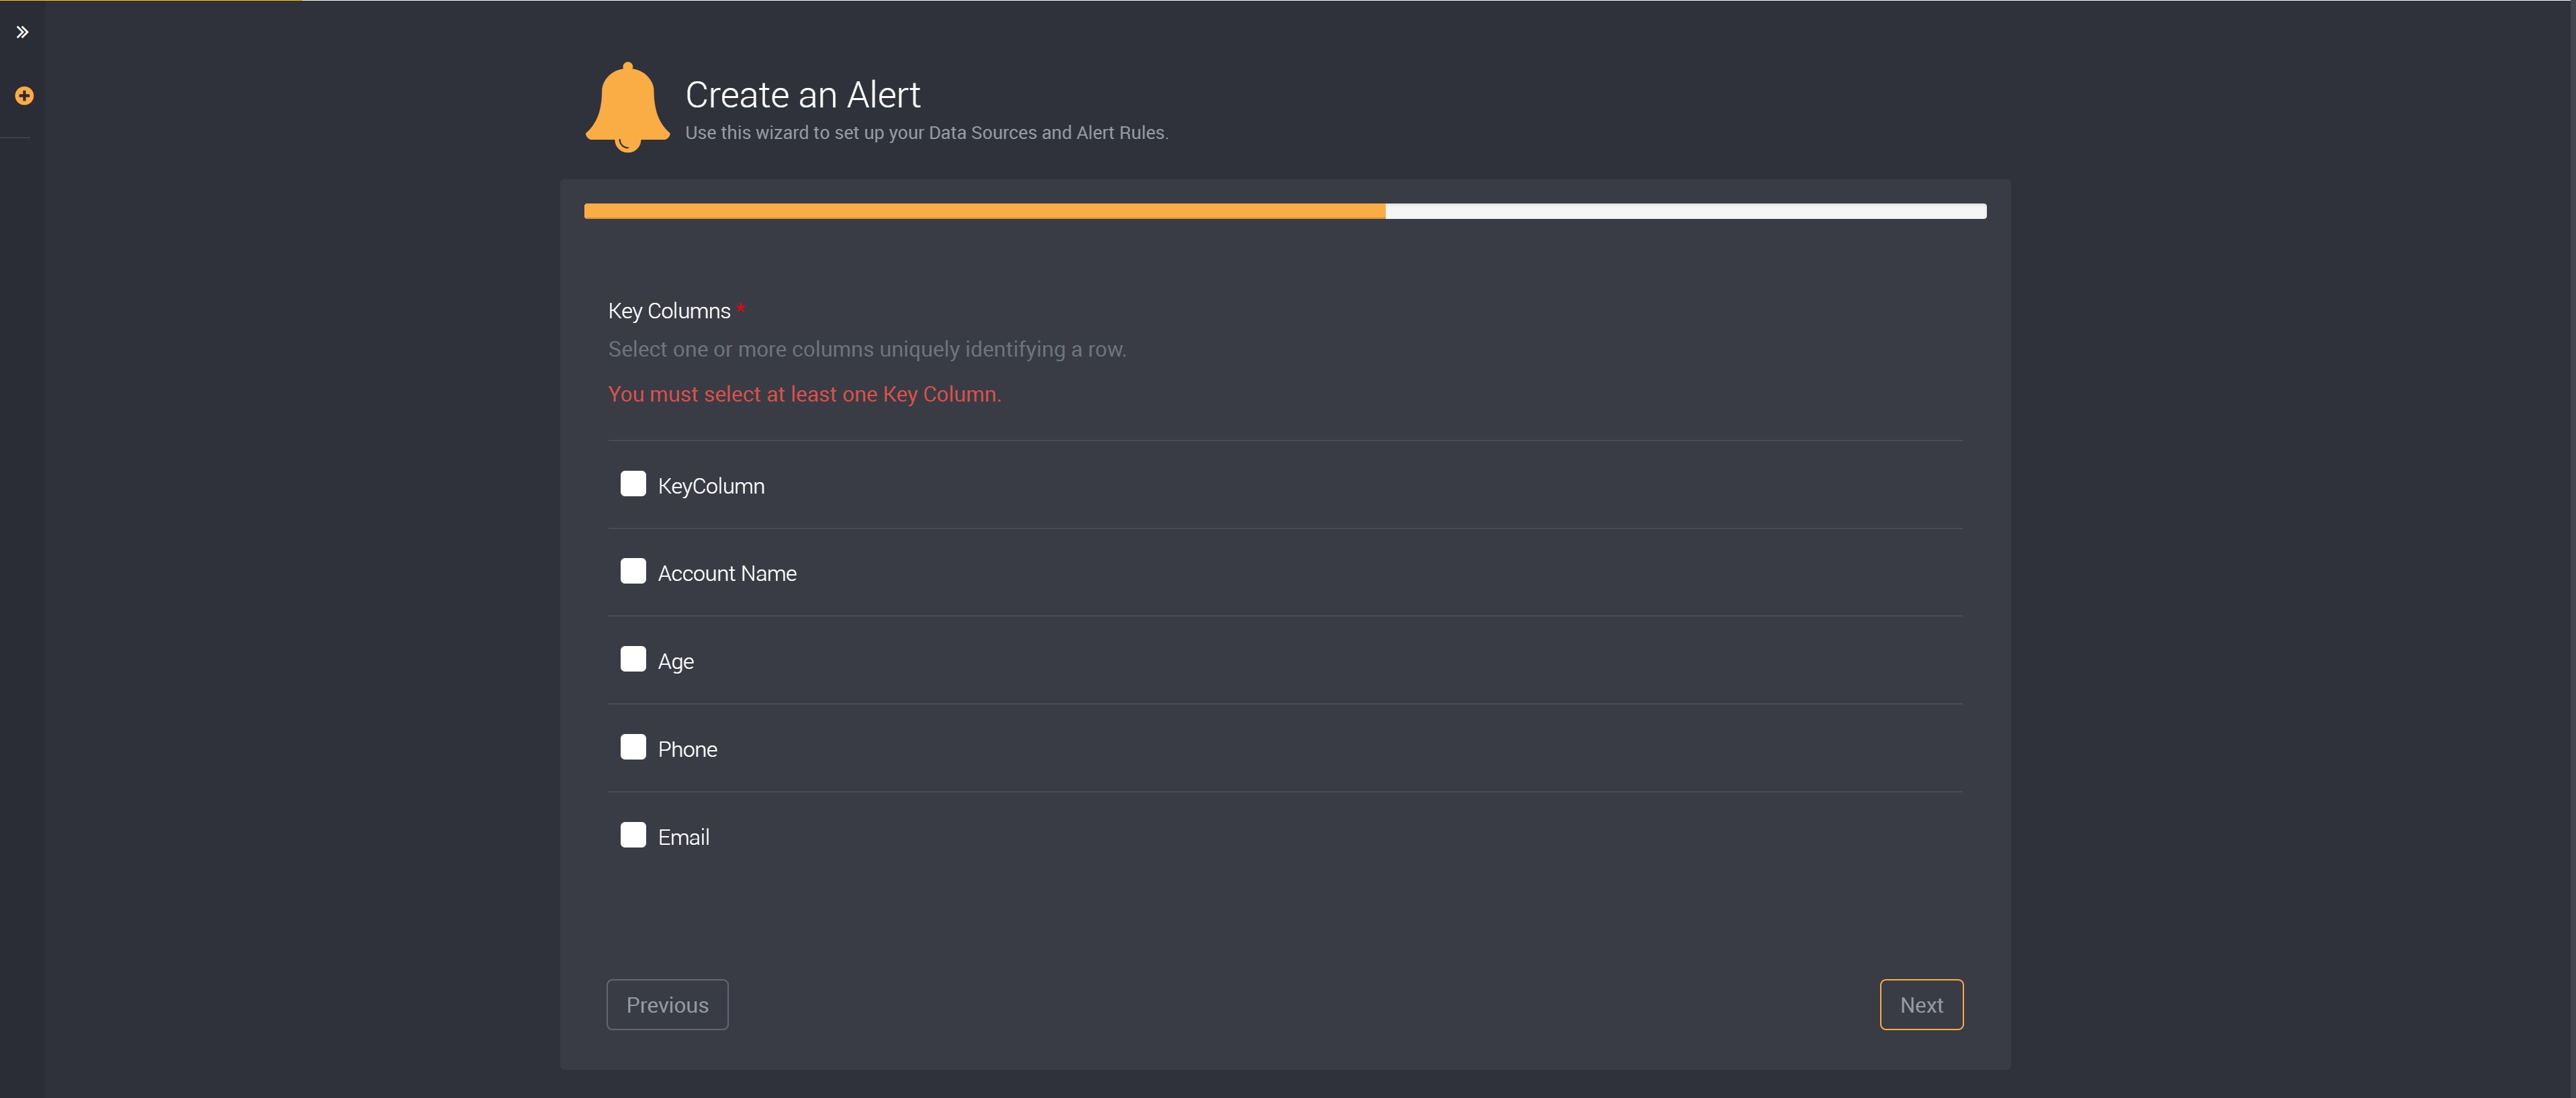
Select your Key Column
In this next window, select one or more Key Columns for your rule.
Examples of key columns are unique identifiers such as primary keys or a combination of columns to form a composite key. In the event of Key Columns not being entirely unique, Loome Monitor will not behave as expected.
In order to create a rule that will persistently stage your data and perform communication steps accordingly, you will need to choose at least one unique key column and also leave at least one column unselected.
In the example below, you will see that I can select one of the columns available from my query in my data source.
Please note that rules that use a SQL connection as a target connection will use clustered indexes. If you choose any individual key column size that exceeds 900 bytes or if the sum of all key column sizes exceed 2600 bytes, you will need to confirm your key column selection as these columns can cause your data to be truncated.
If you change your selected key column after you have run a rule, any existing data in this rule will be archived when the rule is next run. Archived tables will include the date it was archived in the table name. The newly created tables will continue to be created using the project ID and rule ID as its name.
Select an Existing Column to Assign Users to Records
In this next window you can choose to populate the ‘Assigned To’ field from your own data, rather than manually completing this field after your results have been created. This is optional and you can choose to skip this step.
All columns in your data source will be available to choose from.
In order to populate the Assigned to fields with users, this column must contain values in an email format.
Choose an existing column from your data source that contains the email addresses you would like to assign to each record and click next.
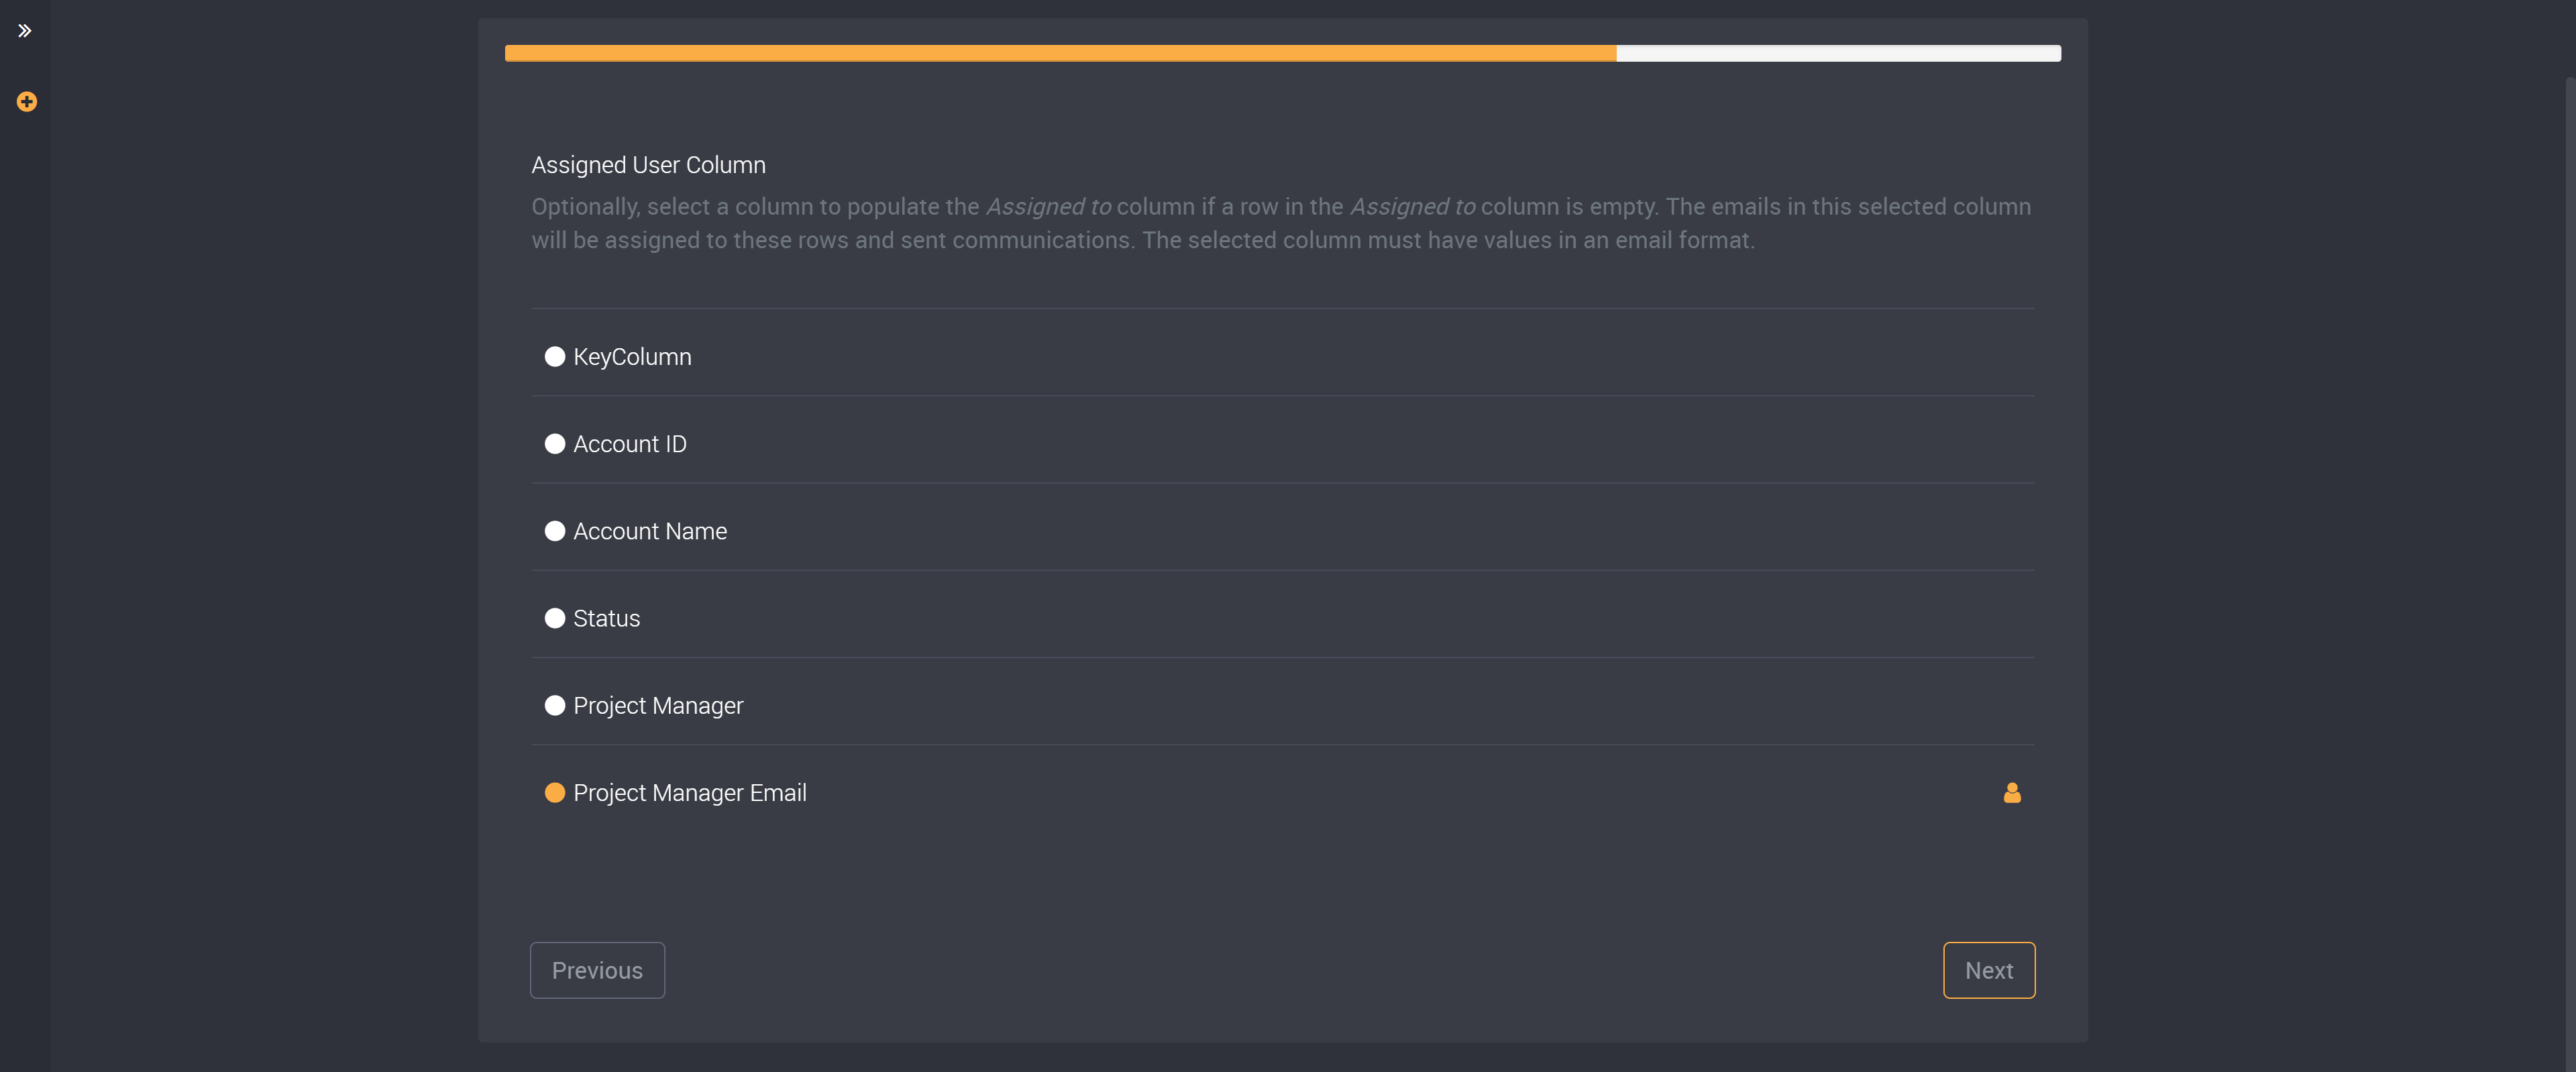
If you have already added a user to an assigned to field, this user will not be replaced with the value in your selected column. The values in your selected column will only populate empty fields.
If you would like to notify these assigned users of any results, add a communication rule by following the next step and select Assigned to as the Recipient Column.
Create Custom Fields
You can choose to create custom fields in the last step of creating a rule. (This is not a requirement and you have the choice to proceed without adding any custom fields.)
A custom field is used to capture feedback for your results. Loome will create a dedicated schema for your custom field metadata and it will be independent from the results table generated from this rule. Feedback can be captured from users that have been notified about unresolved results.
Click on Add Custom Field and a slide-out will be expanded with the option to choose from six different field types.
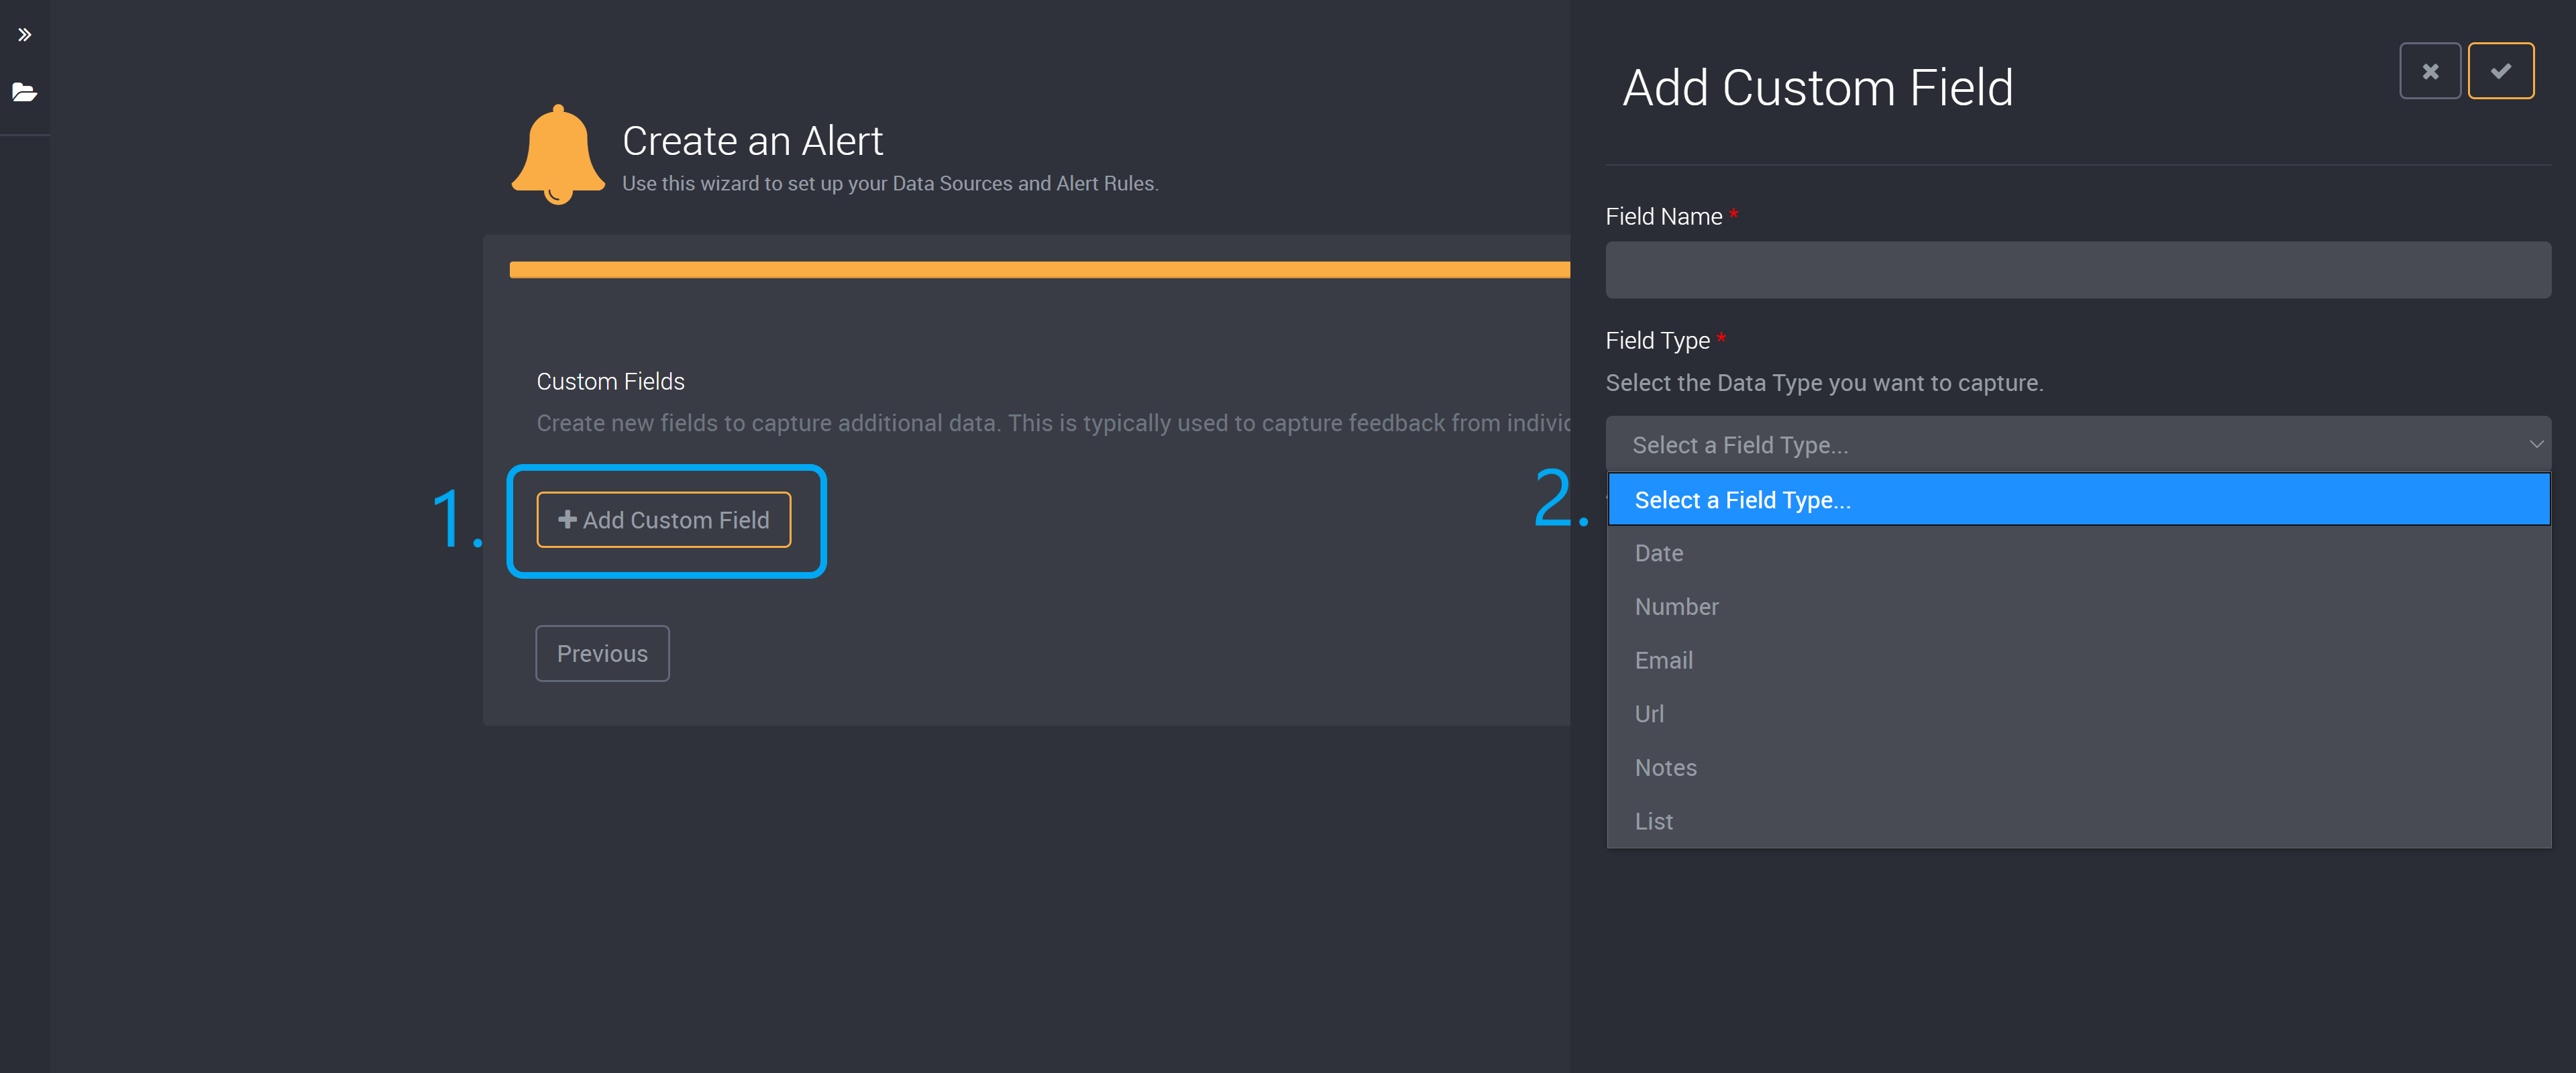
| Type | Description |
|---|---|
| Date | This will add a field where users can select a date for each row. |
| Number | Users can attribute a number to each row. |
| Users can attach an email to a record. | |
| URL | Users can add a related URL to this result. |
| Notes | Users can add notes to rows to capture feedback, add additional information, or provide definitions for terms. You can add up to 4000 characters to each note. |
| List | Add this custom field when you would like to provide the options that a user can select from when they are providing feedback for a result. |
If you have edited a custom field that is used in a communication rule, please check its recipient column to ensure that your communication rule runs successfully.
Please also note that support for renaming a column is not available in Azure Synapse Analytics GA as of February 2021. Thus renaming an existing custom field column may not work when using Azure Synapse Analytics as a target connection.
Please note that you cannot create a custom field with the same name as a source data column.
How to Delete a Custom Field
To delete a custom field, click on Update Custom Field.
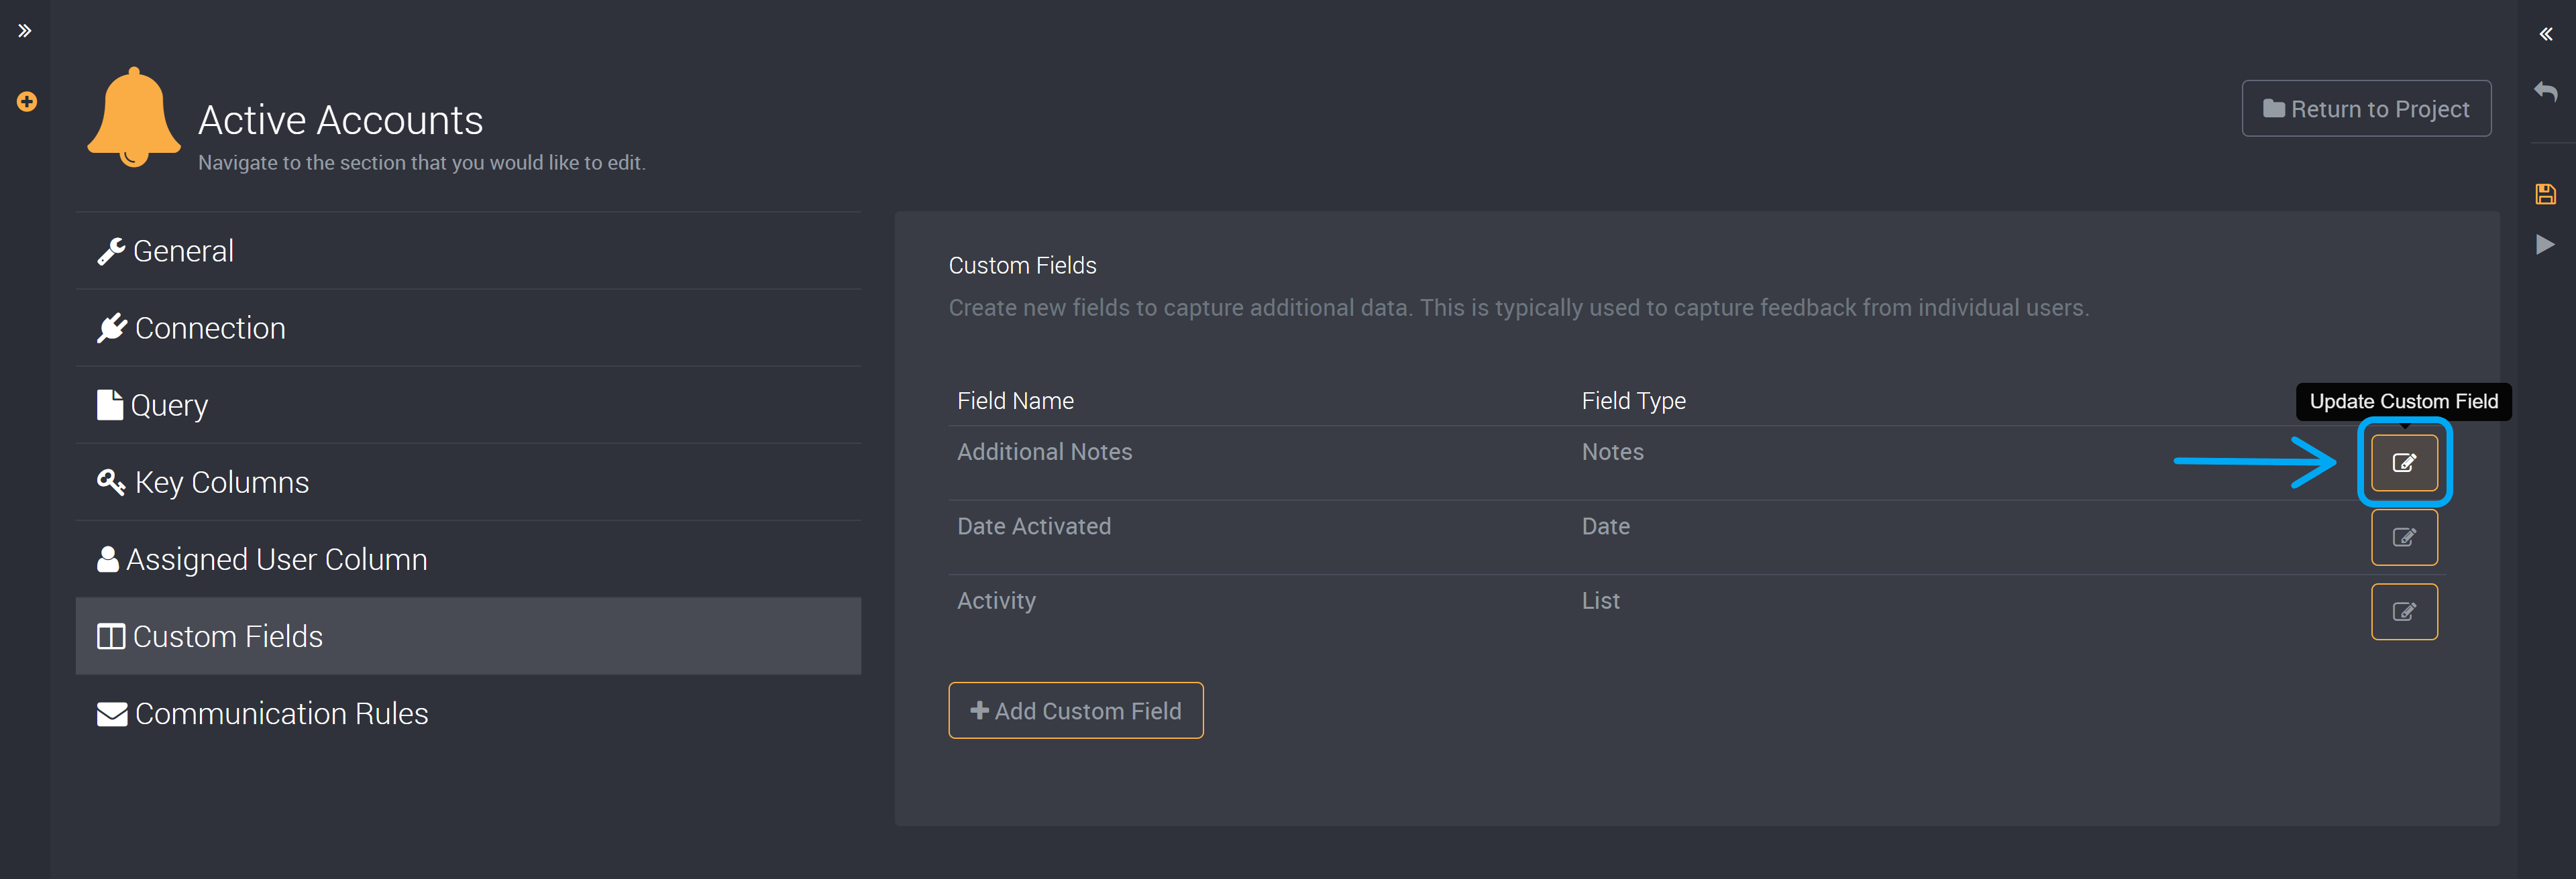
This will expand a slideout, click on delete in the top right corner.
You will not be able to delete a custom field if it is used in a communication rule. Change the custom field used in that communication rule to another column in order to delete this custom field.
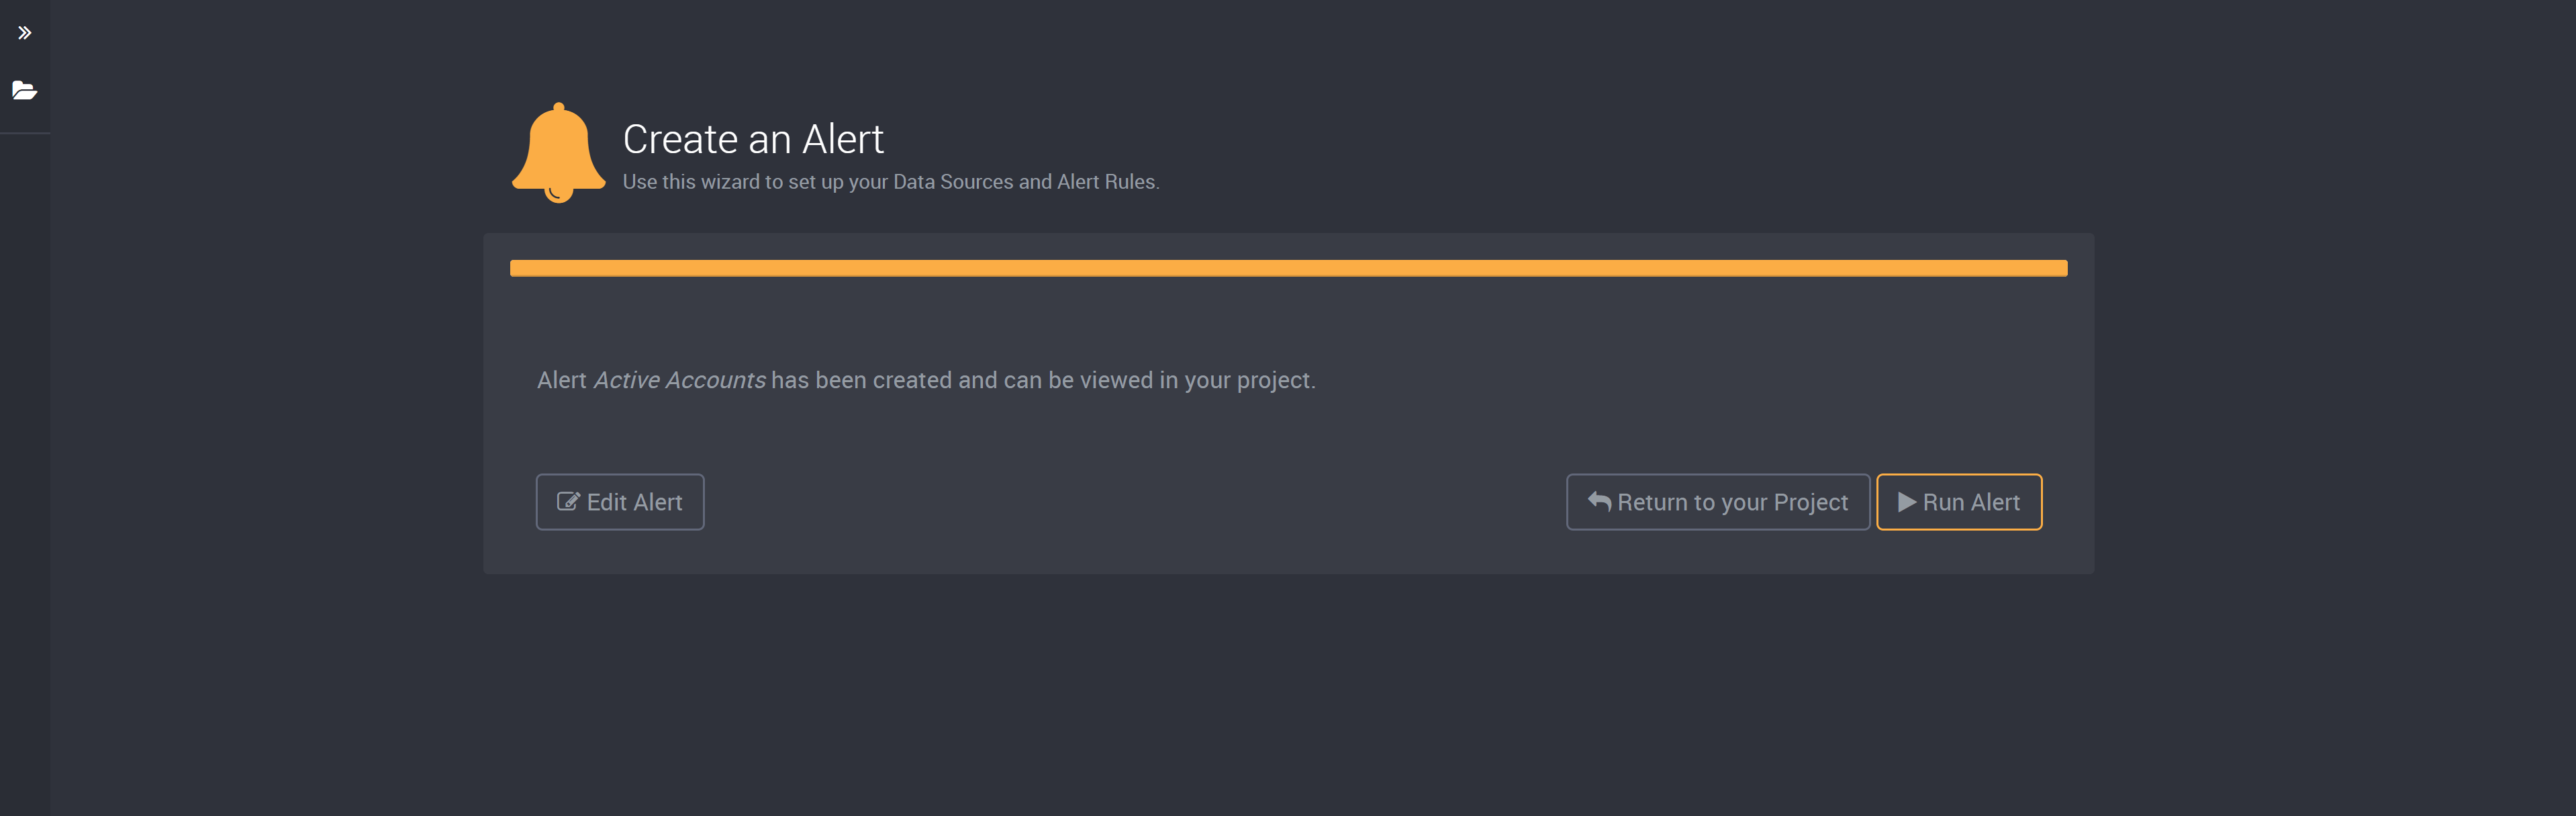
Create your Rule
Click on Create to save and complete this rule.
You will be shown a page where you have the option to either return to your project, edit, or run this rule.
Run this Rule
Run this rule to view the results it will generate.
Once you click on Run, you will be able to see the progress of this rule as each step is listed under ‘Execution Steps’.

If the rule execution failed, you can also see which steps have failed in this log. You will also be able to see an error log under the title at the top.
Once you have run this rule, you will have your results ready and you can choose to add communication steps by clicking on edit on this page or by editing the rule after you have viewed your results.
Click on the Results button, which is the table icon in the top-right of these execution steps, to be directed to your Results page.
You can also run this rule from the slide-out when editing a rule, and on the page of the rule’s project using the Run button at the bottom corner of each rule card.