IIS Application
Follow the below steps to create your IIS web application.
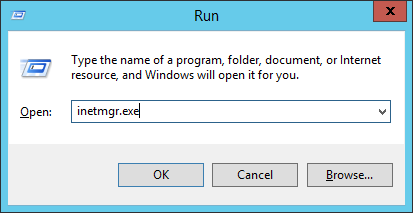
- Open inetmgr.exe from Start Menu > Run
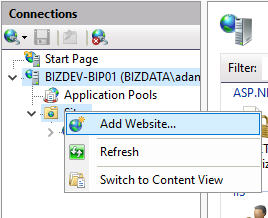
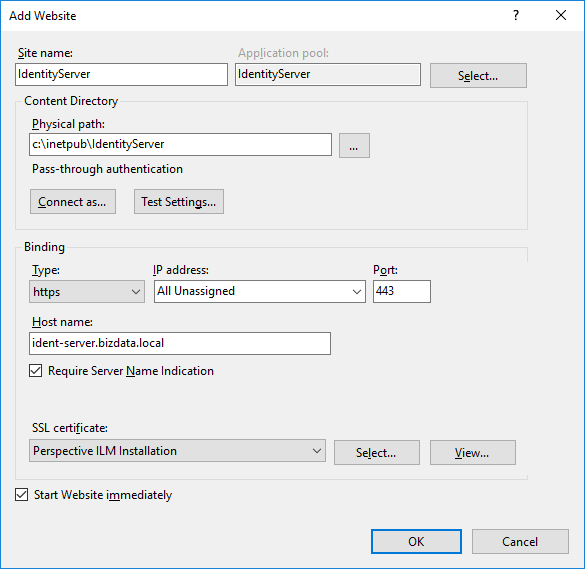
- Right click on sites > Add Website…
- Enter the site name as ‘IdentityServer’ or a site name of your choosing
- Set the physical path to ‘c:\inetpub\IdentityServer’
- Change the Binding Type to ‘https’
- Enter the DNS name created for the Loome Identity under the ‘Host name’ field.
- Select the SSL certificate installed on the machine for the Loome Identity
- Click on ‘OK’
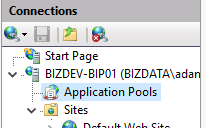
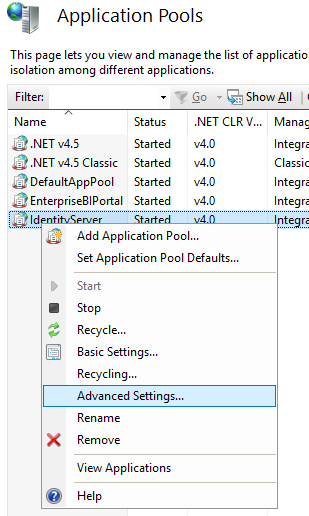
- Click on ‘Application Pools’ from the left-hand menu
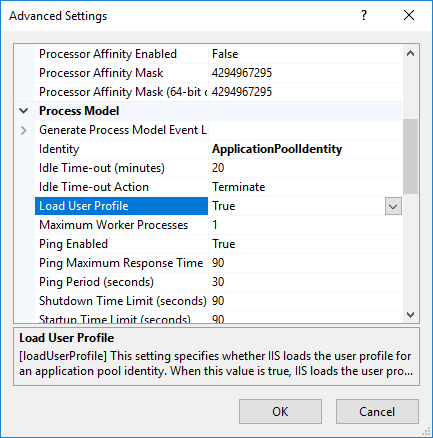
- Right click on the IdentityServer application pool and select ‘Advanced Settings…’
- Change ‘.NET CLR Version’ to ‘No Managed Code’
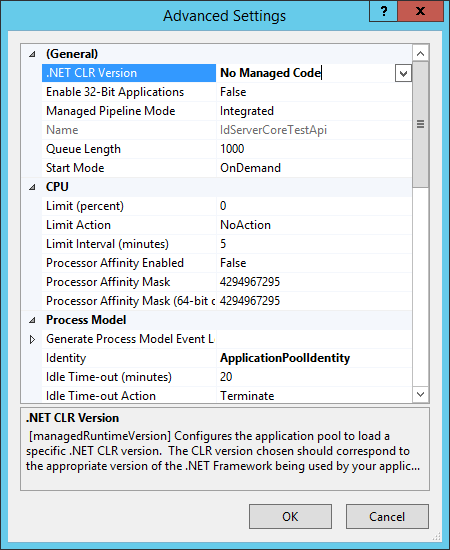
- Change ‘Load User Profile’ to true
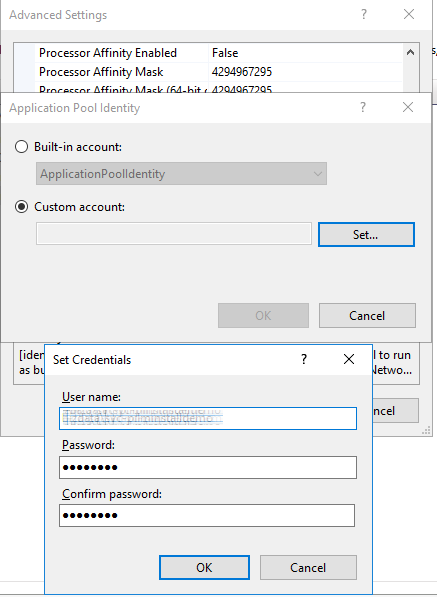
- Select the value in ‘Identity’ and click the ellipse button
- Select ‘Custom account’, and then click the ‘Set…’ button
- Enter the ‘User name’, ‘Password’, and ‘Confirm password’ for the service account
- Note: ‘User name’ should include the domain in either the domain\username for username@domain.local format
- Click ‘Ok’, then ‘Ok’, then ‘Ok’
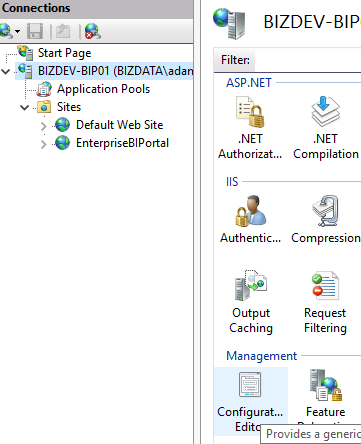
- Browse to the server level of the IIS server
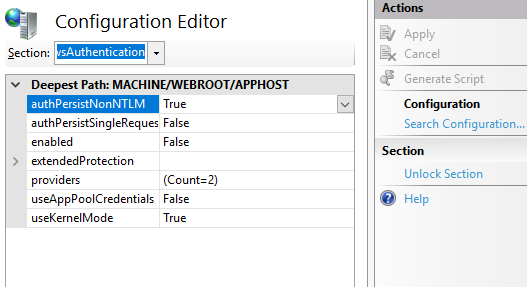
- Click on ‘Configuration Editor’
- Click the Section drop down and navigate to system.webServer > security > authentication > windowsAuthentication and select it.
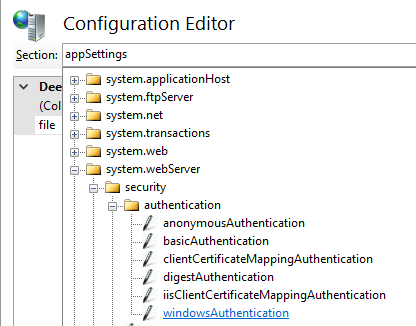
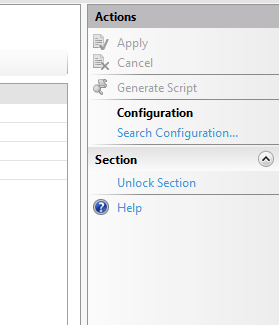
- Check on the right-hand Action menu for the ‘Unlock Section’ link. If it is present, it means the section is locked. Click the link to unlock the section, or if it is already unlocked then no further action is required
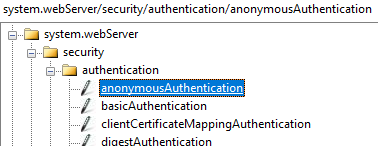
- Click the Section drop down and navigate to system.webServer > security > authentication > anonymousAuthentication and select it.
- Check on the right-hand Action menu for the ‘Unlock Section’ link. If it is present, it means the section is locked. Click the link to unlock the section, or if it is already unlocked then no further action is required
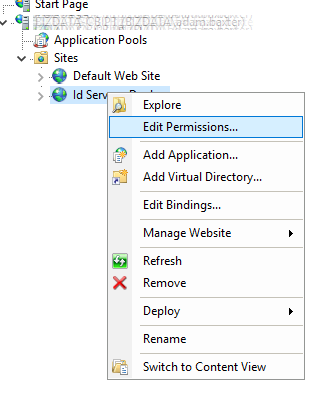
- Click on ‘Sites’ from the left-hand menu, and then click on the Loome Identity site that you have just created
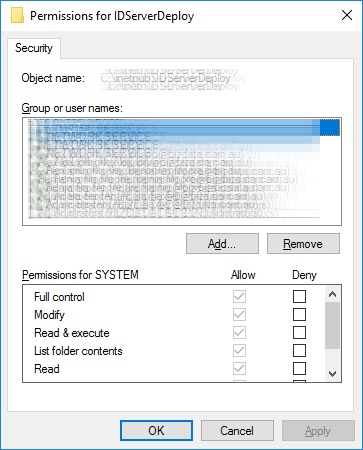
- Right click on the site and click ‘Edit Permissions’
- Click on the ‘Security’ tab in the popup window.
- Check to see if your service account is already listed under permissions.
- If so, you can skip straight to the database creation section. If not, then click the ‘Edit’ button.

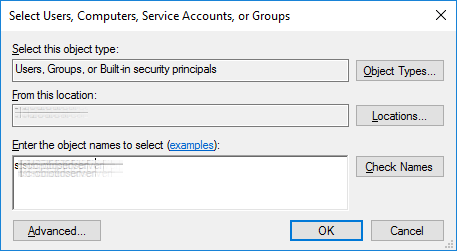
- Click the ‘Add’ button.
- Enter the username of the service account configured for the Application Pool.
- Click ‘Ok’.
- Click ‘Ok’ again.
- And then click ‘Ok’ again.